

Page 1
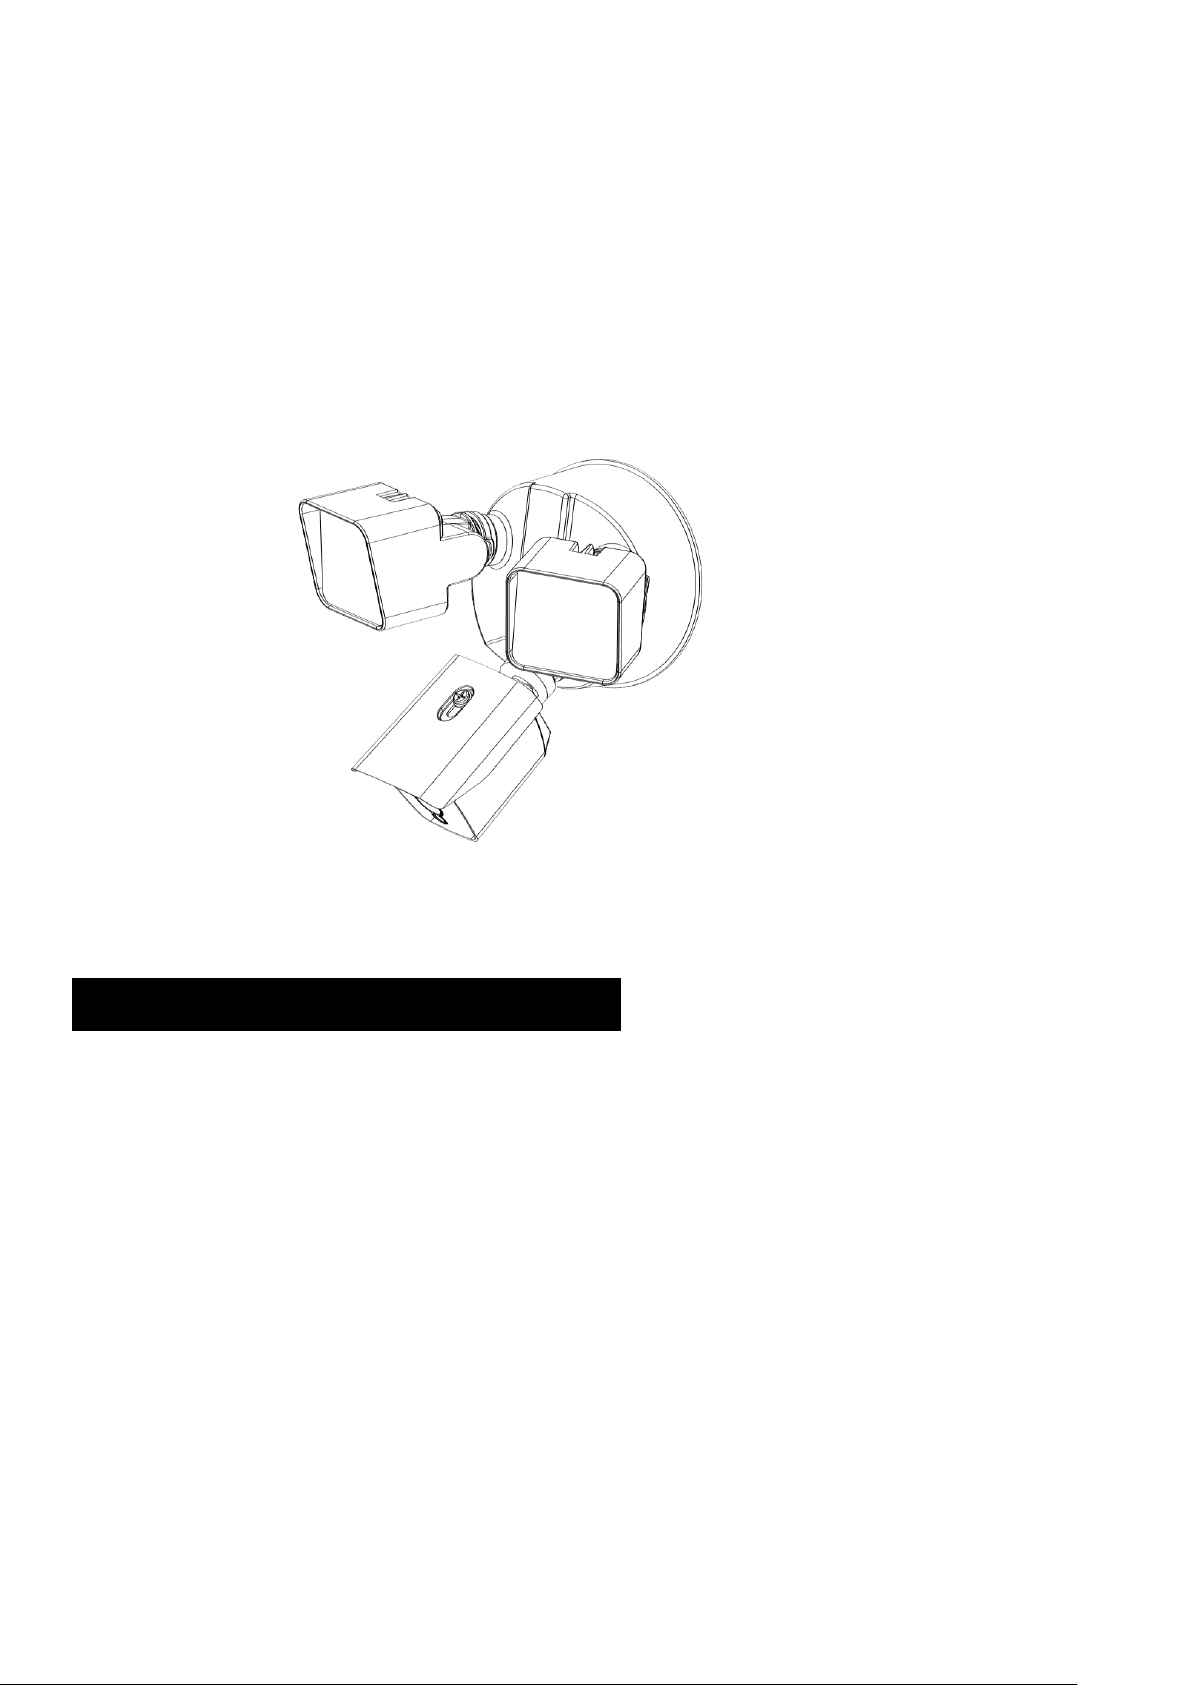
YR-001 泛光灯 说明书
料号:1409020005
尺寸:A5 单面印刷
YR-001 泛光灯 说明书
料号:1409020005
尺寸:A5 单面印刷
YR-001 泛光灯 说明书
料号:1409020005
尺寸:A5 单面印刷
INSTRUCTION MANUAL
Wi-Fi Floodlight Camcorder Instruction Manual
IMPORTANT SAFETY INFORMATION
IMPORTANT:Read these instructions carefully and look at the equipment to become familiar with it
before installation.
These instructions assume you’re replacing an existing floodlight and/or have a junction box where Floodlight
Camcorder can be mounted. If you don’t have a junction box, then you’ll need to hire a professional electrician to install
one or install the device.
In the use of the product,you must be in strict compliance with the electrical safety regulations of the nation and region
Please refer to technical specifications for detailed information
Disconnect power at the fuse or circuit breaker before installing.
NOTE:
◆ Do not handle any working device or attempt to turn on the power of the device with wet hand or while standing
on a wet or damp surface or in water.
◆Do not use the wires under excessive tension or compression loading
◆Do not use aggressive or abrasive detergents to clean body of the device
◆Verify that the supply voltage is correct. Connect fixture to a 100-240 V~ 50/60 Hz power source.
◆ Do not look inside the lights.
◆This product is fit for installations on garages, outdoor wall, house roof etc.
Page 2
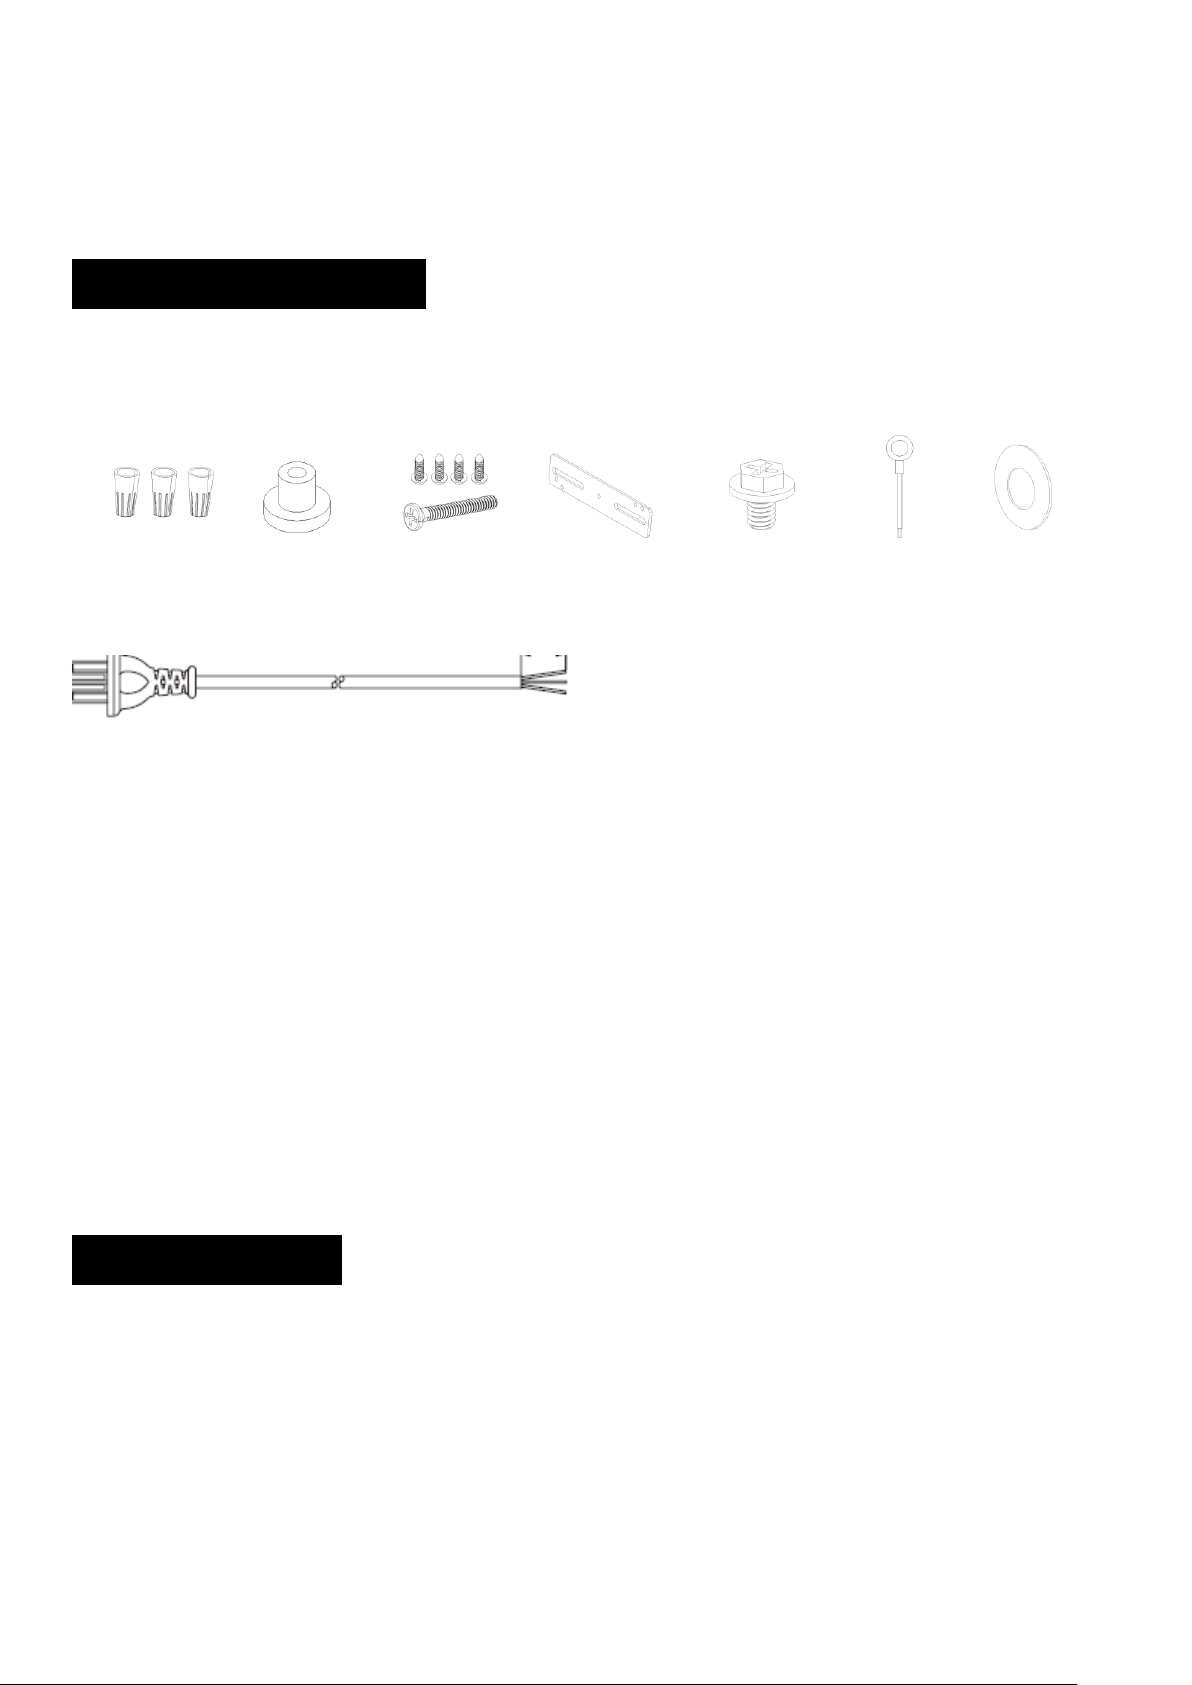
◆if the product does NOT work properly ,please contact your dealer or the nearest service center. Never attempt
Mounting
bracket
Fix screw
Rubber plug
wire nut
Green Screw
Ground
wire
EVA
to disassemble the camera yourself.
WARNING: FAILURE TO FOLLOW THESE INSTRUCTION MAY RESULT IN A POTENTIALLY
FATAL ELECTRICAL SHOCK OR PROPERTY DAMAGE
PRE-INSTALLATION
Check and make sure below accessories are included out of the box
Setup Connection Cable
The camcorder normally is installed above 3 meters high place, to avoid setting up on
the ladder, we provide a setup connection cable so that you can set up beside router
before installation.
First, Connect two wires of the setup connection cable with your floodlight camcorder
separately and fix them with the wire nut in the accessory kit. (Black to Brown, white
to blue , Green is Ground, use it when you do the real installation). Plug the cable plug
to your socket you will hear “System is ready” after a while.
Operation Manual
1. Downloading and Installing the App.
Page 3

E-yard For IOS E-yard for Google E-yard for Android
2. Wi-Fi Set Up
Turn on the power of the camcorder, after a while, you will hear:
System ready, the camera is now ready to begin pairing
Remind: Make sure your mobile is near the device when it is pairing. And your mobile
phone volume is ON
When you hear Wi-Fi is connected, the last apps page below should be prompted, if
not, it is normally because your Wi-Fi router has some delay, please reset your router
and device to add device again.
Page 4
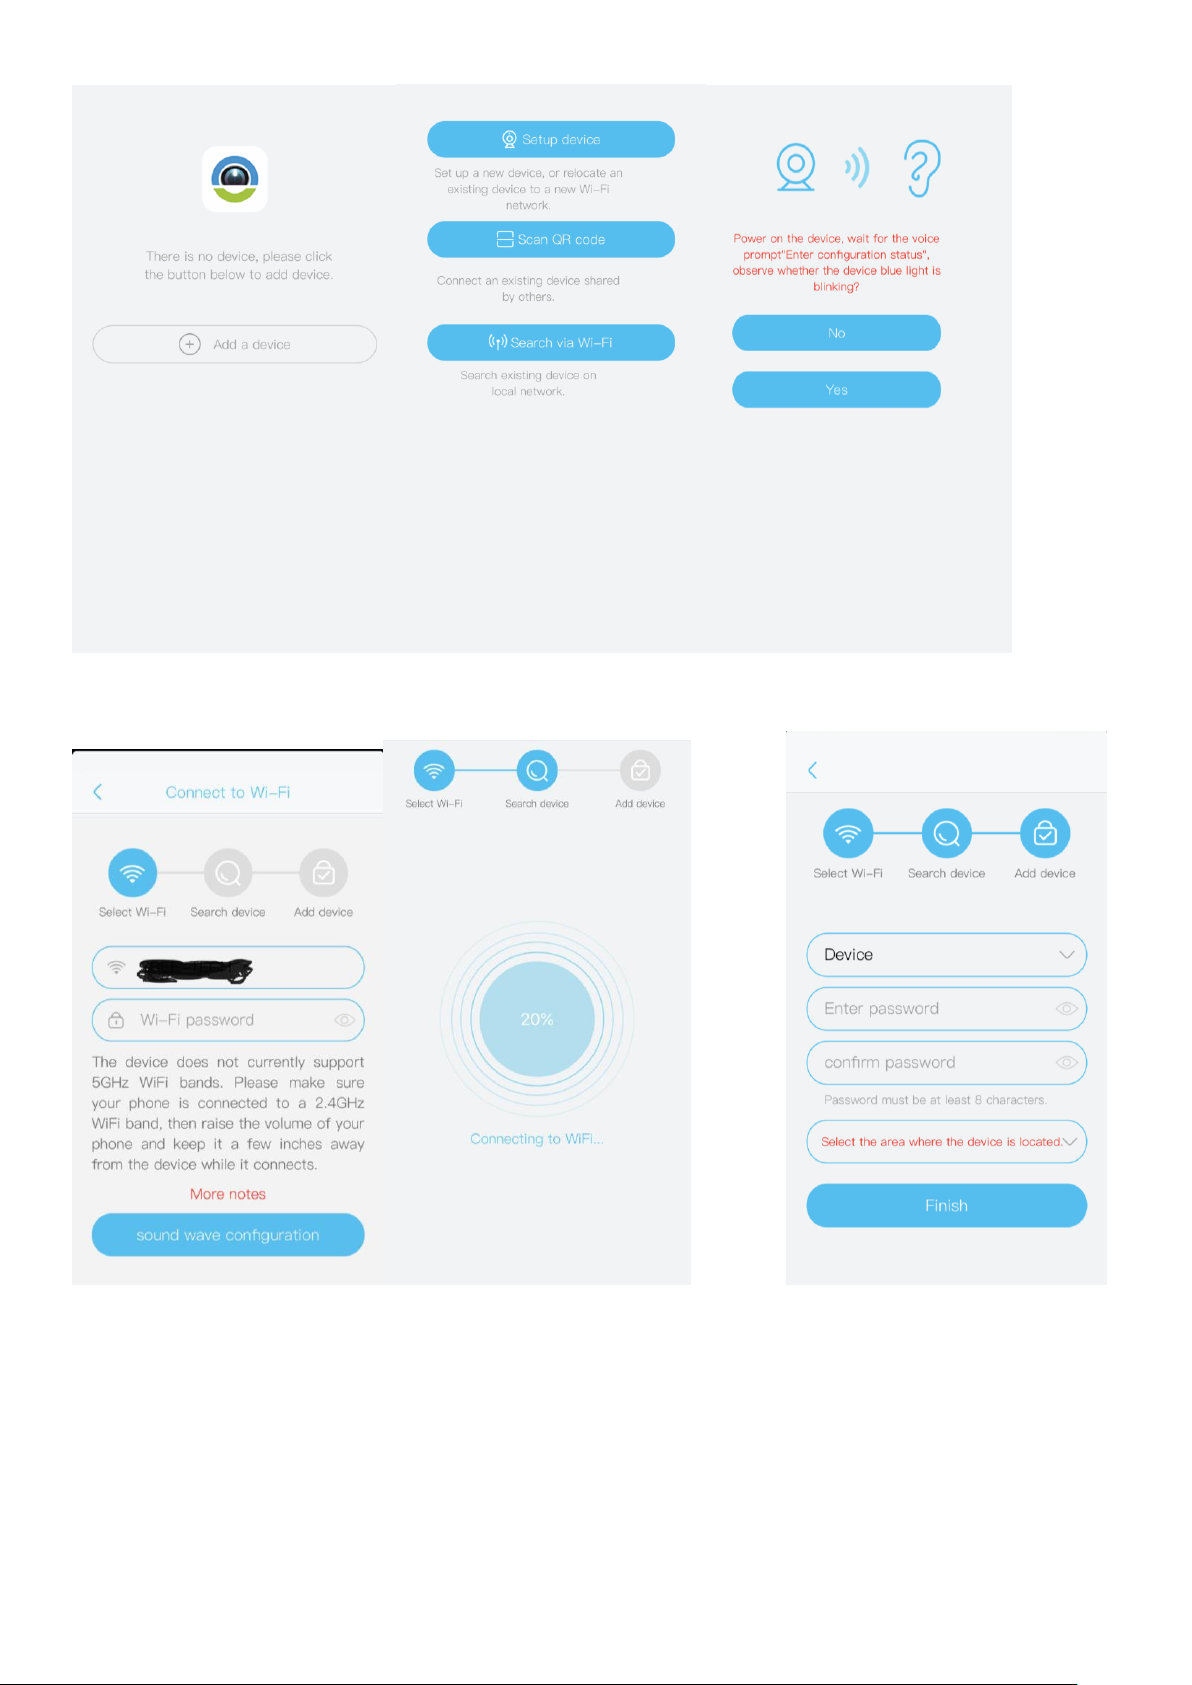
Follow the instruction of the device to set up Wi-Fi connection step by step. Or you
can watch the video how to set up the camcorder Wi-Fi connection.
Remind: The password needs to be with at least 8 digit including upper and lower
letter and numbers.
Page 5
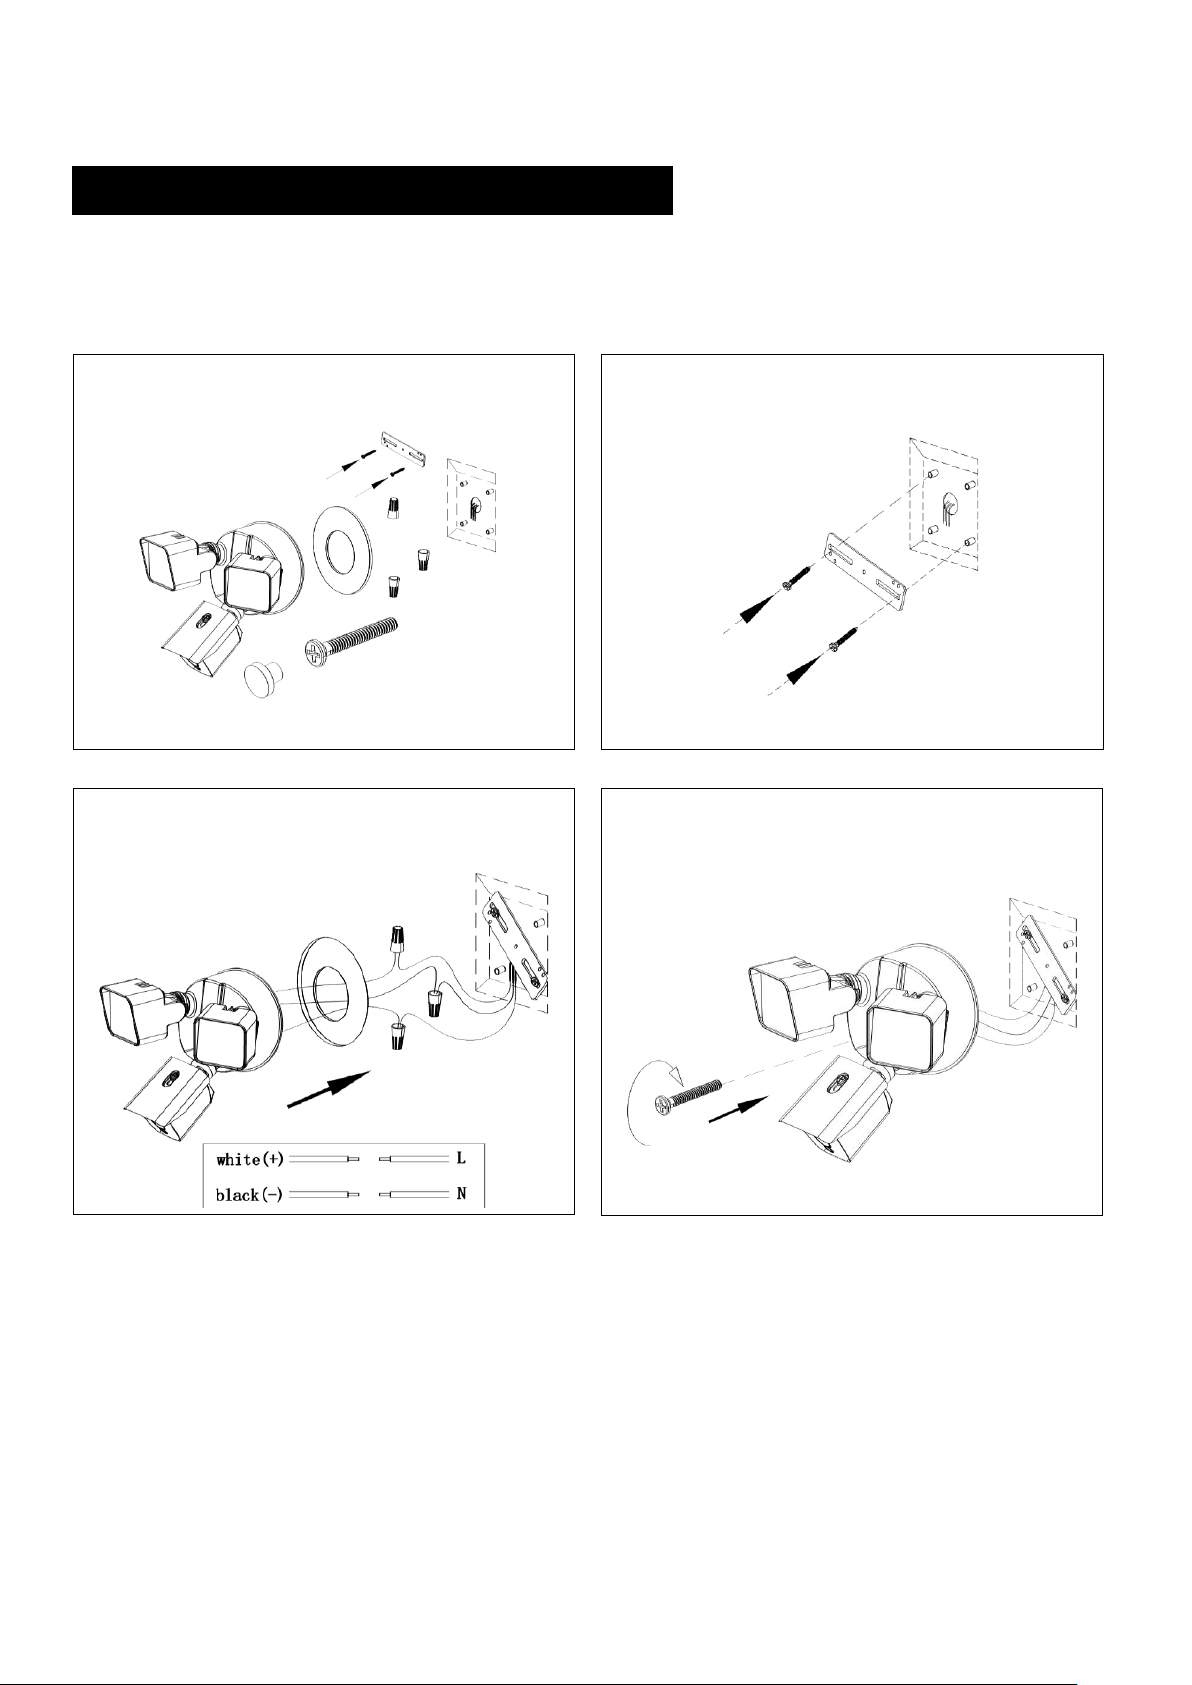
4.Lamp body is aligned with the hole on the
bracket of the junction box, and use screw fixed
in the middle of the bottom box.
3.The wire pass through EVA pad, and use wire
nut to connect the junction box wire.
2.Mounting bracket to wall junction box.
1.Installation parts display.
INSTALLATION WITH A JUNCTION BOX
Note: Disconnect power at the fuse or circuit breaker before installing.
Page 6
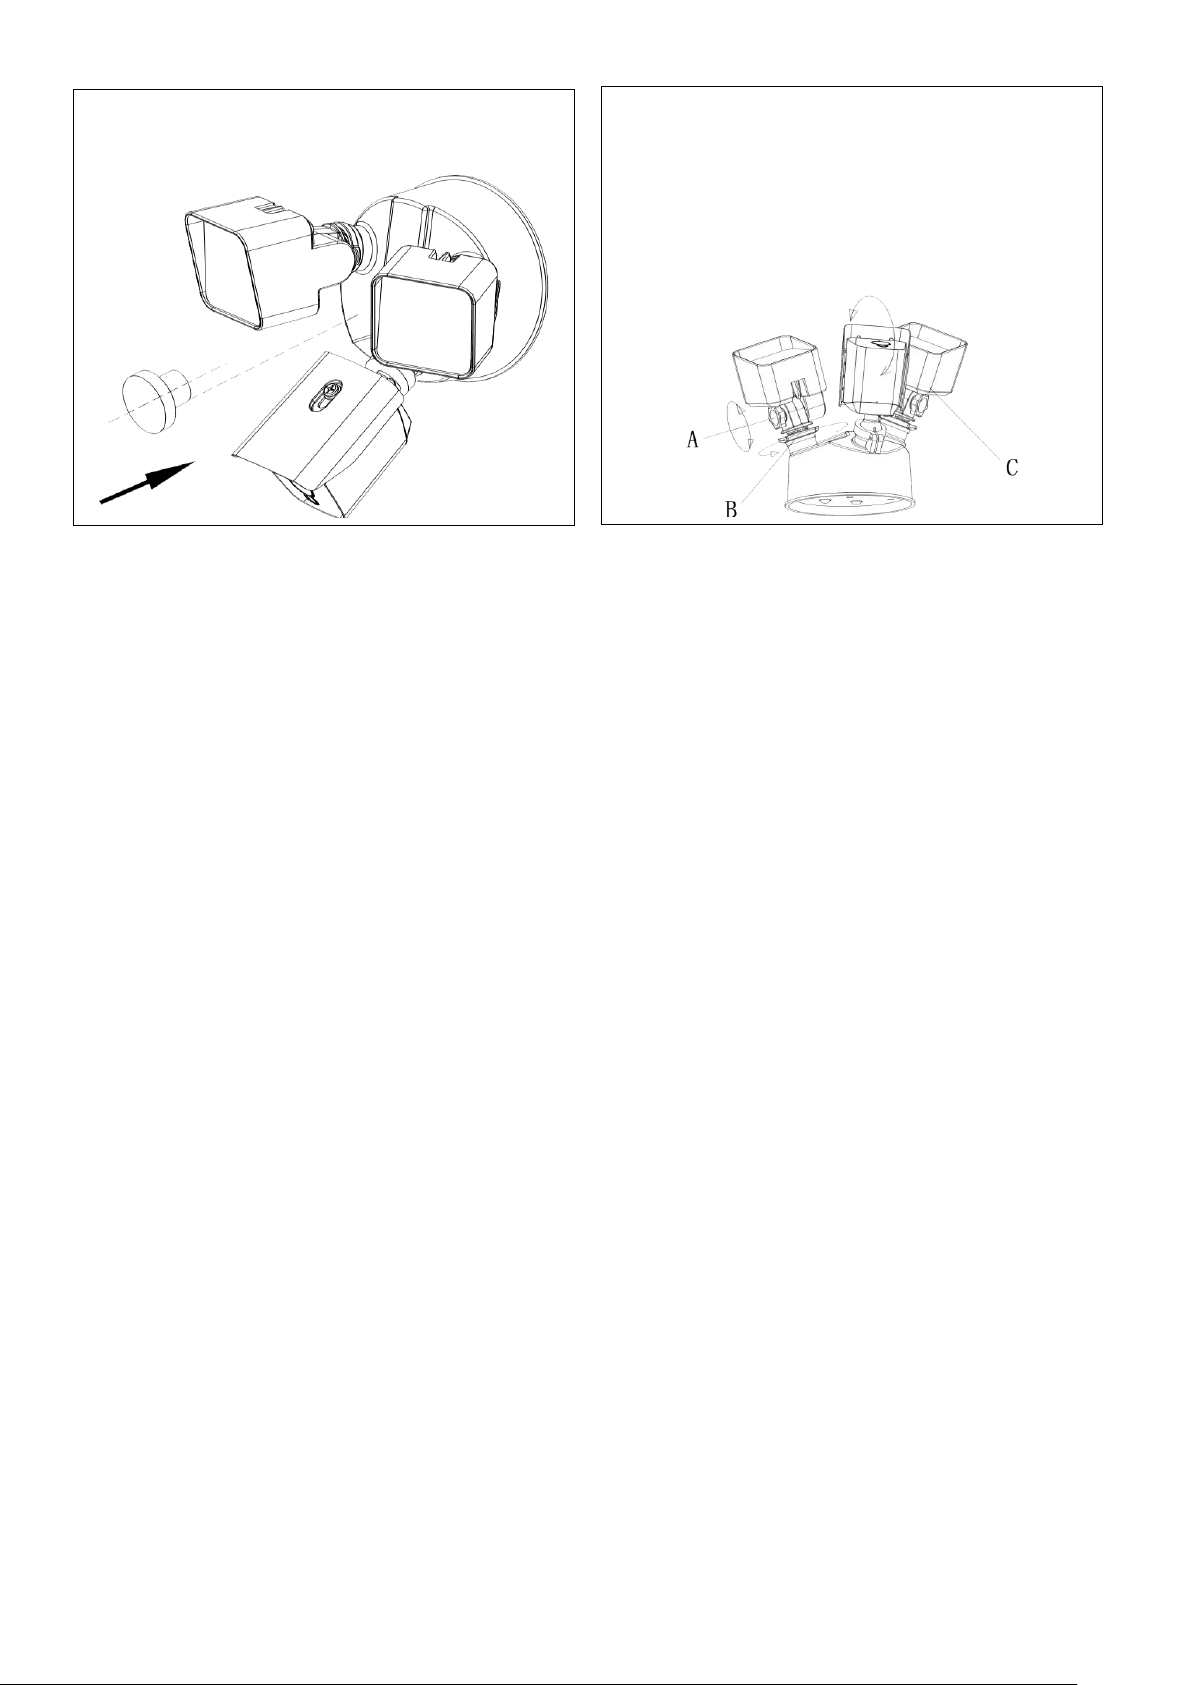
6.refer to the picture below: loose the screws A
and B, Adjust the heads of the lights to the direc
tion you want. (it is upside down out of the box)
and then tight the screws. Adjust the camera C t
o the ideal direction, make sure the antenna is
properly secured.
5.Plug the hole with a rubber plug, waterproof
and dust proof.
Restore power at the breaker
After restoring power, the lights will turn on and your Floodlight Camcorder will begin speaking to you to let
you know the system is ready and Wi-Fi is connected.
FCC Statement
This equipment has been tested and found to comply with the limits for a Class B digital device, pursuant to Part 15 of
the FCC Rules. These limits are designed to provide reasonable protection against harmful interference in a residential
installation. This equipment generates uses and can radiate radio frequency energy and, if not installed and used in
accordance with the instructions, may cause harmful interference to radio communications. However, there is no
guarantee that interference will not occur in a particular installation. If this equipment does cause harmful interference
to radio or television reception, which can be determined by turning the equipment off and on, the user is encouraged to
try to correct the interference by one or more of the following measures:
-- Reorient or relocate the receiving antenna.
-- Increase the separation between the equipment and receiver.
-- Connect the equipment into an outlet on a circuit different from that to which the receiver is connected.
-- Consult the dealer or an experienced radio/TV technician for help.
This device complies with part 15 of the FCC Rules. Operation is subject to the following two conditions:
(1) This device may not cause harmful interference, and (2) this device must accept any interference received,
including interference that may cause undesired operation.
Changes or modifications not expressly approved by the party responsible for compliance could void the user's
authority to operate the equipment.
The antenna(s) used for this transmitter must be installed to provide a separation distance of at least 20 cm from all
persons and must not be co-located or operating in conjunction with any other antenna or transmitter.
 Loading...