

Page 1
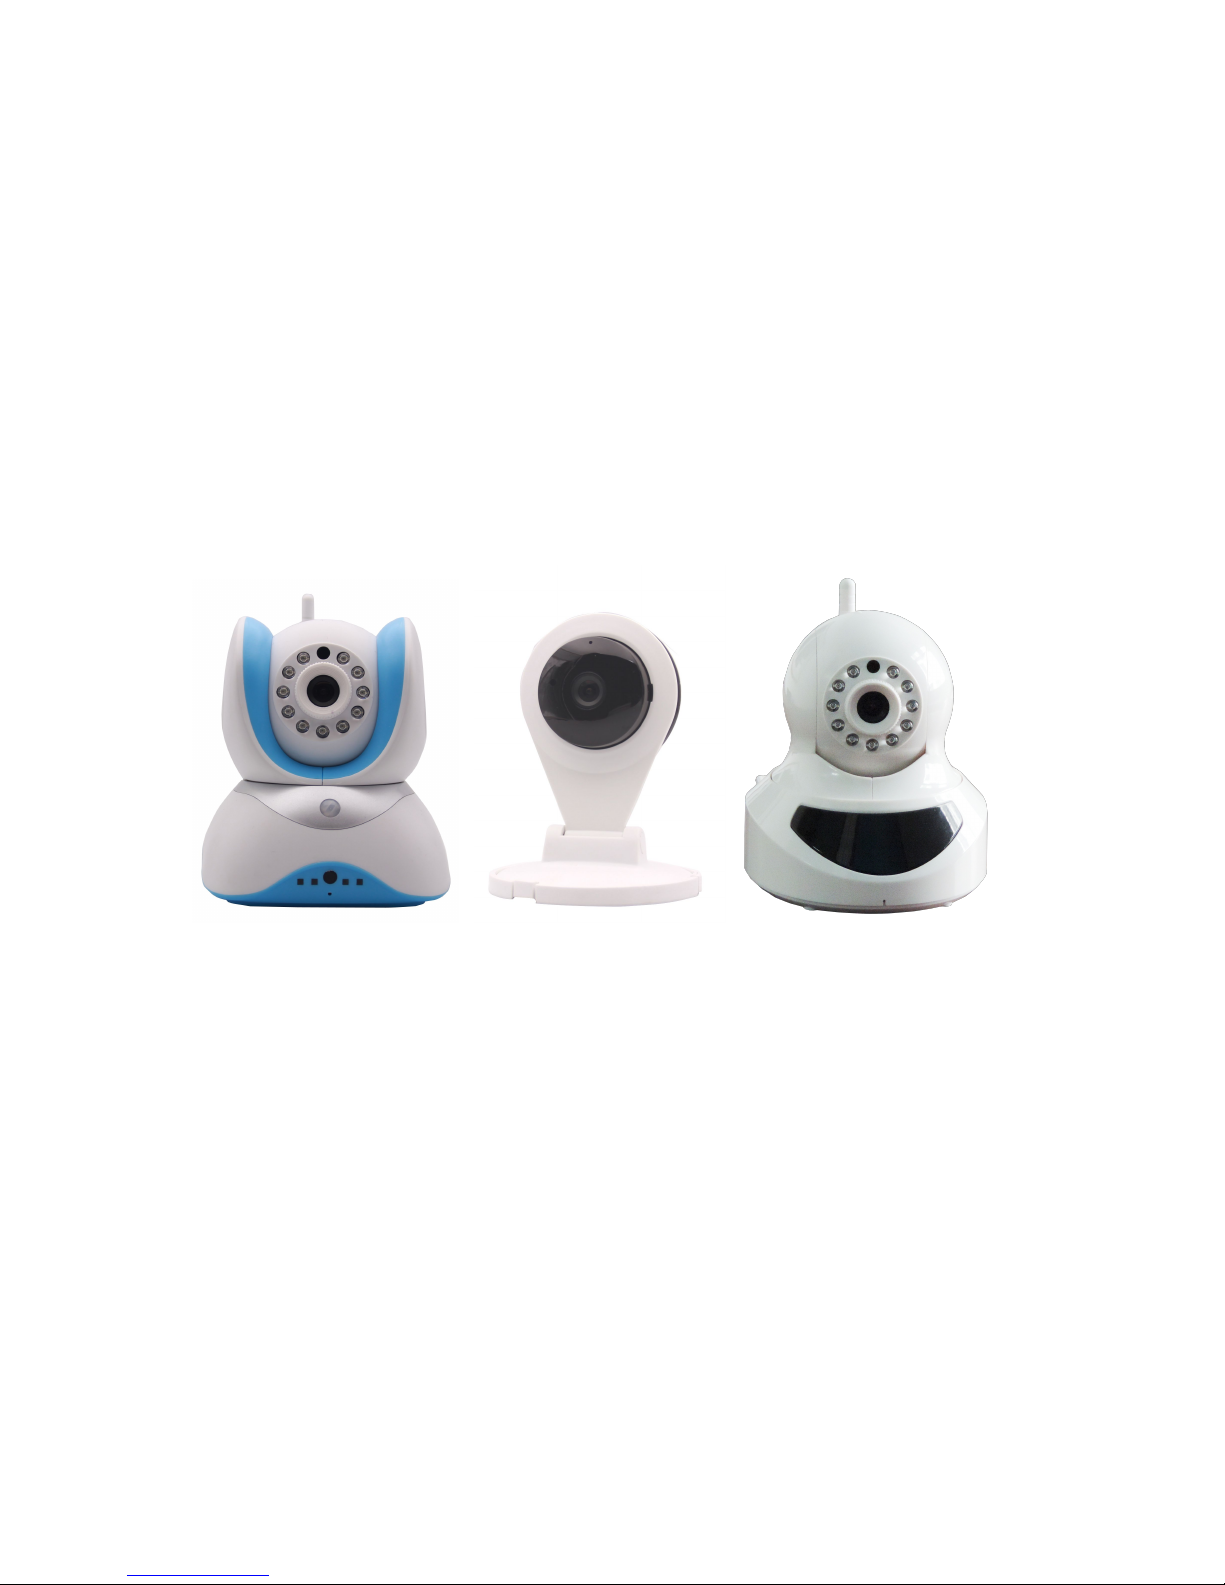
VOIPC series
Quick Guide
Read and understand thoroughly this safety awareness &
instruction before using and keep it for future reference
Page 2
1 Packing list
Please confirm the network camera is intact when open the package (hereinafter referred to as the
"camera"), also check the accessory list items are completed, if you find anything missing, please
contact with dealers.
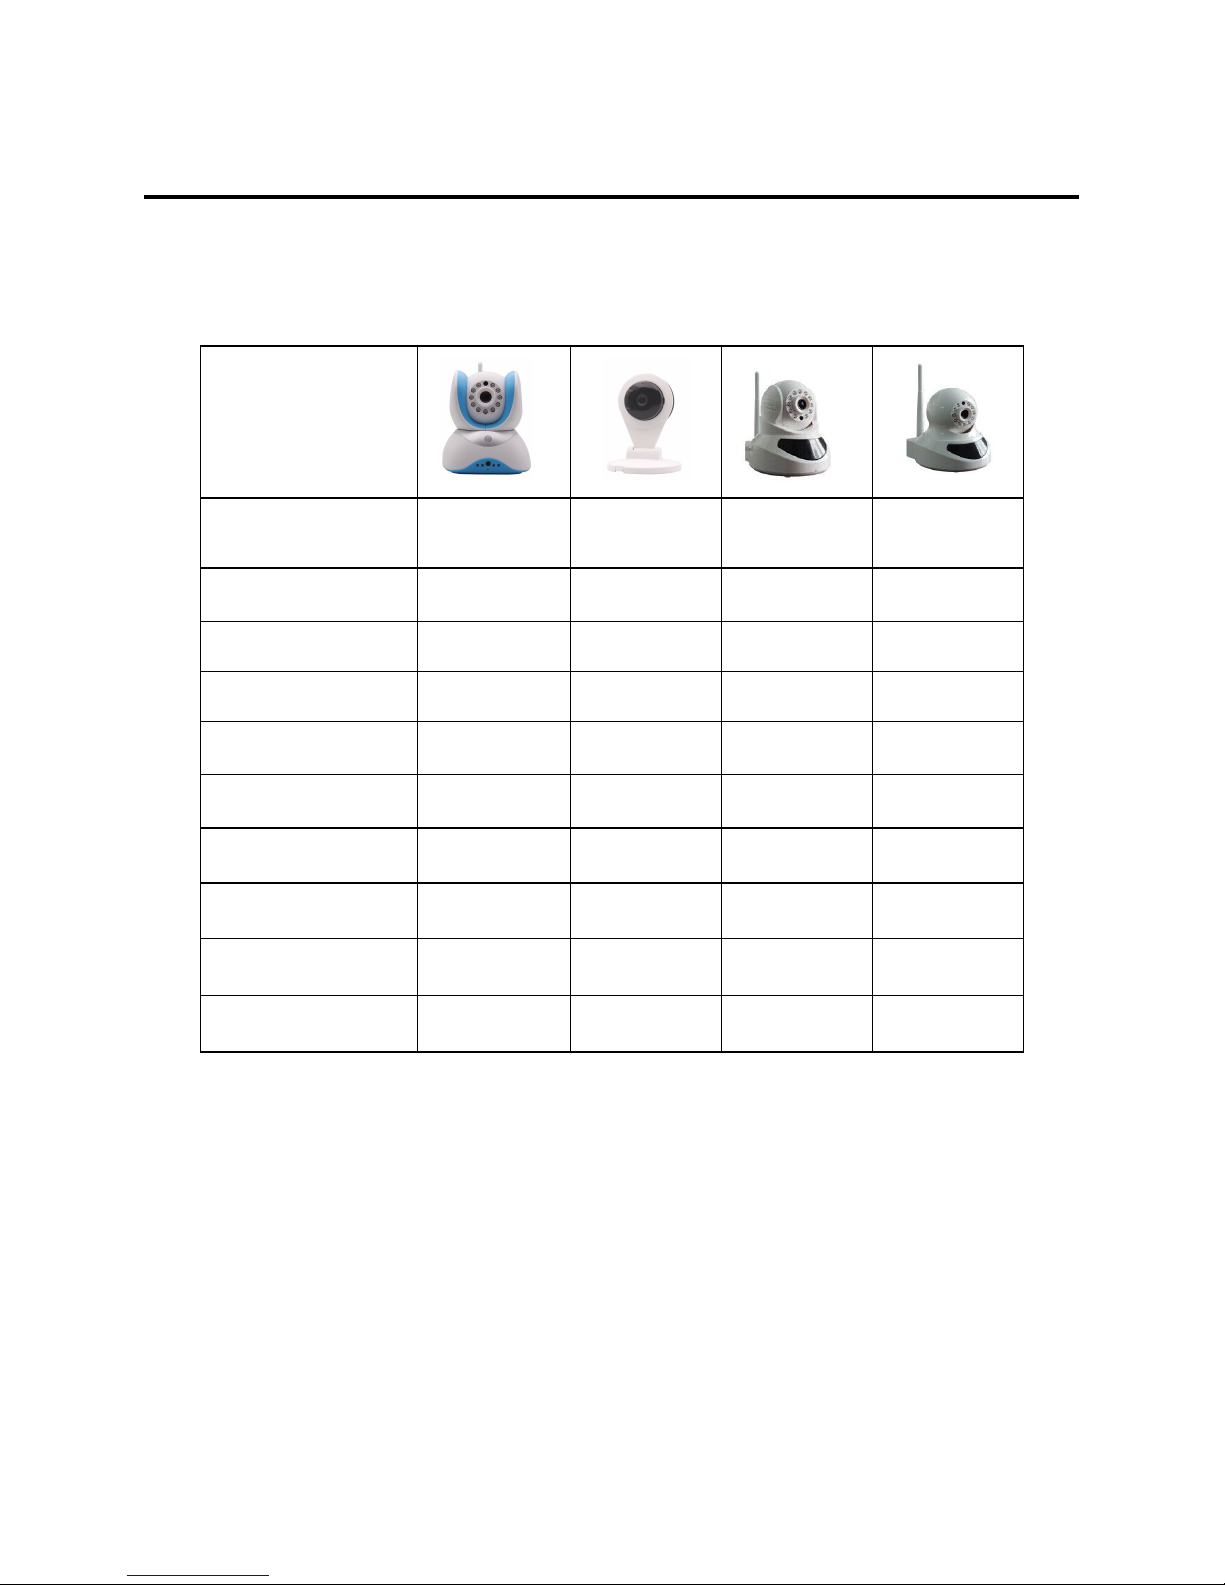
Power adaptor
√ √ √ √
Bracket
√ √ √ √
WiFi ANT √ --- --- ---
Alarm ANT √ --- √ √
Manual
√ √ √ √
Screws package
√ √ √ √
Certificate
√ √ √ √
Remote control
Optional --- Optional Optional
Magnetometer
Optional --- Optional Optional
Smart Key
Optional Optional Optional Optional
Page 3
2 Interface
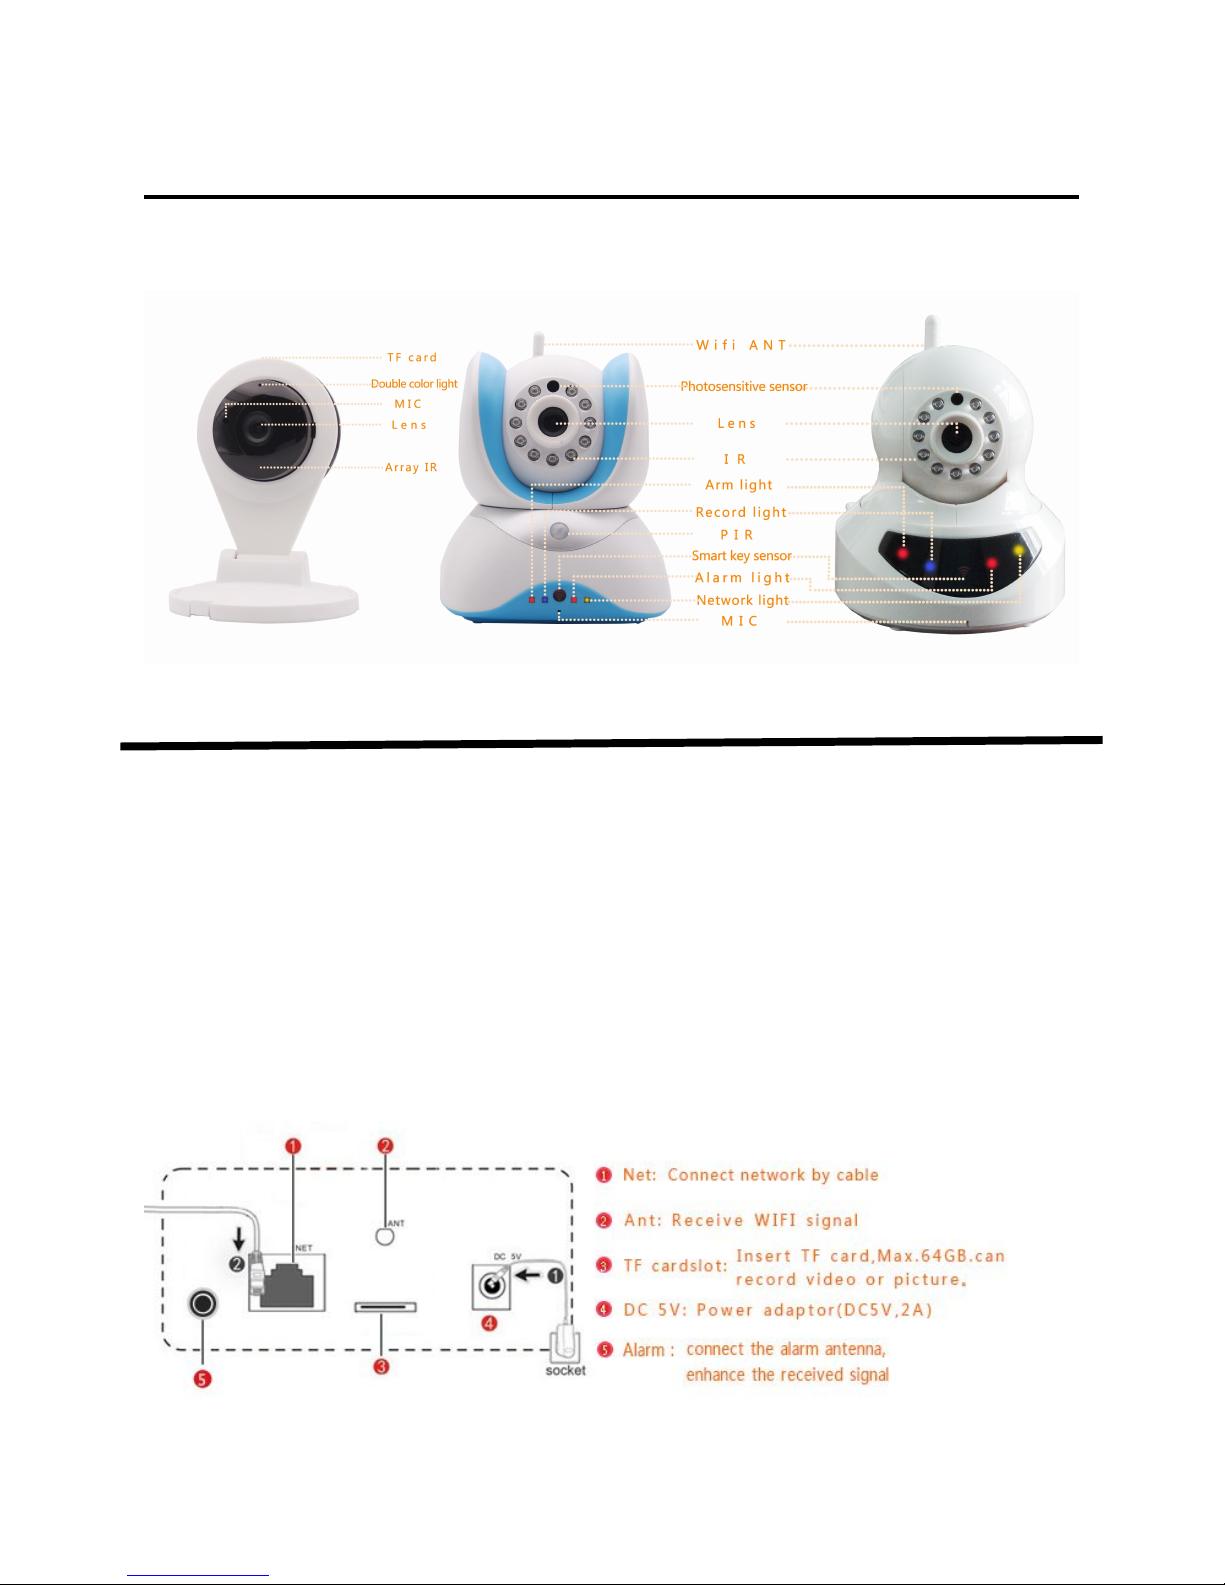
You can check if the camera is under normal operation according to the below indication.
Description Explain
On Flicking Off
Alarm light Alarm ----- No Alarm
Arm light Arm ----- Disarm
Network light Networking Monitoring No network
Record light Detect TF card Recording Don’t detect TF card
Double color light(Blue) Networking Monitoring No network
Double color light(Pink) Detect TF card Recording Don’t detect TF card
PIR Infrared detector(5 meters, open this function in “Alarm setting”
)
Page 4

3 Download APP
1、 if you use the mobile phone client
Scanning the QR code on the packaging box, download and install according to the prompts to
complete the registration (IOS user can download from APP Store, Search and download
"2CU".Android user can access to website: www.p2pcam.so or any other Way for downloading
APP.Then search and download"2CU").
2、 if you use the PC client
Open the computer, Enter "www.p2pcam.so" in the browser, download "CMSClient", according
to the prompt set the username and password, and add the camera.
"CMSClient" support add a device by LAN search, you can also manually enter the 3C ID and
password to add the camera. 3C ID at the bottom of the camera or on the packaging box, its 7
Arabia digitals, and the default password is "123".
4 Network connection
By cable
Once powered on the camera, connect the NET interface on the camera with the net
interface of router (Make sure open the DHCP function of the Router). The NET
indicator will be on once network connection done.
Smart Key
Connect your mobile with WIFI first. Then access to 2CU APP > Tool ( )>
Page 5
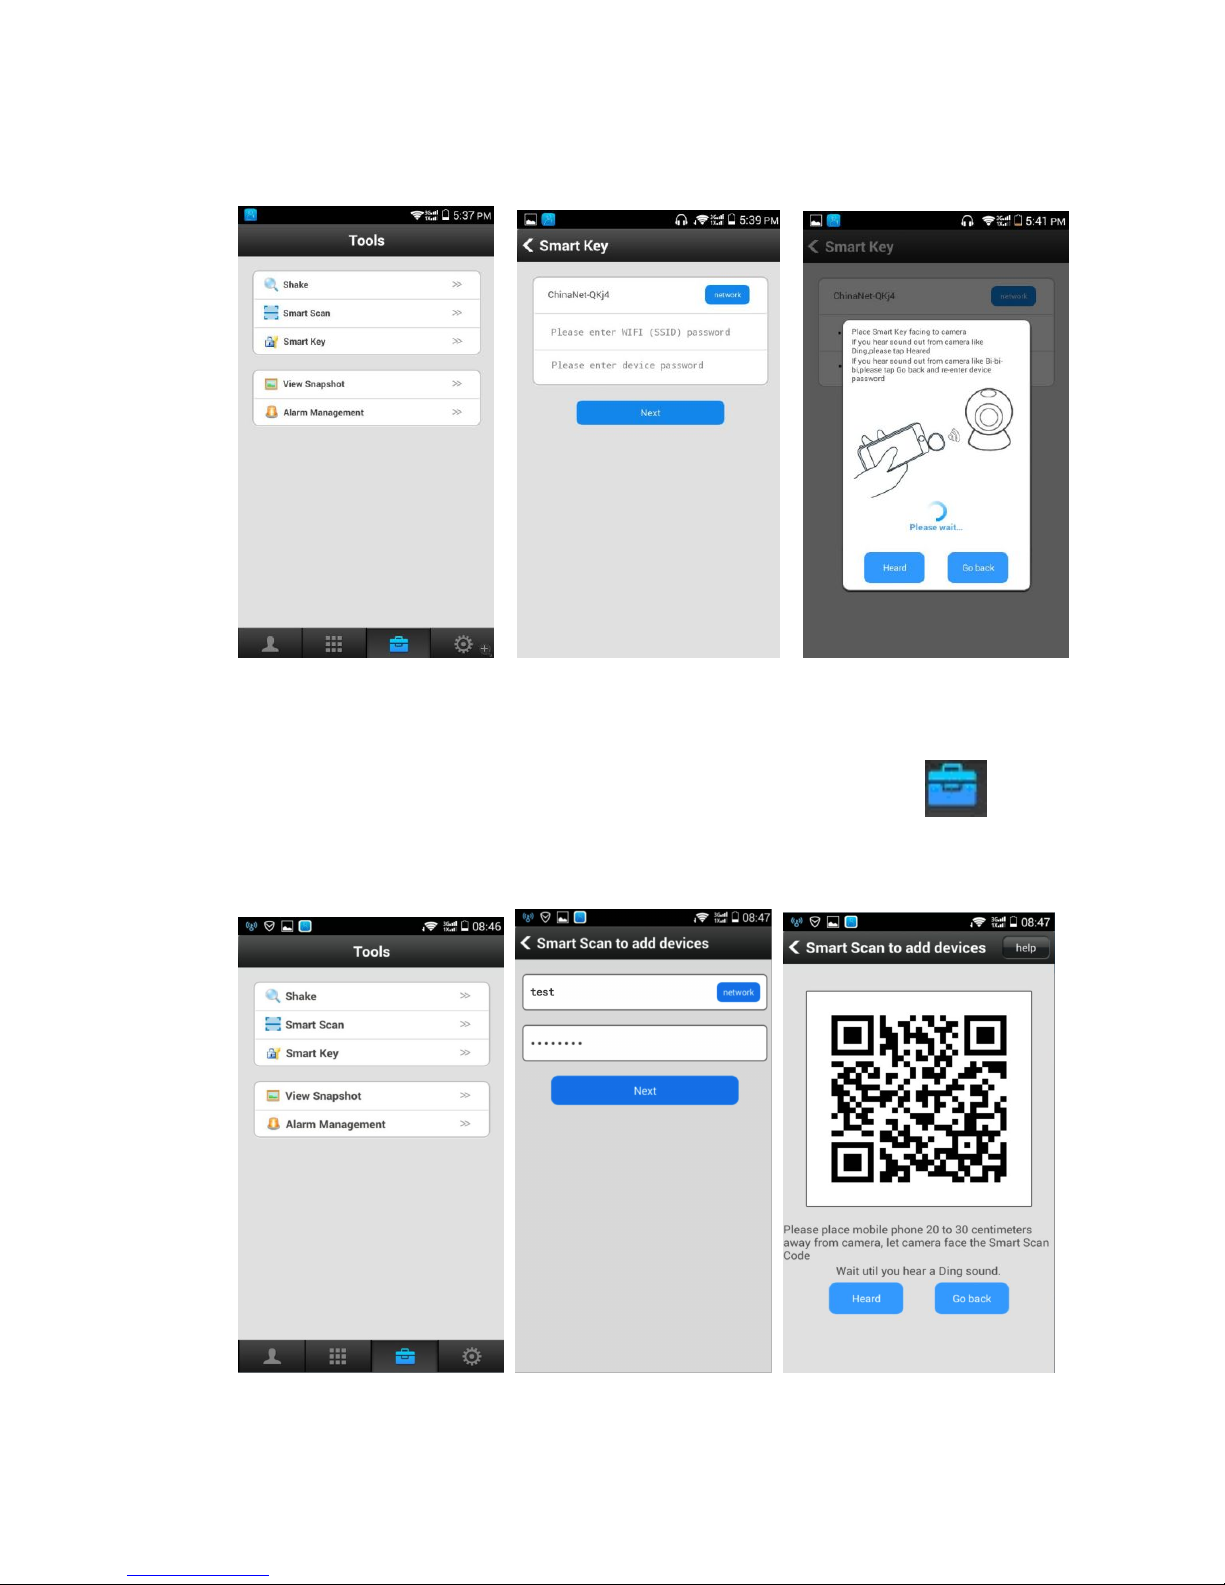
Smart key. Insert the “smart key" into the mobile earphone interface, and make the
Mobile sounds to the highest level, and then follows the prompts to set WIFI.
Smart Scan
Connect your mobile with WIFI first. Then access to 2CU APP > Tool ( )>
Smart Scan, and then follow the prompts to set WIFI (If the device is connected to a
Network, then this function is invalid, valid only after reset).
Page 6
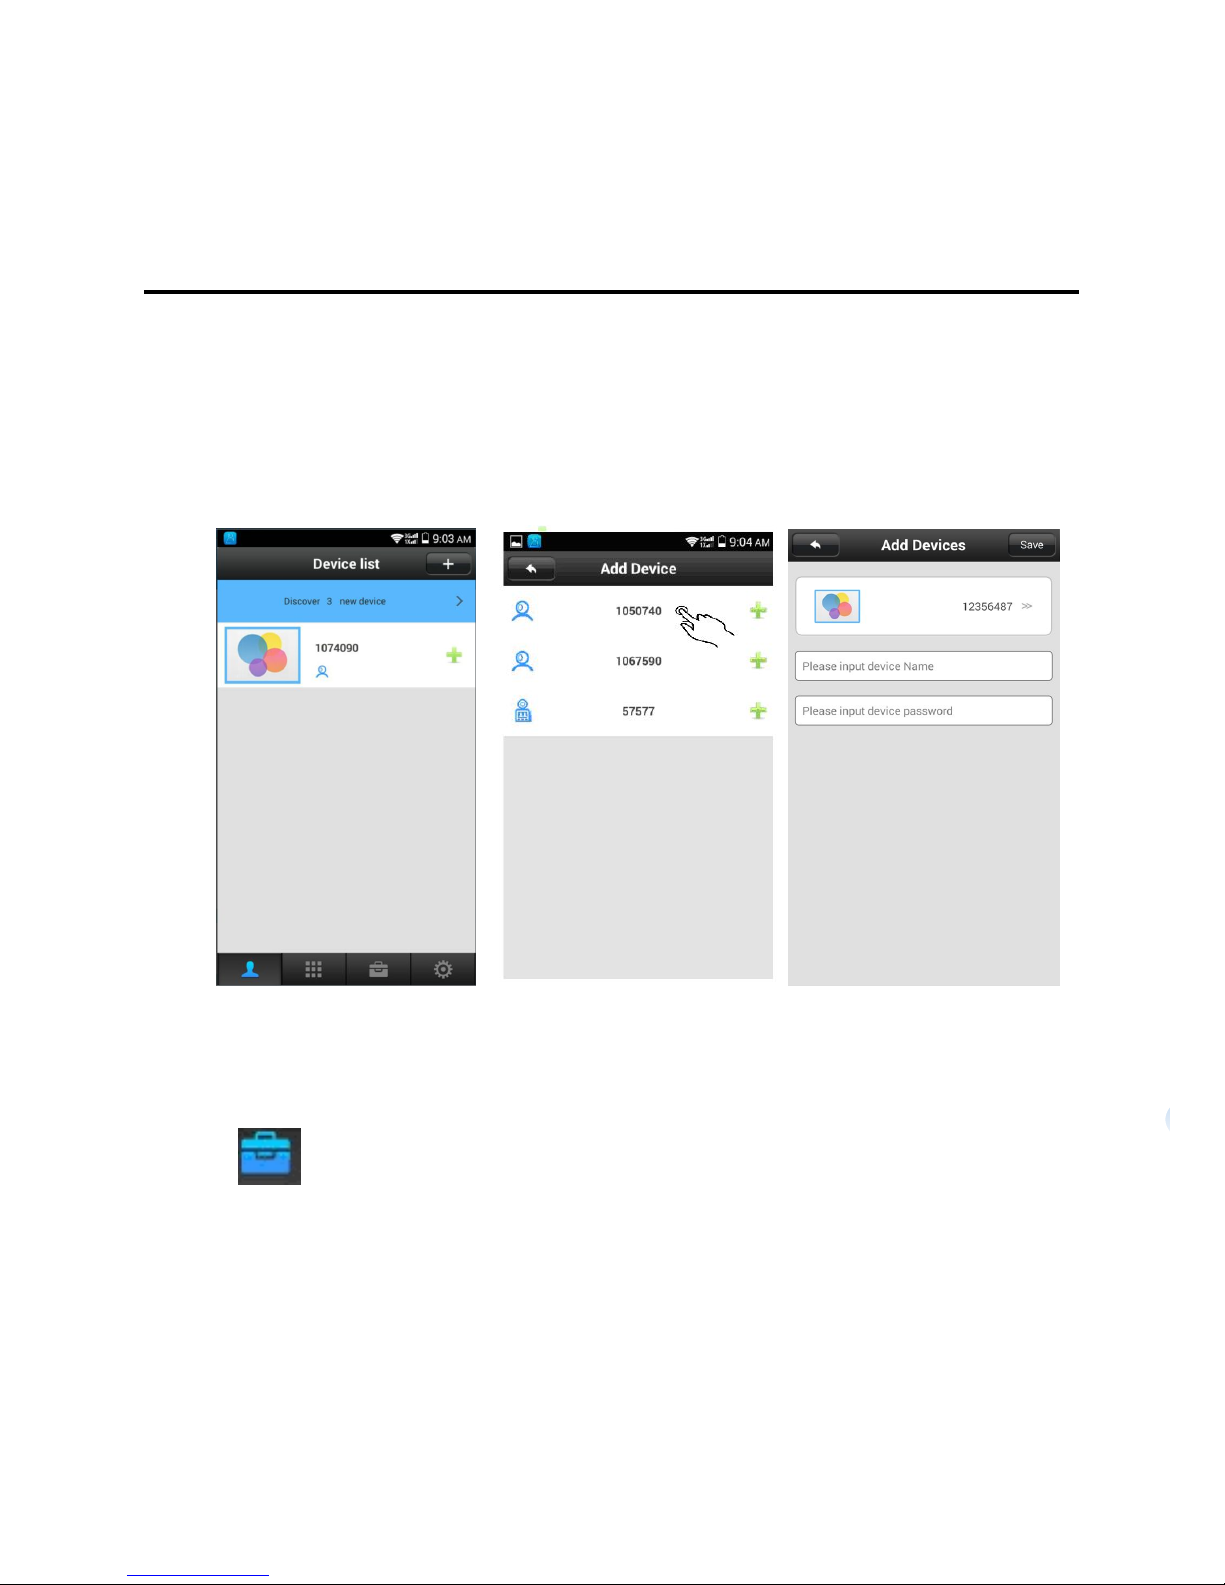
5 Add Device
Auto search
When the camera has connected with internet in the same LAN as mobile, then the APP
will search all the devices in the same LAN automatically. And it will indicate
"discover * new device ". Click “Add" and input a device name, password. And then
click “Save” to save. (The device default password is 123).
Shake:
When the camera is connecting the same LAN as mobile, then“Open 2CU, click "
Tool”, and select “Shake”. Shake the mobile, then APP will search and list the
entire device in the same LAN, Click the device to be added, and then add Name for
this device also Input the password (default password is 123).
Page 7
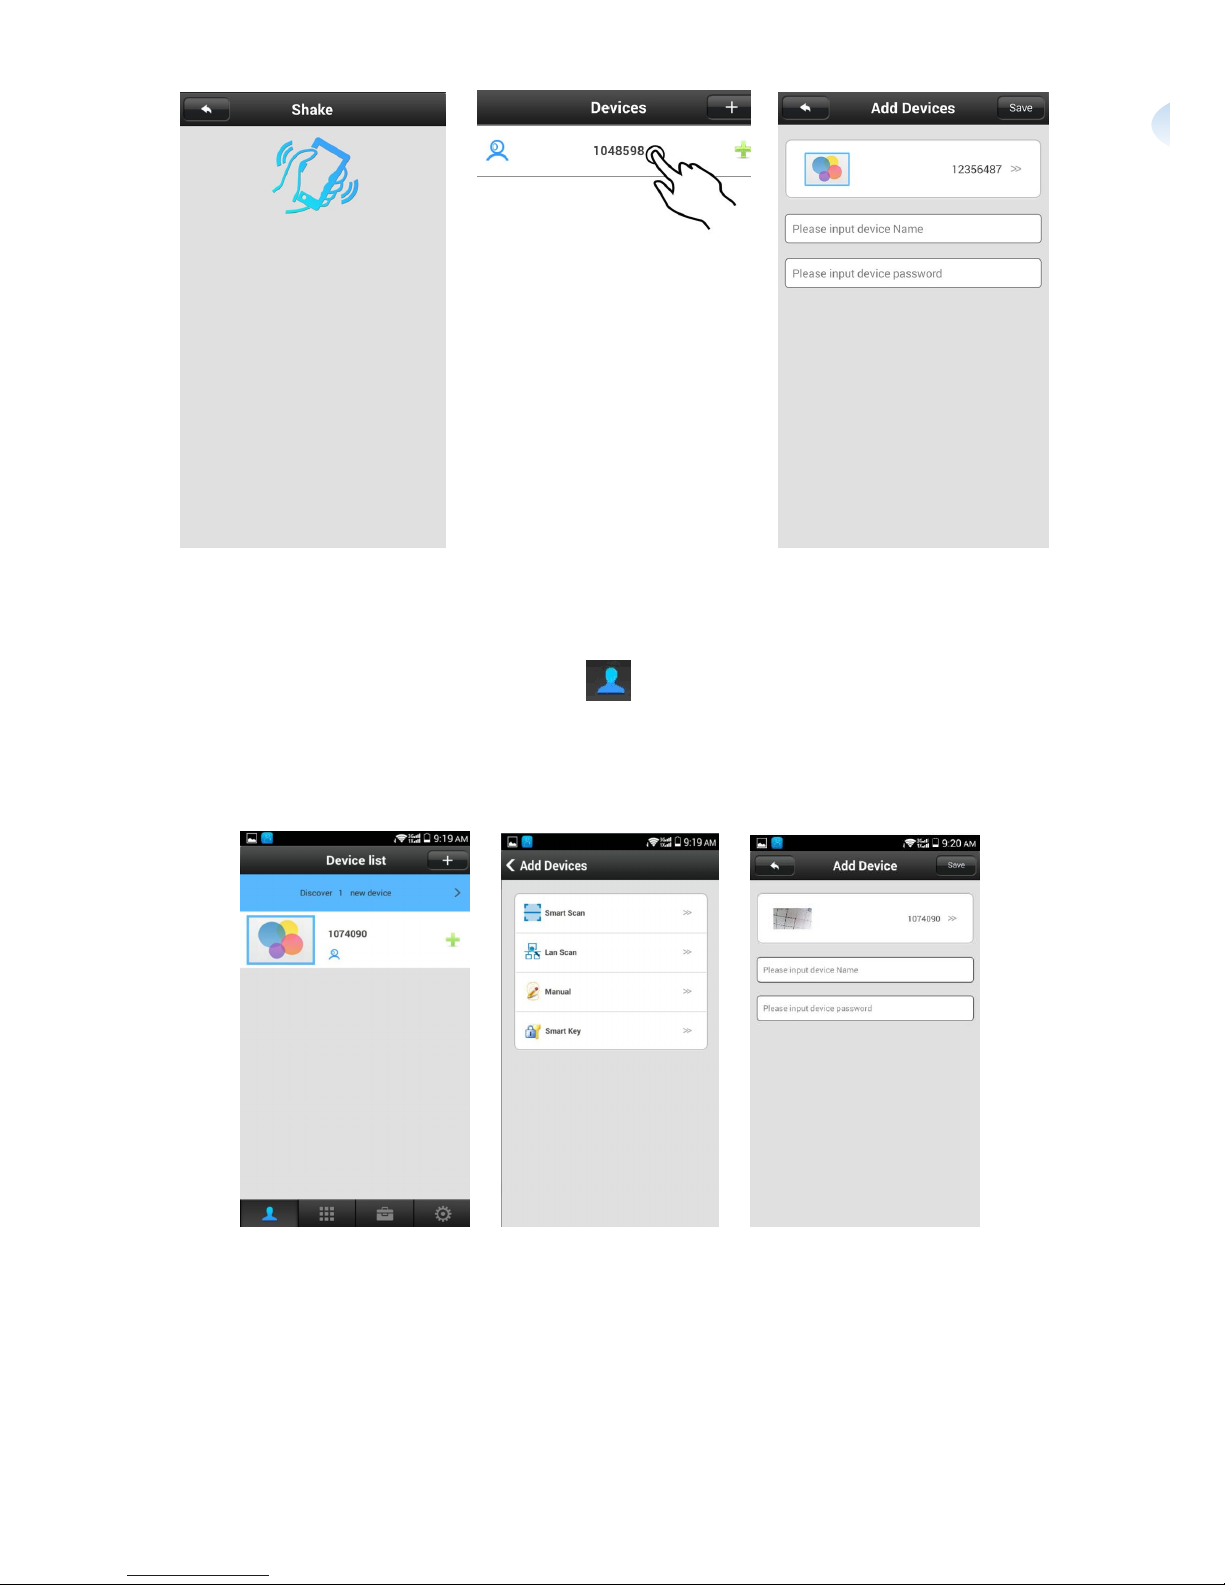
Manual Add:
Click the bottom right corner button ,it will access to Device List interface as
showed in below picture. Then click the“+”button, input the device ID Number,
click " Next" . Then input one Name for the device and input the password to finish the
Device Adding step. (The entire Camera has one default ID No. showed on the camera
label on the bottom of camera)
Complete the above operation, Click on the left in the list, can enter the monitor screen.
Click the device name in the list, "playback Settings Edit" dialog box will pop up, click
the playback, playback the video in the TF card, click the Settings, and set the
functions and parameters.
Page 8

6 Q&A
Q: Prompt "are not in the same subnet” when Scan QR code? Don’t find the camera in LAN?
A: Please confirm that the mobile phone and camera is connected with a router, and then restart
the router and camera, try again.
Q: Don’t record; don’t cover when TF card is full
A: Format the TF card on the computer first, and then insert the TF card into the camera, if the
blue light is not bright, TF card has a problem, please replace the TF card.
Q: Forget the password?
A: There is a reset hole at the bottom of the camera, use a toothpick or similar objects inserted
into the reset hole, restore the default password "123".
Q: Or code scanning is invalid?
A: Check the camera is under normal operation,move the mobile before and after.
Q: The camera is offline?
A: Check whether the router open DHCP.
 Loading...