

Page 1
Eagle® AXS™ Systems
DRAFT
Eagle AXS Systems
User Manual
Eagle AXS Systems
User Manual
Eagle AXS Systems
User Manual
Eagle AXS Systems
User Manual
Eagle AXS Systems
User Manual
Eagle AXS Systems
User Manual
Eagle AXS Systems
User Manual
Eagle AXS Systems
User Manual
Eagle AXS Systems
User Manual
95-3018-020-000 Rev A
© 2019 SRAM, LLC
Page 2

You must read and understand the Safety
DRAFT
SAFETY INSTRUCTIONS
Instructions document included with your
product before proceeding with installation.
Improperly installed components are
extremely dangerous and could result in
severe and/or fatal injuries. If you have any
questions about the installation of these
components, consult a qualified bicycle
mechanic. This document is also available
on www.sram.com.
CONSIGNES DE SÉCURITÉ
Vous devez lire et comprendre le document
consacré aux instructions de sécurité livré
avec votre produit avant de procéder à son
installation. Des composants installés de
manière inappropriée sont extrêmement
dangereux et peuvent provoquer des
blessures graves, voire mortelles. Pour toute
question concernant l’installation de ces
composants, consultez un mécanicien vélo
professionnel. Ce document est également
disponible sur www.sram.com.
INSTRUÇÕES DE SEGURANÇA
Tem que ler e compreender o documento
de Instruções de Segurança, incluído com
o seu produto, antes de proceder com
ainstalação. Os componentes instalados
de forma incorrecta são extremamente
perigosos e poderão resultar em lesões
graves e/ou fatais. Se tiver quaisquer
perguntas sobre a instalação destes
componentes, consulte um mecânico de
bicicletas qualificado. Este documento
também está disponível em www.sram.com.
Bevor Sie mit der Installation beginnen,
müssen Sie die Ihrem Produkt beiliegenden
Sicherheitshinweise gelesen und verstanden
haben. Falsch montierte Komponenten
stellen eine erhebliche Gefahr dar und
könnten zu schweren und/oder tödlichen
Verletzungen führen. Wenn Sie Fragen
zur Montage dieser Komponenten haben,
wenden Sie sich an einen qualifizierten
Fahrradmechaniker. Dieses Dokument steht
auch unter www.sram.com zur Verfügung.
Antes de proceder a la instalación de
este producto, es necesario que lea
yentienda perfectamente el documento
de instrucciones de seguridad que lo
acompaña. Unos componentes mal
instalados suponen un enorme peligro
ypueden ocasionar lesiones graves
o incluso mortales. Si tiene alguna
pregunta acerca de la instalación de estos
componentes, consulte con un mecánico de
bicicletas cualificado. Este documento está
disponible también en la dirección
www.sram.com.
SICHERHEITSHINWEISE
INSTRUCCIONES DE SEGURIDAD
ISTRUZIONI DI SICUREZZA
L'utente deve leggere e comprendere
il documento di Istruzioni di sicurezza
accluso al prodotto, prima di procedere
all’installazione. I componenti, se installati
in modo improprio, sono estremamente
pericolosi e potrebbero essere all’origine di
ferite gravi e/o mortali. In caso di domande
sull’installazione di questi componenti,
consultare un meccanico per biciclette
qualificato. Il presente documento è
disponibile anche sul sito www.sram.com.
VEILIGHEIDSINSTRUCTIES
Lees en begrijp het document met
veiligheidsinstructies dat met uw product
is meegeleverd voordat u met de
installatie begint. Verkeerd geïnstalleerde
componenten kunnen buitengewoon
gevaarlijk zijn en kunnen leiden tot
ernstige en/of fatale verwondingen. Als
uvragen hebt over de installatie van deze
componenten, raadpleeg een vakbekwame
fietsenmaker. Dit document is tevens
beschikbaar op www.sram.com.
安全にお使いいただくために
取り付けを開始する前に、製品に付属してい
る安全に関する記述を必ず読み、内容を理解
してください。コンポーネントを間違って取り
付けると、非常に危険な状態になり、その結
果、重度または致命的な障害を引き起こすこ
とがあります。これらのコンポーネントの取り
付けに関して質問がある場合は、正規の自転
車整備士にご相談ください。このマニュアルは
www.sram.comにも掲 載されています。
安全说明
进行安装之前,您必须阅读并理解产品随附的
安全说明书。部件安装不当是极为危险的,可
能导致严重甚至致命的人身伤害。如果您对部
件安装有任何疑问,请咨询专业自行车技工。
本文件也发布在
www.sram.com上。
2
Page 3

NOTICE
DRAFT
This manual is a complete system
installation guide, from unboxing each
component to heading out for a ride.
Complete the installation and setup in the
order described in the manual. Do not
begin a new section before completing the
previous sections.
NOTICE
This manual is a complete system
installation guide, from unboxing each
component to heading out for a ride.
Complete the installation and setup in the
order described in the manual. Do not
begin a new section before completing the
previous sections.
NOTICE
This manual is a complete system
installation guide, from unboxing each
component to heading out for a ride.
Complete the installation and setup in the
order described in the manual. Do not
begin a new section before completing
the previous sections.
NOTICE
This manual is a complete system
installation guide, from unboxing each
component to heading out for a ride.
Complete the installation and setup in the
order described in the manual. Do not
begin a new section before completing the
previous sections.
NOTICE
This manual is a complete system
installation guide, from unboxing each
component to heading out for a ride.
Complete the installation and setup in the
order described in the manual. Do not
begin a new section before completing the
previous sections.
This manual is a complete system
installation guide, from unboxing each
component to heading out for a ride.
Complete the installation and setup in the
order described in the manual. Do not
begin a new section before completing the
previous sections.
This manual is a complete system
installation guide, from unboxing each
component to heading out for a ride.
Complete the installation and setup in the
order described in the manual. Do not
begin a new section before completing the
previous sections.
NOTICE
NOTICE
NOTICE
This manual is a complete system
installation guide, from unboxing each
component to heading out for a ride.
Complete the installation and setup in the
order described in the manual. Do not
begin a new section before completing
the previous sections.
NOTICE
This manual is a complete system
installation guide, from unboxing each
component to heading out for a ride.
Complete the installation and setup in the
order described in the manual. Do not
begin a new section before completing
the previous sections.
3
Page 4

Tools and Supplies 8
DRAFT
AWerkzeuge und Material
BHerramientas y accesorios
COutils et accessoires
DStrumenti e forniture
EGereedschap en benodigdheden
FFerramentas e Produtos a Usar
Gツールおよび付属品
H工具和用品
SRAM® AXS™ App 9
ASRAM AXS App
BSRAM AXS App
CSRAM AXS App
DSRAM AXS App
ESRAM AXS App
FSRAM AXS App
GSRAM AXS App
HSRAM AXS App
Eagle® AXS™ Controller 10
AEagle AXS Controller
BEagle AXS Controller
CEagle AXS Controller
DEagle AXS Controller
EEagle AXS Controller
FEagle AXS Controller
GEagle AXS Controller
HEagle AXS Controller
Eagle® AXS™ Rear Derailleur 11
AEagle AXS Rear Derailleur
BEagle AXS Rear Derailleur
CEagle AXS Rear Derailleur
DEagle AXS Rear Derailleur
EEagle AXS Rear Derailleur
FEagle AXS Rear Derailleur
GEagle AXS Rear Derailleur
HEagle AXS Rear Derailleur
SRAM® Battery 12
ASRAM Battery
BSRAM Battery
CSRAM Battery
Battery Charging 13
ALaden der Batterie
BRecarga de la batería
CRecharge de la batterie
DSRAM Battery
ESRAM Battery
FSRAM Battery
DCarica della batteria
EDe accu opladen
FCarga da bateria
GSRAM Battery
HSRAM Battery
G電池の充電
H电池充电
Battery Installation 14
AEinlegen der Batterie
BInstalación de la batería
CInstallation de la batterie
DInstallazione della batteria
EDe accu installeren
FInstalação da Bateria
G電池の取り付け
H安装电池
System Pairing 16
ASystem Pairing
BSystem Pairing
CSystem Pairing
DSystem Pairing
ESystem Pairing
FSystem Pairing
GSystem Pairing
HSystem Pairing
AXS™ Button Functions 19
AAXS Button Functions
BAXS Button Functions
CAXS Button Functions
DAXS Button Functions
EAXS Button Functions
FAXS Button Functions
GAXS Button Functions
HAXS Button Functions
4
Page 5

Shifting 20
DRAFT
ASchalten
BCambio de marchas
CPassage des vitesses
DCambio
ESchakelen
FMeter Mudanças
Gシフ ティン グ
H变速
AXS™ Button Shifting 21
ASchalten mit der
Funktionstaste
BCambio con botones de
función
CPassage des vitesses avec le
bouton de commande
DTasto funzione Cambio
ESchakelen met de functieknop
FMeter Mudanças com o Botão
de Função
G機能 ボタンによるシフティング
H功能按钮变速
Cassette Installation 22
AEinbau der Kassette
BInstalación del casete
CInstallation de la cassette
DInstallazione della cassetta
EDe cassette installeren
FInstalação da Cassete
Gカセット の取り 付 け
H安装飞轮
Crankset Installation 24
ACrankset Installation
BCrankset Installation
CCrankset Installation
DCrankset Installation
ECrankset Installation
FCrankset Installation
GCrankset Installation
HCrankset Installation
Rear Derailleur Installation 25
AEinbau des Schaltwerks
BInstalación del desviador trasero
CInstallation du dérailleur arrière
Rear Derailleur Adjustments 27
AEinstellung des Schaltwerks
BAjustes del desviador trasero
CRéglages du dérailleur arrière
DInstallazione deragliatore
posteriore
EDe achterderailleur installeren
derailleur traseiro
DRegolazioni del deragliatore
posteriore
FInstalação do desviador/derailleur
traseiro
Gリア・デ ィレ イ ラ ー の 取り 付 け
H后变速器安装
EDe achterderailleur afstellen
FAfinação do desviador/
Gリア・ディレイラーの調節
H后变速器调节
Adjust Limit Screws 28
AAdjust Limit Screws
BAdjust Limit Screws
CAdjust Limit Screws
DAdjust Limit Screws
EAdjust Limit Screws
FAdjust Limit Screws
GAdjust Limit Screws
HAdjust Limit Screws
Chain Sizing 30
AKettenlänge
BAjuste de longitud de la cadena
CLongueur de la chaîne
DDimensionamento della catena
EDe ketting inkorten
FTamanho da corrente
Gチェーン 長の 調 節
H链条尺寸测量
5
Page 6

Full Suspension Bicycles 31
DRAFT
AVollgefederte Fahrräder
BBicicletas de suspensión integral
CVélos tout suspendus
DBiciclette a sospensione totale
EFietsen met voor- en achtervering
FBicicletas com suspensão
completa
Gフル・サスペ ンション の自 転 車
H全避震自行车
Eagle® X-SYNC™ 2 Chainrings 32
Eagle® X-SYNC™ 2 Oval Chainrings 33
Chain Installation 34
AKettenmontage
BInstalación de la cadena
CInstallation de la chaîne
DInstallazione della catena
EDe ketting installeren
FInstalação da Corrente
Gチェーン の取り 付け
H链条安装
Chain Gap Adjustment 38
AEinstellung des Kettenabstands
BAjuste del espacio de separación
de la cadena
CRéglage du passage de la chaîne
DRegolazione del chain gap
EKettingspeling afstellen
FAfinação da folga da corrente
Gチェーン 間 隔の 調 節
H链距调节
Chain Gap Adjustment without Gauge 40
AEinstellung des
Kettenabstands
ohne Werkzeug
BAjuste de la separación de la
cadena sin utilizar un
calibrador
CRéglage du passage de la
chaîne
sans outil de mesure
DRegolazione del chain gap
senza indicatore
EKettingspeling afstellen
zonder meter
FAfinação de folga da corrente
sem a ferramenta
Gゲージを使用しないチェー
ン・ギャップの調節
H无测量仪辅助下调节链隙
Fine Tuning 41
AFeineinstellung
BAjuste fino
CRéglage précis
DTaratura
EFijnafstelling
FRegulação fina
Gファイン・チューニン グ
H精细调整
Eagle® AXS™ Controller Installation 42
AAXS Controller Installation
BController Installation
CInstallation du levier de dérailleur
DInstallazione del comando del
cambio
EDe shifter installeren
FInstalação do Manípulo de
Comando das Mudanças
Gシフターの取り付け
H指拨安装
Controller Discrete Clamp 42
AController Discrete Clamp
BController Discrete Clamp
CController Discrete Clamp
DController Discrete Clamp
EController Discrete Clamp
FController Discrete Clamp
GController Discrete Clamp
HController Discrete Clamp
MMX™ Clamp 43
AMMX Clamp
BMMX Clamp
CMMX Clamp
DMMX Clamp
EMMX Clamp
FMMX Clamp
GMMX Clamp
HMMX Clamp
6
Page 7

Battery Overview 44
DRAFT
AÜbersicht über die Batterie
BDescripción de la batería
CPrésentation des batteries
DPanoramica della batteria
EOverzicht van de accu
FVista Geral da Bateria
G電池の概要
H电池简介
Battery Charge LED Indicator 44
ABatteriezustandsanzeige-LED
BLED indicador de carga de la
pila
CDEL indiquant le niveau de
charge
de la batterie
DLED indicatore di carica della
batteria
ELED-controlelampje voor
batterijniveau
FLED indicador de carga da
bateria
G電池充電 LED インジケーター
H电池充电指示 LED
Controller Battery Replacement 45
AController Battery
Replacement
BController Battery
Replacement
CController Battery
Replacement
DController Battery
Replacement
EController Battery
Replacement
FController Battery
Replacement
GController Battery
Replacement
HController Battery
Replacement
Maintenance 47
AWartung
BMantenimiento
CEntretien
DManutenzione
EOnderhoud
FManutenção
Gメンテナンス
H保养
Recycling 50
ARecycling
BReciclaje
CRecyclage
DRiciclaggio
ERecycling
FReciclagem
Gリサ イクリング
H骑行
7
Page 8
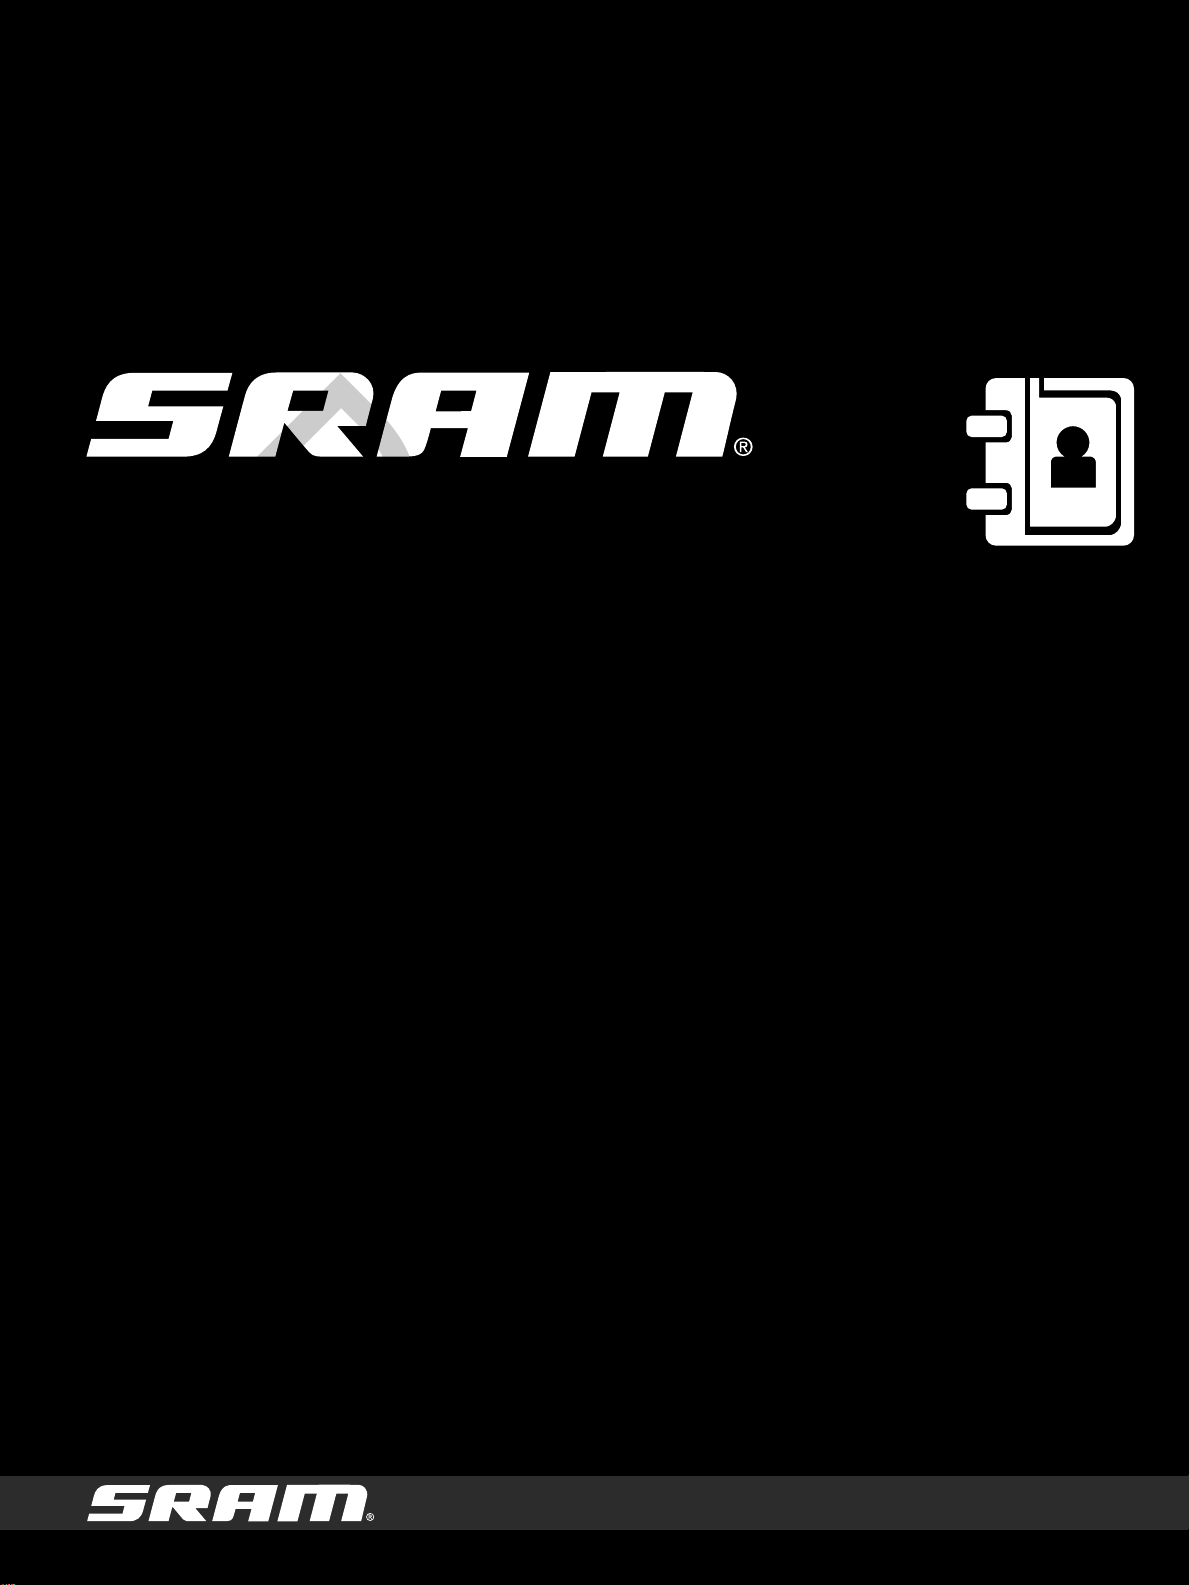
Tools and Supplies COutils et accessoires FFerramentas e Produtos a Usar
Grease
Friction
DRAFT
AWerkzeuge und Material DStrumenti e forniture
BHerramientas y accesorios EGereedschap en benodigdheden
Gツールおよび付属品
H工具和用品
Highly specialized tools and supplies are
required for the installation of your SRAM®
components. We recommend that you have
a qualified bicycle mechanic install your
SRAM components.
Für den Einbau Ihrer SRAM-Komponenten
werden Spezialwerkzeuge und spezielles
Material benötigt. Es wird empfohlen, den
Einbau Ihrer SRAM-Komponenten von einem
qualifizierten Fahrradmechaniker durchführen
zu lassen.
Para instalar los componentes SRAM se
necesitan herramientas y accesorios muy
especializados. Recomendamos que confíe
la instalación de sus componentes SRAM a
un mecánico de bicicletas cualificado.
Des outils et accessoires hautement
spécialisés sont nécessaires pour
l’installation de vos composants SRAM.
Nous vous recommandons de faire installer
vos composants SRAM par un mécanicien
vélo qualifié.
Sono necessari strumenti e forniture
altamente specializzati per l’installazione
dei componenti SRAM. Consigliamo di
far installare i componenti SRAM da un
meccanico per biciclette qualificato.
Hooggespecialiseerd gereedschap en
benodigdheden zijn nodig voor de installatie
van uw SRAM-componenten. We bevelen
aan om uw SRAM-componenten door
een vakbekwame fietsenmaker te laten
installeren.
São necessárias ferramentas altamente
especializadas e produtos específicos para
a instalação dos seus componentes SRAM.
Recomendamos que mande um mecânico
de bicicletas qualificado instalar os seus
componentes SRAM.
SRAM コンポーネントの取り付けには、非
常に特殊なツールおよび付属品が必要です。
当社では、SRAM コンポーネントの取り付
けは、専門の自転車整備士に依頼すること
を推奨しています。
安装 SRAM 组件需要非常专业的工具和用
品。我们建议您让专业的自行车技工安装
SRAM 组件。
5 4
Chaingap Adjustment Gauge Chaingap Adjustment Gauge Chaingap Adjustment Gauge
Chaingap Adjustment Gauge Chaingap Adjustment Gauge Chaingap Adjustment Gauge
Chaingap Adjustment Gauge Chaingap Adjustment Gauge Chaingap Adjustment Gauge
3
2.5
5 4 2.5
T25
T25
8
Page 9

SRAM® AXS™ App CSRAM AXS App FSRAM AXS App
DRAFT
ASRAM AXS App DSRAM AXS App
BSRAM AXS App ESRAM AXS App
GSRAM AXS App
HSRAM AXS App
After your SRAM components have been
paired and installed on your bicycle, connect
with the SRAM AXS App, available for free
in the app stores. Use the app to create
your SRAMid™, connect and register your
components, and customize your SRAM AXS
experience. Through the app, you will also
be able to:
• Change settings for your components
• Receive notifications for new product
features and firmware updates
• Access product data and
recommended service intervals
• Locate information about service and
replacement parts
After your SRAM components have been
paired and installed on your bicycle,
connect with the SRAM AXS App,
available for free in the app stores. Use
the app to create your SRAMid™, connect
and register your components, and
customize your SRAM AXS experience.
Through the app, you will also be able
to:
• Change settings for your
components
• Receive notifications for new
product features and firmware
updates
• Access product data and
recommended service intervals
• Locate information about service
and replacement parts
After your SRAM components have been
paired and installed on your bicycle, connect
with the SRAM AXS App, available for free
in the app stores. Use the app to create
your SRAMid™, connect and register your
components, and customize your SRAM AXS
experience. Through the app, you will also
be able to:
• Change settings for your components
• Receive notifications for new product
features and firmware updates
• Access product data and
recommended service intervals
• Locate information about service and
replacement parts
After your SRAM components have been
paired and installed on your bicycle,
connect with the SRAM AXS App,
available for free in the app stores. Use
the app to create your SRAMid™, connect
and register your components, and
customize your SRAM AXS experience.
Through the app, you will also be able
to:
• Change settings for your
components
• Receive notifications for new
product features and firmware
updates
• Access product data and
recommended service intervals
• Locate information about service
and replacement parts
9
Page 10
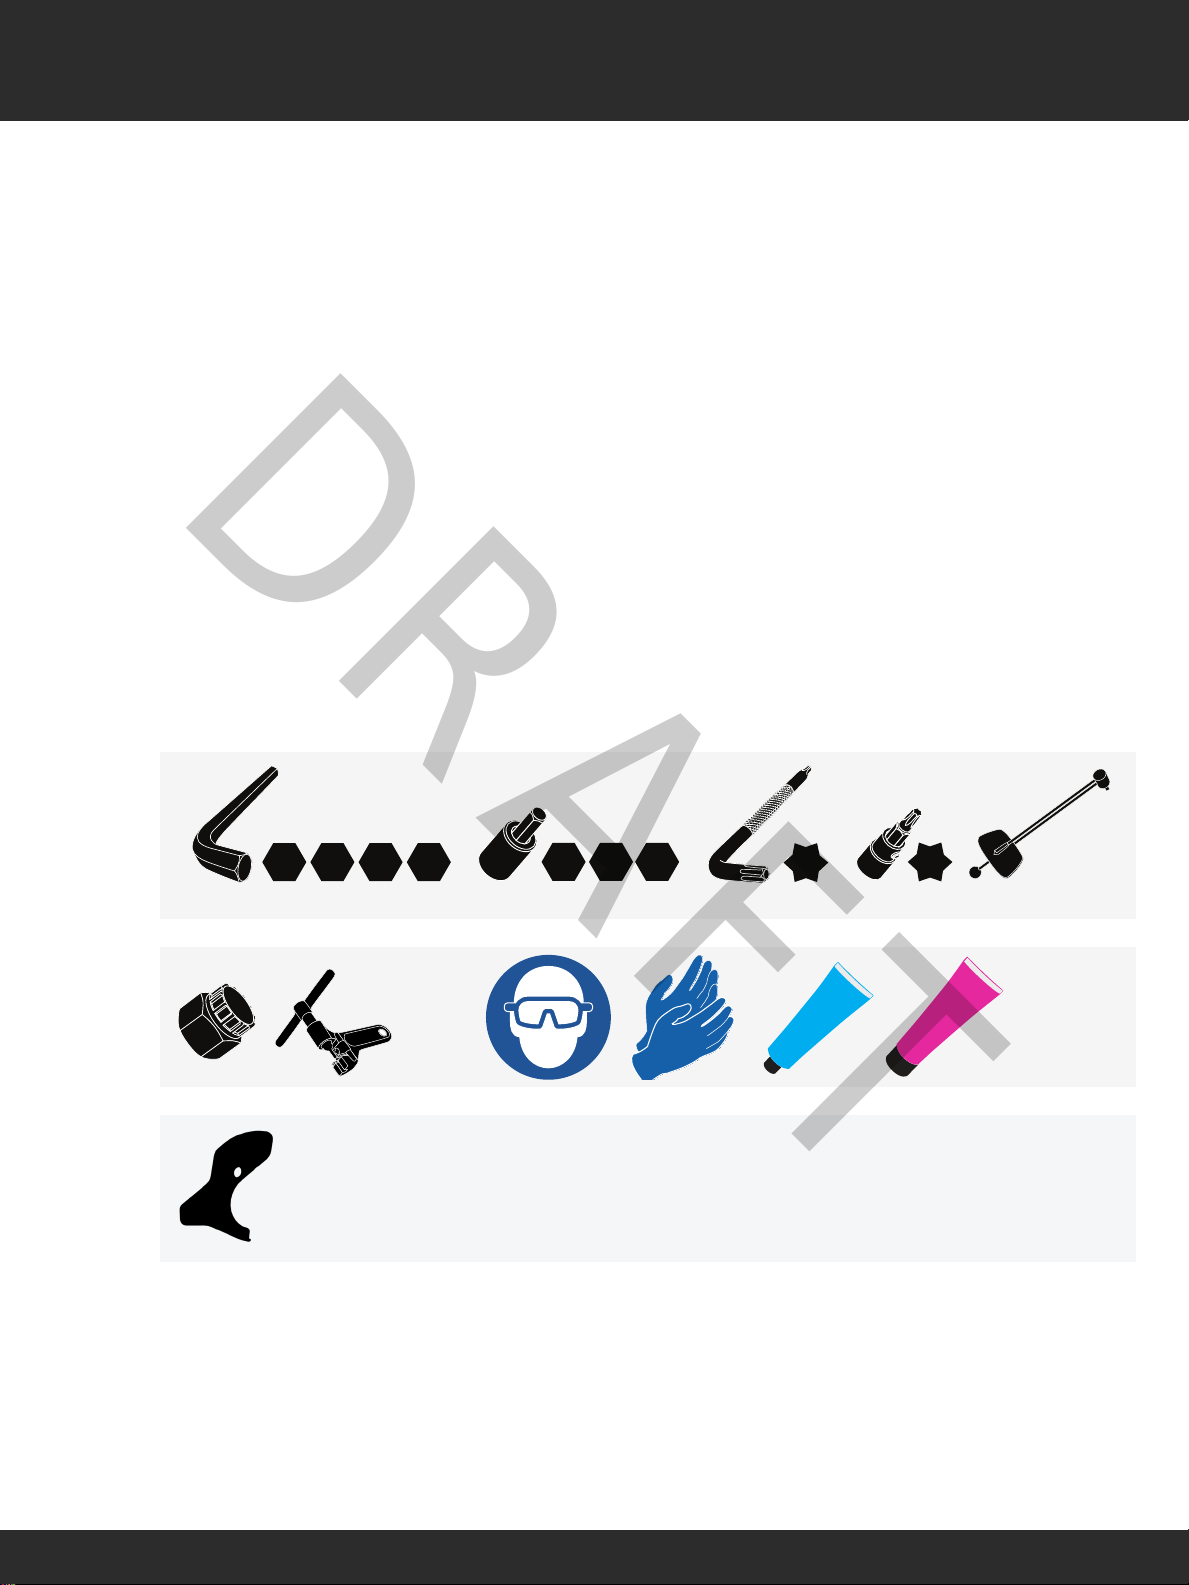
Eagle® AXS™ Controller CEagle AXS Controller FEagle AXS Controller
DRAFT
AEagle AXS Controller DEagle AXS Controller
BEagle AXS Controller EEagle AXS Controller
GEagle AXS Controller
HEagle AXS Controller
g
d
c
a
b
f
e
a. MatchMaker™ X (MMX) Clamp
b. Controller Discrete Clamp
c. Mount Plug Screw and Clamp Bolt Holes
d. Battery Cover
e. Paddle
f. AXS Button (Pairing)
g. LED Indicator
a. MatchMaker™ X (MMX) Clamp
b. Controller Discrete Clamp
c. Mount Plug Screw and Clamp Bolt Holes
d. Battery Cover
e. Paddle
f. AXS Button (Pairing)
g. LED Indicator
a. MatchMaker™ X (MMX) Clamp
b. Controller Discrete Clamp
c. Mount Plug Screw and Clamp Bolt Holes
d. Battery Cover
e. Paddle
f. AXS Button (Pairing)
g. LED Indicator
a. MatchMaker™ X (MMX) Clamp
b. Controller Discrete Clamp
c. Mount Plug Screw and Clamp Bolt Holes
d. Battery Cover
e. Paddle
f. AXS Button (Pairing)
g. LED Indicator
a. MatchMaker™ X (MMX) Clamp
b. Controller Discrete Clamp
c. Mount Plug Screw and Clamp Bolt Holes
d. Battery Cover
e. Paddle
f. AXS Button (Pairing)
g. LED Indicator
a. MatchMaker™ X (MMX) Clamp
b. Controller Discrete Clamp
c. Mount Plug Screw and Clamp Bolt Holes
d. Battery Cover
e. Paddle
f. AXS Button (Pairing)
g. LED Indicator
a. MatchMaker™ X (MMX) Clamp
b. Controller Discrete Clamp
c. Mount Plug Screw and Clamp Bolt Holes
d. Battery Cover
e. Paddle
f. AXS Button (Pairing)
g. LED Indicator
a. MatchMaker™ X (MMX) Clamp
b. Controller Discrete Clamp
c. Mount Plug Screw and Clamp Bolt Holes
d. Battery Cover
e. Paddle
f. AXS Button (Pairing)
g. LED Indicator
a. MatchMaker™ X (MMX) Clamp
b. Controller Discrete Clamp
c. Mount Plug Screw and Clamp Bolt Holes
d. Battery Cover
e. Paddle
f. AXS Button (Pairing)
g. LED Indicator
10
Page 11

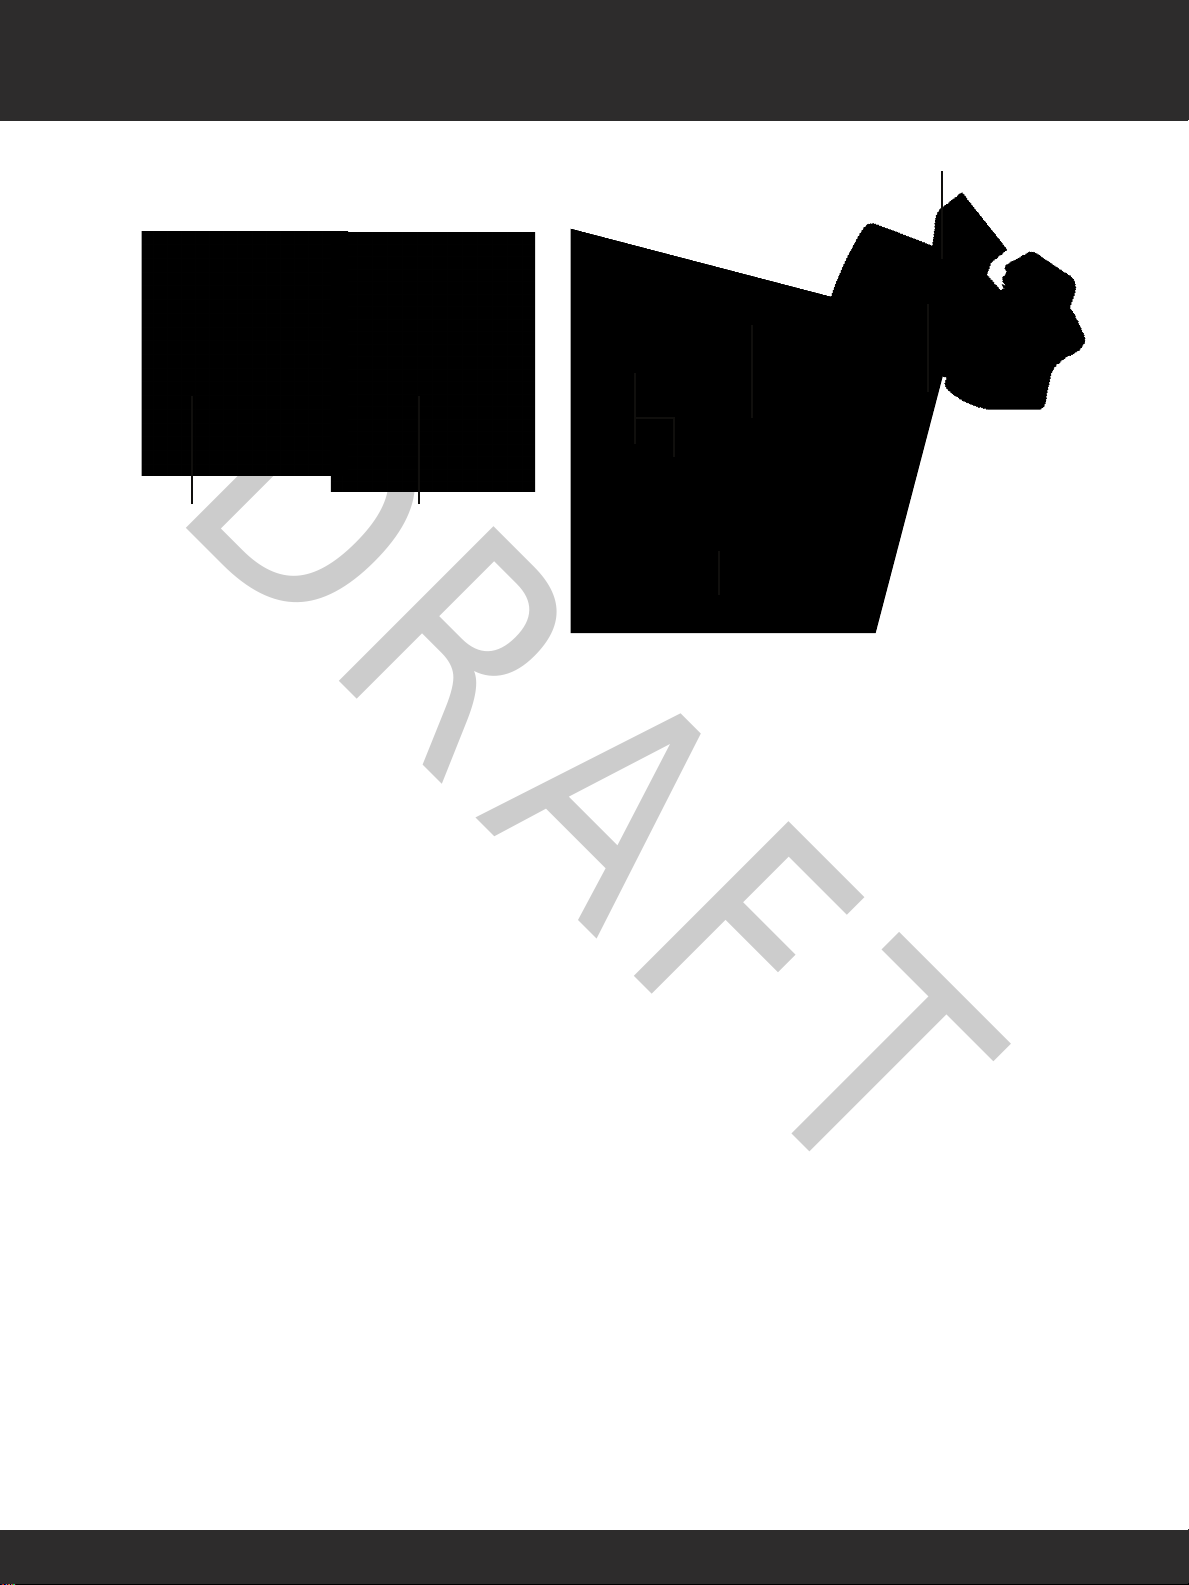
Eagle® AXS™ Rear Derailleur CEagle AXS Rear Derailleur FEagle AXS Rear Derailleur
DRAFT
AEagle AXS Rear Derailleur DEagle AXS Rear Derailleur GEagle AXS Rear Derailleur
BEagle AXS Rear Derailleur EEagle AXS Rear Derailleur HEagle AXS Rear Derailleur
c
a
e
d
b
f
g
i
j
h
a. B-Adjust Washer
b. B-Adjust Screw
c. Battery Latch
d. LED Indicator
e. Upper Pulley
f. AXS Button (Battery Status, Pairing)
g. SRAM Battery
h. High Limit Screw
i. Low Limit Screw
j. CageLock™ Button
a. B-Adjust Washer
b. B-Adjust Screw
c. Battery Latch
d. LED Indicator
e. Upper Pulley
f. AXS Button (Battery Status, Pairing)
g. SRAM Battery
h. High Limit Screw
i. Low Limit Screw
j. CageLock Button
a. B-Adjust Washer
b. B-Adjust Screw
c. Battery Latch
d. LED Indicator
e. Upper Pulley
f. AXS Button (Battery Status, Pairing)
g. SRAM Battery
h. High Limit Screw
i. Low Limit Screw
j. CageLock Button
a. B-Adjust Washer
b. B-Adjust Screw
c. Battery Latch
d. LED Indicator
e. Upper Pulley
f. AXS Button (Battery Status, Pairing)
g. SRAM Battery
h. High Limit Screw
i. Low Limit Screw
j. CageLock Button
a. B-Adjust Washer
b. B-Adjust Screw
c. Battery Latch
d. LED Indicator
e. Upper Pulley
f. AXS Button (Battery Status, Pairing)
g. SRAM Battery
h. High Limit Screw
i. Low Limit Screw
j. CageLock Button
a. B-Adjust Washer
b. B-Adjust Screw
c. Battery Latch
d. LED Indicator
e. Upper Pulley
f. AXS Button (Battery Status, Pairing)
g. SRAM Battery
h. High Limit Screw
i. Low Limit Screw
j. CageLock Button
a. B-Adjust Washer
b. B-Adjust Screw
c. Battery Latch
d. LED Indicator
e. Upper Pulley
f. AXS Button (Battery Status, Pairing)
g. SRAM Battery
h. High Limit Screw
i. Low Limit Screw
j. CageLock Button
a. B-Adjust Washer
b. B-Adjust Screw
c. Battery Latch
d. LED Indicator
e. Upper Pulley
f. AXS Button (Battery Status, Pairing)
g. SRAM Battery
h. High Limit Screw
i. Low Limit Screw
j. CageLock Button
a. B-Adjust Washer
b. B-Adjust Screw
c. Battery Latch
d. LED Indicator
e. Upper Pulley
f. AXS Button (Battery Status, Pairing)
g. SRAM Battery
h. High Limit Screw
i. Low Limit Screw
j. CageLock Button
11
Page 12

SRAM® Battery CSRAM Battery FSRAM Battery
DRAFT
ASRAM Battery DSRAM Battery GSRAM Battery
BSRAM Battery ESRAM Battery HSRAM Battery
Hands and gloves must be clean before
NOTICE
handling the SRAM® battery. Contact with
sunscreen or hydrocarbon cleaners may
cause the battery to crack.
HINWEIS
Berühren Sie die Batterie nur mit
sauberen Händen und Handschuhen.
Kontakt mit Sonnenmilch oder
kohlenwasserstoffhaltigen Reinigungsmitteln
kann die Batterie beschädigen.
AVISO
Las manos y los guantes deben estar limpios
antes de manipular la batería. El contacto
con protectores solares o limpiadores de
hidrocarburos puede hacer que la batería
se agriete.
Ne manipulez la batterie qu’avec des mains
AVIS
ou des gants propres. Tout contact avec
des crèmes solaires ou des hydrocarbures
pourrait fissurer la batterie.
AVVISO
Le mani e i guanti devono essere puliti prima
di maneggiare la batteria. Il contatto con
protezione solare o idrocarburi detergenti
può causare la rottura della batteria.
MEDEDELING
Zorg dat uw handen of handschoenen
schoon zijn voordat u de accu aanraakt.
Contact met zonnebrandcrème of een
reinigingsmiddel met koolwaterstof kan de
accu doen barsten.
Tanto as mãos como as luvas têm que estar
NOTIFICAÇÃO
limpas antes de manipular a bateria. O
contacto com cremes de protecção contra
o sol ou com produtos de limpeza com
hidrocarbonetos pode causar que a bateria
rache.
注意事項
電池を取り扱う前に、手と手袋 を必ずきれいに
し てください。 日焼け止めや炭化水素クリーナー
などが付着すると、電池に亀裂が生じる可能性
があります。
注意
手套和手都必须洁净,才可操作电池。电池
如果接触到防晒霜或碳氢清洗剂,可能会发
生破裂。
12
Page 13

Battery Charging CRecharge de la batterie FCarga da bateria
DRAFT
ALaden der Batterie DCarica della batteria
BRecarga de la batería EDe accu opladen
G電池の充電
H电池充电
1
Remove the battery cover from the battery,
and charge the battery.
Consult the SRAM® Battery and Charger
user manual for charging instructions,
battery maintenance, and traveling
guidelines.
Do not discard the battery cover. To protect
the battery terminals, install the battery
cover on the battery when it is not on the
charger or derailleur.
Entfernen Sie die Batterieabdeckung von
der Batterie und laden Sie die Batterie.
Consult the SRAM® Battery and Charger
user manual for charging instructions,
battery maintenance, and traveling
guidelines.
Bewahren Sie die Batterieabdeckung auf.
Bringen Sie die Batterieabdeckung an, wenn
die Batterie sich nicht im Ladegerät oder
Schaltwerk/Umwerfer befindet.
NOTICE
HINWEIS
2
Retirez le couvercle de la batterie puis
rechargez la batterie.
Consult the SRAM® Battery and Charger
user manual for charging instructions,
battery maintenance, and traveling
guidelines.
AVIS
Ne jetez pas le couvercle de la batterie.
Laissez le couvercle sur la batterie
lorsqu’elle n’est pas installée sur le chargeur
ou le dérailleur.
Rimuovere il coperchio della batteria dalla
batteria e caricare la batteria.
Consult the SRAM® Battery and Charger
user manual for charging instructions,
battery maintenance, and traveling
guidelines.
AVVISO
Non gettare la copertura della batteria.
Installare la copertura della batteria sulla
batteria quando non è sul caricabatteria
osul deragliatore.
Retire a tampa da bateria para fora da
bateria e carregue a bateria.
Consult the SRAM® Battery and Charger
user manual for charging instructions,
battery maintenance, and traveling
guidelines.
NOTIFICAÇÃO
Não descarte a tampa da bateria. Instale
a tampa da bateria na bateria quando ela
não estiver no carregador ou no câmbio
(desviador/derailleur).
電池本体から電池カバーを取り外し、電池を
交換します。
Consult the SRAM® Battery and Charger
user manual for charging instructions,
battery maintenance, and traveling
guidelines.
注意事項
電池カバーは廃棄しないでください。電池が
充電器またはディレイラーに取り付けられて
いないときは、電池に電池カバーを取り付け
て く だ さ い 。
43
Quítele la tapa a la batería y cárguela.
Consult the SRAM® Battery and Charger
user manual for charging instructions,
battery maintenance, and traveling
guidelines.
No tire la tapa de la batería. Cuando la
batería no esté colocada en el cargador
o instalada en el desviador, debe llevar
siempre la tapa.
Remove/Loosen Retirer/Desserrer
Entfernen/Lösen Rimuovere/Allentare
Quitar/Aflojar Verwijderen/Losmaken
AVISO
Retirar/Desapertar
取り外し/ 緩める
拆卸 / 旋松
Verwijder het accudeksel van de accu en
laad de accu op.
Consult the SRAM® Battery and Charger
user manual for charging instructions,
battery maintenance, and traveling
guidelines.
Gooi het accudeksel niet weg. Installeer het
accudeksel op de accu wanneer het zich
niet op de lader of derailleur bevindt.
MEDEDELING
Install Installer Instalar
Einbauen Installare
Instalar Monteren
取り付け
安装
从电池上卸下电池防护罩,并给电池充电。
Consult the SRAM® Battery and Charger
user manual for charging instructions,
battery maintenance, and traveling
guidelines.
注意
请勿丢弃电池防护罩。当电池不在充电器或变
速器上时请装上电池防护罩。
Adjust Régler Ajustar
Einstellen Regolare
Ajustar Afstellen
調節
调节
13
Page 14

Battery Installation CInstallation de la batterie FInstalação da Bateria
DRAFT
AEinlegen der Batterie DInstallazione della batteria
BInstalación de la batería EDe accu installeren
G電池の取り付け
H安装电池
1
2
A B
Do not discard the derailleur battery
blocks
(A) or the battery covers (B).
To prevent battery depletion during
transportation, remove the batteries and
install the derailleur battery blocks and
battery covers. Failure to cover the battery
and derailleur terminals could result in
damage to the terminals.
Bewahren Sie die Batterietrenner (A) und die
Batterieabdeckungen (B) für das Schaltwerk
und den Umwerfer auf. Um ein Entladen
der Batterien während des Transports zu
vermeiden, entfernen Sie die Batterien
und bringen Sie die Batterietrenner
und die Batterieabdeckungen für das
Schaltwerk und den Umwerfer an. Wenn
die Batteriekontakte und die Kontakte des
Schaltwerks/Umwerfers nicht abgedeckt
werden, können die Kontakte beschädigt
werden.
No tire los bloques de batería del desviador
(A) ni las tapas de batería (B). Para evitar
su posible descarga durante su transporte,
retire las baterías e instale los bloques de
batería del desviador además de colocar sus
tapas a las baterías. Si deja al descubierto
los terminales del desviador yde la batería,
podrían dañarse.
NOTICE
Ne jetez pas les blocs des batteries des
dérailleurs (A) ni les couvercles des batteries
(B). Pour éviter toute décharge lors du
transport, retirez les batteries puis installez
les blocs de batteries des dérailleurs ainsi
que les couvercles des batteries. Le fait de
ne pas protéger les bornes de la batterie et
du dérailleur peut les endommager.
HINWEIS
Non gettare via i blocchi della batteria del
deragliatore (A) o le coperture della batteria
(B). Per evitare il deterioramento della
batteria durante il trasporto, rimuovere le
batterie e installare i blocchi della batteria
del deragliatore e le coperture della batteria.
La mancata copertura dei morsetti della
batteria e del deragliatore potrebbe causare
danni ai morsetti.
AVISO
Gooi de derailleuraccublokken (A) of de
derailleuraccukappen (B) niet weg. Om het
onnodig ontladen van de accu's tijdens het
transport te vermijden, verwijder de accu’s
en installeer de derailleuraccublokken
en -kappen. Het niet afdekken van de
accuaansluitingen kan schade aan de
aansluitingen veroorzaken.
AVIS
AVVISO
MEDEDELING
Não descarte os blocos da bateria do
NOTIFICAÇÃO
desviador/derailleur (A) nem as tampas
de bateria (B). Para evitar o esgotamento
das baterias durante o transporte, retire
as baterias e instale os blocos de bateria
do desviador/derailleur e as tampas das
baterias. Não cobrir os terminais da bateria
e do desviador/derailleur poderá resultar
em danos aos terminais.
注意事項
ディレ イラ ー の電 池 ブロック (A) または電池
カバー (B) を廃棄しないでください。電池の消
耗を防ぐため、移動中は電池を取り外し、ディ
レイラーの電池ブロックと電池カバーを取り
付けてください。電池とディレイラーの端子に
カバーを取り付けないと、端子を損傷する可
能性 があります。
注意
不要丢弃变速器电池堵块 (A) 或电池防护罩
(B)。为防止电池在运输过程中损耗电能,请
卸下电池并安装变速器电池堵块和电池防护
罩。未能覆盖电池和变速器接线端可能导致
损坏接线端。
Adjust Régler Ajustar
Einstellen Regolare
Ajustar Afstellen
調節
调节
Remove/Loosen Retirer/Desserrer
Entfernen/Lösen Rimuovere/Allentare
Quitar/Aflojar Verwijderen/Losmaken
Retirar/Desapertar
取り外し/ 緩める
拆卸 / 旋松
14
Page 15
3 4
DRAFT
Insert the fully charged battery into the
derailleur and close the battery latch. When
installed correctly, the latch will snap into
place.
Insert the fully charged battery into the
derailleur and close the battery latch. When
installed correctly, the latch will snap into
place.
Insert the fully charged battery into the
derailleur and close the battery latch. When
installed correctly, the latch will snap into
place.
Insert the fully charged battery into the
derailleur and close the battery latch. When
installed correctly, the latch will snap into
place.
Insert the fully charged battery into the
derailleur and close the battery latch. When
installed correctly, the latch will snap into
place.
Insert the fully charged battery into the
derailleur and close the battery latch. When
installed correctly, the latch will snap into
place.
Insert the fully charged battery into the
derailleur and close the battery latch. When
installed correctly, the latch will snap into
place.
Insert the fully charged battery into the
derailleur and close the battery latch. When
installed correctly, the latch will snap into
place.
Insert the fully charged battery into the
derailleur and close the battery latch. When
installed correctly, the latch will snap into
place.
Install Installer Instalar
Einbauen Installare
Instalar Monteren
取り付け
安装
Adjust Régler Ajustar
Einstellen Regolare
Ajustar Afstellen
調節
调节
15
Page 16

System Pairing CSystem Pairing FSystem Pairing
DRAFT
ASystem Pairing DSystem Pairing
BSystem Pairing ESystem Pairing
GSystem Pairing
HSystem Pairing
The AXS™ controller must be paired with
the AXS rear derailleur. Pairing allows the
controller to communicate when a shift
command is transmitted.
Jede AXS-Komponente muss mit dem
Schaltwerk gekoppelt werden. Die Kopplung
ermöglicht die Kommunikation zwischen
den Komponenten, wenn ein Schaltbefehl
übertragen wird.
Cada uno de los componentes del sistema
AXS debe emparejarse con el desviador
trasero. El emparejamiento permite que
cada componente pueda comunicarse con
el sistema cuando se transmita una orden
de cambio de marcha.
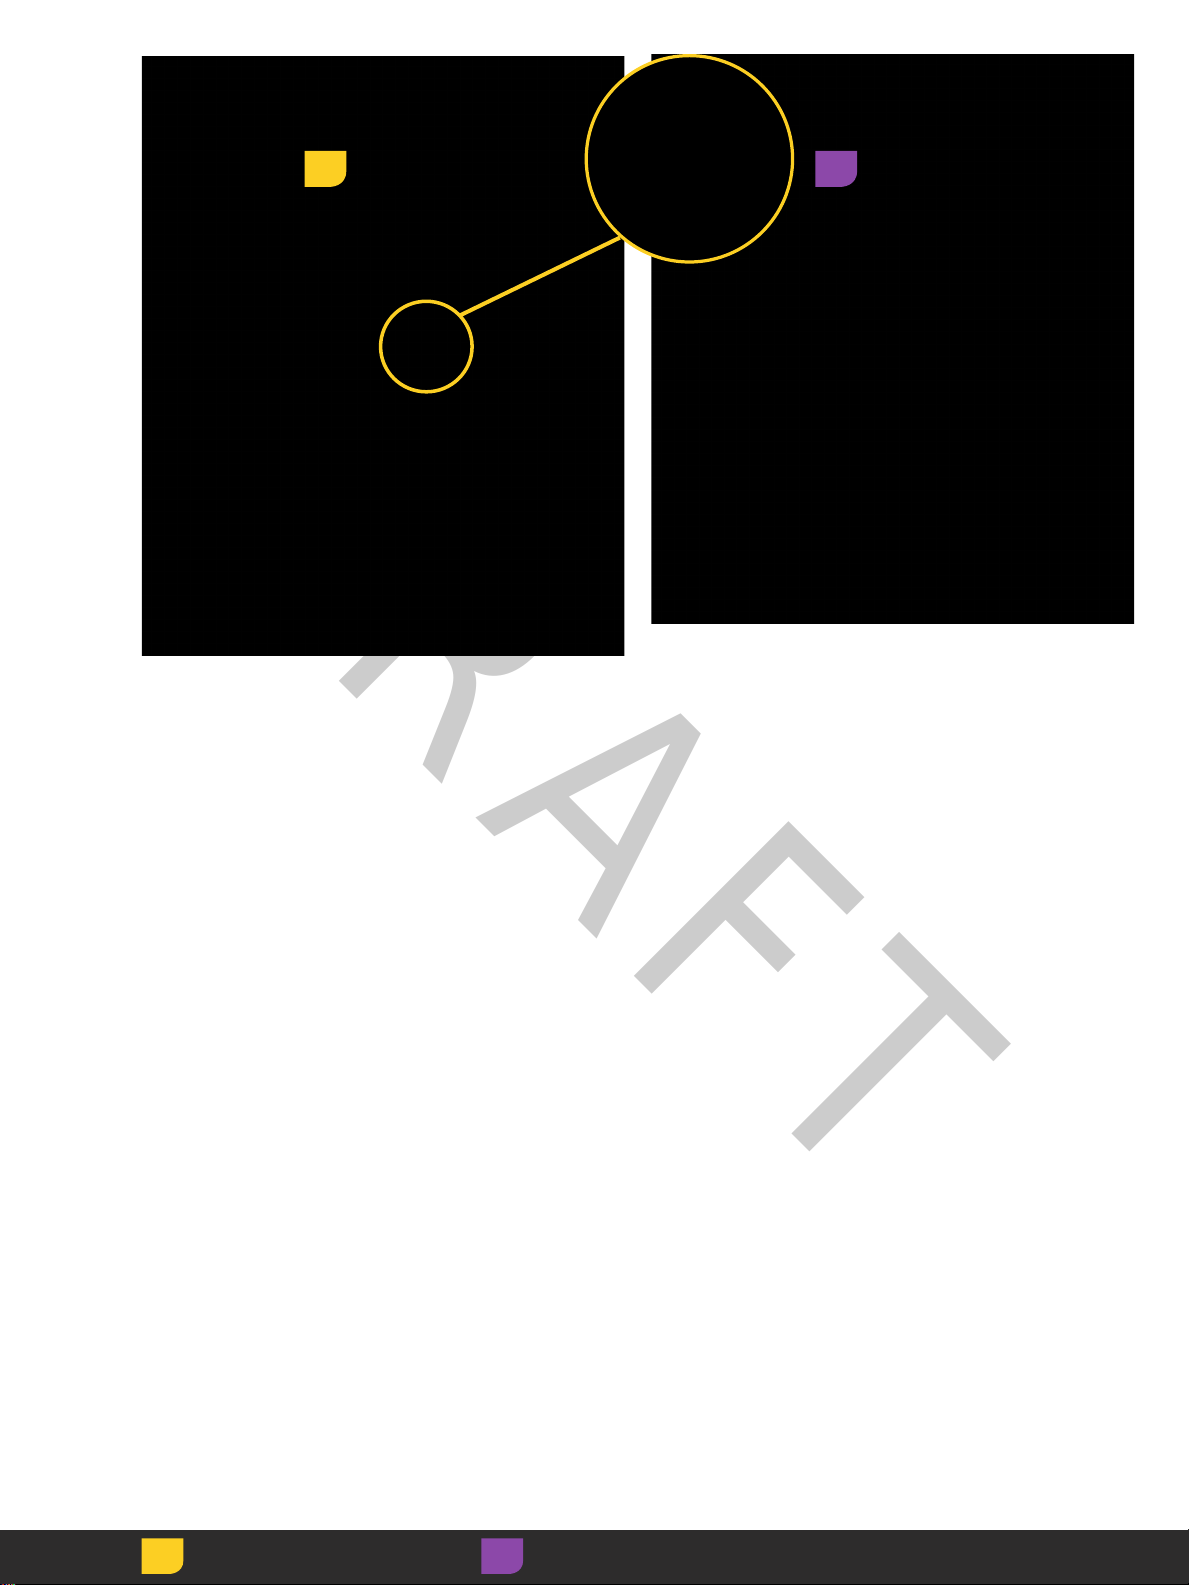
1
Chaque composant AXS doit être
synchronisé avec le dérailleur arrière.
La synchronisation permet à chaque
composant de communiquer à chaque fois
qu’un passage de vitesse est transmis.
Ciascun componente AXS deve essere
accoppiato con il deragliatore posteriore.
L’accoppiamento consente a ciascun
componente di comunicare quando viene
trasmesso un comando di cambio.
Elk AXS component moet aan de
achterderailleur worden gekoppeld.
De koppeling zorgt voor het communiceren
van elk component wanneer een
schakelcommando wordt verzonden.
Begin the pairing session
at the rear derailleur. Press
and hold the AXS button
until the green LED blinks
slowly, then release.
The pairing session will
time out after 30 seconds of
inactivity.
Beginnen Sie mit
der Kopplung am
Schaltwerk. Halten Sie die
Funktionstaste gedrückt,
bis die grüne LED langsam
blinkt. Lassen Sie dann die
Funktionstaste los.
The pairing session will
time out after 30 seconds of
inactivity.
Commencez par
synchroniser le dérailleur
arrière. Maintenez appuyé
le bouton de commande
jusqu’à ce que la DEL verte
clignote lentement, puis
relâchez le bouton.
The pairing session will
time out after 30 seconds of
inactivity.
Iniziare la sessione di
accoppiamento sul
deragliatore posteriore.
Tenere premuto il tasto
funzione fino a che il LED
verde non lampeggia
lentamente, quindi
rilasciarlo.
The pairing session will
time out after 30 seconds of
inactivity.
Cada componente AXS tem que ser
emparelhado com o desviador/derailleur
traseiro. O emparelhamento permite que
cada componente comunique quando um
comando de mudança for transmitido.
AXS の各コンポーネントは、リア・ディレイラ
ーとペアリングしなければなりません。ペア
リ ン グ す る こ と に よ り 、シ フ ト ・ コ マ ン ド を 送 信
して各コンポーネントが通信できるようにな
ります。
所有 AXS 组件都必须与后变速器配对。配
对的目的是让每个组件在变速命令发出时能
进行通信。
Inicie a sessão de
emparelhamento no câmbio
(desviador/derailleur)
traseiro. Pressione e segure
o botão de função até
que o LED verde pisque
lentamente, e então solte-o.
The pairing session will
time out after 30 seconds of
inactivity.
ペアリングの作業は、リア・
デ ィ レ イ ラ ー か ら 始 め ま す 。機
能ボタンを押して保持し、緑
色の LED が ゆっくり 点 滅した
ら、ボタンを放します。
The pairing session will
time out after 30 seconds of
inactivity.
Press and hold Press and hold Press and hold
Press and hold Press and hold Press and hold
Press and hold Press and hold Press and hold
Empiece la sesión de
emparejamiento por
el desviador trasero.
Mantenga presionado el
botón de función hasta que
el LED verde parpadee
despacio y suéltelo a
continuación.
The pairing session will
time out after 30 seconds of
inactivity.
Start de koppelingsprocedure aan de
achterderailleur. Druk
en houd de functieknop
ingedrukt totdat de groene
LED langzaam knippert en
laat vervolgens los.
The pairing session will
time out after 30 seconds of
inactivity.
在后变速器上开始配对操作。
按住住功能按钮,直到绿色
LED 缓慢地闪烁,再放开。
The pairing session will
time out after 30 seconds of
inactivity.
16
Page 17

2
DRAFT
Press and hold the AXS™
button on the controller
until the green LED blinks
quickly, then release.
Maintenez appuyé le
bouton de commande de
l’un des leviers de dérailleur
jusqu’à ce que la DEL verte
clignote rapidement, puis
relâchez le bouton.
Pressione e segure
obotão de função num
comando das mudanças
até que o LED verde pisque
rapidamente, e então
solte-o.
Halten Sie die
Funktionstaste an einem der
Schalthebel gedrückt, bis
die grüne LED schnell blinkt.
Mantenga presionado el
botón de función de una
de las palancas de cambio
hasta que el LED verde
parpadee deprisa y suéltelo
a continuación.
3
Press and release the AXS
button on the rear derailleur
to end the pairing session,
or wait 30 seconds for the
pairing session to time out.
The green LED will stop
blinking.
Drücken Sie die
Funktionstaste am
Schaltwerk und lassen
Sie sie wieder los, um die
Kopplung zu beenden. Sie
können auch 30 Sekunden
warten, bis die Kopplung
automatisch beendet wird.
Die grüne LED hört auf zu
blinken.
Tenere premuto il tasto
funzione su un cambio
fino a che il LED verde non
lampeggia rapidamente,
quindi rilasciarlo.
Druk en houd de
functieknop op één shifter
ingedrukt totdat de groene
LED snel knippert en laat
vervolgens los.
Pour terminer le processus
de synchronisation,
appuyez une fois sur le
bouton de commande situé
sur le dérailleur arrière
ou attendez 30 secondes
pour que le processus
de synchronisation
s’interrompe. La DEL verte
cessera alors de clignoter.
Premere e rilasciare il
pulsante funzione sul
deragliatore posteriore
per terminare la sessione
di accoppiamento, oppure
attendere 30 secondi
affinché la sessione di
accoppiamento scada.
Il LED verde smette di
lampeggiare.
シフター の 1 つにある機能ボ
タンを押して保 持し、緑色の
LED が素早く点滅したらボタ
ンを放します。
按住一个指拨上的功能按钮,
直到绿色 LED 快速地闪烁,
再放开。
Pressione e solte o botão
de função no desviador/
derailleur traseiro para
terminar a sessão de
emparelhamento, ou
espere 30 segundos para
que a sessão termine por
esgotamento do período
de tempo permitido
(time out). O LED verde
deixará de piscar.
リア ディレ イラ ー の機 能 ボ
タンを、ペアリングのセッシ
ョンが終了するまで押して放
す か 、ま た は 、30 秒間待って
ペアリングのセッションをタイ
ム ア ウ ト さ せ ま す 。緑 色 の LED
の点 滅が 止まります。
Para finalizar la sesión de
emparejamiento, presione
y suelte el botón de función
del desviador trasero,
obien espere 30 segundos
a que la sesión se cierre
automáticamente. El LED
verde dejará de parpadear.
Druk en laat de functieknop
op de achterderailleur los
om de koppelingsprocedure
te beëindigen, of wacht
30 seconden en de
koppelingsprocedure
wordt automatisch gestopt.
De groene LED stopt met
knipperen.
按压并放开后变速器上的功
能按钮结束配对操作,或等
待 30 秒让操作自动结束。
绿色 LED 将停止闪烁。
Press and hold Press and hold Press and hold
Press and hold Press and hold Press and hold
Press and hold Press and hold Press and hold
Press & release Press & release Press & release
Press & release Press & release Press & release
Press & release Press & release Press & release
17
Page 18

The pairing process does not need to be
DRAFT
repeated when batteries are removed and/
or replaced.
The pairing process must be repeated if any
components are replaced.
The pairing process does not need to be
repeated when batteries are removed and/
or replaced.
The pairing process must be repeated if any
components are replaced.
The pairing process does not need to be
repeated when batteries are removed
and/or replaced.
The pairing process must be repeated if
any components are replaced.
The pairing process does not need to be
repeated when batteries are removed and/
or replaced.
The pairing process must be repeated if any
components are replaced.
The pairing process does not need to be
repeated when batteries are removed and/
or replaced.
The pairing process must be repeated if any
components are replaced.
The pairing process does not need to be
repeated when batteries are removed and/
or replaced.
The pairing process must be repeated if any
components are replaced.
The pairing process does not need to be
repeated when batteries are removed and/
or replaced.
The pairing process must be repeated if any
components are replaced.
The pairing process does not need to be
repeated when batteries are removed
and/or replaced.
The pairing process must be repeated if
any components are replaced.
The pairing process does not need to be
repeated when batteries are removed
and/or replaced.
The pairing process must be repeated if
any components are replaced.
18
Page 19

AXS™ Button Functions CAXS Button Functions FAXS Button Functions
DRAFT
AAXS Button Functions DAXS Button Functions GAXS Button Functions
BAXS Button Functions EAXS Button Functions HAXS Button Functions
The AXS button has different functions
that vary from component to component.
Descriptions of each function can be found
in their respective sections.
The AXS button has different functions
that vary from component to component.
Descriptions of each function can be found
in their respective sections.
The AXS button has different functions
that vary from component to component.
Descriptions of each function can be found
in their respective sections.
The AXS button has different functions
that vary from component to component.
Descriptions of each function can be found
in their respective sections.
The AXS button has different functions
that vary from component to component.
Descriptions of each function can be found
in their respective sections.
The AXS button has different functions
that vary from component to component.
Descriptions of each function can be found
in their respective sections.
The AXS button has different functions
that vary from component to component.
Descriptions of each function can be
found in their respective sections.
The AXS button has different functions
that vary from component to component.
Descriptions of each function can be
found in their respective sections.
The AXS button has different functions
that vary from component to component.
Descriptions of each function can be
found in their respective sections.
19
Page 20

Shifting CPassage des vitesses FMeter Mudanças
DRAFT
ASchalten DCambio
BCambio de marchas ESchakelen
Gシフティン グ
H变速
Press the
controller paddle
downward to
move the rear
derailleur inboard
to a larger cog.
Press and hold the
paddle for multiple
shifts.
Press the
controller paddle
downward to
move the rear
derailleur inboard
to a larger cog.
Press and hold the
1
paddle for multiple
shifts.
Press the
controller paddle
downward to
move the rear
derailleur inboard
to a larger cog.
Press and hold the
paddle for multiple
shifts.
Press the
controller paddle
downward to
move the rear
derailleur inboard
to a larger cog.
Press and hold the
paddle for multiple
shifts.
Press the
controller paddle
downward to
move the rear
derailleur inboard
to a larger cog.
Press and hold the
paddle for multiple
shifts.
Press the
controller paddle
downward to
move the rear
derailleur inboard
to a larger cog.
Press and hold the
paddle for multiple
shifts.
Press the controller
paddle downward
to move the rear
derailleur inboard to a
larger cog. Press and
hold the paddle for
multiple shifts.
Press the controller
paddle downward
to move the rear
derailleur inboard to a
larger cog. Press and
hold the paddle for
multiple shifts.
Press the controller
paddle downward
to move the rear
derailleur inboard to a
larger cog. Press and
hold the paddle for
multiple shifts.
2
Adjust Régler Ajustar
Einstellen Regolare
Ajustar Afstellen
調節
调节
Press the controller
paddle upward
to move the rear
derailleur outboard to
a smaller cog. Press
and hold the
for multiple shifts.
Press the controller
paddle upward
to move the rear
derailleur outboard to
a smaller cog. Press
and hold the
for multiple shifts.
Press the controller
paddle upward
to move the rear
derailleur outboard to
a smaller cog. Press
and hold the
for multiple shifts.
paddle
paddle
paddle
Press the
controller paddle
upward to move
the rear derailleur
outboard to a
smaller cog. Press
and hold the
paddle for multiple
shifts.
Press the
controller paddle
upward to move
the rear derailleur
outboard to a
smaller cog. Press
and hold the
paddle for multiple
shifts.
Press the
controller paddle
upward to move
the rear derailleur
outboard to a
smaller cog. Press
and hold the
paddle for multiple
shifts.
Press the controller
paddle upward
to move the rear
derailleur outboard
to a smaller cog.
Press and hold the
paddle for multiple
shifts.
Press the controller
paddle upward
to move the rear
derailleur outboard
to a smaller cog.
Press and hold the
paddle for multiple
shifts.
Press the controller
paddle upward
to move the rear
derailleur outboard
to a smaller cog.
Press and hold the
paddle for multiple
shifts.
20
Page 21

AXS™ Button Shifting CPassage des vitesses avec le bouton
DRAFT
de commande
ASchalten mit der Funktionstaste DTasto funzione Cambio
BCambio con botones de función ESchakelen met de functieknop
FMeter Mudanças com o Botão
de Função
G機 能 ボタン による シフティン グ
H功能按钮变速
Press and release the AXS
button on the rear derailleur
once to move the derailleur
outboard one position,
or twice quickly to move
inboard one position.
Drücken Sie die
Funktionstaste am
Schaltwerk einmal, um das
Schaltwerk um eine Position
nach außen zu bewegen.
Wenn Sie die Funktionstaste
zweimal kurz hintereinander
drücken, bewegt sich das
Schaltwerk um eine Position
nach innen.
Presione el botón de
función del desviador
trasero una sola vez para
desplazar el desviador hacia
fuera una posición, o dos
veces rápidamente para
desplazarlo una posición
hacia dentro.
Appuyez une fois sur le
bouton de commande
du dérailleur arrière pour
le faire bouger d’un cran
vers l’extérieur ou deux
fois rapidement pour le
faire bouger d’un cran vers
l’intérieur.
Premere il pulsante funzione
sul deragliatore posteriore
una volta per spostare il
deragliatore verso l’esterno
di una posizione o due volte
rapidamente per spostarlo
verso l’interno di una
posizione.
Druk eenmaal op de
functieknop op de
achterderailleur om de
derailleur één positie
naar buiten te brengen of
tweemaal snel na elkaar om
de derailleur één positie
naar binnen te brengen.
Pressione o botão de
função do desviador/
derailleur traseiro uma vez
para mover o derailleur para
“fora” uma posição, ou duas
vezes rapidamente para
mover para “dentro” uma
posição.
リア・デ ィレ イラ ー の 機 能 ボ
タンを 1 回 押 す と 、デ ィ レ イ ラ ー
が アウト ボ ード に 1 段 階シフ
ト し 、素 早 く 2 回 押す とイン
ボードに 1 段 階 シフトし ます 。
按压一次后变速器上的功能
按钮使变速器向外移动一个
位置,或快速按压两次使变速
器向内移动一个位置。
Press & release Press & release Press & release
Press & release Press & release Press & release
Press & release Press & release Press & release
Double press Double press Double press
Double press Double press Double press
Double press Double press Double press
21
Page 22

Cassette Installation CInstallation de la cassette FInstalação da Cassete
DRAFT
AEinbau der Kassette DInstallazione della cassetta
BInstalación del casete EDe cassette installeren
Gカ セット の 取 り付 け
H安装飞轮
7 - 8 mm
SRAM XD
Cassette lockring tool splines must fully
engage the cassette lockring or locktube
TM
(XD
). Splines must be between 7 and
8 mm in length for XD cassettes, and less
than or equal to 8 mm for traditional non-XD
cassettes.
If there is lateral play or movement in the
cassette after tightening it, contact your
SRAM dealer.
SRAM XD cassettes are exclusively
compatible with the SRAM XD
driver body.
Das Profil des Sicherungsring-Werkzeugs
der Kassette muss vollständig in den
Sicherungsring oder das Verriegelungsrohr
(XD) der Kassette eingreifen. Die Profile
müssen für XD-Kassetten 7 bis 8 mm lang
und für herkömmliche nicht-XD-Kassetten
höchstens 8 mm lang sein.
Wenn die Kassette nach dem Anziehen
seitliches Spiel aufweist oder sich seitlich
bewegt, wenden Sie sich an Ihren SRAMHändler.
SRAM XD-Kassetten sind ausschließlich mit
dem SRAM XD-Freilaufkörper kompatibel.
™
HINWEIS
NOTICE
Les cannelures de l’outil d’installation de
AVIS
la cassette doivent être complètement
engagées sur la bague de verrouillage ou
le tube de verrouillage de la cassette (XD).
Les cannelures doivent mesurer entre 7et
8 mm pour les cassettes XD et ne pas être
supérieures à 8 mm pour les cassettes
classiques (non XD).
Si vous constatez du jeu latéral ou du
mouvement dans la cassette après l’avoir
serrée, contactez votre revendeur SRAM.
Les cassettes SRAM XD sont exclusivement
compatibles avec le corps de cassette
SRAM XD.
AVVISO
Le scanalature dello strumento per l’anello
di blocco della cassetta devono innestarsi
completamente nell’anello di blocco onel
tubo di blocco della cassetta (XD). Le
scanalature devono avere una lunghezza fra
7 e 8 mm per cassette XD, euna lunghezza
inferiore o pari a 8 mm per cassette non XD
tradizionali.
Se esiste movimento o gioco laterale nella
cassetta dopo aver serrato, contattare il
rivenditore SRAM.
Le cassette SRAM XD sono compatibili
esclusivamente con il corpo dell'elemento
motore SRAM XD.
As estrias da ferramenta para o anel
NOTIFICAÇÃO
de bloqueio/freio da cassete têm
que encaixar completamente no anel
de bloqueio ou tubo de bloqueio da
cassete (XD). As estrias têm que ter
entre 7e8 mm de comprimento para
cassetes XD, e 8 mm ou menos de
comprimento para cassetes tradicionais
que não sejam XD.
Se houver folga lateral ou movimento na
cassete depois de a apertar, contacte
oseu concessionário SRAM.
As cassetes SRAM XD são compatíveis
exclusivamente com o corpo de
accionador SRAM XD.
注意事項
カ セット・ ロ ック リン グ・ ツ ー ル の スプ ラ
インが 、カセットの ロックリングまた はロック
チューブ (XD) に完全に噛み合っている必要
があります。 スプライン の長 さは 、X D カ セッ
トでは 7 ~ 8 mm の間、従来の非 XD カセッ
トでは 8 m m と同じか、それ 以下 でなけれ
ばなりません 。
締めた後に、カセットに横方向への遊びが
あったり、動いたりする場合は、SRAM ディー
ラーまでご 連 絡ください 。
SRAM XD カセットは、SRAM XDドライバー・
ボディにのみ対応しています。
Las acanaladuras de la llave para la
AVISO
tuerca de cierre del casete deben encajar
completamente en la tuerca o en el tubo
de cierre del casete (XD). Las acanaladuras
deben tener una longitud de entre
7y 8mm para los casetes XD, e igual
oinferior a8mm para los casetes no XD
tradicionales.
Si el casete presenta alguna holgura lateral
o movimiento después de haberlo apretado,
contacte con su distribuidor de SRAM para
más información.
Los casetes SRAM XD son compatibles
exclusivamente con el núcleo motriz
SRAMXD.
De inkepingen van de borgringafnemer
MEDEDELING
moeten volledig in de borgring of borgbuis
(XD) grijpen. De inkepingen moeten voor
XD cassettes tussen 7 en 8 mm lang zijn en
voor traditionele niet-XD cassettes kleiner
dan of gelijk aan 8 mm zijn.
Als er na het aandraaien van de cassette
laterale speling of beweging aanwezig is,
neem contact op met uw SRAM-handelaar.
SRAM XD cassettes zijn alleen compatibel
met de SRAM XD aandrijver.
飞轮锁环工具齿条必须完全啮合飞轮锁环
注意
或锁管 (XD)。XD 飞轮使用的齿条必须在
7 mm 到 8 mm 之间,而传统的非 XD 飞轮
使用的齿条长度不得超过 8 mm。
如果拧紧后飞轮内仍有侧向游隙或松动,则
请咨询 SRAM 经销商。
SRAM XD 飞轮仅与 SRAM XD 塔基兼容。
22
Page 23

1 2
DRAFT
3
40 N·m
(354 in-lb)
Grease is critical to prevent the cassette
from seizing onto the driver body. Make sure
the hub driver body and cassette interface
are free of dirt and debris.
Schmierfett ist unerlässlich, damit sich
die Kassette auf dem Freilaufkörper nicht
festfrisst. Stellen Sie sicher, dass die
Kontaktflächen des Freilaufkörpers der
Nabe und der Kassette frei von Schmutz
und Ablagerungen sind.
La grasa es fundamental para evitar que
el casete se agarrote contra el núcleo.
Asegúrese de que no haya polvo ni
suciedad en la superficie de contacto
entre el casete y el núcleo del buje.
NOTICE
Il est très important de lubrifier la cassette
pour éviter qu’elle ne se bloque dans le
corps de cassette. Veillez à ce que le corps
de cassette du moyeu et l’interface de la
cassette ne présentent pas de poussière ou
de débris.
HINWEIS
Il grasso è fondamentale per evitare
che la cassetta grippi sul corpo
dell'elemento motore. Assicurarsi che il
corpo dell'elemento motore del mozzo e
l'interfaccia della cassetta siano privi di
detriti e sporcizia.
AVISO
Het aanbrengen van smeer is nodig om het
vastlopen van de cassette op de aandrijver
te vermijden. Zorg dat de naafaandrijver en
het contactvlak van de cassette vrij van
vuil zijn.
AVIS
AVVISO
MEDEDELING
A massa lubrificante é crítica para evitar
NOTIFICAÇÃO
que a cassete gripe (se agarre) no corpo do
accionador. Assegure-se de que o corpo da
manga propulsora do cubo e a interface da
cassete estejam livres de sujidade e
de detritos.
注意事項
グリスの塗布は、カセットがドライバー・
ボディに括着するのを防ぐうえで大変重要です。
ハブ・ドライバー・ボディとカセットの表面に付
着した土や汚れは、きれいに落としてください。
注意
润滑脂对于防止飞轮卡住塔基至关重要。确保
轮毂塔基和飞轮接口无污垢或碎屑。
Grease Lubrifier
Schmierfett Ingrassare
Engrasar Smeren
Massa lubrificante
グリス
润滑
Install
Einbauen
Instalación
Installer
Installare
Monteren
Instalar
Torque Serrage
Drehmoment Coppia
Par de apriete
Aandraaimoment
Momento de torção
締め付け
扭紧
23
Page 24

Crankset Installation CCrankset Installation FCrankset Installation
DRAFT
ACrankset Installation DCrankset Installation GCrankset Installation
BCrankset Installation ECrankset Installation HCrankset Installation
Consult the DUB™ MTB Cranksets and
Bottom Brackets user manual for crankset
and bottom bracket installation before
proceeding.
Consult the DUB™ MTB Cranksets and
Bottom Brackets user manual for crankset
and bottom bracket installation before
proceeding.
Consult the DUB™ MTB Cranksets and
Bottom Brackets user manual for crankset
and bottom bracket installation before
proceeding.
Consult the DUB™ MTB Cranksets and
Bottom Brackets user manual for crankset
and bottom bracket installation before
proceeding.
Consult the DUB™ MTB Cranksets and
Bottom Brackets user manual for crankset
and bottom bracket installation before
proceeding.
Consult the DUB™ MTB Cranksets and
Bottom Brackets user manual for crankset
and bottom bracket installation before
proceeding.
Consult the DUB™ MTB Cranksets
and Bottom Brackets user manual for
crankset and bottom bracket installation
before proceeding.
Consult the DUB™ MTB Cranksets
and Bottom Brackets user manual for
crankset and bottom bracket installation
before proceeding.
Consult the DUB™ MTB Cranksets
and Bottom Brackets user manual for
crankset and bottom bracket installation
before proceeding.
Install
Einbauen
Instalación
Installer
Installare
Monteren
Instalar
24
Page 25

Rear Derailleur Installation CInstallation du dérailleur arrière FInstalação do desviador/derailleur
DRAFT
traseiro
AEinbau des Schaltwerks DInstallazione deragliatore
Gリ ア・ディレ イラ ー の 取 り 付 け
posteriore
BInstalación del desviador trasero EDe achterderailleur installeren
H后变速器安装
Use a rear derailleur alignment tool to make
sure the derailleur hanger is straight.
NOTICE
A bent derailleur hanger can impact shifting
performance.
Use a rear derailleur alignment tool to make
sure the derailleur hanger is straight.
NOTICE
A bent derailleur hanger can impact shifting
performance.
Use a rear derailleur alignment tool to make
sure the derailleur hanger is straight.
NOTICE
A bent derailleur hanger can impact shifting
performance.
Use a rear derailleur alignment tool to make
sure the derailleur hanger is straight.
A bent derailleur hanger can impact shifting
performance.
Use a rear derailleur alignment tool to make
sure the derailleur hanger is straight.
A bent derailleur hanger can impact shifting
performance.
Use a rear derailleur alignment tool to make
sure the derailleur hanger is straight.
A bent derailleur hanger can impact shifting
performance.
Shift the rear derailleur
1
inboard to the 2nd largest
cog.
Shift the rear derailleur
inboard to the 2nd largest
cog.
Shift the rear derailleur
inboard to the 2nd largest
cog.
NOTICE
NOTICE
NOTICE
Use a rear derailleur alignment tool to make
sure the derailleur hanger is straight.
A bent derailleur hanger can impact shifting
performance.
Use a rear derailleur alignment tool to make
sure the derailleur hanger is straight.
A bent derailleur hanger can impact shifting
performance.
Use a rear derailleur alignment tool to make
sure the derailleur hanger is straight.
A bent derailleur hanger can impact shifting
performance.
Shift the rear derailleur
inboard to the 2nd largest
cog.
Shift the rear derailleur
inboard to the 2nd largest
cog.
Shift the rear derailleur
inboard to the 2nd largest
cog.
NOTICE
NOTICE
NOTICE
Shift the rear derailleur
inboard to the 2nd largest
cog.
Shift the rear derailleur
inboard to the 2nd largest
cog.
Shift the rear derailleur
inboard to the 2nd largest
cog.
Do not manually force the derailleur to move
NOTICE
inboard or outboard. Manually forcing the
derailleur to move can cause damage to the
motor. Use the AXS button on the derailleur
or the control paddle to adjust the derailleur.
HINWEIS
Bewegen Sie das Schaltwerk nicht mit
Gewalt nach innen oder nach außen.
Manually forcing the derailleur to move can
cause damage to the motor. Verwenden Sie
die Funktionstaste am Schaltwerk oder die
Schalthebel, um das Schaltwerk zu justieren.
AVISO
No fuerce manualmente el desplazamiento
del desviador hacia dentro o hacia fuera.
Manually forcing the derailleur to move can
cause damage to the motor. Para ajustar
el desviador, utilice su botón de función
asociado o las palancas de cambio.
Ne touchez pas le dérailleur pour l’obliger
AVIS
àbouger vers l’intérieur ou l’extérieur.
Manually forcing the derailleur to move
can cause damage to the motor. Utilisez
les leviers de dérailleur ou le bouton de
commande situé sur le dérailleur pour le
régler correctement.
AVVISO
Non forzare manualmente il deragliatore
per spostarlo verso l’interno o l’esterno.
Manually forcing the derailleur to move can
cause damage to the motor.Utilizzare il tasto
funzione sul deragliatore o le palette cambio
per regolare il deragliatore.
MEDEDELING
Oefen geen druk op de derailleur uit met
uw hand om deze naar binnen of buiten te
brengen. Manually forcing the derailleur
to move can cause damage to the motor.
Gebruik de functieknop op de derailleur of
de schakelhendels om de derailleur aan te
passen.
Não deve forçar manualmente o desviador/
NOTIFICAÇÃO
derailleur a mover-se para “dentro” nem
para “fora”. Manually forcing the derailleur to
move can cause damage to the motor. Use o
botão de função no desviador/derailleur ou
os manípulos achatados das mudanças para
ajustar oderailleur.
注意事項
デ ィ レ イ ラ ー を 手 で 無 理 に 、イ ン ボ ー ド ま た は ア
ウ ト ボ ー ド に 動 か さ な い で く だ さ い 。 Manually
forcing the derailleur to move can cause
damage to the motor.ディレ イラ ー の 調節 に
は 、デ ィ レ イ ラ ー の 機 能 ボ タ ン ま た は シ フ タ ー ・
パドルを使用してください。
注意
请勿用手直接拨动变速器向内或向外变
速。Manually forcing the derailleur to move
can cause damage to the motor.使用变速器
上的功能键或变速拨片来调节变速器。
25
Page 26

5
2
DRAFT
3
10-12 N·m
(88-106 in-lb)
B-Adjust Washer
Do not apply grease to the mounting bolt or
NOTICE
derailleur hanger threads.
Push the B-adjust washer forward when
installing the derailleur. There must not be
a gap between the B-Adjust washer and
the derailleur hanger. A gap can cause the
derailleur to loosen or break away from the
B-Bolt. poor shifting performance.
N’appliquez jamais de graisse sur le boulon
de fixation ou sur le filetage du support du
dérailleur.
Poussez la rondelle de réglage B vers
l’avant pour installer le dérailleur. Il ne doit
pas y avoir d’espace entre la rondelle B et
le support du dérailleur. S’il y a un espace, le
dérailleur peut se desserrer ou se détacher
du boulon B.
AVIS
Não aplique massa lubrificante nos fios
NOTIFICAÇÃO
de rosca do perno de montagem nem do
suspensor do derailleur.
Empurre a anilha de ajuste B para a frente
quando instalar o derailleur. Não pode
haver folga entre a anilha B e o suporte
que suspende o derailleur. Uma folga pode
causar que se solte ou separe o derailleur,
desprendendo-se do perno B.
Kein Schmierfett auf das Gewinde der Be-
HINWEIS
festigungsschraube oder der Schaltwerkaufhängung auftragen.
Die B-Einstellscheibe beim Einbau des
Schaltwerks/Umwerfers nach vorn drücken.
Zwischen B-Scheibe und Schaltwerkaufhängung darf kein Spalt vorhanden sein.
Ein Spalt kann dazu führen, dass sich das
Schaltwerk löst oder von der B-Schraube
abbricht.
AVISO
No aplique grasa al tornillo de fijación
ni a las roscas de la pata de cambio del
desviador.
Al instalar el desviador, empuje hacia
adelante la arandela B. No debe quedar
espacio entre la arandela B y la pata de
cambio del desviador. Si quedase algún
espacio, el desviador podría aflojarse
odesprenderse del tornillo B.
Non applicare grasso al bullone di
montaggio o alla filettatura del gancio del
deragliatore.
Spingere la rondella di registro B in avanti
durante il montaggio del deragliatore. Non
deve esserci alcuno spazio tra la rondella
B e il gancio del deragliatore. Lo spazio
può causare lo svitamento o il distacco del
deragliatore dal bullone B.
Breng geen smeer aan de montagebout of
schroefdraad van de derailleurhanger aan.
Duw de B-sluitring naar voren tijdens
het installeren van de derailleur. Er mag
geen ruimte tussen de B-sluitring en de
derailleurhanger zijn. De derailleur kan
van de B-bout loskomen als er ruimte
aanwezig
is.
AVVISO
MEDEDELING
注意事項
取り付けボルトまたはディレイラー・ハン
ガーのスレッドにグリスを塗布しないでく
ださい。
ディレイラーを取り付ける際は、B 調節ワッ
シャーを前に押します。Bワッシャーとディ
レイラー・ハンガーとの間に隙間があって
はなりません。隙間があると、ディレイラー
が B ボルトから緩んだり、壊れて外れてし
まう場合があります。
注意
请勿在安装螺栓或变速器挂钩螺纹上涂抹润
滑脂。
安装变速器时向前推动 B 调节垫圈。B 垫圈
与变速器挂钩之间不得留有间隙。间隙会导
致变速器松动或脱离 B 螺栓。
Install
Einbauen
Instalación
Installer
Installare
Monteren
Instalar
Torque
Drehmoment
Momento
Valeur de couple
Coppia
Aandraaimoment
Momento de torção
Adjust Régler Ajustar
Einstellen Regolare
Ajustar Afstellen
調節
调节
26
Page 27

Rear Derailleur Adjustments
DRAFT
CRéglages du dérailleur arrière FAfinação do desviador/
derailleur traseiro
AEinstellung des Schaltwerks DRegolazioni del deragliatore
Gリア・ディレ イラ ー の 調 節
posteriore
BAjustes del desviador trasero EDe achterderailleur afstellen
+
+
H后变速器调节
1
Align the pulley wheel with the center of
the 2nd-largest cog by adjusting the rear
derailleur:
Press and hold the controller AXS™ button
while pressing the paddle. Press downward
on the paddle to adjust the derailleur
inboard, and press upward on the paddle to
adjust the derailleur outboard.
The rear derailleur may not appear to
move. Watch for the derailleur LED to flash
to confirm the derailleur executed the
command.
Press & hold, shift Press & hold, shift Press & hold, shift
+
Press & hold, shift Press & hold, shift Press & hold, shift
Press & hold, shift Press & hold, shift Press & hold, shift
Measure Mesurer Medir
Messen Misurare
Medir Meten
計測
测量
27
Page 28

3
Adjust Limit Screws CAdjust Limit Screws FAdjust Limit Screws
DRAFT
AAdjust Limit Screws DAdjust Limit Screws
BAdjust Limit Screws EAdjust Limit Screws HAdjust Limit Screws
GAdjust Limit Screws
Shift the rear derailleur inboard to the
1
largest cassette cog.
Shift the rear derailleur inboard to the
largest cassette cog.
Shift the rear derailleur inboard to the
largest cassette cog.
2
Shift the rear derailleur inboard to the
largest cassette cog.
Shift the rear derailleur inboard to the
largest cassette cog.
Shift the rear derailleur inboard to the
largest cassette cog.
Adjust the low limit screw
(L) so that it lightly contacts
the inner link of the rear
derailleur.
Adjust the low limit screw
so that it lightly contacts
the inner link of the rear
derailleur.
Adjust the low limit screw
so that it lightly contacts
the inner link of the rear
derailleur.
Adjust the low limit screw
so that it lightly contacts
the inner link of the rear
derailleur.
Adjust the low limit screw
so that it lightly contacts
the inner link of the rear
derailleur.
Adjust the low limit screw
so that it lightly contacts
the inner link of the rear
derailleur.
Shift the rear derailleur inboard to the
largest cassette cog.
Shift the rear derailleur inboard to the
largest cassette cog.
Shift the rear derailleur inboard to the
largest cassette cog.
Adjust the low limit
screw so that it lightly
contacts the inner link of
the rear derailleur.
Adjust the low limit
screw so that it lightly
contacts the inner link of
the rear derailleur.
Adjust the low limit
screw so that it lightly
contacts the inner link of
the rear derailleur.
L
Adjust Régler Ajustar
Einstellen Regolare
Ajustar Afstellen
調節
调节
28
Page 29

3
Shift the rear derailleur outboard to the
DRAFT
3
smallest cog.
Shift the rear derailleur outboard to the
smallest cog.
Shift the rear derailleur outboard to the
smallest cog.
Shift the rear derailleur outboard to the
smallest cog.
Shift the rear derailleur outboard to the
smallest cog.
Shift the rear derailleur outboard to the
smallest cog.
Shift the rear derailleur outboard to the
smallest cog.
Adjust the high limit screw
(H) until it lightly touches
the inner link of the rear
derailleur.
Adjust the high limit screw
until it lightly touches
the inner link of the rear
derailleur.
Adjust the high limit screw
until it lightly touches
the inner link of the rear
derailleur.
H
Adjust the high limit screw
until it lightly touches
the inner link of the rear
derailleur.
Adjust the high limit screw
until it lightly touches
the inner link of the rear
derailleur.
Adjust the high limit screw
until it lightly touches
the inner link of the rear
derailleur.
Shift the rear derailleur outboard to the
smallest cog.
Shift the rear derailleur outboard to the
smallest cog.
Adjust the high limit
screw until it lightly
touches the inner link of
the rear derailleur.
Adjust the high limit
screw until it lightly
touches the inner link of
the rear derailleur.
Adjust the high limit
screw until it lightly
touches the inner link of
the rear derailleur.
4
Adjust Régler Ajustar
Einstellen Regolare
Ajustar Afstellen
調節
调节
29
Page 30

Chain Sizing CLongueur de la chaîne FTamanho da corrente
AKettenlänge DDimensionamento della catena
Gチェーン長 の 調 節
BAjuste de longitud de la cadena EDe ketting inkorten
H链条尺寸测量
NOTICE
DRAFT
A chain must be installed to properly adjust
your derailleur. For detailed chain installation
instruction, visit www.sram.com/service.
⚠WARNING CRASH HAZARD
Failure to size or connect the chain properly
may lead to chain failure or cause the rider
to crash, resulting in serious injury
and/or death.
AVIS
Pour pouvoir régler convenablement votre
dérailleur, il faut d’abord installer une chaîne.
Pour obtenir des instructions d'installation
de la chaîne plus détaillées, consultez le site
www.sram.com/service
⚠AVERTISSEMENT RISQUE DE CHUTE
Le fait d’installer la chaîne de manière
inappropriée ou de ne pas respecter la
longueur adéquate peut entraîner une
défaillance de la chaîne, ou la chute du
cycliste, et provoquer des blessures graves
voire mortelles.
.
NOTIFICAÇÃO
Uma corrente tem que estar montada para
poder ajustar correctamente o
Para obter informações detalhadas sobre
a instalação da corrente, visite www.sram.
com/service.
⚠AVISO PERIGO DE ACIDENTE
Se o tamanho da corrente não for
determinado correctamente ou se ela
não ficar fixada/fechada correctamente
no seu lugar, poderá provocar a avaria da
corrente ou fazer com que o ciclista tenha
um acidente, de onde resultarão ferimentos
graves e/ou morte.
seu derailleur.
HINWEIS
Damit Sie Ihren Umwerfer/Ihr Schaltwerk
ordnungsgemäß einstellen können, muss
eine Kette montiert sein. Detaillierte Anweisungen zum Einbau der Kette finden Sie
unter www.sram.com/service.
⚠WARNUNG UNFALLGEFAHR
Wenn Sie die Kette nicht korrekt kürzen oder
richtig verbinden, kann die Kette versagen
oder Unfälle verursachen, die zu schweren
oder tödlichen Verletzungen führen können.
AVISO
Para poder ajustar bien el desviador, debe
estar instalada una cadena. Puede encontrar
instrucciones detalladas de instalación de la
cadena en
Una cadena mal conectada o de longitud
incorrecta puede resultar dañada o provocar un
accidente, con consecuencias graves o incluso
mortales para el ciclista.
www.sram.com/service
⚠ATENCIÓN RIESGO DE ACCIDENTE
.
Una catena deve essere installata per regolare
correttamente il deragliatore. Per le istruzioni
dettagliate di installazione della catena,
visitare il sito www.sram.com/service.
⚠AVVERTENZA PERICOLO DI INCIDENTE
Il mancato dimensionamento corretto
o il mancato collegamento della catena
potrebbe comportare il cedimento della
stessa o la caduta del biker con conseguenti
gravi lesioni e/o la morte.
Breng de ketting aan om uw derailleur juist
af te stellen. Voor gedetailleerde installatieinstructies voor de ketting, ga naar
www.sram.com/service.
GEVAAR OP EEN ONGEVAL
Een onjuist ingekorte ketting of een
verkeerde aansluiting kan de ketting
beschadigen en leiden tot breuk. De fietser
kan daarbij ten val komen wat tot ernstig
letsel en/of de dood kan leiden.
AVVISO
MEDEDELING
⚠WAARSCHUWING
注意事項
ディレ イラ ー を正しく調 節 する た め 、チェーン
を取 り付ける必 要が あります。チェーンの詳し
い取り付け方法は、
に掲載されています。
⚠警告 – 事故につながる危険性
チェーン長の調節を適切に行わなかったか、ま
たは正しく固定しなかった場合は、チェーンの
損傷、あるいは事故を引き起こし、重傷および/
または死亡につながる可能性があります。
必须安装链条,以便正常调节变速器。安装链
条的详细说明请访问
链条尺寸测量不当或未适当连接,可能导致
链条故障,或引起骑行者撞车,从而造成严
重伤害甚至死亡。
www.sram.com/service
注意
www.sram.com/service
⚠警告 – 撞伤隐患
。
30
Page 31

Full Suspension Bicycles CVélos tout suspendus FBicicletas com suspensão
DRAFT
completa
AVollgefederte Fahrräder DBiciclette a sospensione totale
BBicicletas de suspensión integral EFietsen met voor- en achtervering
Gフル・サスペンションの自転車
H全避震自行车
Full Suspension Frames: To size the chain,
the rear shock must be compressed to the
point in the travel where the rear axle is
farthest from the bottom bracket. Deflate or
remove the rear shock if necessary.
Vollgefederte Rahmen: Um die Länge der
Kette einzustellen, lassen Sie den Hinterbaudämpfer auf die Position einfedern, an der die
Hinterachse am weitesten vom Innenlager
entfernt ist. Lassen Sie bei Bedarf die Luft aus
dem Hinterbaudämpfer ab oder bauen Sie
ihn aus.
Cuadros con suspensión integral: Para
ajustar el tamaño de la cadena, el
amortiguador trasero debe comprimirse
hasta el punto del recorrido en el que el
eje trasero quede más alejado del eje de
pedalier. Si es necesario, despresurice
desmonte el amortiguador trasero.
o
NOTICE
HINWEIS
AVISO
Cadres tout suspendus : pour définir la
AVIS
bonne longueur de la chaîne, comprimez
l’amortisseur arrière jusqu’à ce que l’axe
arrière se trouve le plus loin du boîtier de
pédalier. Baissez la pression de l’amortisseur
arrière ou retirez-le si nécessaire.
AVVISO
Telai con sospensione totale: per
dimensionare la catena, comprimere
l'ammortizzatore posteriore fino al punto
nella corsa in cui l'asse posteriore è alla
distanza massima dal movimento centrale.
Sgonfiare o rimuovere l'ammortizzatore
posteriore se necessario.
MEDEDELING
Frames met voor- en achtervering:
Om de ketting in te korten, druk de
achterschokdemper samen tot het punt
waar de achteras zich het verste van de
onderste trapas bevindt. Indien nodig,
laat de achterschokdemper leeglopen of
verwijder deze.
Quadros com suspensão completa:
Para pôr a corrente ao tamanho
correcto, o amortecedor traseiro tem
que estar comprimido até ao ponto,
no seu curso, em que o eixo traseiro
esteja o mais afastado possível do eixo
pedaleiro. Descomprima/despressurize
ou retire o
necessário.
フル・サスペンション・フレーム:チェー
ンの長さを調節するには、リア・ショッ
クを圧縮し、トラベルでリア・アクス
ルがボトム・ブラケットから最も遠い
位置にくるようにします。必要であれ
ば、リア・ショックの空気を抜くか、
取り外してください。
全避震车架 :要测量链条尺寸,请将后
减震器压至后轴离中轴最远的行程位置。
如有必要,将后减震器放气或卸下。
NOTIFICAÇÃO
amortecedor traseiro se for
注意事項
注意
Measure
Messen
Medir
Mesurer
Misurare
Meten
Medir
Adjust
Einstellen
Ajustar
Régler
Regolare
Afstellen
Ajustar
31
Page 32

Eagle® X-SYNC™ 2 Chainrings
DRAFT
1
3
2
Page 27
Wrap the chain around the large chainring and
largest cassette cog.
For full suspension bicycles, add one inner
link and one outer link where the chain starts
to overlap. For hardtail bicycles, add two
inner links and two outer links where the
chain starts to overlap.
Use a chain breaker tool to break the chain at
the inner link.
Führen Sie die Kette um das große Kettenblatt
und den größten Zahnkranz.
Bei vollgefederten Fahrrädern fügen Sie
an dem Punkt, an dem sich die Kette zu
überlappen beginnt, ein inneres und ein
äußeres Glied hinzu. Bei Hardtail-Fahrrädern
fügen Sie an dem Punkt, an dem sich die
Kette zu überlappen beginnt, zwei innere und
zwei äußere Glieder hinzu.
Verwenden Sie einen Kettennietdrücker, um
die Kette am inneren Glied zu öffnen.
Engrane la cadena alrededor del plato grande
y del piñón más grande del casete.
En bicicletas de suspensión integral, añada
un eslabón interior y otro exterior en el punto
por donde la cadena empieza a solaparse.
En bicicletas sin suspensión trasera, añada
dos eslabones interiores y dos exteriores
en el punto por donde la cadena empieza a
solaparse.
Utilice un tronchacadenas para abrir la
cadena por el eslabón interior.
Faites passer la chaîne autour du grand
plateau et autour du plus grand pignon de la
cassette.
Avec les vélos tout suspendus, ajoutez
un maillon interne et un maillon externe à
l’endroit où les deux extrémités de la chaîne
se rejoignent. Avec les vélos suspendus à
l’avant, ajoutez deux maillons internes et
deux maillons externes àl’endroit où les deux
extrémités de la chaîne se rejoignent.
À l’aide d’un dérive-chaîne, déboîtez la chaîne
au niveau du maillon interne.
Avvolgere la catena attorno alla corona
dentata grande e al pignone più grande della
cassetta.
Per biciclette a sospensione totale,
aggiungere una maglia interna ed una maglia
esterna nel punto in cui la catena inizia a
sovrapporsi. Per biciclette con telaio a coda
rigida, aggiungere due maglie interne e due
maglie esterne nel punto in cui la catena inizia
a sovrapporsi.
Utilizzare uno smagliacatena per spezzare la
catena in corrispondenza della maglia interna.
Wikkel de ketting rond het grote kettingblad
en het grootste cassettetandwiel.
Voor fietsen met voor- en achtervering, voeg
één binnenschakel en één buitenschakel
toe op het punt waar de ketting start met
overlappen. Voor hardtail-fietsen, voeg twee
binnenschakels en twee buitenschakels
toe op het punt waar de ketting start met
overlappen.
Gebruik een kettingpons om de ketting bij de
binnenschakel te breken.
Enrole a corrente em redor da cremalheira
grande e do carreto maior da cassete.
Para bicicletas com suspensão completa,
acrescente um elo interior e um elo exterior
onde a corrente começar a sobrepor-se. Para
bicicletas com traseira rija, acrescente dois
elos interiores edois elos exteriores onde a
corrente começar a sobrepor-se.
Use uma ferramenta de cortar (abrir) a
corrente para a cortar de forma a ficar com
um elo interior na extremidade.
大きなチェーンリングと最も大きなカセッ
ト・コグの周りにチェーンを巻きつけます。
フル・サスペンションの自転車には、チェー
ンが重なり始める部分にインナー・リンクと
アウター・リンクを 1 つずつ追加します。ハー
ドテイルの自転車には、チェーンが重なり始
める部分にインナー・リンクとアウター・リ
ンクを 2 つずつ追加してください。
インナー・リンクの箇所でチェーンを分割す
る際は、チェーン分割ツールを使用してくだ
さい。
将链条缠绕在大链环和最大的齿轮上。
对于全避震自行车,在链条开始重叠处添
加一个内链接和一个外链接。对于硬尾自
行车,在链条开始重叠处添加两个内链接
和两个外链接。
用拆链工具在内链接处拆开链条。
Install
Einbauen
Instalación
Installer
Installare
Monteren
Instalar
Measure Mesurer Medir
Messen Misurare
Medir Meten
計測
测量
Remove Retirer Retirar
Entfernen Rimuovere
Quitar Verwijderen
取り外し
拆卸
32
Page 33

Eagle® X-SYNC™ 2 Oval Chainrings
DRAFT
2
4
1
3
Page 8
Rotate the crank arm to the
1 o'clock position.
Wrap the chain around the chainring and
largest cassette cog.
For full suspension bicycles, add one inner
link and one outer link where the chain starts
to overlap. For hardtail bicycles, add two
inner links and two outer links where the
chain starts to overlap.
Use a chain breaker tool to break the chain at
the inner link.
Drehen Sie den Kurbelarm in die
1-Uhr-Position.
Führen Sie die Kette um das große Kettenblatt
und den größten Zahnkranz.
Bei vollgefederten Fahrrädern fügen Sie
an dem Punkt, an dem sich die Kette zu
überlappen beginnt, ein inneres und ein
äußeres Glied hinzu. Bei Hardtail-Fahrrädern
fügen Sie an dem Punkt, an dem sich die
Kette zu überlappen beginnt, zwei innere und
zwei äußere Glieder hinzu.
Verwenden Sie einen Kettennietdrücker, um
die Kette am inneren Glied zu öffnen.
Tournez la manivelle de manière à la
positionner à 1 heure.
Faites passer la chaîne autour du grand
plateau et autour du plus grand pignon de la
cassette.
Avec les vélos tout suspendus, ajoutez
un maillon interne et un maillon externe à
l’endroit où les deux extrémités de la chaîne
se rejoignent. Avec les vélos suspendus à
l’avant, ajoutez deux maillons internes et
deux maillons externes àl’endroit où les deux
extrémités de la chaîne se rejoignent.
À l’aide d’un dérive-chaîne, déboîtez la chaîne
au niveau du maillon interne.
Ruotare la pedivella in posizione a ore 1.
Avvolgere la catena attorno alla corona
dentata grande e al pignone più grande della
cassetta.
Per biciclette a sospensione totale,
aggiungere una maglia interna ed una maglia
esterna nel punto in cui la catena inizia a
sovrapporsi. Per biciclette con telaio a coda
rigida, aggiungere due maglie interne e due
maglie esterne nel punto in cui la catena inizia
a sovrapporsi.
Utilizzare uno smagliacatena per spezzare la
catena in corrispondenza della maglia interna.
Rode o braço da manivela para a posição da
1hora num relógio.
Enrole a corrente em redor da cremalheira
grande e do carreto maior da cassete.
Para bicicletas com suspensão completa,
acrescente um elo interior e um elo exterior
onde a corrente começar a sobrepor-se. Para
bicicletas com traseira rija, acrescente dois
elos interiores edois elos exteriores onde a
corrente começar a sobrepor-se.
Use uma ferramenta de cortar (abrir)
acorrente para a cortar de forma a ficar com
um elo interior na extremidade.
クランクアー ムを時 計の1時の位置に回転させ
ます。
大きなチェーンリングと最も大きなカセッ
ト・コグの周りにチェーンを巻きつけます。
フル・サスペンションの自転車には、チェー
ンが重なり始める部分にインナー・リンクと
アウター・リンクを 1 つずつ追加します。ハー
ドテイルの自転車には、チェーンが重なり始
める部分にインナー・リンクとアウター・リ
ンクを 2 つずつ追加してください。
インナー・リンクの箇所でチェーンを分割す
る際は、チェーン分割ツールを使用してくだ
さい。
Gire la biela a la posición de la 1 en punto.
Engrane la cadena alrededor del plato grande
y del piñón más grande del casete.
En bicicletas de suspensión integral, añada
un eslabón interior y otro exterior en el punto
por donde la cadena empieza a solaparse.
En bicicletas sin suspensión trasera, añada
dos eslabones interiores y dos exteriores
en el punto por donde la cadena empieza a
solaparse.
Utilice un tronchacadenas para abrir la
cadena por el eslabón interior.
Install
Einbauen
Instalación
Installer
Installare
Monteren
Instalar
Draai de crankarm naar de 1 uur positie.
Wikkel de ketting rond het grote kettingblad
en het grootste cassettetandwiel.
Voor fietsen met voor- en achtervering, voeg
één binnenschakel en één buitenschakel
toe op het punt waar de ketting start met
overlappen. Voor hardtail-fietsen, voeg twee
binnenschakels en twee buitenschakels
toe op het punt waar de ketting start met
overlappen.
Gebruik een kettingpons om de ketting bij de
binnenschakel te breken.
Measure Mesurer Medir
Messen Misurare
Medir Meten
計測
测量
将曲臂转动至
将链条缠绕在大链环和最大的齿轮上。
对于全避震自行车,在链条开始重叠处添
加一个内链接和一个外链接。对于硬尾自
行车,在链条开始重叠处添加两个内链接
和两个外链接。
用拆链工具在内链接处拆开链条。
1
点钟位置。
Remove Retirer Retirar
Entfernen Rimuovere
Quitar Verwijderen
取り外し
拆卸
33
Page 34

Chain Installation CInstallation de la chaîne FInstalação da Corrente
DRAFT
AKettenmontage DInstallazione della catena
BInstalación de la cadena EDe ketting installeren
Gチェーンの 取り付 け
H链条安装
2
1
Shift the chain to the smallest cassette cog.
Rotate the derailleur cage forward and
press the Cage Lock™ lock button to lock the
derailleur in the extended position.
Route the chain through the derailleur pulleys.
⚠WARNING PINCH HAZARD
The derailleur is spring loaded and will return
from the Cage Lock position rapidly. Keep
fingers clear of pinch points.
Schalten Sie die Kette auf den kleinsten
Zahnkranz.
Drehen Sie den Schaltwerkkäfig nach vorn und
drücken Sie den Cage Lock-Verriegelungsknopf,
um das Schaltwerk in der vorgeschobenen
Position zu verriegeln.
Führen Sie die Kette durch die Umlenkrollen
des Schaltwerks.
⚠WARNUNG QUETSCHGEFAHR
Das Schaltwerk ist federbelastet und kehrt
schnell aus der Cage Lock-Position zurück.
Halten Sie die Finger von Quetschstellen fern.
3
Déplacez la chaîne sur le plus petit pignon de
la cassette.
Faites basculer la chape du dérailleur
vers l’avant puis appuyez sur le bouton de
verrouillage Cage Lock afin de verrouiller le
dérailleur dans sa position d’extension.
Faites passer la chaîne à travers les galets du
dérailleur.
⚠AVERTISSEMENT RISQUE DE PINCEMENT
Le dérailleur est monté sur ressort et se
désengagera de la position Cage Lock très
rapidement. Éloignez vos doigts des points de
pincement.
Spostare la catena fino al pignone più piccolo
della cassetta.
Ruotare la gabbia del deragliatore in avanti e
premere il pulsante Cage Lock per bloccare il
deragliatore nella posizione estesa.
Far passare la catena attraverso le pulegge del
deragliatore.
⚠AVVERTENZA PERICOLO DI PIZZICAMENTO
Il deragliatore è caricato a molla e ritornerà
rapidamente dalla posizione Cage Lock. Tenere
le dita lontane dai punti di rischio.
Mova a corrente para o carreto mais pequeno
da cassete.
Rode a armação do derailleur para a frente
epressione o botão de trancar o Cage Lock,
para trancar o derailleur na posição estendida.
Encaminhe a corrente através das polias guias
do derailleur/desviador.
⚠AVISO PERIGO DE ENTALAMENTO
O derrailleur/desviador tem efeito de mola e vai
recolher/ressaltar desde a posição Cage Lock
(tranca da armação) rapidamente. Mantenha os
dedos fora dos pontos de entalamento.
チェーンを最も小さなカセット・コグにシフ
トします。
ディレイラー・ケージを前に回転させ、
Lock
のロック・ボタンを押して、ディレイラー
を伸張した位置にロックします。
ディレイラーのプーリーを通してチェーンを
ルーティングします。
⚠警告 - 指を挟まれる危険性
ディレイラーにはスプリングが組み込まれて
おり、Cage Lock のポジションから急に戻り
ます。挟まれる箇所に指を置かないでくださ
い。
Cage
Cambie la cadena al piñón más pequeño del
casete.
Gire hacia adelante la jaula del desviador
ypresione el botón de bloqueo del mecanismo
Cage Lock para dejar bloqueado el desviador
en la posición extendida.
Haga pasar la cadena a través de las roldanas
del desviador.
⚠ATENCIÓN RIESGO DE PINZAMIENTO
El desviador lleva un resorte mecánico, por lo que
recuperará rápidamente su posición desde la de
bloqueo del Cage Lock. Mantenga los dedos fuera
de los puntos donde puedan quedar atrapados.
Adjust Régler Ajustar
Einstellen Regolare
Ajustar Afstellen
調節
调节
Breng de ketting naar het kleinste
cassettetandwiel.
Draai de derailleurkooi naar voren en druk
op de Cage Lock-vergrendelingsknop om de
derailleur in de uitgestrekte positie vast te
zetten.
Leid de ketting door de leirollen van de
derailleur.
⚠WAARSCHUWING BEKLEMMINGSGEVAAR
De derailleur is voorzien van een veer en keert
snel terug uit de Cage Lock-positie. Houd uw
vingers uit de buurt van de klempunten.
Install
Einbauen
Instalación
Installer
Installare
Monteren
Instalar
将链条移到最小的齿轮上。
向前转动变速器导板,并按压
按钮,将变速器锁定在伸展位置。
将链条穿过变速器滑轮。
⚠小心 – 夹伤隐患
变速器装有弹簧,会快速从
回。请保持手指与夹点的距离。
Cage Lock
Cage Lock
锁止
位置弹
34
Page 35

4
DRAFT
5
PowerLock®
Eagle 12 SPD
Pull each end of the chain together and
install the PowerLock. Press the PowerLock
connector links together.
The arrow must point in the direction of
chain travel before locking the PowerLock
into place. Once locked, the PowerLock
cannot be disconnected.
Ziehen Sie die beiden Enden der Kette
zusammen und montieren Sie den
PowerLock-Verschluss. Drücken Sie die
beiden PowerLock-Verschlussglieder
zusammen.
Der Pfeil muss in die Kettenlaufrichtung
weisen, bevor Sie den PowerLockVerschluss verschließen. Der PowerLockVerschluss kann nach dem Verschließen
nicht mehr geöffnet werden.
Tire a la vez de ambos extremos de la
cadena e instale el PowerLock. Presione
uno contra otro los eslabones del conector
PowerLock.
Antes de dejar bloqueado el eslabón
PowerLock en su posición, la flecha debe
estar apuntando en la dirección de avance
de la cadena. Una vez bloqueado, el eslabón
PowerLock no puede desconectarse.
NOTICE
HINWEIS
AVISO
Rapprochez les deux extrémités de la chaîne
et installez le PowerLock. Enfoncez les deux
parties du PowerLock l’une dans l’autre.
AVIS
Avant de verrouiller le PowerLock, vérifiez
que la flèche pointe bien dans le sens de
rotation de la chaîne. Une fois verrouillé, le
PowerLock ne peut plus s’ouvrir.
Tirare le estremità della catena e installare il
PowerLock. Premere insieme le maglie del
PowerLock.
AVVISO
La freccia deve essere rivolta nella
direzione di movimento della catena prima
di bloccare il PowerLock in posizione. Una
volta bloccato, il PowerLock non può essere
scollegato.
Trek beide uiteinden van de ketting naar
elkaar toe en monteer de PowerLock. Druk
de verbindingen van de PowerLock samen.
MEDEDELING
De pijl moet naar de draairichting van de
ketting zijn gericht voordat u de PowerLock
op zijn plaats vergrendeld. Eenmaal
vergrendeld, kan de PowerLock niet langer
worden ontkoppeld.
Puxe ambas as extremidades da corrente,
juntando-as, e instale o PowerLock.
Comprima os elementos de ligação do
PowerLock juntando-os.
A seta tem que apontar na direcção do
movimento da corrente, antes de bloquear/
fechar o PowerLock no seu lugar. Uma
vez bloqueado/fechado, o PowerLock não
poderá ser desligado/aberto.
チェーンの両端を引き寄せ、
付けます。
士を押します。
PowerLock
矢印がチェーンの作動方向に向いていること
を必ず確認してください。
度ロックすると取り外すことはできません。
将链条的两端拉到一起并安装
PowerLock
将
PowerLock
将
条转动的方向。一旦锁定,
再断开。
NOTIFICAÇÃO
PowerLock
注意事項
を所定の位置にロックする前に、
链条扣按压到一起。
锁定到位前请确保箭头指向链
PowerLock
のコネクター・リンク同
PowerLock
注意
PowerLock
を取り
は一
PowerLock
不能
。
Adjust Régler Ajustar
Einstellen Regolare
Ajustar Afstellen
調節
调节
Install
Einbauen
Instalación
Installer
Installare
Monteren
Instalar
35
Page 36

6
DRAFT
Release the Cage Lock™ by rotating the cage
forward then carefully letting it return to the
unlocked position.
Geben Sie die Cage Lock-Verriegelung frei,
indem Sie den Käfig nach vorn drehen und
dann vorsichtig in die entriegelte Position
zurückkehren lassen.
Para liberar el mecanismo Cage Lock, gire
la jaula hacia adelante y déjela volver con
cuidado a la posición de desbloqueo.
Relâchez le Cage Lock en faisant tourner la
chape vers l’avant, puis laissez-la lentement
retourner à la position déverrouillée.
Rilasciare il Cage Lock ruotando la gabbia in
avanti quindi con cautela facendola tornare
alla posizione di sblocco.
Maak de Cage Lock los door de kooi naar
voren te draaien en voorzichtig naar de
ontgrendelde positie terug te brengen.
Solte o Cage Lock rodando a armação
para a frente e depois deixando-a
cuidadosamente regressar à posição
destrancada.
ケージを前に回転させて
リリースし、ロック解除のポジション
に注意深く戻します。
向前转动导板,然后让其缓缓回到未锁
止位置,释放
Cage Lock
Cage Lock
。
を
Rotate the crank until the PowerLock®
is above the chainstay.
Drehen Sie die Kurbel, bis sich der
PowerLock-Verschluss über der
Kettenstrebe befindet.
Haga girar la biela hasta que el eslabón
PowerLock quede por encima de la vaina
del cuadro.
Adjust Régler Ajustar
Einstellen Regolare
Ajustar Afstellen
調節
调节
Faites tourner la manivelle jusqu’à ce que
le PowerLock se situe au-dessus de la base
du cadre.
Ruotare la pedivella fino a che il PowerLock
non si trovi al di sopra del forcellino
batticatena.
Draai de crank totdat de PowerLock zich
boven de liggende achtervork bevindt.
7
Rode a manivela até que o PowerLock
fique acima do suporte traseiro da corrente
(escora inferior do quadro).
PowerLock
まで、クランクを回します。
旋转曲柄,直至
方。
がチェーンステイの上部に来る
PowerLock
位于护链贴上
36
Page 37

8
DRAFT
10
9
Check that the two halves of the PowerLock®
are properly aligned.
Apply the rear brake and firmly push the crank
arm down to lock the PowerLock. You should
hear and feel the PowerLock click into place.
Check the PowerLock by hand to make sure it
moves freely.
The PowerLock is designed for one-time use
only. The PowerLock can only be removed with
a chain breaker tool and must not be re-used.
Install a new PowerLock each time a new chain
is installed.
Stellen Sie sicher, dass die beiden Hälften des
PowerLock-Verschlusses ordnungsgemäß
ausgerichtet sind.
Betätigen Sie die Hinterradbremse und ziehen
Sie den Kurbelarm kräftig nach unten, um den
PowerLock-Verschluss zu verschließen. Sie
sollten hören und spüren, wie der PowerLockVerschluss einrastet.
Prüfen Sie den PowerLock-Verschluss von
Hand, um sicherzustellen, dass er frei
beweglich ist.
Der PowerLock-Verschluss ist nur für den einmaligen Gebrauch bestimmt! Der PowerLockVerschluss kann nur mit einem Kettennietdrücker entfernt werden und darf nicht wiederverwendet werden. Bringen Sie jedes Mal
einen neuen PowerLock-Verschluss an, wenn
Sie eine neue Kette montieren.
⚠CAUTION
⚠VORSICHT
Vérifiez que les deux parties du PowerLock
soient parfaitement alignées.
Serrez le frein arrière et appuyez fortement
sur la manivelle vers le bas pour verrouiller le
PowerLock. Vous devez entendre et sentir le
PowerLock se mettre en place.
Vérifiez à la main que le PowerLock pivote
librement.
⚠ATTENTION
Le PowerLock est conçu pour un usage unique.
Le PowerLock ne peut être retiré qu’à l’aide
d’un dérive-chaîne et ne doit pas être réutilisé.
Installez un PowerLock neuf à chaque fois
qu’une nouvelle chaîne est installée.
Controllare che le due metà del PowerLock
siano allineate correttamente.
Applicare il freno posteriore e spingere il
braccio della pedivella verso il basso per
bloccare il PowerLock. Si deve sentire
epercepire il PowerLock che scatta in
posizione.
Controllare il PowerLock a mano per assicurarsi
che si muova liberamente.
⚠ATTENZIONE
Il PowerLock è solo monouso. Il PowerLock può
essere rimosso solo con uno smagliacatena e
non deve essere riutilizzato. Installare un nuovo
PowerLock ogni volta che si installa una nuova
catena.
Verifique que as duas metades do
PowerLock estejam correctamente
alinhadas.
Aplique o travão traseiro e empurre com
firmeza o braço da manivela para baixo,
para bloquear/fechar o PowerLock. Deverá
ouvir um estalido e sentir o PowerLock
encaixar/fechar no seu lugar.
Verifique o PowerLock com a mão para se
assegurar de que ele se move livremente.
O PowerLock foi concebido para ser usado
apenas uma vez. O PowerLock só pode ser
retirado com uma ferramenta de cortar (abrir)
a corrente, e não pode ser usado de novo.
Instale um PowerLock novo cada vez que uma
nova corrente for instalada.
それぞれの
んと揃っていることを確認します。
リア・ブレーキを使用し、クランク・アー
ムをしっかりと押し下げ、
をロックします。
位置に収まると、カチッという音と感
触が伝わるはずです。
PowerLock
で確認します。
PowerLock
作られています。
割ツールのみで取り外すことがき、再度使
用することはできません。新しいチェーン
を取り付けるたびに、新しい
使用してください。
⚠CUIDADO
PowerLock
が支障なく動くことを、手
は 1 度しか使用できないように
の位置が、きち
PowerLock
⚠警告
PowerLock
PowerLock
が所定の
はチェーン分
PowerLock
を
Compruebe que las dos mitades del eslabón
PowerLock estén bien alineadas.
Aplique el freno trasero y empuje con fuerza
la biela hacia abajo para bloquear el eslabón
PowerLock. Debería notar y oír el clic que hace
el eslabón PowerLock al encajar.
Compruebe con la mano el eslabón PowerLock
para asegurarse de que puede moverse sin
restricciones.
El eslabón PowerLock está diseñado para un
solo uso. Un eslabón PowerLock sólo puede
desmontarse con un tronchacadenas, y no
debe reutilizarse una vez desmontado. Cada
vez que instale una cadena, instale un nuevo
eslabón PowerLock.
⚠PRECAUCIÓN
Adjust Régler Ajustar
Einstellen Regolare
Ajustar Afstellen
調節
调节
Controleer of de twee helften van de
PowerLock juist zijn uitgelijnd.
Trek de achterrem aan en duw de crankarm
stevig omlaag om de PowerLock te
vergrendelen. U moet horen en voelen hoe de
PowerLock op zijn plaats klikt.
Controleer met de hand of de PowerLock vrij
kan bewegen.
⚠OPGELET
De PowerLock is alleen ontworpen voor
eenmalig gebruik. De PowerLock kan alleen
met behulp van een kettingpons worden
verwijderd en kan niet opnieuw worden
gebruikt. Installeer een nieuwe PowerLock
telkens u een nieuwe ketting monteert.
PowerLock
检查
握住后刹,用力向下推曲柄臂将
Lock
锁定。您应听到“咔哒”声并感觉
PowerLock
手动检查
动。
PowerLock
用拆链工具拆卸且不能再次使用。每次安装
新链条时请安装新的
的两半是否正确对齐。
锁定到位。
PowerLock
为一次性用品。
,确保它能自由活
⚠注意事项
PowerLock
Power-
PowerLock
。
只能
37
Page 38

Chain Gap Adjustment CRéglage du passage de la chaîne FAfinação da folga da corrente
DRAFT
AEinstellung des Kettenabstands DRegolazione del chain gap
BAjuste del espacio de separación
EKettingspeling afstellen
Gチェーン間隔の調節
H链距调节
de la cadena
1
Shift the chain onto the second largest cassette
cog.
NOTICE
For full suspension bicycles, measure the chain
gap while the bicycle is in the sag position.
For Eagle® X-SYNC™ 2 Oval chainrings, rotate
the crankarm to the 4 o'clock position prior to
rotating the B-Adjust Screw.
Shift the chain onto the 42T cog, the second
largest cassette cog.
HINWEIS
Messen Sie bei vollgefederten Fahrrädern
den Kettenabstand im Sag (Fahrrad mit Fahrer
statisch belastet).
Drehen Sie bei ovalen Eagle X-SYNC 2Kettenblättern den Kurbelarm in die 4-UhrPosition, bevor Sie die B-Einstellschraube
drehen.
Shift the chain onto the 42T cog, the second
largest cassette cog.
AVISO
En bicicletas con suspensión integral, mida el
espacio de separación de la cadena mientras
la bicicleta se encuentra en la posición de
precarga (sag).
Para los platos ovalados Eagle X-SYNC 2, gire
la biela a la posición de las 4 en punto antes de
girar el tornillo de ajuste B.
Shift the chain onto the 42T cog, the second
largest cassette cog.
AVIS
Pour les vélos tout suspendus, mesurez
l’espace autour de la chaîne lorsque le vélo est
en position d’affaissement (sag).
Pour les plateaux Eagle X-SYNC 2 Oval,
tournez la manivelle de manière à la
positionner à 4 heures avant de tourner la vis
de réglage B.
Shift the chain onto the 42T cog, the second
largest cassette cog.
AVVISO
Per biciclette a sospensione totale, misurare il
chain gap mentre la bicicletta è in posizione di
abbassamento (sag).
Per corone dentate ovali Eagle X-SYNC 2,
ruotare la pedivella alle ore 4 prima della
rotazione della vite di regolazione B.
Shift the chain onto the 42T cog, the second
largest cassette cog.
MEDEDELING
Voor fietsen met voor- en achtervering, meet
de kettingspeling terwijl de fiets ingeveerd is
(sag).
Voor Eagle X-SYNC 2 ovalen kettingbladen,
draai de crankarm naar de 4 uur positie voordat
u aan de B-stelschroef draait.
Shift the chain onto the 42T cog, the second
largest cassette cog.
Para bicicletas com suspensão completa, meça
a folga da corrente enquanto a bicicleta está na
posição de retracção (sag).
Para as cremalheiras Eagle X-SYNC 2 Oval,
rode obraço da manivela para a posição das
4horas num relógio, antes de rodar o parafuso
de ajuste B.
Shift the chain onto the 42T cog, the second
largest cassette cog.
フル・サスペンションの自転車の場合は、自転
車をサグ・ポジションにして、チェーンのギャッ
プを計測します (sag)。
Eagle X-SYNC 2
B
テンション調節ネジを回転させる前に、クラン
クアームを時 計の4時の位置に回転させてくだ
さい。
Shift the chain onto the 42T cog, the second
largest cassette cog.
对于全避震自行车,测量自行车处于松弛位
置时的链隙 (sag)。
Eagle X-SYNC 2 Oval
对于
动至 4 点钟位置,然后方可转动
NOTIFICAÇÃO
注意事項
楕円チェーンリングの場合は、
注意
链环,请先将曲臂转
B
调节螺钉。
Adjust
Einstellen
Ajustar
Régler
Regolare
Afstellen
Ajustar
38
Page 39

3
Chain Gap Adjustment with Gauge CChain gap adjustment with gauge FChain gap adjustment with gauge
DRAFT
AChain gap adjustment with gauge DChain gap adjustment with gauge
BChain gap adjustment with gauge EChain gap adjustment with gauge HChain gap adjustment with gauge
B-Adjust Screw
GChain gap adjustment with gauge
2
Shift the rear derailleur inboard to the
largest cog.
Install the chain gap adjustment gauge onto
the upper pulley wheel.
Turn the B-Adjust screw to align the tallest
teeth of the largest cassette cog with the
groove outline on the gauge that matches
your cassette size.
Shift the rear derailleur inboard to the
largest cog.
Install the chain gap adjustment gauge onto
the upper pulley wheel.
Turn the B-Adjust screw to align the tallest
teeth of the largest cassette cog with the
groove outline on the gauge that matches
your cassette size.
Shift the rear derailleur inboard to the
largest cog.
Install the chain gap adjustment gauge onto
the upper pulley wheel.
Turn the B-Adjust screw to align the tallest
teeth of the largest cassette cog with the
groove outline on the gauge that matches
your cassette size.
Shift the rear derailleur inboard to the
largest cog.
Install the chain gap adjustment gauge onto
the upper pulley wheel.
Turn the B-Adjust screw to align the tallest
teeth of the largest cassette cog with the
groove outline on the gauge that matches
your cassette size.
Shift the rear derailleur inboard to the
largest cog.
Install the chain gap adjustment gauge onto
the upper pulley wheel.
Turn the B-Adjust screw to align the tallest
teeth of the largest cassette cog with the
groove outline on the gauge that matches
your cassette size.
Shift the rear derailleur inboard to the
largest cog.
Install the chain gap adjustment gauge onto
the upper pulley wheel.
Turn the B-Adjust screw to align the tallest
teeth of the largest cassette cog with the
groove outline on the gauge that matches
your cassette size.
Shift the rear derailleur inboard to the
largest cog.
Install the chain gap adjustment gauge onto
the upper pulley wheel.
Turn the B-Adjust screw to align the tallest
teeth of the largest cassette cog with the
groove outline on the gauge that matches
your cassette size.
Shift the rear derailleur inboard to the
largest cog.
Install the chain gap adjustment gauge onto
the upper pulley wheel.
Turn the B-Adjust screw to align the tallest
teeth of the largest cassette cog with the
groove outline on the gauge that matches
your cassette size.
Shift the rear derailleur inboard to the
largest cog.
Install the chain gap adjustment gauge onto
the upper pulley wheel.
Turn the B-Adjust screw to align the tallest
teeth of the largest cassette cog with the
groove outline on the gauge that matches
your cassette size.
39
Page 40

Chain Gap Adjustment without
3
DRAFT
Gauge
AEinstellung des Kettenabstands
ohne Werkzeug
BAjuste de la separación de la
cadena sin utilizar un calibrador
B-Adjust Screw
2
CRéglage du passage de la chaîne
sans outil de mesure
DRegolazione del chain gap
senza indicatore
EKettingspeling afstellen
zonder meter
FAfinação de folga da corrente
sem a ferramenta
Gゲージを使用しないチェーン・ギ
ャップの調節
H无测量仪辅助下调节链隙
25 mm
Turn the B-Adjust screw until the appropriate
gap between the upper pulley and the
largest cassette cog is attained.
Turn the B-Adjust screw until the appropriate
gap between the upper pulley and the
largest cassette cog is attained.
Turn the B-Adjust screw until the appropriate
gap between the upper pulley and the
largest cassette cog is attained.
Turn the B-Adjust screw until the appropriate
gap between the upper pulley and the
largest cassette cog is attained.
Turn the B-Adjust screw until the appropriate
gap between the upper pulley and the
largest cassette cog is attained.
Turn the B-Adjust screw until the appropriate
gap between the upper pulley and the
largest cassette cog is attained.
Turn the B-Adjust screw until the appropriate
gap between the upper pulley and the
largest cassette cog is attained.
Turn the B-Adjust screw until the appropriate
gap between the upper pulley and the
largest cassette cog is attained.
Turn the B-Adjust screw until the appropriate
gap between the upper pulley and the
largest cassette cog is attained.
Adjust Régler Ajustar
Einstellen Regolare
Ajustar Afstellen
調節
调节
Measure Mesurer Medir
Messen Misurare
Medir Meten
計測
测量
40
Page 41

Fine Tuning CRéglage précis FRegulação fina
DRAFT
AFeineinstellung DTaratura
BAjuste fino EFijnafstelling
0.25 mm
Gフ ァ イン・チ ュ ー ニ ン グ
H精细调整
1
c
0.25 mm
+
1
a
Similar to a barrel adjuster on mechanical
systems, unwanted rasping sounds can be
eliminated by fine-tuning the rear derailleur
shifting with micro-adjustments.
Press and hold the controller AXS™ button
(1a) while pressing downward on the
controller paddle (1b). This will adjust the
derailleur inboard to eliminate rasping
sounds from a smaller cog to a larger cog.
Press and hold the controller AXS button
(1a) while pressing upward on the controller
paddle (1c) to adjust the derailleur outboard
to eliminate rasping sounds from a larger
cog to a smaller cog.
The rear derailleur may not appear to move.
Watch for the LED to blink to confirm the
derailleur executed the command.
Ähnlich wie mit einem
Zugspannungseinsteller bei mechanischen
Systemen können unerwünschte
Schleifgeräusche beseitigt werden, indem
die Bewegung des Schaltwerks mit MikroAnpassungen abgestimmt wird.
Halten Sie die Funktionstaste am Schaltwerk
gedrückt (1a), während Sie den Schalthebel
nach innen drücken (1b). Der linke Schalt-hebel
justiert das Schaltwerk auf der Innenseite, der
rechte Schalthebel auf der Außen-seite.
Das Schaltwerk führt möglicherweise keine
sichtbare Bewegung aus. Achten Sie darauf,
ob die LED blinkt, um zu bestätigen, dass
das Schaltwerk den Befehl ausgeführt hat.
1
b
Comme avec les molettes de réglage des
systèmes mécaniques, vous pouvez éliminer
les craquements des changements de
vitesses en ajustant plus précisément le
passage des vitesses du dérailleur arrière
grâce à des micro-réglages.
Maintenez appuyé le bouton de commande
situé sur le levier de dérailleur (1a) tout
en poussant le levier de dérailleur vers
l’intérieur (1b). Le levier de dérailleur de
gauche va régler le dérailleur vers l’intérieur
et le levier de dérailleur de droite va régler
le dérailleur vers l’extérieur.
Il se peut que le dérailleur arrière ne donne
pas l’impression de bouger. Lorsque la
DEL se met à clignoter, cela signifie que le
dérailleur a exécuté la commande.
Come il barilotto di regolazione sui sistemi
meccanici, la fastidiosa raspatura può
essere eliminata mediante la taratura del
cambio del deragliatore posteriore con
micro regolazioni.
Premere e tenere premuto il pulsante funzione
del cambio (1a) mentre si preme la paletta
cambio verso l’interno (1b). Il cambio sinistro
regola il deragliatore verso l’interno e il cambio
destro regola il deragliatore verso l’esterno.
Potrebbe sembrare che il deragliatore
posteriore non si muova. Osservare il
lampeggiamento del LED per confermare
che il deragliatore abbia eseguito il
comando.
+
1
a
De forma semelhante a um ajustador de
tambor em sistemas mecânicos, sons
de raspagem indesejáveis podem ser
eliminados pela afinação fina do comando
de mudanças do câmbio (desviador/
derailleur) traseiro com micro-ajustes.
Prima e segure o botão de função do
comando das mudanças (1a) enquanto carrega
no manípulo achatado das mudanças para
“dentro” (1b). O manípulo das mudanças
esquerdo irá ajustar odesviador/derailleur
para “dentro”, e o manípulo das mudanças da
direita irá ajustar o derailleur para “fora”.
O desviador/derailleur traseiro poderá
parecer que não se move. Observe
que oLED pisque para confirmar que
odesviador/derailleur executou o comando.
メカニカル・システムのバレル調節器と同様、
リア・ディレイラーのシフティングにマイクロ調
節 を行 うファイン・チューニングによって、不 要な
きしみ音 を取り除くことができます。
シフターの機能ボタンを押して保持し (1a)
、同時にシフト・パドルを内側に抑えま
す (1b)。左のシフターはディレイラーをイ
ンボードに調節し、右のシフターはディレ
イラーをアウトボードに調節します。
リ ア ・ デ ィ レ イ ラ ー は 、動 き を 見 せ な い 場 合 が あ
ります。LED が 点 滅 す る の を 見 て 、デ ィ レ イ ラ ー
に調節が行われたことを確認します。
Al igual que en los sistemas mecánicos ode
ajuste por tambor, es posible eliminar los
chirridos indeseados realizando un reglaje
del cambio trasero con microajustes.
Mantenga presionado el botón de función
del cambio (1a) a la vez que presiona hacia
dentro la palanca de cambio (1b). La palanca
de cambio izquierda desplaza el desviador
hacia dentro y la derecha hacia fuera.
Puede que el desviador trasero
aparentemente no se mueva. Espere hasta
que parpadee el LED, lo que confirmará que
el desviador ha ejecutado la orden enviada.
Press & hold, shift Press & hold, shift Press & hold, shift
+
Press & hold, shift Press & hold, shift Press & hold, shift
Press & hold, shift Press & hold, shift Press & hold, shift
Net zoals bij een cilinderafsteller op
mechanische systemen kunnen ongewenste
schuurgeluiden worden geëlimineerd door
het schakelen van de achterderailleur met
behulp van micro-aanpassingen fijn af te
stellen.
Druk en houd de functieknop van de shifter
vast (1a) terwijl u de schakelhendel naar
binnen duwt (1b). De linker shifter brengt de
derailleur naar binnen en de rechter shifter
brengt de derailleur naar buiten.
De achterderailleur mag niet bewegen.
Controleer of de LED knippert als
bevestiging dat de derailleur het
commando heeft uitgevoerd.
类似于机械系统中的圆筒调节器,可通过对
后变速器上的微调装置进行微调来消除不协
调的刺耳声。
按住指拨功能按钮 (1a),同时向内按压变速
拨片 (1b)。左边的拨片将向内调节变速器,
右边的拨片则向外调节变速器。
后变速器可能不会移动。等待 LED 闪烁,确认
变速器执行了命令。
Measure Mesurer Medir
Messen Misurare
Medir Meten
計測
测量
41
Page 42

Eagle® AXS™ Controller
DRAFT
Installation
AAXS Controller Installation DInstallazione del comando del
BController Installation EDe shifter installeren
Controller Discrete Clamp CController Discrete Clamp FController Discrete Clamp
AController Discrete Clamp DController Discrete Clamp
BController Discrete Clamp EController Discrete Clamp
CInstallation du levier de dérailleur FInstalação do Manípulo de
Comando das Mudanças
Gシフター の取り付け
cambio
H指拨安装
GController Discrete Clamp
HController Discrete Clamp
2.5
1
2
4 3
3 N·m
T25
7
(27 in-lb)
2.5
2 N·m
(18 in-lb)
6
5
Friction Paste Pâte de montage Pasta de fricção
Montagepaste Pasta ad attrito
Pasta de fricción Frictiepasta
Adjust Régler Ajustar
Einstellen Regolare
Ajustar Afstellen
フ リク シ ョン・ ペ ー スト
摩擦膏
調節
调节
Install Installer Instalar
Einbauen Installare
Instalar Monteren
取り付 け
安装
8
2 N·m
T25
9
Torque Serrage Momento de torção
Drehmoment Coppia
Par de apriete Aandraaimoment
(18 in-lb)
締め付け
扭紧
42
Page 43

MMX™ Clamp CMMX Clamp FMMX Clamp
DRAFT
AMMX Clamp DMMX Clamp
BMMX Clamp EMMX Clamp
GMMX Clamp
HMMX Clamp
2
1
5.5 N·m
T25
4
2.5
3
4
(49 in-lb)
5
3 N·m
T25
8
(27 in-lb)
2.5
2 N·m
(18 in-lb)
9
10
T25
7
6
3 N·m
(27 in-lb)
Friction Paste Pâte de montage Pasta de fricção
Montagepaste Pasta ad attrito
Pasta de fricción Frictiepasta
Adjust Régler Ajustar
Einstellen Regolare
Ajustar Afstellen
フ リク シ ョン・ ペ ー スト
摩擦膏
調節
调节
Install Installer Instalar
Einbauen Installare
Instalar Monteren
取り付 け
安装
Torque Serrage Momento de torção
Drehmoment Coppia
Par de apriete Aandraaimoment
締め付け
扭紧
43
Page 44

Battery Overview CPrésentation des batteries FVista Geral da Bateria
DRAFT
AÜbersicht über die Batterie DPanoramica della batteria
BDescripción de la batería EOverzicht van de accu
G電池の概要
H电池简介
Battery Charge LED Indicator CDEL indiquant le niveau de charge
de la batterie
ABatteriezustandsanzeige-LED DLED indicatore di carica della
batteria
BLED indicador de carga de la pila ELED-controlelampje voor
batterijniveau
The LED illuminates when a shift is
performed. The color of the LED indicates
the ride time remaining. Consult the SRAM®
Battery and Charger user manual for
charging instructions.
Die LED leuchtet auf, wenn ein
Schaltvorgang durchgeführt wird. Die Farbe
der LED gibt die verbleibende Fahrzeit an.
Hinweise zum Laden der Batterie finden Sie
in der SRAM Bedienungsanleitung für das
Ladegerät und die Batterie.
El LED se enciende cada vez que se
realiza un cambio de marcha. El color del
LED indica el tiempo de marcha restante.
Consulte las instrucciones de carga en el
manual del Cargador y la Batería SRAM.
La DEL s’allume à chaque fois que vous
passez une vitesse. La couleur de la DEL
indique la durée d’autonomie restante. Pour
obtenir des informations sur la recharge des
batteries, consultez le manuel SRAM sur les
batteries et chargeurs.
Il LED si illumina durante un cambio. Il colore
del LED indica il tempo di guida rimanente.
Consultare il manuale della batteria e del
caricabatteria SRAM per istruzioni per la
ricarica.
De LED brandt wanneer wordt geschakeld.
De kleur van de LED geeft de resterende
fietstijd aan. Raadpleeg de handleiding
van de SRAM accu en lader voor de juiste
laadinstructies.
FLED indicador de carga da bateria
G電池充電 LED インジケーター
H电池充电指示 LED
O LED acende quando se mete uma
mudança. A cor do LED indica o tempo de
ciclismo que lhe resta. Consulte o manual
da Bateria e do Carregador da SRAM para
obter instruções de carga.
シフト を行 うと LED が点灯します。LED の色は、
残りの乗車可能時間を示しています。充電に関
する説明は、SRAM の電池および充電器マニュ
アルを参照してください。
变速时,LED 会亮起。LED 的颜色表示剩余的
骑行时间。参阅 SRAM 电池和充电器手册了
解充电说明。
6-24 months 15 à 60 heures 15-60 horas
15-60 Stunden 15-60 ore
15-60 horas 15-60 uur
1-6 months 6 à 15 heures 6-15 horas
6-15 Stunden 6-15 ore
6-15 horas 6-15 uur
<1 month <6 heures <6 horas
<6 Stunden <6 ore
<6 horas <6 uur
5-20 hours 5 à 20 heures 5-20 horas
5-20 Stunden 5-20 ore
5-20 horas 5-20 uur
1.5-5 hours 1,5 à 5 heures 1,5-5 horas
1,5-5 Stunden 1,5-5 ore
1,5-5 horas 1,5-5 uur
15-60 時間
15-60 小时
6-15 時間
6-15 小时
<6 時間
<6 小时
5-20 時間
5-20 小时
1.5-5 時間
1.5-5 小时
< 1.5 hours < 1,5 heures < 1,5 horas
< 1,5 Stunden < 1,5 ore
< 1,5 horas < 1,5 uur
< 1.5 時間
<1.5 小时
44
Page 45

Controller Battery Replacement CController Battery Replacement FController Battery Replacement
DRAFT
AController Battery Replacement DController Battery Replacement
BController Battery Replacement EController Battery Replacement
GController Battery Replacement
HController Battery Replacement
Consult the battery manufacturer for safe
handling instructions.
Keep the battery out of reach of children.
Do not put the battery in your mouth.
If ingested, seek medical attention
immediately.
Do not use sharp objects to remove
batteries.
Wenden Sie sich bezüglich Informationen
zur sicheren Handhabung von Batterien an
den Batteriehersteller.
Bewahren Sie die Batterie außerhalb der
Reichweite von Kindern auf. Nehmen Sie
die Batterie nicht in den Mund. Falls Sie die
Batterie verschlucken, suchen Sie sofort
einen Arzt auf.
Verwenden Sie keine spitzen Gegenstände,
um die Batterien herauszuhebeln.
Consulte las instrucciones de seguridad
en el manejo de la batería indicadas por
su fabricante.
Mantenga la batería fuera del alcance de
los niños. No se introduzca la batería en
la boca. En caso de ingestión, consiga
atención médica de inmediato.
No utilice objetos punzantes para sacar
la pila.
⚠WARNING
Pour une utilisation en toute sécurité,
consultez les instructions du fabricant
de la pile.
Maintenez la pile hors de la portée des
enfants. Ne mettez pas la pile dans votre
bouche. En cas d’ingestion, consultez
immédiatement un médecin.
N’utilisez pas d’objet pointu pour retirer
les piles.
⚠WARNUNG
Consultare il produttore della batteria per
istruzioni per una manipolazione sicura.
Tenere la batteria al di fuori della portata
dei bambini. Non mettere in bocca la
batteria. In caso di ingestione consultare
immediatamente un medico.
Non utilizzare alcun oggetto appuntito per
rimuovere le batterie.
⚠ATENCIÓN
Neem contact op met de fabrikant van de
batterij hoe deze op een veilige manier te
gebruiken.
Houd de batterij uit de buurt van kinderen.
Steek de batterij niet in uw mond. Indien
ingeslikt, raadpleeg onmiddellijk een arts.
Gebruik geen scherpe voorwerpen om de
batterij te verwijderen.
⚠AVERTISSEMENT
⚠AVVERTENZA
⚠WAARSCHUWING
Consulte o fabricante da pilha para obter
⚠AVISO
instruções de manejo seguro.
Mantenha a pilha fora do alcance das
crianças. Não meta a pilha na sua boca.
Se a ingerir, busque imediatamente
cuidados médicos.
Não use quaisquer objectos aguçados
para retirar as pilhas.
⚠警告
安全な取り扱い方法について、電池メーカー
にお 問い 合わ せください 。
電池は子供の手の届かない場所に保管してく
ださい。電池は口の中に入れないでください。
電池を飲み込んだ場合は、直ちに医師の指導を
仰 いでくだ さい 。
電池を取り外す際は、尖った物を使用しない
でくだ さい 。
⚠警告
参阅电池厂商说明书了解安全操作说明。
将电池放在儿童拿不到的地方。请勿将电池放
入口中。如不慎吞咽,请立即就医。
请勿使用尖锐物体卸除电池。
45
Page 46

1
DRAFT
Use a coin to remove the
battery cover.
Remove the battery.
NOTICE
To prevent moisture
damage do not remove the
battery cover o-ring seal.
Use a coin to remove the
battery cover.
Remove the battery.
NOTICE
To prevent moisture
damage do not remove the
battery cover o-ring seal.
Use a coin to remove the
battery cover.
Remove the battery.
NOTICE
To prevent moisture
damage do not remove the
battery cover o-ring seal.
Use a coin to remove the
battery cover.
Remove the battery.
NOTICE
To prevent moisture
2
Insert a new CR2032
coin cell battery into the
controller, negative terminal
side first.
Reinstall the battery cover.
Use a coin to turn the cover
clockwise to align the dots
and lock it into place.
Insert a new CR2032
coin cell battery into the
controller, negative terminal
side first.
Reinstall the battery cover.
Use a coin to turn the cover
clockwise to align the dots
and lock it into place.
damage do not remove the
battery cover o-ring seal.
Use a coin to remove the
battery cover.
Remove the battery.
NOTICE
To prevent moisture
damage do not remove the
battery cover o-ring seal.
Insert a new CR2032
coin cell battery into the
controller, negative terminal
side first.
Reinstall the battery cover.
Use a coin to turn the cover
clockwise to align the dots
and lock it into place.
Use a coin to remove the
battery cover.
Remove the battery.
NOTICE
To prevent moisture
damage do not remove the
battery cover o-ring seal.
Use a coin to remove the
battery cover.
Remove the battery.
NOTICE
To prevent moisture
damage do not remove the
battery cover o-ring seal.
Use a coin to remove the
battery cover.
Remove the battery.
NOTICE
To prevent moisture
damage do not remove the
battery cover o-ring seal.
Use a coin to remove the
battery cover.
Remove the battery.
NOTICE
To prevent moisture
damage do not remove the
battery cover o-ring seal.
3
Insert a new CR2032
coin cell battery into the
controller, negative terminal
side first.
Reinstall the battery cover.
Use a coin to turn the cover
clockwise to align the dots
and lock it into place.
Insert a new CR2032
coin cell battery into the
controller, negative terminal
side first.
Reinstall the battery cover.
Use a coin to turn the cover
clockwise to align the dots
and lock it into place.
Insert a new CR2032
coin cell battery into the
controller, negative terminal
side first.
Reinstall the battery cover.
Use a coin to turn the cover
clockwise to align the dots
and lock it into place.
Insert a new CR2032
coin cell battery into the
controller, negative terminal
side first.
Reinstall the battery cover.
Use a coin to turn the cover
clockwise to align the dots
and lock it into place.
Insert a new CR2032
coin cell battery into the
controller, negative terminal
side first.
Reinstall the battery cover.
Use a coin to turn the cover
clockwise to align the dots
and lock it into place.
Insert a new CR2032
coin cell battery into the
controller, negative terminal
side first.
Reinstall the battery cover.
Use a coin to turn the cover
clockwise to align the dots
and lock it into place.
4
Adjust Régler Ajustar
Einstellen Regolare
Ajustar Afstellen
調節
调节
Remove/Loosen Retirer/Desserrer Retirar/Desapertar
Entfernen/Lösen Rimuovere/Allentare
Quitar/Aflojar Verwijderen/Losmaken
取り外し/ 緩める
拆卸/旋松
Install Installer Instalar
Einbauen Installare
Instalar Monteren
取り付 け
安装
46
Page 47

Maintenance CEntretien FManutenção
DRAFT
AWartung DManutenzione
BMantenimiento EOnderhoud
Gメンテナンス
H保养
We recommend that you periodically clean
your electrical components. Use a damp
cloth to wipe off any dirt and debris. Clean
the components with soap and water only.
Rinse thoroughly with water and allow the
parts to dry, then lubricate the chain.
Remove the SRAM® derailleur batteries and
install the derailleur battery blocks before
cleaning.
Do not clean the components with a
power washer. Do not use acidic or
grease-dissolving agents on your electrical
components. Do not soak or store your
electrical components in any cleaning
product or liquid. Chemical cleaners and
solvents can damange plastic components.
Wir empfehlen, die electrical-Komponenten
regel-mäßig zu reinigen. Wischen Sie
mit einem feuchten Tuch Schmutz und
Ablagerungen ab. Reinigen Sie die
Komponenten nur mit Seife und Wasser.
Spülen Sie die Teile sorgfältig mit Wasser ab
und lassen Sie sie trocknen, bevor Sie die
Kette schmieren.
Entfernen Sie vor der Reinigung die
Batterien des SRAM-Schaltwerks/Umwerfers
und setzen Sie Batterietrenner in das
Schaltwerk/den Umwerfer ein.
Reinigen Sie die Komponenten nicht mit
einem Hochdruckreiniger. Verwenden
Sie an electrical-Komponenten keine
säurehaltigen oder fettlösenden
Mittel. Die electrical-Komponenten
dürfen nicht in Reinigungsmitteln
oder Flüssigkeiten eingetaucht oder
darin gelagert werden. Chemische
Reinigungsmittel und Lösungsmittel können
NOTICE
HINWEIS
Nous vous recommandons de nettoyer
régulièrement vos composants electrical.
À l’aide d’un chiffon humide, essuyez toute
trace de saleté ou de poussière. Nettoyez
les composants à l’eau savonneuse
uniquement. Rincez à grande eau et laissez
sécher les pièces ; puis lubrifiez la chaîne.
AVIS
Retirez les batteries des dérailleurs SRAM
puis installez les blocs de batterie des
dérailleurs avant tout nettoyage.
Ne nettoyez jamais les composants avec
un jet à haute pression. N’utilisez jamais de
produits acides ou de produits dissolvant
la graisse pour nettoyer vos composants
electrical. Ne faites trempez et n’entreposez
jamais vos composants electrical dans
un produit ou liquide nettoyant. Les
produits chimiques et les solvants peuvent
endommager les composants en plastique.
Si consiglia di pulire periodicamente i
componenti electrical. Utilizzare un panno
umido per rimuovere la sporcizia e i detriti.
Lavare i componenti esclusivamente con
acqua e sapone. Sciacquare a fondo con
acqua e lasciare asciugare le parti, quindi
lubrificare la catena.
AVVISO
Rimuovere le batterie SRAM e del
deragliatore e installare i blocchi batteria del
deragliatore prima di effettuare la pulizia.
Non pulire i componenti con un’idropulitrice.
Non utilizzare agenti acidi o in grado di
sciogliere il grasso sui componenti electrical.
Non immergere né conservare i componenti
electrical in alcun prodotto detergente o
liquido. L’uso di detergenti chimici esolventi
può danneggiare i componenti in plastica.
Recomendamos que periodicamente limpe
os componentes do seu electrical. Use um
pano húmido para limpar qualquer sujidade
ou detritos. Limpe os componentes apenas
com sabão e água. Enxagúe completamente
com água e deixe que
as peças sequem, e depois lubrifique a
corrente.
NOTIFICAÇÃO
Retire as baterias SRAM do câmbio
(desviador/derailleur) einstale os blocos das
baterias do derailleur antes de limpar.
Não limpe os componentes com uma
máquina de lavagem por jacto sob pressão.
Não use nos seus componentes electrical
produtos ácidos nem os que dissolvam
a massa lubrificante. Não deixe embeber
nem guarde os seus componentes
electrical dentro de nenhum produto de
limpeza ou líquido. Os produtos de limpeza
químicos e os solventes podem danificar os
componentes de plástico.
electrical コンポーネントは定期的に清掃する
ことを推 奨して います。湿った 布を使 用して、汚
れやゴミを拭き取ってください。コンポーネント
の清掃には、石鹸と水のみを使用してください。
水 で よ く す す ぎ 、パ ー ツ を 乾 か し ま す 。そ の 後 、チ
ェ ー ン に 注 油 し ま す 。
注意事項
清掃前には、SRAM ディレイラ ーの 電 池 を 取
り外し、ディレイラー電 池ブロックを取り付け
てくだ さい 。
コンポーネントを高圧洗
浄機で清掃しないでくだ
さい。electrical コンポーネントには、
酸性剤またはグリス溶解剤を使用しな
いでくだ さい 。electrical コンポーネン
トを、洗浄剤や洗浄液の中に浸し
たり、保存したりしないでください。
化学洗剤や溶剤はプラスチック・
コンポーネントを損傷する可能性があります。
Le recomendamos que limpie
periódicamente sus componentes electrical.
Utilice un paño húmedo para limpiar
cualquier suciedad o residuo. Para limpiar
los componentes utilice sólo agua y jabón.
Rocíe generosamente todas las piezas
con agua, déjelas secar, y una vez secas,
engrase la cadena.
AVISO
Antes de limpiarlos, saque las baterías del
desviador SRAM y coloque los bloques de
batería del desviador.
No utilice máquinas de limpieza a presión para
limpiar los componentes. No utilice agentes
disolventes de grasa o ácidos sobre sus
componentes electrical. No guarde o sumerja
sus componentes electrical en ningún líquido
o producto de limpieza. Los limpiadores
y disolventes químicos pueden dañar los
componentes de plástico.
We raden u aan om uw electrical
componenten regelmatig te reinigen. Veeg
eventueel vuil weg met een vochtige doek.
Reinig de componenten alleen met water
en zeep. Spoel grondig met water af, laat de
onderdelen drogen en smeer vervolgens de
ketting.
MEDEDELING
Verwijder de BlipBox en derailleuraccu’s
en installeer de derailleuraccukappen voor
reiniging.
Reinig de componenten niet met
een hogedrukreiniger. Gebruik geen
vetoplossende of zuurreinigers op
uw electrical componenten. Week of
bewaar uw electrical componenten niet
in een reinigingsmiddel. Chemische
reinigingsmiddelen en oplosmiddelen
kunnen de kunststof componenten
beschadigen.
我们建议您定期清洁您的 electrical 组 件 。用
湿抹布擦净污垢和碎屑。请仅使用肥皂和水
清洗组件。用水彻底冲洗,等待部件晾干,然
后润滑链条。
注意
清洁前请卸下 SRAM 变速器电池,并安装变
速器电池堵块。
请勿使用动力清洗器清洗组件。请勿在
electrical 组件上使用酸性或油脂溶剂。请勿
将您的 electrical 组件浸泡或储存在任何清
洁产品或液体中。化学清洁剂和溶剂可能损
坏塑料组件。
47
Page 48

Check the battery level of each component
DRAFT
NOTICE
before and after each use.
Avoid using or storing your components in
excessive heat or cold.
Remove the SRAM batteries from the
derailleur and install the derailleur battery
blocks when the bicycle is being transported
or not in use for long periods of time.
Failure to remove the battery could result
in unintentional actuation and/or battery
depletion.
Install the battery cover on the battery when
the battery is not in use. Failure to cover the
battery terminals could result in damage to
the battery.
Vérifiez le niveau de charge de la batterie
de vos composants eTap
chaque utilisation.
Évitez d’exposer ou d’entreposer vos
composants eTap
excessives.
Retirez les batteries des dérailleurs puis
installez les blocs de batterie des dérailleurs
lorsque vous transportez votre vélo ou
pendant les longues périodes d’inutilisation.
Le fait de ne pas retirer les batteries pourrait
les décharger complètement.
Installez le couvercle sur la batterie lorsque
celle-ci n’est pas utilisée. Le fait de ne
pas couvrir les bornes de la batterie peut
endommager la batterie.
AVIS
avant et après
à des températures
Verifique o nível da bateria para cada
componente eTap
uso.
Evite usar ou armazenar os seus
componentes eTap
excessivo.
Retire as baterias do desviador/derailleur e
instale os blocos das batarias do derailleur
quando abicicleta esteja a ser transportada
ou não esteja em uso por períodos de
tempo longos. Não retirar a bateria pode
resultar no esgotamento da bateria.
Instale a tampa da bateria na bateria,
quando abateria não estiver a ser usada.
Não cobrir os terminais da bateria poderá
resultar em danos àbateria.
NOTIFICAÇÃO
antes e depois de cada
em calor ou frio
Überprüfen Sie vor und nach jedem
Gebrauch den Batterieladezustand jeder
eTap
-Komponente.
Vermeiden Sie es, Ihre eTap
bei übermäßiger Hitze oder Kälte zu
verwenden oder zu lagern.
Entfernen Sie die Batterien und
bringen Sie die Batterietrenner und die
Batterieabdeckungen für das Schaltwerk
und den Umwerfer an, wenn Sie das Fahrrad
transportieren oder längere Zeit nicht
verwenden. Wenn Sie die Batterien nicht
entfernen, können sie sich entladen.
Bringen Sie die Batterieabdeckung an, wenn
die Batterie nicht verwendet wird. Wenn die
Batteriekontakte nicht abgedeckt werden,
kann die Batterie beschädigt werden.
Antes y después de cada uso, compruebe el
nivel de batería de cada componente eTap
Procure no utilizar ni guardar sus
componentes eTap
excesivamente cálidos o fríos.
Siempre que vaya a transportar la bicicleta
o vaya a estar sin utilizarla durante bastante
tiempo, saque las baterías del desviador e
instale los bloques de batería. Si no saca la
batería, podría descargarse completamente.
Cuando la batería no se esté utilizando,
póngale la tapa. Si deja los terminales de la
batería sin tapar, podría dañarse la batería.
HINWEIS
AVISO
en lugares
-Komponenten
Controllare il livello di carica della batteria
di ciascun componente eTap
ogni uso.
Evitare di utilizzare o conservare i
componenti eTap
eccessivamente caldo ofreddo.
Rimuovere le batterie del deragliatore e
installare i blocchi batteria del deragliatore
quando la bicicletta viene trasportata o non
è in uso per lunghi periodi di tempo. La
mancata rimozione della batteria potrebbe
causare il deterioramento della batteria.
Installare il coperchio della batteria sulla
batteria quando la batteria non è in uso.
La mancata copertura dei morsetti della
batteria potrebbe causare danni alla
batteria.
Controleer het accu-/batterijniveau van elk
eTap
.
component voor en na elk gebruik.
Gebruik of berg uw eTap
op in een omgeving met een overmatige
warmte of koude.
Verwijder de derailleuraccu’s en installeer
de derailleuraccublokken wanneer de fiets
wordt getransporteerd of gedurende een
lange periode niet gebruikt zal worden. Het
niet verwijderen van de accu kan de accu
onnodig ontladen.
Breng het accudeksel op de accu aan
wanneer
de accu niet wordt gebruikt. Het niet
afdekken
van de accuaansluitingen kan schade aan
de
accu veroorzaken.
AVVISO
in un ambiente
MEDEDELING
componenten niet
prima e dopo
各 eTa p コンポーネントの電池の充電レベル
注意事項
を、使用前と使用後に毎回確認してください。
過度に高温または低温の
環境における eTap コン
ポーネントの使用または保管は避けてくださ
い。
自転車を運搬するときや
長期間使用しないときは、
デ ィ レ イ ラ ー の 電 池 を 取 り 外 し 、デ
ィレイラ ー 電池 ブロック を取 り付 け
て く だ さ い 。電 池 を 取 り 外 さ な い と 、
電池が消耗してしまう可能性があります。
電池を使用していないときは、電池カバーを
取り付けてください。電池の端子面にカバー
を取り付けないと、電池を損傷する可能性が
あ り ま す 。
注意
每次使用前后请检查每个 eTa p 组件的电池
电量。
避免在过热或过冷的环境中使用或储存 eTap
组件。
在自行车运输过程中或长时间未使用的情况
下,请卸下变速器电池并安装变速器电池堵
块。未能卸下电池可能导致电池损耗。
电池不使用时,请确保安装电池防护罩。未能
覆盖电池接线端可能导致损坏电池。
48
Page 49

Replace your chain before 0.8% elongation
DRAFT
to limit wear and maintain performance to
the cassette and chain ring.
Replace your chain before 0.8% elongation
to limit wear and maintain performance to
the cassette and chain ring.
Replace your chain before 0.8% elongation
to limit wear and maintain performance to
the cassette and chain ring.
Replace your chain before 0.8% elongation
to limit wear and maintain performance to
the cassette and chain ring.
Replace your chain before 0.8% elongation
to limit wear and maintain performance to
the cassette and chain ring.
Replace your chain before 0.8% elongation
to limit wear and maintain performance to
the cassette and chain ring.
Replace your chain before 0.8% elongation
to limit wear and maintain performance to
the cassette and chain ring.
Replace your chain before 0.8% elongation
to limit wear and maintain performance to
the cassette and chain ring.
Replace your chain before 0.8% elongation
to limit wear and maintain performance to
the cassette and chain ring.
49
Page 50

Recycling CRecyclage FReciclagem
DRAFT
ARecycling DRiciclaggio
BReciclaje ERecycling
Gリサ イクリン グ
H骑行
For recycling and environmental
compliance, please visit
www.sram.com/company/environment.
Replace the derailleur battery with an
authentic SRAM replacement battery only.
Replace the AXS Controller battery with a
CR2032 coin cell battery only.
Consult the SRAM® Battery and Charger
manual for battery maintenance and
specifications.
Never dispose of batteries in a fire.
Hinweise zum Recycling und
Umweltschutz finden Sie auf
www.sram.com/company/environment.
Ersetzen Sie die Schaltwerk-/UmwerferBatterie nur durch eine Original-SRAMErsatzbatterie. Ersetzen Sie die SchalthebelBatterie nur durch eine CR2032-Knopfzelle.
Hinweise zur Wartung und die technischen
Daten der Batterie finden Sie in der SRAM
Bedienungsanleitung für die Batterie und
das Ladegerät.
Batterien dürfen keinesfalls verbrannt
werden.
⚠WARNING
⚠WARNUNG
Pour obtenir des informations
sur le recyclage et le respect de
l’environnement, veuillez consulter le site
www.sram.com/company/environment.
Remplacez la batterie du dérailleur par
une batterie de remplacement SRAM
authentique uniquement. Remplacez la pile
du levier de dérailleur par une pile bouton
CR2032 uniquement.
Pour obtenir des informations sur l’entretien
et les caractéristiques des batteries,
consultez le manuel SRAM sur les batteries
et chargeurs.
Ne jetez jamais les piles dans les flammes.
ai requisiti ambientali, visitare il sito
www.sram.com/company/environment.
Sostituire la batteria del deragliatore solo
con una batteria di ricambio originale
SRAM. Sostituire la batteria del cambio
esclusivamente con una batteria a bottone
CR2032.
Consultare il manuale della batteria e del
caricabatteria SRAM per istruzioni sulla
manutenzione della batteria e le specifiche.
Non gettare le batterie nel fuoco.
⚠AVERTISSEMENT
Per il riciclaggio e la conformità
⚠AVVERTENZA
Para reciclagem
e conformidade ambiental, visite
www.sram.com/company/environment.
Substitua a bateria do desviador/derailleur
apenas com baterias sobressalentes
autênticas SRAM. Substitua a pilha apenas
com uma pilha tipo moeda CR2032.
Consulte o manual da Bateria e do
Carregador da SRAM para obter instruções
de manutenção eespecificações.
⚠AVISO
Nunca descarte baterias/pilhas atirando-as
para um fogo.
リサイクリングと環境に関する順守事項
については、
environment
ディレイラーの交換用電池は、SRAM 純正交
換用電池のみです。シフターの交換用電池
は、CR2032 コイン型電池のみです。
電池のメンテナンスおよび仕様について
は、SRAM の電池および充電器マニュアルを
参 照してくだ さい 。
電池は火中に投じないでください。
www.sram.com/company/
を 参照 してくだ さい 。
⚠警告
Puede encontrar información
sobre reciclaje y cumplimiento de la
normativa medioambiental en la página
www.sram.com/company/environment.
Si necesita cambiar la batería del desviador,
utilice siempre baterías de recambio
originales de SRAM. Para el elemento de
cambio de marchas, utilice exclusivamente
baterías de botón de tipo CR2032.
En el manual de la batería y el cargador de SRAM
se detallan las especificaciones de la batería y sus
requisitos de mantenimiento.
⚠ATENCIÓN
No tire nunca una batería al fuego.
Voor meer informatie over recycling en
bescherming van het milieu, ga naar
www.sram.com/company/environment.
Vervang de derailleuraccu alleen door een
originele SRAM-accu. Vervang de batterij
in de shifter alleen door een CR2032
knoopcelbatterij.
Raadpleeg de handleiding van de
SRAM accu en lader voor de juiste
onderhoudsinstructies en specificaties.
⚠WAARSCHUWING
Gooi batterijen nooit in vuur.
有关回收利用和环保合规信息,请访问
www.sram.com/company/environment
请仅使用 SRAM 正版替换电池更换变速器电
池;仅用CR2032 硬币电池更换指拨电池。
参阅 SRAM 电池和充电器手册了解电池维护
说明和规格。
⚠警告
请勿将电池丢入火中。
。
50
Page 51

tmplt 12.1.2016
DRAFT
www.sram.com
ASIAN HEADQUARTERS
SRAM Taiwan
No. 1598-8 Chung Shan Road
Shen Kang Hsiang, Taichung City
Taiwan R.O.C.
WORLD HEADQUARTERS
SRAM LLC
1000 W. Fulton Market, 4th Floor
Chicago, Illinois 60607
USA
EUROPEAN HEADQUARTERS
SRAM Europe
Paasbosweg 14-16
3862ZS Nijkerk
The Netherlands
51
 Loading...