

Page 1
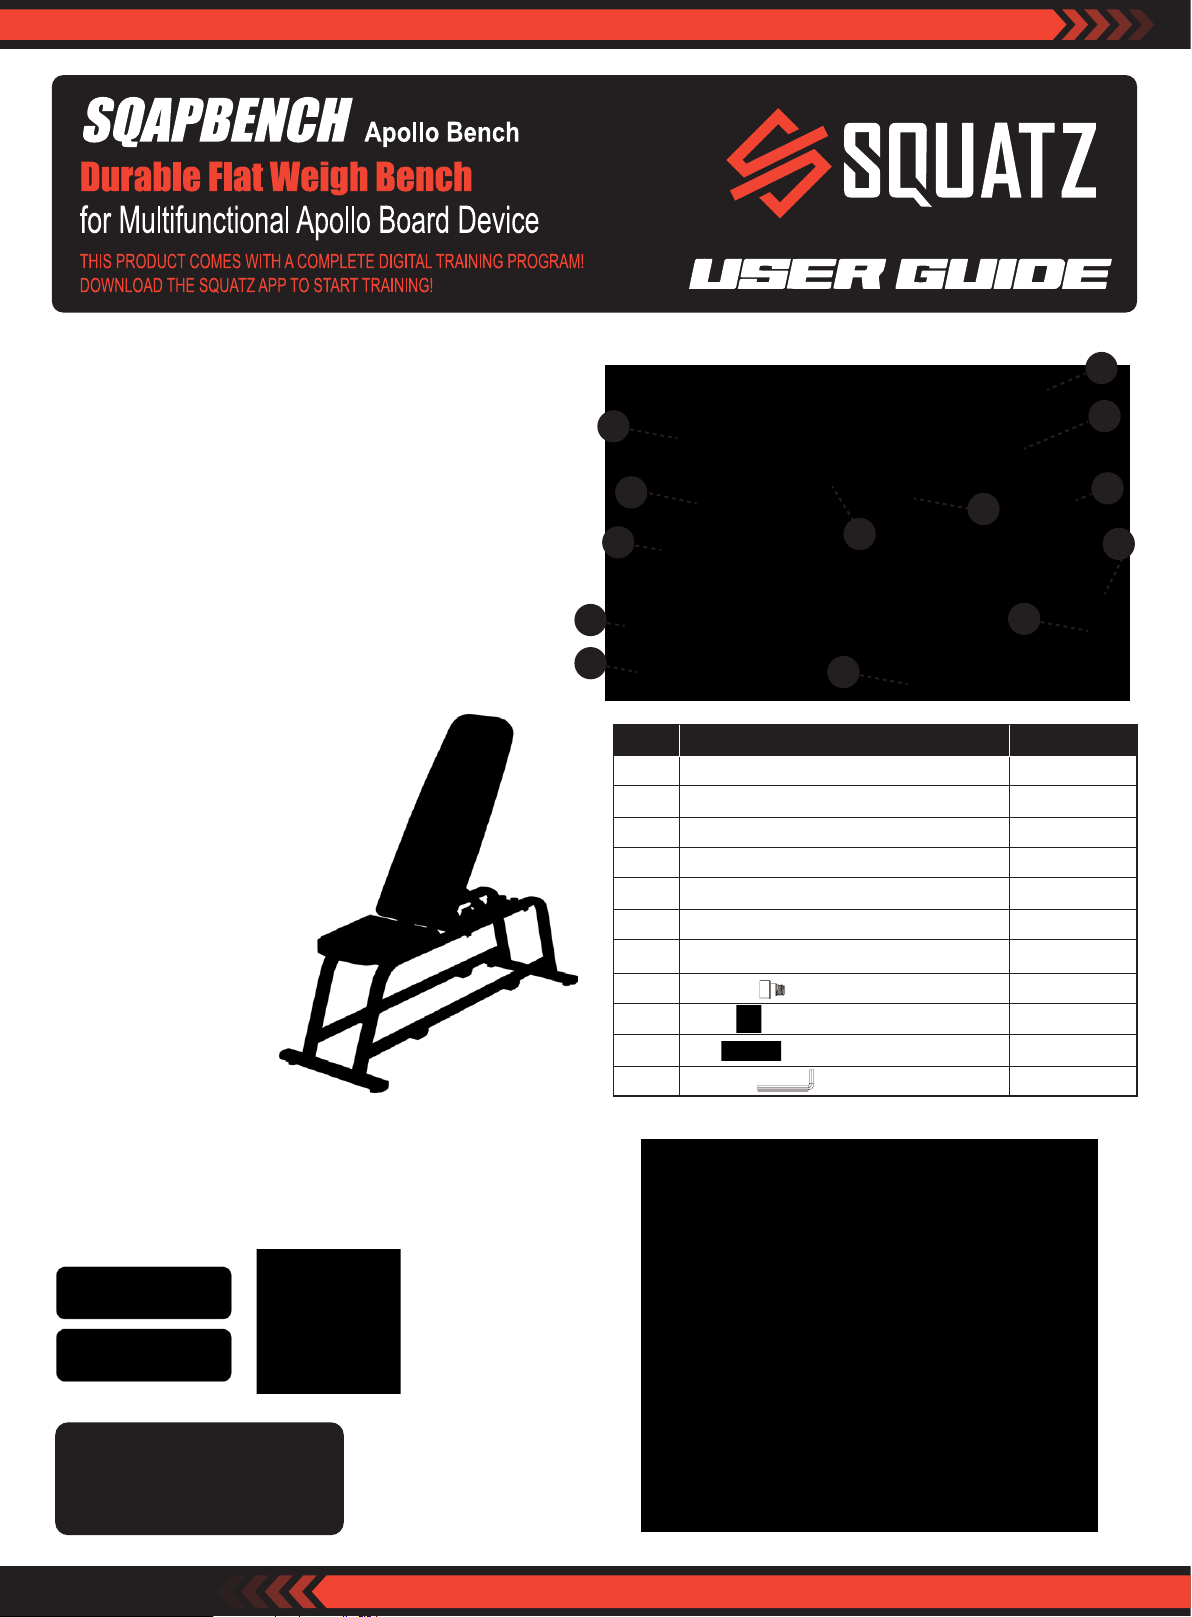
Features
• Endure High-Strength Stretching Exercises and Prevent Injury
• Wide Range of Applications
• Easy to use and Ergonomic Design
• Stable, Reliable and Not Wobble
• Non-Slip Foot Cap
• Heavy-Duty Steel Structure
• Extended & Thickened Cushion
• Great for Full Body Workout like Bench Press, Dumbbell Exercise, etc.
• Angle Adjustable from 94 to 180 Degrees with 5 Levels
• Some Assembly Needed
What's in the Box:
• (1) Cushion
• (1) Back Cushion
• (1) Limit Group
• (1) Left Pipe
• (1) Right Pipe
• (1) Front Foot Tube
• (1) Rear Foot Tube
• (2) Plug Screw M8 x 4.8
• (4) Round head M8 x 15 Screw
• (8) Round head M8 x 45 Screw
• (1) L6 Allen Wrench
Technical Specs:
• Construction Material: Steel, Leather, Foam
• Weight Capacity: Up to 550lbs.
• Product Dimensions (L x W x H): 50.67’’ x 16.38’’ x 16.97’’ -inches
Installation
Packing List
1
10
4
6
10
No.
1
2
3
4
5
6
7
8
9
10
11
Installation Diagram
8
11
Name
Cushion group
Back cushion group
Limit group
Left pipe group
Right pipe group
Front foot tube group
Rear foot tube group
Plug screw M8 * 4.8
Round head M8 * 15 screw
Round head M8 * 45 screw
L6 Allen wrench
2
3
5
9
7
10
Volume
1
1
1
1
1
1
1
2
4
8
1
Questions? Comments?
We are here to help!
www.squatz.com
Page 2
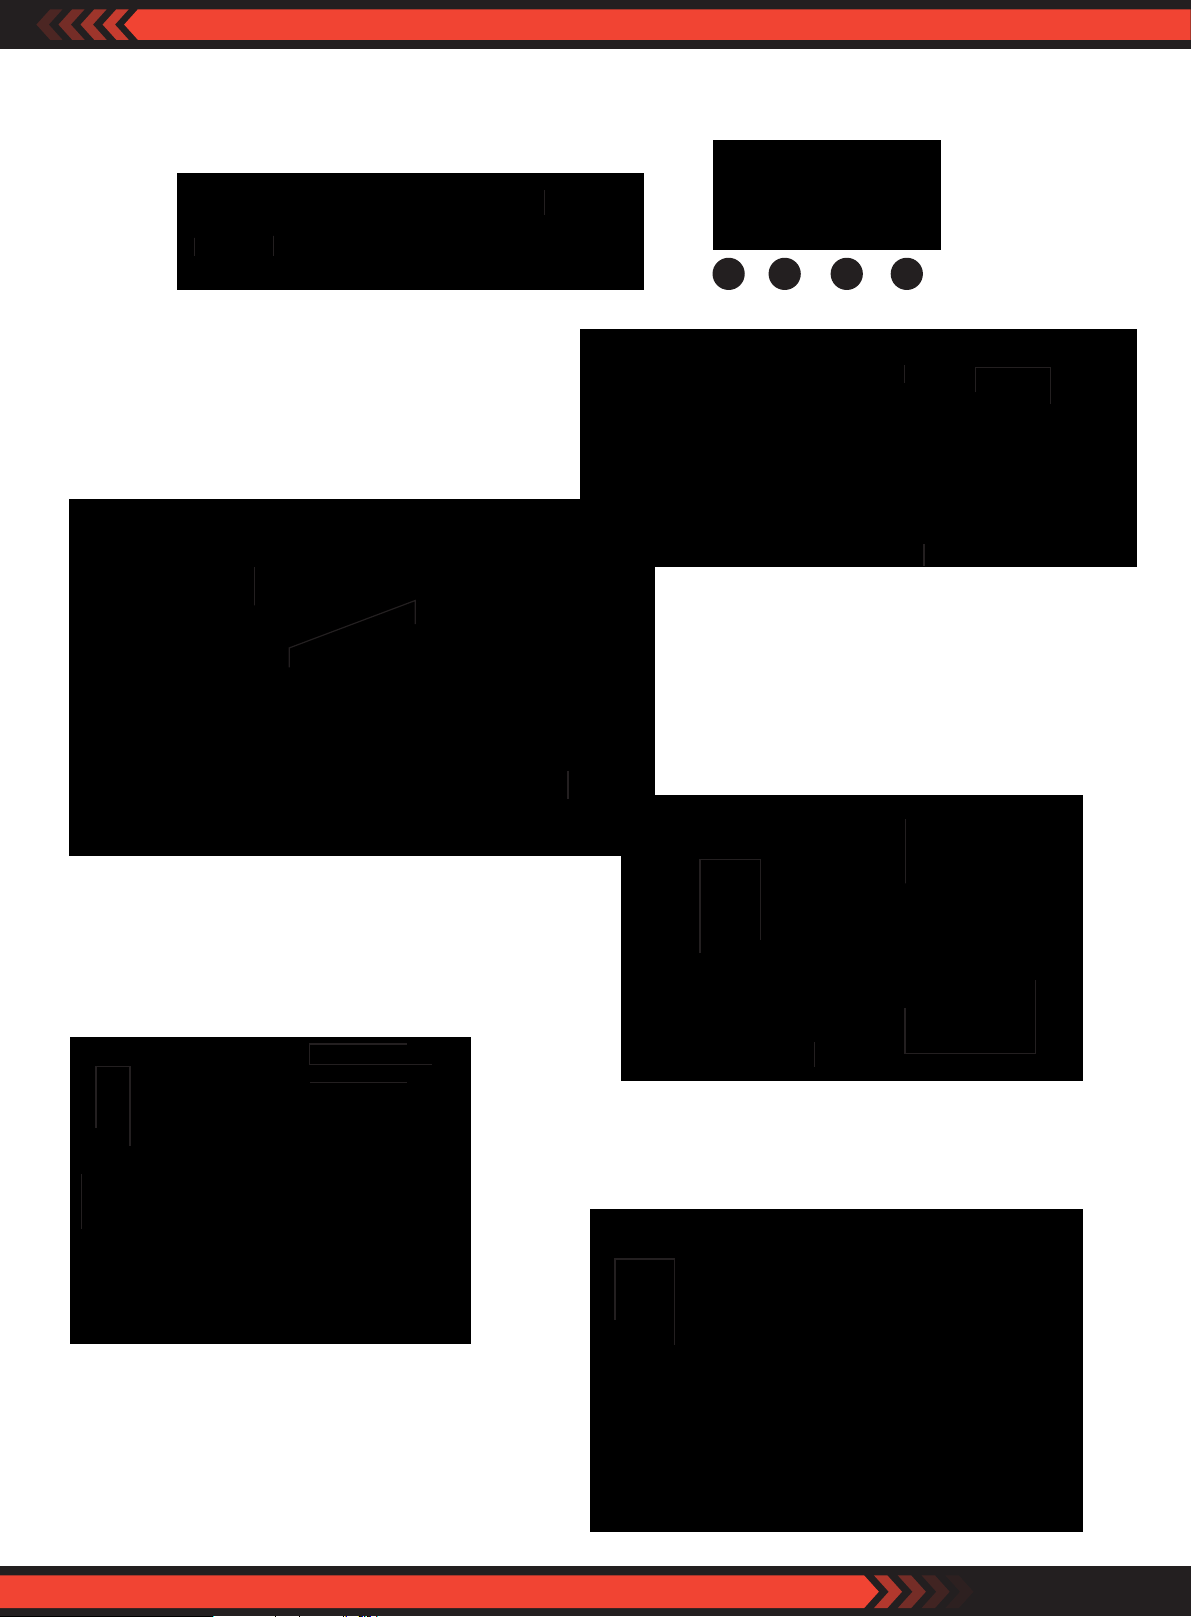
Installation Steps
1. Take out the cardboard box, place it on the oor. Put the cushion group 1 and the back the cushion group 2 shall be placed atly, and the parts package 8, 9, 10 screws and 11
wrenches shall be taken out.
1
Cardboard 2
2. Use two half round head screws 10 and a plug screw 8 to pass through the
xing plate of the right pipe group 5 respectively, and x the right pipe group 5
on the cushion group 1 and the back cushion group 2 (pay attention not to lock
the screws completely).
5
9
8 9 10 11
5
8
3. Use two round head screws 9 to pass through the xing plate of the
right pipe group 5 respectively, and x the limit group 3 on the right
pipe group 5 (note that the reverse tooth direction of the limit group 3
is consistent with the gure, and the screws shall not be locked
completely).
3
5
10
10
4. Use two round head screws 10, one plug screw 8 and two round head screws 9
to pass through the xing plate of the left pipe group 4 respectively, and x the
left pipe group 4 with the cushion group 1, back cushion group 2 and limit
group 3 (pay attention not to lock the screws completely)
10
10
7
5. Fix the front foot tube group 6 and the rear foot tube group 7 on the left and right tube groups 4
and 5 respectively with four round head screws 10 (pay attention not to lock the screws completely).
6
6. Lock the above mounting screws 8, 9, 10 in turn with a hexagonal wrench 11
to complete the installation. If the four feet are uneven, the adjustable foot pad
in the front foot tube group can be adjusted.
Adjustable Foot Pad
3
8
9
www.squatz.com
 Loading...