

Page 1
Page 2
Page 3
SP4200 Flash Studio Kit
Thank you for your purchase of the SP4200 Flash Softbox Studio Please read this manual carefully before use, and keep it handy
kit. This manual has been written to help you with the assembly, for use during break down of equipment. Please read and heed all
operating procedures and accessories. Square Perfect's SP4200 safety precautions listed in this manual. For ordering spare bulbs
Flash Kit is manufactured with the finest material available. Your or replacement parts, contact us at [email protected].
flash kit will provide many years of quality service with proper care Also check out our extended line of photo equipment now
and handling. available.
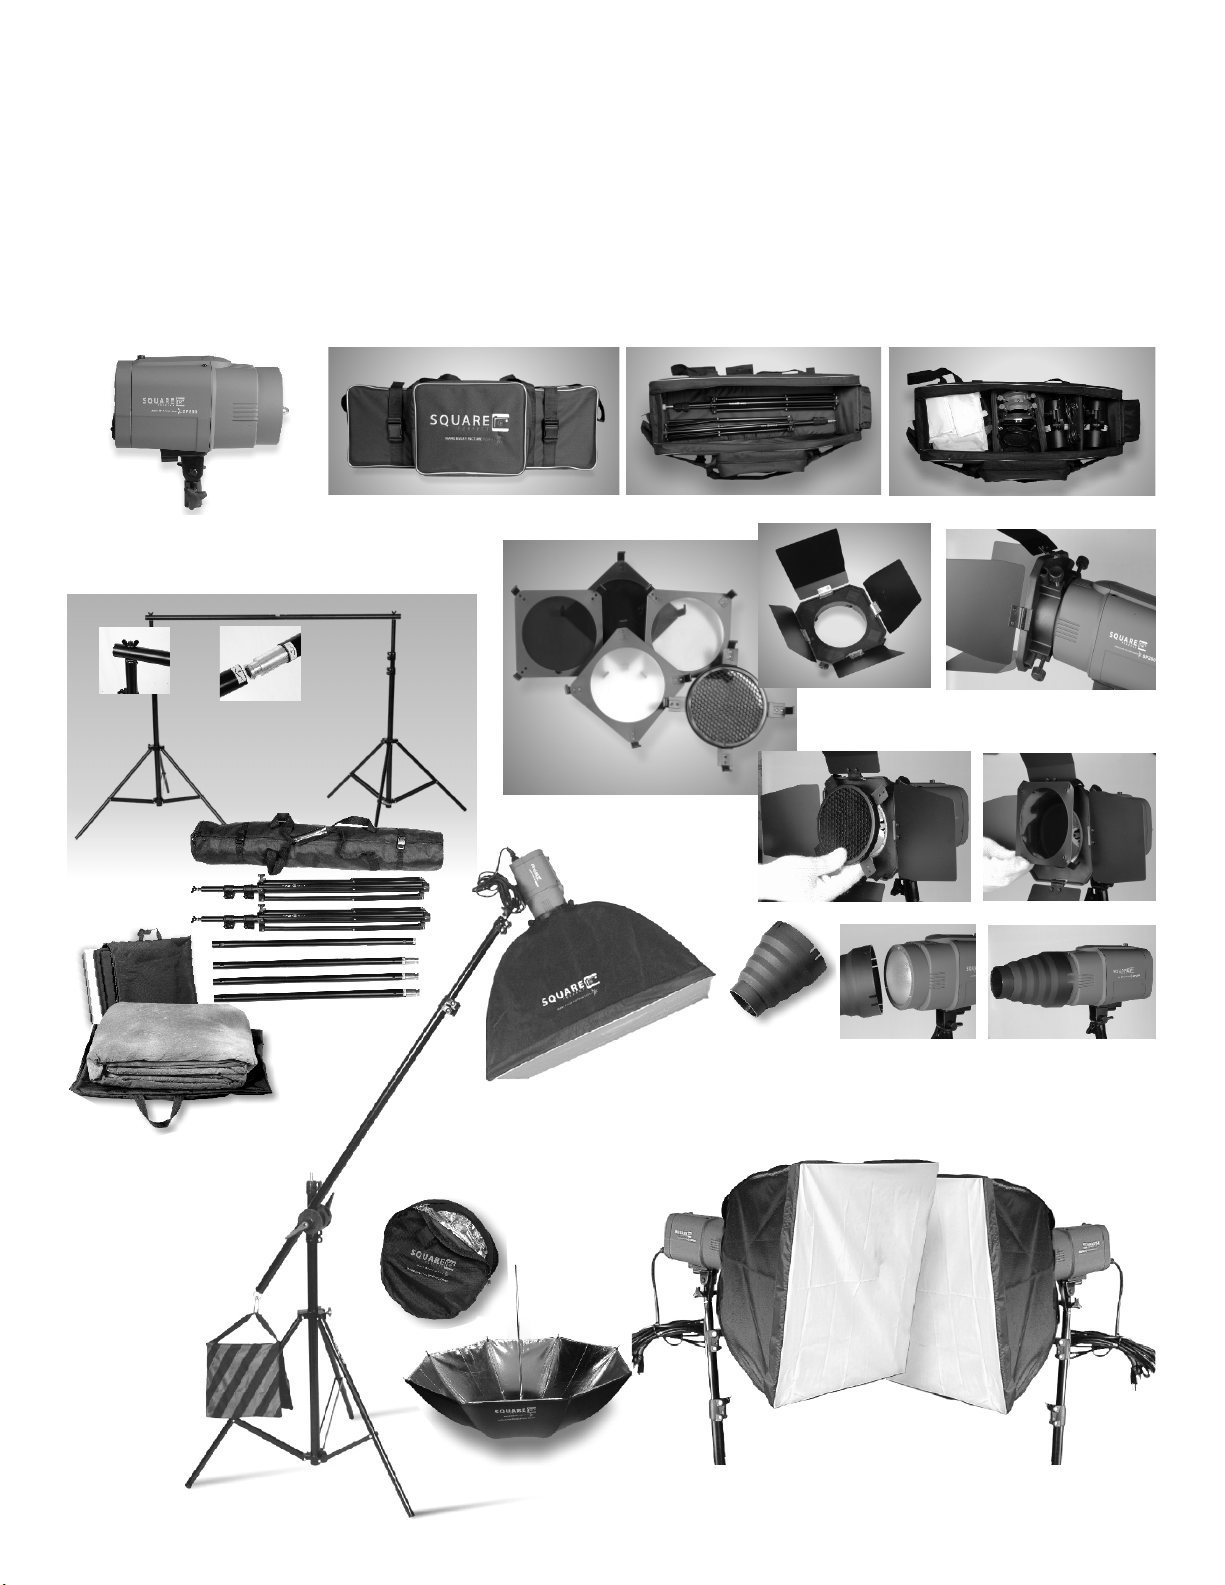
SP200 lamp body.
12' power cord.
Nylon Carry Case. Two layers, bottom for storing light stands, Adjustable compartments for easy storage of light units.
Complete backdrop stand
assembles in minutes. Bars
attattach and lock with a quarter
turn.
Four leaf barndoor.
Red, blue, yellow frosted and
honeycomb filter.
Snoot will direct light
to exact spot without
affecting surrounding area.
Varigated dye backdrop
Black backdrop
White backdrop
Adjustable boom with weight counter
balance bag.
Flat reflector for creative fill
techniques,
includes carry case
Umbrella - double
layered reflective
inside light proof
backing.
©2007 All rights reserved Square Perfect Photo.
SP8061 professional duty adjustable
light stand. Four panel softbox set with
lamp connector.
Page 4
Page 5
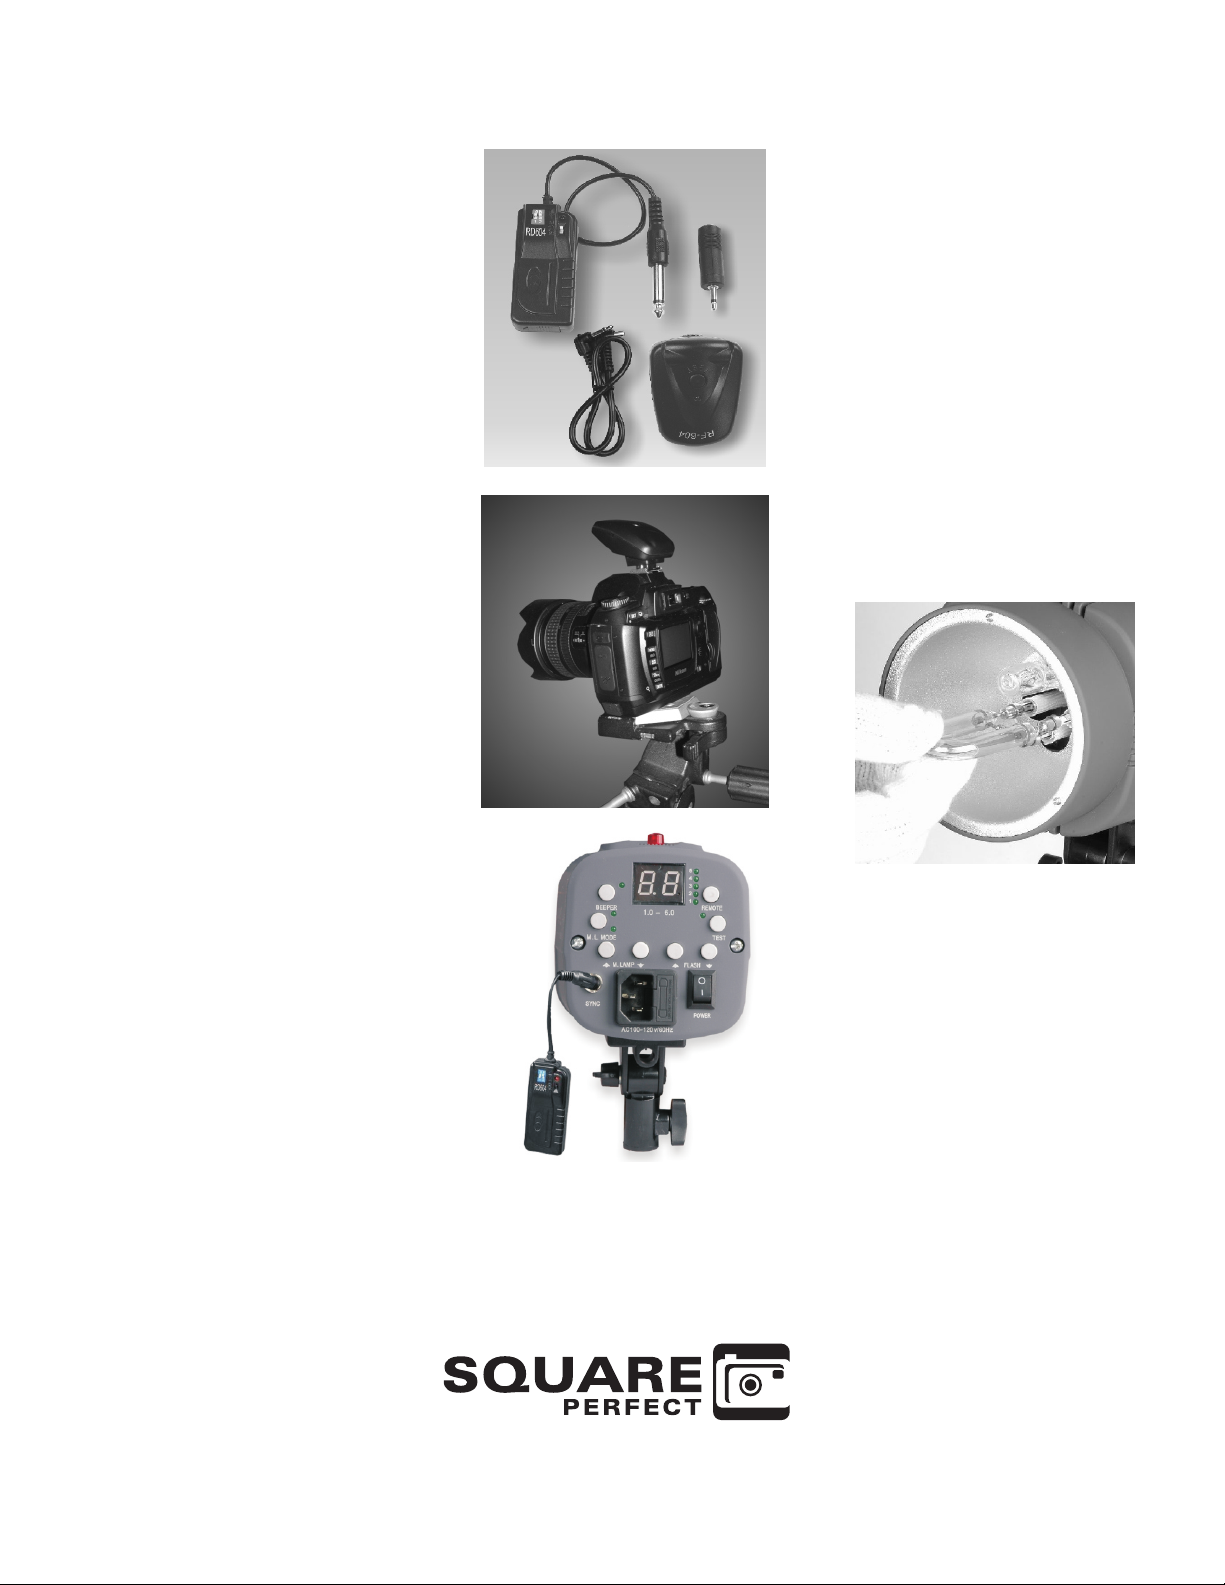
Electronic Radio Trigger Device
Replacement Bulbs
The SP4200 Flash Kit is shipped with the a
Wireless Triggering Device for your convenience.
It is an easy to use device that will give you extra
control in the photographic studio environment.
The Wireless Triggering Device is designed to
work with a variety of flash units. We provide a
wide range of sync cord adaptors to fit most
popular brands.
The Wireless Triggering Device has four channels
and uses a 23A battery (installed). The receiver
uses two AAA batteries (not included).
1. To use the Wireless Triggering Device, first
slide the trigger into the hot shoe found on top
on your camera. If a hot shoe is not available,
use the sync cord attachment found on the
side of the trigger device.
2. Attach the receiver to a remote flash unit. Use
the proper sync cord adaptor provided, plug
into sync cord socket.
3.Switch the receiver unit ON/OFF button to the
ON position. Press the test button located on
the top of the trigger unit. You will see a
twinkling of the LED on the receiver unit. This
indicates the trigger is working properly and is
locked-in on a working channel of the receiver.
4. Switch the remote flash unit power switch to
the ON position with the receiver attached.
Push the test button on the trigger, it should
trigger the remote flash unit.
5. To change channels on the trigger, slide the
channel switch on the side of the trigger
device to one of four positions. Next press the
power switch on the receive unit twice to reset
the receiver.
Fo r o r de ri n g sp a re b u lb s or
replacement parts, contact us at
[email protected]. Also check
out our exten ded line of photo
equipment. Before replacing bulbs be
sure to read the instructions and follow
the safety procedures.
Before attempting any of the following
procedures UNPLUG the unit. Next
check the fuse found on the back of the
unit. If it is tripped replace it. Plug the unit
in and recheck the flash bulb.
If it is determined the bulb is faulty, a
replacement can be ordered from
[email protected]
BULB replacement is simple and easy.
Before handling new bulbs remember to
wear clean cotton glove. Oils from skin
will cause premature bulb failure.
Hold bulb close to base. Gently push the
three prongs into the receiving holes.
Strob e flas h bulb s may vary in
appearance and shape from model to
model, replacement procedures remain
the same unless noted.
www.squareperfect.com
©2007 All rights reserved Square Perfect Photo.
 Loading...