

Page 1
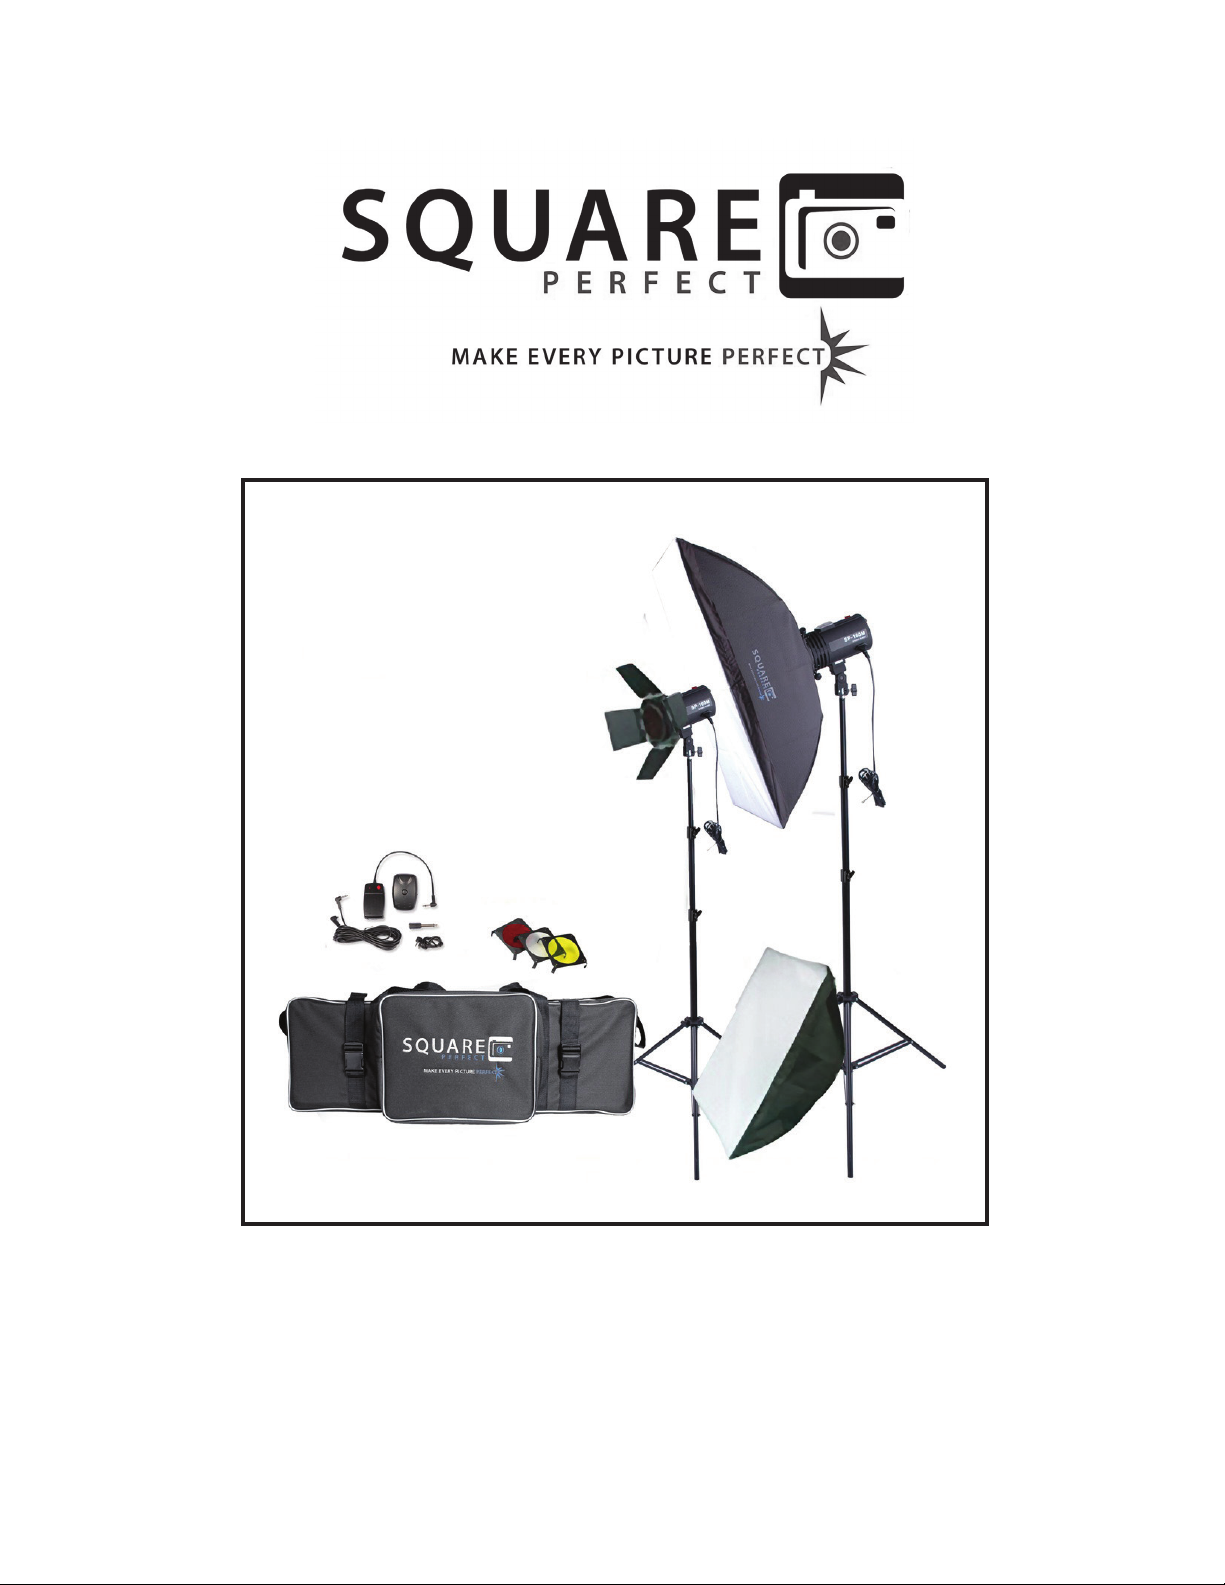
SP160M STUDIO FLASH KIT
www.squareperfect.com
© 2007 All rights reserved Square Perfect.
Page 2
D
A
F
A
G
E
B
H
B
C
D
I
SP160M STUDIO FLASH KIT
A
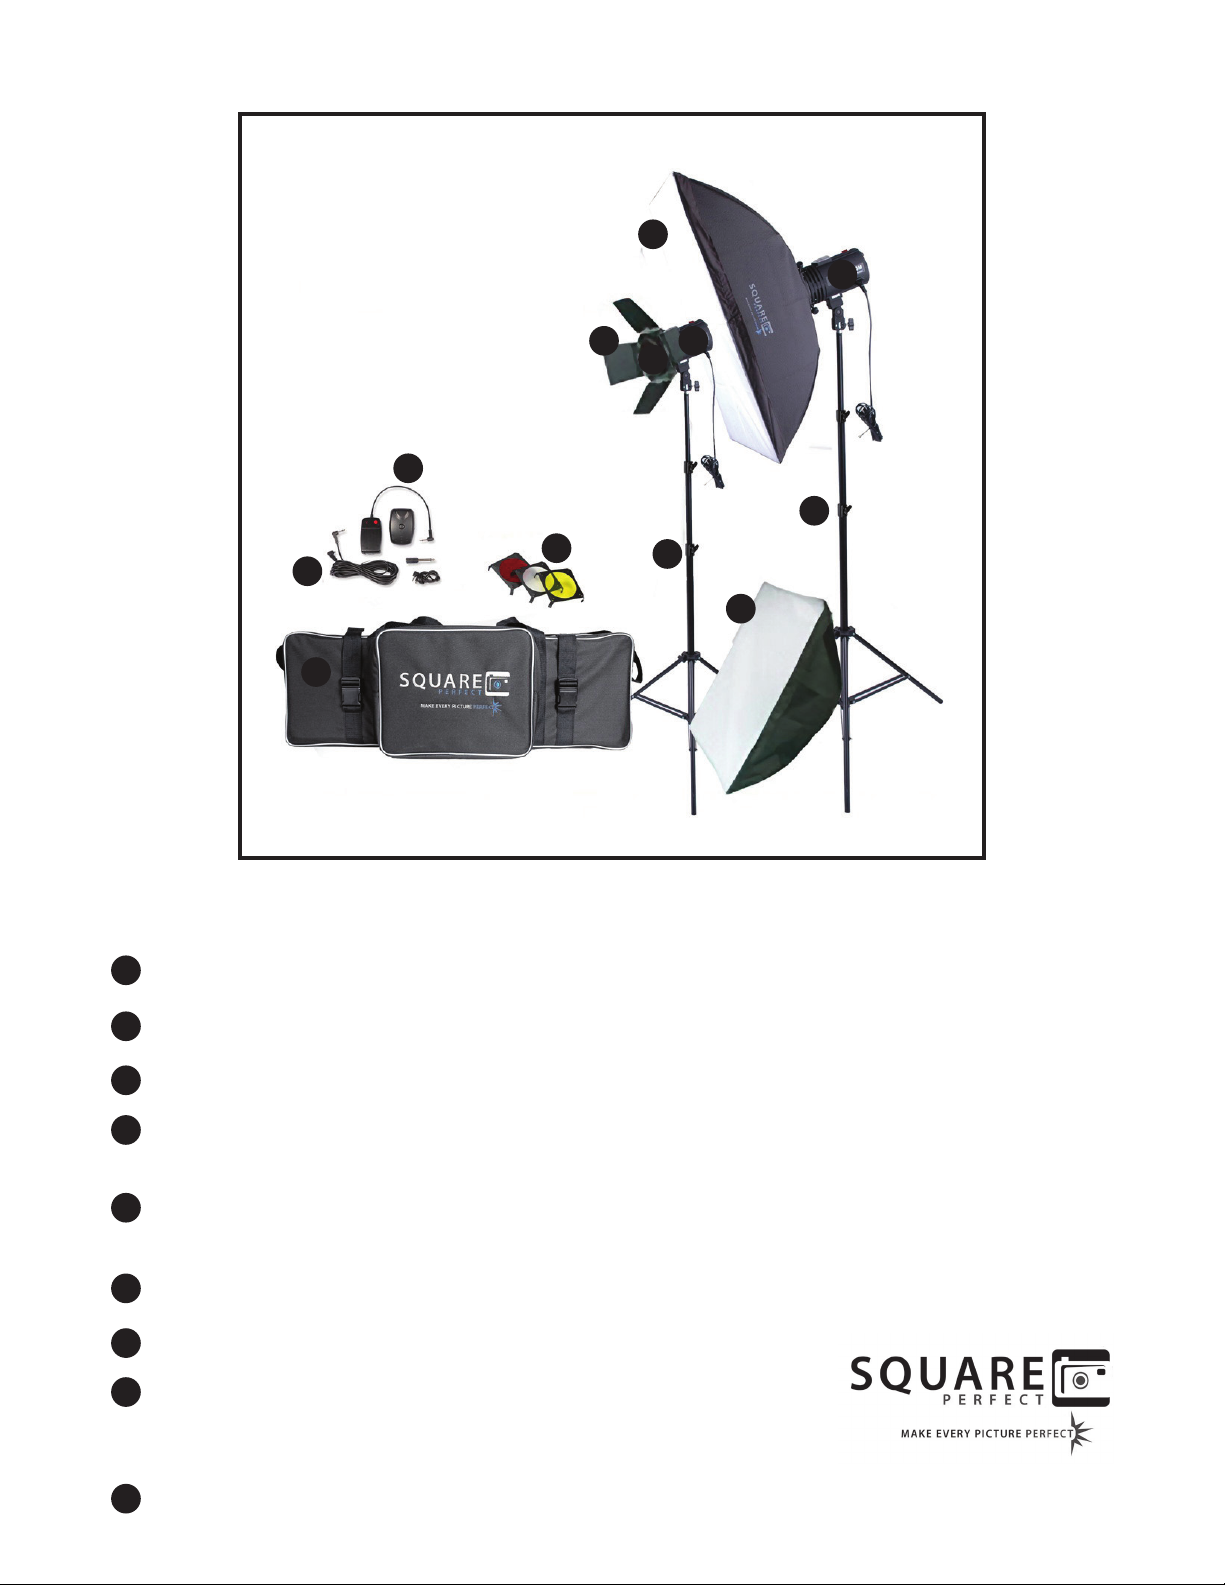
Qty. 2 SP160M Lamps. 320 w/s total output, Includes all bulbs and cords
Qty. 2 SP803 Professional Tripods/Light Stands. Stands extend from 34” to 81.5”
B
Qty. 2 12’ Heavy Power Cords
C
Qty. 2 Softbox Four Panel Tents (28” x 20”). The soft box umbrellas will give you almost
D
shadowless wrap around professional lighting
E
Qty. 1 DRT-2G Two Channel Radio Flash Trigger System--includes receiver, trigger, and
sync cord
Qty. 1 Four Leaf Barn Door
F
Qty. 1 Honeycomb Filter
G
H
Qty. 1 Set Studio Gels (Red, Blue, Yellow, and Clear).
These are used to change the color of your back ground
or for mood lighting
I
Qty. 1 Premium Nylon Carrying Case
www.squareperfect.com
© 2007 All rights reserved Square Perfect.
Page 3
SP160M Studio Flash Kit
Thank you for your purchase of the SP160M Studio
Flash Kit. This manual has been written to help you
with the assembly, operating procedures and accessories. Square Perfect’s SP160M Studio Flash Kit is
manufactured with the nest material available. Your
ash kit will provide many years of quality service with
Please read this manual carefully before use, and keep it
handy for use during break down of equipment. Please
read and heed all safety precautions listed in this manual. For ordering spare bulbs or replacement parts, contact us at [email protected]. Also check out our
extended line of photo equipment now available.
proper care and handling.
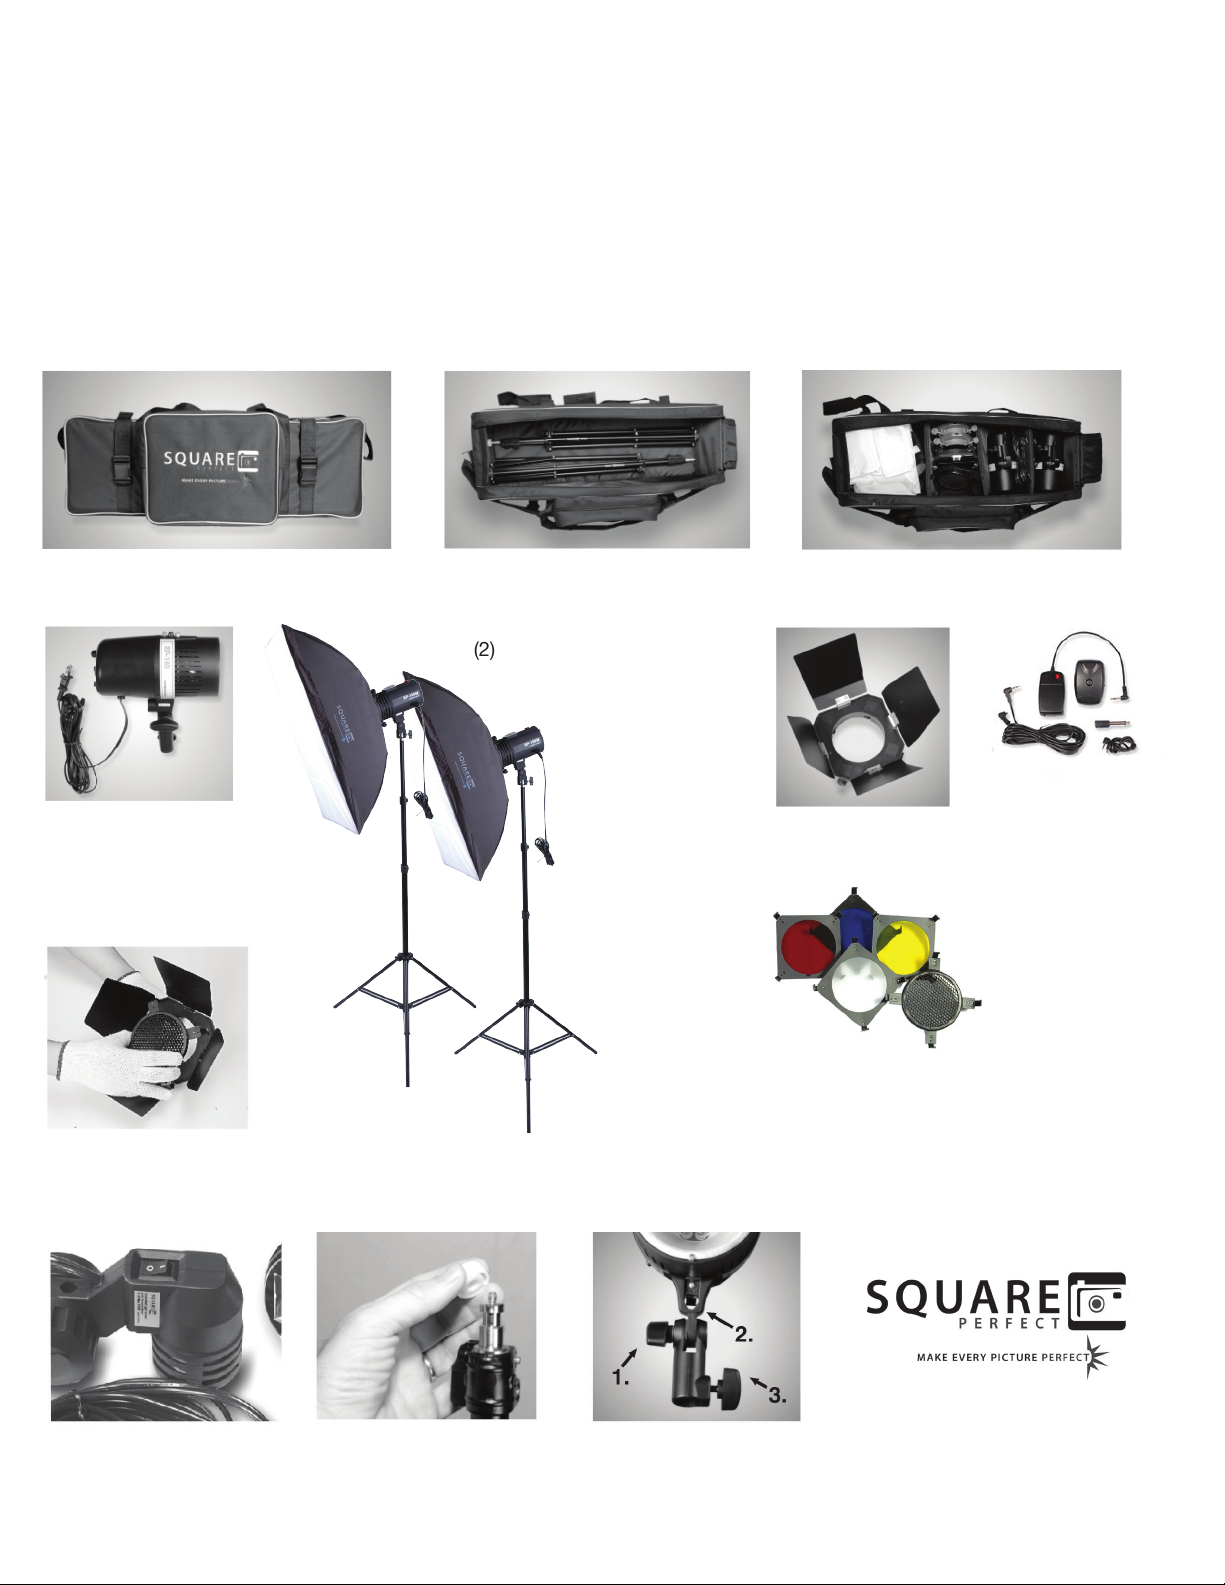
Nylon Carry Case. Two layer for stowing light stands (bottom) Second layer has adjustable compartment.
(2) Softbox 4 panel
tents (28x20).
(2) SP160M lamp
bodies and (2) 12’
Power Cords.
Honeycomb lter.
Technical notes for use:
(2) SP803 professional
duty adjustable
light stands.
Four leaf barndoor.
Set of Red, Blue, Yellow
and clear Studio Gels
DRT-2G Two Channel
Radio Flash Trigger
System
If ll strobe is not working, be sure
to check the on/off switch. Located on the back of the lamp holder.
Remove protective cover from
mounting tip before attempting
to place ash head on stand.
© 2007 All rights reserved Square Perfect.
www.squareperfect.com
1. Swivel screw.
2. Umbrella rod mount.
3. Mounting screw
Page 4
SP160M Lamp Head Operation:
Specifications:
Power Input: AC110-130 volt, 60 Hz
Flash Power: 160ws (joule) in full
Guide No. : 120ft/36m ISO 100
Color Temperature : 5600K
Flash-Tube Lifetime : over 8,000 typical ashing
Recharge Time : 0.5-3 seconds in full
Flash Duration : 1*600 sec.; 1/1000 sec.
Slave Range : 35ft / 10m
Lighting Range : 55 degree
Modeling Power : Halogen 75w
Bulb Base : E-14 screw
Synch Voltage : 5 volt
Fuse : 5A
Dimension : 4’ x 7-1/2”
Weight : 1.8 lb (800g)
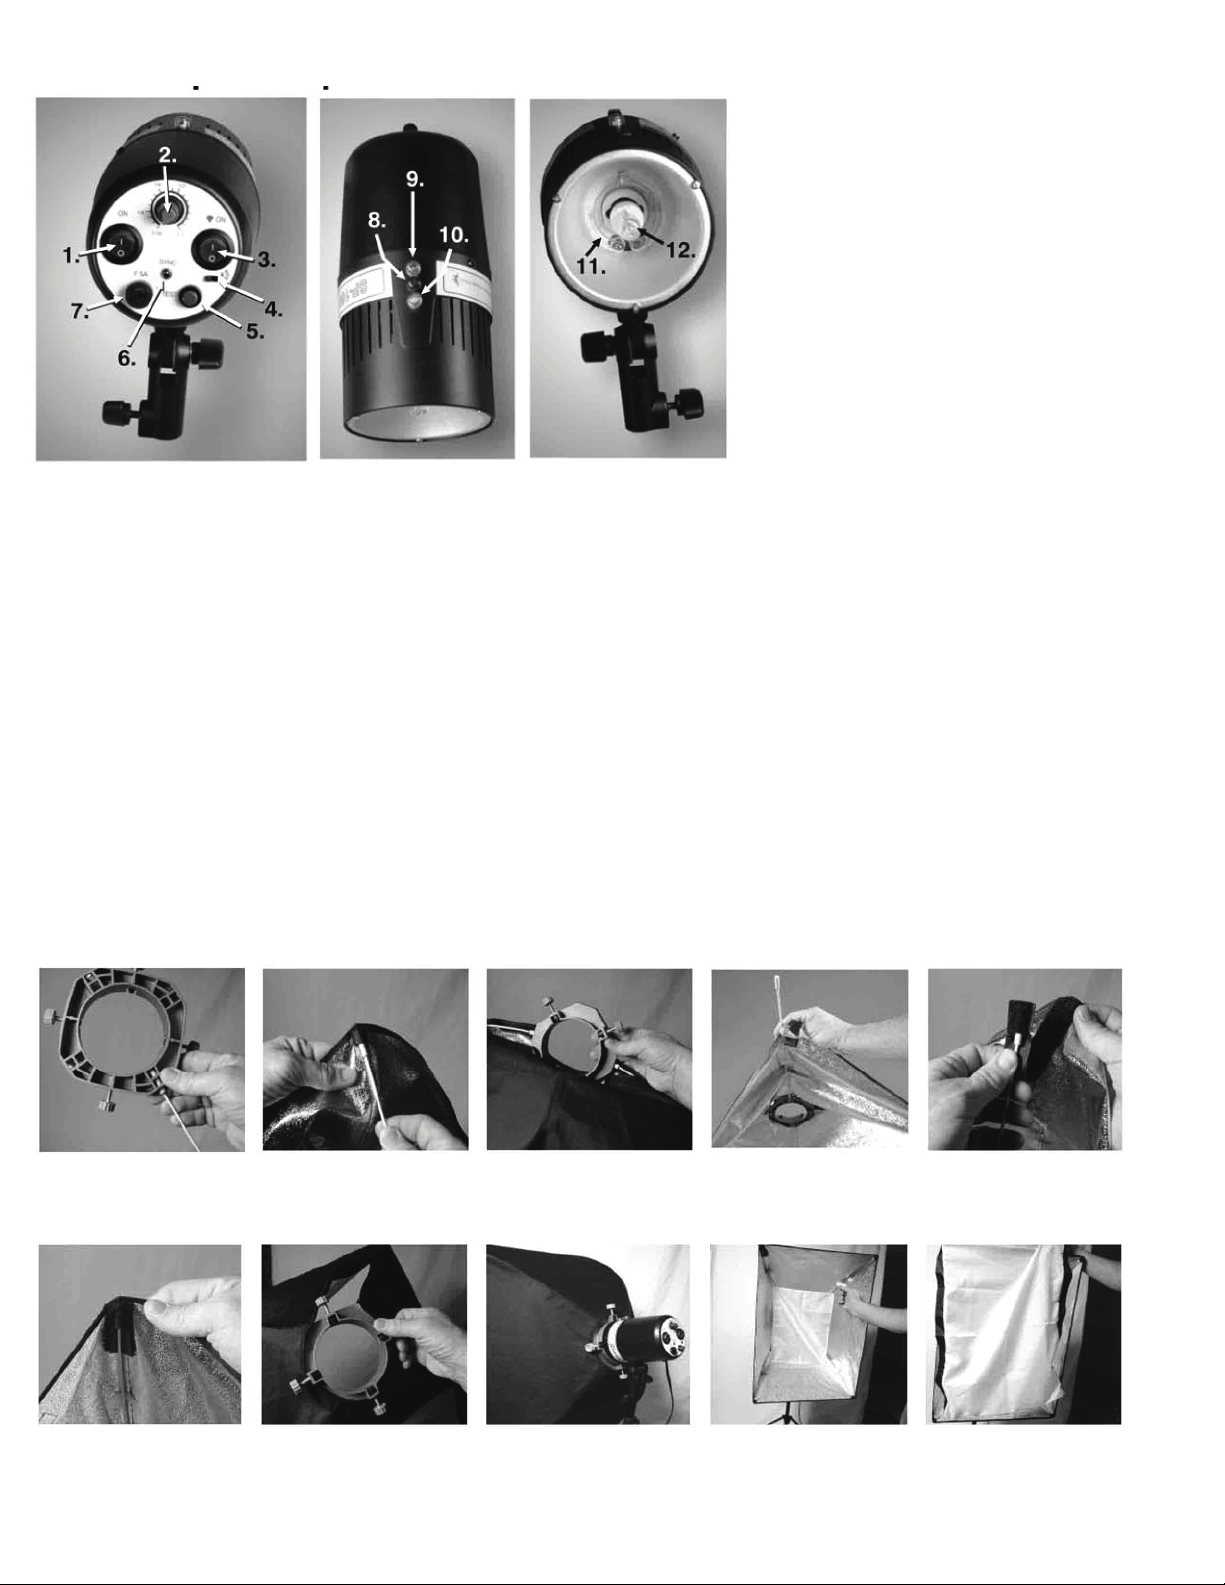
1. On/Off electric supply.
2. Variable ash dial.
3. On/Off, model lamp.
4. On/Off ash ready beep.
5. Flash test.
6. Sync receptacle.
7. Safety fuse.
8. Charging lamp.
9. Flash ready lamp.
10. Slave dome.
11. Flash ring.
12 Model lamp.
SAFETY PRECAUTIONS:
l
Become thoroughly familiar with this product before use. Run
through at least one practice assembly and breakdown before
you schedule a shoot.
l
Never leave the lighting unsupervised when in use. Keep children
or incompetent person away from lighting equipment.
l
If the power cords show signs of wear or damage, they should be
replaced or repaired by a qualied electrician before use.
l
Wait until bulbs are completely cool before touching or removing
them.
Softbox Assembly:
l
Never use in a wet environment.
l
Never move the appliance by pulling the cord. Make sure the cords
do not come in contact with bulbs. Do not wind the cord around
the appliance.
l
Place stands/tripods on at surface to prevent toppling.
l
Do not touch the metal parts near the bulbs while in use, these
parts may become very hot.
l
Do not let umbrella touch light bulb when in use. Light bulb will get
hot and can ruin the umbrella or start a re.
1. Pictured is the SP 4” lamp ring
connector shown with the large
end of the ex rod inserted.
6. Push the velcro strap into place
just below the lip of the tent. Note:
the rods take a good deal of force
to ex into position.
2. Small end of ex rod t into
corner pocket on the softbox
tent.
7. Now close the velcro aps as
shown in the picture.
3. With three rods inserted into the
ring and corners, fold the SP 4”
ring into the tent.
8. The SP 4” ring can now be
attached to the SP 160M ash
unit. DO NOT over tighten.
© 2007 All rights reserved Square Perfect.
4. Next insert the fourth rod into
the SP 4” ring. Note: Keep the
velcro aps at the ring open to
allow sufcient slack.
9. Next attach the inner diffusion
lense with the velcro straps.
5. Insert the fourth rod into the
pocket on the velcro strap.
10. Attach the outer diffusion lense
to velcro patches on the outer
edges.
Page 5
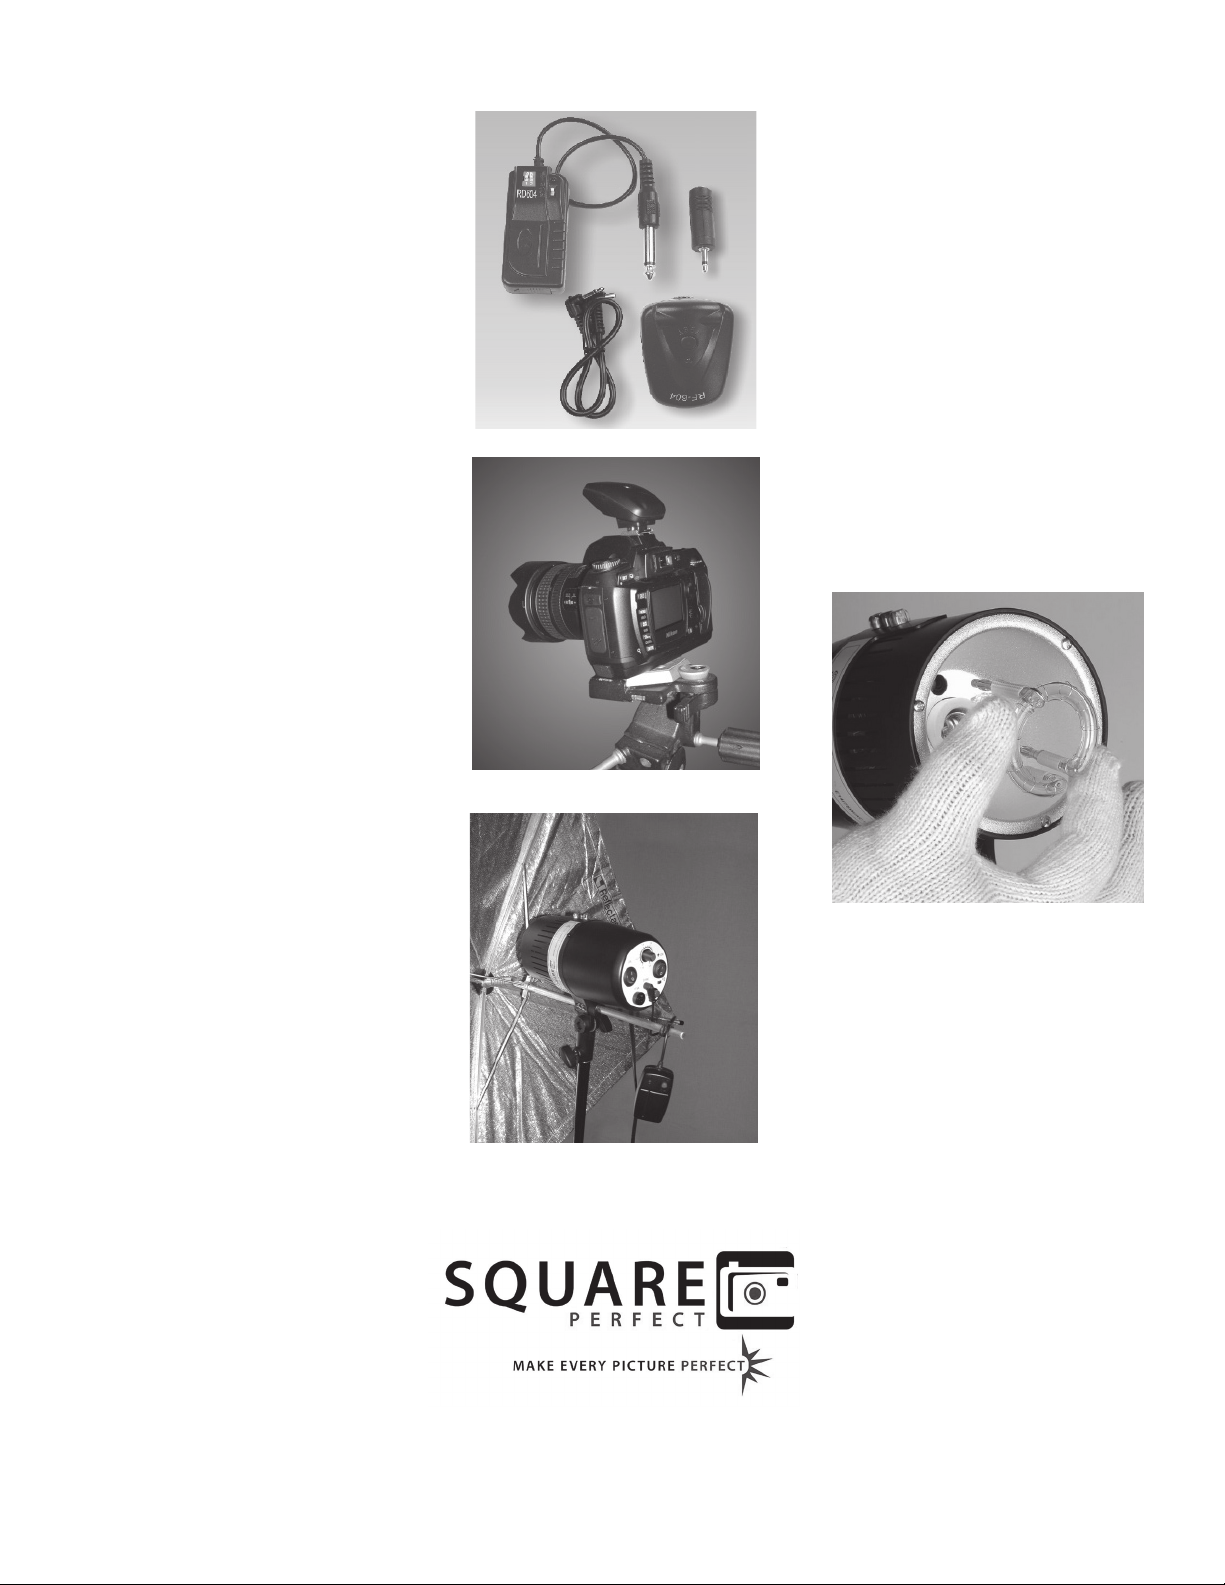
Fo r o r de ri n g s p ar e b u lb s or
replacement parts, contact us at
[email protected]. Also check
out our extende d line of ph oto
equipment. Before replacing bulbs be
sure to read the instructions and follow
the safety procedures.
Replacement Bulbs
Before attempting any of the following
procedures UNPLUG the unit. Next
check the fuse found on the back of the
unit. If it is tripped replace it. Plug the unit
in and recheck the flash bulb.
If it is determined the bulb is faulty, a
replacement can be ordered from
[email protected]
BULB replacement is simple and easy.
Before handling new bulbs remember to
wear clean cotton glove. Oils from skin
will cause premature bulb failure.
Hold bulb close to base. Gently push the
two prongs into the receiving holes.
Next attach spring retaining strap.
Strobe flash bulbs may v ary i n
appearance and shape from model to
model, replacement procedures remain
the same unless noted.
Electronic Radio Trigger Device
Replacement Bulbs
Fo r o r de ri n g s p ar e b u lb s o r
replacement parts, contact us at
[email protected]. Also check
out our extende d line of ph oto
equipment. Before replacing bulbs be
sure to read the instructions and follow
the safety procedures.
Replacement Bulbs
Before attempting any of the following
procedures UNPLUG the unit. Next
check the fuse found on the back of the
unit. If it is tripped replace it. Plug the unit
in and recheck the flash bulb.
If it is determined the bulb is faulty, a
replacement can be ordered from
[email protected]
BULB replacement is simple and easy.
Before handling new bulbs remember to
wear clean cotton glove. Oils from skin
will cause premature bulb failure.
The SP3500 Flash Kit is shipped with the Wire-
less Triggering Device for your convenience. It
is an easy to use device that will give you extra
control in the photographic studio environment.
The Wireless Triggering Device is designed to
work with a variety of ash units. We provide
a wide range of sync cord adapters to t most
popular brands.
The Wireless Triggering Device has four channels
and uses a 23A battery (installed). The receiver
uses two AAA batteries (not included).
To use the Wireless Triggering Device, rst
1.
slide the trigger into the hot shoe found on top
of your camera. If a hot shoe is not available,
use the sync cord attachment found on the
side of the trigger device.
Attach the receiver to a remote ash unit. Use
2.
the proper sync cord adapter provided, plug
into sync cord socket.
Switch the receiver unit ON/OFF button to the
3.
ON position. Press the test button located on
the top of the trigger unit. You will see a twinkling of the LED on the receiver unit. This in-
dicates the trigger is working properly and is
locked-in on a working channel of the receiver.
Switch the remote ash unit power switch to
4.
the ON position with the receiver attached.
Push the test button on the trigger, it should
trigger the remote ash unit.
To change channels on the trigger, slide the
5.
channel switch on the side of the trigger de-
vice to one of four positions. Next press the
power switch on the receiver unit twice to reset the receiver.
For ordering spare bulbs or replacement
parts, contact us at sales@squareperfect.com. Also check out our extended
line of photo equipment. Before replacing bulbs be sure to read the instructions and follow the safety procedures.
Before attempting any of the following
procedures UNPLUG the unit. Next
check the fuse found on the back of the
unit. If it is tripped, replace it. Plug the
unit in and recheck the ash bulb.
If it is determined the bulb is faulty, a replacement can be ordered from sales@
squareperfect.com.
BULB replacement is simple and easy.
Before handling new bulbs remember
to wear a clean cotton glove. Oils from
skin will cause premature bulb failure.
Hold bulb close to base. Gently push
the three prongs into the receiving
holes. Strobe ash bulbs may vary in
appearance and shape from model to
model, replacement procedures remain
the same unless noted.
© 2007 All rights reserved Square Perfect.
 Loading...