

Squareled Aura Panel gold matrix & dream color User Manual
SquareLED - Aura Panel gold matrix & dream color

Manual | Aura Panel gold matrix & dream color
Please read these instructions carefully
Ifusinga230Vac50Hzpowersupply,donotconnectin
1. SAFETY INSTRUCTIONS
they include the important information
about the installation usage and
maintenance of this products
• Please keep this User Manual for future consultation. If you sell the xture to another user, be sure that
they also receive this instruction booklet.
• Unpack and check carefully there is no transportation damage before using the xture.
• It’s important to ground the yellow/green conductor to earth in order to avoid electric shock.
• Disconnect main power before servicing and maintenance.
• The unit must be installed in a location with adequate ventilation, at least 50cm from adjacent surfaces.
Be sure that no ventilation slots are blocked.
• Maximum ambient temperature is Ta : 40℃. Don’t operate it where the temperature is higher than this.
• Unit surface temperature may reach up to 85℃. Don’t touch the housing bare-hand during its operation.
Turn o the power and allow about 15 minutes for the unit to cool down before replacing or serving.
• In the event of serious operating problem, stop using the xture immediately. Never try to repair the
xture by yourself. Repairs carried out by unskilled people can lead to damage or malfunction. Please
contact the nearest authorized technical assistance center. Always use the same type spare parts.
• Do not connect the device to any dimmer pack.
• Do not touch any wire during operation and there might be a hazard of electric shock.
• To prevent or reduce the risk of electrical shock or re, do not expose the xture to rain or moisture.
• The housing must be replaced if they are visibly damaged.
• Do not look directly at the LED light beam while the xture is on.
• There are no user serviceable parts inside the xture. Do not open the housing or attempt any repairs by
yourself. In the unlikely event your xture may require service, please contact your nearest dealer.
• Due to the magnifying type lens, please keep the lens out of contact with direct sunlight. Direct sunlight
can cause heat to build up inside of the unit, which will seriously damage unit.
seriesmorethan8units,useanothermainssupplyforthe
next8units.
Ifusinga120Vac60Hzpowersupply,donotconnectin
Manual | Aura Panel gold matrix & dream color
2. Technical Specications
• DMX 4/7/13/48/43 channels switchable.
• Smooth 0~100% dimming and variable strobe speeds.
• Three operation modes: DMX, Mater/Slave mode, Sound Active.
• Ideal for discotheques, clubs, bars, parties, Mobile DJs, ect.
• Power Supply: 120~240V 50/60Hz
• Fuse: T 6.3A
• Power consumption: 190W
• LED: CREE ,36PCS , 3W ,(2700 – 3000 K)warm white 144PCS 0.5W SMD RGB LED
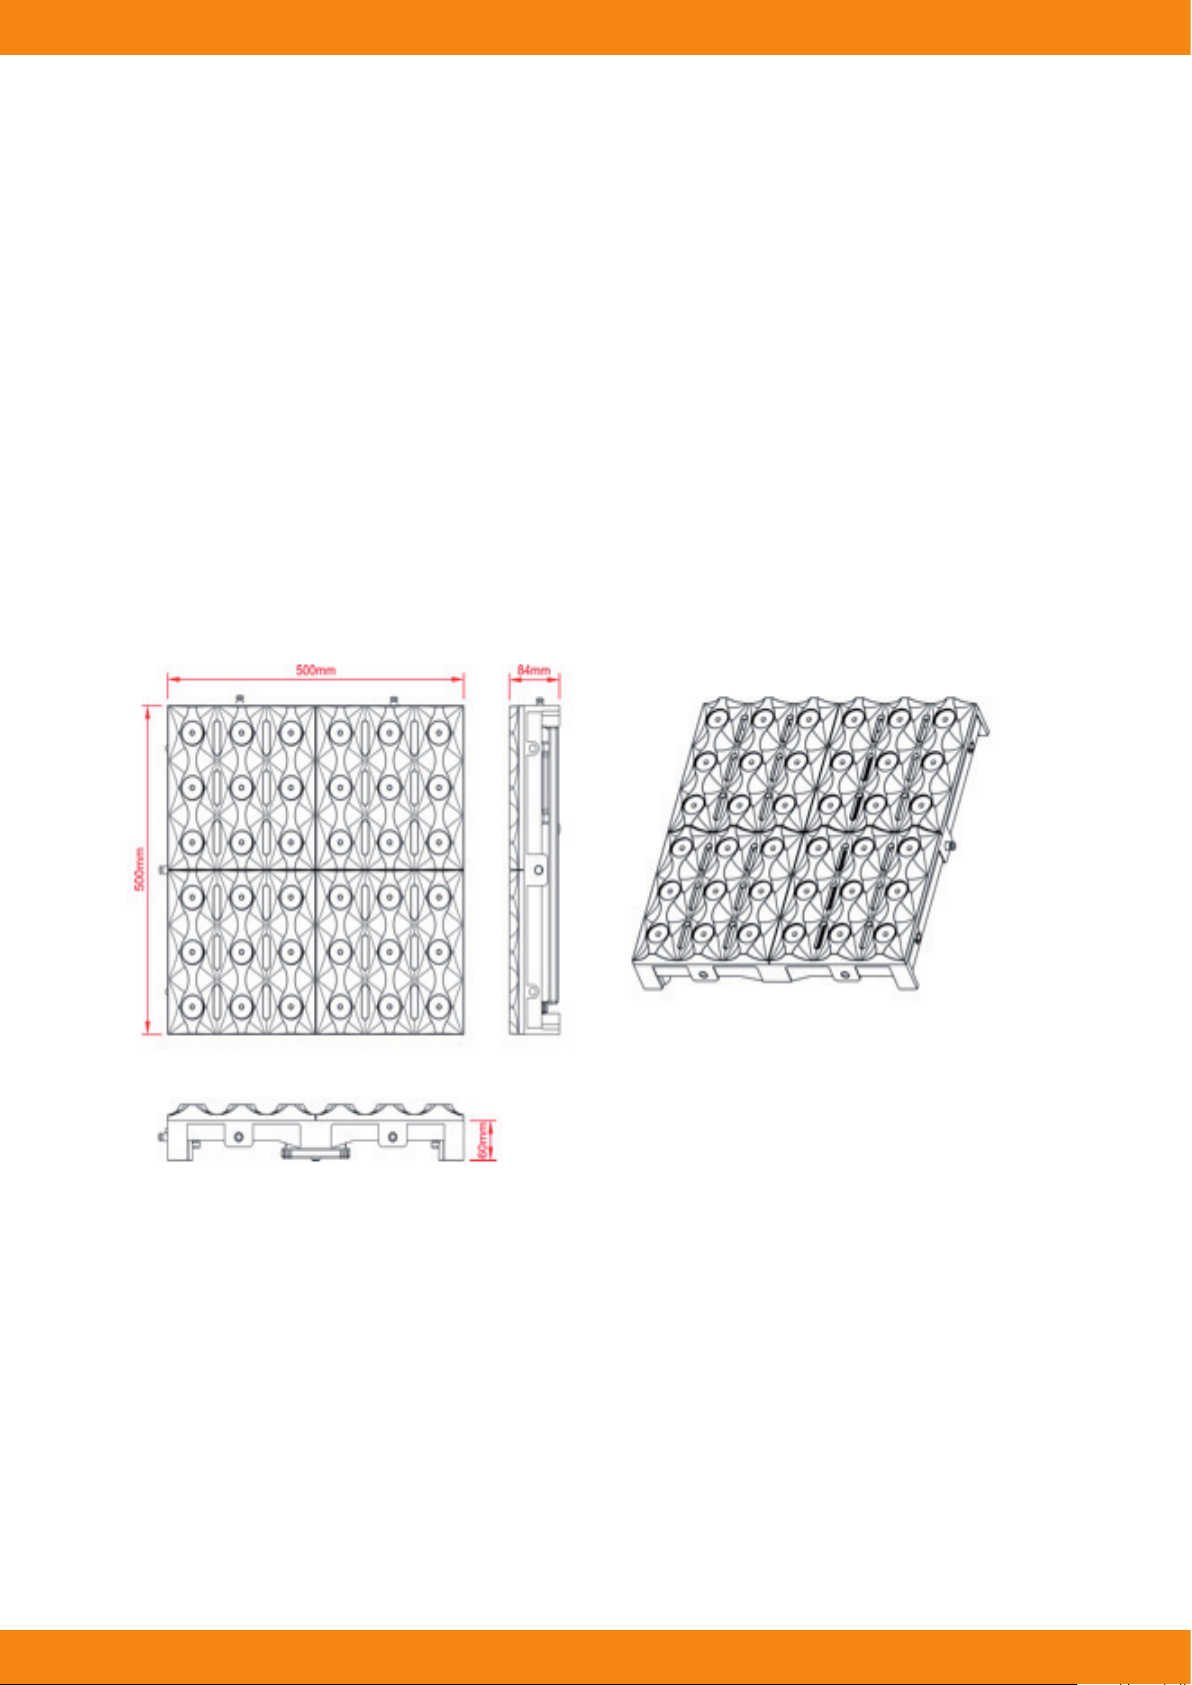
• Dimension: 500 x 500 x 84 mm
• Weight: 8.5 kgs
3. Installation
The unit should be mounted via its screw holes on the bracket. Always ensure that the unit is rmly xed to avoid
vibration and slipping while operating. Always ensure that the structure to which you are attaching the unit is
secure and is able to support a weight of 10 times of the unit’s weight. Also always use a safety cable that can
hold 12 times of the weight of the unit when installing the xture.
The equipment must be xed by professionals. And it must be xed at a place where is out of the touch of people
and has no one pass by or under it, the range of mounting height is 0~30 M.
Manual | Aura Panel gold matrix & dream color
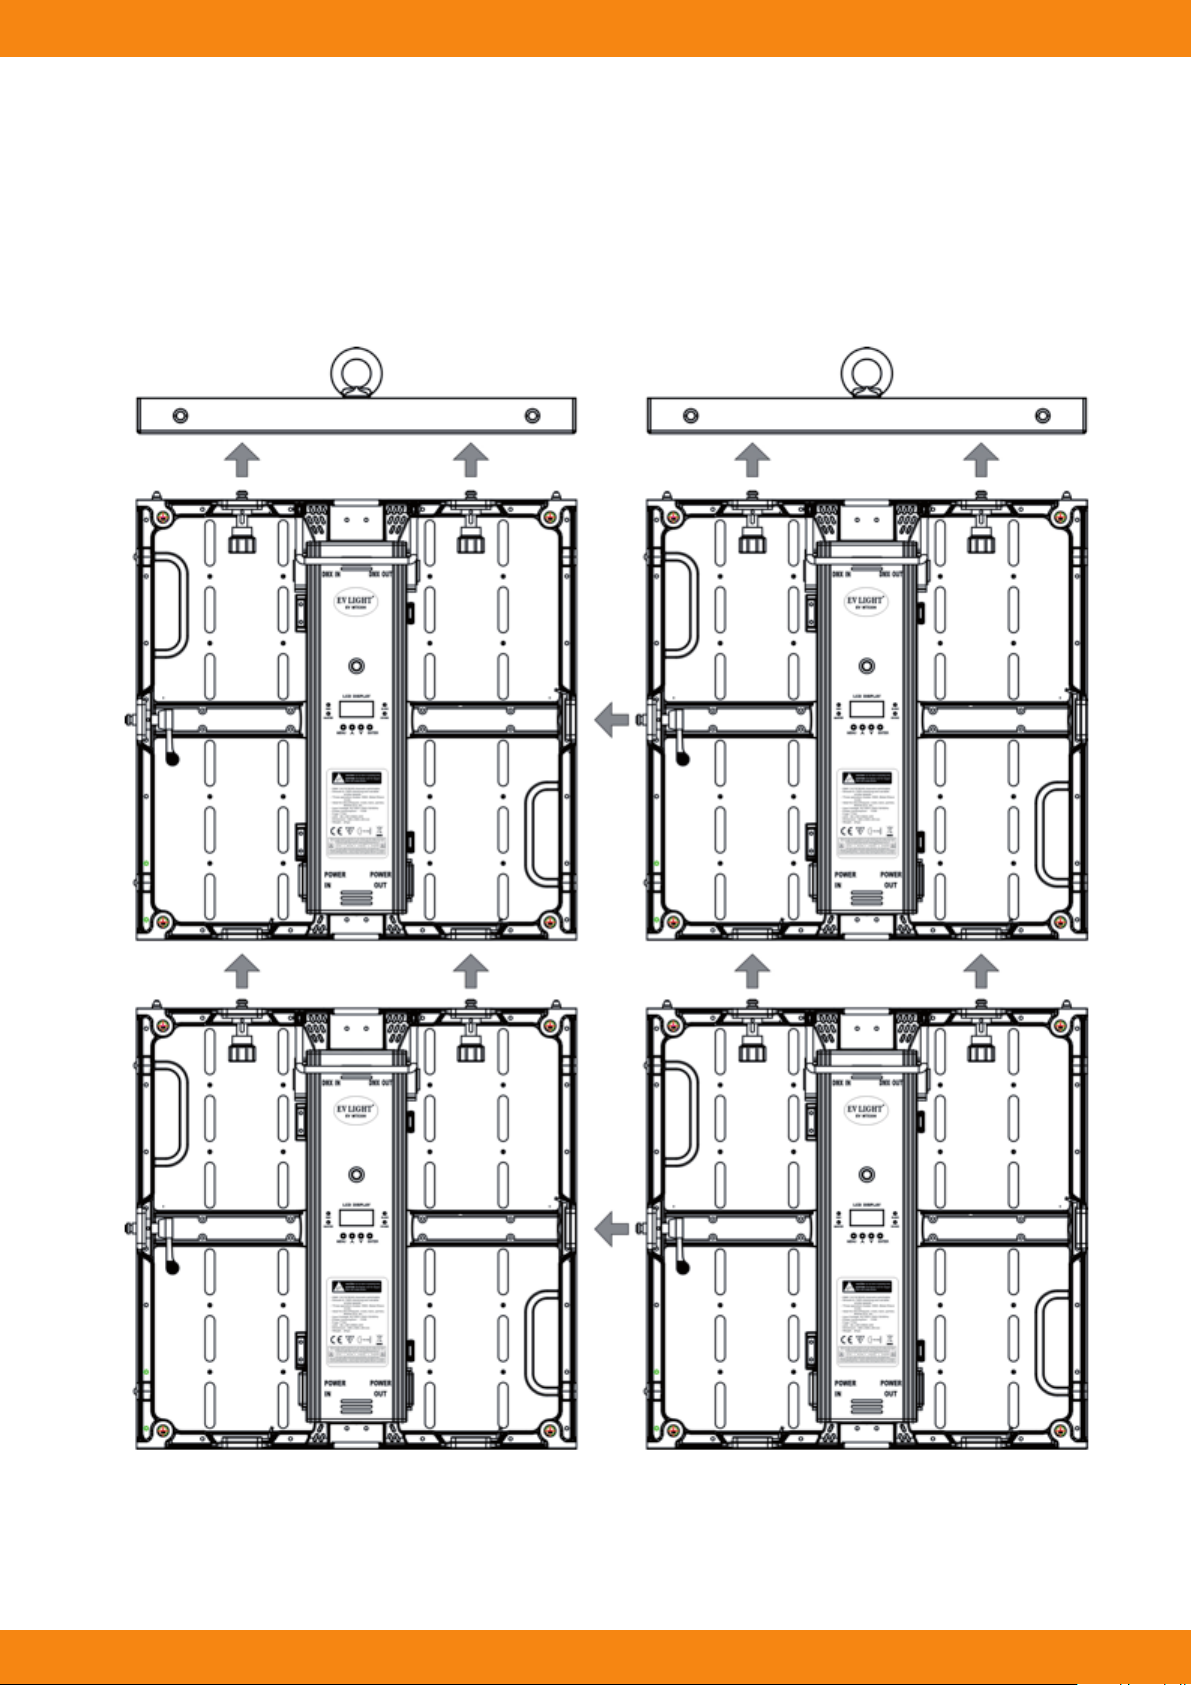
3.1 Fixture Jointing
Finished xture jointing is showed as follows:
Manual | Aura Panel gold matrix & dream color
4. How to set the unit
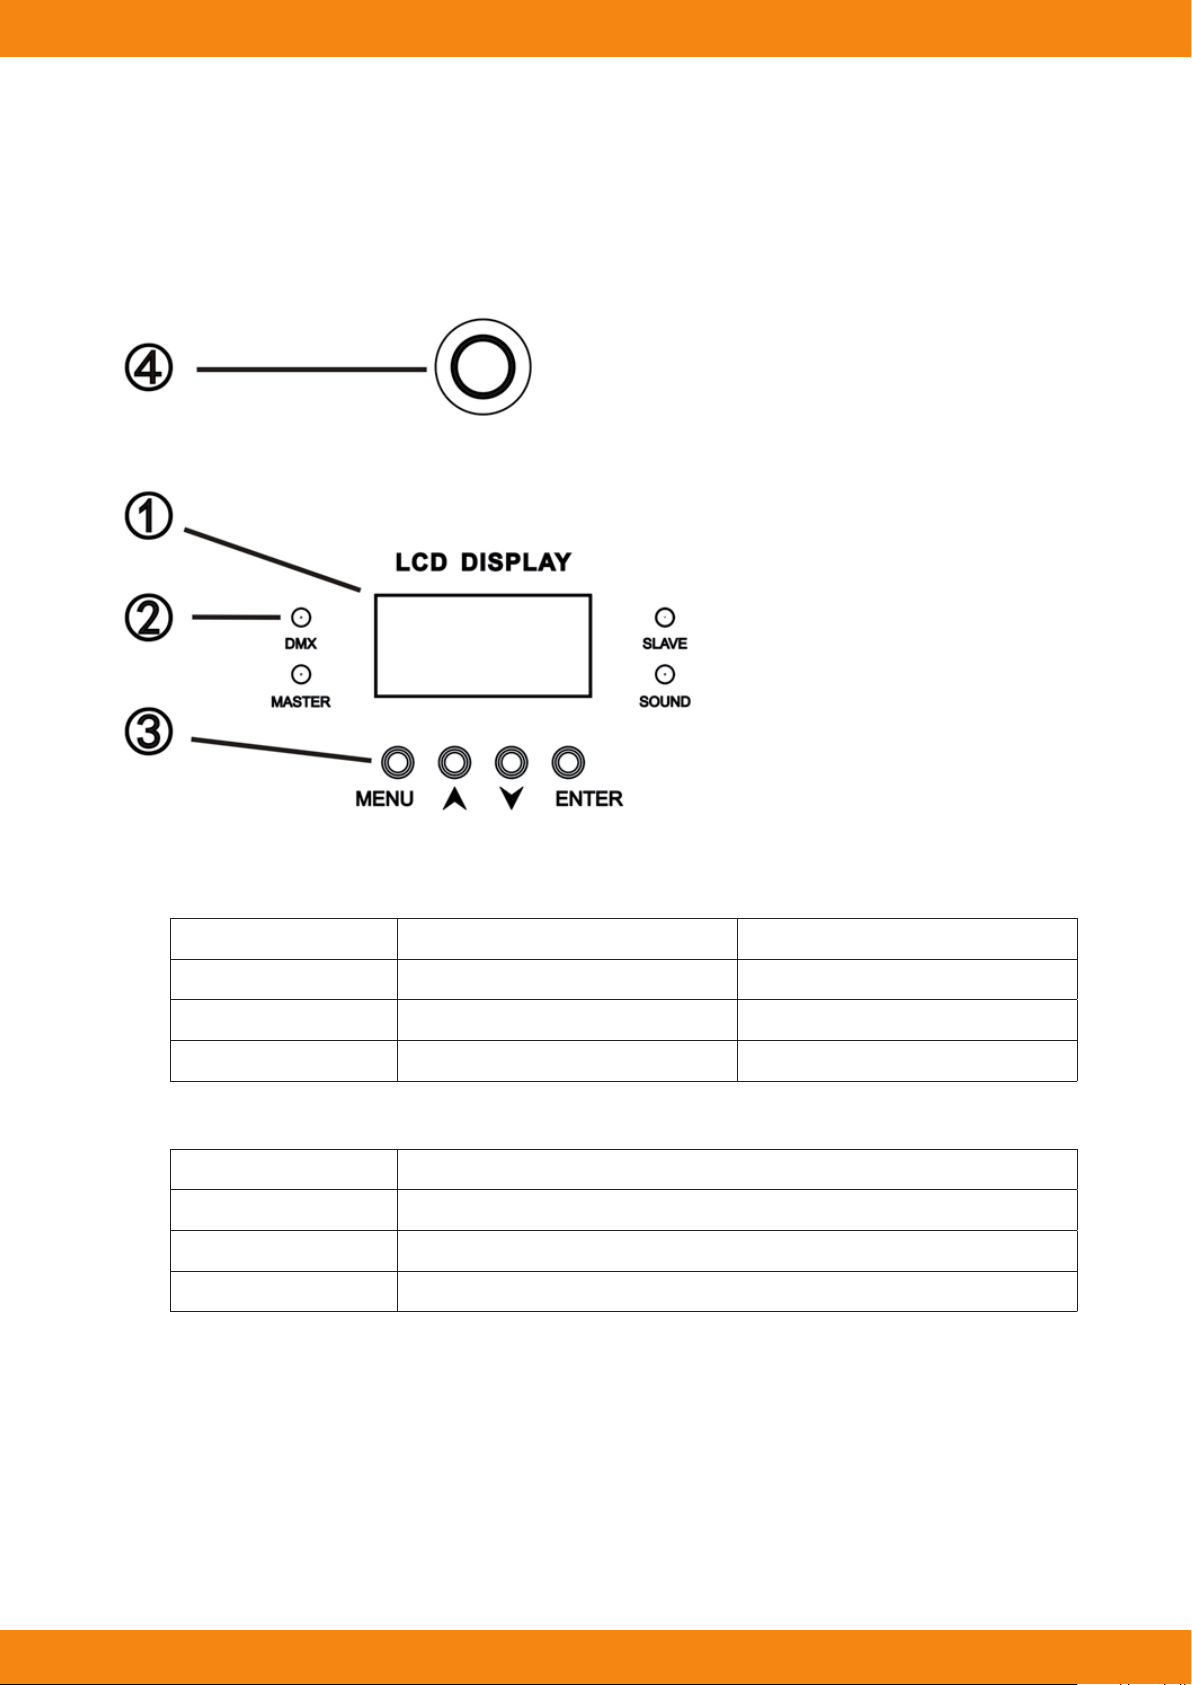
4.1 Rear Panel
• 1 - Display: To show the various menus and the selected functions
• 2 - LED:
DMX On DMX input present
MASTER On Master Mode
SLAVE On Slave Mode
SOUND Flashing Sound activation
• 3 - Button:
DMX To select the programming functions
MASTER To go backward in the selected functions
SLAVE To go forward in the selected functions
SOUND To conrm the selected functions
• 4 - DMX input: For DMX512 link, use 3/5-pin XLR plug cable to input DMX signal.
• 5 - DMX output: For DMX512 link, use 3/5-pin XLR plug cable to link the next unit.
• 6 - Mains input: Connect to supply mains power.
• 7 - Mains output: Connect to supply mains power for the next unit.
• 8 - Microphone: Receive music for the sound active.
Manual | Aura Panel gold matrix & dream color
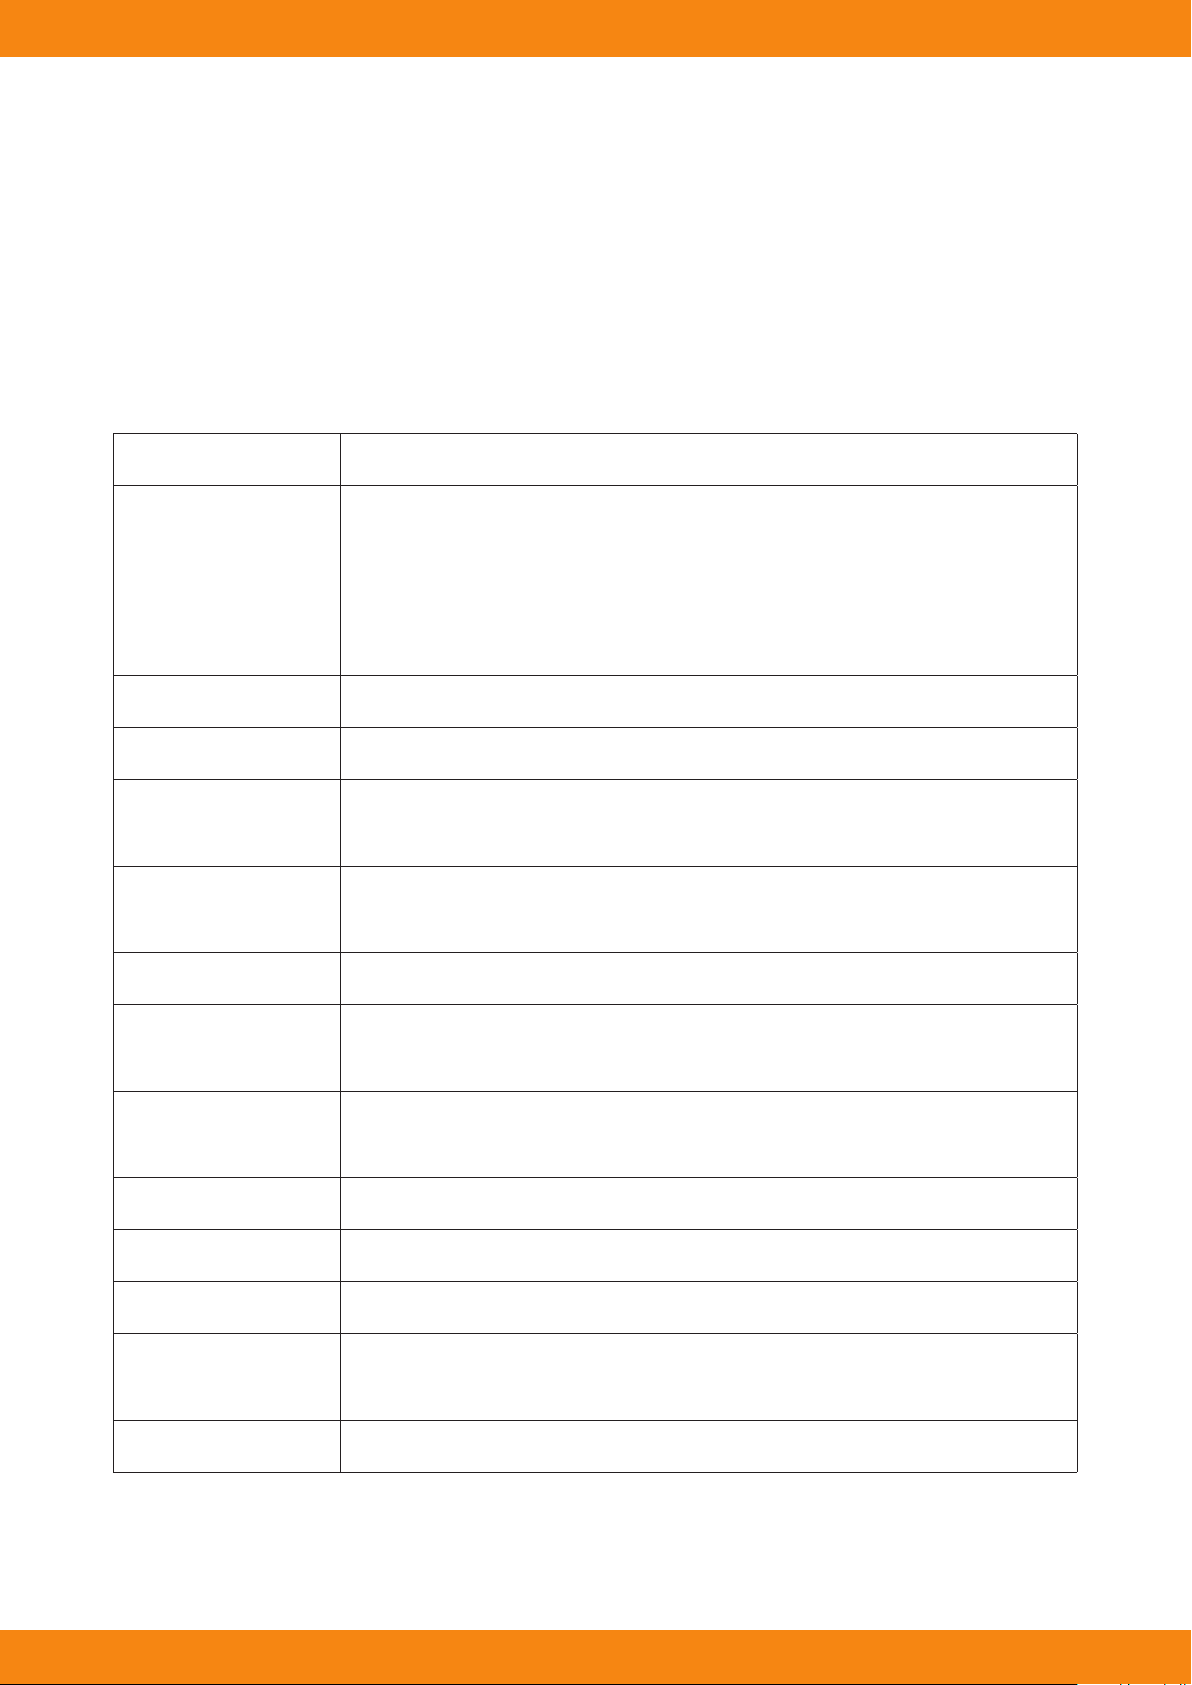
4.2 Main Function
To select any functions, press MENU button until the required one is shown on the display. Select the function by
ENTER button and the display will blink. Use DOWN and UP button to change the mode.
Once the required mode has been selected, press ENTER button to setup or it will automatically return to the
main functions without any change after idling 60 seconds. Back to the functions without any change press
MENU button. The main functions are shown below:
DMX Address 1-512
4 CH
7 CH
Channel Mode
Slave Mode Show0~Show8
Show Mode Show0~Show4
Show Mode-C
Manual Mode
Sound State Sound sense 0-100%
Sound Sense
Blackout
13 CH
48 CH
43 CH
Number 0 - 9
Letter A - Z
Sound mode
On - O
Yes
No
Yes
No
Blackout-C On – O
Back Light
Auto Test YES -- NO
Fixture Time
Fixture Version Fixture V1.0
Fixture hours
0 ~ 9999
 Loading...