

Square SPB1 User Manual
Getting Staed
1455 Market Street, Suite 600, San Franc isco, CA 94103
PROJECT
DESIGN
PRODUCTION
PART #
REV
VERSION
FILE NAME M-LIT-0094-03_X2_GSG_16-pages_US_M09
X2 Packaging
Eric Manago
Jordan Lebrecht
M- LIT-0 09 4
-03
M08
DELIVERABLE
SIZE
MATERIAL
FINISHING
VENDOR
MODIFIED
GSG - US - 16 pag es INKS 1/1 + Anti-scu ff Mat te AQ
Flat: 28 8mm x 144 mm
Folded: 144mm x 144mm
130gm couche
Diecut, score, fold, staple
Veritiv China
August 30, 2017 2:14 PM
MATTE AQ
_______
_______
______
BLACK
PRODUCTION NOTES
Adhesi ve
Dielin e
Pe
REV NOTES
REV-02 (06/ 17): Add ed 4 pages,
updated content.
REV-03 (08/17): Ad ded regulatory
language
CONTRIBUTORS
COPYWRITING
Approved
Changes
EDITING
Approved
Changes
LOCALIZATION
Approved
Changes
IMAGING
Approved
Changes
OTHER __________
Approved
Changes
APPROVALS
CR EAT IVE
Approved
Changes
LEGAL
Approved
Changes
PMM (MARKETING)
Approved
Changes
COUNTRY MANAGER
Approved
Changes
PROGRAM MANAGER
Approved
Changes
WELCOME TO SQUARE
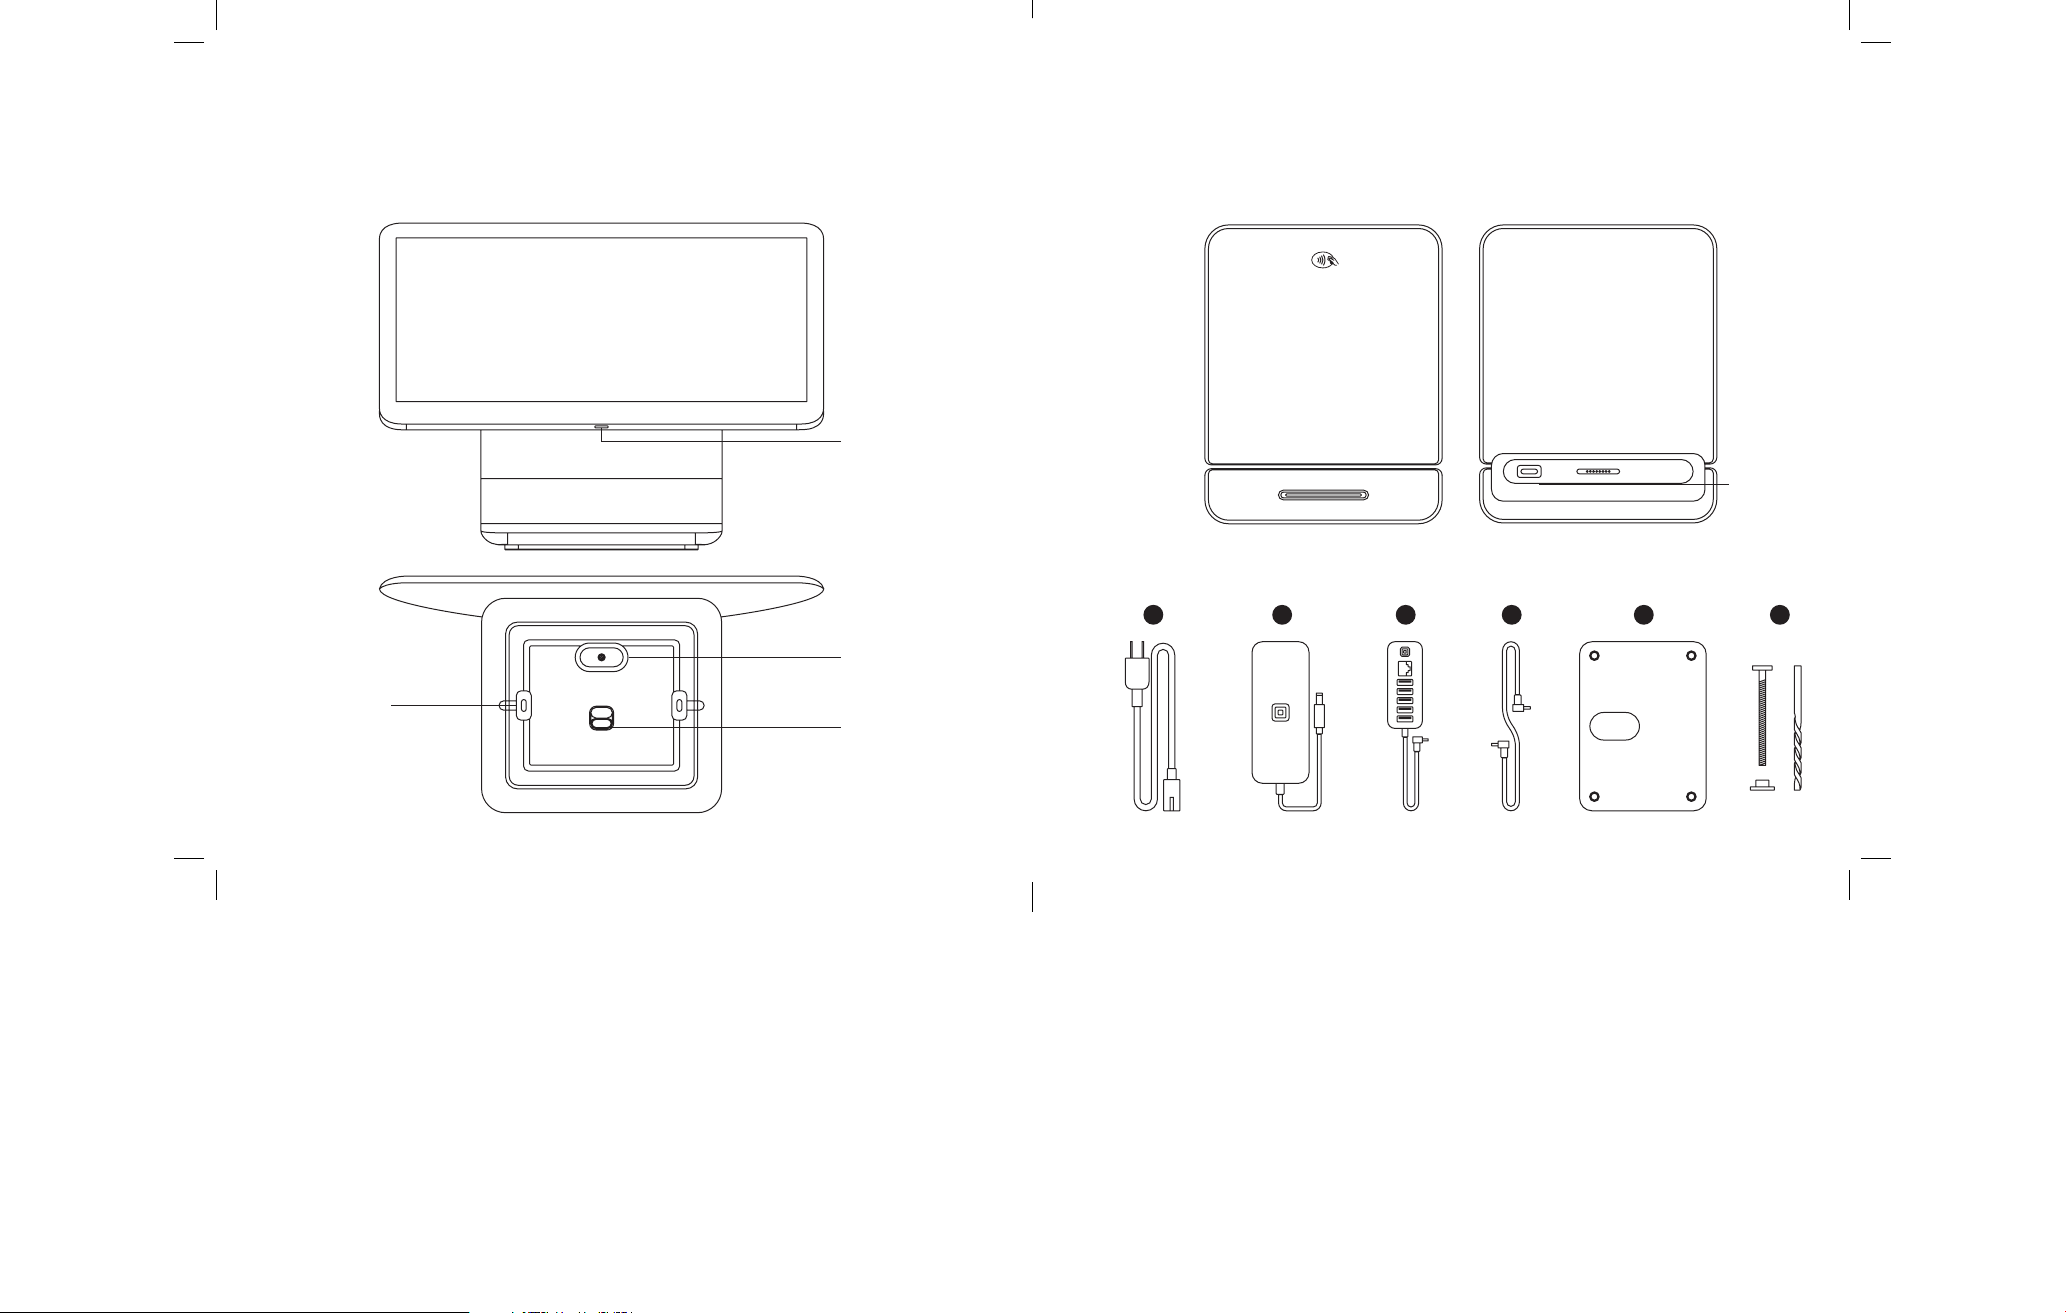
Let’s get your Square Register up and running. Sta by taking a quick look at what’s in the box.
Square Register Customer Display
Power button
1. Power adapter cable
2. Power adapter
3. Accessory hub
4. Customer display cable
5. Mounting plate with cleat
6. Mounting tools
Micro
USB po
Front Back
Micro USB pos
Mounting plate
cleat slot
Customer display
release latch
1
2
3
4
5 6
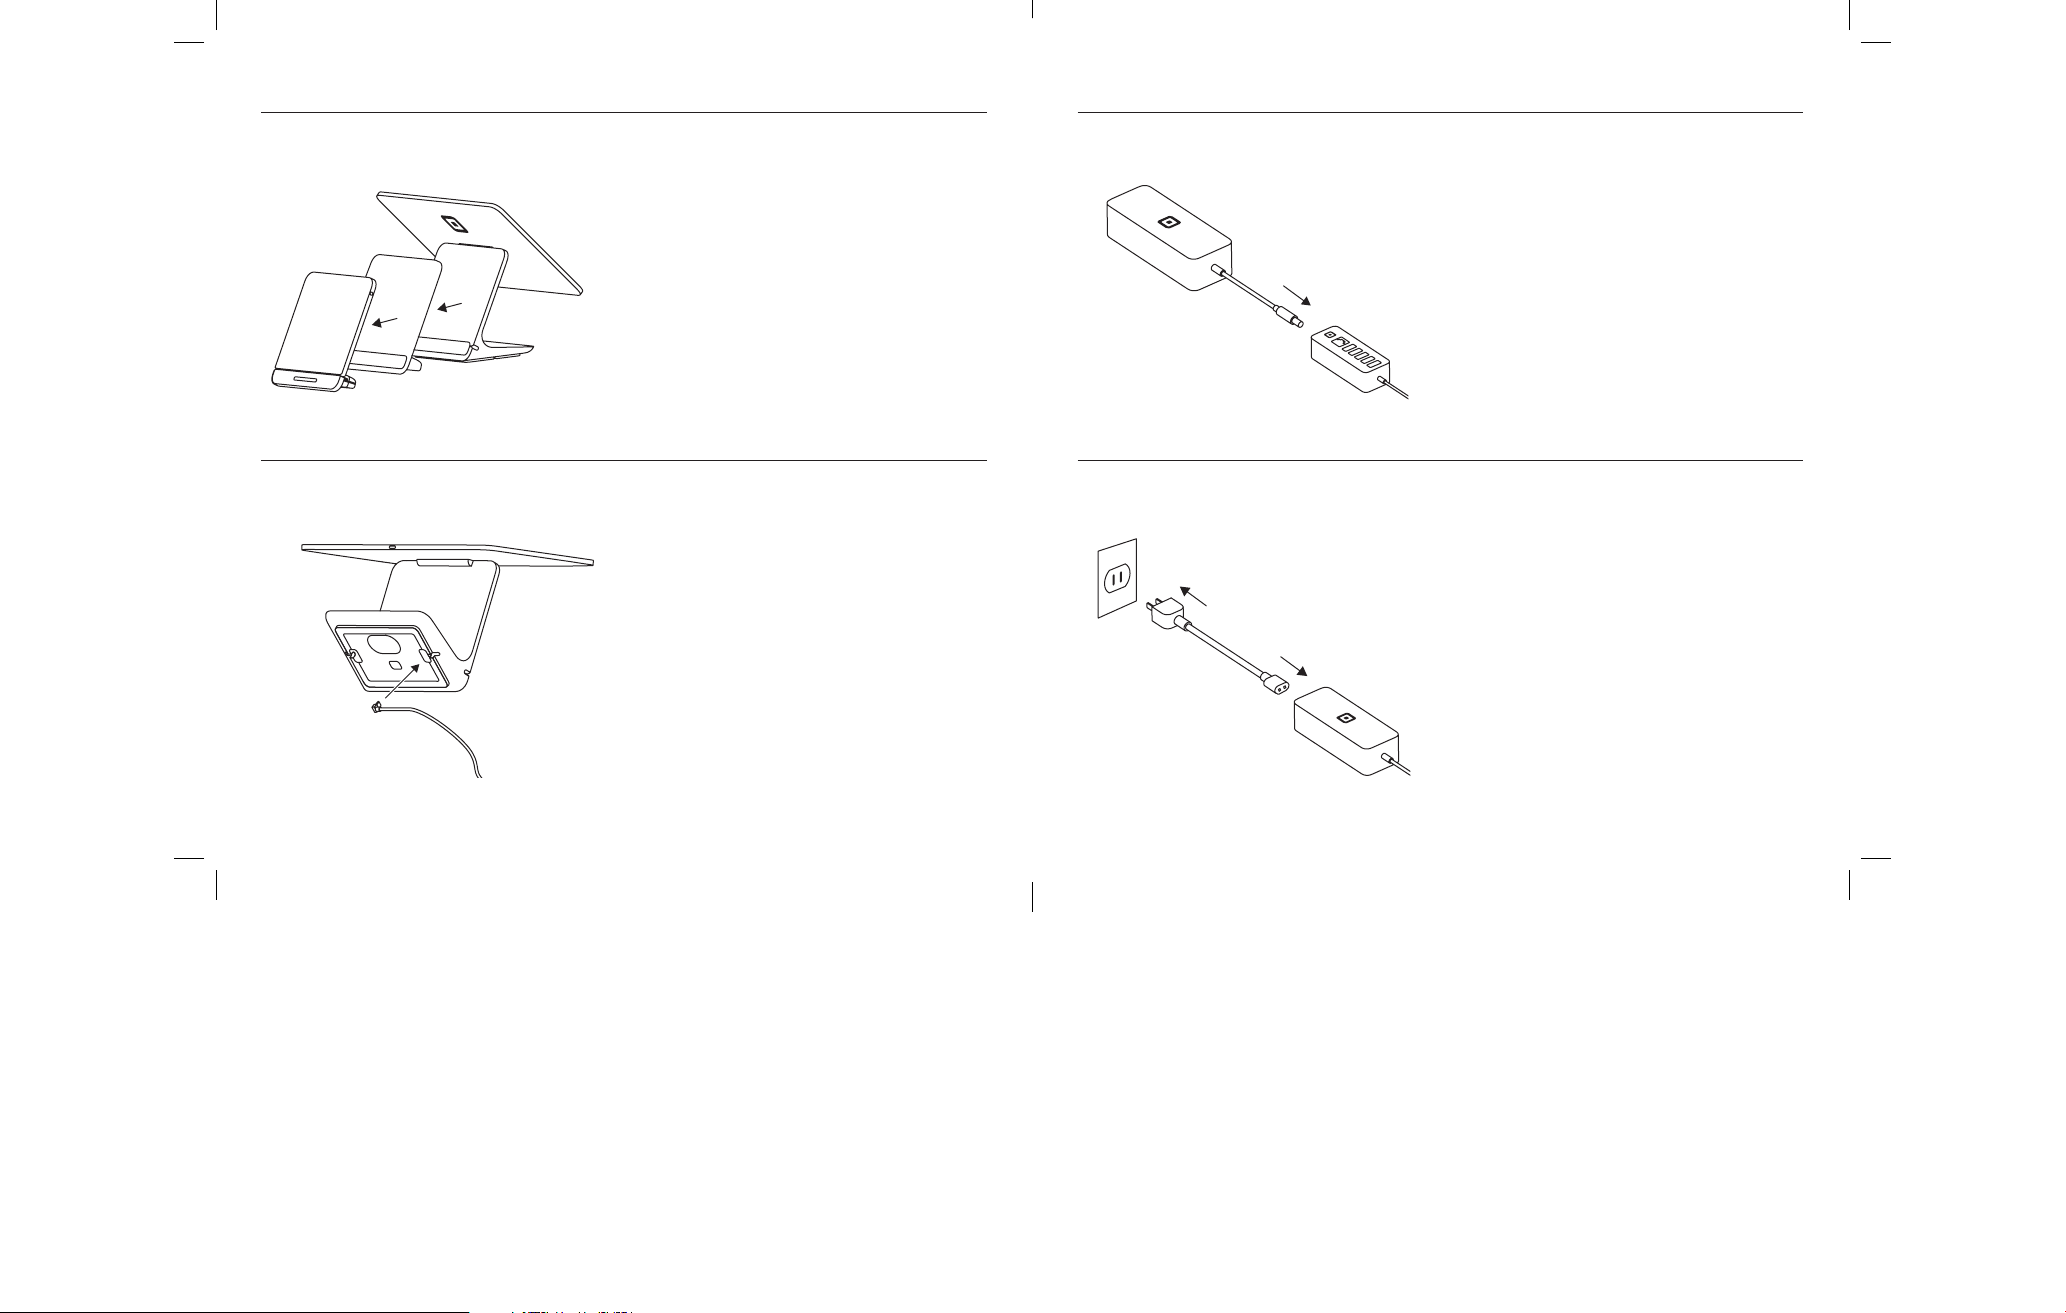
GET SET UP
1. Separate the customer display
Remove the instructional wrap, carefully lift the
customer display out of Register, and remove
the protective foam pad. Place the customer
display aside for now—make sure you lay it
down flat.
2. Connect the accessory hub to Register
Simply plug the cable into one of the micro
USB pos located on the bottom of Register.
3. Connect the power adapter to the
accessory hub
4. Plug it in
With the power adapter cable, plug one end
into the power adapter and the other end into
a power outlet.
 Loading...