

Spypen QX-O User Manual
User’s Manual
qx.o
2
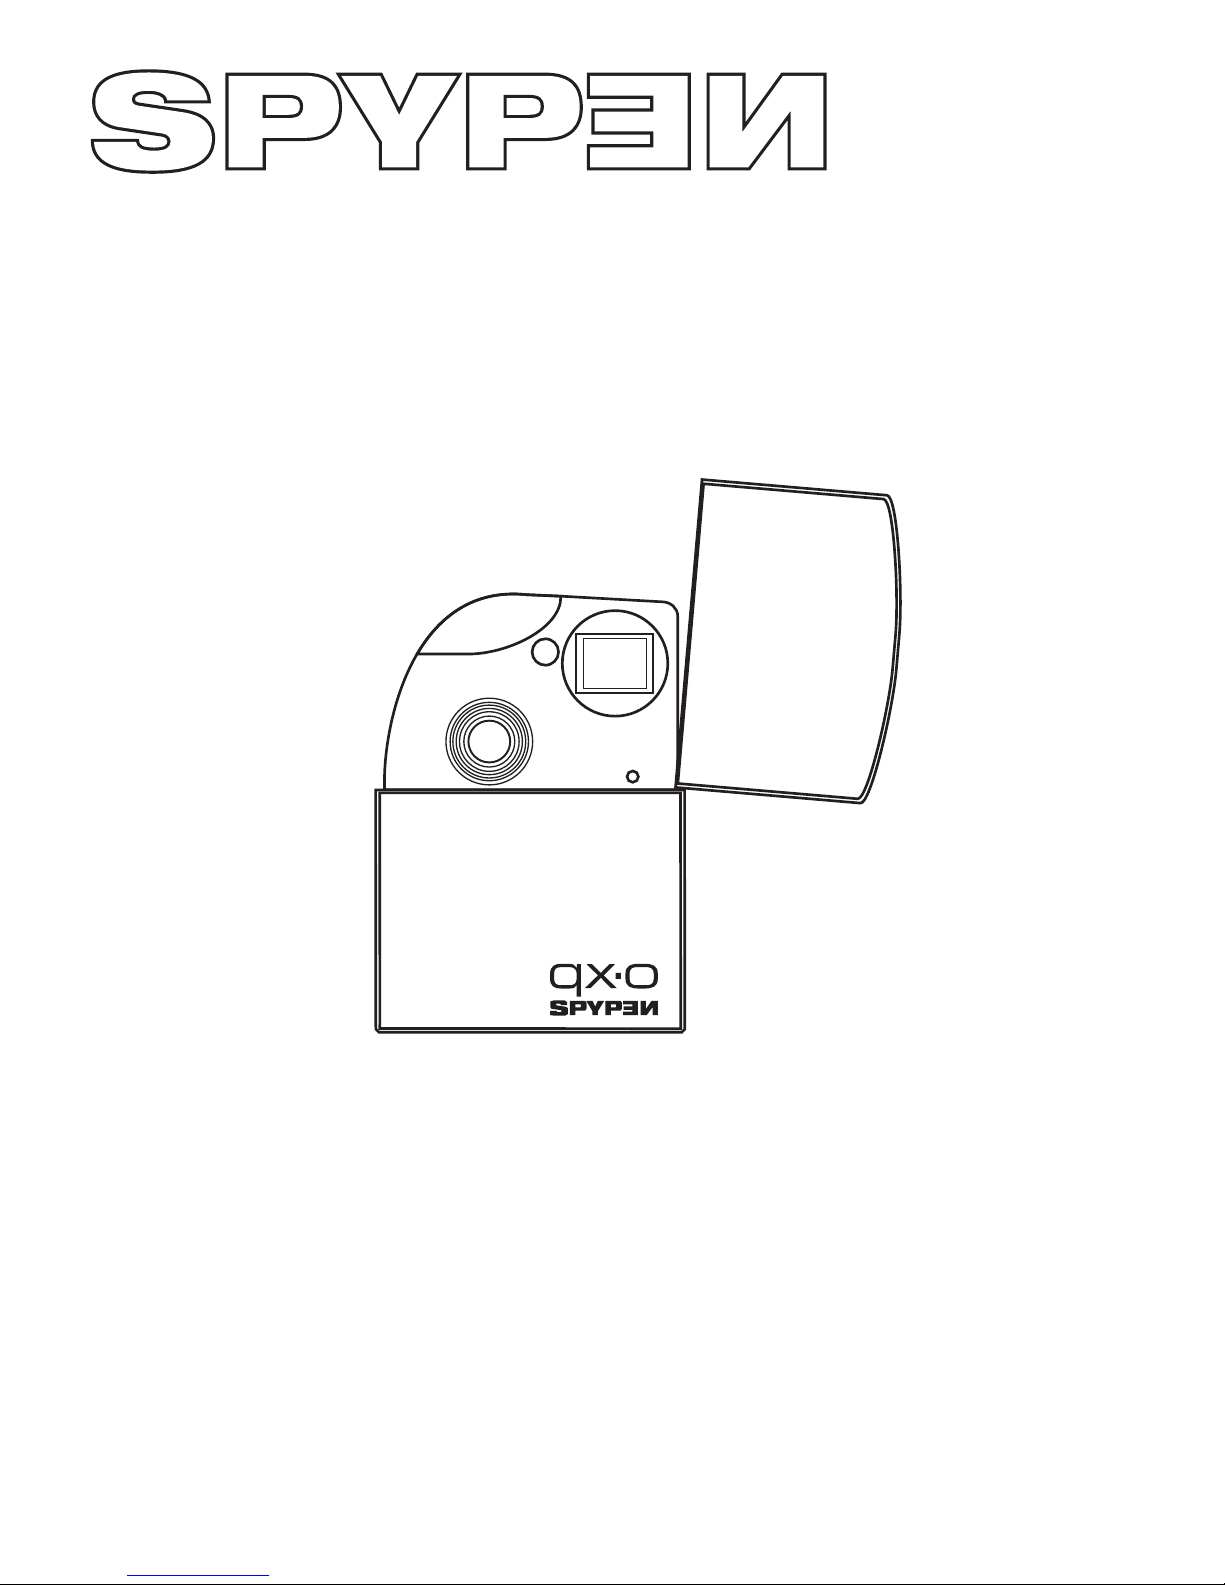
Product Overview
1. Shutter button
2. Status LED
3. Lens
4. Reset button
5. Viewfinder
6. Cover
Front View
1
2
3
6
5
4
1. Viewfinder
2. LCD display
3. Mode button
1
2
3
Rear View
1. USB port
1
Bottom View
1. USB cable
Docking Station (with USB Cable)
1

3
Table of Contents
1 Getting Started ........................................................................................................................ 4
• What can I do with my Camera? ............................................................................................ 4
• What can I do with my Digital Pictures? .................................................................................. 4
• What can I do with my Video clips ? ....................................................................................... 4
• Camera Package Contents..................................................................................................... 4
• Using the Docking Station..................................................................................................... 4
• Charging the Battery............................................................................................................ 5
• Turning the Camera On and Off .............................................................................................5
• Automatic Power Saving ....................................................................................................... 5
2 Camera Setting ........................................................................................................................ 6
• Checking Camera Status....................................................................................................... 6
• Reset Feature...................................................................................................................... 6
3 Taking and Managing the Pictures ............................................................................................... 7
• Taking a Picture...................................................................................................................7
• Setting Self-timer ............................................................................................................... 7
• Setting Picture Resolution and Quality .................................................................................... 7
• Setting Frequency................................................................................................................ 8
• Deleting the Last Picture ...................................................................................................... 8
• Deleting All Pictures ............................................................................................................. 8
4 Recording Video Clips ................................................................................................................ 8
5 Installing the Software onto a Computer ...................................................................................... 9
• Installing the software.......................................................................................................... 9
• Software Included with Your Camera ...................................................................................... 9
• Computer System Requirements.......................................................................................... 10
6 Transferring Pictures and Video Clips to a Computer .................................................................... 11
• Before Transferring Pictures ................................................................................................ 11
• Connecting to Your Computer .............................................................................................. 11
• Setting the Camera to “
” (Mass storage mode) or “
” (PC mode) ....................................... 11
• Transferring the Pictures and Video clips to PC ....................................................................... 11
• Transferring the Pictures and Video clips to Mac ..................................................................... 11
7 Using Your Camera as a Web Cam (PC Only) .............................................................................. 12
• Setting up NetMeeting™ ..................................................................................................... 12
• Start NetMeeting™............................................................................................................. 12
8 Troubleshooting Problems ........................................................................................................ 13
• Troubleshooting ................................................................................................................. 13
9 Getting Help........................................................................................................................... 14
• Online Services ................................................................................................................. 14
• Customer Support ............................................................................................................. 14
• ArcSoft Software Help ........................................................................................................ 14
10 Appendix ............................................................................................................................. 14
• Technical Specifications ...................................................................................................... 14
• Tips, Your Safety & Maintenance .......................................................................................... 15
• Regulatory Information....................................................................................................... 16
4
1 Getting Started
• What can I do with my Camera?
Capture
Enjoy point-and-shoot operation. Store pictures and video clips to the
internal memory.
Set Up
Select various camera settings.
• What can I do with my Digital Pictures?
View
View the pictures on a computer.
Save
Save the pictures to a computer memory by Mass Storage interface.
Communicate
Send the pictures over the Internet to family and friends.
• What can I do with my Video clips ?
Playback
Playback video clips on a computer using your system default video
application.
Save
Save video clips to the computer memory by Mass Storage interface.
Communicate
Send the video clips over the Internet to family and friends.
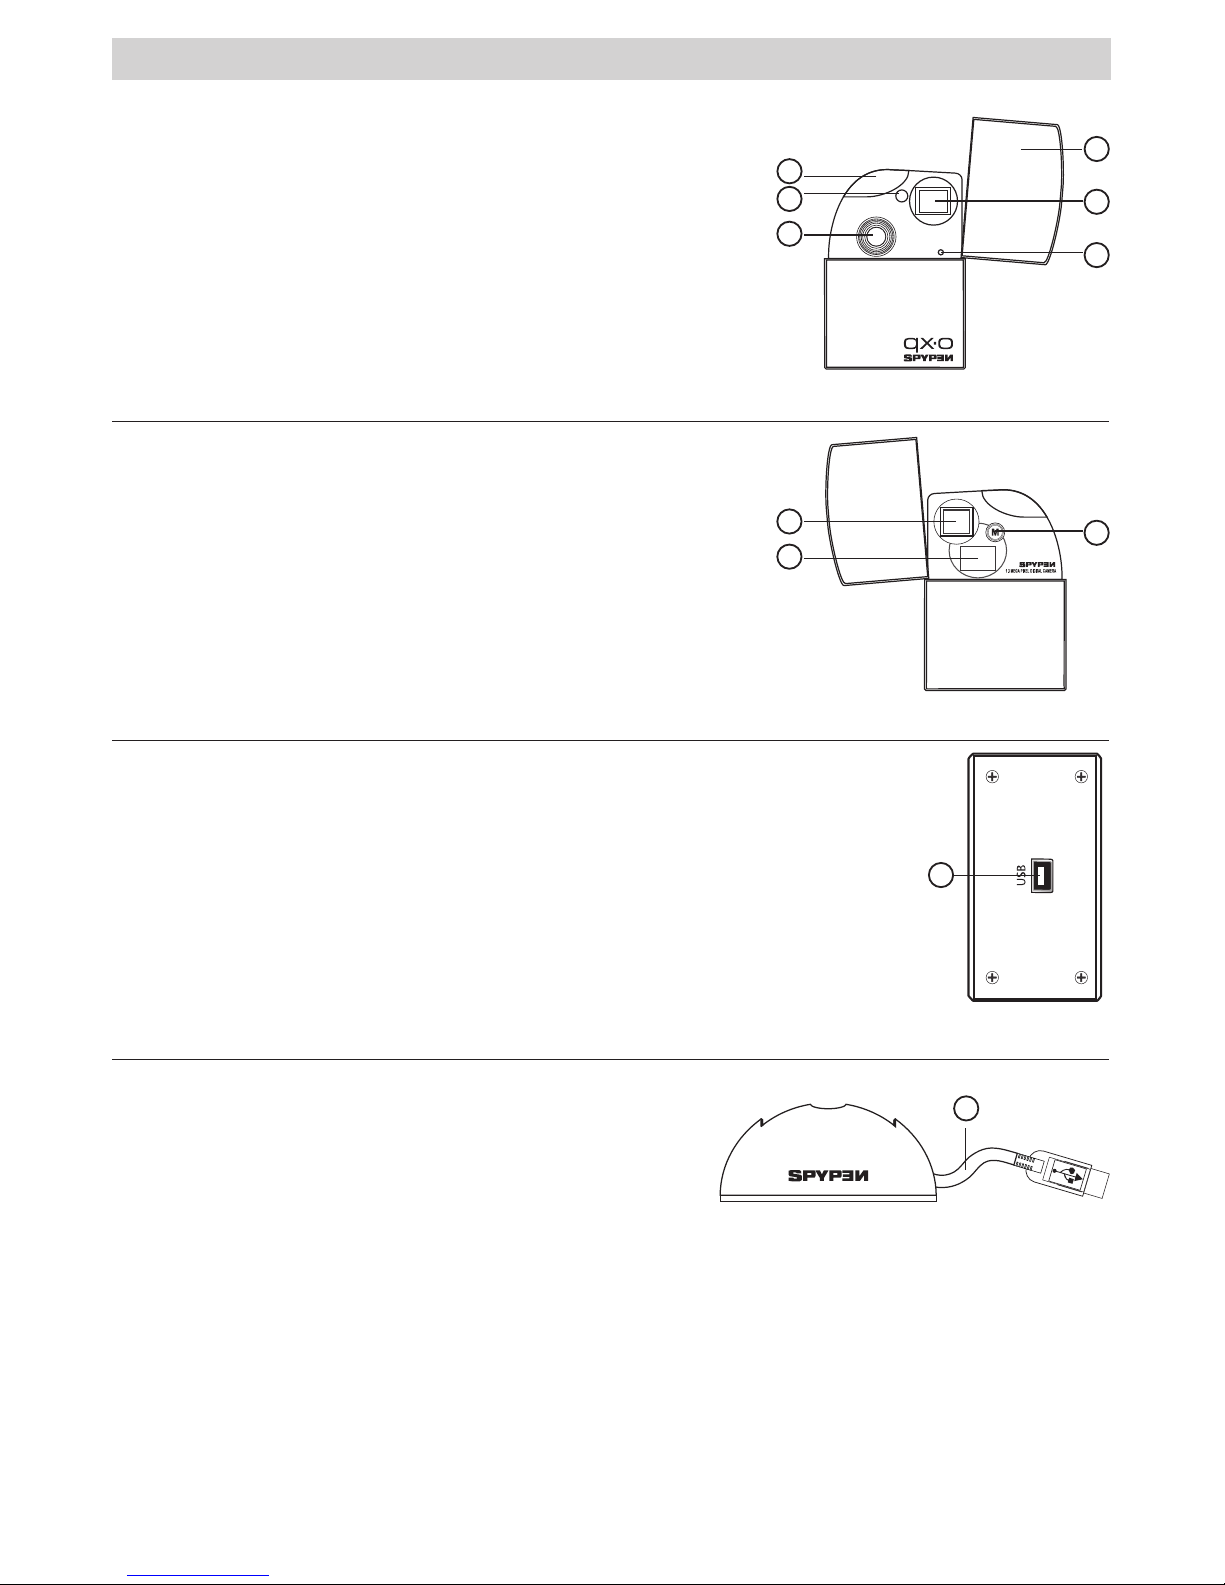
• Camera Package Contents
qx.o
The CD-Rom includes
Digital Camera Driver (PC)
Arcsoft® Software Suite (PC & Mac)
Microsoft® NetMeeting™
Adobe® Acrobat® Reader (PC & Mac)
User’s manual in PDF format.
Docking Station
(With USB cable)
Warranty CardPouch
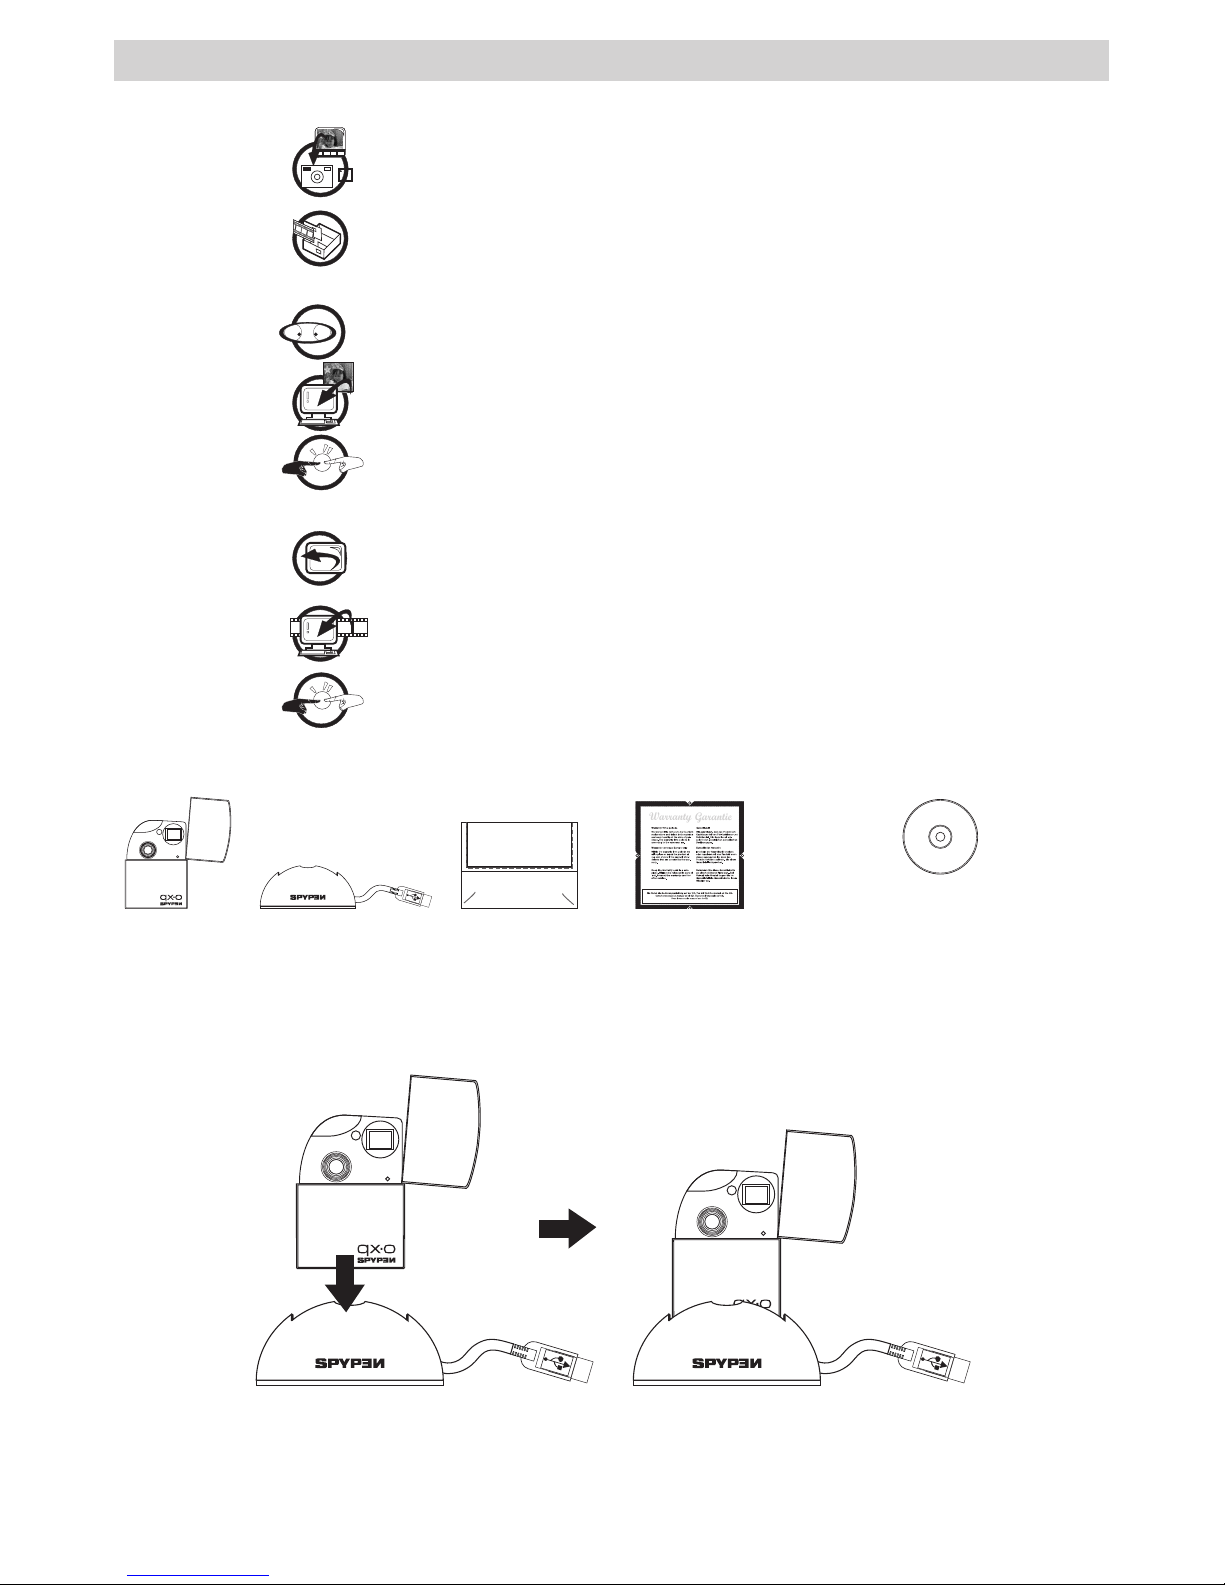
• Using the Docking Station

5
• Charging the Battery
The Li-polymer rechargeable battery is integrated in the camera and it is not replaceable. When the LCD
display flashes for about 30 seconds and then the camera turns off automatically, it means the battery is
low. Please follow the following steps to recharge the battery.
NOTE:
Please install the software provided before you connect the camera to your computer. Please refer to “5 Installing the
Software onto a Computer” on page 8 for further details.
USB Series “A” Plug Connects to your Computer
Status LED
1. Plug the camera into the Docking station.
2. Plug the USB cable on the Docking station into the port marked on your computer.
3. The battery begins charging. The status LED turns green until the charging is completed.
It takes approximately eight hours to fully charge the internal battery the first time after purchase and
then approximately 2 to 3 hours for subsequent recharging depending on use. The battery should last for
thousands of uses but should it ever need to be replaced please visit us at http://www.spypen.com for
information on replacement.
• Turning the Camera On and Off
Press and hold the Mode button until a beep sounds. Release the mode button
and the LCD display is activated. To turn off the camera, press the Mode
button repeatedly till you see “
” on the LCD display, then press the Shutter
button, and the camera will be off.
Mode button
Shutter button
• Automatic Power Saving
This camera is designed to automatically power off to save battery life in 30 seconds of inactivity. Repeat
the above steps of turning the camera on to turn on the camera again.
 Loading...