

Spypen Designer User Manual
User’s Manual
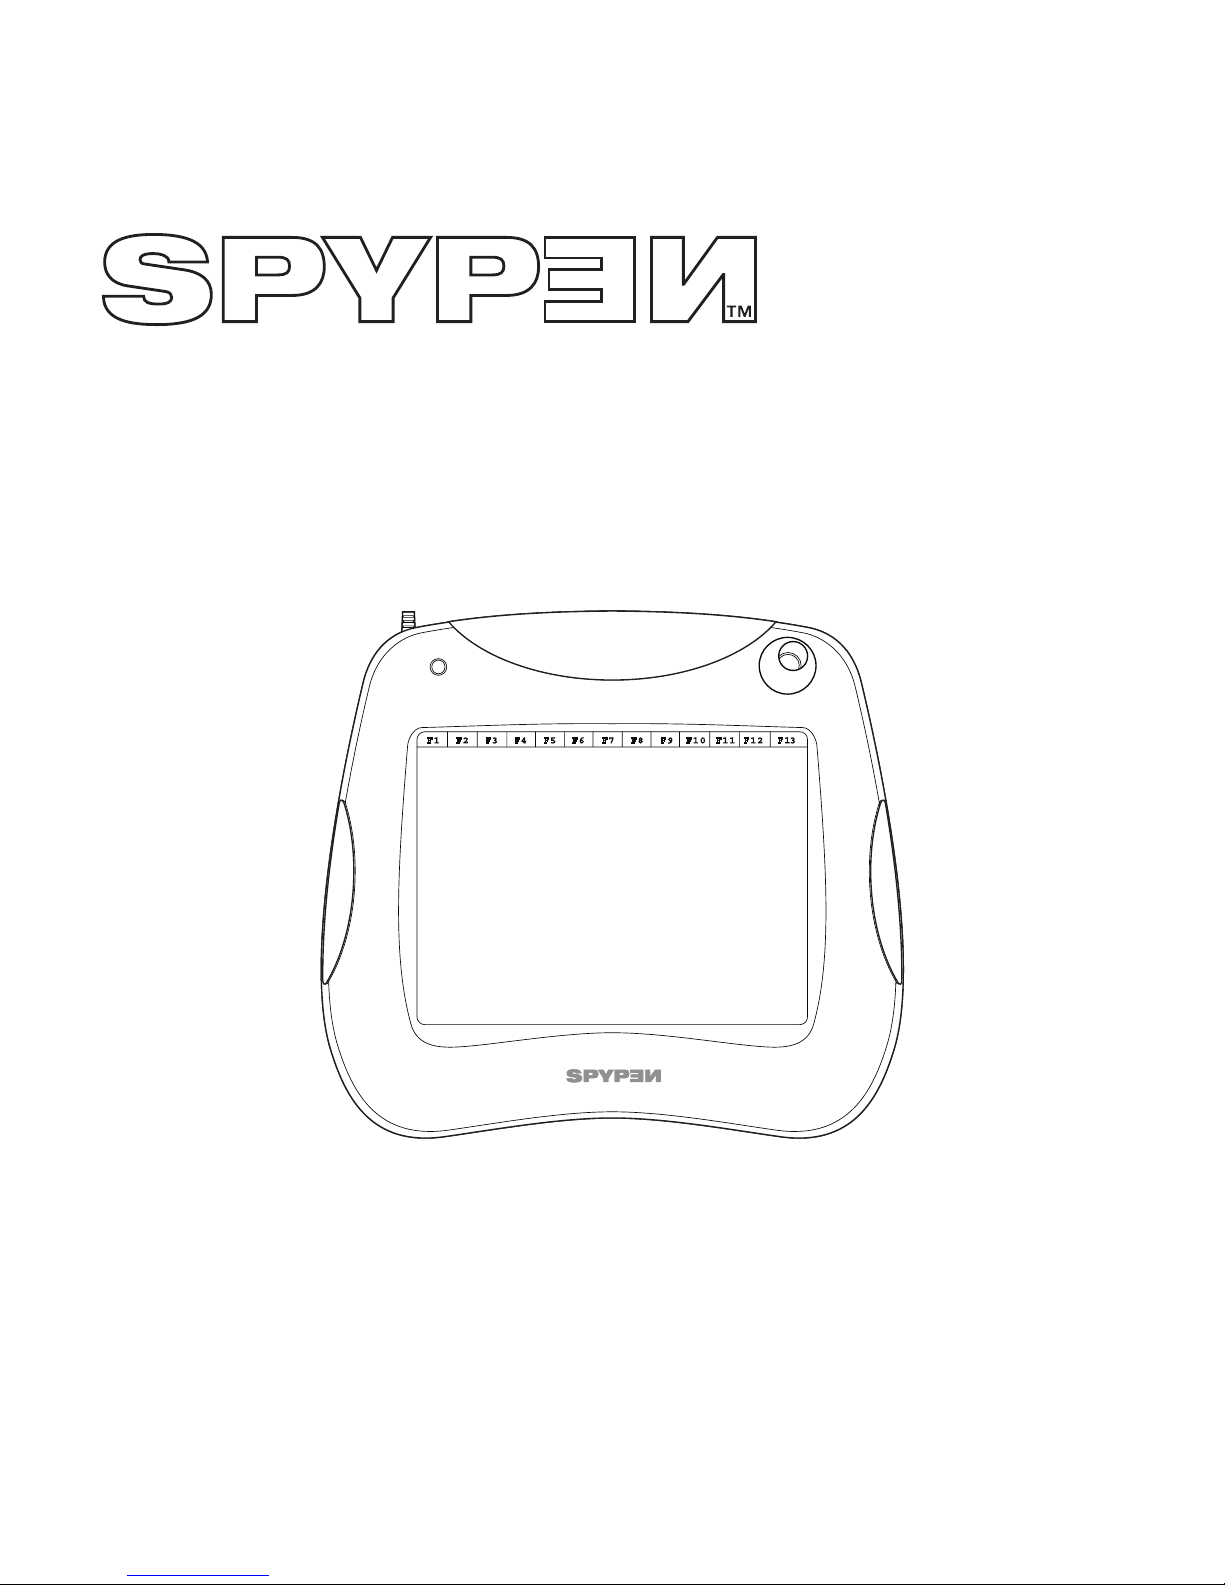
SPYPEN Designer
© 2002 plawa
DESIGNER

2
Introduction
Congratulations on purchasing the SPYPEN Designer. We hope you have many hours of fun
with this amazing USB device for your PC.
The SPYPEN Designer is a complete drawing, painting and writing tool. It features a 512-level
pressure-sensitive drawing pad, a cordless three-button mouse and cordless two-button pen.
As a pressure-sensitive pad, the harder you press with the cordless pen, the thicker the ink,
paint, crayon etc. appears on screen.
The software bundle should ensure many hours of fun. PhotoStudio® includes varies tools to
create fun drawing.
The software supplied includes Microsoft® NetMeeting™. The SPYPEN Designer supports
NetMeeting™’s shared “Whiteboard” facility and allows you to share drawings and sketches
over the Internet. There are also annotation and sketching tools, a signature verication
program.

3
Table of Contents
Introduction .................................................................................................... 2
Table of Contents ............................................................................................. 3
1. System Requirements ......................................................................................... 4
2. Package Contents .............................................................................................. 4
3. Getting Started .................................................................................................. 5
3.1 Battery Installation ..................................................................................... 5
3.2 How to install the SPYPEN Designer Driver .................................................. 6
3.3 How to connect Your SPYPEN Designer ........................................................ 7
3.4 How to install PenSoft ................................................................................. 7
3.5 How to use PenSoft..................................................................................... 7
3.6 How to install PhotoStudio® 2000 ............................................................... 12
3.7 How to adjust the cordless mouse and pen settings ....................................... 12
3.8 How to use PhotoStudio® 2000 .................................................................. 14
3.9 How to install Microsoft® NetMeeting™ ....................................................... 15
3.10 How to use Microsoft® NetMeeting™ ........................................................... 16
4. Customer Support ............................................................................................. 17
5. Troubleshooting ................................................................................................ 28
6. Battery Guidance .............................................................................................. 29
7. Technical Specications ...................................................................................... 20
8. FCC Notice ................................................................................................... 21
4
1. System Requirements
Compatible with Microsoft® Windows® 98, Windows® ME, Windows® 2000 or XP
• Intel® Pentium® II 333Mhz or equivalent processor
• 128MB RAM
• USB Port
• CD-ROM Drive
• Colour Monitor with minimum 16-bit colour graphic capability or higher
• Standard mouse and keyboard
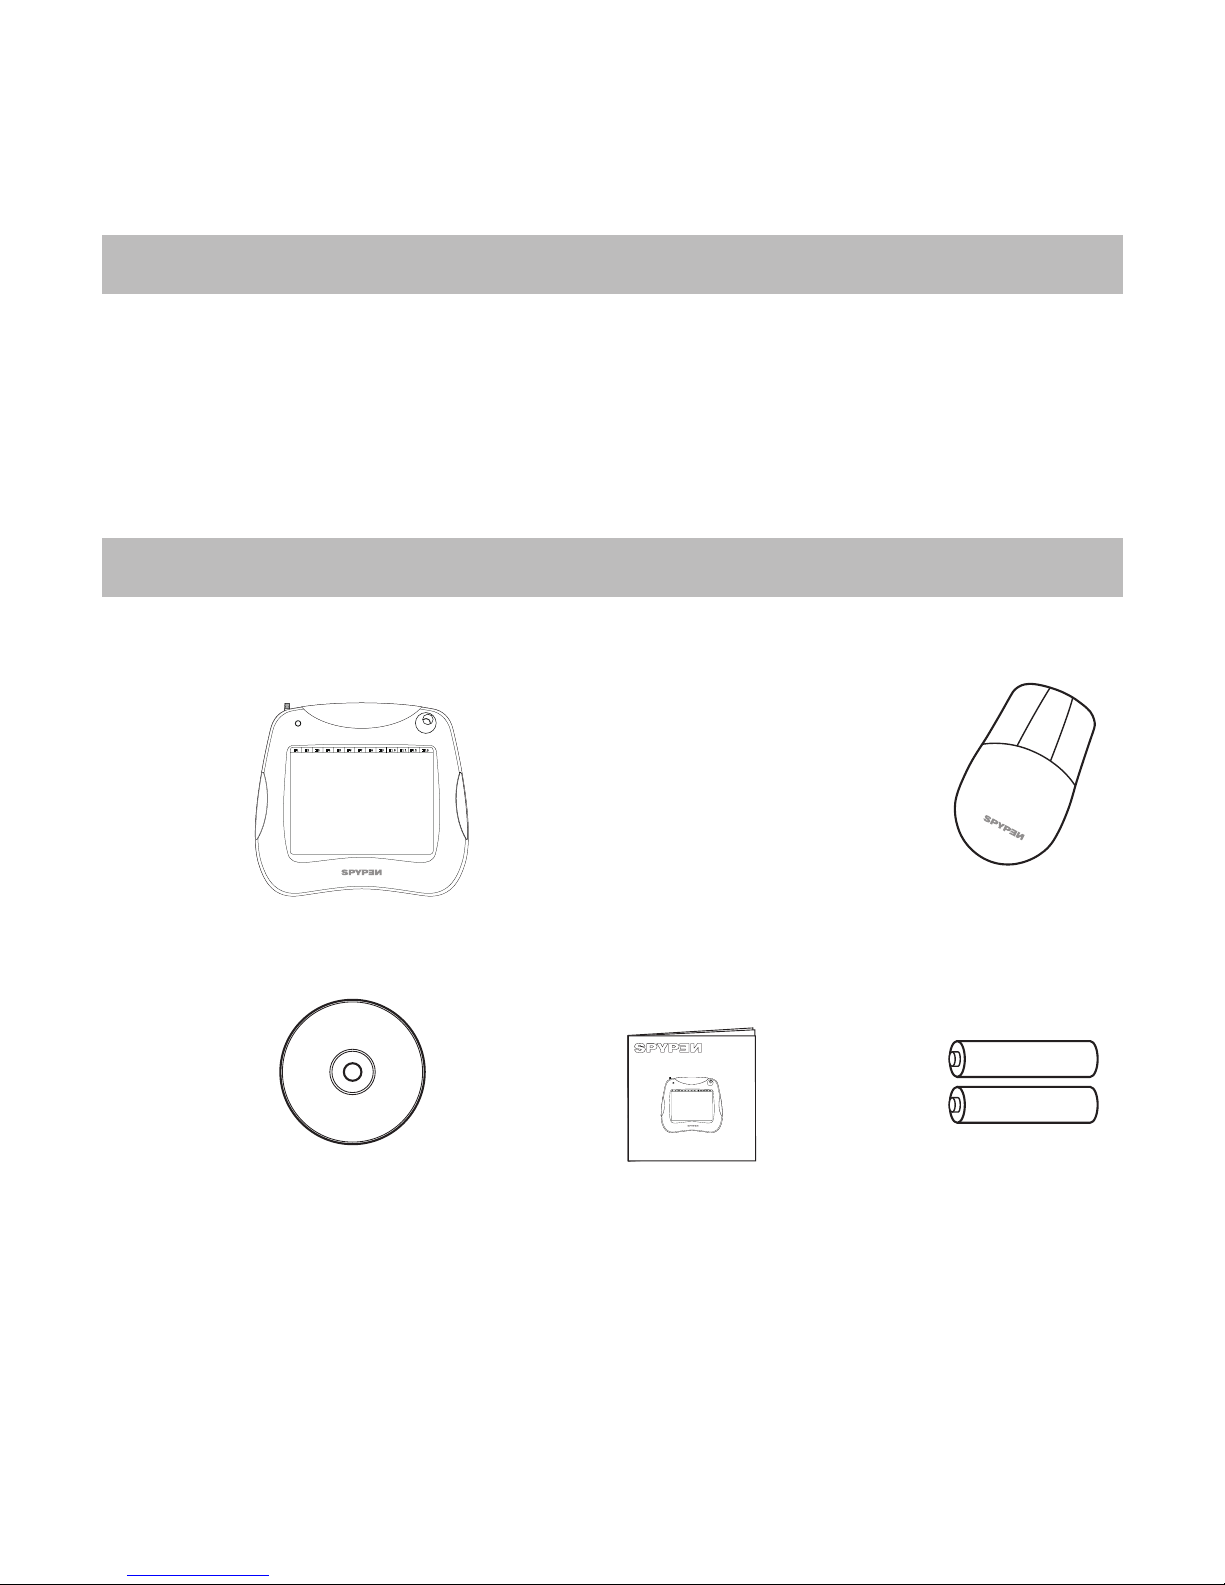
2. Package Contents
SPYPEN Designer Software CD-ROM
(includes Art Pad II Driver, PhotoStudio® 2000, Pen Soft,
Microsoft® NetMetting™ and Acrobat® Reader)
2 x AAA Batteries
User’s Manual
Tablet
DESIGNER
Cordless Mouse
User’s Manual
SPYPEN Designer
DESIGNER
5
3. Getting Started
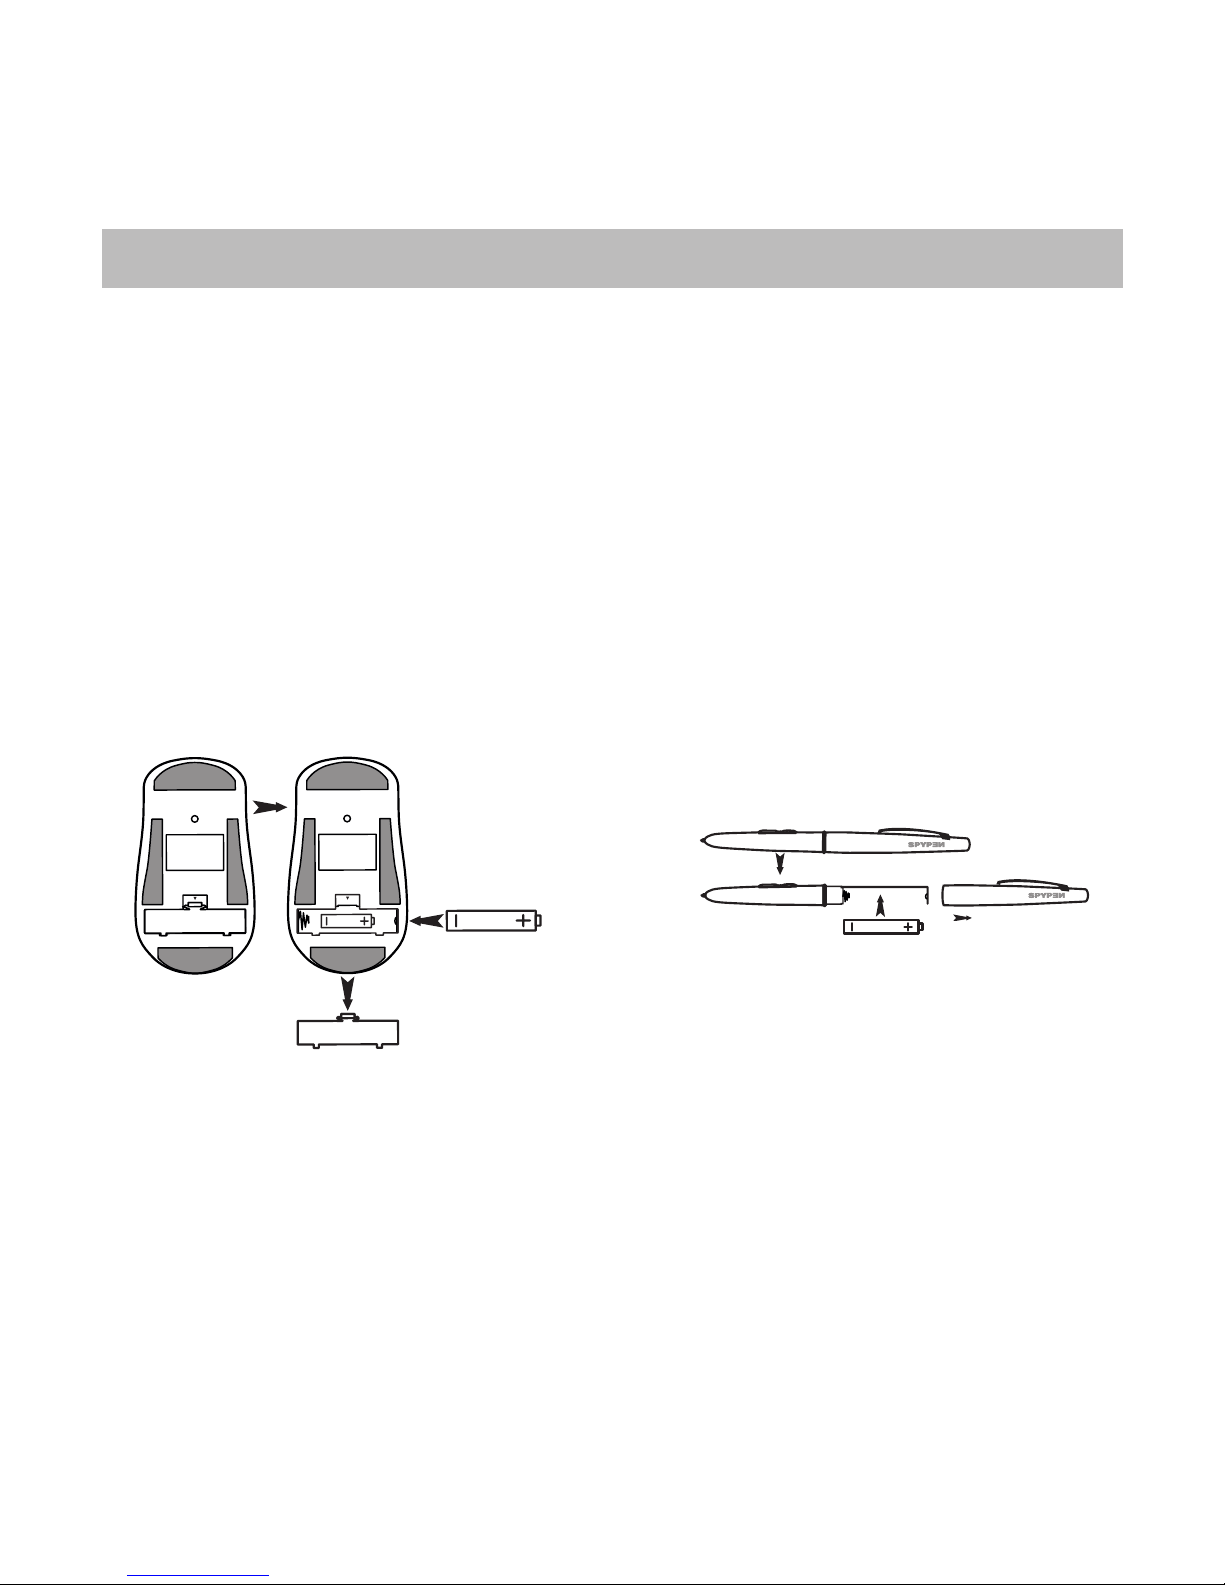
3.1 Battery Installation
Cordless Mouse
1. Open the battery door on the back of the cordless mouse. Insert the 1 x AAA alkaline
battery into the battery compartment. (Make sure you follow the correct polarity (+) (-) as
indicated.)
2. Close the battery door.
Cordless Pen
1. Carefully ease the 2 pen halves apart. Insert 1 x AAA alkaline battery into the battery
compartment. (Make sure you follow the correct polarity (+) (-) as indicated.)
2. Slide the 2 pen halves together ensuring the raised area on both halves is lined up.
Cordless Mouse Cordless Pen
6
3.2 How to install the Art Pad II Driver
Note:
We recommend NOT TO CONNECT YOUR USB SPYPEN Designer UNTIL YOU HAVE INSTALLED THE
Art Pad II Driver SOFTWARE. Ensure you have inserted your batteries in both the cordless pen and mouse
before SPYPEN Designer installation. (see Section 3.1 for battery installation)
3.2.1 Installing your Art Pad II Driver
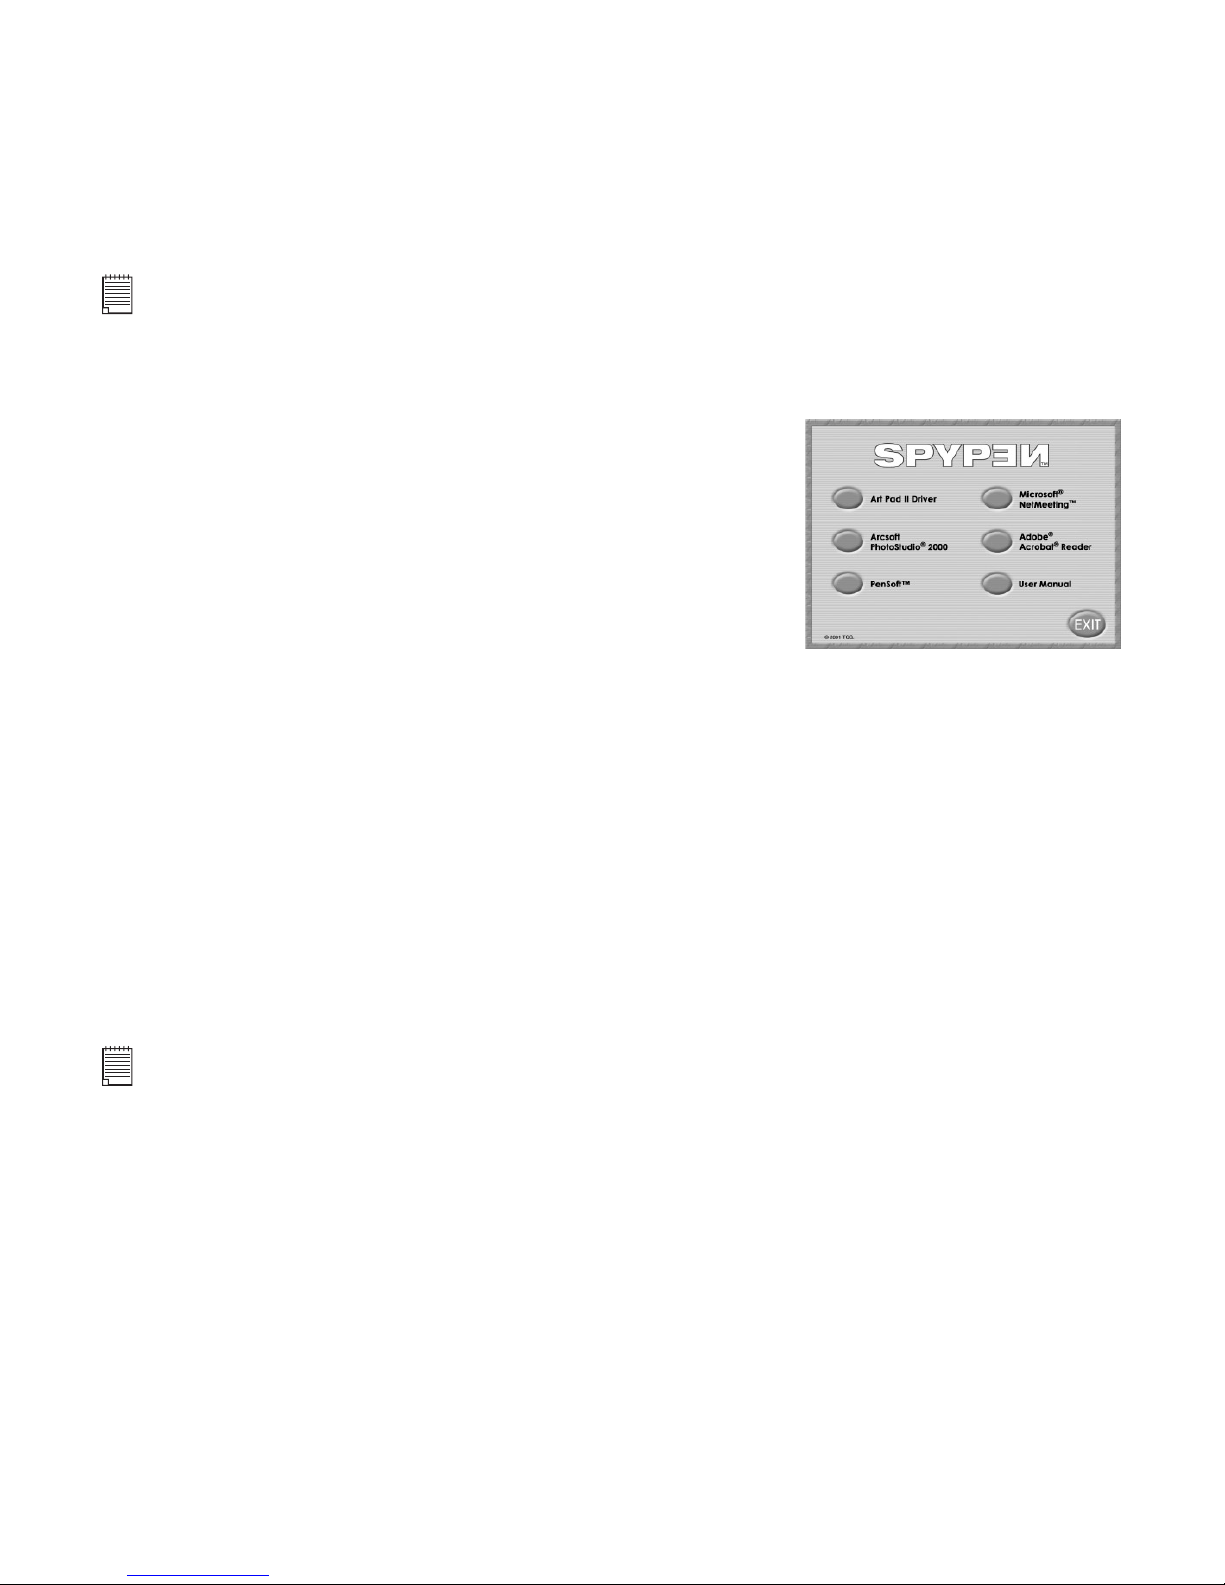
1. Insert the CD-ROM disk into the CD-ROM drive and close
the CD ROM drawer.
2. An installation wizard will automatically launch.
3. Click “Art Pad II Driver” icon.
4. Follow the instructions presented on the screen to complete
the installation.
5. The Art Pad II Driver les will begin to install to the
proper location.
6. Installation will prompt you to plug in your USB tablet.
Connect your SPYPEN Designer’s USB connector into an
available USB port on your computer. (See Section 3.3)
7. Microsoft® Windows® will detect your newly installed SPYPEN Designer and will proceed
with the nal steps of the installation.
8. You need to restart your computer to complete the installation.
9. Then connect your SPYPEN Designer to your computer please refer to section 3.3.
10. The Green LED on the SPYPEN Designer surface will ash to denote that
the surface is active when used with the pen and mouse.
Tips! Leaving the mouse on the SPYPEN Designer will slow down the access of other les and
programs or starting your computer.
3.2.2 To Uninstall the Art Pad II Driver
1. Go to Start -> Programs-> SPYPEN Designer -> Uninstall -> Ok
2. Follow the on screen instructions.
Note:
If the setup screen doesn’t appear after loading the CD, then you can manually start it by double-clicking
the “My Computer” icon on your desktop, then double-clicking the icon for the CD-ROM drive. When the
CD-ROM window opens, double-click the “Autorun” icon.
7
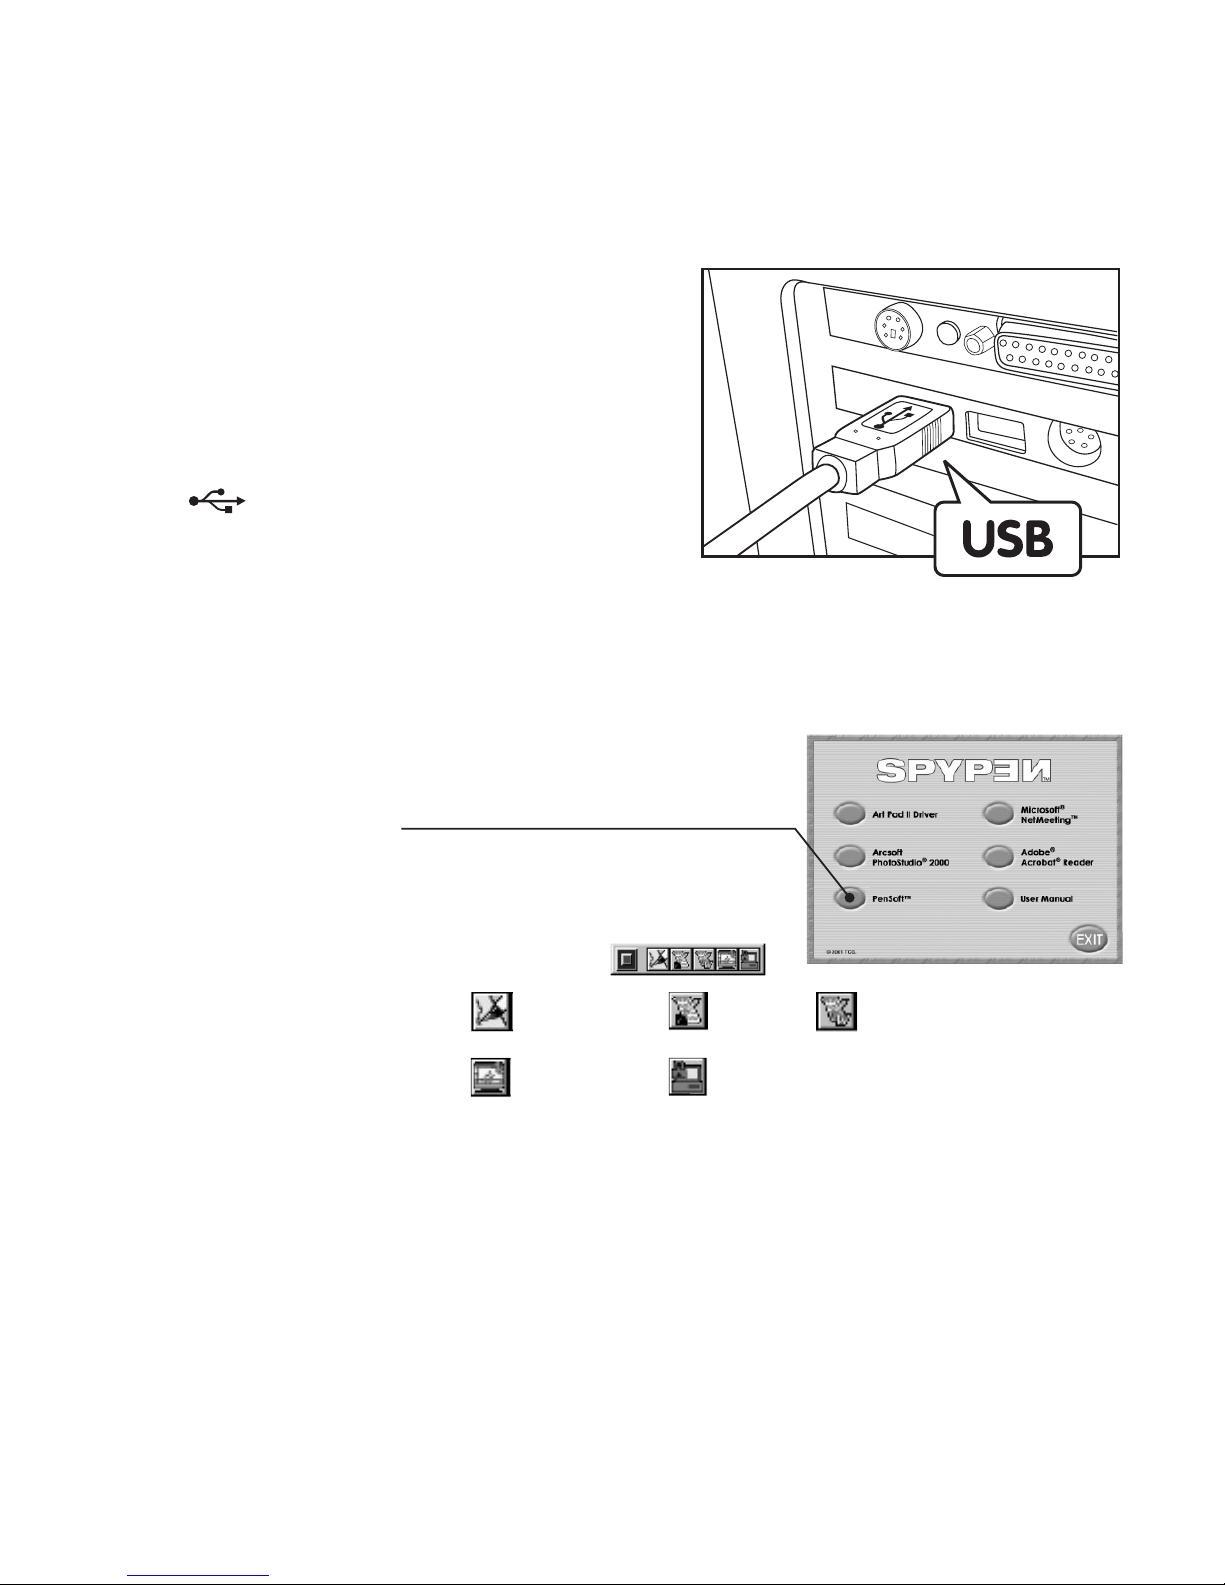
3.3 How to connect Your SPYPEN Designer
For the fastest and easiest installation of the
SPYPEN Designer , we recommend NOT TO
CONNECT YOUR USB UNTIL YOU HAVE INSTALLED
THE Art Pad II Driver SOFTWARE.
Simply plug in the USB cable to the USB port on
your PC or Notebook device.
The USB port can be found on the front or back
panel of your PC or Notebook device. Look for this
symbol
next to the USB connection port.
(Also see your PC operating manual for the
location of your USB connection port.)
3.4 How to install PenSoft
PenSoft provides tools to add “Inks” (geometrical shapes, handwriting, signatures) to
documents. This is useful if you want to make a document (e.g. an e-mail) more personal,
authentic, expressive, as well as impressive.
1. Insert the CD-ROM disk into the CD-ROM drive and close
the CD-ROM drawer.
2. An installation wizard will automatically launch.
3. Click “PEN SOFT” icon.
4. Follow the instructions presented on the screen to complete
the installation.
5. If you need further help on using Pen Soft, simply double
click the le “Document” under the Pen Soft folder.
6. If installation is succesful, the following icon
will appear on the desktop.
Pen Lock
Sign
Word 97
Annotation
Screen Saver
Handwriting
Recognition
3.5 How to use PenSoft
Handwriting easy set up instructions
Turn your handwriting, signatures and geometrical shapes into e-mail and word processed
documents by using your own handwriting that is cleverly recognised and turned into typed
text. Some patience is initially required when programming in your own handwriting style.
Letters are automatically kept in the “Learn” window, ensure the toolbar is set to the mouse/
pen icon. Access the learn window by pressing the 3rd from left icon on the toolbar. Your
letters are kept here, over type into the box below named “Input text here” Select the “insert”
key to record the letter.
 Loading...