

Spyder Auto PRO-YD-DINT98-HL Installation Manual
*Please Note*
If you are unfamiliar with the installation pro-
cesses, professional installation is highly rec-
ommended.
INSTALLATION GUIDE:
PRO-YD-DINT98-HL (ALL COLORS)
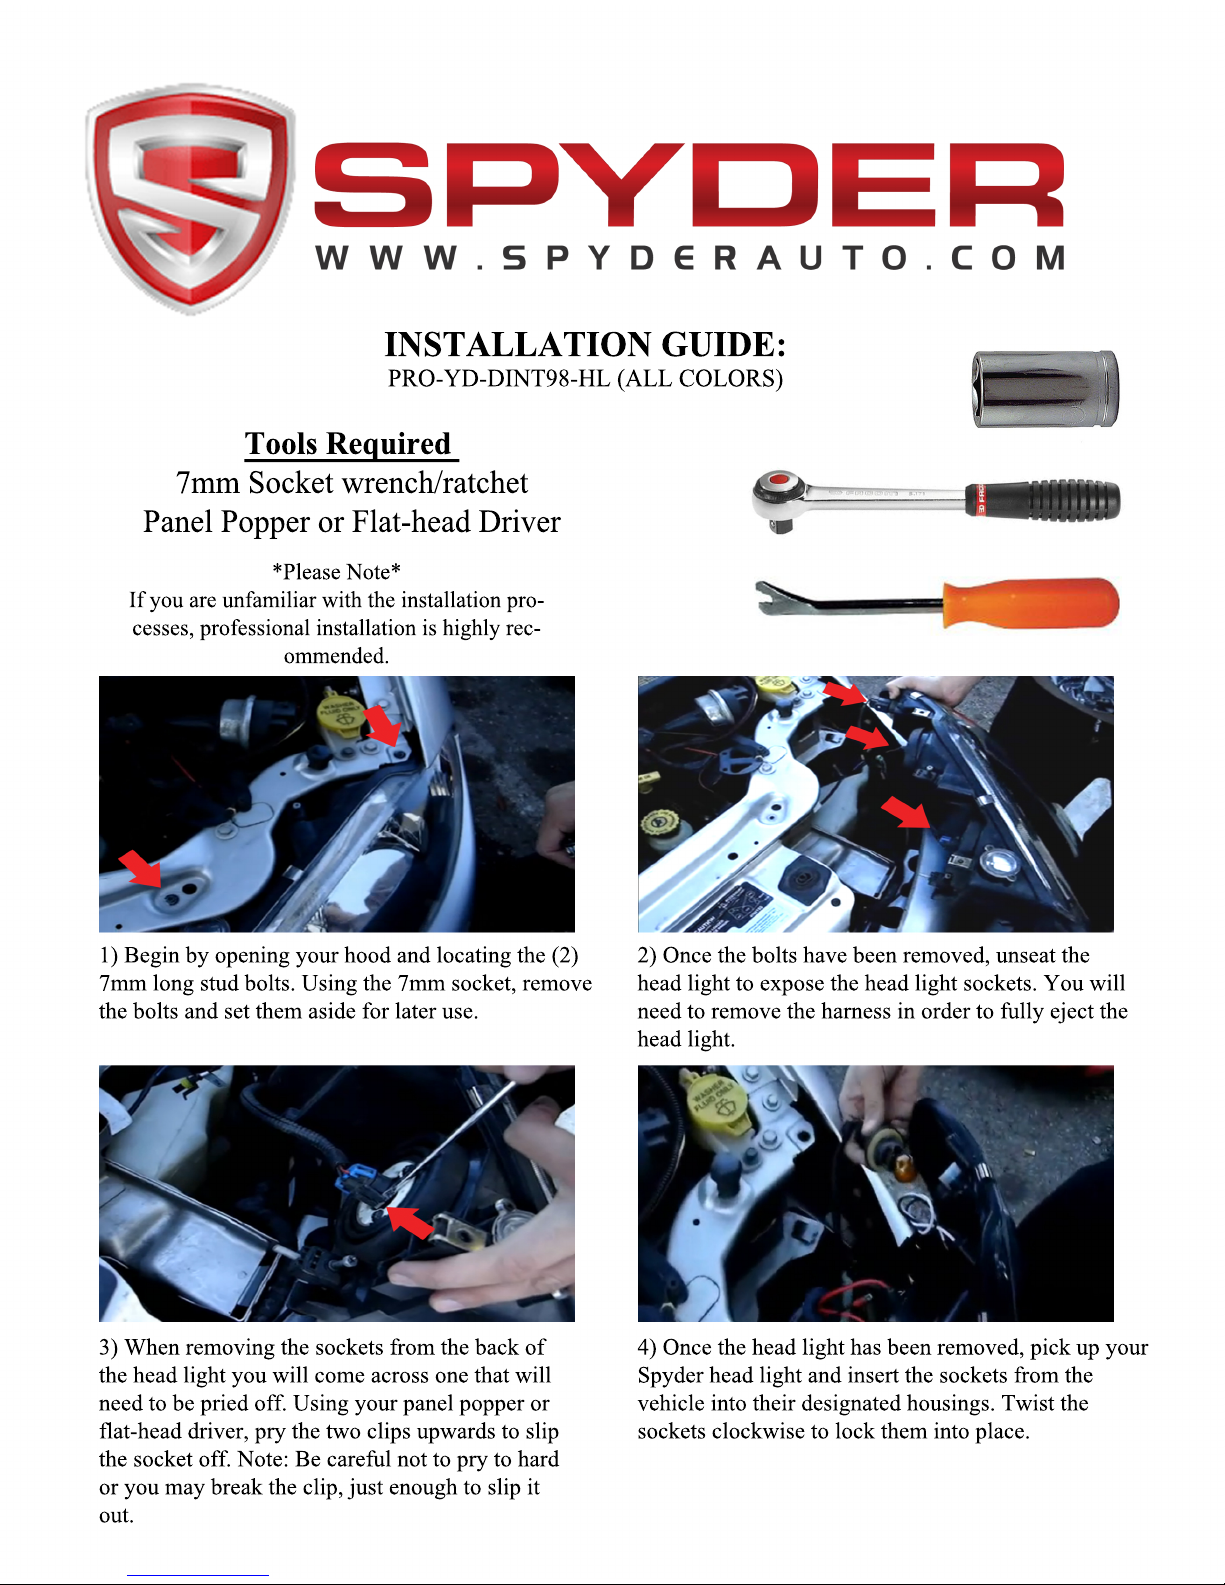
1) Begin by opening your hood and locating the (2)
7mm long stud bolts. Using the 7mm socket, remove
the bolts and set them aside for later use.
3) When removing the sockets from the back of
the head light you will come across one that will
need to be pried off. Using your panel popper or
flat-head driver, pry the two clips upwards to slip
the socket off. Note: Be careful not to pry to hard
or you may break the clip, just enough to slip it
out.
4) Once the head light has been removed, pick up your
Spyder head light and insert the sockets from the
vehicle into their designated housings. Twist the
sockets clockwise to lock them into place.
2) Once the bolts have been removed, unseat the
head light to expose the head light sockets. You will
need to remove the harness in order to fully eject the
head light.
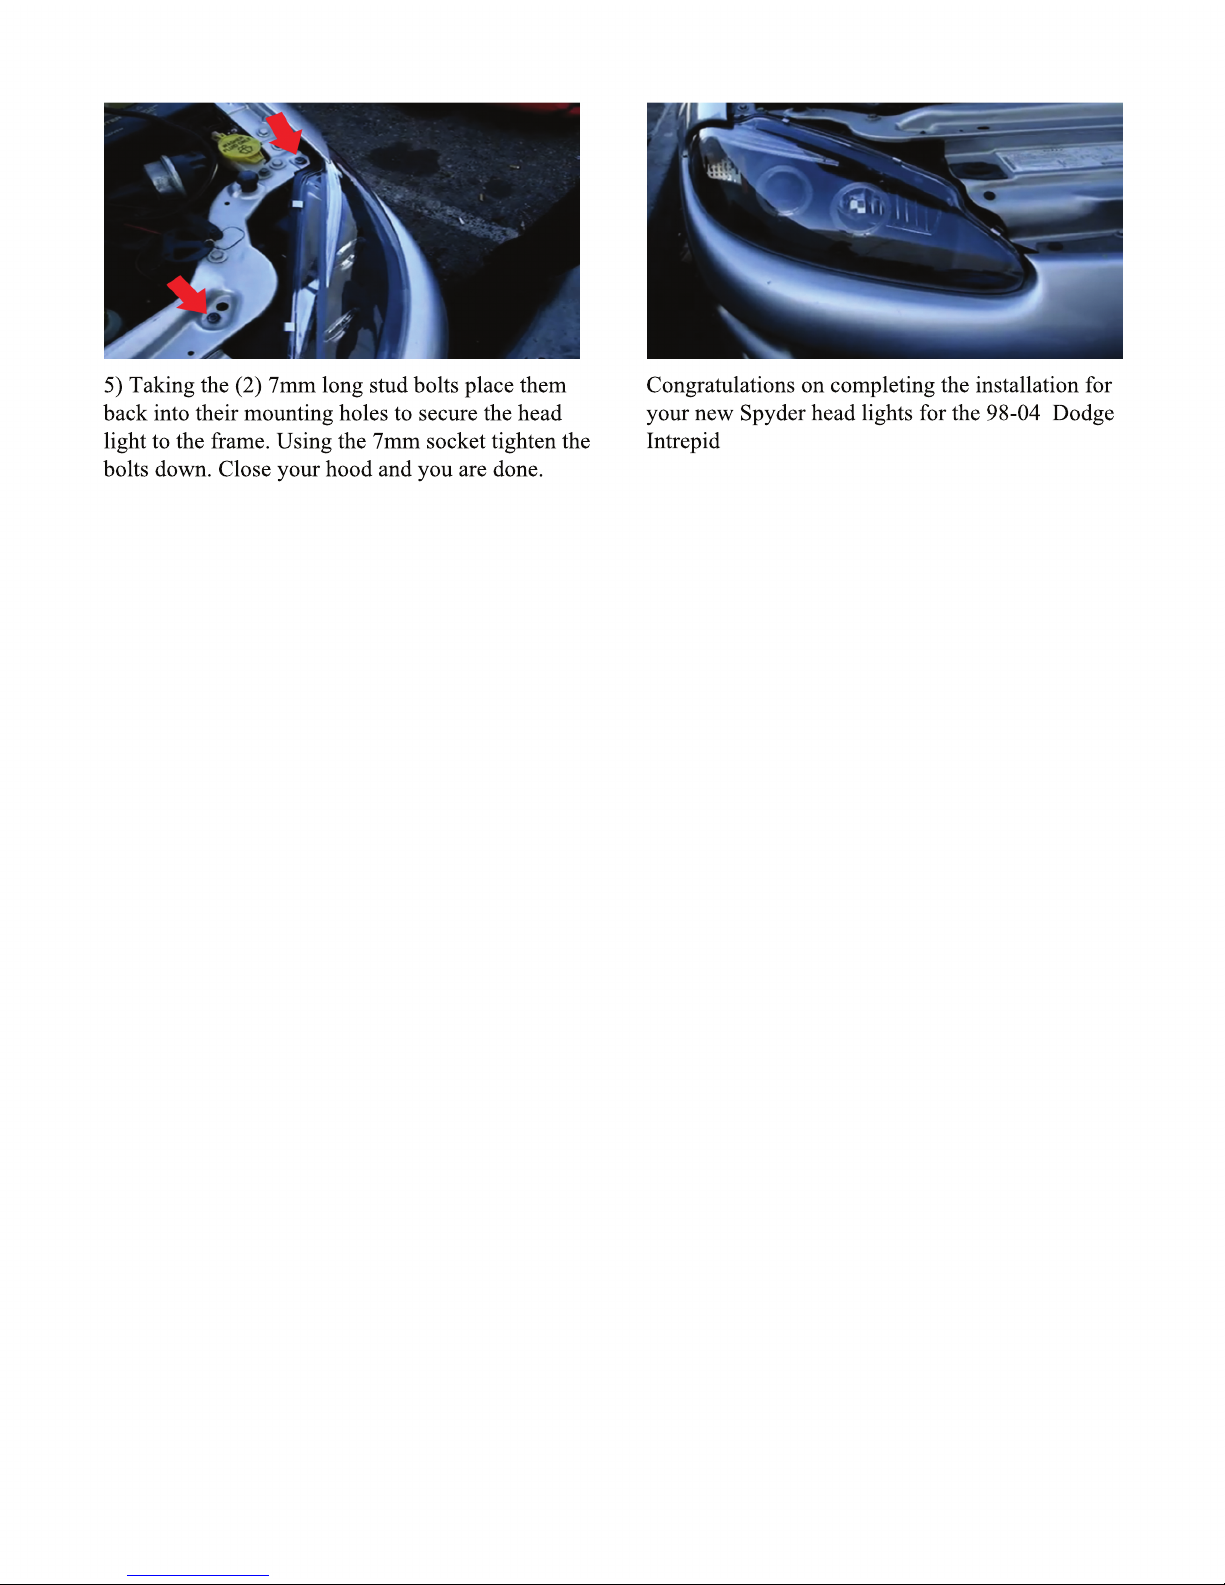
Congratulations on completing the installation for
your new Spyder head lights for the 98-04 Dodge
Intrepid
5) Taking the (2) 7mm long stud bolts place them
back into their mounting holes to secure the head
light to the frame. Using the 7mm socket tighten the
bolts down. Close your hood and you are done.
 Loading...