

Spyder Auto PRO-YD-C300C-HL Installation Manual

*Please Note*
If you are unfamiliar with the installation pro-
cesses, professional installation is highly rec-
ommended.
INSTALLATION GUIDE:
PRO-YD-C300C-HL (ALL COLORS)
1) The bumper will need to be removeed to install
your new Spyder head lights. First you will start by
detaching the fender liner from the bumper. Use the
Pannel Popper or Flat-head driver to pry the 4 clips
from there mounting holes.
3) Now you will need to remove the top 4 clips
fromg the grill area. Using the Pannel Popper or
Flat-head driver again, pry the 4 clips from there
mounting holes.
4) Before the bumper can be fully removed it will need
to be detached from the slash guard. This is secured 4
8mm bolt on the outter edges of the bumper and 4
8mm bolts on the inner portion. You will need to use
the 8mm socket or wrench to remove these from there
bolt holes.
1
2
2) Next you will need to remove the 10mm bolt that
is secured behind the fender liner. Use the 10mm
socket or wrench to unscrew it from its bolt hole.
Clips and bolts will need to be removed from both
sides of the bumper.
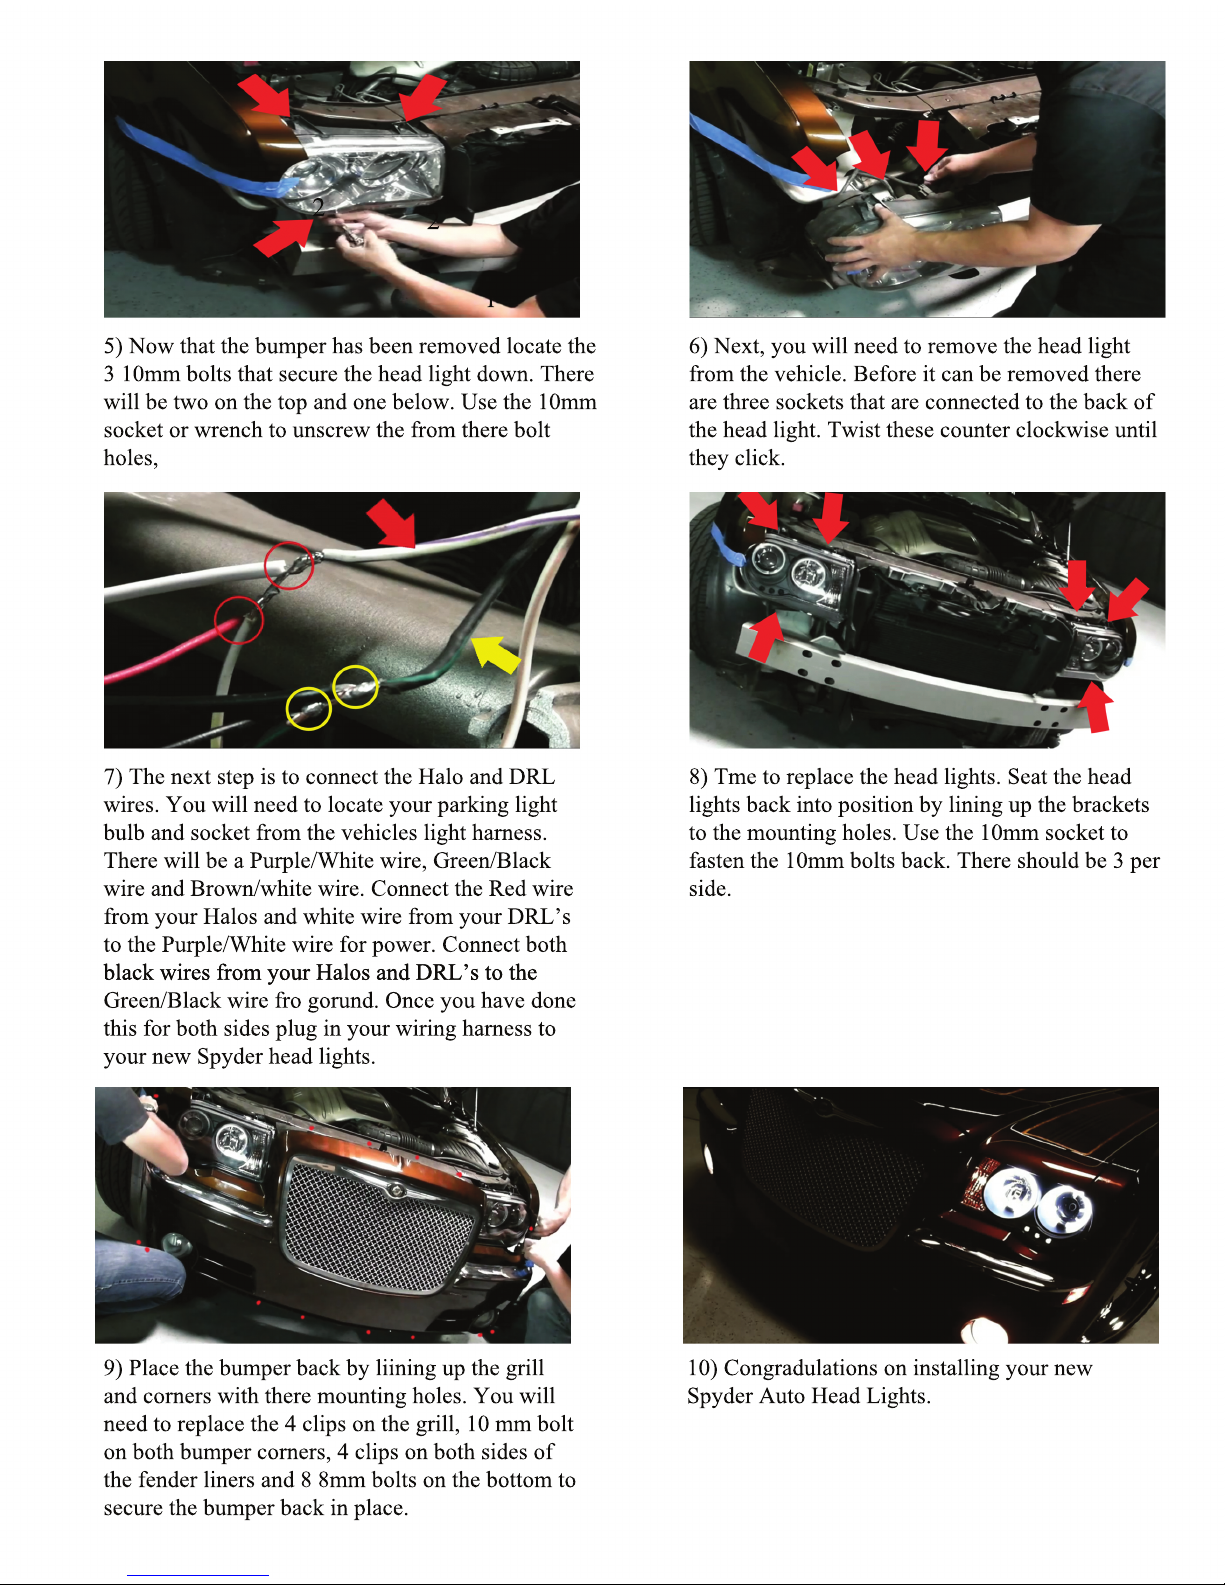
6) Next, you will need to remove the head light
from the vehicle. Before it can be removed there
are three sockets that are connected to the back of
the head light. Twist these counter clockwise until
they click.
7) The next step is to connect the Halo and DRL
wires. You will need to locate your parking light
bulb and socket from the vehicles light harness.
There will be a Purple/White wire, Green/Black
wire and Brown/white wire. Connect the Red wire
from your Halos and white wire from your DRL’s
to the Purple/White wire for power. Connect both
black wires from your Halos and DRL’s to the black wires from your Halos and DRL’s to the
Green/Black wire fro gorund. Once you have done
this for both sides plug in your wiring harness to
your new Spyder head lights.
1
2
2
8) Tme to replace the head lights. Seat the head
lights back into position by lining up the brackets
to the mounting holes. Use the 10mm socket to
fasten the 10mm bolts back. There should be 3 per
side.
9) Place the bumper back by liining up the grill
and corners with there mounting holes. You will
need to replace the 4 clips on the grill, 10 mm bolt
on both bumper corners, 4 clips on both sides of
the fender liners and 8 8mm bolts on the bottom to
secure the bumper back in place.
10) Congradulations on installing your new
Spyder Auto Head Lights.
5) Now that the bumper has been removed locate the
3 10mm bolts that secure the head light down. There
will be two on the top and one below. Use the 10mm
socket or wrench to unscrew the from there bolt
holes,
 Loading...