

Spyder Auto HALO and LED User Manual
INSTALLATION GUIDE:
HALO and L.E.D. Installation Guide
For more information about how to install HALO/L.E.D. to your vehicle, come visit our youtube page on
http://www.youtube.com/spyderauto
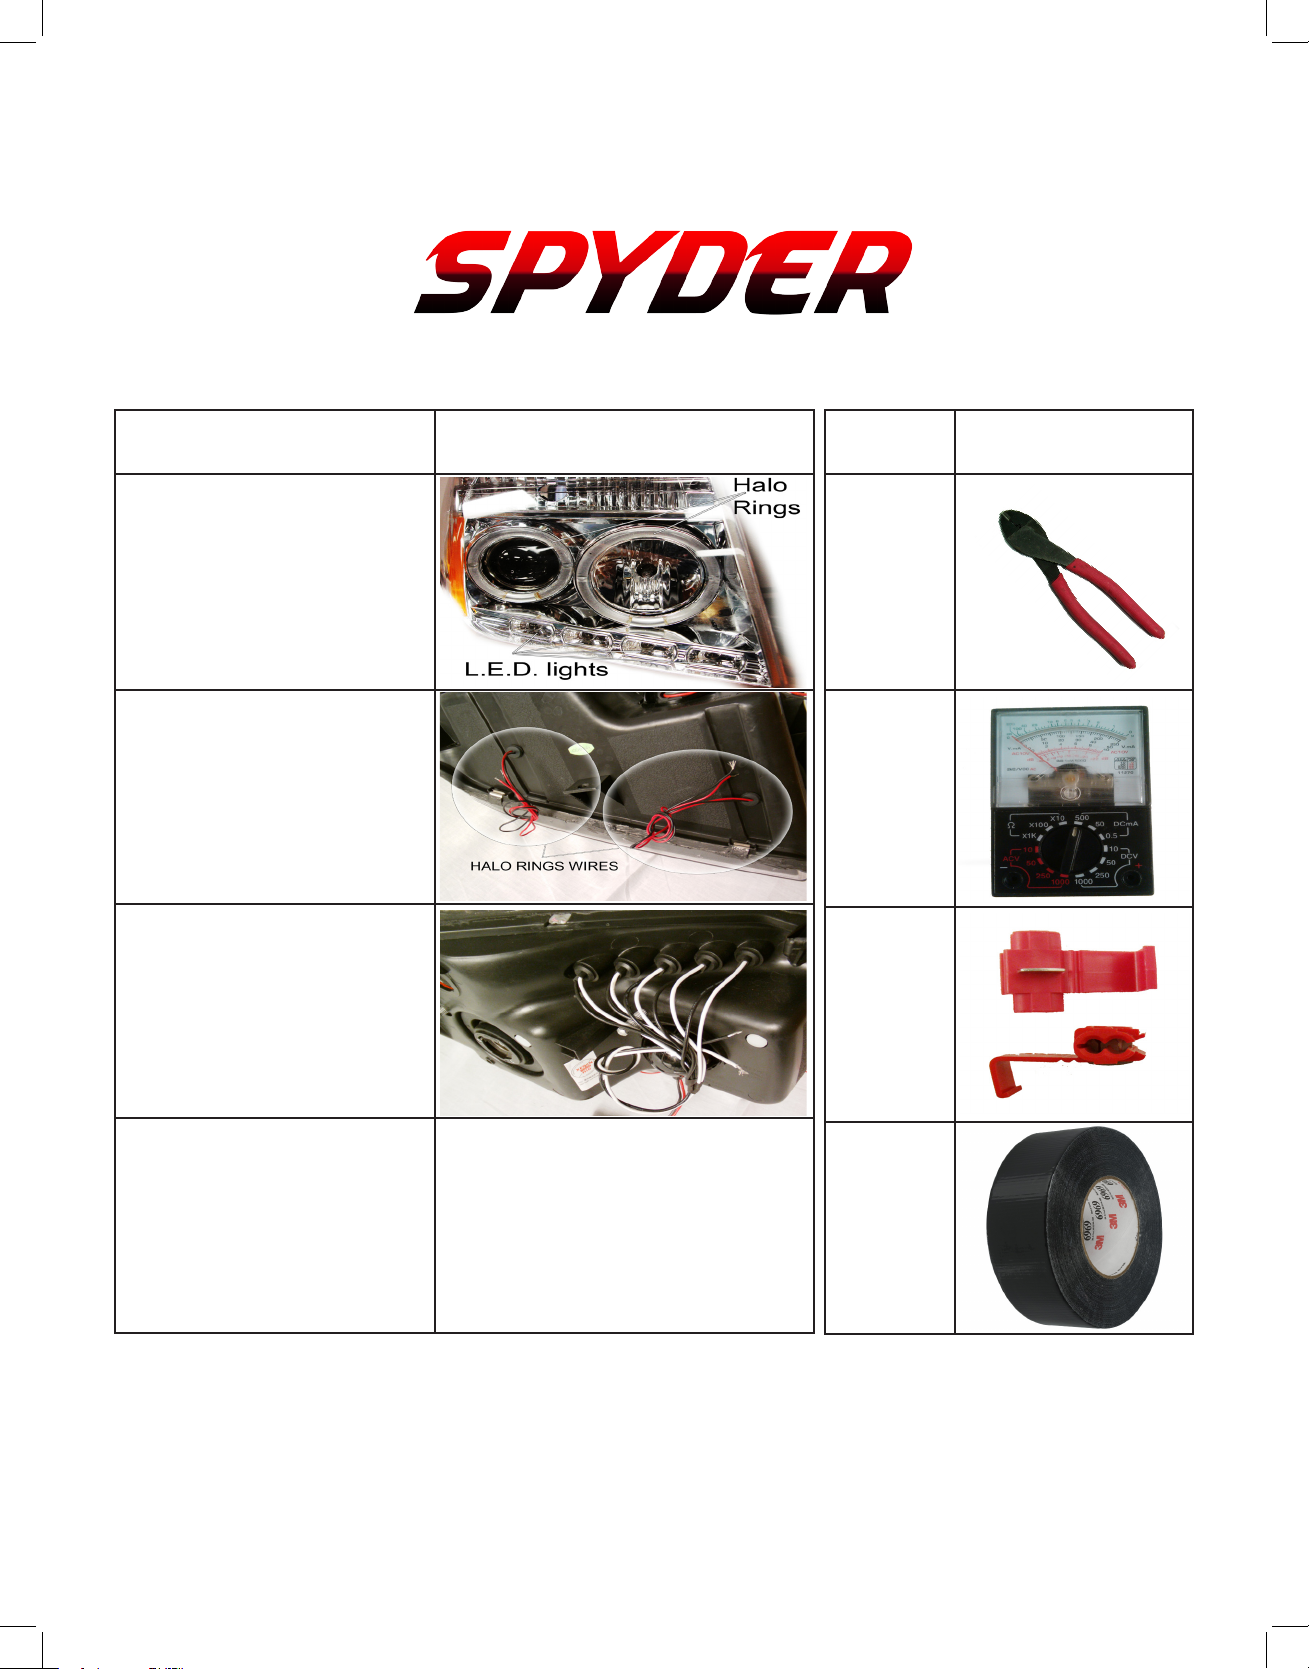
Parts Identication:
HALO & L.E.D.
HEAD LIGHT
HALO WIRES(FROM
HEADLIGHT)
RED(POSITIVE) BLACK
(NEGATIVE)
L.E.D. WIRES.
-POSITIVE(WHITE)
-NEGATIVE(BLACK)
TOOLS
REQUIRE
CRIMPER
VOLT
METER
4-5QTY
QUICK
CONNECT
BLACK
TAPE
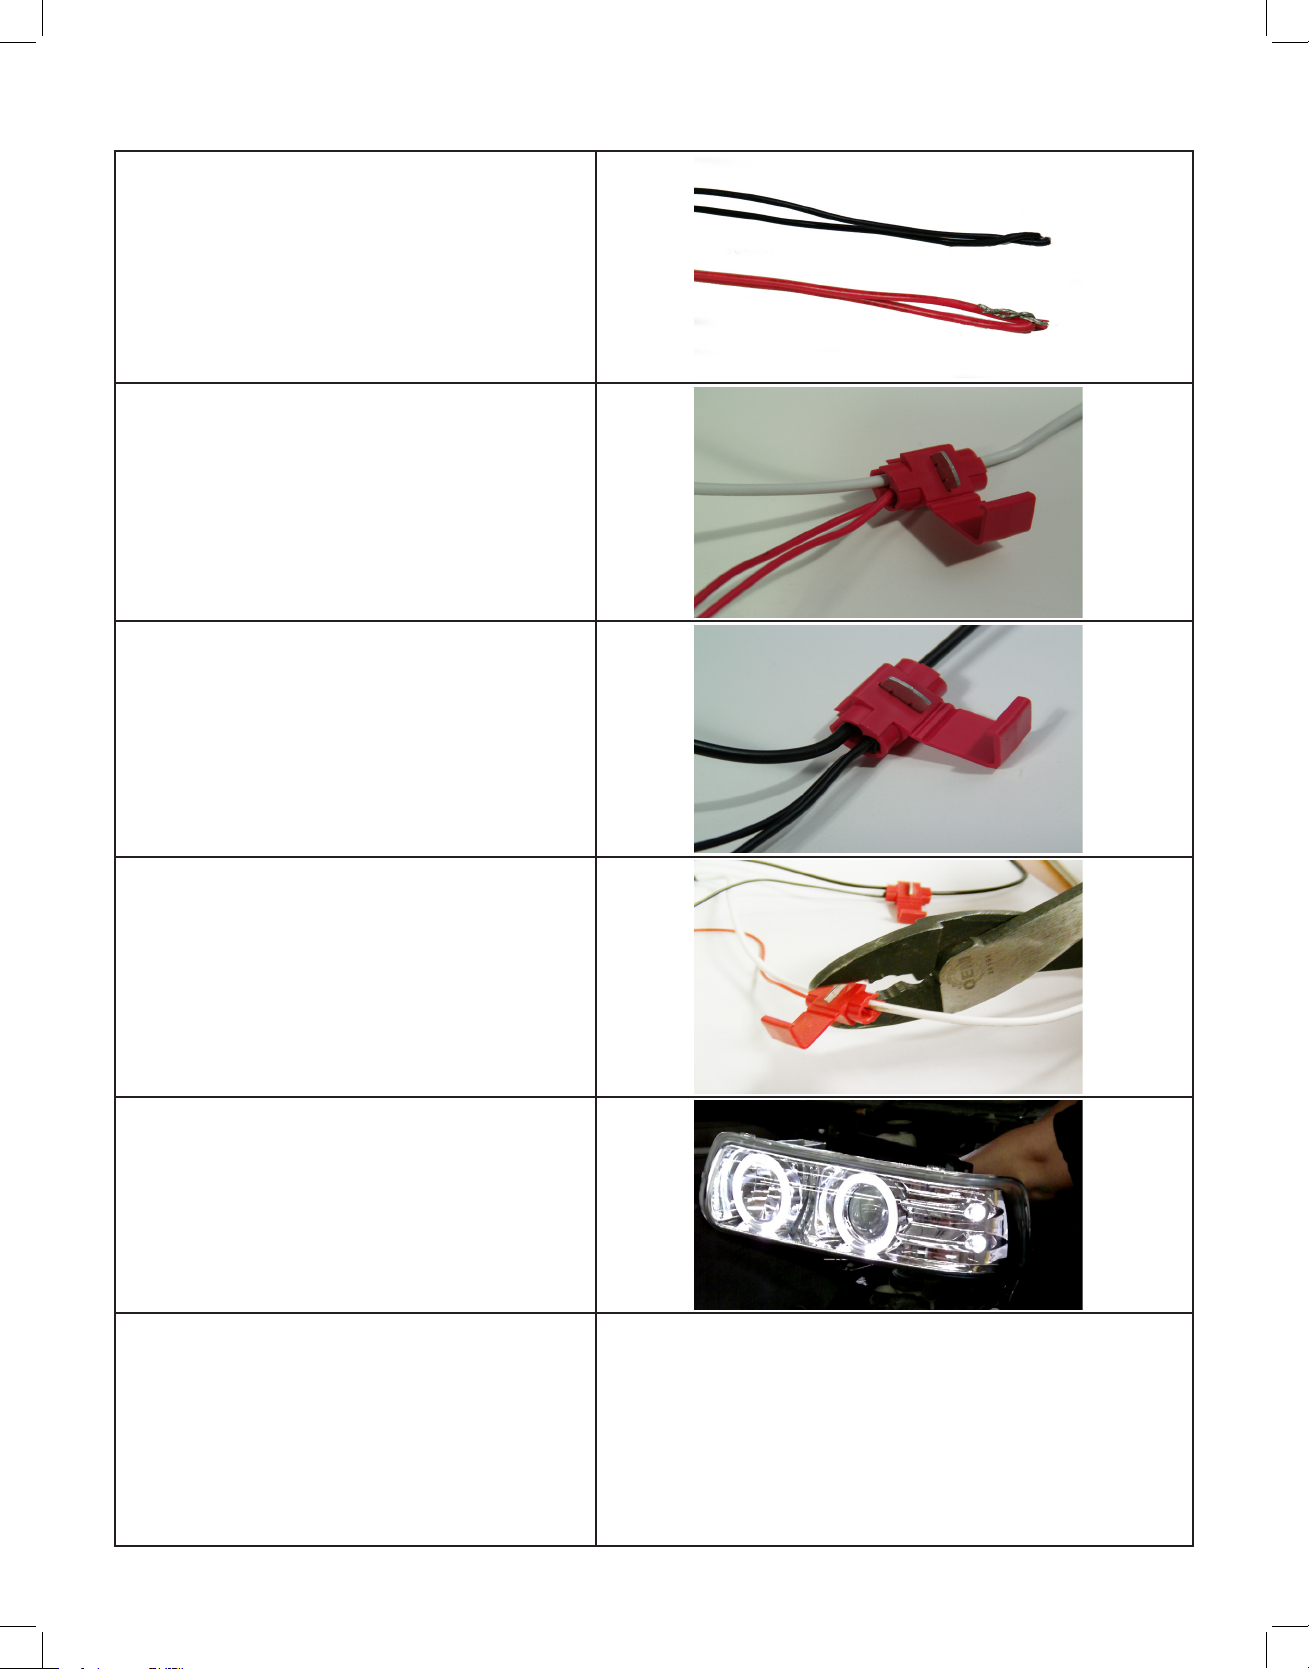
STEP:2 PRE-WIRING
There is two red(positive) and two black(negative)
wires coming from the HALO Rings. Pair the color
together by source.
Connect the HALO wires to the L.E.D. wires using
a quick connect. Red and White wires are Positive.
Black is Negative.
Negative connection.
Use the Crimper to close the quick connects together. Check the wiring after connecting, make
sure it is connected properly.
Check all connections before installing the
headlights onto the vehicle. Connect the Positive and Negative wires to the battery terminal
to see if all HALO and L.E.D.’s are lid up.
 Loading...