

Spyder Auto Dodge Charger 06-09 Headlight with LED User Manual
INSTALLATION GUIDE:
1 Piece 2006-2009 Dodge Charger Headlight with L.E.D. Installation Guide
For more information about how to install this headlight to your vehicle, come visit our youtube page on
http://www.youtube.com/spyderauto
Parts Identication:
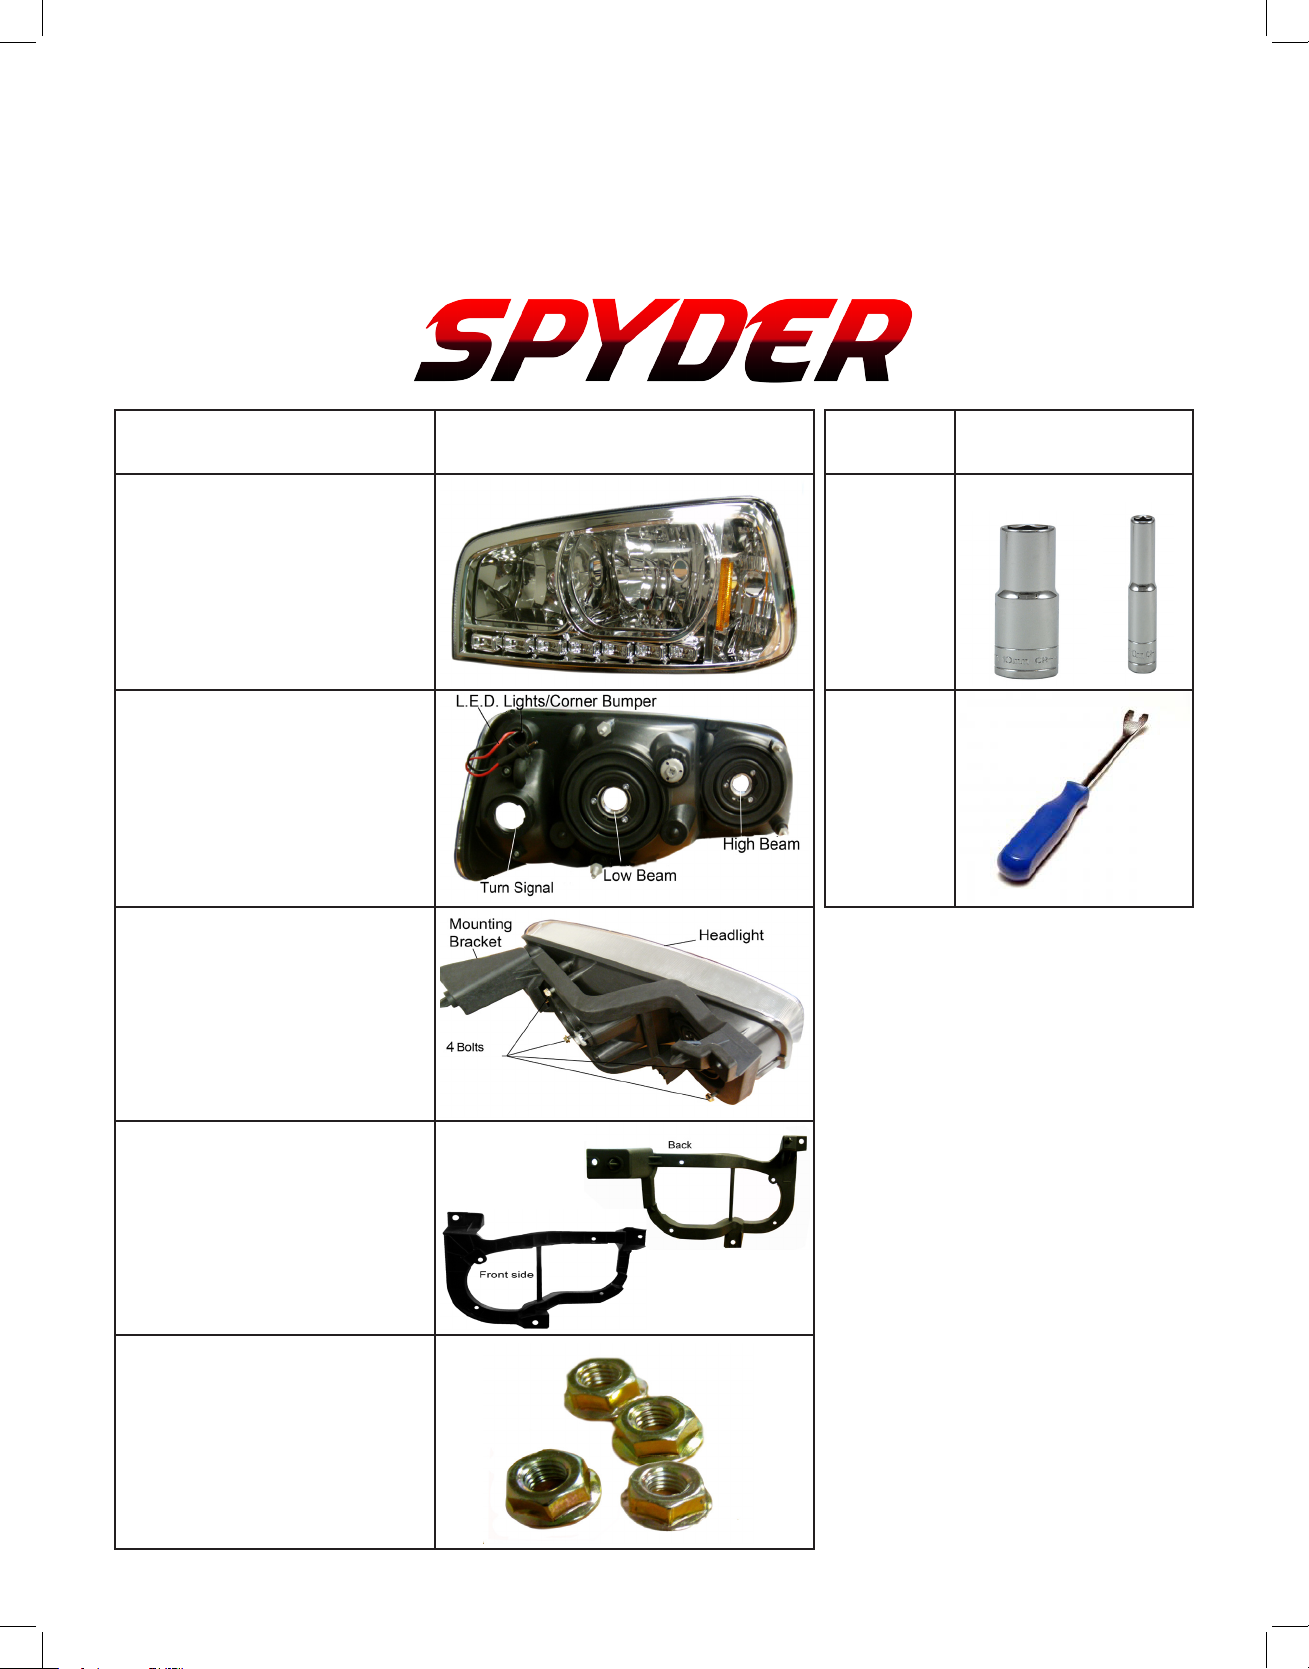
One Piece Headlight
with L.E.D.’s
Back Headlight: Turn
Signal, Low beam, High
Beam, and L.E.D.
Headlight with Mounting
bracket. There are 4 bolts
holding the headlight from
the mounting bracket.
TOOLS
REQUIRE
10mm
and 7mm
Socket
Panel
Popper
Front and Back View of
Mounting Bracket
4 bolts to hold the headlights onto the mounting
brackets.
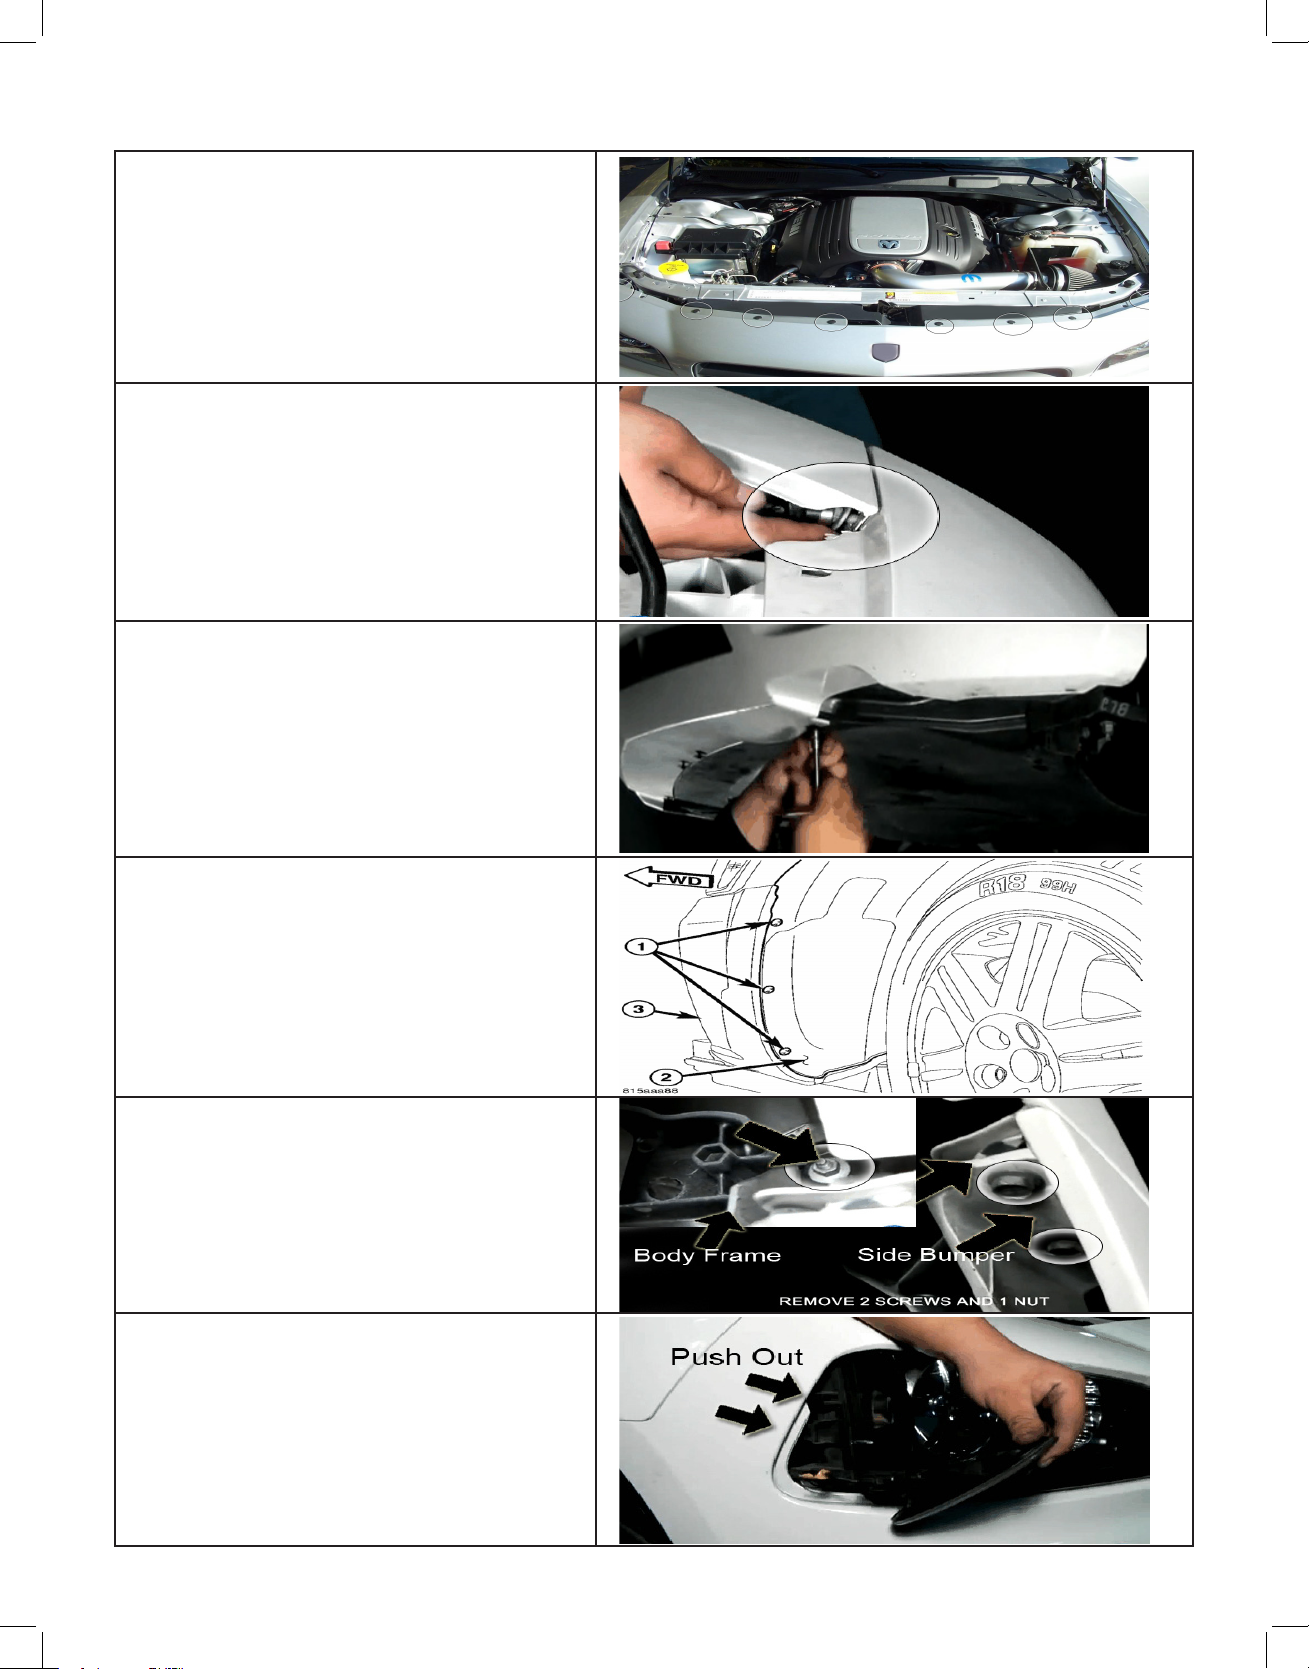
STEP 1: REMOVING BUMPER
Open the hood, there are 8 clips to remove on the
top of the front bumper. Use a panel popper and
carefully remove the clips.
Remove the Screw that is holding the Fender, using
a 10mm socket. On both ends
Remove the nine screws that secure the belly pan to
the underbody using a 7mm socket.
Turn the wheel away and remove three clips
from the wheel cover. On both ends of the
vehicle.
Once you remove the wheel cover, there are
two screws on the each side of the bumper (side
bumper).
Then remove one nut on both sides in order to
remove the bumper off (body frame).
Before removing the bumper, remove the corner
bumper lights on both side. Push it out carefully, it should slide out.
 Loading...