

Page 1

PROTEGÉ
®
Digital Hybrid Key System
User Guide—Single Line Telephone
Item Number 699031
Page 2

Copyright © 2000 North Supply Company. All Rights Reserved.
Sprint and the diamond logo are registered trademarks of Sprint Communications Company L.P., used under license.
S
PRINT PRODUCTS GROUP HAS MADE EVERY EFFORT TO ENSURE THE TECHNICAL
ACCURACY OF THIS GUIDE
. FEATURES AND TECHNICAL DATA ARE SUBJECT TO CHANGE
WITHOUT NOTICE.
Page 3

Contents
chapter
1
chapter
2
chapter
3
chapter
4
Introduction
Answering Calls
Making Calls
Call Handling
1.How To Use This Guide . . . . . . . .1
2.Your Phone’s Parts . . . . . . . . . . . .2
3.Understanding the Tones . . . . . . .3
4.Care Of Your Keyset . . . . . . . . . . .3
5.Your Protegé Phone System . . . . .4
1.Call Pickup . . . . . . . . . . . . . . . . . .5
2.Call Forward . . . . . . . . . . . . . . . . .6
3.Avoiding Calls . . . . . . . . . . . . . . .11
1.Placing Intercom Calls . . . . . . . .13
2.Off-Hook Voice Announce . . . . . .15
3.Placing Outside Calls . . . . . . . . .16
4.Special Dialing . . . . . . . . . . . . . .18
5.Callback . . . . . . . . . . . . . . . . . . .19
6.Camp On . . . . . . . . . . . . . . . . . .21
7.Authority Code . . . . . . . . . . . . . .22
1.Hold . . . . . . . . . . . . . . . . . . . . . .23
2.Transferring Calls . . . . . . . . . . . .24
3.Conference . . . . . . . . . . . . . . . . .25
4.Call Brokering . . . . . . . . . . . . . . .27
chapter
Protegé®User Guide - single line telephone
Paging And
5
Messaging
1.Paging . . . . . . . . . . . . . . . . . . . .29
2.Messaging . . . . . . . . . . . . . . . . .30
i
Page 4

Contents
chapter
6
chapter
7
Convenience
Features
Voice Mail
Features
1.Reminder Service . . . . . . . . . . . .33
2.Speed Dial Numbers . . . . . . . . . .34
3.Hotline . . . . . . . . . . . . . . . . . . . . .36
4.Security . . . . . . . . . . . . . . . . . . . .37
5.Cancel Operations . . . . . . . . . . . .39
1.Voice Mail Features . . . . . . . . . . .41
Glossary . . . . . . . . . . . . . . . . . . . . .43
Index . . . . . . . . . . . . . . . . . . . . . . . .45
ii
Protegé®User Guide - single line telephone
Page 5

chapter
one
Introduction
1. How to Use this Guide
The Protegé phone system is perfect for today’s workplace. This guide shows
you how to use its many advanced and labor-saving features using a single line
telephone. Some features are only available with specific software versions. If
you are not sure whether a feature is available to you, please see your system
administrator.
Getting Started
Read this chapter carefully; it contains some important safety instructions.
Then, flip through the rest of the guide to become familiar with how information is organized. Study the features you will use on a daily basis. Keep this
guide handy so you can quickly refer to it as you need.
How to Locate Information
If You Want Then Refer To
General information on using your phone Chapter 1, Introduction
To use a specific feature Index to point you to the page
A definition of telecommunications term Glossary
Information on taking and avoiding calls Chapter 2, Answering Calls
Information on placing internal and Chapter 3, Making Calls
outside calls
Information on holding and transferring Chapter 4, Call Handling
calls, and on making conferences
Information on paging and messaging Chapter 5, Paging and Messaging
Information on labor-saving features Chapter 6, Convenience Features
such as programming speed dial numbers
Information on using voice mail features Chapter 7, Voice Mail Features
Protegé®User Guide - single line telephone
1
Page 6
1 / Introduction
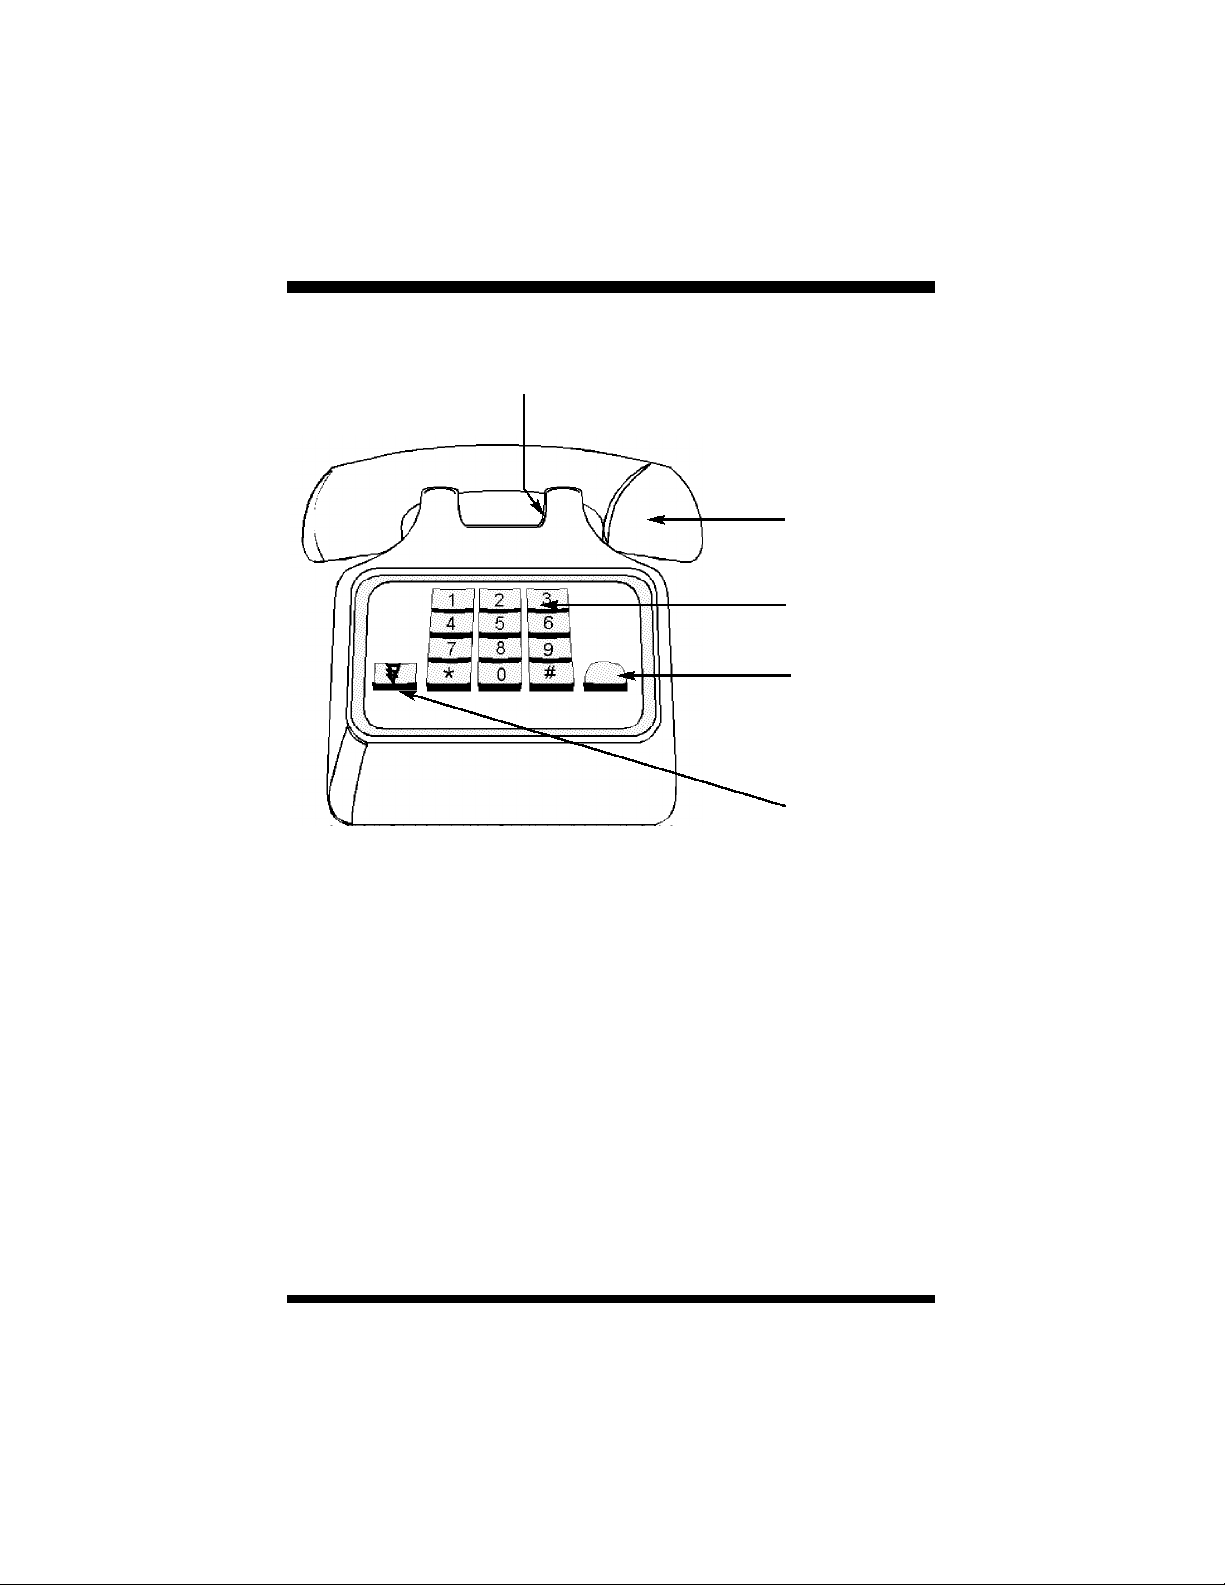
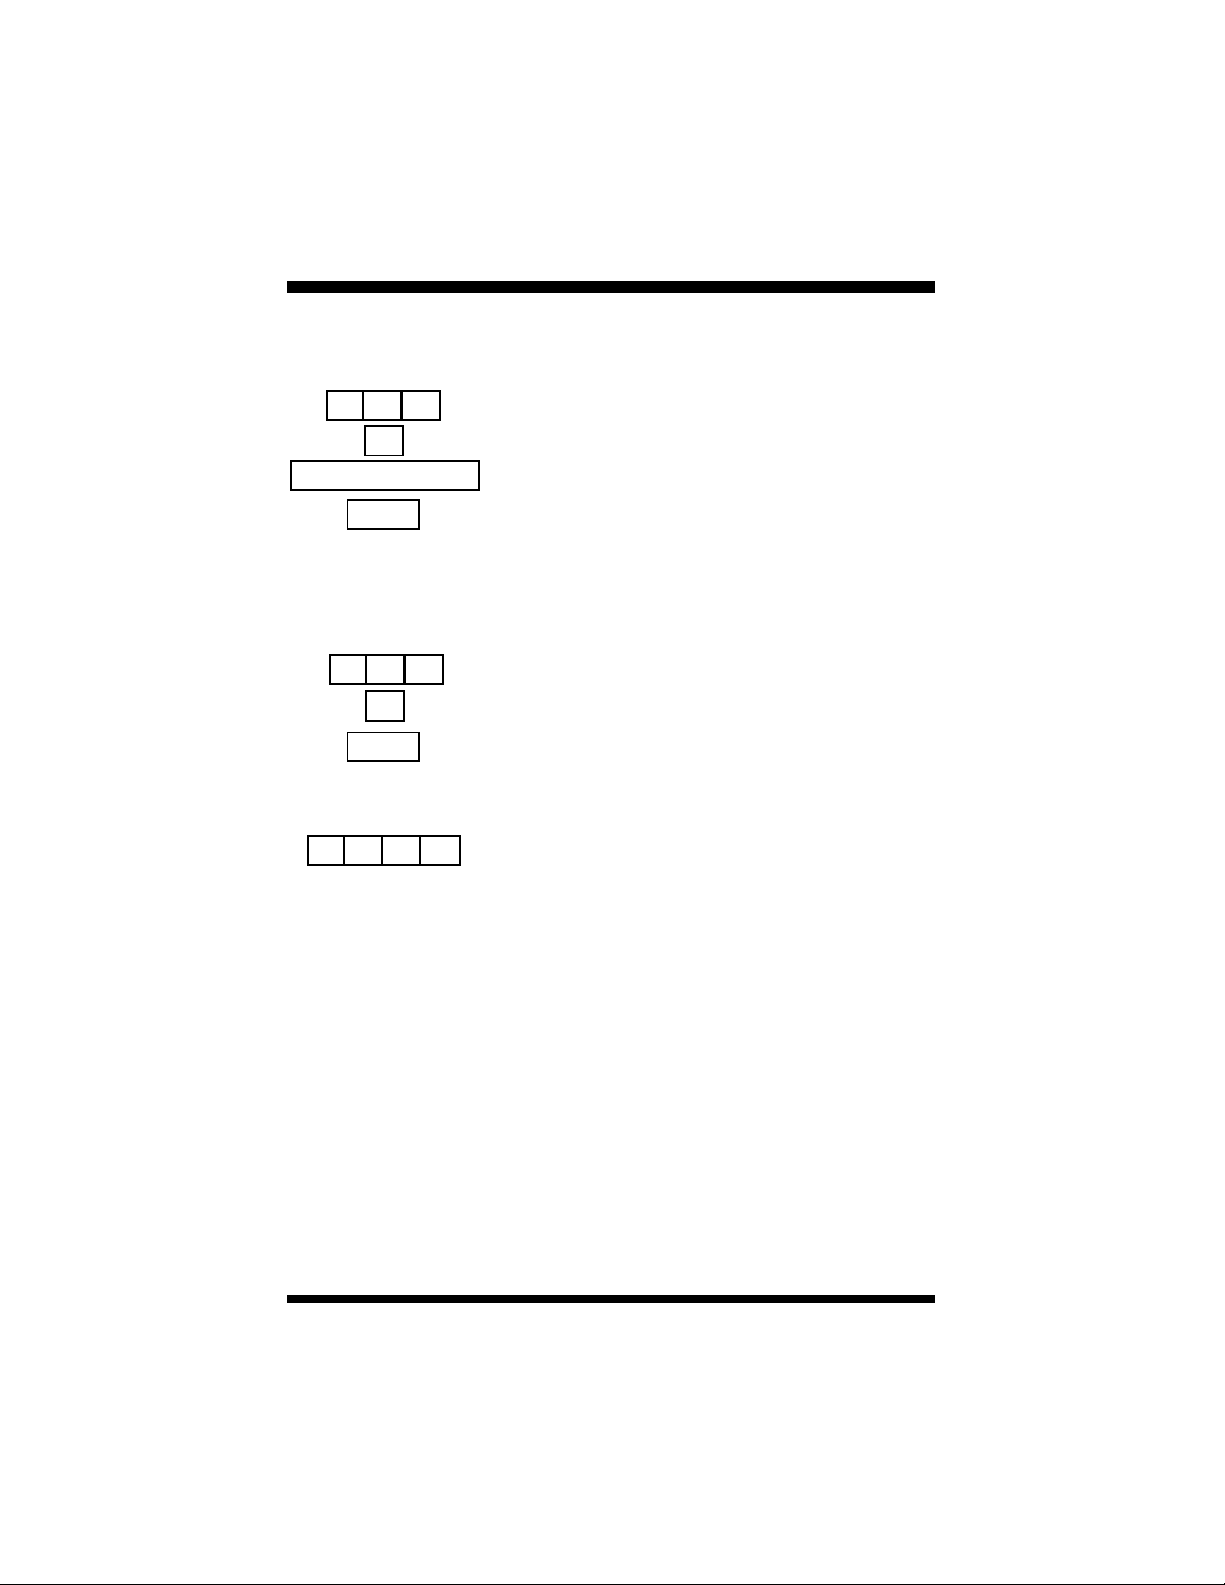
2. Your Phone’s Parts
Hookswitch
Handset
Dial Pad
Message
Waiting Lamp
(not all models)
Flash Key
(not all models)
Dial Pad
Use the dial pad to dial telephone numbers, and to enter feature codes.
Flash Key (not all models)
Press the flash key when setting features. If you do not have a flash key, press
and release the hookswitch.
Message Waiting Lamp (not all models)
The Message Waiting Lamp lights when you have a voice mail message or a
“call me” message from another extension.
2
Protegé®User Guide - single line telephone
Page 7

1 / Introduction
3. Understanding the Tones
This table will help you distinguish between the different ring tones you hear
on your telephone.
Signal Description
Single ring Confirmation tone - heard on the handset only
Two short rings Error tone - heard on the handset only
Continued single ring Incoming outside call
Hold reminder tone
Trunk recall
Continued double ring Incoming intercom call
Callback
4. Care of Your Telephone
Care for your phone as you would a precision instrument. Keep it clean, and
place it on a firm level surface, or affix it securely to a wall, to protect it from
being dropped. Periodic cleaning with a soft cloth dampened with glass cleaner
or mild solution of non-abrasive detergent will keep your telephone looking
new for years. Do not spray aerosol cleaner or pour any liquid directly into the
keyset. Doing so may cause severe damage to your telephone.
Warning
To prevent fire or shock hazard, do not expose this telephone to rain or any
type of excess moisture. If accidentally dropped in water, immediately unplug
this telephone from the wall outlet.
Protegé®User Guide - single line telephone
3
Page 8

1 / Introduction
5. Your Protegé Phone System
Access To Features
You may not be able to operate all the features in this guide exactly as written.
If your company’s telephone system uses an early version of software, some
features may offer fewer or different options, others may not be available at all.
Also, a particular feature option may be included in your company’s system,
but may not be programmed to operate at your extension.
If you attempt to use a feature that is not available to you, or make a mistake in
using the feature, you will hear an error signal. See your telephone system
administrator for further details regarding feature access.
Feature Interaction
When you are setting a feature, please read the introductory paragraphs carefully. They describe what the feature does, and, if applicable, how it interacts
with other features.
Protegé Flexibility
The Protegé phone system is highly flexible and can be customized to fit many
business needs. This guide has been written to accommodate the structure of
most companies. Your system administrator can tell you the numbers assigned
to resources such as hunt groups, and speed dial numbers. Write in this guide
any additional information that is relevant to your working environment.
Following the Instructions
The instructions in this guide often ask you to “press” a key. Throughout these
instructions, the word “press” means press and release, not press and hold. You
may be instructed to “dial” which means to press the desired numbers on the
dial pad. You may be required to dial [ (star) or # (pound) on the dial pad to
access certain features.
You should hear a confirmation tone when you have successfully set most features. Consult with your telephone system administrator if you want this tone
disabled or reinstated.
4
Protegé®User Guide - single line telephone
Page 9
chapter
two
Answering Calls
1. Call Pickup
Call Pickup lets you answer calls that are ringing at another location. Simply
dial the loud bell directory number to answer a call at a ringing loud bell.
Use Directed Call Pickup to pick up another ringing extension or a ringing virtual number. You specify (“direct”) the ringing location by dialing the directory
number of the ringing extension or virtual number.
Use Group Call Pickup to pick up a ringing extension that is within your work
group. You do not specify the location. Your system administrator can tell you
if your extension is part of a work group, and what number to dial to pick up
calls.
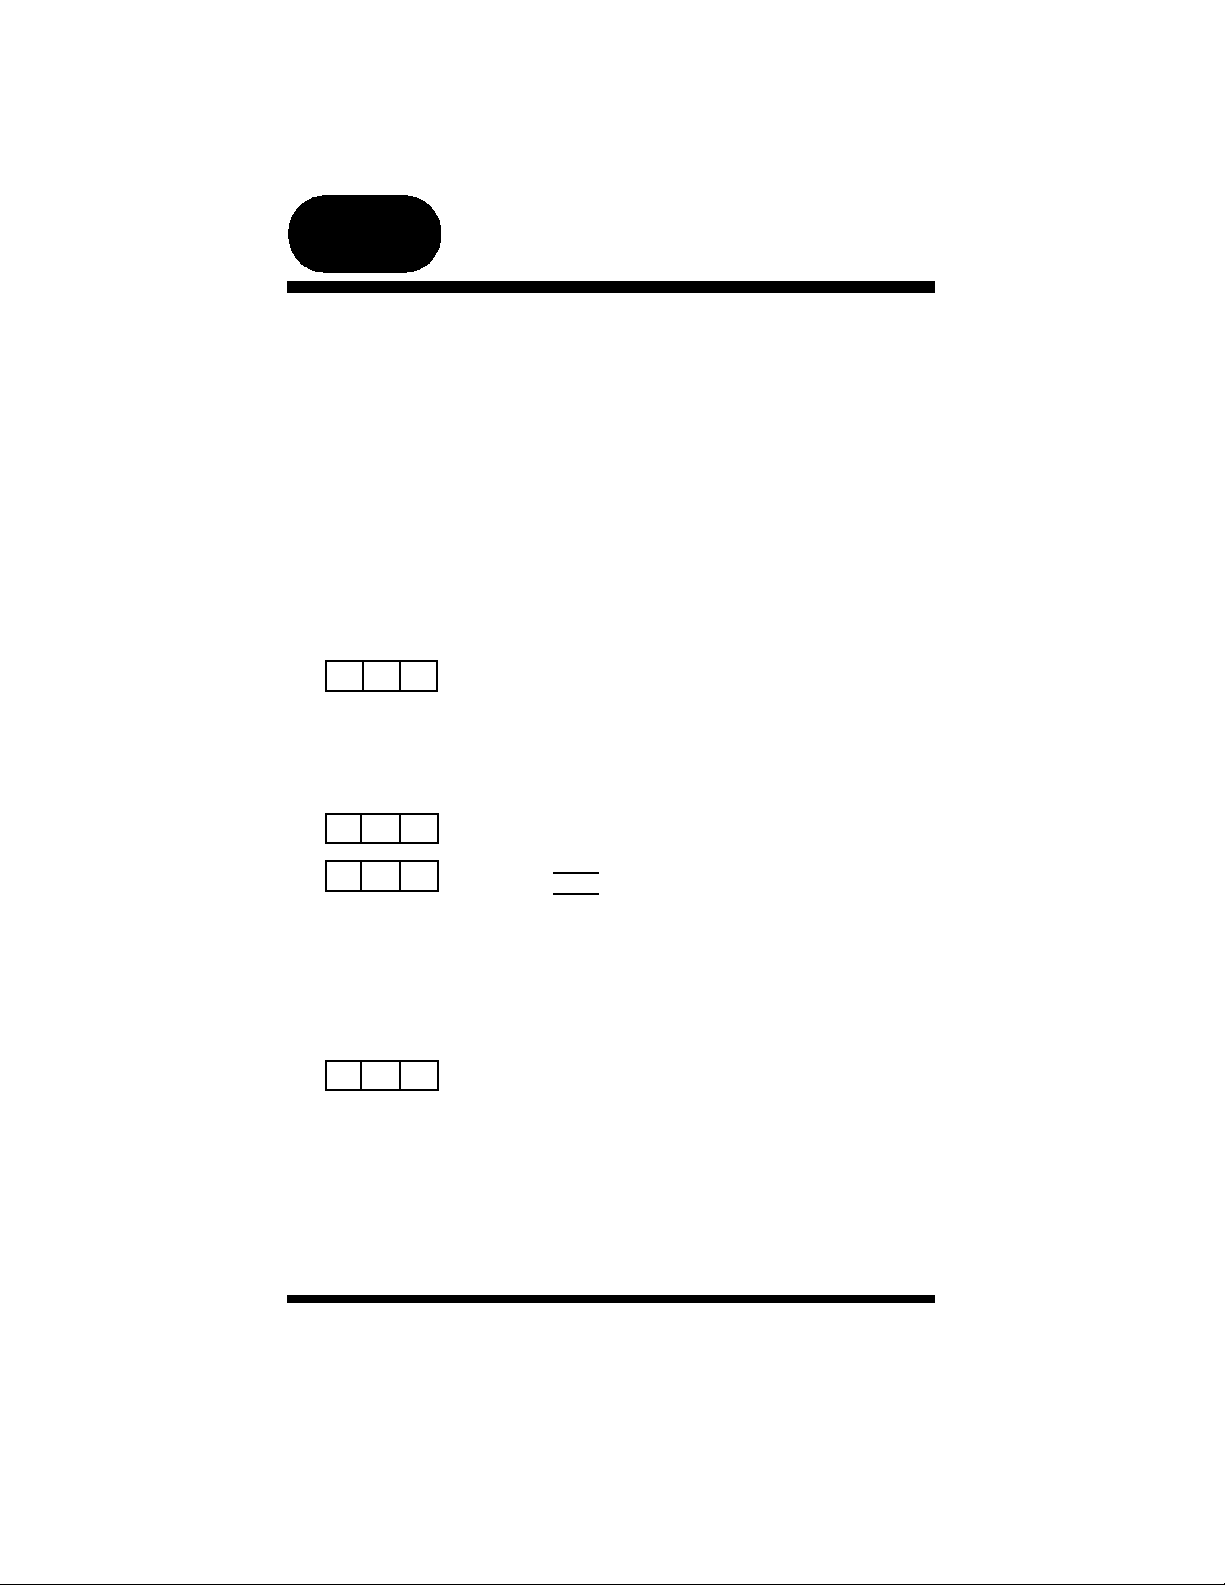
Loud Bell Call Pickup
1. Lift the handset.
8 1
# 5 3
x x x
2. Dial the ringing loud bell (810 or 811).
3. Call is connected.
Directed Call Pickup
1. Lift the handset.
2. Dial # 53.
3. Dial extension number ringing.
- or -
Dial virtual number ringing (830-859).
4. Call is connected.
Group Call Pickup
1. Lift the handset.
2. Dial your pickup group number.
3. Call is connected.
Protegé®User Guide - single line telephone
5
Page 10

2 / Answering Calls
2. Call Forward
Call Forward, also known as Diversion, is a powerful and flexible feature that
allows you to direct some or all of your calls to one or several locations. You
can set several different call forward instructions at your extension to handle
different situations.
The three most commonly used options are Direct Call Forward, Busy Call
Forward and No Answer Call Forward.
Direct Call Forward diverts all calls immediately. Busy Call Forward diverts
calls immediately when your extension is busy or in Do Not Disturb mode. No
Answer Call Forward diverts calls which are unanswered after a specified period of time.
You can forward calls to extensions or hunt groups. Specify whether to forward
all calls, just intercom or just outside calls. Additionally with No Answer Call
Forward, you may choose to forward the first call after a different length of
time than the second and subsequent calls. Both No Answer timers are independent and programmable from six to thirty seconds in increments of two seconds.
For example, you might set Busy Call Forward to divert intercom calls to a
colleague’s extension, and outside calls to a hunt group, and set No Answer
Call Forward to divert all calls to your voice mail box.
Use Follow Me Call Forward if you are moving temporarily to another extension and would like to receive your calls at that location. The Preset option
enables you to place your forwarding instructions before you leave your desk.
The Remote option allows you to place your forwarding instructions from your
new location. Remote requires you enter your user password; consult your system administrator if you are unsure what this is. You can cancel and reprogram
Remote Follow Me Call Forward from any keyset on the system.
6
# 2 0
Cancel all Call Forwards
1. Lift the handset.
2. Dial # 20.
3. Receive confirmation tone.
Protegé®User Guide - single line telephone
Page 11
# 2 2
x x x
1/2/3
#
[
# 2 1
x x x
1/2/3
#
[
2 2
2 1
2 / Answering Calls
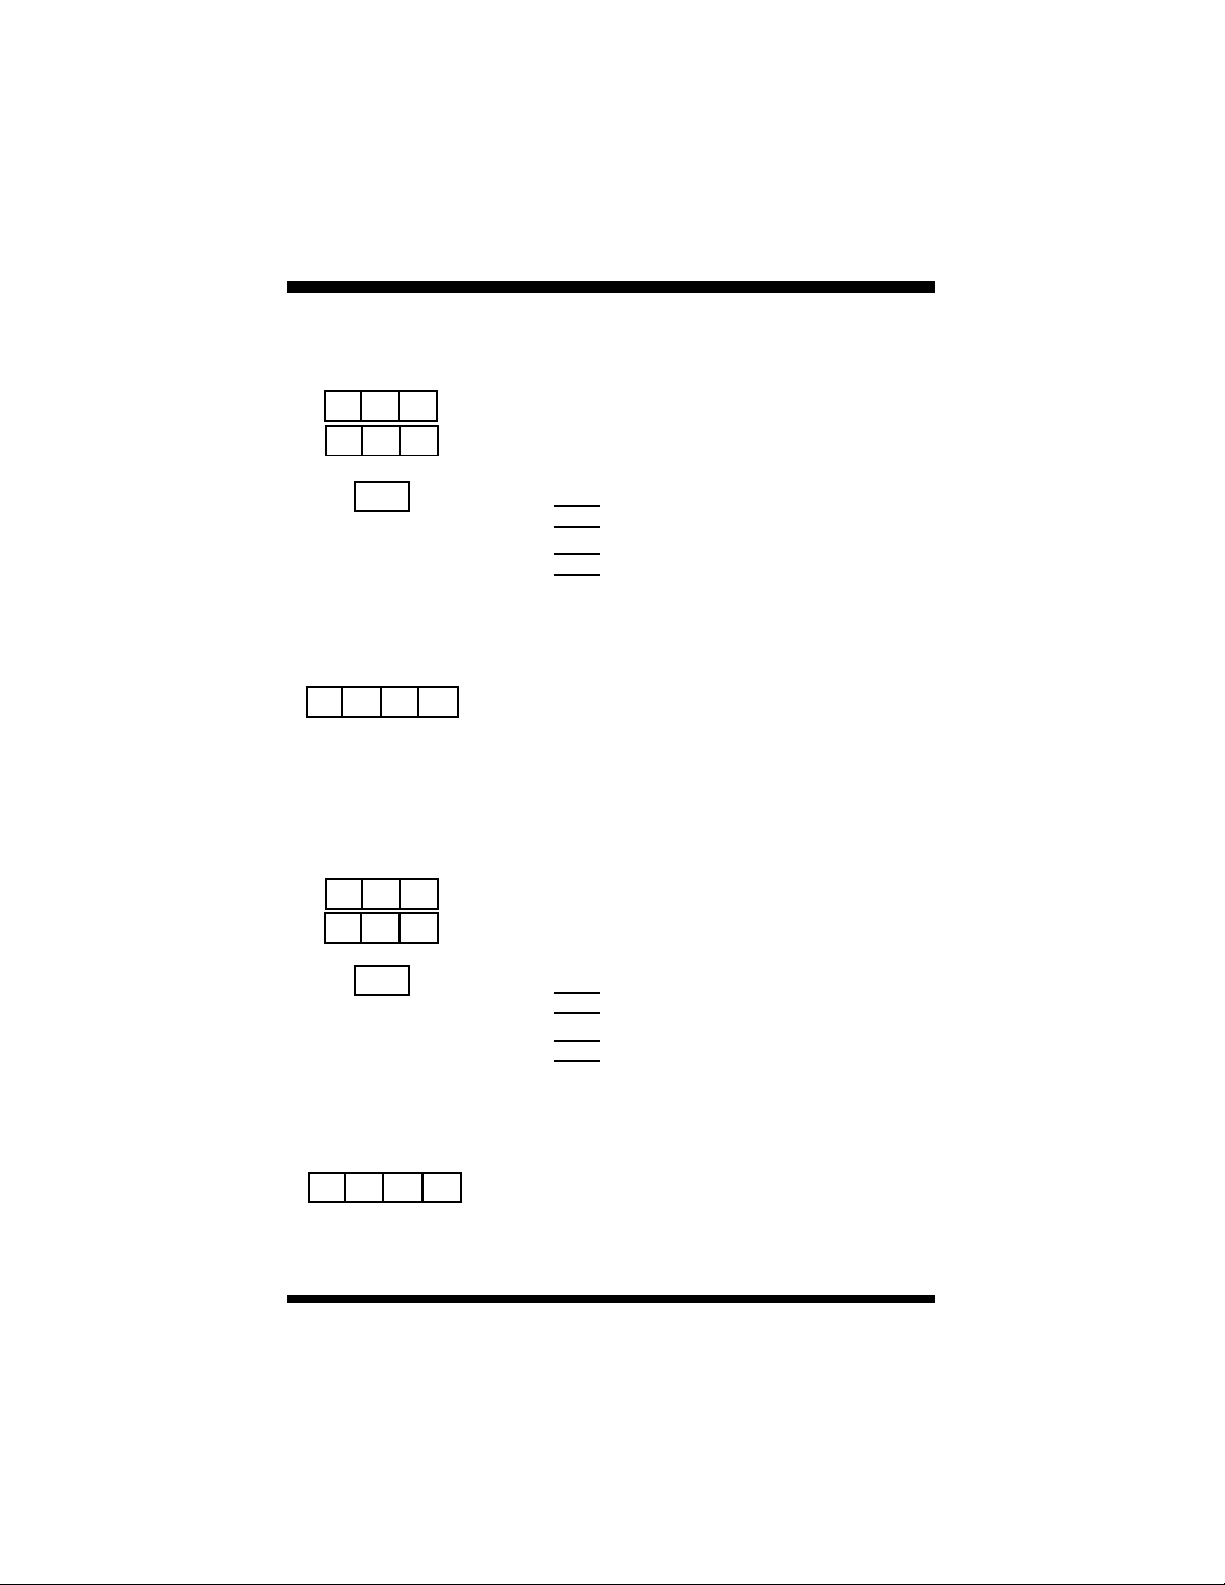
Direct Call Forward
To activate
1. Lift the handset.
2. Dial # 22.
3. Enter the extension number to which you want
to forward calls.
4. Dial 1 to forward outside calls only
- or -
Dial 2 to forward all calls
- or -
Dial 3 to forward intercom calls only
5. Receive confirmation tone.
To cancel
1. Lift the handset.
2. Dial # [ 22.
3. Receive confirmation tone.
Busy Call Forward
To activate
1. Lift the handset.
2. Dial # 21.
3. Enter the extension number to which you want
to forward calls.
4. Dial 1 to forward outside calls only
- or -
Dial 2 to forward all calls
- or -
Dial 3 to forward intercom calls only
5. Receive confirmation tone.
To cancel
1. Lift the handset.
2. Dial # [ 21.
3. Receive confirmation tone.
Protegé®User Guide - single line telephone
7
Page 12

2 / Answering Calls
# 2 4
x x x
1/2/3
x x
x x
#
[
2 4
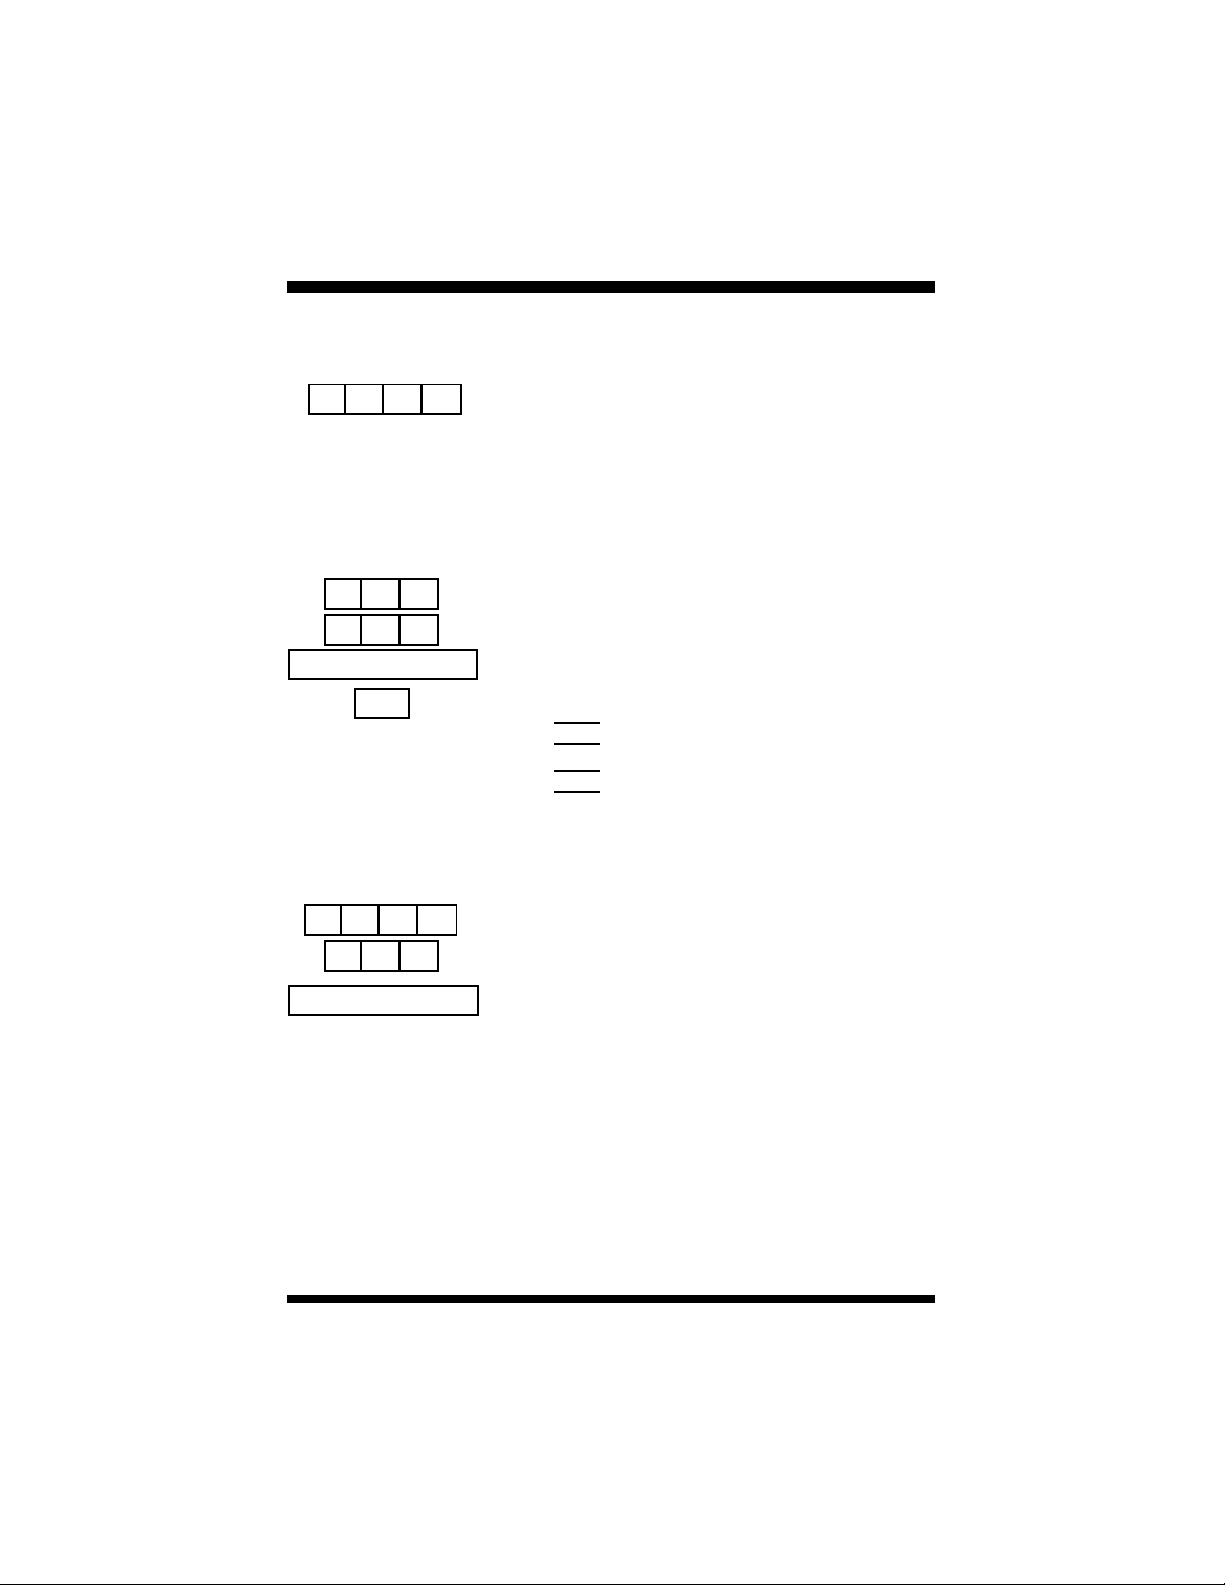
No Answer Call Forward
To activate
1. Lift the handset.
2. Dial # 24.
3. Enter the extension number to which you want
to forward calls.
4. Dial 1 to forward outside calls only
- or -
Dial 2 to forward all calls
- or -
Dial 3 to forward intercom calls only
5. Enter a time for the first No Answer Call
Forward.For example, “08” is 8 seconds (two
ring cycles).
6. Enter a time for the second No Answer Call
Forward.For example, “08” is 8 seconds (two
ring cycles).
7. Receive confirmation tone.
To cancel
1. Lift the handset.
2. Dial # [ 24.
3. Receive confirmation tone.
8
# 2 5
x x x
1/2/3
Follow Me Call Forward - Preset
To activate
1. Lift the handset.
2. Dial # 25.
3. Enter the extension number to which you want
to forward calls.
4. Dial 1 to forward outside calls only.
- or -
Dial 2 to forward all calls.
- or -
Dial 3 to forward intercom calls only.
Protegé®User Guide - single line telephone
Page 13
#
[
# 2 3
x x x
1/2/3
#
[
x x x
2 5
2 3
2 / Answering Calls
5. Receive confirmation tone.
To cancel
1. Lift the handset.
2. Dial # [ 25.
3. Receive confirmation tone.
Follow Me Call Forward - Remote
To activate
1. Lift the handset.
2. Dial # 23.
3. Enter your normal extension number.
4. Enter your user passwordto verify your
identity.
5. Dial 1 to forward outside calls only
- or -
Dial 2 to forward all calls
- or -
Dial 3 to forward intercom calls only
6. Receive confirmation tone.
To cancel
1. Lift the handset.
2. Dial # [ 23.
3. Enter your normal extension number (the
number from which calls were forwarded).
4. Enter your user password to verify your
identity.
5. Receive confirmation tone.
Protegé®User Guide - single line telephone
9
Page 14
2 / Answering Calls
# 2 6
1
Flash
# 2 6
2
Flash
#
[
2 6
External Call Forward (ECF)
To activate
1. Lift the handset.
2. Press the # key, and then dial 26.
3. Dial 1 followed by the outside telephone number to which you want to forward calls.
4. Depress the hook switch to save the entry.
5. Receive confirmation tone.
For systems requiring account codes
1. Lift the handset.
2. Press the # key, and then dial 26.
3. Dial 2 followed by the appropriate account
code.
4. Depress the hook switch to save the entry.
5. Receive confirmation tone.
To cancel
1. Lift the handset.
2. Dial # [ 26.
3. Receive confirmation tone.
10
Protegé®User Guide - single line telephone
Page 15

2 / Answering Calls
3. Avoiding Calls
At times you may want to work at your desk without phone interruptions. In
addition to Call Forward, you can choose the following two features to block
some or all calls.
Do Not Disturb (DND) blocks all calls to your telephone, making it appear to
be busy to outside callers, and internal callers without display keysets. Internal
users with display keysets will see that you are in DND mode. Some users,
such as the attendant, may have the authority to override DND and force calls
through. Your system administrator can tell you if anyone has override authority. If you set both DND and Call Forward at your station, calls will forward as
if your extension is busy.
If you are a member of a hunt group, you can use the Agent Log Off/Log On
feature to temporarily remove your extension from the hunt group. While you
are logged off, calls directed to the hunt group will not ring at your extension.
However, outside and intercom calls directed specifically to your extension
number will still ring through.
Do Not Disturb
To activate
1. Lift the handset.
2. Dial # 4.
# 4
3. Receive confirmation tone.
To cancel
1. Lift the handset.
2. Dial # 4.
3. Receive confirmation tone.
# 9 1
#
Protegé®User Guide - single line telephone
[
9 1
To log off
1. Lift the handset.
2. Dial # 91.
3. Receive confirmation tone.
To log on
1. Lift the handset.
2. Dial # [ 91.
3. Receive confirmation tone.
Agent Log Off/Log On
11
Page 16

2 / Answering Calls
12
Protegé®User Guide - single line telephone
Page 17

chapter
three
Making Calls
1. Placing Intercom Calls
You can reach any individual extension or group of extensions by dialing the
appropriate directory number.
Use the Voice to Ring Interchange feature to force a keyset that is in Voice Call
mode to ring. This is particularly useful in situations when the called extension
is unattended, as it enables you to leave a “Call Me” message. If an extension
is programmed to forward intercom calls that are not answered, Protegé forces
the extension to ring. The caller will hear ringing.
If the extension you call is busy you may be able to intrude on the call. Your
ability to use this feature depends on your class of service, and that of the destination extension.
If the person you call has their keyset in Do Not Disturb mode, you may be
able to use the DNDOverride feature to force your call to ring through. Your
ability to use this feature depends on your class of service.
If your call to a specific extension goes unanswered, you can request a
Callback (page 19), or leave a “Call Me” message (page 30).
Calling an Extension
1. Lift the handset.
x x x
2. Dial the extension number.
Calling a Virtual Number
1. Lift the handset.
8
2. Dial the virtual number.
Calling the Attendant
1. Lift the handset.
0
2. Dial 0.
Dialing a Hunt Group
1. Lift the handset.
x x x
Protegé®User Guide - single line telephone
2. Dial the hunt group number.
13
Page 18

3 / Making Calls
2
x x x
8
x x x
3
Voice To Ring Interchange (VRI)
1. Lift the handset.
2. Dial the extension number.
3. Receive confirmation tone.
4. Dial 2. Your call overrides the Voice Call
Allow setting and rings through to the extension.
Intrusion
1. Lift the handset.
2. Dial an extension. Receive busy tone.
3. Dial 8. You intrude on the other extension’s
call. You can speak to and hear both parties.
Do Not Disturb Override
1. Lift the handset.
2. Dial an extension. Receive busy tone.
3. Dial 3. Your call overrides DND and rings
through to the extension.
14
Protegé®User Guide - single line telephone
Page 19

3 / Making Calls
2.Off-Hook Voice Announce
(OHVA)
Use the OHVA feature when you want to interrupt a busy extension. To be able
to perform an OHVA the called party must meet the following criteria:
1. He/she must have an Executive or Executive Data keyset.
2. He/she must be using the handset. Your OHVA call will be connected
through the speakerphone.
3. His/hre keyset must be programmed to permit OHVA calls. Your system
administrator can advise if this is the case.
OHVA is programmed at the system level to connect immediately or after a
specified period of time. This gives the called party time to reject the call
before being interrupted.
Note, therefore, that the called party may reject your OHVA. If this occurs, you
will receive an error tone consisting of a double ring.
If you attempt to place anOHVA call to the wrong type of keyset, or if the
called extension is using the speakerphone, you will hear a fast busy signal
instead of a confirmation tone.
Placing an OHVACall
1. Lift the handset.
x x x
0
Protegé®User Guide - single line telephone
2. Dial the extension number.
3. Receive busy tone.
4. Dial 0.
5. You are connected through the speaker of the
called party.
15
Page 20

3 / Making Calls
3. Placing Outside Calls
Consult your telephone system administrator for any restrictions in your ability
to make outside calls.
If your company has different types of outside lines, your telephone system
may use the Least Cost Routing feature to ensure calls go over the cheapest
possible route. You may be required to enter the Least Cost Routing feature
code on some or all of your long distance calls. Alternatively, your system may
be programmed to select the cheapest route automatically.
If your company monitors outgoing calls for cost or billing purposes, you may
need to enter account codes for some or all of your calls. Your system may be
programmed to force you to enter a valid account code before allowing you to
make an outside call. Or it may be optional, leaving it to your discretion, or
your company policy, when to enter an account code.
Last Number Redial (LNR) simply redials the last outside number dialed out
from your phone.
Any frequently dialed telephone number can be stored as a Speed Dial
Number. Speed dial numbers are similar to the directory numbers you dial to
access hunt groups, and other extensions. When you dial a speed dial number,
Protegé dials out the corresponding telephone number.
System speed dial numbers are shared by many extension users, Individual
speed dial numbers are specific to your phone. See Speed Dial Numbers (page
34) for instructions on how to store individual speed dial numbers.
Also note that if you make an emergency 911 call, the attendant automatically
will be notified of your call. This allows the attendant to direct emergency
personnel to your work area.
16
9
Placing Outside Calls
1. Lift the handset.
2. Dial 9 for any available outside line.
- or -
Dial 124 for a random outside line.
- or -
Dial a specific trunk or trunk route number
3. Dial the number.
Protegé®User Guide - single line telephone
Page 21

6
# 7
#
3 / Making Calls
Using Least Cost Routing
1. Lift the handset.
2. Dial # 67.
3. Listen for special dial tone.
4. Dial outside number.
5. Press # to indicate dialing is complete.
Last Number Redial (LNR)
# 8
x x x
1. Lift the handset.
2. Dial # 8.
Dialing a Speed Dial Number
1. Lift the handset.
2. Dial the speed dial number.
3. Call is dialed automatically. You may wait
several seconds before hearing the distant
ringing.
Protegé®User Guide - single line telephone
17
Page 22

3 / Making Calls
4. Special Dialing
Your telephone system administrator can advise you if you need to use either
of these features.
If your system uses pulse dialing for outside calls, you may need to use the
Pulse to Tone Conversion feature to access remote equipment such as voice
mail systems.
If your company’s Protegé phone system is behind a Centrex office or another
PBX, you may need to use the Trunk Hookflash feature to perform certain
tasks.
Pulse to Tone Conversion
1. Lift the handset.
2. Access an outside line (dial 9).
3. Dial the destination telephone number (in
[[
pulse).
4. Dial [.
5. Dial additional required digits (in tone).
18
FLASH
# 3
Trunk Hookflash
1. Lift the handset.
2. Press the Flash key.
3. Dial # 3.
Protegé®User Guide - single line telephone
Page 23

3 / Making Calls
5. Callback
When you place an intercom call to a busy or unattended extension, you can
request a callback and hang up. You then receive a callback when the busy
extension becomes available, or when the unattended extension is next used
(goes off-hook and back on-hook).
You may also request a callback on a busy trunk or trunk route. Again, you
receive a callback when the trunk or trunk route becomes available.
The callback signal is two double rings.
Several parties may activate the callback feature on the same extension, trunk
or trunk route. Callers receive callbacks in the order in which they requested
them.
Callback to an Extension
To activate
1. Lift the handset.
x x x
5
2. Dial the extension number.
3. Receive busy tone.
- or -
Receive no answer.
4. Dial 5.
5. Receive confirmation tone.
To respond to a callback
1. Your extension rings.
2. Lift handset.
3. The call rings through to the extension.
Protegé®User Guide - single line telephone
19
Page 24

3 / Making Calls
x x x
5
# # 5
[
x x x
Callback to a Trunk (Group)
To activate
1. Lift the handset.
2. Dial the outside line number.
- or -
Dial the trunk group number.
3. Receive busy tone.
4. Dial 5.
5. Receive confirmation tone.
To respond to a trunk callback
1. Your extension rings.
2. Pick up handset. Receive dial tone.
3. Dial outside number.
Deleting a Callback
To delete an individual callback
1. Lift the handset.
2. Dial # [ # 5.
3. Dial the directory number of the extension,
trunk or trunk group.
4. Receive confirmation tone.
# # 5
[ [
20
To delete all callbacks
1. Lift the handset.
2. Dial # [ # 5 [.
3. Receive confirmation tone.
Protegé®User Guide - single line telephone
Page 25

3 / Making Calls
6. Camp On
When you call a busy extension, you can choose to use the Camp On feature,
remain off-hook, and wait for the busy extension to become available. You will
hear music on hold while waiting if your system is equipped with a music
source.
Only one extension can camp on to another at any one time. If you hear an
error tone another extension user has already camped on to the busy extension.
You can still use the Callback Busy feature, which will alert you when the line
becomes free.
Camp On is a useful feature for urgent calls. If two parties are competing for
the same busy extension, Camp On overrides Callback Busy even if the
Callback Busy feature was activated first.
To activate
1. Lift the handset.
x x x
4
2. Dial the extension. Receive busy tone.
3. Dial 4.
4. Receive confirmation tone.
5. Music on Hold plays until the called extension
hangs up.
6. The call rings through.
Protegé®User Guide - single line telephone
21
Page 26

3 / Making Calls
7. Authority Code
Use the Authority Code feature to activate your extension’s class of service at
another extension to place an outgoing trunk call that would otherwise be tollrestricted from that extension.
When you enter the authority code, Protegé activates your normal class of service at that extension for a period of one minute, allowing you to place your
call.
This feature is also sometimes referred to as Travelling Class of Service.
Please note that the authority code will not override a locked keyset. See page
38 for information on the Lock feature.
FUNCTION
5# 5
x x x
To activate
1. Lift the handset.
2. Dial # 55.
3. Enter your extension number.
4. Enter your password.
5. Receive high pitched confirmation tone.
6. Receive intercom dial tone.
7. Dial outside line or trunk route number.
- or -
Dial 9.
8. Dial outside number.
22
Protegé®User Guide - single line telephone
Page 27

chapter
four
Call Handling
1. Hold
You can place up to two calls on hold. To move between calls on hold see Call
Calls on hold will recall to your phone after a specified period of time (default
Holding Calls
To put a call on hold
1. Phone is active on a call.
2. Press the Flash key.
3. Receive intercom dial tone. You can dial
another number or hang up.
Retrieving Calls
To retrieve an outside call
1. Lift the handset.
FLASH
2. Press the Flash key.
3. Call is connected.
To retrieve an internal call
1. Lift the handset.
2. Call is connected.
Protegé®User Guide - single line telephone
23
Page 28

4 / Call Handling
2. Transferring Calls
Perform a blind transfer when you do not notify the target extension or hunt
group member prior to redirecting a call. A screened transfer is when you notify the target extension or hunt group member prior to redirecting the call.
All transfers recall to your phone automatically if they are unanswered after a
predetermined time.
Transferring a Call
1. Phone is active on a call.
FLASH
x x x
2. Press the Flash key.
3. Receive internal dial tone.
4. Dial the destination extension.
5. Hang up to perform a blind transfer.
- or -
Stay off-hook to screen the transfer, and then
hang up.
24
Protegé®User Guide - single line telephone
Page 29

4 / Call Handling
3. Conference
The Conference feature allows you to connect up to two additional parties in a
single conversation. The two additional parties can be any combination of
trunk or intercom callers.
As the Conference Controller (the person who set up the conference), you can
exit the call at any time. If you are leaving an inside party connected to an
external party, or two internal parties, simply hang up and the conference
reverts to being a normal two-way call.
Use the Unsupervised Conference feature to connect two outside parties to
each other. First form a three party conference and then remove yourself by
entering the Unsupervised Conference feature code. You can rejoin the conference. Note that unsupervised conferences disconnect automatically after a preset time. See your telephone system administrator for the exact time length
allocated in your system. A warning tone is given 10 seconds before the call
disconnects automatically. Participants can extend the talk time by entering a
special code.
Forming a Conference
1. Phone is active on a call.
FLASH
x x x
FLASH
3
2. Press the Flash key.
3. Dial the extension number to be added to the
conference.
- or -
Access an outside line, dial the telephone
number.
4. The second party answers.
5. Press the Flash key
6. Dial 3, within three seconds.
7. Receive confirmation tone.
8. All parties are conferenced together.
Protegé®User Guide - single line telephone
25
Page 30

4 / Call Handling
FLASH
#
7 7
# 7 7
Forming an Unsupervised
Conference
To conference two outside lines
1. Create a conference by following steps 1-8,
Forming a Conference, on page 25.
2. Press the Flash key.
3. Dial # 77.
To intrude on an unsupervised conference
1. Lift the handset.
2. Dial # 77.
26
Protegé®User Guide - single line telephone
Page 31

4 / Call Handling
4. Call Brokering
You can switch back and forth between two active calls by using the Call
Brokering feature code. At any one time, one of the two calls will be on hold,
and will not be able to hear your conversation with the other party.
Holding a Call and Retrieving
a Held Call
1. Phone is active on a call.
FLASH
2
2. Press the Flash key.
3. Dial 2, within two seconds.
4. You are connected to the held party.
Retrieving a Held Call and
Abandoning the Current Call
1. Phone is active on a call.
FLASH
1
Protegé®User Guide - single line telephone
2. Press the Flash key.
3. Dial 1, within two seconds to release the current call.
4. You are connected to the held party.
27
Page 32

4 / Call Handling
28
Protegé®User Guide - single line telephone
Page 33

chapter
five
Paging
and
Messaging
1. Paging
You can initiate a page from your keyset by dialing a paging group directory
number. The Protegé system will broadcast the page over the speakers of all
digital keysets within that group.
If your system is connected to any paging speakers, you can access external
paging equipment by dialing the appropriate directory number.
Group Page
1. Lift the handset.
4
2. Dial the group paging number.
3. Receive confirmation tone.
External Page
1. Lift the handset.
8
2. Dial the external page number.
3. Receive confirmation tone.
Tenant Group Page
1. Lift the handset.
4 0 0
Protegé®User Guide - single line telephone
2. Dial 400.
3. Receive confirmation tone.
29
Page 34

5 / Paging and Messaging
2. Messaging
You can send a “Call Me” message to another extension when you get no
answer or the line is busy. A Call Me message leaves a “message waiting” indication for the called party indicating that a caller from a specified extension
was trying to reach them. Keysets without display and single line telephones
with message waiting lamps can only receive Call Me messages.
If you have a message waiting lamp it will light when you have been sent a
message. Also, when you have a message, you will hear three to four interruptions in the intercom dial tone, known as stutter dial tone. This indicates you
have a message. To reply to the message, dial the Message Answer feature
code.
To extinguish the message waiting indication (lamp or stutter dial tone), the
reply call must be answered. If the call goes unanswered, the message waiting
indication continues.
(In previous versions of software, stutter dial tone indicated Do Not Disturb or
Call Forward was programmed on an extension. Check with your system
administrator to see if this applies to you.)
Leaving a Message at Another
Extension
30
x x x
9
# 9 6
x x x
To activate - method 1
1. Lift the handset.
2. Dial the target extension number.
3. Receive busy tone or no reply.
4. Dial 9.
5. Receive confirmation tone.
To activate - method 2
1. Lift the handset.
2. Dial # 96.
3. Dial the target extension number.
4. Receive confirmation tone.
Protegé®User Guide - single line telephone
Page 35

# 9 6
5 / Paging and Messaging
Message Answer
1. Message Waiting lamp is lit or you hear stutter
dial tone, indicating you have a message.
2. Lift the handset.
3. Dial # 96.
4. Call is placed to the extension that sent the
message.
5. If the message waiting lamp is still lit or you
hear stutter dial tone after replying to the message, you have at least one more message
waiting. Repeat the process to reply to all your
messages until the light turns off.
Note: If, by chance, you place a call to an exten-
sion that has left you a message wait and
the call is answered, the message wait
indication is deleted.
Consult your system administrator to
verify that your system will support this
feature.
Deleting Messages
Deleting an individual message you sent
1. Lift the handset.
## 9
[
x x x
## 9
[ [
Protegé®User Guide - single line telephone
2. Dial # [ # 9.
3. Dial the target extension number.
4. Receive confirmation tone.
Deleting all messages sent by you
1. Lift the handset.
2. Dial # [ # 9 [.
3. Receive confirmation tone.
31
Page 36

5 / Paging and Messaging
32
Protegé®User Guide - single line telephone
Page 37

chapter
six
Convenience Features
1. Reminder Service
The Reminder Service feature acts like an alarm clock. Use it to remind yourself of appointments.
Use the 24 hour clock format to record the time for the reminder. For example,
2:23 p.m. is recorded as 1423.
The attendant can program reminders for other keysets in the telephone system.
When the reminder time is reached, your phone will ring to alert you. Note that
you will not receive a notification if you are on a call at the time.
To activate
1. Lift the handset.
9# 2
x x x x
2. Dial # 92.
3. Enter time for reminder in 24 hour format.
4. Receive confirmation tone.
To cancel
1. Lift the handset.
2. Dial # [ 92.
[[
9 2
3. Receive confirmation tone.
#
Protegé®User Guide - single line telephone
33
Page 38

6 / Convenience Features
2. Speed Dial Numbers
A Speed Dial Number stores either an outside telephone number or an account
code. You may store a maximum of 20 digits (including special dialing
characters) in a single speed dial number.
The quantity of speed dial numbers assigned to your extension and the numbers
themselves depend on how your company’s phone system has been configured.
Your system administrator can tell you which numbers are available to you.
When storing an outside telephone number you can specify the trunk or trunk
route to be used.
Storing a Speed Dial Number
1. Lift the handset.
1
#
x x x
1
FLASH
2. Dial # 1.
3. Dial the speed dial number.
4. Dial 1.
5. Enter the telephone number you wish to save.
6. Press the Flash key to save the number.
7. Receive confirmation tone.
34
1#
x x x
1
FLASH
Deleting a Speed Dial Number
1. Lift the handset.
2. Dial # 1.
3. Dial the speed dial number.
4. Dial 1.
5. Press the Flash key.
6. Receive confirmation tone.
Protegé®User Guide - single line telephone
Page 39

1#
x x x
3
x x x
6 / Convenience Features
Assigning a Trunk (Group)
1. Lift the handset.
2. Dial # 1.
3. Dial the speed dial number.
4. Dial 3.
5. Enter the number of the trunk or trunk group
you wish to use with the speed dial number.
6. Receive confirmation tone.
Deleting a Trunk (Group)
1#
x x x
3
FLASH
1#
x x x
2
FLASH
1#
x x x
2
FLASH
1. Lift the handset.
2. Dial # 1.
3. Dial the speed dial number.
4. Dial 3.
5. Press the Flash key.
6. Receive confirmation tone.
Storing an Account Code
1. Lift the handset.
2. Dial # 1.
3. Dial the speed dial number.
4. Dial 2.
5. Enter the account code number.
6. Press the Flash key to save the number.
7. Receive confirmation tone.
Deleting an Account Code
1. Lift the handset.
2. Dial # 1.
3. Dial the speed dial number.
4. Dial 2.
5. Press the Flash key.
6. Receive confirmation tone.
Protegé®User Guide - single line telephone
35
Page 40

6 / Convenience Features
3. Hotline
With a Hotline programmed, you automatically dial another resource when you
lift the handset. This resource can be one of the following:
uAn extension number
uA trunk directory number
uA trunk route number
uA system or individual speed dial number
uA pickup group, hunt group, or paging group
A Hotline can be dependent on the time of day. You specify whether the
Hotline operates all the time, just during the day, or just when your company’s
phone system is in Night mode.
In addition, you can specify whether the Hotline should access the resource
immediately, or wait a second or two. A delay allows you to dial another
resource before the Hotline takes effect.
To activate
1. Lift the handset.
# 9
x x x
[[
1/2/3
0/1
2. Dial # 9 [.
3. Enter the directory number of the resource you
wish to hotline (normally three digits).
4. Select the service mode. Dial 1 for day.
- or -
Dial 2 for night.
- or -
Dial 3 for always.
5. Dial 0 for immediate action.
- or -
Dial 1 for delayed action.
6. Receive confirmation tone.
# 9
36
To cancel
1. Lift the handset.
[[[[
2. Dial # [9 [.
3. Receive confirmation tone.
Protegé®User Guide - single line telephone
Page 41

6 / Convenience Features
4. Security
For security reasons, you must enter a password to be able to use three features: Remote Follow Me Call Forward (page 9), Authority Code (page 22) and
Lock/Unlock (page 38).
Ask your telephone system administrator if you are unsure what your password
is. Use the Password Change feature to change your password.
The Lock/Unlock feature is designed to prevent unauthorized trunk calls from
your phone while you are away from your desk. A locked extension will still
receive incoming trunk calls, and a user may still place and receive intercom
calls. You need a valid password to use the Lock/Unlock feature.
Caution
The Lock feature prevents all trunk calls, not just long-distance calls. Because
local calls - including 911 calls - are blocked by this feature, exercise caution in
using this feature.
Password Change
Changing your password
1. Lift the handset.
9 7#
Protegé®User Guide - single line telephone
2. Dial # 97.
3. Enter the old password.
4. Enter the new password.
5. Receive confirmation tone.
37
Page 42

6 / Convenience Features
9 7#
#
9 7#
[
Lock/Unlock
To Lock
1. Lift the handset.
2. Dial # 97.
3. Enter your password.
4. Dial # to lock your phone.
5. Receive confirmation tone.
To Unlock
1. Lift the handset.
2. Dial # 97.
3. Enter your password.
4. Dial [to unlock your phone.
5. Receive confirmation tone.
38
Protegé®User Guide - single line telephone
Page 43

6 / Convenience Features
5. Cancel Operations
The Cancel Operations feature can be useful for troubleshooting. If your phone
seems to behave oddly, a particular feature such as Hotline may be set differently to how you expect.
Use the Cancel Operations feature to terminate your current feature settings.
To cancel
1. Lift the handset.
# 6 9
[
2. Dial # 69 [.
Protegé®User Guide - single line telephone
39
Page 44

6 / Convenience Features
40
Protegé®User Guide - single line telephone
Page 45

chapter
seven
Voice MailFeatures
1. Voice Mail
If you have a Message Waiting lamp, it will light when you receive a voice
mail message.
If you call an extension that is unattended or busy, you can access the associated voice mail box by dialing a single digit.
Use the Extinguish Lit Voice Mail Lamp feature to manually turn off the
Message Waiting light. Use this feature if your company’s phone and voice
mail systems suffer some kind of connection interruption, and the lamp fails to
extinguish after you have checked all your voice mail messages.
Dialing Voice Mail
1. Lift the handset.
4
FLASH
4
x x x
2. Dial the Voice Mail System general number.
Transferring to Voice Mail
1. Phone in use on an active call.
2. Press the Flash key.
3. Dial the Voice Mail System general number.
4. Dial the appropriate extension number.
5. Hang up.
Forwarding to Voice Mail
1. Begin by using whichever call forward type
you prefer (see pages 6-10).
4
x x x
Protegé®User Guide - single line telephone
2. Dial the Voice Mail System general number.
3. Dial the appropriate extension number.
4. Hang up.
41
Page 46

7 / Voice Mail Features
Retrieving Your Voice Mail
Messages
[
xx
7
46#
x
1. Lift the handset.
2. Dial # 64.
Calling an Extension’s Mailbox
1. Lift the handset.
2. Dial the extension number. Receive busy tone
or no answer.
3. Dial 7 to be transferred directly to the associated mailbox.
Deleting Voice Mail Message
Wait
4# 6
1. Lift the handset.
2. Dial # [64.
42
Protegé®User Guide - single line telephone
Page 47

Glossary
Class of Service
Your level of access to certain features. Your company’s phone system
may assign a different class of service to particular extensions, to
restrict access to certain features.
See also Tenant Group.
Flash Key
A key on your telephone marked
with a lightening bolt. If you do not
have a flash key to press, you can
get the same effect by pressing and
releasing the hookswitch. Doing this
is known as a hookflash.
Hookflash
The act of pressing and releasing the
hookswitch.
Hookswitch
The lever the handset presses down
on when it is in the cradle. See Offhook.
Hunt Group
A group of extensions with a common access number, organized in
such a way that calls “hunt” from
extension to extension to find a free
line. See also UCD.
Intercom
An intercom call is a call between
extensions of your company’s phone
system.
Off-Hook
When you lift the handset you are
“going off-hook.” Early telephones
had a metal hook on which the handset hung.
On-Hook
When the phone handset is resting in
the cradle. See Off-Hook.
Outside Line
See Trunk.
Service Mode
The way calls are handled depending
on the time of day. For example,
your company’s phone system may
be configured so that in Day Service
Mode all incoming calls are routed
through the attendant. In Night
Service Mode, incoming calls may
be broadcast over a loud bell for
anyone to answer.
Station
Another word for extension.
System Administrator
The person responsible for your
company’s telephones. It may be an
outside business, or a person or
department at your company.
Essentially, whoever you go to to
report problems with your phone or
to request changes in your telephone
service.
Protegé®User Guide - single line telephone
43
Page 48

Glossary
Tenant Group
Tenant Groups are a way of grouping
groups of extensions in a Protegé
phone system. For example, if several companies in a building share a
common phone system, each company’s extensions would form a Tenant
Group. See also class of service.
Tone
The audible sound your phone
makes. There are many different
tones: for example, dial tone, ring
tone, busy tone, and error tone.
Trunk
A telephone line owned by the local
telephone company that connects
your office telephone system to the
outside world. Also known as an
“outside” line, or “c.o.line.”
UCD
Uniform Call Distribution. A Protegé
feature that accepts incoming calls
and routes them to a series or bank
of agents. See also Hunt Group.
Virtual Number
An extension number that is not
physically connected to a specific
keyset. This number might be programmed under a feature key of one
or several extension keysets. This
Protegé feature has many possible
applications. If your company’s
phone system uses virtual numbers,
consult your system administrator
for an explanation of how they work
in your location.
44
Protegé®User Guide - single line telephone
Page 49

Index
Abbreviated Numbers - see Speed
Dial Numbers
Account Code 35
Agent Log On/Log Off 12
Alarm Clock 33
Attendant, Calling the 13
Authority Code 22, 37
Avoiding Calls 11
Blind Transfer 24
Busy Call Forward 6, 7
Busy Trunk (route) 20
Call Brokering 23, 27
Call Forward 6-10
Call Me Messages 30
Call Pickup 5
Callback 19
Calling an Extension 13
Camp On 21
Cancel All Call Forwards 6
Cancel Operations 39
Class of Service 20, 43
Cleaning 3
Conference 25
Dialing Speed Dial Numbers 17
Dialing Voice Mail 41
Dial Pad 2
Direct Call Forward 6, 7
Directed Call Pickup 5
Directory Numbers 5, 13, 16, 20,
29, 26
Diversion - see Call Forward
DND - see Do Not Disturb
DND Override 11, 14
Do Not Disturb 11
Feature Access 4
Feature Interaction 4
Flash Key 43
Follow Me Call Forward 6, 8-9
Forward 6
Forwarding to Voice Mail 41
Group Call Pickup 5
Group Page 29
Hold 23
Hookflash 43
Hookswitch 2, 43
Hotline 36
Hunt Group 11, 13, 36, 43
Instant dialing - see Hotline
Intercom 43
Intrusion 14
Last Number Redial 17
LCR - see Least Cost Routing
Least Cost Routing 17
LNR - see Last Number Redial
Lock/Unlock 38
Loud Bell 5
Messages 30
Message Waiting indication 30, 41
Protegé®User Guide - single line telephone
45
Page 50

Index
No Answer Call Forward 6, 8
Off-Hook 43
Off-Hook Voice Announce 15
OHVA - see Off-Hook Voice
Announce
On-Hook 43
Outside Line 43
Outside Telephone Numbers -
storing 34-35
Paging 29
Password 22, 37
Pickup Group Number 5
Placing Outside Calls 16
Preset Follow Me Call Forward 6,
8-9
Preventing Unauthorized Calls 37
Pulse dialing 18
Recall, Automatic Transfer 24
Redialing 17
Reminder Service 33
Remote Follow Me Call Forward
6, 9
Ring Tones 3
System Administrator 43
Tenant Group 44
Time Reminder 33
Tone 44
Tones, Understanding 3
Transferring Calls 24
Transferring to Voice Mail 41
Travelling Class of Service - see
Authority Code
Trunk 44
Trunk (Route) and Speed Dial
Numbers 34, 35
Unlocking Your Phone 37, 38
Unsupervised Conference 25, 26
UCD 44
Urgent calls 21
User Password - see Password
Virtual Number 13, 44
Voice Call Override 14
Voice Mail 41
Voice to Ring Interchange 14
Screened Transfer 24
Security37
Service Mode 43
- in hotline programming 36
Special Dialing 18
Speed Dial Numbers 17, 34
Storing Telephone Numbers 34
46
Protegé®User Guide - single line telephone
Page 51

QUICK GUIDE TO NUMBERING
DEFAULT PROTEGÉ YOUR COMPANY’S
R
ESOURCE DIRECTORY NUMBERS DIRECTORY NUMBERS
Extension Numbers 200 - 399 _______________
Trunk Numbers 700 - 799 _______________
Trunk Groups 100 - 129 _______________
Page Groups 400 - 429 _______________
External Paging 820 - 829 _______________
Pickup Groups 460 - 489 _______________
System Speed Dial Numbers 600 - 699 _______________
Individual Speed Dial Numbers 500 - 599 _______________
Hunt Groups 430 - 459 _______________
Background Music 800 - 801 _______________
Loud Bell 810 - 811 _______________
Virtual Numbers 830 - 859 _______________
Voice Mail Access _______________
Night Ring Pick Up _______________
Least Cost Routing _______________
INDIVIDUAL SPEED DIAL NUMBERS
NUMBER ACTUAL DETAIL
500 ______ ____________________________________
501 ______ ____________________________________
502 ______ ____________________________________
503 ______ ____________________________________
504 ______ ____________________________________
505 ______ ____________________________________
506 ______ ____________________________________
507 ______ ____________________________________
508 ______ ____________________________________
509 ______ ____________________________________
Page 52

QUICK GUIDE TO FEATURE CODES
Feature Code
ABANDON
CURRENT/
RETRIEVE HELD CALL 1
AGENT LOG OFF #91 (OFF)
#*91 (ON)
AUTHORITY CODE #55
C
ALLBACK
5
C
ALLBACK - CANCEL #*#5 (INDIV.)
#*#5* (ALL)
CALL BROKERING 2
CALL FORWARD #2X
(CANX ALL) #20
CALL PICKUP #53
CAMP ON 4
CANCEL OPERATIONS #69*
CONFERENCE 3
DND OVERRIDE 3
DO NOT DISTURB (DND) #4
EXTINGUISH LIT VOICE MAIL LED #*64
HOTLINE #9* (ON)
#*9* (OFF)
INTRUSION 8
Feature Code
LAST
NUMBER REDIAL (LNR) #8
LEAST COST ROUTING (LCR) #67
LOCK/UNLOCK #97
MESSAGES - DELETING #*#9 (INDIV.)
#*#9*(ALL)
M
ESSAGES
- SENDING #96
9
M
ESSAGES - ANSWERING #96
OHVA 0
PASSWORD CHANGE #97
PULSE TO TONE CONVERSION *
REMINDER SERVICE #92 (ON)
#*92 (OFF)
RETRIEVE VOICE MAIL MESSAGE #64
SPEED DIAL NUMBER PROGRAMMING #1
TRUNK HOOKFLASH #3
UNSUPERVISED CONFERENCE #77
VOICE TO RING INTERCHANGE 2
VOICE MAIL FROM BUSY
OR UNATTENDED EXTENSION 7
 Loading...