

Page 1

®
PROTEGÉ
Digital Hybrid Key System
Keyset User Guide—with Display
Item Number 699029
Page 2

S
PRINT PRODUCTS GROUP HAS MADE EVERY EFFORT TO ENSURE THE TECHNICAL
ACCURACY OF THIS GUIDE. FEATURES AND TECHNICAL DATA ARE SUBJECT TO CHANGE
WITHOUT NOTICE
.
Copyright © 2000 North Supply Company. All Rights Reserved.
Sprint and the diamond logo are registered trademarks of Sprint Communications Company L.P., used under license.
Page 3

Contents
chapter
1
chapter
2
chapter
3
Introduction
Answering Calls
Making Calls
1.How To Use This Guide . . . . . . . .1
2.Your Keyset’s Parts . . . . . . . . . . . .2
3.Understanding the Lights . . . . . . .6
4.Understanding the Tones . . . . . . .7
5.Care Of Your Keyset . . . . . . . . . . .7
6.Your Protegé Phone System . . . . .8
1.Answering Calls . . . . . . . . . . . . . .9
2.Call Pickup . . . . . . . . . . . . . . . . .10
3.Call Forward . . . . . . . . . . . . . . . .11
4.Avoiding Calls . . . . . . . . . . . . . . .19
1.Placing Intercom Calls . . . . . . . .21
2.Intrusion . . . . . . . . . . . . . . . . . . .23
3.Off-Hook Voice Announce . . . . . .24
4.Alert . . . . . . . . . . . . . . . . . . . . . .25
5.Placing Outside Calls . . . . . . . . .26
6.Redialing . . . . . . . . . . . . . . . . . .28
7.Dialing Speed Dial Numbers . . . .30
8.Dialing Directory And Speed
Dial Numbers By Name . . . . . . . .31
9.Special Dialing . . . . . . . . . . . . . .32
10.Callback . . . . . . . . . . . . . . . . . . .33
11.Camp On . . . . . . . . . . . . . . . . . .35
12.Authority Code . . . . . . . . . . . . . .36
chapter
Call Handling
4
chapter
Protegé®Keyset User Guide - with display
Paging And
5
Messaging
1.Hold . . . . . . . . . . . . . . . . . . . . . .37
2.Transferring Calls . . . . . . . . . . . .39
3.Conference . . . . . . . . . . . . . . . . .42
1.Paging . . . . . . . . . . . . . . . . . . . .45
2.Station-to-Station Messages . . . .47
3.Premises Messages . . . . . . . . . .49
4.Creating Personal Messages . . .50
i
Page 4

Contents
chapter
6
chapter
7
chapter
8
Convenience
Features
Customizing
Your Keyset
Voice Mail And
Data Features
1.Mute . . . . . . . . . . . . . . . . . . . . . .53
2.Reminder Service . . . . . . . . . . . .54
3.Speed Dial Numbers . . . . . . . . . .55
4.Group Listen . . . . . . . . . . . . . . . .60
5.Hunt Group Features . . . . . . . . . .61
1.Three Features For Easier
Dialing . . . . . . . . . . . . . . . . . . . . .63
2.Three Features For Easier
Answering . . . . . . . . . . . . . . . . . .66
3.Security . . . . . . . . . . . . . . . . . . . .68
4.Feature Code Settings . . . . . . . . .70
5.Setting The Feature Keys . . . . . .71
6.Headset Operation . . . . . . . . . . .75
7.Background Music . . . . . . . . . . . .76
1.Voice Mail Features . . . . . . . . . . .77
2.Data Features . . . . . . . . . . . . . . .80
ii
Glossary . . . . . . . . . . . . . . . . . . . . .81
Index . . . . . . . . . . . . . . . . . . . . . . . .83
Protegé®Keyset User Guide - with display
Page 5

chapter
one
Introduction
1. How to Use this Guide
Your Protegé Display keyset is the perfect tool for today’s workplace. This
guide shows you how to set and use your phone’s many advanced and laborsaving features. Some features are only available with specific software versions. If you are not sure whether a feature is available to you, please see your
system administrator.
Getting Started
Read this chapter carefully; it contains some important safety instructions.
Then, flip through the rest of the guide to become familiar with how information is organized. Study the features you will use on a daily basis. Keep this
guide handy so you can quickly refer to it as you need.
How to Locate Information
If You Want Then Refer To
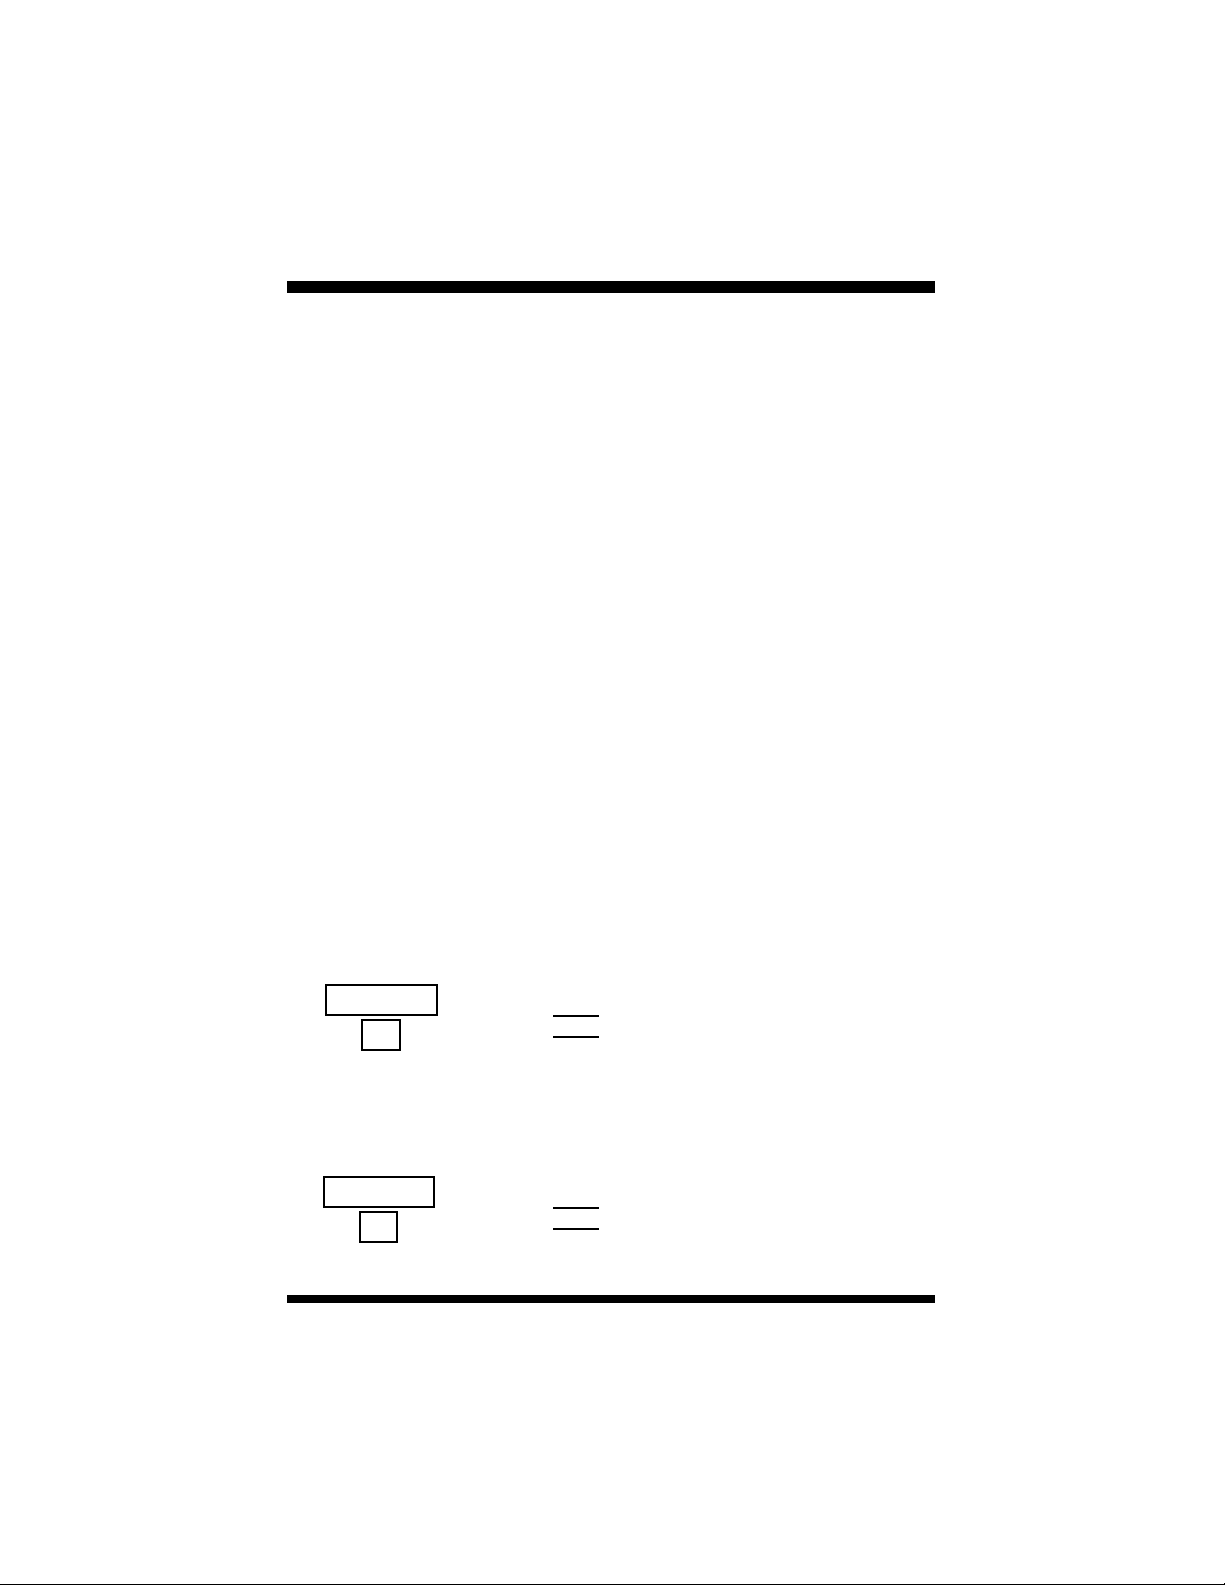
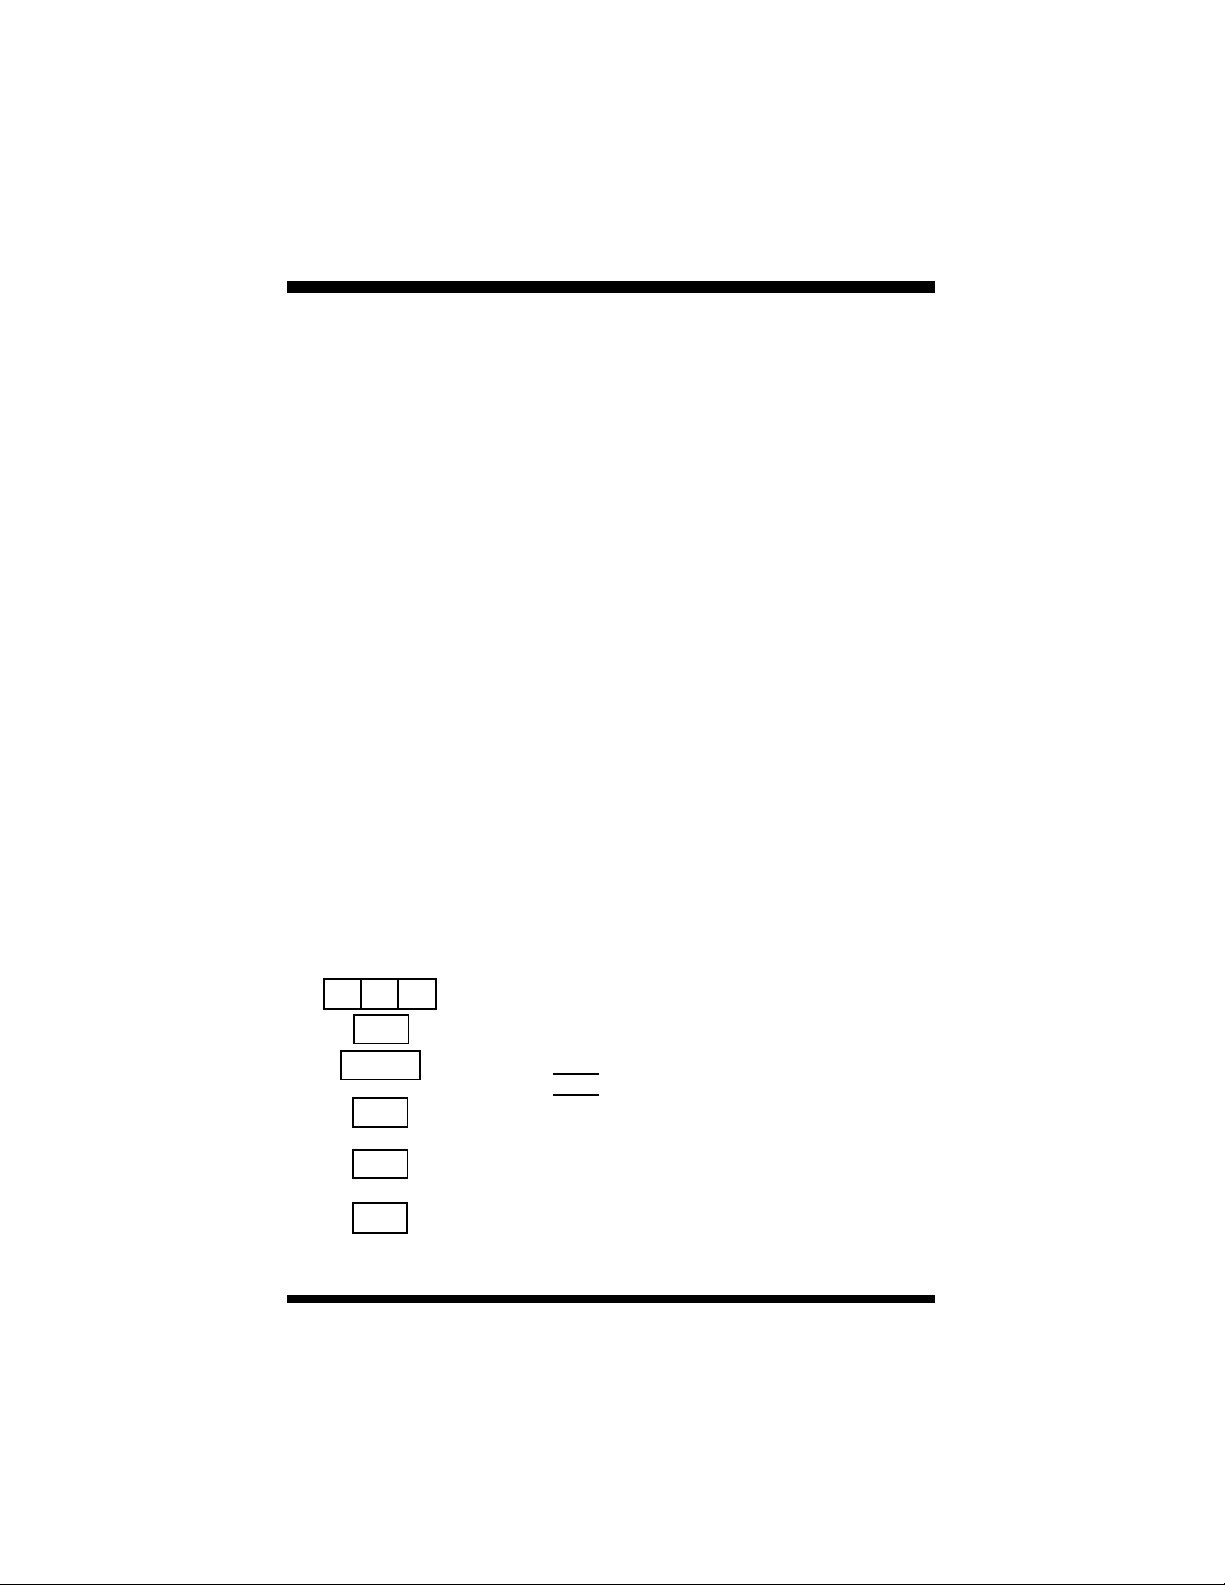
General information on using your keyset Chapter 1, Introduction
To use a specific feature Index to point you to the page
A definition of a telecommunications term Glossary
Information on taking and avoiding calls Chapter 2, Answering Calls
Information on placing internal and Chapter 3, Making Calls
outside calls
Information on holding and transferring Chapter 4, Call Handling
calls, and on making conferences
Information on paging and messaging Chapter 5, Paging And Messaging
Information on labor-saving features Chapter 6, Convenience Features
such as programming speed dial numbers
Information on performing keyset-specific Chapter 7, Customizing Your
functions Keyset
Information on using voice mail and Chapter 8, Voice Mail And Data
data features Features
Protegé®Keyset User Guide - with display
1
Page 6

*
1 / Introduction
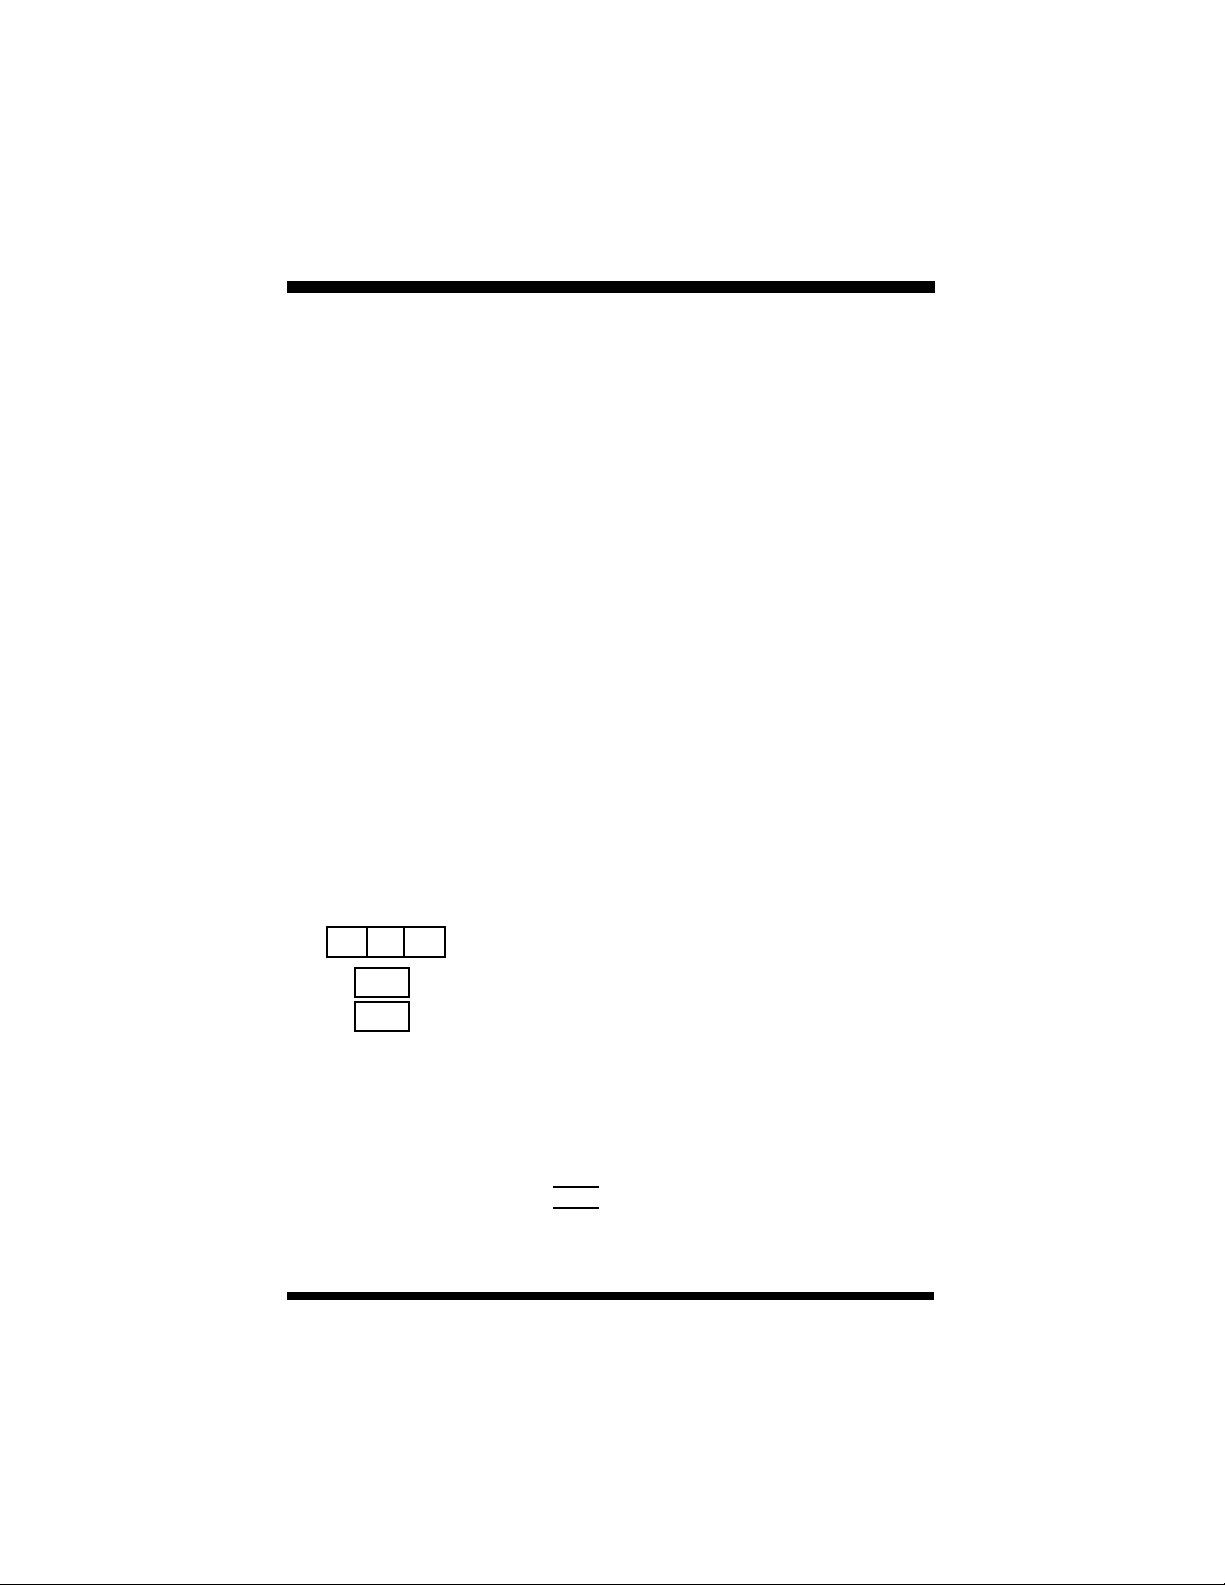
2. Your Keyset’s Parts
Headset Jack (not all models)
Speakerphone
Data Port (not all models)
F1 F2
HOLD VOL VOL
XFR/CONF
REDIAL
CLEAR
FUNCTION
Sprint
F3
SPEAKER
ABC DEF
1 3
2
JKL MNO
GHI
4 5 6
PRS TUV WXY
7 8
OPER
0
Display (LCD)
R
Soft Keys
Feature Keys
And Dual
Function
Feature Keys
(number of keys
varieswith model)
Pull Out Tray
Speaker Key
and Light
9
#
Volume Keys
Dial Pad
Hold Key
Xfr/Conf Key
Redial Key Clear Key
2
Function Key
Sprint Protegé, Keyset User Guide - with display
Model illustrated:Executive Data keyset
Page 7

1 / Introduction
Clear Key
Press the Clear key to cancel any task you are in the middle of performing, and
to terminate a call. Also use this key to conclude programming certain features.
However, do not press the Clear key to complete a programming task if you
are active on a call, as this will also disconnect you from your call.
Data Port (not all models)
The data port enables you to use a connecting cable to connect your keyset to a
personal computer.
Dial Pad
Use the dial pad to dial telephone numbers, and to enter alphabetical letters for
directories and messages.
Display (LCD)
The LCD displays time, day, and date. It provides information on the status of
your keyset, and prompts you when you are setting and cancelling features.
Display in an idle state
MONTH DATE DAY TIME
EXT. OR USER NAME DAY/NIGHT MODE EXT. #
While you are on an outside call the LCD will display a call duration timer.
Press soft key F1 to display the dialed number. Press soft key F2 to display the
idle state information.
Feature Keys and Dual Function Feature Keys
(number of keys varies with model)
These keys and their associated single or dual colored LEDs (Light Emitting
Diode) give you speedy access to outside lines, internal resources such as
extensions and hunt groups, frequently used features, and speed dial numbers.
Your telephone system administrator may have already programmed these keys
for you.
Protegé®Keyset User Guide - with display
3
Page 8

1 / Introduction
Each key can be one of the following:
uAn outside line key. Press this for direct access to a line or group of
lines.
uA Direct Station Selection key. Press this to call a specific internal
resource, instead of dialing manually. A DSSkey can connect with a
specific keyset, hunt group, paging group or voice mail general number.
uA frequently used feature such as Call Forward, Do Not Disturb or a
Message Waiting light. Press the key to activate and cancel the feature.
uA speed dial number. Press the key to dial the stored number.
See page 6 for a guide to what the associated LEDs signify.
Dual function feature keys have a second “level” of capacity. This upper level
can store speed dial numbers. Press the Function key followed by the appropriate feature key to dial a speed dial number stored in the upper level.
If your keyset has nine keys, all are dual function feature keys and all have
dual colored LEDs. If your keyset has 20 keys, only the last two colums of five
keys are dual function feature keys. All 20 keys have dual colored LEDs,
except in some older models, when the dual function feature keys have single
colored LEDs.
Function Key
Most feature codes are set and cancelled by pressing this key followed by dialing one to four digits. Also use this key to access the speed dial numbers stored
in the “upper” level of the dual function feature keys.
Headset Jack (not all models)
The headset jack enables you to connect a headset to your telephone.
Hold Key
Press this key to place a call on hold. Also use this key to go back one level in
programming certain features.
Pull Out Tray
The pull out tray contains a card for you to note frequently dialed numbers, or
contents of dual function feature keys.
4
Protegé®Keyset User Guide - with display
Page 9

1 / Introduction
Redial Key
The Redial key is programmable. It is usually programmed to redial the last
outside number dialed from the keyset. For more information, see page 28.
Soft Keys
Use these interactive buttons in conjunction with the LCD to access your
keyset’s features. While you are in idle state, you can also access three features
by pressing a soft key. Press F1 to program the upper level of a dual function
feature key. Press F2 to program a feature key. For more information on
programming feature keys, see page 71. Press F3 to search the directories (see
also page 31).
Speaker Key and Light
The speaker key turns your speakerphone on and off. Use it to disconnect a
hands-free call. Your speakerphone is active when the light is lit.
This key also activates the Group Listen feature.
Pressing the Speaker key will answer or release a call on the spearkerphone.
Switching from the handset to the speakerphone is easy. Press the Speaker key
(it will light red) and then hang up the handset. To return to the handset, simply
lift it up and the speaker will automatically turn off.
Speakerphone
The speakerphone enables you to make hands-free calls. If your company does
not have external paging equipment, pages may be broadcast over keyset
speakerphones.
Volume Keys
Use the volume keys to regulate the volume of the ringer, the speaker, the
handset, the headset, and of the group listen feature.
Xfer/Conf Key
Use this key when transferring calls, and when forming three- or four-party
conference calls.
Protegé®Keyset User Guide - with display
5
Page 10

1 / Introduction
3. Understanding the Lights
The lights on your keyset indicate the status of lines, features, and other extensions.
The table below describes what each light indicates. The lights are situated
beside each Feature key. Line keys are feature keys programmed to access outside lines. DSS keys are feature keys programmed to access other internal
resources such as extensions or hunt groups. Feature keys are feature keys programmed to activate specific features such as Do Not Disturb, Mute, and Call
Forward.
Signal Description
Dark (Line) Trunk not in use
(DSS) Resource in idle state
(Feature) Feature not in use
Solid Red (Line) Trunk (or trunk route) in use
(DSS) Resource is busy
(Feature) Feature activated
Slow Flash Red (Line) Trunk on hold by another extension
(DSS) Resource is in Do Not Disturb mode
(Feature) You have a message waiting
Fast Flash Red (Line) Incoming trunk call
(Feature) Incoming intercom call
(Line or Feature) You have a transferred or recalled call
Twinkling Green (Line) You are on a trunk call
(Feature) You are on an intercom call
Fast Flash Green (Line) Trunk exclusively held by you
Hotel/Motel Specific Uses
Dark (DSS)Room check-in
Slow Flash Green (DSS) Room check-out
Steady Green (DSS)Room clean
Solid Red (DSS) Extension busy
Fast Flash Red (DSS) Extension ringing (MTX/LTX ONLY)
Slow FlashRed (DSS) Extension in Do Not Disturb
6
Protegé®Keyset User Guide - with display
Page 11

1 / Introduction
4. Understanding the Tones
This table will help you distinguish between the different ring tones you hear
on your keyset.
Signal Description
Single ring Hold reminder tone
Confirmation tone
Two short rings (Once) Error tone
(Twice) Callback
Continued single ring Incoming outside call
Trunk recall
Continued double ring Incoming intercom call
5. Care of Your Keyset
Care for your keyset as you would a precision instrument. Keep it clean, and
place it on a firm level surface, or affix it securely to a wall, to protect it from
being dropped. Periodic cleaning with a soft cloth dampened with glass cleaner
or mild solution of non-abrasive detergent will keep your telephone looking
new for years. Do not spray aerosol cleaner or pour any liquid directly into the
keyset. Doing so may cause severe damage to your telephone.
Warning
To prevent fire or shock hazard, do not expose this telephone to rain or any
type of excess moisture. If accidentally dropped in water, immediately unplug
this telephone from the wall outlet.
Protegé®Keyset User Guide - with display
7
Page 12

1 / Introduction
6. Your Protegé Phone System
Access To Features
You may not be able to operate all the features in this guide exactly as written.
If your company’s telephone system uses an early version of software, some
features may offer fewer or different options, others may not be available at all.
Also, a particular feature option may be included in your company’s system,
but may not be programmed to operate at your extension.
If you attempt to use a feature that is not available to you, or make a mistake in
using the feature, you will hear an error signal or see a visual display instruction. See your telephone system administrator for further details regarding feature access.
Feature Interaction
When you are setting a feature, please read the introductory paragraphs carefully. They describe what the feature does, and, if applicable, how it interacts
with other features.
Protegé Flexibility
The Protegé phone system is highly flexible and can be customized to fit many
business needs. This guide has been written to accommodate the structure of
most companies. Your system administrator can tell you the numbers assigned
to resources such as hunt groups, and speed dial numbers. Write in this guide
any additional information that is relevant to your working environment.
Following the Instructions
The instructions in this guide often ask you to “press” a key. Throughout these
instructions, the word “press” means press and release, not press and hold. You
may be instructed to “dial” which means to press the desired numbers on the
dial pad. You may be required to dial [ (star) or # (pound) on the dial pad to
access certain features.
Your LCD displays informative prompts while you are operating your keyset.
Press soft key F1 to go back one digit or character. Press the Hold key to go
back one level in feature setting, and press the Clear key to abandon a task.
You should hear a confirmation tone when you have successfully set most features. Consult with your telephone system administrator if you want this tone
disabled or reinstated.
8
Protegé®Keyset User Guide - with display
Page 13

chapter
two
Answering Calls
1. Answering Calls
Answering Internal and Outside Calls
Answering internal and outside calls is as easy as picking up the handset or
pressing the Speaker key, if you have the Auto Answer feature set to “on” (see
page 63). Otherwise, to answer a call you will need to press a feature key
appropriate to the type of call: a line, line group, or overflow key for an outside
call; an intercom key for an internal call.
Call Indication
Your LCD displays information about the caller:outside calls show the directory number of the trunk carrying the call. Internal calls show the identity (name
or number) of the extension calling you. All transfers, forwards, and recalls
show their origin on the LCD.
Caller ID
Depending on the service you receive from your local telephone company,
Protegé can display incoming call information on the LCD. If you have caller
number service only, the LCD displays the caller’s number. If you have name
and number service, the LCD displays the caller’s name on the top line and the
number on the bottom line. Your LCD displays this infomation only while a
call is ringing in. When you answer, the LCD changes to display the normal
answer information. You can review caller information at any time during a
call by press ing soft key F1. With name and number service, the caller’s name
is displayed on the top line and the caller’s number on the bottom line.
Intercom Key
A feature key programmed as an intercom key (labeled “ICM”) is useful for
processing internal calls. If you do not have an ICM key already allocated, you
can create one. The feature code is Function key, dial 65. For more information
on setting the feature keys, see page 70.
Your ICMkey flashes when an internal party has “camped on” to your extension while you are on an outside call. Press this key to speak to the internal
caller. Be sure to place the first call on hold if you do not have the Automatic
Hold feature enabled at your keyset or you will disconnect the outside caller.
See page 34 for more information on the Camp On feature, and page 37 for
more information on the Automatic Hold feature.
Protegé®Keyset User Guide - with display
9
Page 14

2 / Answering Calls
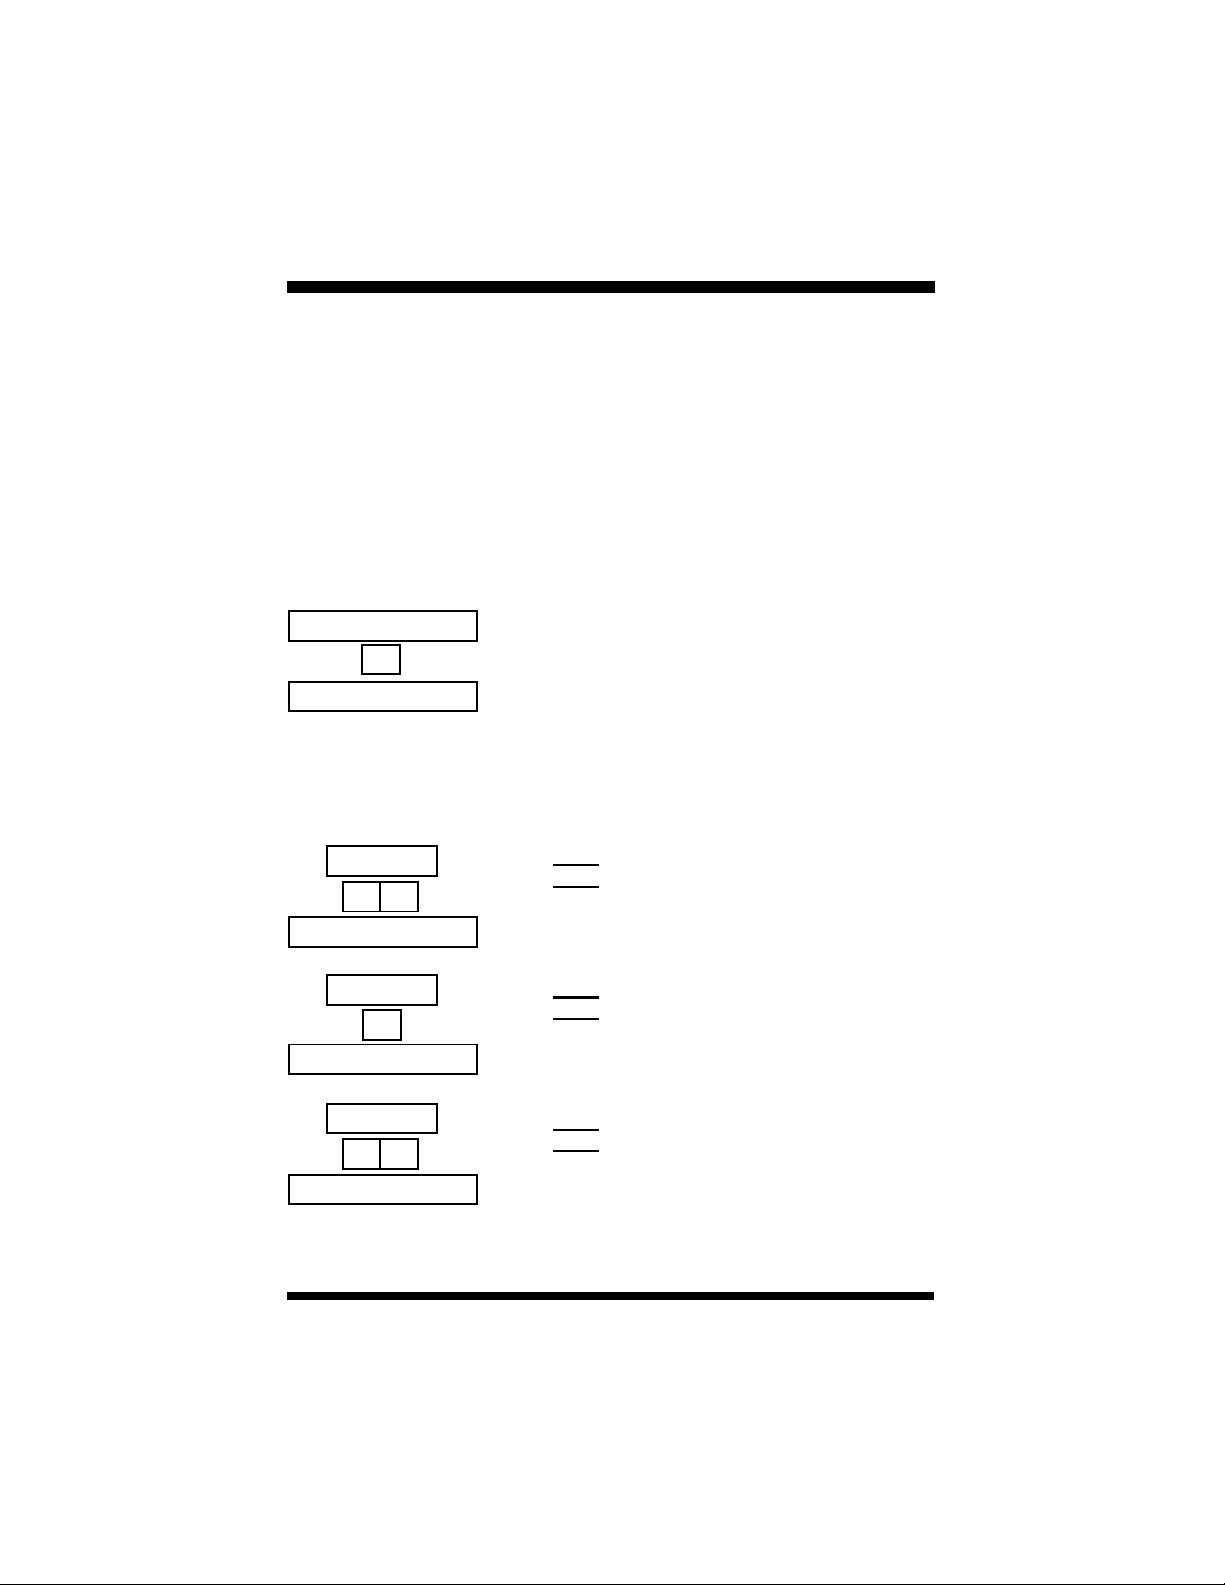
2. Call Pickup
Call Pickup helps you answer calls that are ringing at another location. Simply
dial the loud bell directory number to answer a call at a ringing loud bell.
Use Directed Call Pickup to answer a ringing extension or a ringing virtual
number. You specify (“direct”) the ringing location by dialing the directory
number of the ringing extension or virtual number.
Dial the Group Call Pickup number to pick up a ringing extension that is within your work group. Your system administrator can tell you if your extension is
part of a work group, and what number to dial to pick up calls.
Loud Bell Call Pickup
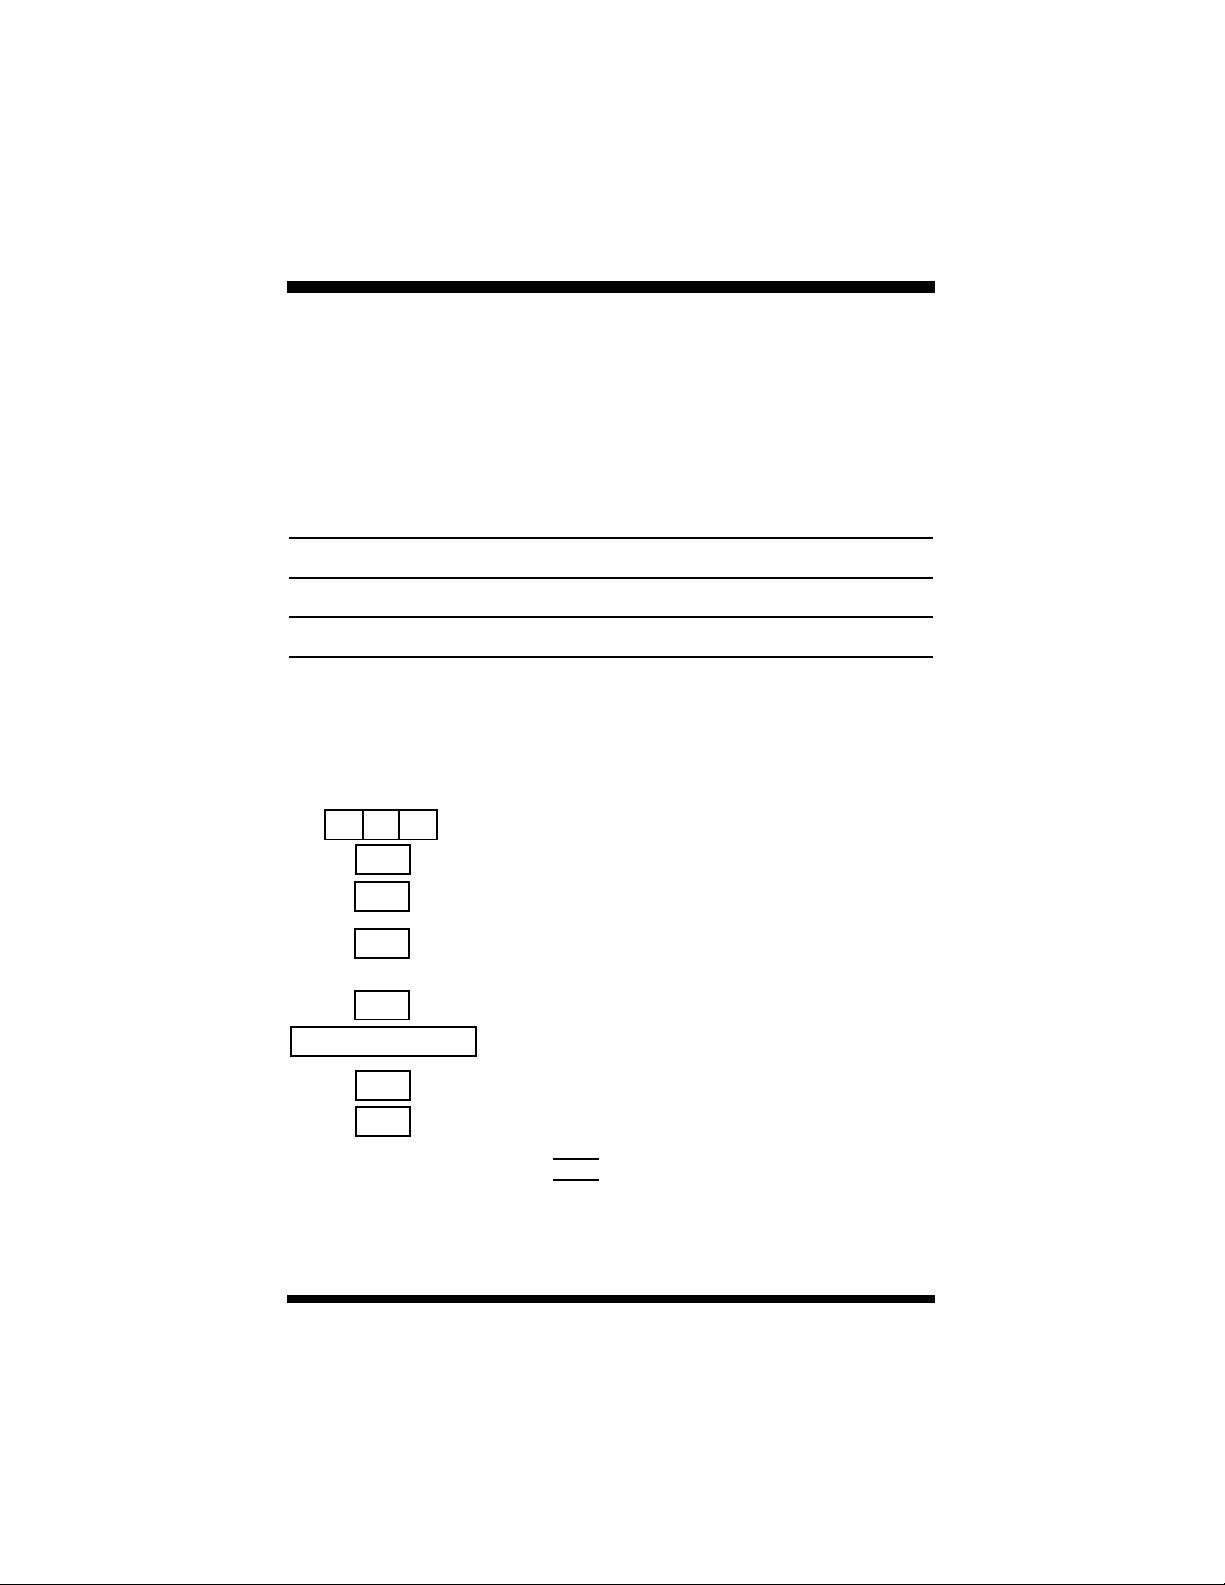
1. Keyset is in idle state.
8 1
FUNCTION
5
3
x x x
2. Dial the ringing loud bell (810 or 811).
3. Call is connected. Pick up the handset or use
the keyset speaker to talk to the caller.
Directed Call Pickup
1. Keyset is in idle state.
2. Press the Function key and then dial 53.
- or -
Press the designated feature key.
3. Dial the extension number ringing.
- or -
Dial the virtual number ringing (830-859).
4. Call is connected. Pick up the handset or use
the keyset speaker to talk to the caller.
10
Group Call Pickup
1. Keyset is in idle state.
2. Dial your pickup group number.
- or -
Press the designated feature key.
3. Call is connected. Pick up the handset or use
the keyset speaker to talk to the caller.
Protegé®Keyset User Guide - with display
Page 15

2 / Answering Calls
3. Call Forward
Call Forward gives you the ability to redirect calls from your extension to other
extensions. Protegé gives you the flexibility to forward some or all of your
calls to one or more extensions depending upon the situation. An example
would be that you could set up your phone to forward all external calls directly
to voice mail with intercom calls going directly to the operator.
The three most commonly used forwarding options are Direct, Busy and No
Answer. Direct forwarding allows you to send calls to another extension number before they ring at your extension. Busy forwarding sends a call to another
extension number when yours is busy. No Answer forwarding allows you to
send calls to another extension number if yours goes unanswered for a specific
period of time.
You are allowed to forward calls to either extensions or hunt group numbers.
The extensions can be at remote locations if your system supports them. You
are able to specify whether to forward just the intercom or external calls or to
forward all calls. For example, you might set Busy Call Forward to divert intercom calls to a colleague's extension, and outside calls to a hunt group, and set
No Answer Call Forward to divert all calls to your voice mail box.
With No Answer Call Forward you can forward the first call after a different
length of time than the second and subsequent calls. Both No Answer timers
are independent and programmable from six to 30 seconds in increments of
two seconds.
Another forwarding feature is External Call Forward, which forwards inbound
or transferred external calls to a specified outside telephone number ECF does
not forward UCD Hunt Group calls. If your system requires an account code
when you make outbound calls, you must program the correct code to be able
to use this feature. Your system administrator can advise whether ECF is available to you.
Use Follow Me Call Forward if you are moving temporarily to another extension and would like to receive your calls at that location. The Preset option
enables you to place your forwarding instructions before you leave your desk.
The Remote option allows you to place your forwarding instructions from your
new location. Remote requires you enter your user password; consult your system administrator if you are unsure what this is. You can cancel and reprogram
Remote Follow Me Call Forward from any display keyset on the system.
If any type of call forward is programmed under a feature key, the key will
light up when the forward is activated.
Protegé®Keyset User Guide - with display
11
Page 16

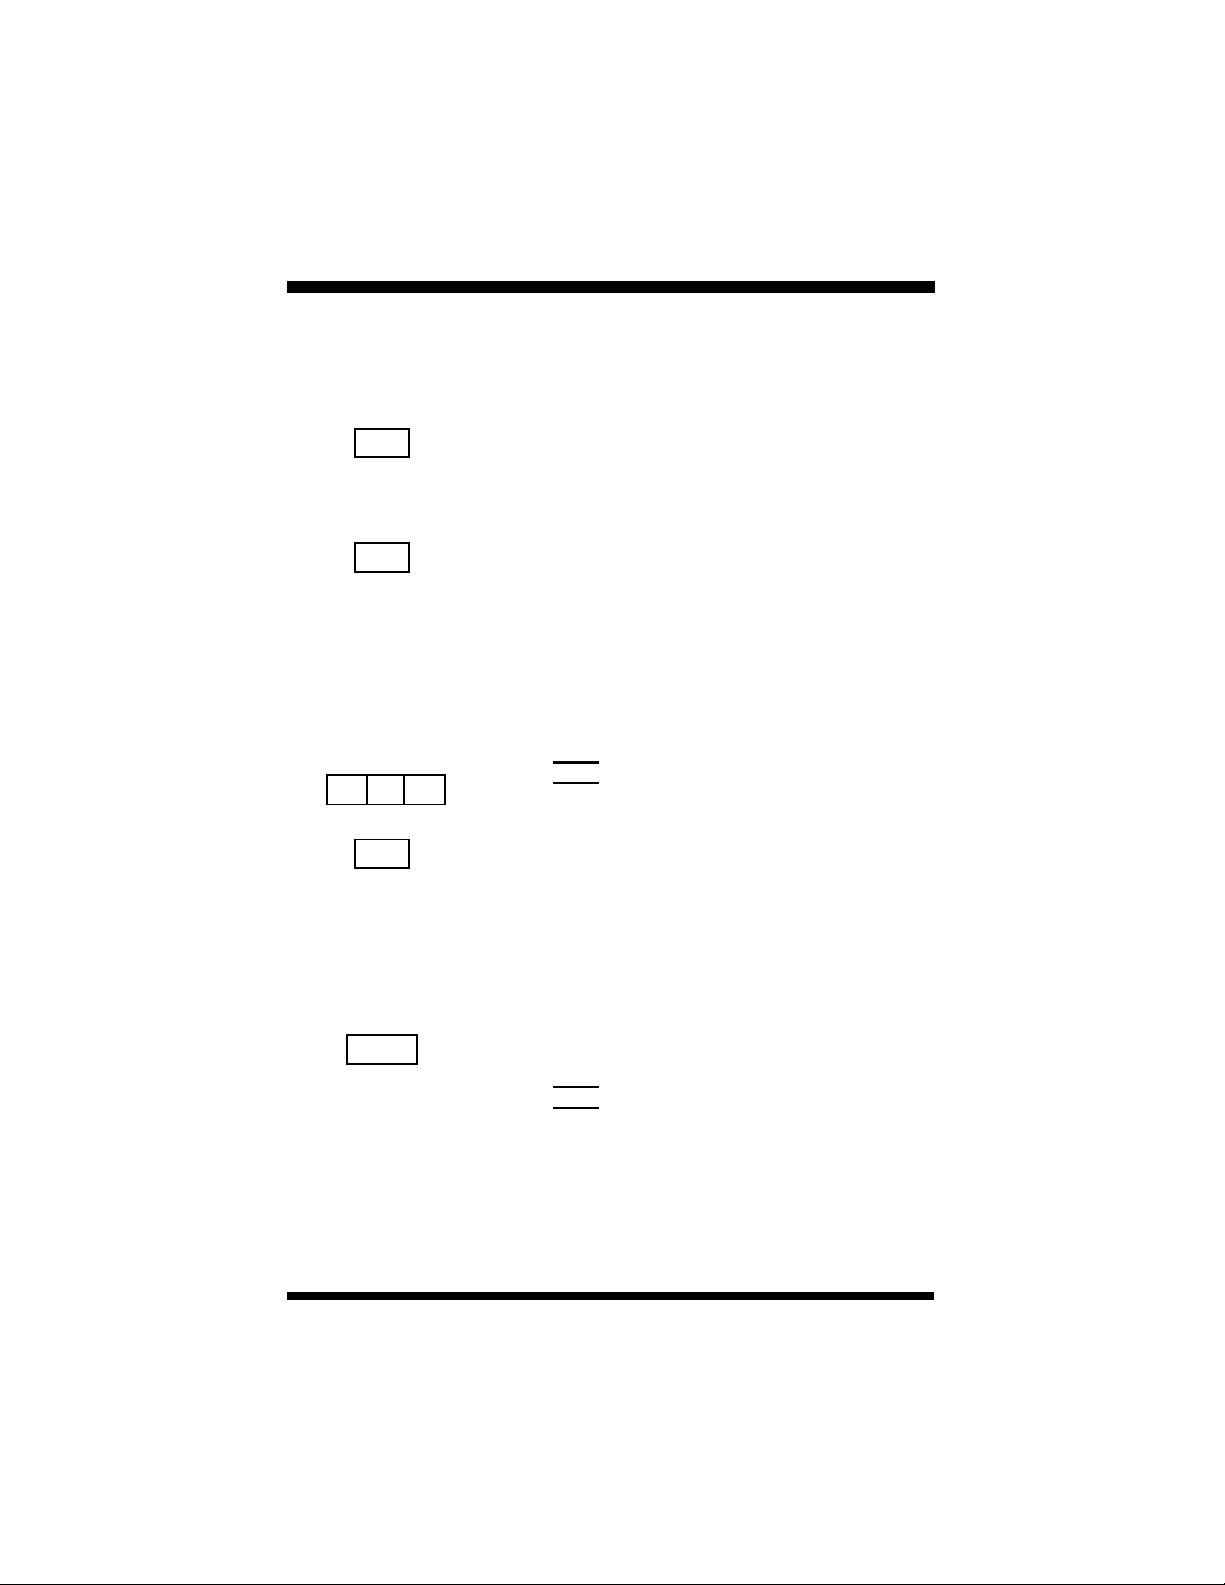
2 / Answering Calls
FUNCTION
2 0
FUNCTION
2
F1
x x x
F2
F1/F2/F3
Cancel All Call Forwards
1. Keyset is idle or in use on a call.
2. Press the Function key and then dial 20.
- or -
Press the designated feature key, followed by
soft key F1 below the word “cancel.”
3. Receive confirmation tone.
Direct Call Forward
To activate
1. Keyset is idle or in use on a call.
2. Press the Function key and then dial 2.
- or -
Press the designated feature key.
3. Press soft key F1 below the word “direct.”
4. Enter the extension number to which you want
to forward calls.
5. Press soft key F2 below the word “save” to
accept the extension number.
6. Choose whether to divert all calls (icm/co),
just intercom calls (icm), or just outside calls
(co), by pressing the appropriate soft key (F1,
F2, or F3).
7. Receive confirmation tone.
FUNCTION
12
2
F1
F2
To cancel
1. Keyset is idle or in use on a call.
2. Press the Function key and then dial 2.
3. Press soft key F1 below the word “direct.”
4. Press soft key F2 below the word “del.”
5. Receive confirmation tone.
Protegé®Keyset User Guide - with display
Page 17

FUNCTION
2
F2
x x x
F2
F1/F2/F3
2 / Answering Calls
Busy Call Forward
To activate
1. Keyset is idle or in use on a call.
2. Press the Function key and then dial 2.
- or -
Press the designated feature key.
3. Press soft key F2 below the word “busy.”
4. Enter the extension number to which you want
to forward calls.
5. Press soft key F2 below the word “save” to
accept the extension number.
6. Choose whether to route all calls (icm/co), just
intercom calls (icm), or just outside calls (co),
by pressing the appropriate soft key (F1, F2,
or F3).
7. Receive confirmation tone.
FUNCTION
2
F2
F2
Protegé®Keyset User Guide - with display
To cancel
1. Press the Function key and then dial 2.
2. Press soft key F2 below the word “busy.”
3. Press soft key F2 below the word “del.”
4. Receive confirmation tone.
13
Page 18

2 / Answering Calls
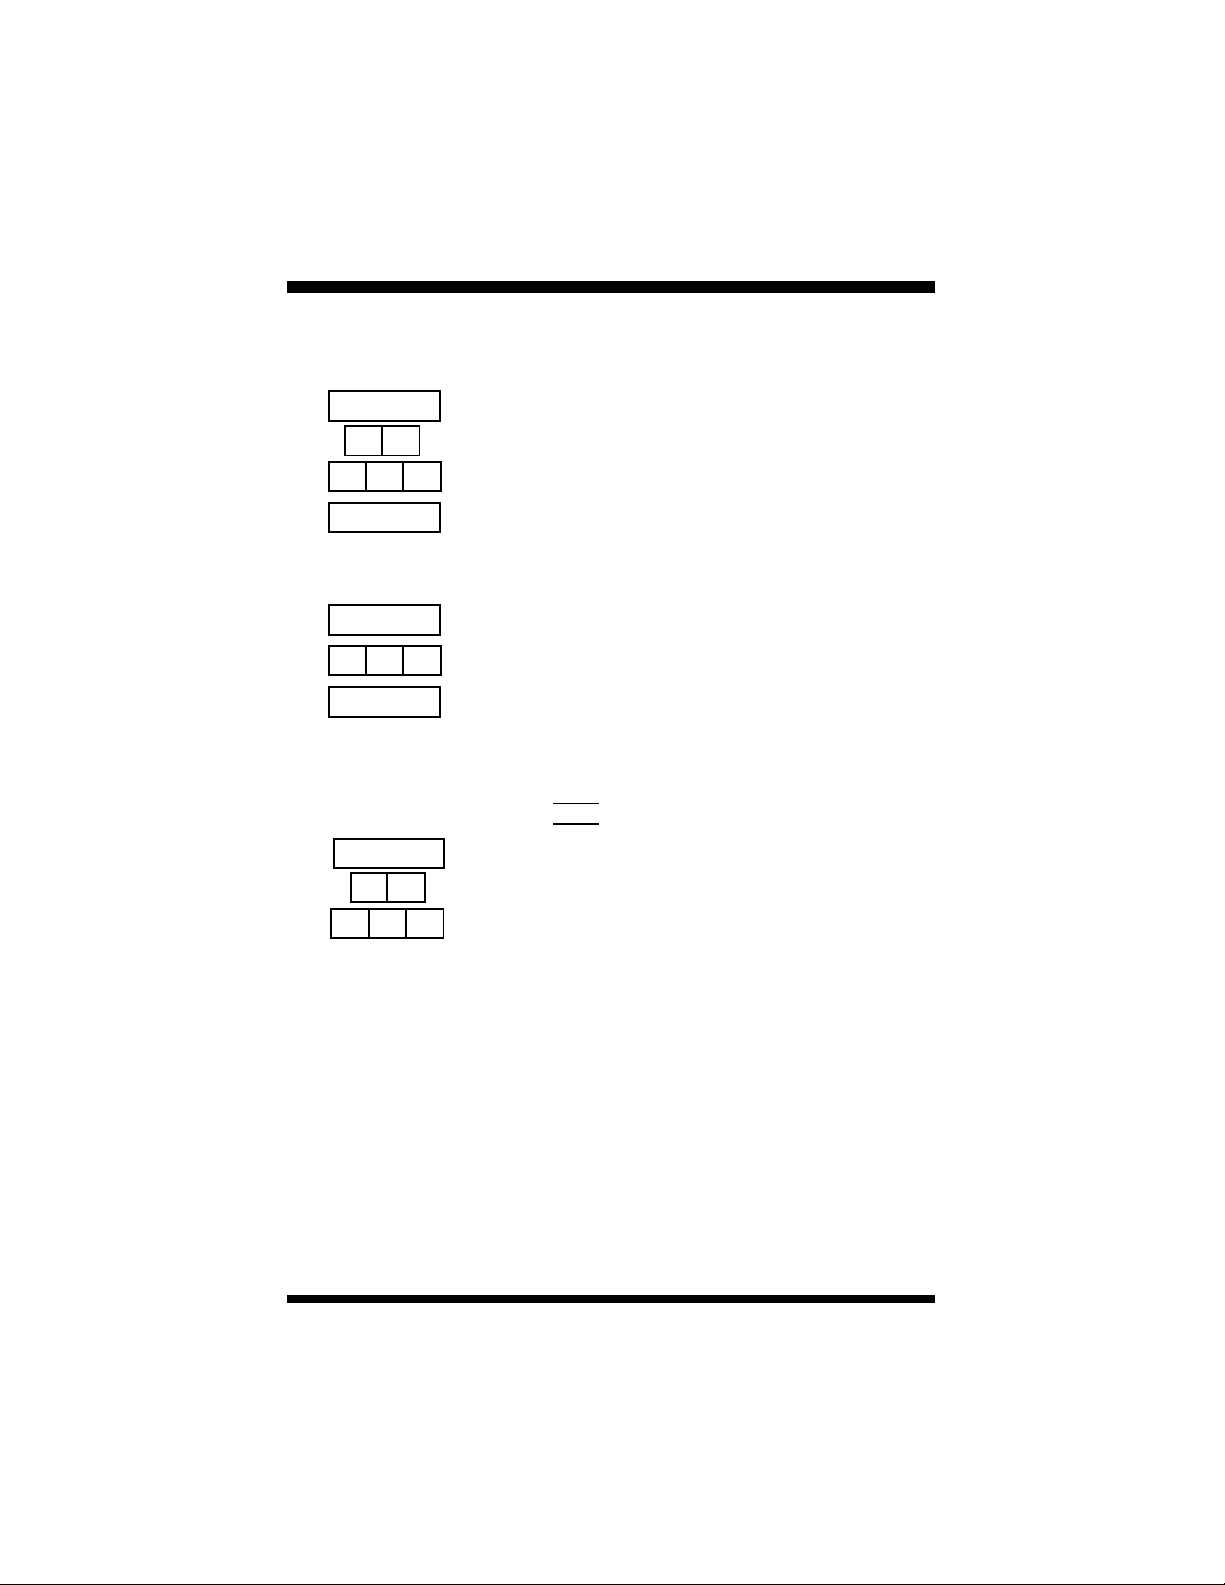
FUNCTION
2
F3
F1
x x x
F2
F1/F2/F3
F3
F2
F3
CLEAR
No Answer Call Forward
To activate
1. Keyset is idle or in use on a call.
2. Press the Function key and then dial 2.
- or -
Press the designated feature key.
3. Press soft key F3 below the word “next.”
4. Press soft key F1 below the word “n_ans.”
5. Enter the extension number to which you
want to forward calls.
6. Press soft key F2 below the word “save” to
accept the extension number.
7. Choose whether to route all calls (icm/co),
just intercom calls (icm), or just outside calls
(co) calls by pressing the appropriate soft key
(F1, F2, or F3).
8. Receive confirmation tone.
9. Press soft key F3 below “chg” to enter a time
for the first No Answer Call Forward.Default
value is 8 seconds (two ring cycles).
10. Press soft key F2 below “next.”
11. Press soft key F3 below “chg” to enter a time
for the second and subsequent No Answer
Call Forwards. Default value is 8 seconds
(two ring cycles).
12. Press the Clear key to save the settings and
exit programming.
FUNCTION
14
2
F3
F1
F2
To cancel
1. Keyset is idle or in use on a call.
2. Press the Function key and then dial 2.
3. Press soft key F3 below the word “next.”
4. Press soft key F1 below the word “n_ans.”
5. Press soft key F2 below the word “del.”
6. Receive confirmation tone.
Protegé®Keyset User Guide - with display
Page 19

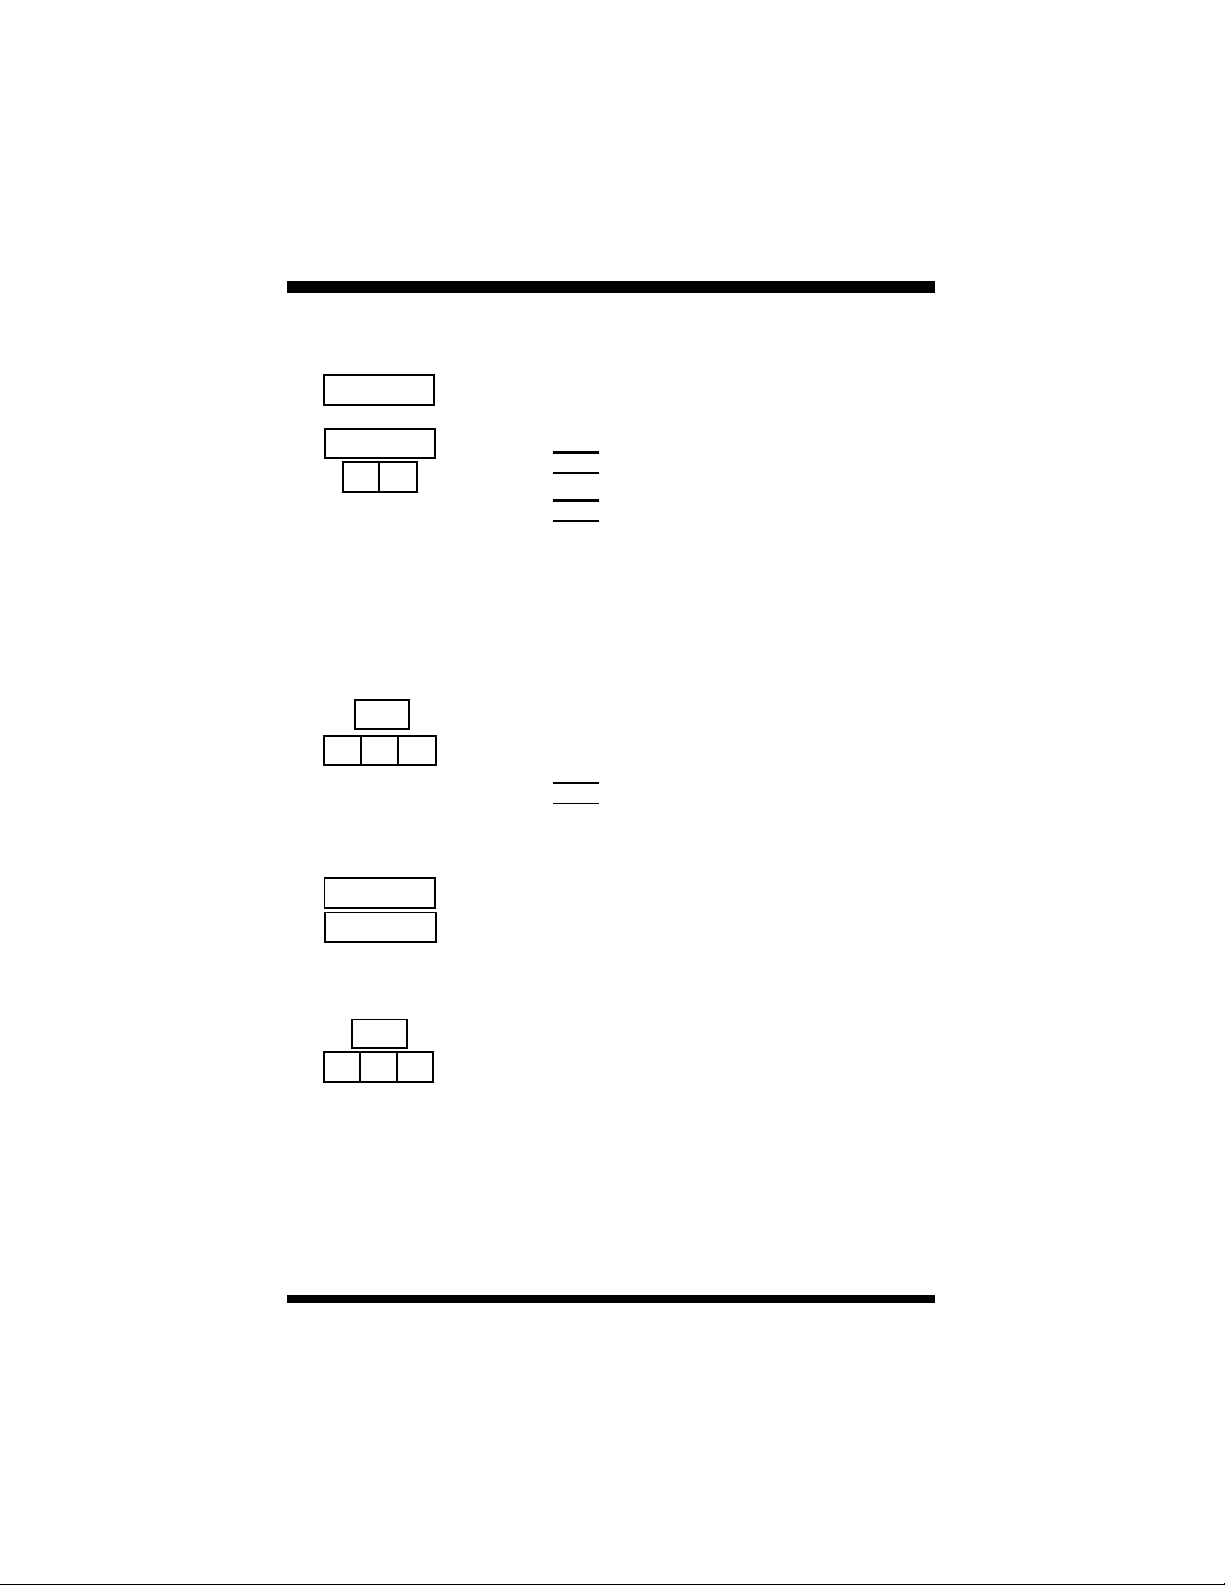
FUNCTION
2
F3
F2
F1
F2
CLEAR
2 / Answering Calls
External Call Forward (ECF)
Your system administrator can advise if this feature
is available to you.
To activate
1. Keyset is idle or in use on a call.
2. Press the Function key and then dial 2.
- or -
Press the designated feature key.
3. Press soft key F3 below the word “next.”
4. Press soft key F2 below the word “ext.”
5. Press soft key F1 below the word “tel.”
6. Enter the outside telephone number to which
you want to forward calls.
7. Press soft key F2 below the word “save” to
accept the extension number.
8. Receive confirmation tone.
9. For systems requiring account codes: Press
soft key F3 below the word “fac” and enter an
appropriate account code.Press soft key F2
below the word “save” to accept the code.
Receive confirmation tone.
10.Press the Clear key to save the settings and
exit.
To cancel
FUNCTION
2
F3
F2
F1
F2
Protegé®Keyset User Guide - with display
1. Keyset is idle or in use on a call.
2. Press the Function key and then dial 2.
3. Press soft key F3 below the word “next.”
4. Press soft key F2 below the word “ext.”
5. Press soft key F1 below the word “tel.”
6. Press soft key F2 below the word “del.”
7. Receive confirmation tone.
15
Page 20

2 / Answering Calls
FUNCTION
2
F3
F3
F1
x x x
F2
F1/F2/F3
Follow Me Call Forward Preset
Use Preset Follow Me Call Forward to forward
calls from your extension to an extension where
you will be temporarily.
To activate
1. Keyset is idle or in use on a call.
2. Press the Function key and then dial 2.
- or -
Press the designated feature key.
3. Press soft key F3 below the word “next.”
4. Press soft key F3 below the word “follow.”
5. Press soft key F1 below the word “preset.”
6. Enter the extension number to which you
want to forward calls.
7. Press soft key F2 below the word “save” to
accept the extension number.
8. Choose whether to route all calls (icm/co),
just intercom calls (icm), or just outside calls
(co), by pressing the appropriate soft key (F1,
F2, or F3).
9. Receive confirmation tone.
FUNCTION
16
2
F3
F3
F1
F2
To cancel
1. Keyset is idle or in use on a call.
2. Press the Function key and then dial 2.
3. Press soft key F3 below the word “next.”
4. Press soft key F3 below the word “follow.”
5. Press soft key F1 below the word “preset.”
6. Press soft key F2 below the word “del.”
7. Receive confirmation tone.
Protegé®Keyset User Guide - with display
Page 21

FUNCTION
2
F3
F3
F3
F3
x x x
F2
F2
F1/F2/F3
2 / Answering Calls
Follow Me Call Forward Remote
Use Remote Follow Me Call Forward when
you are at another extension and want to forward calls from your normal extension to the
new temporary location.
To activate
1. Keyset is idle or in use on a call.
2. Press the Function key and then dial 2.
- or -
Press the designated feature key.
3. Press soft key F3 below the word “next.”
4. Press soft key F3 below the word “follow.”
5. Press soft key F3 below the word “remote.”
6. Press soft key F3 below the word “set.”
7. Enter your normal extension number.
8. Press soft key F2 below “save” to accept the
extension number.
9. Enter your user passwordto verify your identity. At default the password is 0000.*
10. Press soft key F2 below the word “save” to
accept the password. If the password is incorrect, Protegé will not advance to the next step.
11. Choose whether to route all calls (icm/co),
just intercom calls (icm), or just outside calls
(co), by pressing the appropriate soft key (F1,
F2, or F3).
12.Receive confirmation tone.
* Ask your system administrator if you do not
know your password.
Protegé®Keyset User Guide - with display
17
Page 22

2 / Answering Calls
FUNCTION
2
F3
F3
F3
F2
x x x
F2
F2
FUNCTION
2
F3
To cancel
1. Keyset is idle or in use on a call.
2. Press the Function key and then dial 2.
3. Press soft key F3 below the word “next.”
4. Press soft key F3 below the word “follow.”
5. Press soft key F3 below the word “remote.”
6. Press soft key F2 below the word “del.”
7. Enter your normal extension number (the
number from which calls were forwarded).
8. Press soft key F2 below the word “save” to
accept the extension number.
9. Enter your user password to verify your identity. At default the password is 0000.*
10. Press soft key F2 below “save” to accept the
password.
11.Receive confirmation tone.
Setting Additional Call
Forwards
1. Keyset is idle or in use on a call.
2. Press the Function key, and then dial 2.
- or -
Press the designated feature key, followed by
soft key F3 below the word “set.”
3. Follow steps 3 onwards for whichever type of
call forward you wish to add.
18
* Ask your system administrator if you do not
know your password.
Protegé®Keyset User Guide - with display
Page 23
2 / Answering Calls
4. Avoiding Calls
At times you may want to work at your desk without phone interruptions. In
addition to Call Forward, you can choose from the following features to block
some or all calls.
Do Not Disturb (DND) blocks all calls to your telephone, making it appear to
be busy to outside callers, and internal callers without display keysets. Internal
users with display keysets will see that you are in DND mode. Some users,
such as the attendant, may have the authority to override DND and force calls
through. Your system administrator can tell you if anyone has override authority. If you set both DND and Call Forward at your keyset, calls will forward as
if your extension is busy.
Use the Forced Diversion feature to deflect an internal incoming call to the
attendant.
If you are a member of a hunt group, you can use the Agent Log Off/Log On
feature to temporarily remove your extension from the hunt group. While you
are logged off, calls directed to the hunt group will not ring at your extension.
However, outside and intercom calls directed specifically to your extension
number will still ring through.
If you have an Executive or ExecutiveData keyset configured to allow voice
calls, you may want to reject Off-Hook Voice Announce calls. For more information see Off-Hook Voice Announce (page 24) and Voice Calls (page 63).
Do Not Disturb
To activate
1. Keyset is idle or in use on a call.
FUNCTION
4
FUNCTION
4
Protegé®Keyset User Guide - with display
2. Press the Function key and then dial 4.
- or -
Press a designated feature key.
3. Receive confirmation tone.
To cancel
1. Keyset is idle or in use on a call.
2. Press the Function key and then dial 4.
- or -
Press the designated feature key.
3. Receive confirmation tone.
19
Page 24

2 / Answering Calls
FUNCTION
4
FUNCTION
9 1
FUNCTION
9 1
[[
Forced Diversion
1. An incoming internal call rings at your extension.
2. Press the Function key and then dial 4.
- or -
Press the designated feature key.
3. Call diverts to the attendant.
Agent Log Off/Log On
To log off
1. Keyset is idle or in use on a call.
2. Press the Function key and then dial 91.
- or -
Press the designated feature key.
3. Receive confirmation tone.
To log on
1. Keyset idle or in use.
2. Press the Function key and then dial [ 91.
- or -
Press the designated feature key.
3. Receive confirmation tone.
20
F2
Rejecting an OHVA
1. While you are active on a call using the handset, the display shows the extension number
calling you and the word “OHVA.”
2. Press soft key F2 below the word “reject.”
3. Receive confirmation tone.
Protegé®Keyset User Guide - with display
Page 25

chapter
three
Making Calls
1. Placing Intercom Calls
You can reach any individual extension or group of extensions by dialing the
appropriate directory number.
Use the Voice to Ring Interchange feature to force an extension that is in Voice
Call mode to ring. This is particularly useful in situations when the called
extension is unattended, as it enables you to use any available messaging
options, and to follow any No Answer Call Forwarding instructions that may
have been set. See page 66 for more information on the Voice Call feature.
If the person you call has their keyset in Do Not Disturb mode, you may be
able to use the DNDOverride feature to force your call to ring through. Your
ability to use this feature depends on your class of service. Your LCD will
show Override as an option if you are permitted to use this feature. Also the
following options will be available callback, station message or voice mail.
If you are calling an extension that is busy, you will receive the option on the
LCD to go to the voice mailbox of the called party.
If a call to a specific extension goes unanswered, use the soft keys to choose a
messaging option before hanging up. Press soft key F1 or F2 to leave a display
message (see pages 47-52 for more information). If your system is equipped
with Voice Mail, press soft key F3 to leave a voice mail message.
Calling an Extension
1. Keyset is in idle state.
x x x
2. Dial the extension number.
- or -
Press a designated DSS key.
Calling a Virtual Number
8
Protegé®Keyset User Guide - with display
1. Keyset is in idle state.
2. Dial the virtual number.
21
Page 26

3 / Making Calls
0
x x x
x x x
2
Calling the Attendant
1. Keyset is in idle state.
2. Dial 0.
- or -
Press the designated DSS key.
Calling a Hunt Group
1. Keyset is in idle state.
2. Dial the hunt group number.
- or -
Press the designated DSS key.
Voice to Ring Interchange (VRI)
1. Keyset is in idle state.
2. Dial the extension number.
- or -
Press the designated DSS key.
3. Receive confirmation tone. LCD displays the
word “voice.”
4. Dial 2. Your call overrides the Voice Call setting and rings through to the extension.
22
x x x
F2
Do Not Disturb Override
1. Keyset is in idle state.
2. Dial an extension. Receive busy tone. Display
shows that the extension is in DND mode.
3. Press soft key F2 below the word “override.”
4. Your call overrides DND and rings through to
the extension.
Protegé®Keyset User Guide - with display
Page 27

3 / Making Calls
2. Intrusion
Your telephone system administrator can advise if the Intrusion feature is available to you. Use it when you want to interrupt a busy extension or trunk.
Your ability to use this feature depends on your class of service and that of the
extension on which you want to intrude. If you are not permitted to use this
feature it will not appear as an option on your LCD.
Intruding on a Busy Extension
1. Keyset is in idle state.
x x x
F3
F3
2. Dial an extension. Receive busy tone.
3. Press soft key F3 below the word “next.”
4. Press soft key F3 below the word “next.”
5. Press soft key F1 below the word “intru.”
6. You are connected to the call at the busy
extension.
Intruding on a Busy Trunk
1. Keyset is in idle state.
2. Dial a trunk directory number. Receive busy
x x x
F3
Protegé®Keyset User Guide - with display
tone.
- or -
Press a busy line key. Receive busy tone.
3. Press soft key F3 below the word “intru.”
4. You are connected to the call on the busy
trunk.
23
Page 28
3 / Making Calls
3. Off-Hook Voice Announce
(OHVA)
Use the OHVA feature when you want to interrupt a busy extension. To be able
to perform an OHVA the called party must meet the following criteria:
1. The called extension must be an Executive or Executive Data keyset.
2. The called party must be using the handset. Your OHVA call will be connected through the speakerphone.
OHVA is programmed at the system level to connect immediately or after a
specified period of time. This gives the called party time to reject the call
before being interrupted.
Note, therefore, that the called party may reject your OHVA. If this occurs, you
will receive a warning tone, and an “OHVArejected” message on your LCD.
If you attempt to place anOHVA call to the wrong type of phone, or if the
called party is using the speakerphone and not the handset, you will receive an
“OHVA failure, OHVAunobtainable” message.
24
x x x
F3
F2
Placing an OHVACall
1. Keyset is in idle state.
2. Dial the extension number.
3. Receive busy tone.
4. Press soft key F3 below the word “next.”
5. Press soft key F2 below the word “voic.”
6. You are connected through the speaker of the
called party.
Ending an OHVACall
1. Hang up.
- or -
Called party presses soft key F2 to terminate
the OHVAcall.
Protegé®Keyset User Guide - with display
Page 29

3 / Making Calls
4. Alert
Use the Alert feature when you want to break off briefly from a call and consult with another extension without placing the first call on hold. To be able to
use the Alert feature you must meet the following criteria:
1. You must have an Executive or Executive Data keyset. The called party
can have any kind of telephone.
2. You must be using the handset for your main call. The Alert call will be
connected through the speakerphone.
The Alert feature works very much like OHVA, only in reverse. When the
Alert parties are connected the LCDs use OHVA terminology.
The Alert feature may be programmed under a feature key, with a single destination extension. Simply press the key for an instant Alert call.
Making an Alert Call
FUNCTION
5 0
x x x
1. Handset is in use on a call.
2. Press the Function key and then dial 50.
3. Enter the directory number of the extension
with which you want to speak.
4. Use the Mute key to ensure that the handset
caller does not hear the conversation.
5. You are connected to that extension through
your speaker. Your other call (over the handset) remains active.
Ending an Alert Call
1. Press soft key F2 to terminate the Alert call.
- or -
Called party simply hangs up.
2. If Mute key is enabled, press the key to
disable.
Protegé®Keyset User Guide - with display
25
Page 30
3 / Making Calls
5. Placing Outside Calls
Consult your telephone system administrator for any restrictions in your ability
to make outside calls.
If your company has different types of outside lines, your telephone system
may use the Least Cost Routing feature to ensure calls go over the cheapest
possible route. You may be required to enter the Least Cost Routing feature
code on some or all of your long distance calls. Alternatively, your system may
be programmed to select the cheapest route automatically.
If your company monitors outgoing calls for cost or billing purposes, your system may be programmed to force you to enter a valid account code before
allowing you to make an outside call. Or it may be optional, leaving it to your
discretion, or your company policy, when to enter an account code.
Emergency 911 calls that you may make from an extension are displayed on
the attendant’s keyset. The information on the display includes that it was an
emergency call and the extension number that placed the call. This allows the
attendant to direct emergency personnel to the exact location of the call.
Placing Outside Calls
1. Press an available trunk or trunk group key.
- or -
9
Dial 9.
2. Dial the number.
FUNCTION
26
6 7
#
Using Least Cost Routing
1. Lift the handset.
2. Press the Function key and then dial 67.
- or -
Press the designated feature key.
3. Listen for the special dial tone, then dial the
outside number.
4. Dial # to indicate dialing is complete.
Protegé®Keyset User Guide - with display
Page 31

FUNCTION
7 1
F2
3 / Making Calls
Entering an Account Code
1. Access trunk line.
2. Press the Function key and then dial 71.
- or -
Press the designated feature key.
3. Enter the account code.
4. Press soft key F2 below the word “save.”
5. Receive confirmation tone.
Protegé®Keyset User Guide - with display
27
Page 32

3 / Making Calls
6. Redialing
Four redialing options are available to you; Last Number Redial, Automatic
Busy Redial, Saved Number Redial and User Saved Number Redial.
Last Number Redial (LNR) simply redials the last outside number dialed out
from your keyset. By default, the Redial key is programmed for LNR.
Automatic Busy Redial (ABR) also redials the last outside number dialed out
from your keyset. It does it repeatedly for a specified number of attempts, or
until it connects, whichever is shorter. Note that ABR will disconnect if you
operate any telephone feature while this function is invoked.The lower line of
the LCD shows the status of the attempts. For example “2/10” shows that the
keyset is making the second of ten attempts.
The Saved Number Redial (SNR) feature redials a telephone number which
you stored during an earlier call to that number. The saved number remains
stored until you save another number in its place.This is useful for occasions
when you need to make other outside calls between calls to a particular number. Note that to store a telephone number using SNR, you must have initiated
the call.
The User Saved Number Redial (USNR) feature redials a telephone number
which you stored during an earlier call. It offers a paper-free way of recording
a telephone number you want to dial at a later time. Press just three keys to
recall the number and dial it. The saved number remains stored until you save
another in its place.
You can reprogram the Redial button with any one of these four redialing
options, or program feature keys. For instructions, see Setting the Feature Keys
on page 71.
FUNCTION
28
8
CLEAR
Last Number Redial (LNR)
To activate
1. Keyset is in idle state.
2. Press the Redial key.
- or -
Press the Function key and then dial 8.
To cancel
1. Press the Clear key.
Protegé®Keyset User Guide - with display
Page 33

FUNCTION
7 8
CLEAR
FUNCTION
5 1
FUNCTION
5 1
3 / Making Calls
Automatic Busy Redial (ABR)
To activate
1. Keyset is in idle state.
2. Press the Function key and then dial 78.
- or -
Press the designated feature key.
To cancel
1. Press the Clear key.
2. Receive confirmation tone.
Saved Number Redial (SNR)
To save a number
1. Keyset is in use on a call.
2. Press the Function key and then dial 51.
- or -
Press the designated feature key.
To dial the saved number
1. Keyset is in idle state.
2. Press the Function key and then dial 51.
- or -
Press the designated feature key.
User Saved Number Redial (USNR)
To save a number
1. Keyset is in use on a call.
FUNCTION
5
[[
F2
FUNCTION
5
[[
Protegé®Keyset User Guide - with display
2. Press the Function key and then dial 5 [.
- or -
Press the designated feature key.
3. Dial the number to be stored.
4. Press soft key F2 below the word “save.”
5. Receive confirmation tone.
To dial the saved number
1. Keyset is in idle state.
2. Press the Function key and then dial 5 [.
- or -
Press the designated feature key.
29
Page 34

3 / Making Calls
7. Dialing Speed Dial Numbers
Any frequently dialed telephone number can be stored as a Speed Dial
Number. Speed dial numbers are similar to the directory numbers you dial to
access hunt groups and other extensions. When you dial a speed dial number,
Protegé dials out the corresponding telephone number.
System speed dial numbers are shared by many extension users. Individual
speed dial numbers are specific to your keyset. You can program speed dial
numbers under feature keys, and on both “levels” of dual function feature keys.
See Speed Dial Numbers on page 55 for instructions on how to store individual
speed dial numbers, and Setting the Feature Keys on page 72 for how to program them under feature keys.
To Dial on any Available Outside Line
1. Dial the speed dial number.
x x x
- or -
Press the designated feature key.
- or -
Press the Function key followed by the designated feature key.
x x x
FUNCTION
x x x
30
1
To Dial on a Specific Trunk or Trunk Route,
Or With LCR
1. Dial the trunk number or trunk route number.
- or -
Press the specific line key.
2. Press the Function key and then dial 1, followed by the speed dial number.
- or -
Press the designated feature key.
- or -
Press the Function key followed by the designated feature key.
Protegé®Keyset User Guide - with display
Page 35
3 / Making Calls
8.Dialing Directory and Speed
Dial Numbers by Name
Use this feature to look up directory and speed dial numbers by name. Each
number is stored in one of three directories:
uIntercom, which lists other internal users, and includes hunt groups and
paging numbers.
uSystem, which lists all the system speed dial numbers.
uIndividual, which lists your individual speed dial numbers.
Use the chart at the bottom of the page as a guide to how to enter letters.
Dialing by name
1. Keyset is in idle state.
FUNCTION
5 2
F1/F2/F3
F1/F2/F3
F2
2. Press soft key F3.
- or -
Press the Function key and then dial 52.
3. Select the appropriate directory. Choose
between Intercom (icm), System (sys), or
Individual (ind) by pressing the appropriate
soft key (F1, F2, or F3).
4. Use the soft keys (F1, F2, F3) to move
through the entries in the directory.
- or -
Enter the first few letters of the name. Press
F2 to display entries that match.
5. When the selected name is displayed, press
soft key F2 to dial.
Times to ----------------------------- Key Pad Number -------------------------------Press 1 2 3 4 5 6 7 8 9 0 #
One , A D G J M P T W Q space
Two - B E H K N R U X Z space
Three & C F I L O S V Y . space
Four 1 2 3 4 5 6 7 8 9 0 space
Protegé®Keyset User Guide - with display
31
Page 36
3 / Making Calls
9. Special Dialing
Your system administrator can confirm if your system uses pulse dialing, and
whether you need to add any of the special dial characters (pause, flash, and
wait-for-dial-tone).
If your system uses pulse dialing for outside calls, you may need to use the
Pulse to Tone Conversion feature to access remote equipment such as voice
mail systems.
Pulse to Tone Conversion
1. Access an outside line key.
2. Dial telephone number (in pulse).
[[
FUNCTION
7 0
FUNCTION
3
FUNCTION
7 9
3. Dial [.
4. Dial additional required digits (in tone).
Inserting Special Dial
Characters
To dial a pause
1. Press the Function key and then dial 70.
- or -
Press the designated feature key.
2. Dial the remaining digits.
To insert a flash
1. Press the Function key and then dial 3.
- or -
Press the designated feature key.
2. Dial the remaining digits.
To insert a wait-for-dial-tone
1. Press the Function key and then dial 79.
- or -
Press the designated feature key .
2. Dial the remaining digits.
32
Protegé®Keyset User Guide - with display
Page 37

3 / Making Calls
10. Callback
When you place an intercom call to a busy or unattended extension, you can
request a callback and hang up. You then receive a callback when the busy
extension becomes available, or when the unattended extension is next used
(goes off-hook and back on-hook).
You may also request a callback on a busy trunk or trunk route. Again, you
receive a callback when the trunk or trunk route becomes available.
The callback signal is two double rings, and a callback notification on the
LCD.
Several parties may activate the callback feature on the same extension, trunk
or trunk route. Callers receive callbacks in the order in which they requested
them.
Placing a Callback to a Busy
Or Unattended Extension
To activate
1. Dial the extension number.
x x x
F1
2. Receive busy tone.
- or -
Receive no answer.
3. Press soft key F1 below the word “cbck.”
4. Receive confirmation tone.
FUNCTION
# 5
[[
x x x
FUNCTION
# 5
[[ [[
Protegé®Keyset User Guide - with display
To delete an individual callback
1. Press the Function key and then dial [ # 5.
2. Dial the extension number.
3. Receive confirmation tone.
To delete all callbacks
1. Press the Function key and then dial [ # 5 [.
2. Receive confirmation tone.
33
Page 38
3 / Making Calls
F2
F3
x x x
F1
Responding to a Callback
To activate
1. Your extension rings. LCD alerts you to the
extension callback.
2. Press soft key F2 below the word “reply.”
3. The call rings through to the extension.
To cancel
1. Press soft key F3 below the word “del.”
2. Receive confirmation tone.
Placing a Callback to a Busy
Trunk or Trunk Route
To activate
1. Dial the outside line number.
- or -
Dial the trunk route number.
2. Receive busy tone.
3. Press soft key F1 below the word “cbck.”
34
F2/F3
Responding to a Trunk
Callback
1. Your extension rings. LCD display alerts you
to the trunk callback.
2. Press soft key F2 below the word “reply” to
receive dial tone and place an outside call.
- or -
Press soft key F3 below the word “del” to cancel.
Protegé®Keyset User Guide - with display
Page 39

3 / Making Calls
11. Camp On
When you call a busy extension, you can use the Camp On feature, remain offhook, and wait for the busy extension to become available. You will hear music
on hold while waiting if your system is equipped with a music source.
Only one extension can camp on to another at any one time. If you receive a
“Camp On Failure” message on your keyset’s LCD and hear a warning tone
another extension user has already camped on to the busy extension. You can
still use the Callback Busy feature, which will alert you when the line becomes
free.
Camp On is a useful feature for urgent calls. If two parties are competing for
the same busy extension, Camp On overrides Callback Busy even if the
Callback Busy feature was activated first.
To activate
1. Keyset is in idle state.
x x x
F3
F1
2. Call extension number. Receive busy tone.
3. Press soft key F3 below the word “next.”
4. Press soft key F1 below the word “camp.”
5. Background music plays until the called extension hangs up.
6. The call rings through.
To cancel while waiting for extension to
become available
1. Hang up.
To cancel while ringing
CLEAR
Protegé®Keyset User Guide - with display
1. Press the Clear key.
35
Page 40

3 / Making Calls
12. Authority Code
Use the Authority Code feature to activate your extension’s class of service at
another extension to place an outgoing trunk call that would otherwise be tollrestricted at that extension.
When you enter the authority code, Protegé activates your normal class of service at that extension for a period of one minute, allowing you to place your
call.
This feature is also sometimes referred to as Travelling Class of Service.
Please note that the authority code will not override a locked keyset. See page
69 for information on the Lock feature.
FUNCTION
5 5
x x x
F2
F2
To activate
1. Keyset is in idle state.
2. Press the Function key and then dial 55.
3. Enter your extension number.
4. Press soft key F2 below the word “save.”
5. Enter your password.
6. Press soft key F2 below the word “save.”
7. Receive confirmation tone.
8. Receive intercom dial tone.
9. Press an available outside line key.
- or -
Dial 9.
10. Dial outside number.
* Ask your system administrator if you do not
know your password.
*
36
Protegé®Keyset User Guide - with display
Page 41

chapter
four
Call Handling
1. Hold
You can place a trunk call on one of two types of hold; System or Exclusive.
A trunk call placed on System Hold is held at the system level. Any extension
keyset can retrieve the call.
A trunk call placed on Exclusive Hold is held specifically at your station. At
other extensions an exclusively held trunk will still appear busy. This prevents
any other extension from inadvertently picking up that call and gives you a certain level of privacy on trunk calls. Calls placed on Exclusive Hold can be
retrieved from a different extension by using the Directed Call Pickup feature.
After a time period, a call placed on Exclusive Hold will revert to System Hold
status.
You can place several different calls on both types of hold. Use the Hold
Retrieve function code to retrieve successive held calls. Calls are retrieved in
the order in which they were placed on hold; the first call held is the first one
retrieved.
The Protegé phone system generates a periodic tone over your keyset’s speaker
to remind you of a call you have placed on hold.
If you enable Automatic Hold on your keyset you can skate from one call to
another, automatically placing the first call on exclusive hold. This method
shortens the transfer process by allowing you to transfer an active trunk call to
another extension via a preprogrammed DSS key without first pressing the
Hold key.
System Hold
Placing a trunk call on system hold
1. Keyset in use on an active call.
HOLD
FUNCTION
7
[[
Protegé®Keyset User Guide - with display
2. Press the Hold key.
Retrieve
1. Press held outside line key (flashing green).
- or -
Press the Function key and then dial 7 [.
37
Page 42

4 / Call Handling
FUNCTION
HOLD
FUNCTION
7
[[
Exclusive Hold
To place a trunk call on exclusive hold
1. Keyset in use on an active call.
2. Press the Function key followed by the Hold
key.
To retrieve
1. Press the held outside line key (flashing
green).
- or -
Press the Function key and then dial 7 [.
Holding an Intercom Call
HOLD
FUNCTION
9 4
F1/F2/F3
FUNCTION
9 4
[[
1. Press the Hold key.
To retrieve
1. Hang up, and return to idle state.
2. Pick up the handset.
- or -
Press the Speaker key.
Automatic Hold
To activate
1. Keyset is idle or in use on a call.
2. Press the Function key and then dial 94.
3. Select the type of call to use the automatic
hold feature. Choose between all calls
(icm/co), just intercom calls (icm), or just outside calls (co) by pressing the appropriate soft
key (F1, F2, or F3).
4. Receive confirmation tone.
To cancel
1. Keyset is idle or in use on a call.
2. Press the Function key and then dial [ 94.
3. Receive confirmation tone.
38
Protegé®Keyset User Guide - with display
Page 43

4 / Call Handling
2. Transferring Calls
Use the Auto Transfer Mode to speed up using a DSS key to transfer a call.
Press the DSS key to immediately transfer the call to the DSS extension. Your
keyset returns to idle state. When transferring to a voice mail hunt group
number, you have the option to dial a mailbox.
Perform a blind transfer when you do not wish to notify the target extension or
hunt group member prior to redirecting a call. A screened transfer is when you
notify the target extension or hunt group member prior to redirecting the call.
The No Ring Transfer feature lets you park a call so another extension user can
pick it up. Calls can be parked on a valid extension number or on a number
used exclusively for parked calls, if one has been assigned. The call is placed
on exclusive hold at both extensions when performing a No Ring Transfer.
All transfers recall automatically to your keyset if they are unanswered.
Auto Transfer Mode
FUNCTION
5 4
FUNCTION
5 4
To enable
1. Keyset is idle or in use on a call.
2. Press the Function key and then dial 54.
To disable
1. Keyset is idle or in use on a call.
2. Press the Function key and then dial 54.
Transferring a Call - Method 1
1. Keyset is in use on a call.
XFR/CONF
x x x
XFR/CONF
Protegé®Keyset User Guide - with display
2. Press the Xfr/Conf key.
3. Dial the destination extension.
4. Hang up to perform a blind transfer.
- or -
Screen the transfer and then hang up.
To cancel the transfer
1. Press the Xfr/Conf key.
39
Page 44

4 / Call Handling
HOLD
x x x
XFR/CONF
Transferring a Call - Method 2
1. Press the Hold key.
2. Dial the extension number to which you wish
to transfer the call.
- or -
Press a designated DSS key.
3. Press the Xfr/Conf key for a blind transfer.
- or -
Wait for a response, announce the call, then
press the Xfr/Conf key for a screened transfer.
4. Receive confirmation tone.
To cancel an outside call transfer
1. Press the appropriate line key.
To cancel an intercom call transfer
1. Press the appropriate DSSkey.
- or -
Press the ICM key (a designated feature key
for intercom calls).
- or -
Hang up, and then pick up the handset or press
the Speaker key.
40
Protegé®Keyset User Guide - with display
Page 45
4 / Call Handling
No Ring Transfer
No Ring Transfers do not work with intercom calls.
FUNCTION
7 3
x x x
CLEAR
XFR/CONF
x x x
HOLD
FUNCTION
5 3
x x x
To place a no ring transfer
Method 1
1. Press the Function key and then dial 73.
2. Dial extension number on which call will be
parked.
3. Press the Clear key to complete the transfer.
Method 2
1. Press the XFR/CONF key.
2. Dial extension number on which call will be
parked.
3. Press the Hold key to complete the transfer.
To retrieve a no ring transfer from another
extension
1. Press the Function key and then dial 53.
- or -
Press the designated Call Pickup feature key.
2. Dial extension number on which call is
parked.
3. Call is connected. Pick up the handset or use
the keyset speaker phone to talk to the caller.
Note:Warning tone will sound when call is not
picked up within a period of time defined by
the System Administrator.
Protegé®Keyset User Guide - with display
41
Page 46

4 / Call Handling
3. Conference
The Conference feature allows you to connect up to three additional parties in a
single conversation. The three additional parties can be any combination of
trunk or intercom callers.
You can use the Private Talk feature to break out of the conference and talk
with one of the parties privately. Use the Forced Release feature to disconnect
each of the distant parties from the conference.
As the Conference Controller (the person who set up the conference), you can
exit the call at any time. If you are leaving a single inside party connected to
two external parties, simply hang up and control of the conference passes to
that internal party. If you want to leave two inside parties with an external
party, hang up and control of the conference passes to the first internal party
you brought into the conference. If you leave a three-way conference, the
conference reverts to being a simple two-way call.
Use the Unsupervised Conference feature to connect two external parties to
each other. First form a three party conference and then remove yourself by
entering the Unsupervised Conference feature code. You can rejoin the
conference.
Note that Unsupervised Conferences disconnect automatically after a preset
time. See your telephone system administrator for the exact time length allocated in your system. A warning tone will be given 10 seconds prior to the call
disconnecting automatically. Participants can extend the talk time by entering a
special code if available.
FUNCTION
XFR/CONF
42
HOLD
Forming a Conference
1. While active on a call.
2. Press the Hold key.
3. Dial the extension number to be added to
conference.
- or -
Access an outside line, dial the telephone
number.
4. Press the Function key followed by the
Xfr/Conf key.
5. Receive confirmation tone.
6. To add a fourth party, repeat steps 2 and 3.
Protegé®Keyset User Guide - with display
Page 47
HOLD
FUNCTION
7
[
F1
x x x
FUNCTION
XFR/CONF
4 / Call Handling
Holding the Conference
To put the conference on hold
1. Press the Hold key.
To return to the conference
1. Press the Function key and then dial 7 [.
- or -
Press the held trunk key.
- or -
Press the DSS or ICM key (designated feature
keys) if the conference is with internal parties
only.
Private Talk
To activate
1. Press soft key F1 below the word “private.”
2. Dial the trunk number with which you wish to
speak privately.
- or -
Dial the extension number with which you
wish to speak privately.
To release and resume conference
1. Press the Function key followed by the
Xfr/Conf key.
Forced Release
F3
xx x
Protegé®Keyset User Guide - with display
1. Press soft key F3 below the word “forced.”
2. Dial the trunk or extension number to be
released.
43
Page 48

4 / Call Handling
FUNCTION
7 7
Ending the Conference
1. Wait for the other parties to disconnect.
- or -
Force release the other parties.
Forming an Unsupervised
Conference
To conference two outside lines
1. Press the Function key and then dial 77.
FUNCTION
7 7
To intrude on the last unsupervised
conference
1. Press the Function key and then dial 77.
44
Protegé®Keyset User Guide - with display
Page 49

chapter
five
Paging
and
Messaging
1. Paging
You can initiate a page from your keyset by dialing a paging group directory
number. The Protegé system will broadcast the page over the speakers of all
idle Protegé extensions within that group.
If your system is connected to any paging speakers, you can access external
paging equipment by dialing the appropriate directory number.
The Page Answer feature enables you to answer a page in progress. Dialing the
feature code will connect you immediately to the paging extension. Note that
this feature only works while the page is still in progress.
By using the Page Receive function, you can prevent pages from being broadcast over your keyset speakerphone. You can still answer a page using the Page
Answer feature code, even if your keyset is in “page deny” mode.
Group Page
1. Lift the handset.
- or -
Press the Speaker key.
2. Dial the group paging number.
- or -
Press the designated feature key.
3. Receive confirmation tone.
External Paging
1. Lift the handset.
2. Dial the external page number.
3. Receive confirmation tone.
Protegé®Keyset User Guide - with display
45
Page 50

5 / Paging and Messaging
4 0 0
Tenant Group Page
1. Lift the handset.
2. Dial 400.
3. Receive confirmation tone.
Page Answer
FUNCTION
5
9
FUNCTION
9 9
[
FUNCTION
9 9
1. Press the Function key and then dial 59.
- or -
Press the designated feature key.
2. You are immediately connected to the extension initiating the page.
Paging Receive Selection
To accept paging
1. Press the Function key and then dial [ 99.
To reject paging
1. Press the Function key and then dial 99.
46
Protegé®Keyset User Guide - with display
Page 51
5 / Paging and Messaging
2. Station to Station Messages
You can send a message to another extension when you get no answer or the
line is busy. You can leave either a simple Call Me message or a more complicated preprogrammed text message if the destination extension is another display keyset.
A Call Me message leaves a “message waiting” indication for the called party
indicating that a caller from a specified extension was trying to reach them.
Keysets without display and single line telephones with message waiting lamps
can only receive Call Me messages.
To extinguish the message waiting indication (lamp or stutter dial tone), the
reply call must be answered. If the call goes unanswered, the message waiting
indication continues.
A preprogrammed message is a text message that accompanies the message
waiting indication. Only display keysets may receive this type of message.
Seven messages are available. Six are available system-wide, and can only be
changed by your system administrator. However, the seventh message is specific to your keyset. See page 50 for instructions on programming your personal
message.
Recipients of Call Me messages who have display keysets can respond by simply pressing a soft key. Recipients of preprogrammed text messages may view
their message at the touch of a button without having to call the sender.
Leaving a Message at Another
Display Keyset
To activate
x x x
F2
F1/F3
F3
F2
F1
Protegé®Keyset User Guide - with display
1. Dial the target extension number.
2. Press soft key F2 below the word “msg.”
3. Press soft key F1 below the words “call me.”
- or -
Press soft key F3 below the word “preprog”
for message choices.
4. Press soft key F2 below the word “next” to
view other selections.
5. Press soft key F1 below the word “send” when
your choice is displayed.
6. Receive confirmation tone.
47
Page 52

5 / Paging and Messaging
To Show a Preset Message
Sent by Another Extension
F2
F2
FUNCTION
# 9
[
x x x
FUNCTION
# 9
[ [
F3
F1/F3
1. Press the soft key F2 below the word “show.”
- or -
If there are two or more messages, press soft
key F1 below the word “more” to scroll
through the list of messages and their originating extensions.
To Reply to a Call Me Message
1. Press the soft key F2 below the word “reply.”
or
Dial the extension number of the phone from
which the Call Me message was left.
Note: If the extension does not answer when
either reply method is used, the LCD will
continue to display the message.
Deleting Messages
Deleting an individual message you sent
1. Press the Function key and then dial [ # 9.
2. Dial the target extension number.
3. Receive confirmation tone.
Deleting all messages sent by you
1. Press the Function key and then dial [ # 9 [.
2. Receive confirmation tone.
Deleting messages left by other extensions
1. Press soft key F3 below the word “del.”
2. Press soft key F1 below the word “indiv” to
delete an individual message.
- or -
Press soft key F3 below the word “all” to
delete all messages.
3. Receive confirmation tone.
48
Protegé®Keyset User Guide - with display
Page 53

5 / Paging and Messaging
3. Premises Messages
A Premises Message is a text message that you can display on your keyset
LCD, and which will also appear on the LCD of any internal caller calling you
from a display keyset.
When you use the premises message feature in conjunction with Do Not
Disturb, an internal calling party hears the DND tone and sees the premises
message.
You may choose from seven messages. The first six are available system-wide,
and can only be changed by your system administrator. However, the seventh
message is specific to your keyset, and you can individually program and
change it as often as you wish.
See page 50 for instructions on programming a personalized message.
Leaving a Premises Message
1. Keyset is idle or active on a call.
FUNCTION
9
0
F2
F1
2. Press the Function key and then dial 90.
- or -
Press the designated feature key.
3. Press soft key F2 below the word “next” to
view other selections.
4. Press soft key F1 below the word “store”
when your choice is displayed.
5. Receive confirmation tone.
Deleting a Premises Message
FUNCTION
9 0
[
Protegé®Keyset User Guide - with display
1. Press the Function key and then dial [ 90.
- or -
Press the designated feature key.
2. Receive confirmation tone.
49
Page 54
5 / Paging and Messaging
4. Creating Personal Messages
The seventh Station-to-Station message and the seventh Premises message are
personal to your keyset. You can program and reprogram them as you wish.
Each message is saved until you save another in its place.
Use the table below as a guide to entering different letters.
Times to ----------------------------- Key Pad Number -------------------------------Press 1 2 3 4 5 6 7 8 9 0 #
One , A D G J M P T W Q space
Two - B E H K N R U X Z space
Three & C F I L O S V Y . space
Four 1 2 3 4 5 6 7 8 9 0 space
Personal Station-to-Station
Message
50
x x x
F2
F3
F2
F3
F2
F1
Creating your message
1. Dial the target extension number.
2. Press soft key F2 below the word “msg.”
3. Press soft key F3 below the word “preprog”
for message choices.
4. Press soft key F2 below the word “next” until
message 7 is displayed.
5. Press soft key F3 below “chg.”
6. Enter the message you wish (maximum 16
characters).
7. Press soft key F2 below the word “save.”
8. Press soft key F1 below the word “send” to
send the message.
- or -
Press the Clear key to exit.
Protegé®Keyset User Guide - with display
Page 55

FUNCTION
9 0
F2
F3
F2
F1
FUNCTION
9 0
F2
F3
F2
CLEAR
5 / Paging and Messaging
Personal Premises Message
Creating your message
1. Keyset is idle or in use on a call.
2. Press the Function key and then dial 90.
3. Press soft key F2 below the word “next” until
the seventh message is displayed.
4. Press soft key F3 below “chg.”
5. Enter the message you wish (maximum 16
characters).
6. Press soft key F2 below the word “save.”
7. Press soft key F1 below the word “store” to
display the message.
- or -
Press the Clear key to exit.
8. Receive confirmation tone.
Deleting your message
1. Keyset idle or in use.
2. Press the Function key and then dial 90.
3. Press soft key F2 below the word “next” until
your private message is displayed.
4. Press soft key F3 below the word “chg.”
5. Press soft key F2 below the word “save.”
6. Press the Clear key to exit.
Protegé®Keyset User Guide - with display
51
Page 56

5 / Paging and Messaging
52
Protegé®Keyset User Guide - with display
Page 57
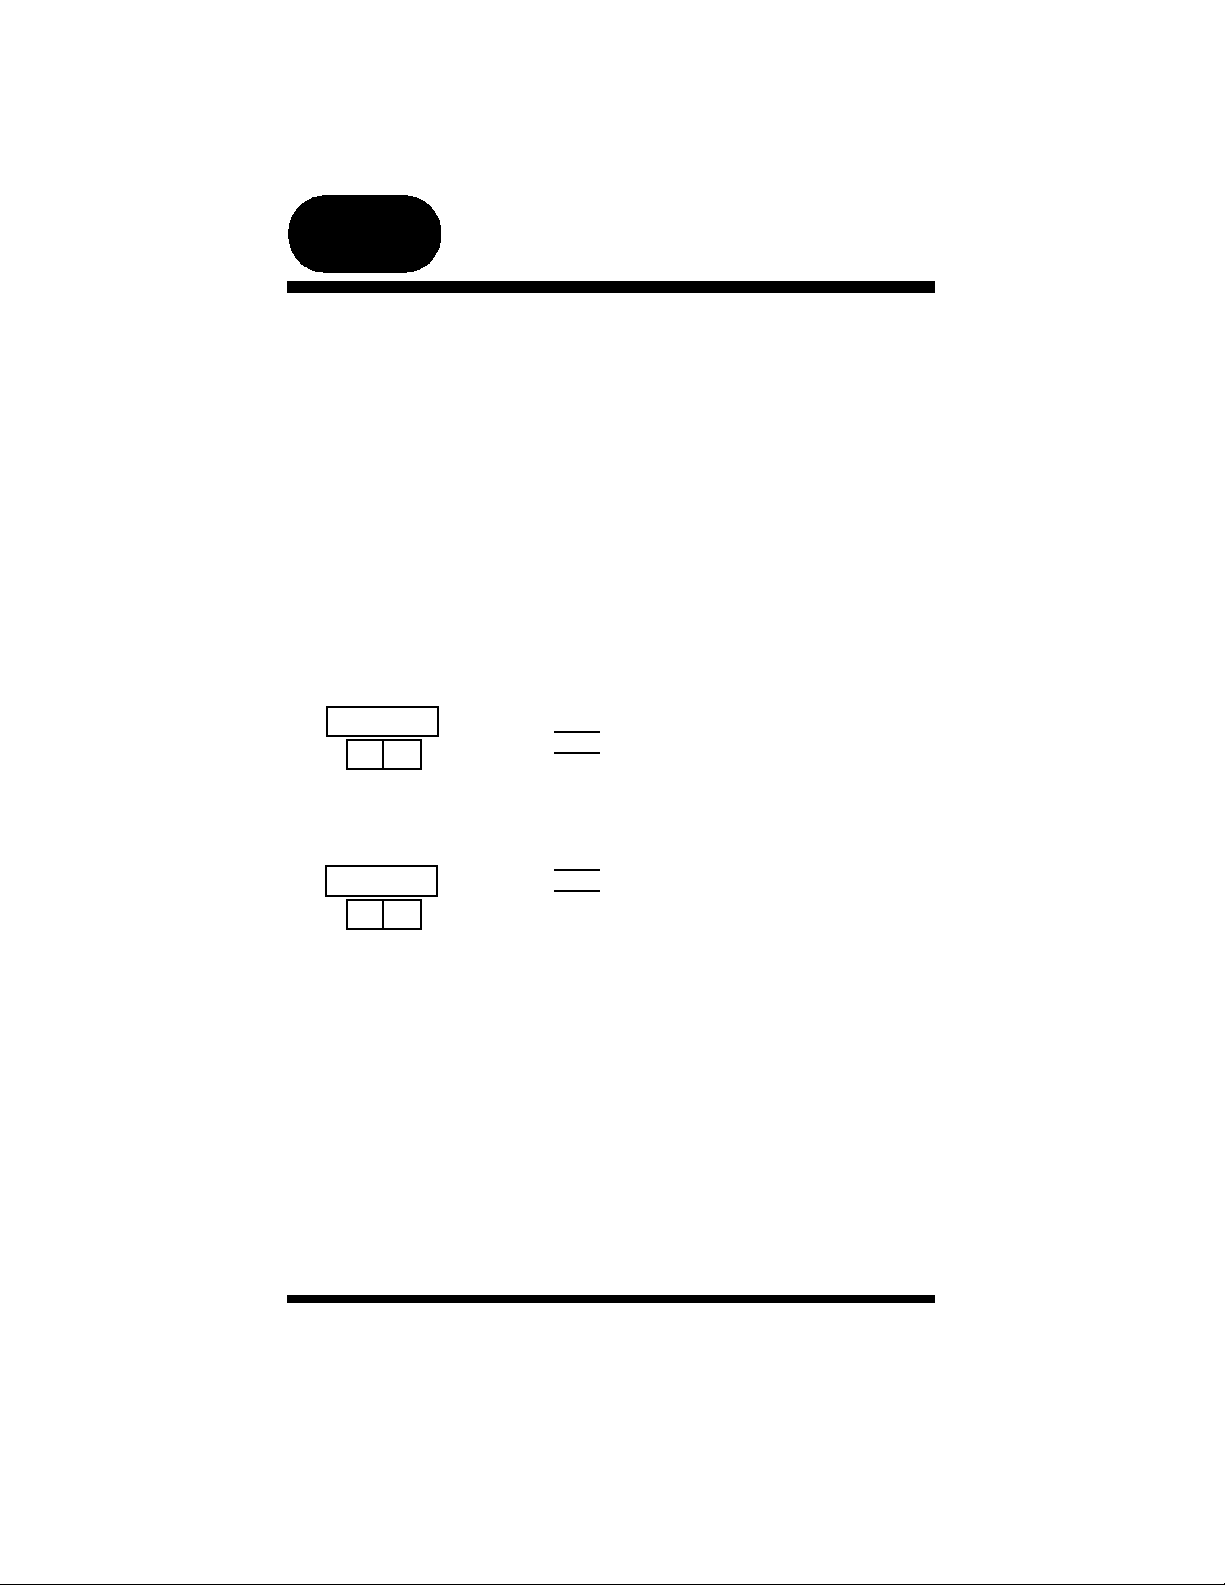
chapter
six
Convenience Features
1. Mute
The Mute feature disables the handset transmitter and the speaker microphone.
Use the mute feature to permit a private conversation while on a call.
If you have a feature key preprogrammed as a Mute key, the light will be lit
while your keyset is muted. We recommend you program a Mute key if you
use the Group Listen feature on page 60, or are a Hunt Group Supervisor.
Information on Hunt Gorups can be found on page 61.
The Mute feature is useful if you work in noisy environments when
background noise becomes amplified over the transmitter or microphone and
impedes communications from the distant end.
To activate
FUNCTION
7 6
FUNCTION
7 6
1. Press the Function key and then dial 76.
- or -
Press the designated feature key.
To cancel
1. Press the Function key and then dial 76.
- or -
Press the designated feature key.
Protegé®Keyset User Guide - with display
53
Page 58

6 / Convenience Features
2. Reminder Service
The Reminder Service feature acts like an alarm clock. Use it to remind yourself of appointments.
Use the 24 hour clock format to record the time for the reminder. For example,
2:23 p.m. is recorded as 1423.
The attendant can program reminders for other keysets in the telephone system.
When the reminder time is reached, your keyset will ring to alert you, even if
you are active on a call.
To activate
1. Keyset is idle or in use on a call.
FUNCTION
9 2
F3
x x x x
F2
FUNCTION
9 2
[[
2. Press the Function key and then dial 92.
3. Press soft key F3 below the word “chg.”
4. Enter the time for the reminder in 24 hour format.
5. Press soft key F2 below the word “save.”
To cancel
1. Keyset is idle or in use on a call.
2. Press the Function key and then dial [ 92.
54
F1
To acknowledge a reminder call
1. Keyset rings. LCD displays “Reminder
Reached.”
2. Press soft key F1 below the word “ack.”
Protegé®Keyset User Guide - with display
Page 59

6 / Convenience Features
3. Speed Dial Numbers
A Speed Dial Number stores either an outside telephone number or an account
code. You may store a maximum of 20 digits (including special dialing characters) in a single speed dial number.
Note:The quantity of speed dial directory numbers assigned to your keyset
and the numbers themselves depend on how your company’s phone system has been configured. Your system administrator can tell you which
numbers are available to you.
When storing an outside telephone number you can specify the trunk or trunk
route to be used. Refer to Special Dialing on page 32 if you need to include
dialing characters such as pause and flash. You can also add a descriptive name
to the speed dial number so you can locate it more easily when searching
through directories on page 31.
Storing a Speed Dial Number
FUNCTION
1
x x x
F2
F1
F1
F3
F2
CLEAR
1. Keyset is in idle state.
2. Press the Function key and then dial 1.
3. Dial the speed dial directory number where
speed dial number is stored.
4. Press soft key F2 below the word “show.”
5. Press soft key F1 below the word “tel.”
6. Press soft key F1 below the word “num.”
7. Press soft key F3 below the word “chg.”
8. Enter the telephone number you wish to save.
9. Press soft key F2 below the word “save.”
10.Receive confirmation tone.
11. Press the Clear key to exit.
- or -
Repeat the process (steps 3-9) to enter another
speed dial number.
Protegé®Keyset User Guide - with display
55
Page 60
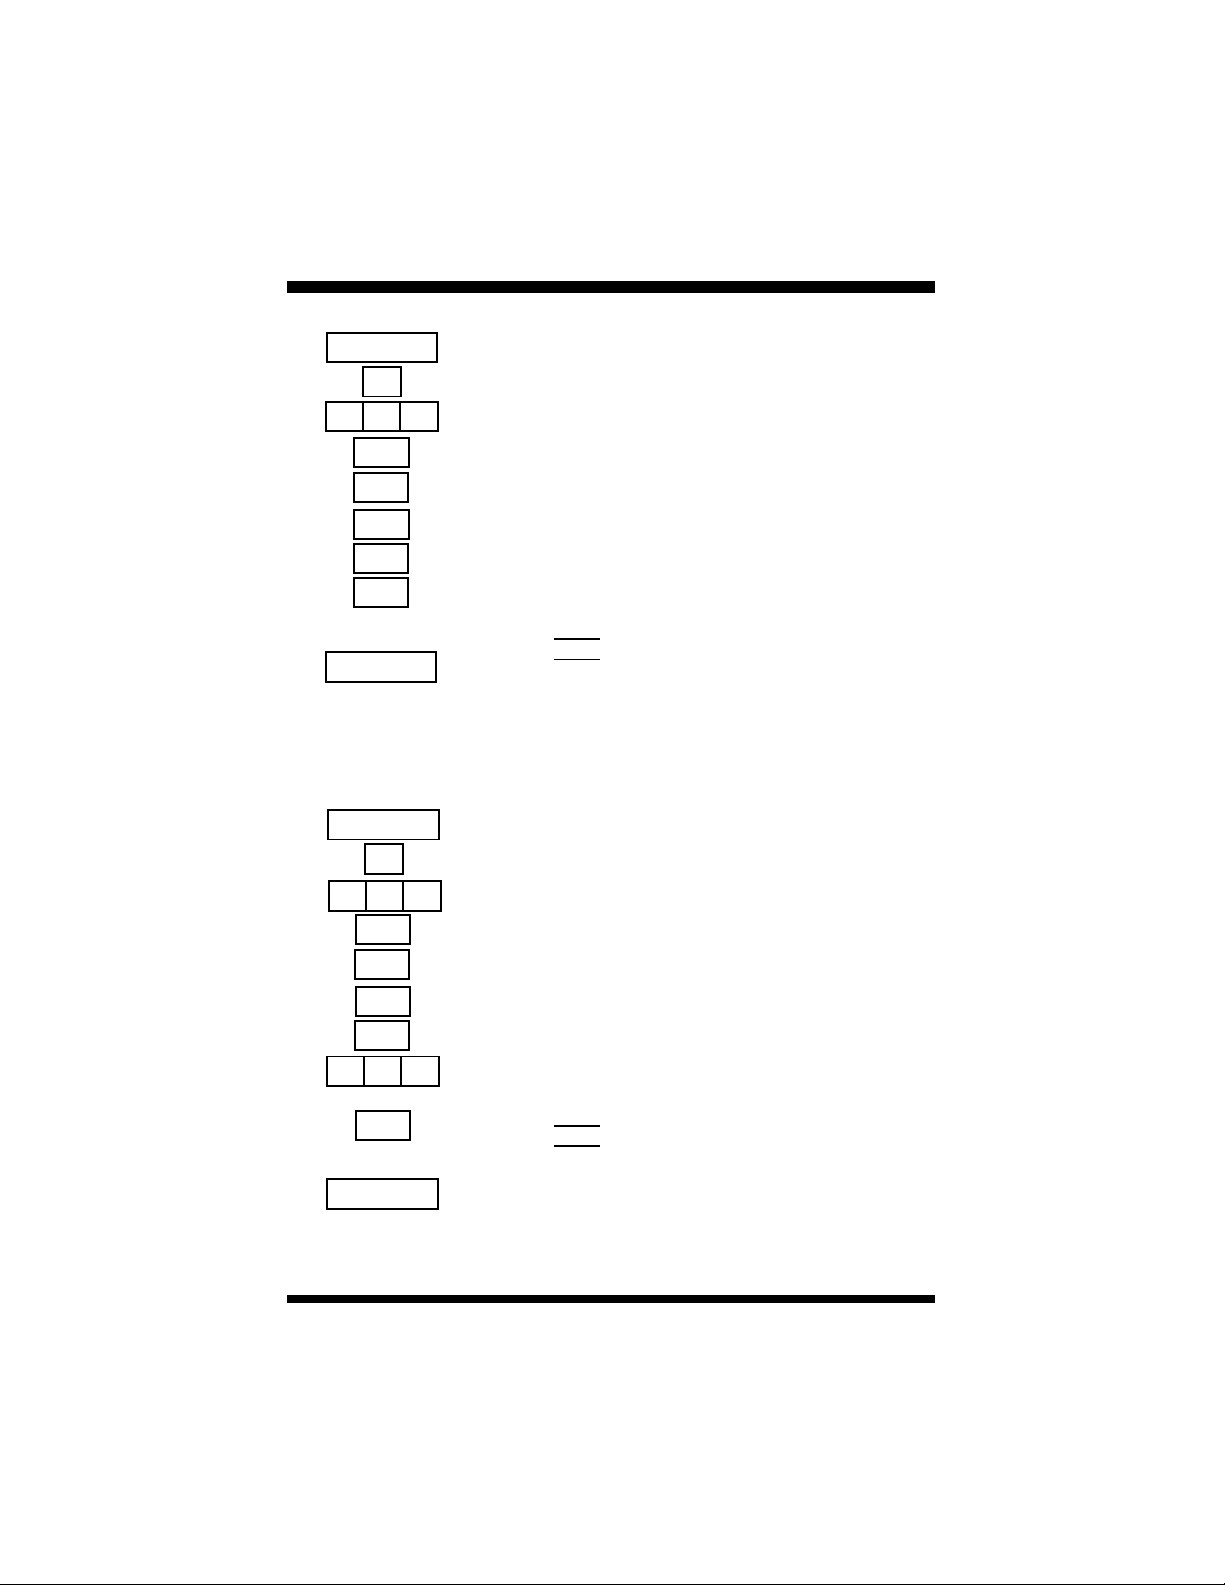
6 / Convenience Features
FUNCTION
1
x x x
F2
F1
F1
F3
F2
CLEAR
FUNCTION
1
x x x
F2
F1
F3
F3
x x x
F2
CLEAR
Deleting a Speed Dial Number
1. Keyset is in idle state.
2. Press the Function key and then dial 1.
3. Dial the speed dial number.
4. Press soft key F2 below the word “show.”
5. Press soft key F1 below the word “tel.”
6. Press soft key F1 below the word “number.”
7. Press soft key F3 below the word “chg.”
8. Press soft key F2 below the word “save.”
9. Receive confirmation tone.
10. Press the Clear key to exit.
- or -
Repeat the process (steps 3-8) to delete another speed dial number.
Assigning a Trunk or Trunk Route
1. Keyset is in idle state.
2. Press the Function key and then dial 1.
3. Dial the speed dial number.
4. Press soft key F2 below the word “show.”
5. Press soft key F1 below the word “tel.”
6. Press soft key F3 below the word “trk/rte.”
7. Press soft key F3 below the word “chg.”
8. Enter the number of the trunk or trunk route
you wish to use with the speed dial number.
9. Press soft key F2 below the word “save.”
10.Receive confirmation tone.
11.Press the Clear key to exit.
- or -
Repeat the process (steps 3-8) to assign a
trunk or trunk route to another speed dial
number.
56
Protegé®Keyset User Guide - with display
Page 61
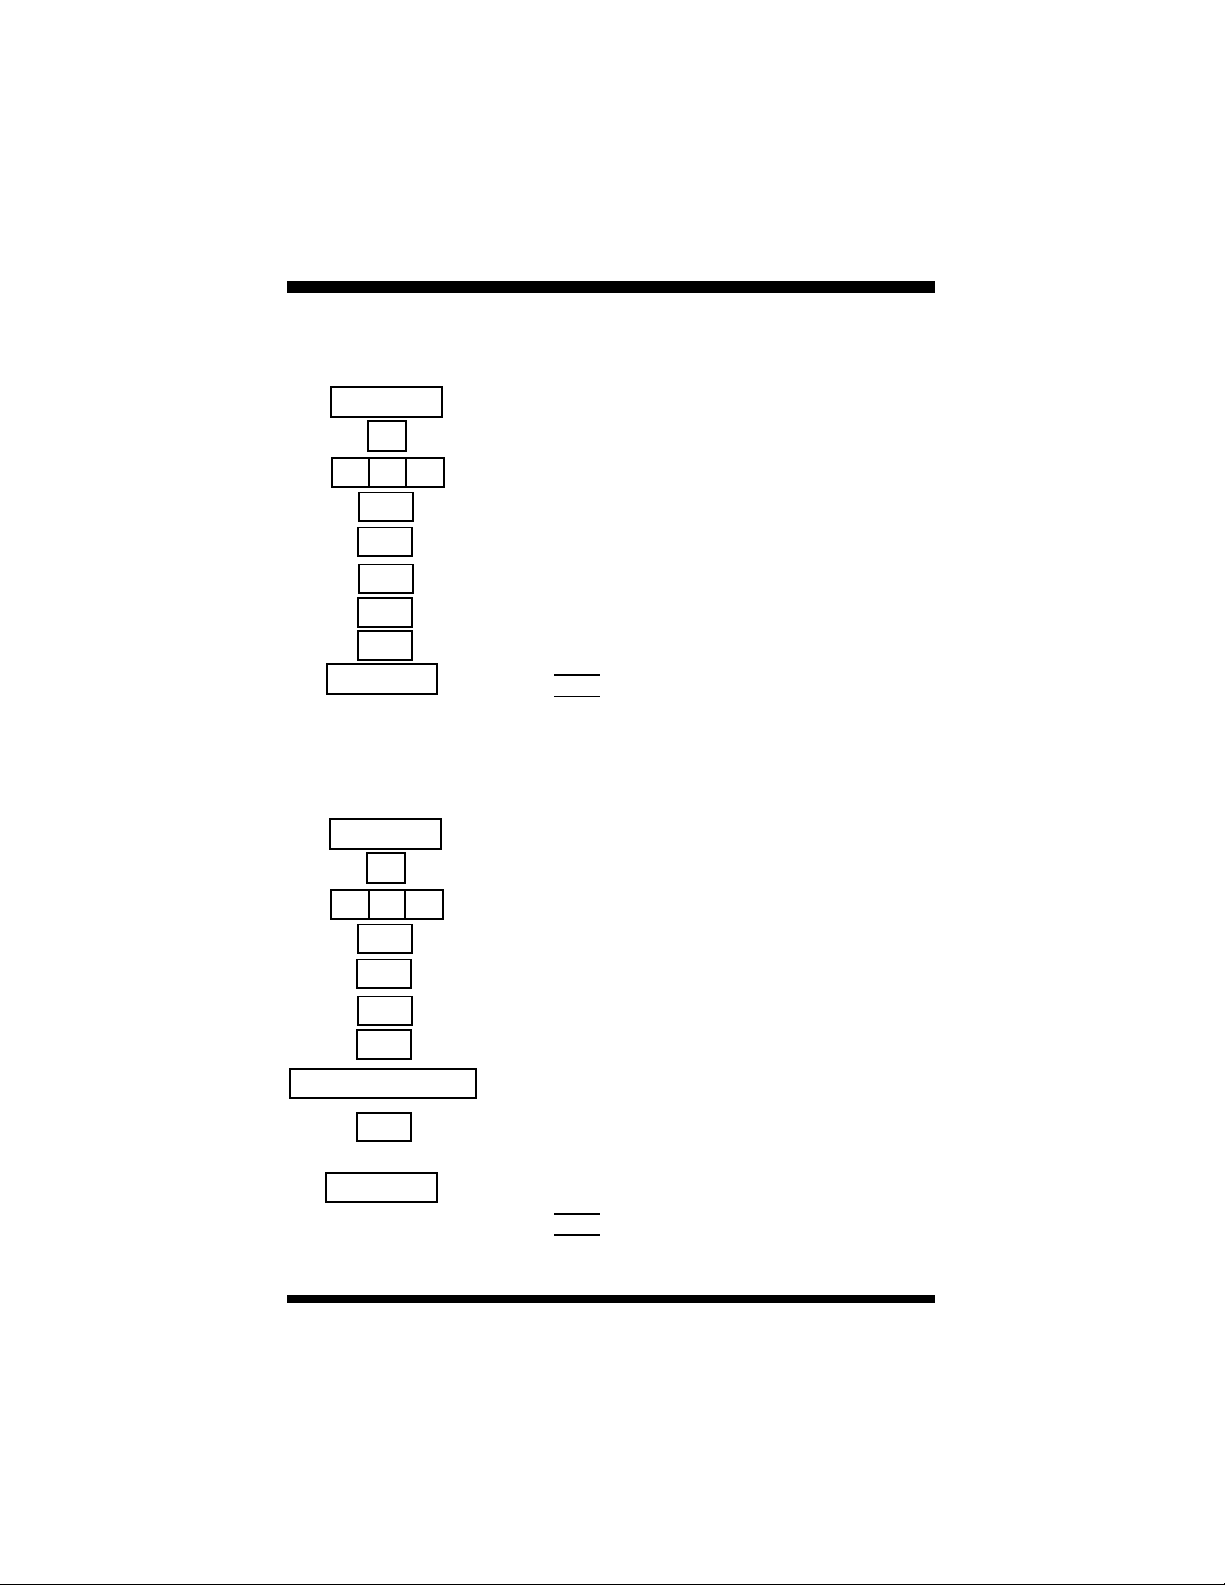
FUNCTION
1
x x x
F2
F1
F3
F3
F2
CLEAR
FUNCTION
1
x x x
F2
F1
F2
F3
F2
CLEAR
6 / Convenience Features
Deleting a Trunk or Trunk
Route Assigned to a Speed
Dial Number
1. Keyset is in idle state.
2. Press the Function key and then dial 1.
3. Dial the speed dial number.
4. Press soft key F2 below the word “show.”
5. Press soft key F1 below the word “tel.”
6. Press soft key F3 below the word “trk/rte.”
7. Press soft key F3 below the word “chg.”
8. Press soft key F2 below the word “save.”
9. Receive confirmation tone.
10. Press the Clear key to exit.
- or -
Repeat the process (steps 3-8) to delete a trunk
or trunk route from another speed dial number.
Assigning a Name to a Speed
Dial Number
1. Keyset is in idle state.
2. Press the Function key and then dial 1.
3. Dial the speed dial number.
4. Press soft key F2 below the word “show.”
5. Press soft key F1 below the word “tel.”
6. Press soft key F2 below the word “name.”
7. Press soft key F3 below the word “chg.”
8. Enter the name you wish to save against the
speed dial number. Use the table on the opposite page as a guide to help you enter the letters.
9. Press soft key F2 below the word “save.”
10. Receive confirmation tone.
11. Press the Clear key to exit.
- or -
Repeat the process (steps 3-9) to enter another
name.
Protegé®Keyset User Guide - with display
57
Page 62

6 / Convenience Features
FUNCTION
1
x x x
F2
F1
F2
F3
F2
CLEAR
Deleting the Name Assigned
To a Speed Dial Number
1. Keyset is in idle state.
2. Press the Function key and then dial 1.
3. Dial the speed dial number.
4. Press soft key F2 below the word “show.”
5. Press soft key F1 below the word “tel.”
6. Press soft key F2 below the word “name.”
7. Press soft key F3 below the word “chg.”
8. Press soft key F2 below the word “save.”
9. Receive confirmation tone.
10. Press the Clear key to exit.
- or -
Repeat the process (steps 3-8) to delete another name.
Times to ----------------------------- Key Pad Number -------------------------------Press 1 2 3 4 5 6 7 8 9 0 #
One , A D G J M P T W Q space
Two - B E H K N R U X Z space
Three & C F I L O S V Y . space
Four 1 2 3 4 5 6 7 8 9 0 space
58
Protegé®Keyset User Guide - with display
Page 63

FUNCTION
1
x x x
F2
F2
CLEAR
FUNCTION
1
x x x
F2
F3
F2
CLEAR
6 / Convenience Features
Storing an Account Code
1. Keyset is in idle state.
2. Press the Function key and then dial 1.
3. Dial the speed dial number.
4. Press soft key F2 below the word “show.”
5. Enter the account code number.
6. Press soft key F2 below the word “save.”
7. Receive confirmation tone.
8. Press the Clear key to exit.
- or -
Repeat the process (steps 3-6) to enter another
account code.
Deleting an Account Code
1. Keyset is in idle state.
2. Press the Function key and then dial 1.
3. Dial the speed dial number.
4. Press soft key F2 below the word “show.”
5. Press soft key F3 below the word “fac.”
6. Press soft key F2 below the word “save.”
7. Receive confirmation tone.
8. Press the Clear key to exit.
- or -
Repeat the process (steps 3-6) to delete another account code.
Protegé®Keyset User Guide - with display
59
Page 64

6 / Convenience Features
4. Group Listen
Your system administrator can confirm if the Group Listen feature is available
to you.
Activate the Group Listen feature to permit others in your immediate area to
listen through the speakerphone to the distant side of a call, while you continue
to use the handset. The keyset microphone is muted so your audience can listen
but not participate. You can hang up the handset at any time to change to full
speakerphone operation. The volume control key on the keyset controls the
speaker volume.
Important Note
We recommend that you activate the Mute feature before returning the handset
to the cradle to avoid the possibility of an audible squeal, or “feedback.”
To activate
SPEAKER
1. While on an active call, press the Speaker key.
3. Distant party is audible over microphone
speaker.
FUNCTION
SPEAKER
60
67
CLEAR
To change to full speakerphone operation
1. Mute your keyset by pressing the Mute key (a
designated feature key).
- or -
Press the Function key and then dial 76.
2. Replace handset on cradle.
3. Repeat step 1 to cancel the muted state.
To return to using only the handset
1. From a Group Listen situation, press the
Speaker key.
To end the call
1. Press the Clear key.
Protegé®Keyset User Guide - with display
Page 65

6 / Convenience Features
5. Hunt Group Features
If you are an agent of a hunt group, use the UCDAgent Help feature to request
assistance from your Supervisor while you are on an active call. The supervisor’s response is displayed on your LCD.
If you are the designated Supervisor of a hunt group you can use the Hunt
Group Monitor feature to listen in on hunt group calls that are handled by
agents. Note that your keyset must be equipped with a Mute key (a feature key
programmed with the Mute feature code) to use this feature effectively.
The Supervisor can also use the UCD Route Override feature code to redirect
all calls assigned to ring the hunt group, to hunt group 24. See your system
administrator for where these calls are directed.
Use the UCDAgent Help Response feature to reply to a message from a UCD
agent requesting assistance. If you answer the request you are conferenced in
on the agent’s call in a muted capacity (similar to the Monitor feature). Note
that agents with non-display keysets will only hear a brief tone to alert them
that you have answered the request. They hear nothing if you acknowledge or
reject the call.
UCD Agent Help
1. Keyset is in use on a UCDhunt group call.
FUNCTION
16
Protegé®Keyset User Guide - with display
2. Press the Function key and then dial 61.
- or -
Press the designated feature key.
3. Your supervisor receives a message requesting
assistance. You remain connected to your hunt
group call. Your LCD displays your supervisor’s response.
4. The supervisor answers the request, and is
connected to you in a muted state.
- or -
The supervisor acknowledges your request,
but is not connected to your call.
- or -
The supervisor rejects your request.
61
Page 66

6 / Convenience Features
FUNCTION
85
x x x
FUNCTION
#6
x x x
FUNCTION
6 #
[[
x x x
Monitoring a UCD Call In
Progress (Supervisor only)
1. Press the Function key and then dial 58.
2. Enter the extension number you wish to monitor.
- or -
Press the DSS key of the extension you wish
to monitor.
3. You are connected in a muted capacity: you
can hear but cannot participate. To interrupt,
press the Mute key (deactivate the mute condition).
UCDRoute Override(Supervisor only)
To activate
1. Press the Function key and then dial 6 #.
2. Dial the extension number of the hunt group
you want to redirect to UCD group 24.
3. Receive confirmation tone.
To cancel
1. Press the Function key and then dial R6 #.
2. Dial the extension number of the hunt group
which has been redirected.
3. Receive confirmation tone.
62
F1/F2/F3
Responding to a UCDAgent
Help Message (Supervisor only)
1. Your keyset rings. The keyset LCDdisplays a
message requesting assistance from a UCD
agent.
2. Press soft key F1 below the word “answer” to
answer the request.
- or -
Press soft key F2 below the word “acknowledge” to acknowledge the agent’s call.
- or -
Press soft key F3 below the word “reject” to
reject the agent’s request.
Protegé®Keyset User Guide - with display
Page 67

chapter
seven
Customizing
Your Keyset
1.Three Features For
Easier Dialing
Hot Key Pad, Automatic Line Selection, and Hotline are three features you can
use to make dialing easier and faster.
Hot Key Pad
When you have the Hot Key Pad feature enabled, you can dial an extension or
outside line without lifting the handset or pressing the speaker key. The Protegé
system senses when any dial pad key is pressed, takes the extension off-hook,
studies the digits dialed to determine whether the call is for intercom or trunk
access, and routes it accordingly. At default, your keyset is programmed with
Hot Key Pad activated.
Automatic Line Selection
Automatic Line Selection allows you to choose which resource your keyset
accesses when you go off-hook at your extension; intercom dial tone, a specific
trunk, or a trunk route. Note that if you set both Automatic Line Selection and
Hotline, Hotline takes priority.
Hotline
With a Hotline programmed, you automatically dial another resource when you
lift the handset or press the Speaker key. This resource can be one of the following:
uAn extension number
uA trunk directory number
uA trunk route number
uA system or individual speed dial number
uA pickup group, hunt group or paging group
A Hotline can be dependent on the time of day. You specify whether the
Hotline operates all the time, just during the day, or just when your company’s
phone system is in Night mode.
In addition, you can specify whether the Hotline should access the resource
immediately, or wait between one and nine seconds. A delay allows you to dial
another resource before the Hotline takes effect.
Protegé®Keyset User Guide - with display
63
Page 68

7 / Customizing Your Keyset
FUNCTION
9
3
FUNCTION
9 3
[
FUNCTION
9
5
F1/F2/F3
FUNCTION
9 5
[
Hot Key Pad
To activate
1. Keyset is idle or in use on a call.
2. Press the Function key and then dial 93.
3. Receive confirmation tone.
To cancel
1. Keyset is idle or in use on a call.
2. Press the Function key and then dial [ 93.
3. Receive confirmation tone.
Automatic Line Selection
To activate
1. Keyset is idle or in use on a call.
2. Press the Function key and then dial 95.
3. Press soft key F1 below the word “icm” to
select internal dial tone every time you lift the
handset.
- or -
Press soft key F2 below the word “trunk’ followed by the appropriate directory number to
select a specific outside line every time you
lift the handset.
- or -
Press soft key F3 below the word “route” followed by the appropriate directory number to
select a specific trunk route every time you lift
the handset.
4. Receive confirmation tone.
To cancel
1. Keyset is idle or in use on a call.
2. Press the Function key and then dial [ 95.
3. Receive confirmation tone.
64
Note: Function 95 cannot be programmed under a
feature key.
Protegé®Keyset User Guide - with display
Page 69

FUNCTION
9
[[
F3
x x x
F2
F2
F3
F2
F1/F3
CLEAR
7 / Customizing Your Keyset
Hotline
To activate
1. Keyset is idle or active on a call.
2. Press the Function key and then dial 9 [.
3. Press soft key F3 below the word “chg.”
4. Enter the directory number of the resource you
wish to hotline (normally three digits).
5. Press soft key F2 below the word “save.”
6. Press soft key F2 below the word “next.”
7. Select the service mode: choose between
“day,” “night,” and “always.” Press soft key
F3 to rotate through the choices. The default
setting is “always.”
8. When the chosen service is shown, press soft
key F2 below the word “next.”
9. Press soft key F1 below the word “immediate”
for immediate action.
- or -
Press soft key F3 below the word “delay” for
delayed action. Enter the number of seconds
delay time you wish.
10. Press the Clear key to finish programming.
FUNCTION
9
[[
F3
F2
Protegé®Keyset User Guide - with display
To cancel
1. Keyset is idle or in use on a call.
2. Press the Function key and then dial 9 [.
3. Press soft key F3 below the word “chg.”
4. Press soft key F2 below the word “save.”
Note: Function 9 [cannot be programmed under a
feature key.
65
Page 70

7 / Customizing Your Keyset
2.Three Features For Easier
Answering
Voice Call, Auto Answer, and Distinctive Ringing are three features that you
can use to make answering calls easier and faster.
Voice Call
When you set your keyset to allow voice calls, intercom callers are connected
immediately over the speakerphone, without requiring you to go off-hook. You
will hear a single tone to alert you and the LCD will display the word “voice”
and the calling extension number. Outside calls continue to ring at your extension in the usual way, so too will blind transfer calls.
Note that when voice calls are allowed, no Call Forward instructions you have
programmed will be followed. Do Not Disturb, however, will continue to operate.
Auto Answer
Use the Auto Answer feature to select how incoming calls will be answered.
With Auto Answer set to “off” you must press an appropriate feature key to
answer an incoming call. This can be one of the following:
uAn ICM key(a feature key designated for intercom calls)
uA Trunk or Trunk Group key
uAn Overflow key (a feature key designated for all additional outside
lines).
With Auto Answer set to “on” you can answer ringing calls by lifting the handset or pressing the Speaker key.
Distinctive Ringing
Distinctive Ringing allows you to choose from four different ring cadences to
distinuguish your phone’s ring from that of others in your immediate area. The
ring cadence you select works for all tones you hear on your keyset. See page 7
for a table of ring tones.
66
Protegé®Keyset User Guide - with display
Page 71

FUNCTION
9 8
FUNCTION
9 8
[[
7 / Customizing Your Keyset
Voice Call
To receive
1. Keyset is idle or in use on a call.
2. Press the Function key and then dial 98.
To prevent
1. Keyset is idle or in use on a call.
2. Press the Function key and then dial [ 98.
Auto Answer
FUNCTION
6
[[
FUNCTION
6
[[
FUNCTION
# 7
F3
CLEAR
To activate
1. Keyset is in idle state.
2. Press the Function key and then dial 6 [.
To cancel
1. Keyset is in idle state.
2. Press the Function key and then dial 6 [.
Distinctive Ringing
To change ring cadence
1. Keyset is in idle state.
2. Press the Function key and then dial # 7.
3. Press soft key F3 below the word “chg” to
listen to each ring tone. Stop when you have
made your selection.
4. Press the Clear key to exit when completed.
Protegé®Keyset User Guide - with display
67
Page 72

7 / Customizing Your Keyset
3. Security
For security reasons, you must enter a password to be able to use three features: Remote Follow Me Call Forward on page 17, Authority Code on page 36
and Lock/Unlock on page 69.
Ask your telephone system administrator if you are unsure what your password
is. Use the Password Change feature to change your password. The temporary
password is 0000 at default.
The Lock/Unlock feature is designed to prevent unauthorized trunk calls from
your keyset while you are away from your desk. A locked extension will still
receive incoming trunk calls, and a user may still place and receive intercom
calls. You need a valid password to use the Lock/Unlock feature.
Caution
The Lock feature prevents all trunk calls, not just long-distance calls. Because
local calls - including 911 calls - are blocked by this feature, exercise caution in
using this feature.
FUNCTION
68
9 7
F2
F1
F2
Password Change
Changing your password
1. Keyset is idle or in use.
2. Press the Function key and then dial 97.
- or -
Press the designated feature key.
3. Enter the old password.
4. Press soft key F2 below the word “show.”
5. Press soft key F1 key below the word “pswd.”
6. Enter the new password.
7. Press soft key F2 below the word “save.”
* Ask your system administrator if you do not
know your password.
Protegé®Keyset User Guide - with display
*
Page 73

FUNCTION
9 7
F2
F2
FUNCTION
9 7
F2
F3
7 / Customizing Your Keyset
Lock/Unlock
To lock
1. Keyset is idle or in use on a call.
2. Press the Function key and then dial 97.
- or -
Press the designated feature key.
3. Enter your user password.
4. Press soft key F2 below the word “show.”
5. Press soft key F2 below the word “yes.”
6. Receive confirmation tone.
To unlock
1. Keyset is idle or in use on a call.
2. Press the Function key and then dial 97.
- or -
Press the designated feature key.
3. Enter your user password.
4. Press soft key F2 below the word “show.”
5. Press soft key F3 below the word “no.”
6. Receive confirmation tone.
Protegé®Keyset User Guide - with display
69
Page 74

7 / Customizing Your Keyset
4. Feature Code Settings
Use the Check Keyset Feature Status feature to confirm which features you
have operating at your keyset. This feature is particularly useful for troubleshooting. If your keyset seems to behave oddly, check your feature settings.
You may find a particular feature is set differently to how you expect. Each of
these features has a big impact on how your keyset operates: Automatic Hold,
Auto Transfer Mode, Hotline, Voice Call and Auto Answer.
Use the Cancel Operations feature to terminate your current feature settings.
Doing so will reset your keyset to its default settings. It will not, however,
change the contents of feature and dual function feature keys.
Check Keyset Feature Status
To check
FUNCTION
# 8
F3
1. Keyset is idle or in use on a call.
2. Press the Function key and then dial # 8.
3. Press soft key F3 below “next” to scroll
through feature settings.
4. Press “Clear” to exit.
FUNCTION
70
6 9
F2
Cancel Operations
To cancel
1. Keyset is idle or in use on a call.
2. Press the Function key and then dial 69.
3. Press soft key F2 below the word “go.”
Note: Function 69 cannot be programmed under a
feature key.
Protegé®Keyset User Guide - with display
Page 75

7 / Customizing Your Keyset
5. Setting the Feature Keys
Depending on the model, your keyset has a number of feature keys and dual
function feature keys that can be programmed to your requirements. You can
program a speed dial number on the “secondary level” of each Dual Function
feature key. The “primary level” can be one of the following:
uAn outside line key
uA DSS key
uA feature such as Call Forward
uA speed dial number
When you program a speed dial number under a feature key or dual function
feature key, note that you enter the abbreviated number (normally three digits
in length), not the full number.
Use the Check Key Status feature to check the current contents of a feature or
dual function feature key. Both the activate and cancel codes are listed.
Use the Look Up Feature Codes feature to look up the access codes to particular features.
Check Key Status
To check the primary function of a feature
key
F2
1. Keyset is in idle state, press soft key F2.
- or -
Keyset is in busy state, press the Function key
and then dial # 3.
2. Press the required feature key.
To check the secondary function of a dual
function feature key
F1
Protegé®Keyset User Guide - with display
1. Keyset is in idle state, press soft key F1.
- or -
Keyset is in busy state, press the Function key
and then dial # 1.
2. Press the required dual function feature key.
71
Page 76

7 / Customizing Your Keyset
Look Up Feature Codes
FUNCTION
# 5
F1/F2/F3
F1/F2
FUNCTION
# 3
F3
F2
FUNCTION
F2
1. Keyset is idle or in use on a call.
2. Press the Function key and then dial # 5.
3. Press soft key F1 to look up directory
numbers.
- or -
Press soft key F2 to look up feature access
codes.
- or -
Press soft key F3 to look up suffix codes.
4. Press soft keys F1 and F2 to scroll through the
chosen directory as needed.
Programming a Feature Under
a Feature Key
1. Keyset is idle or in use on a call.
2. Press the Function key and then dial # 3.
3. Press designated feature key to which to
program feature.
4. Press soft key F3 below the word “chg.”
5. Press soft key F2 below the word “feat.”
6. Press the Function key and then enter the
appropriate feature code number.
7. Press soft key F2 below the word “save” to
save selection.
72
Protegé®Keyset User Guide - with display
Page 77

FUNCTION
# 3
F3
F1
x x x
F2
7 / Customizing Your Keyset
Programming a DSS Key
1. Keyset is idle or in use on a call.
2. Press the Function key and then dial # 3.
3. Press the feature key you wish to program.
4. Press soft key F3 below the word “chg.”
5. Press soft key F1 below the word “dir.”
6. Enter the resource directory number.
7. Press soft key F2 below the word “save” to
save the selection.
8. Receive confirmation tone.
Programming a Speed Dial
Number Under a Feature Key
FUNCTION
# 3
F3
F1
x x x
F2
1. Keyset is idle or in use on a call.
2. Press the Function key and then dial # 3.
3. Press the feature key you want to program.
4. Press soft key F3 below the word “chg.”
5. Press soft key F1 below the word “dir.”
6. Enter the speed dial number.
7. Press soft key F2 below the word “save” to
save the selection.
8. Receive confirmation tone.
Protegé®Keyset User Guide - with display
73
Page 78

7 / Customizing Your Keyset
FUNCTION
# 1
F3
x x x
F2
Programming the Secondary
Level of a Dual Function
Feature Key
1. Keyset is idle or in use on a call.
2. Press the Function key and then dial # 1.
3. Press the dual function feature key you want
to program.
4. Press F3 below the word “chg.”
5. Enter the speed dial number.
6. Press soft key F2 below the word “save” to
save selection.
74
Protegé®Keyset User Guide - with display
Page 79
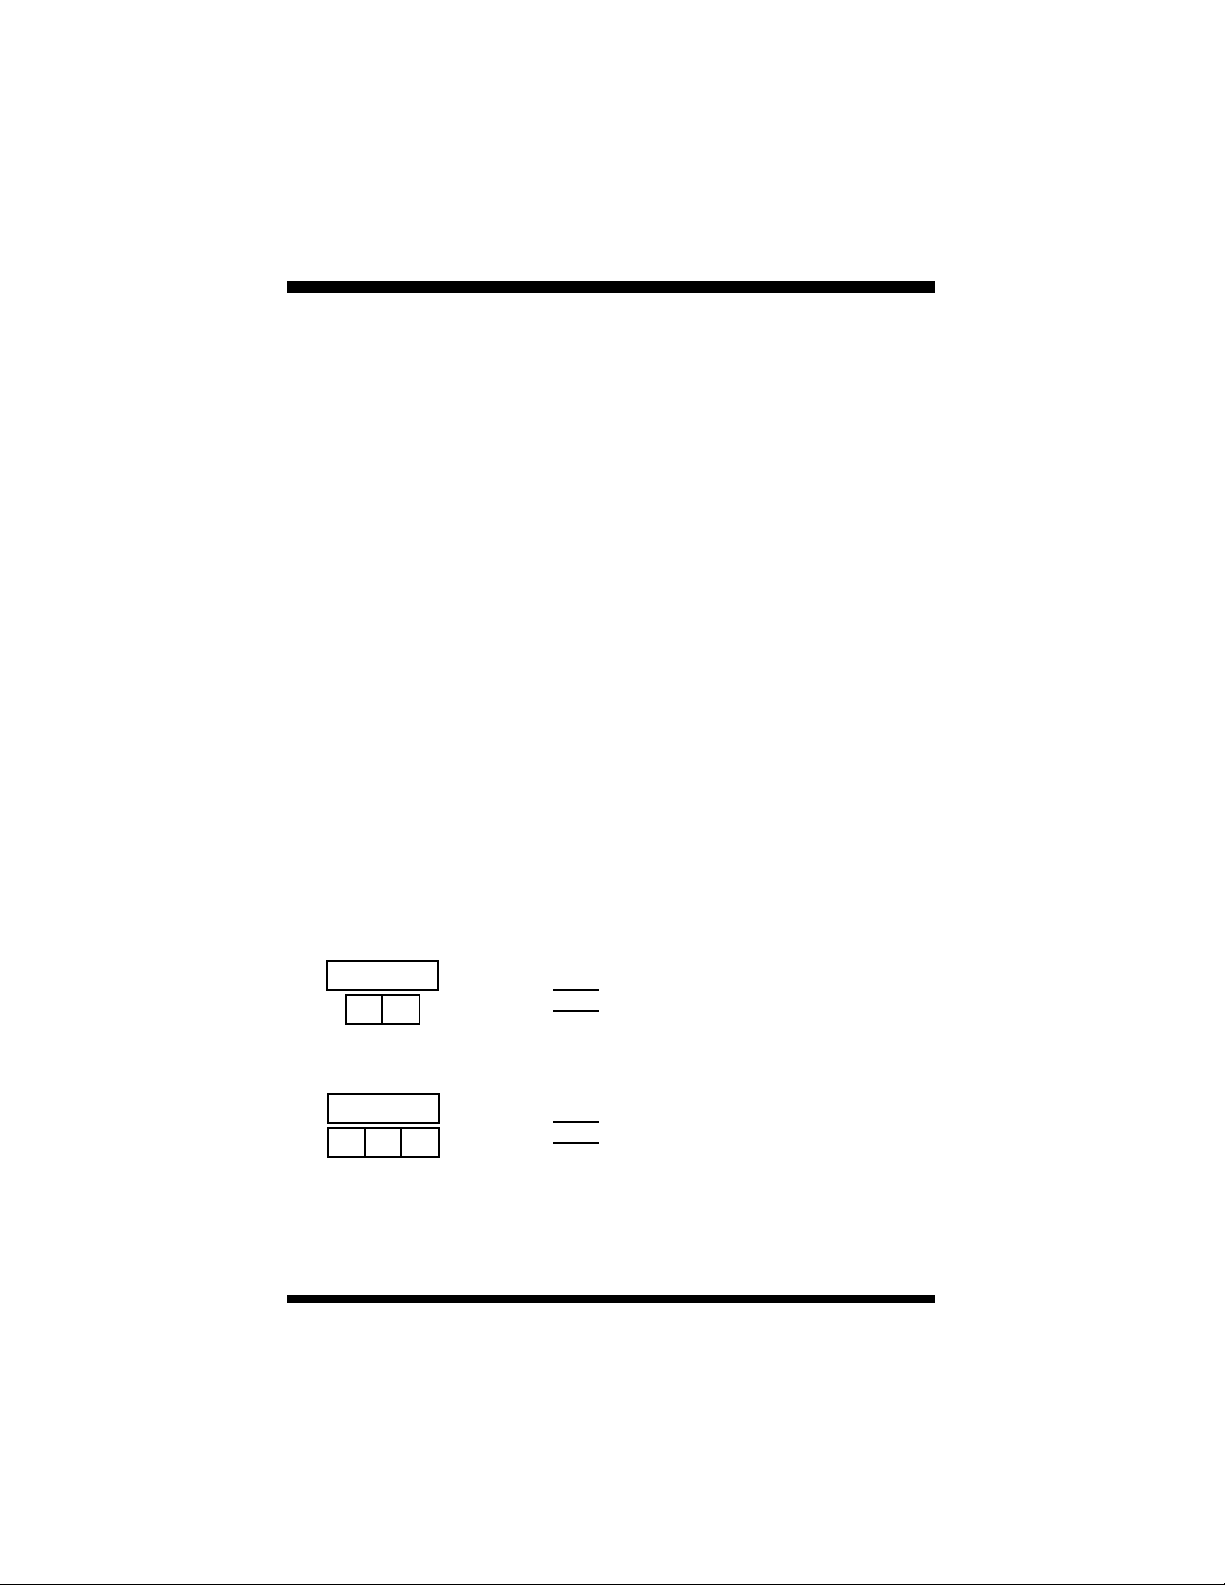
7 / Customizing Your Keyset
6. Headset Operation
Models with headset jacks
If your keyset has a headset jack, simply plug a headset or headset amplifier
directly into the headset jack. Enter the Headset Function feature code. While
you have the Headset Function enabled, keep the handset in its cradle. Use the
Speaker key to answer calls and the Clear key to end calls.
The Speaker key acts as a toggle. Depress once to answer using the headset,
press the Speaker key again to have the call heard over the speaker.
Note that amplified headsets with their own power source disable the Mute
feature on the Executive and Executive Data keysets. Refer to your system
administrator for more information.
Models without headset jacks
If your keyset does not have a headset jack you will first need to unplug your
handset from the handset jack. Plug a headset amplifier into the handset jack,
and then plug the handset into the headset amplifier. Do not place the handset
in the cradle. Do not enter the Headset Function feature code. Use the Speaker
key to answer calls, and the Clear key to end calls. Using a headset amplifer in
this way does not affect the Mute function.
Headset Function
To enable
FUNCTION
9 #
FUNCTION
9 #
[[
Protegé®Keyset User Guide - with display
1. Press the Function key and then dial 9 #.
- or -
Press the designated feature key.
To cancel
1. Press the Function key and then dial [ 9 #.
- or -
Press the designated feature key.
75
Page 80

7 / Customizing Your Keyset
7. Background Music
With the Background Music feature you can play background music over the
speaker of your telephone while it is idle. You will normally hear the same
music source that callers hear when they are placed on hold.
The music stops when you operate your telephone and resumes when you hang
up. You still receive incoming intercom and outside calls, and can answer them
by going off-hook with the handset or speaker key.
If background music is not available on your system your LCD will indicate
“BGM unavailable.”
To activate
8 0
1. Dial 800 or 801, depending on how your
system is programmed.
2. Music plays through your speakerphone.
76
CLEAR
To cancel
1. Press the Clear key.
Protegé®Keyset User Guide - with display
Page 81

chapter
eight
Voice Mail
and
Data
features
1. Voice Mail
If you use your voice mail system on a regular basis, we recommend you
designate a feature key as a voice mail “Message Waiting” key.
The Message Waiting key lights when you receive a voice mail message. Press
the key to gain access to your personal mail box so you can check your
messages. The feature code for this is Function key, dial 64.
Your Protegé phone system offers three useful features to maximize the
benefits of your company’s voice mail system: Extinguish Lit Voice Mail LED,
Answering Machine Emulation, and Auto Conversation Record.
Extinguish Lit Voice Mail LED
Use this feature to manually turn off the LED associated with your voice mail
Message Waiting key. Use this feature if your company’s phone and voice mail
systems suffer some kind of connection interruption, and the LED fails to
extinguish after you have checked all your voice mail messages.
Answering Machine Emulation
Answering Machine Emulation lets you screen your voice mail calls, just as
you can with your home answering machine. Your keyset must be programmed
to permit this feature. Use the Direct or No Answer Call Forward features to
direct your calls to your voice mail box. You will hear a notification ring of
three electronic beeps and your LCD will display the message “vm answer.”
Your keyset must be idle to receive the notification. If you want, you can pull
the call back from voice mail in order to talk to the calling party. You have a
system-specified period of time(default is 30 seconds) to monitor the voice
mail call. The timer begins counting when the voice mail system answers the
forwarded call.
Auto ConversationRecord
If you have a voice mail Message Waiting key (see above), press it while you
are on a call to automatically form a conference with your voice mail box. This
allows you to record your conversation. Depending on system programming,
you and the distant party may or may not hear an alert tone. If the tone is not
enabled, the Auto Conversation Record feature is invisible to both parties.
Protegé®Keyset User Guide - with display
77
Page 82

8 / Voice Mail and Data Features
Dialing Voice Mail
4
1. Dial the Voice Mail System general number.
Transferring to Voice Mail
1. Begin by using whichever transfer method you
4
x x x
2. Dial the Voice Mail System general number.
3. LCD prompts for the destination mailbox.
4. Conclude the transfer as appropriate to the
Forwarding to Voice Mail
1. Begin by using whichever call forward type
4
x x x
2. Dial the Voice Mail System general number.
3. LCD prompts for the destination mailbox.
4. Conclude the transfer as appropriate to the for-
- or -
Press a designated feature key.
prefer (see pages 39 and 40).
- or -
Press a designated feature key.
Enter the appropriate extension number.
- or -
Press an appropriate DSS key.
transfer method you are using.
you prefer (see pages 12-18).
- or -
Press a designated feature key.
Enter the appropriate extension number.
warding method you are using.
78
Retrieving Your Voice Mail
Messages
1. Keyset is in idle state.
2. Press the voice mail Message Waiting key (a
designated feature key).
Protegé®Keyset User Guide - with display
Page 83

FUNCTION
[[
F1/F3
F1/F3
46
8 / Voice Mail and Data Features
Extinguish Lit Voice Mail LED
1. Keyset is idle or in use on a call.
2. Press the Function key and then dial [64.
3. Receive confirmation tone.
Answering Machine Emulation
To activate
1. Keyset is in idle state.
2. Receive notification (ring and LCD display).
3. Ignore the notification.
- or -
Press soft key F1 under the word “reject” to
return to idle state.
- or -
Press soft key F3 under the word “listen” to
listen to the call that is connected to voice
mail.
4. Receive confirmation tone.
5. Wait for the voice mail monitor time to expire.
- or -
Press soft key F1 below the word “intrude” to
disconnect the voice mail and speak with the
calling party.
- or -
Press soft key F3 below the word “exit” to terminate the monitor and return to idle state.
Auto ConversationRecord
To activate
1. Keyset is in use on an active call.
2. Press the voice mail Message Waiting key.
Protegé®Keyset User Guide - with display
79
Page 84
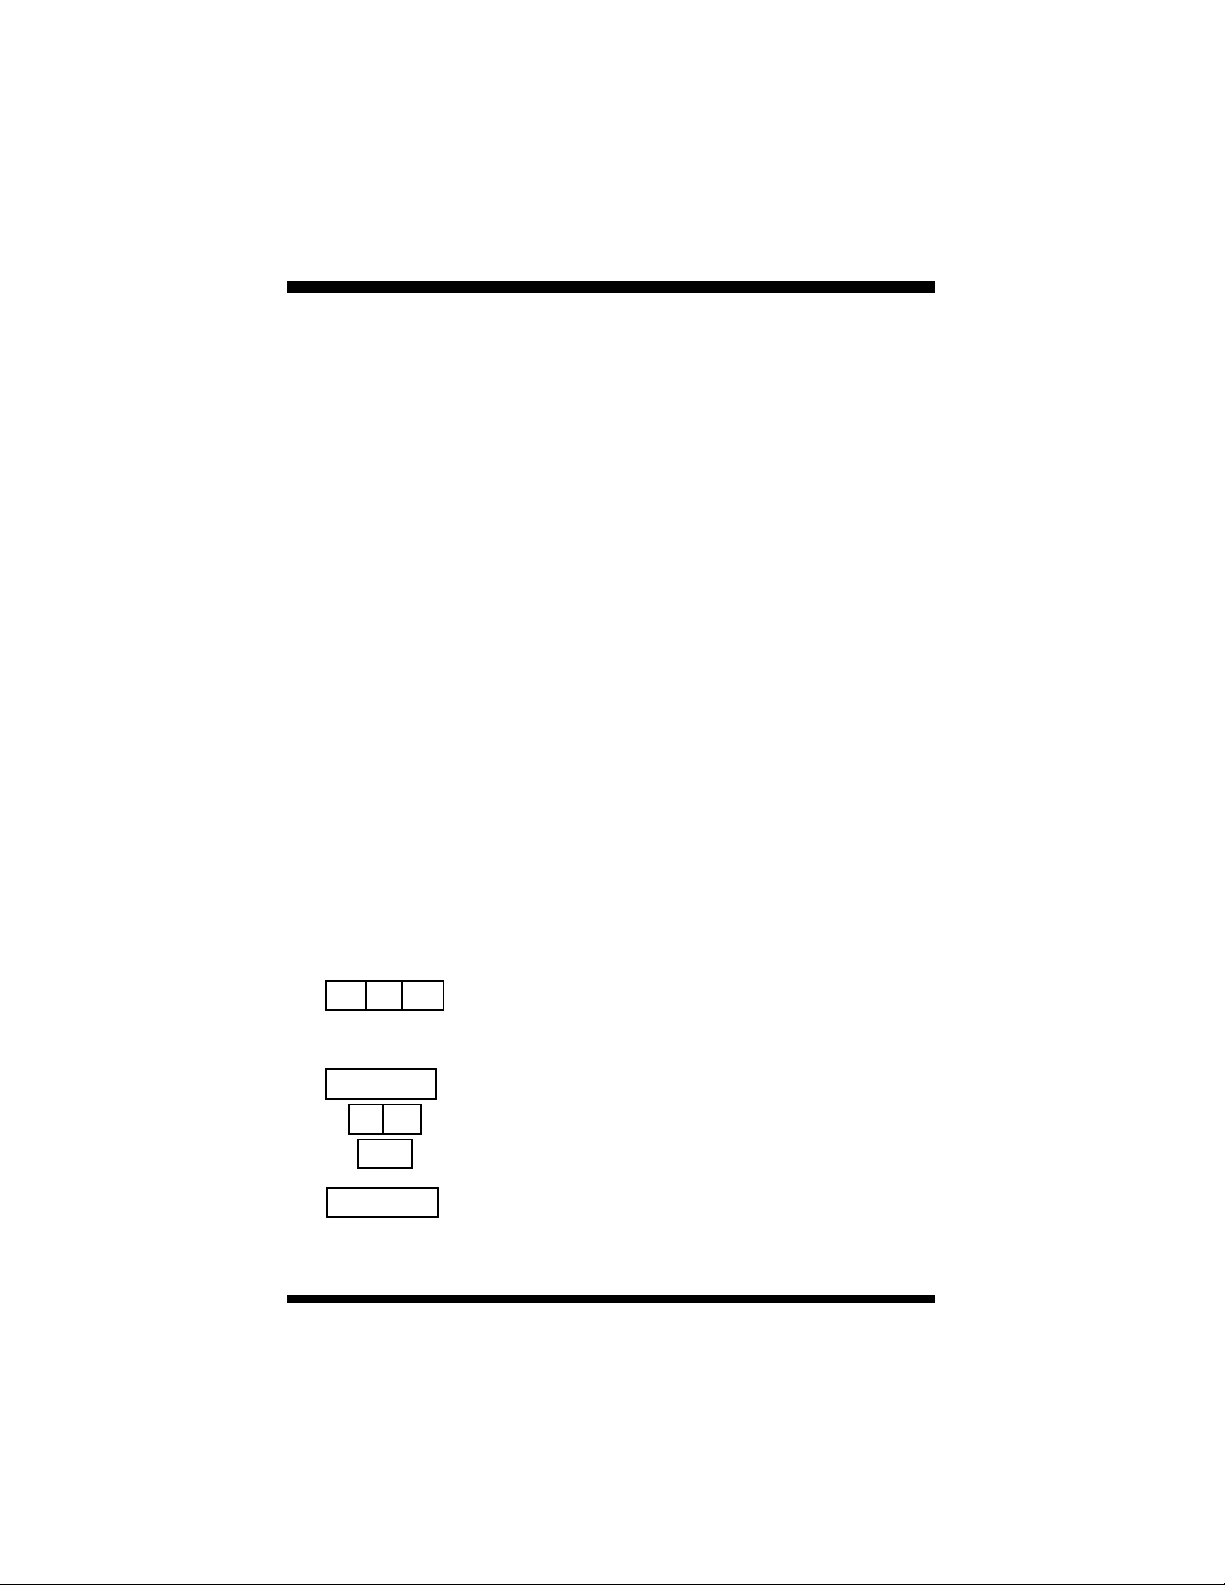
8 / Voice Mail and Data Features
2. Data Features
Data features are only available to you if you have an Executive Data keyset.
This keyset model has a data port which you use to connect your keyset to your
personal computer.
Your telephone system administrator can advise you on the data applications
available to you. These might include communicating with other computers in
your company (as with a local area network); accessing a shared modem for
data communications outside your company; and CTI (Computer Telephony
Integration) applications, such as ProtegéDial.
Depending on how your company’s Protegé phone system has been configured
you may or may not require human intervention at a destination extension to
answer a data call.
Use the Data Call feature to place a data call to another extension or data UCD
group without first establishing a voice call. The feature code (Function key,
dial 66) must be programmed under a feature key.
Use the Data Rate Selection feature to select the speed at which data is transmitted over the data port of your keyset. Baud rate selection is from 2400,
4800, 9600 and 19200 bps.
Because data information is carried on a different channel of your keyset’s telephone cord, you can send and receive data traffic independent of making and
receiving voice calls.
x x x
FUNCTION
80
7 5
F3
CLEAR
Data Call
1. Keyset is in idle state.
2. Press the designated feature key.
3. Enter destination extension number.
Data Rate Selection
1. Keyset is in idle state.
2. Press the Function key and then dial 75.
3. Select the Baud rate. Press soft key F3 below
the word “chg” to scroll through the options.
4. Press the Clear key to exit when your chosen
rate is displayed.
Protegé®Keyset User Guide - with display
Page 85

Glossary
Class of Service
Your level of access to certain features. Your company’s phone system
may assign a different class of service to particular extensions, to
restrict access to certain features. See
also Tenant Group.
DSS
Direct Station Selection. Press a DSS
key to call or transfer to an internal
resource without dialing manually.
The internal resource can be a single
extension, or a group of extensions
such as a hunt group or paging
group. In a Protegé system, a DSS
key is a specially programmed dual
function feature key.
Hunt Group
A group of extensions with a common access number, organized in
such a way that calls “hunt” from
extension to extension to find a free
line. See also UCD.
Idle state
The condition of your keyset when
you are not using it, and when a call
is not coming in.
Intercom
An intercom call is a call between
extensions of your company’s phone
system.
Keyset
Another name for telephone.
Specifically, a phone with a number
of push buttons or “keys.”
LCD
Liquid Crystal Display. The display
screen of your telephone, which provides information on the status of
your keyset.
LED
Light Emitting Diode. The lights
next to the feature and dual function
feature keys. Depending on the
model, your keyset has a number of
single- or dual-colored LEDs. Each
provides information on the status of
the associated feature or dual function feature key. See also page 6.
Off-Hook
When you lift the handset you are
“going off-hook.” Early telephones
had a metal hook on which the handset hung. The modern technology of
the Protegé system means you can
now also go off-hook and on-hook
by pressing the Speaker key.
On-Hook
When the phone handset is resting in
the cradle. See Off-Hook.
Outside Line
See Trunk.
Protegé®Keyset User Guide - with display
81
Page 86

Glossary
Service Mode
The way calls are handled depending
on the time of day. For example,
your company’s phone system may
be configured so that in Day Service
Mode all incoming calls are routed
through the attendant. In Night
Service Mode, incoming calls may
be broadcast over a loud bell for
anyone to answer.
Station
Another word for extension.
System Administrator
The person responsible for your
company’s telephones. It may be an
outside business, or a person or
department at your company.
Essentially, whoever you go to to
report problems with your phone or
to request changes in your telephone
service.
Tenant Group
Tenant Groups are a way of grouping groups of extensions in a Protegé
phone system. For example, if several companies in a building share a
common phone system, each company’s extensions would form a Tenant
Group. See also class of service.
Tone
The audible sound your keyset
makes. There are many different
tones: for example, dial tone, ring
tone, busy tone, and error tone.
Trunk
A telephone line owned by the local
telephone company that connects
your office telephone system to the
outside world. Also known as an
“outside” line, or “c.o. line.”
UCD
Uniform Call Distribution. A Protegé
feature that accepts incoming calls
and routes them to a series or bank
of agents. See also Hunt Group.
Virtual Number
An extension number that is not
physically connected to a specific
keyset. This number might be programmed under a feature key of one
or several extension keysets. This
Protegé feature has many possible
applications. If your company’s
phone system uses virtual numbers,
consult your system administrator
for an explanation of how they work
in your location.
82
Protegé®Keyset User Guide - with display
Page 87

Index
Abbreviated Numbers - see Speed
Dial Numbers
ABR - see Automatic Busy Redial
Account Code 11, 15, 26, 55, 59
Agent Help 61
Agent Log Off/Log On 19, 20
Alarm clock 54
Alert 25
Answering Mach. Emulation 77, 79
Attendant, Calling the 22
Authority Code 36
Auto Answer 9, 66
Auto Conversation Record 77, 79
Auto Transfer Mode 39
Automatic Busy Redial 28
Automatic Hold 9, 37
Automatic Line Selection 63
Avoiding Calls 19
Background Music 76
Baud Rate 80
BGM - see Background Music
Blind Transfer 39
Busy Call Forward 11, 13
Busy Trunk (route) 33
Caller ID 9
Call Forward 11-18
- Password 68
- Answering Mach. Emulation 79
- Voice Call Allow 67
Call Me Messages 47
Call Park - see Transfer, No Ring
Call Indication 9
Call Pickup 10
Callback 33
Calling an Extension 21
Camp On 9, 35
Cancel All Call Forwards 12
Cancel Operations 70
Check Key Status 71
Check Keyset Feature Status 70
Class of Service 21, 36, 81
Cleaning 7
Clear Key 2, 3, 8
Conference 42
Data Call 80
Data Port 2, 3, 80
Data Rate Selection 80
Data Speeds 80
Dialing by Name 31
Dialing Speed Dial Numbers 30
Dialing Voice Mail 78
Dial pad 2, 3
Direct Call Forward 11, 12
Directed Call Pickup 10
Directories 31, 55
Directory Numbers 31
Display 2, 3
Distinctive Ringing 66
Diversion - see Call Forward
DND - see Do Not Disturb
DND Override 21, 22
Do Not Disturb 19, 21
- Premises Message 49
- Voice Call 67
Protegé®Keyset User Guide - with display
83
Page 88

Index
DSS 81
Dual Function Feature Keys 2, 3,
30, 71, 74
ECF - see External Call Forward
Exclusive Hold 37
Executive Data Model 19, 24, 25,
80, 81
External Call Forward 11, 15
Extinguish Voice Mail Light 77, 79
Feature Access 8
Feature Interaction 8
Feature Keys 2, 3
Feature Code Settings 72
Flash 32, 55
Follow Me Call Forward 11, 16
Forced Diversion 20
Forced Release 43
Forward 11
Forwarding to Voice Mail 77, 78
Function Key 2, 4
Group Call Pickup 10
Group Listen 53, 60
Group Page 45
Headset Operation 75
Headset Jack 2, 4, 75
Hold 37
- holding a conference 43
- holding an intercom call 38
- reminder 37
- retrieval order 37
- retrieval from 37
- system 37
Hold Key 2, 4, 8
Hot Key Pad 63
Hotline 63, 65
Hunt Group 11, 19, 22, 31, 53,
61, 81
ICLID - see Caller ID
Idle state 81
Individual Directory 31
Inserting Special Characters 32
Instant Dialing - see Hotline
Intercom 81
Intercom Key 9
Intercom Directory 31
Intrusion 23
Keyset 81
Last Number Redial 28
LCD 2, 3, 8, 81
LCR - see Least Cost Routing
Least Cost Routing 26, 30
LED 81
Lights, Understanding 6
LNR - see Last Number Redial
Lock/Unlock 69
Look Up Feature Codes 72
Loud Bell 10
Messages 21, 47-51, 77
- call me messages 48
- deleting a message 48
- leaving a message 47
- showing a message 48
Message Waiting Indication 47, 77
84
Protegé®Keyset User Guide - with display
Page 89

Index
Music on Hold 35
Mute 53, 60, 61, 75
Names for Speed Dial Numbers 55,
57
No Answer Call Forward 11, 14, 21,
77
No Ring Transfer 41
Off-Hook 81
Off-Hook Voice Announce 19, 24,
25
OHVA - see Off-Hook Voice
Announce
On-Hook 81
Outside Line 81
Outside Telephone Numbers -
storing 55
Paging 45
Parked Calls 39
Password 11, 68
Pause 32, 55
Personal Message - creating 50
Pickup Group Number 10
Placing Outside Calls 26
Premises Messages 49
Preprogrammed Messages 47
Preset Follow Me Call Forward 11,
16
Preventing Unauthorized Calls 68
Private Conversation 53
Private Talk 42
Programming Feature Keys 71
Pull Out Tray 2, 4
Pulse Dialing 32
Recall, Automatic Transfer 39
Redial Key 2, 5, 28
Redialing 28
Reminder Service 54
Remote Follow Me Call Forward
11, 17
Ring Cadences 66
Saved Number Redial 29
Screened Transfer 39
Security68
Service Mode 82
- in hotline programming 65
Setting Additional Call Fowards 18
Setting the Feature Keys 71
SNR - see Saved Number Redial
Soft Keys 2, 5
Speaker Key and Light 2, 5
Speakerphone 2, 5
Special Dialing 32
Speed Dial Numbers 31, 55, 71
Station 82
Station-to-Station Messages 47
Storing Telephone Numbers 55
Supervisor - Hunt Group Features
61
System Administrator 82
System Directory 31
System Hold 37
Tenant Group 82
Text Messages 47
Time Reminder 54
Protegé®Keyset User Guide - with display
85
Page 90

Index
Toll Restriction 36
Tone 82
Tones, Understanding 7
Transferring Calls 39
Transferring to Voice Mail 77
Travelling Class of Service - see
Authority Code
Trunk 82
Trunk (Route) and Speed Dial
Numbers 30, 56
UCD Agent Help61
UCD Route Override 62
Unlocking Your Phone 69
Unsupervised Conference 44
UCD 82
Urgent Calls 35
User Password - see Password
User Saved Number Redial 29
USNR - see User Saved Number
Redial
Virtual Number 10, 21, 82
Voice Call 19, 21, 67
Voice Mail 11, 21, 77
Voice to Ring Interchange 21, 22
Volume Keys 2, 5
Wait-for-Dial Tone 32
Work Group - Pickup a Ringing
Extension 10
Xfr/Conf Key 2, 5
86
Protegé®Keyset User Guide - with display
Page 91

Notes
Protegé®Keyset User Guide - with display
89
Page 92

Notes
90
Protegé®Keyset User Guide - with display
Page 93

Notes
Protegé®Keyset User Guide - with display
91
Page 94

Notes
92
Protegé®Keyset User Guide - with display
Page 95

QUICK GUIDE TO NUMBERING
RESOURCE DIRECTORY NUMBERS DIRECTORY NUMBERS
Extension Numbers 200 - 399 _______________
Trunk Numbers 700 - 799 _______________
Trunk Groups 100 - 129 _______________
Page Groups 400 - 429 _______________
External Paging 820 - 829 _______________
Pickup Groups 460 - 489 _______________
System Speed Dial Numbers 600 - 699 _______________
Individual Speed Dial Numbers 500 - 599 _______________
Hunt Groups 430 - 459 _______________
Background Music 800 - 801 _______________
Loud Bell 810 - 811 _______________
Virtual Numbers 830 - 859 _______________
Voice Mail Access _______________
Night Ring Pick Up _______________
Least Cost Routing _______________
DEFAULT PROTEGÉ YOUR COMPANY’S
INDIVIDUAL SPEED DIAL NUMBERS
NUMBER A
500 ______ ____________________________________
501 ______ ____________________________________
502 ______ ____________________________________
503 ______ ____________________________________
504 ______ ____________________________________
505 ______ ____________________________________
506 ______ ____________________________________
507 ______ ____________________________________
508 ______ ____________________________________
509 ______ ____________________________________
CTUAL DET
AIL
Page 96

QUICK GUIDE TO FEATURE CODES
Feature Code
ACCOUNT CODE ENTRY F71
A
GENT LOG OFF
LERT F50
A
A
UTHORITY CODE F55
UTO ANSWER O
A
UTO TRANSFER
A
UTOMATIC BUSY
A
UTOMATIC LINE SELECTION F95 (ON)
A
ALL FORWARD F2
C
C
ALL P
ALLBACK -
C
C
ANCEL
HECK F
C
IRECTORY DIALING BY NAME F52
D
D
ISTINCTIVE
O N
D
UAL
D
EATURE
F
LASH -
F
EADSET
H
OLD (A
H
OLD
H
OLD (SYSTEM)HOLD (ON)
H
OT
H
H
OTLINE ON/OFF F9*
/ON F91 (OFF)
N/OFF F6*
MODE F54
REDIAL F78
(
CANX ALL) F20
ICKUP F53
CANCEL F*#5 (INDIV
OPERATIONS F69
TATUS F#8
EATURE S
RINGING F#7
OT DISTURB
FUNCTION KEY
(DND) ON/OFF
PROGRAMMING F#1
KEY PROGRAMMING F#3
INSERT A F3
OPERATION F9# (
UTOMATIC) F94 (
(EXCLUSIVE
)FHOLD (
TO RETRIEVE CALL) F7*
(
KEYPAD
F*91 (
F*95 (
F*#5* (
F4
F*9# (
F*94 (
F7* (
F93 (ON)
F*93 (
ON)
ON)
OFF
ON)
OFF)
OFF)
OFF)
OFF)
Feature Code
INTERCOM ACCESS F65
L
AST NUMBER REDIAL
EAST COST ROUTING (LCR) F67
L
OCK/UNLOCK F97
L
ALL)
ON)
)
L
OOK UP FEATURE
ESSAGES - DELETING F*#9 (
M
ESSAGES - PREMISES F90 (
M
UTE ON/OFF F76
M
AGING - ANSWER F59
P
P
AGING - RECEIVE SELECTION F*99 (ON)
.)
ASSWORD C
P
AUSE - INSERT A F70
P
P
ULSE TO TONE CONVERSION
EMINDER S
R
S
AVED
PEED D
S
RANSFER
T
TRANSFER (N
UCD A
UCD M
UCD R
NSUPERVISED CONFERENCE F77
U
SER SAVED NUMBER REDIAL (USNR) F5*
U
V
CALLS F98 (ON)
OICE
OICE TO RING INTERCHANGE 2
V
W
AIT-FOR-DIAL TONE - INSERT A F79
CODES F#5
HANGE F97
ERVICE F92 (ON
NUMBER REDIAL (SNR) F51
IAL NUMBER
GENT H
ONITOR F58
OUTE O
PROGRAMMING F1
O RING), P
TO RETRIEVE CALL
(
ELP F61
VERRIDE F6#
(LNR) F8
LACING A F73
) F53
F*#9*(
F*90 (
F99 (
*
F*92 (
HOLD
XFR/C
F*6# (
F*98 (
INDIV.)
ALL)
LV)
DEL)
OFF)
)
OFF)
ONF
CANCEL
OFF
)
)
 Loading...