

Springs Window Fashions RTS Motorized Shade Owner's Manual
Owner’s Manual
RTS Motorized Shades
Table of Contents
About Your Motorized Shade .............................................................................................3
Basic Shade Control .................................................................................................. 3
Control Features .......................................................................................................4
Shade Adjustments ............................................................................................................. 5
Adjusting Your Shade’s Default Upper Limit ............................................................ 5
Adjusting Your Shade’s Default Lower Limit ............................................................6
Adjusting Your Shade’s “MY” Position .....................................................................7
Adding Additional Controls ................................................................................................ 8
The Copy & Paste Sequence .................................................................................... 8
Adding a Control or Channel....................................................................................9
Deleting a Control or Channel ................................................................................ 10
Creating Group Control ..........................................................................................11
Pair a New Remote to Simple Motorized Shade .............................................................. 12
Rechargeable Motor Sleep Mode ..................................................................................... 13
Activating and Deactivating Sleep Mode ............................................................... 13
Shade Adjustments on Rechargeable Motor .................................................................... 14
Adjusting Your Shade’s Default Upper Limit .......................................................... 15
Adjusting Your Shade’s Default Lower Limit ..........................................................16
Adjusting Your Shade’s “MY” Position ...................................................................16
Rechargeable Motor Control Options ..............................................................................17
Adding a Control or Channel..................................................................................17
Deleting a Control or Channel ................................................................................ 18
Creating Group Control ..........................................................................................19
Helpful Tips and FAQs ................................................................................................20–22
Contact Information .......................................................................................................... 23
Your controls have been programmed by Springs Window Fashions to control your shade. The
upper and lower limits and “MY” position have already been set. If you are not satised with
!
any default upper, lower, or “MY” position of your shade, see steps in the following sections of
this manual.
2
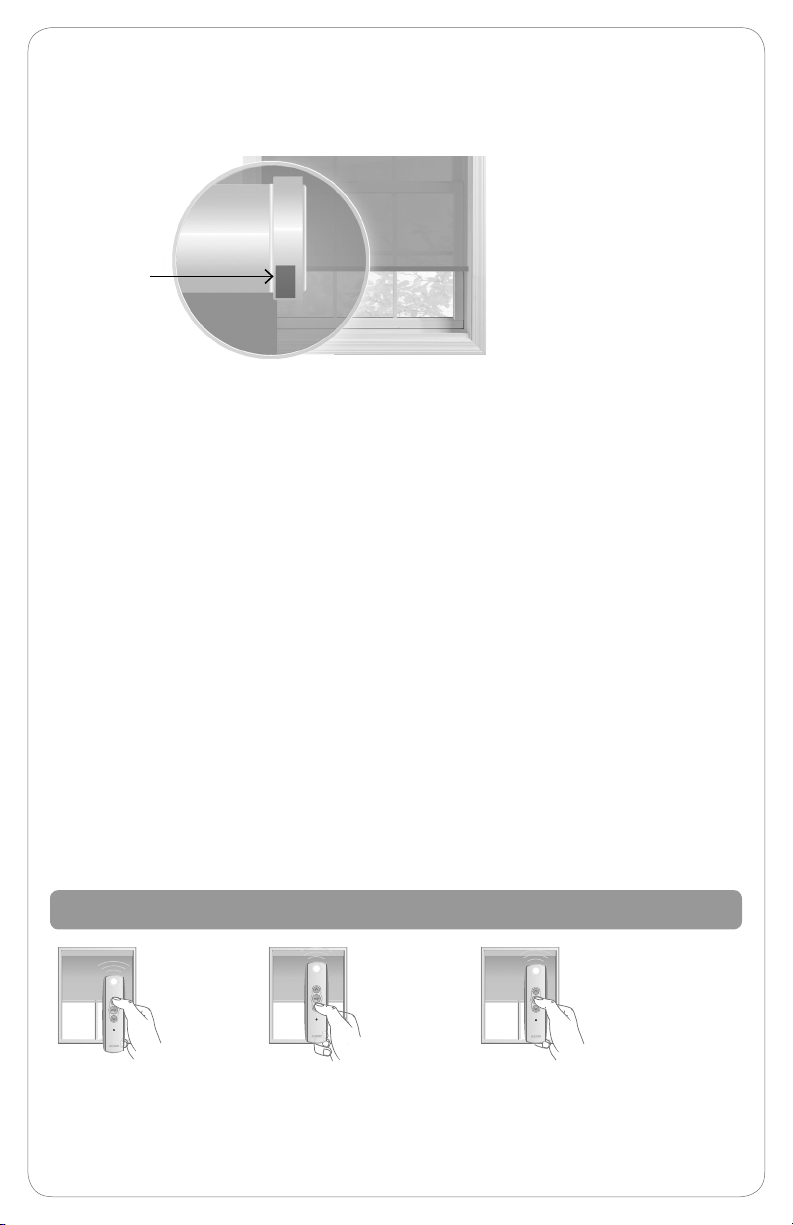
Please be sure to read and remove the securing tape and label before operating your motorized shade.
For initial unpacking of the
rechargeable motor, wake up
the motor by briey pressing
the motor head programming
button or plugging in the
charger. The product briey
Motor Head
Programming
Button
moves up and down to conrm
activation.
About Your Motorized Shade
Motorized shades offer a convenient solution to everyday challenges. They provide
instant privacy, glare reduction, and eliminate the need to manually adjust shades.
Motorized shades also eliminate dangerous cords and create a comfortable and
energy-efcient environment. What’s more is that you will get more enjoyment from
your home because motorized control of your shades is so effortless and features
Radio Technology Somfy® (RTS). RTS is omnidirectional and operates within a range of
65 feet, which eliminates the need to point or aim the remote at the motorized shades.
RTS also offers a wide range of controls and accessories that are designed to work
together, so you can always mix and match to create the perfect setting. Explore the
information within this guide to make the most of your motorized shades.
The term “shade” will be used throughout this manual to refer to your motorized
window covering, either a motorized blind or shade.
NOTE: Motorized horizontal blinds have motorized tilt for the slats only. Raising and
lowering the blinds is manual with cord lift.
NOTE: Rechargeable motor setup information can be found on page 14.
Basic Shade Control
Press and release the
UP button to fully open
the motorized shade.
Press and release the
DOWN button to fully
close the motorized shade.
Press the “MY” button to send the
shade to the favorite programmed
position. See page 4 for “MY”
programming instructions.
3
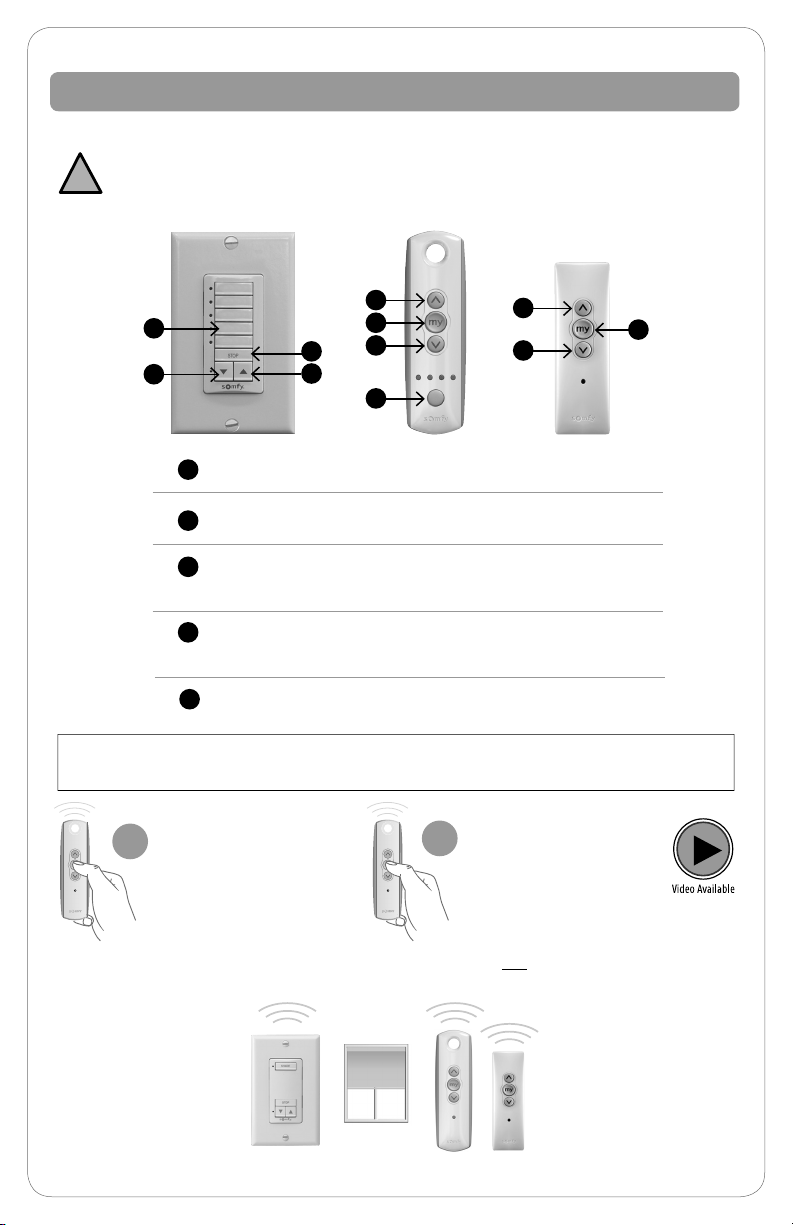
Control Features
Operate your shade with your handheld remote or wireless wall switch control.
Your controls have been programmed by Springs Window Fashions to control your shade. The
upper and lower limits and “MY” position have already been set. If you are not satised with
!
any default upper, lower, or “MY” position of your shade, see steps in the following sections of
this manual.
1
4
5
2
1
UP Button
2
DOWN Button
3
Channel Selector Button: All four lights will illuminate
1
5
2
3
1
5
2
when fth channel is activated.
4
Channel selected by pressing individual or multiple
channel buttons. LED will illuminate when selected.
5
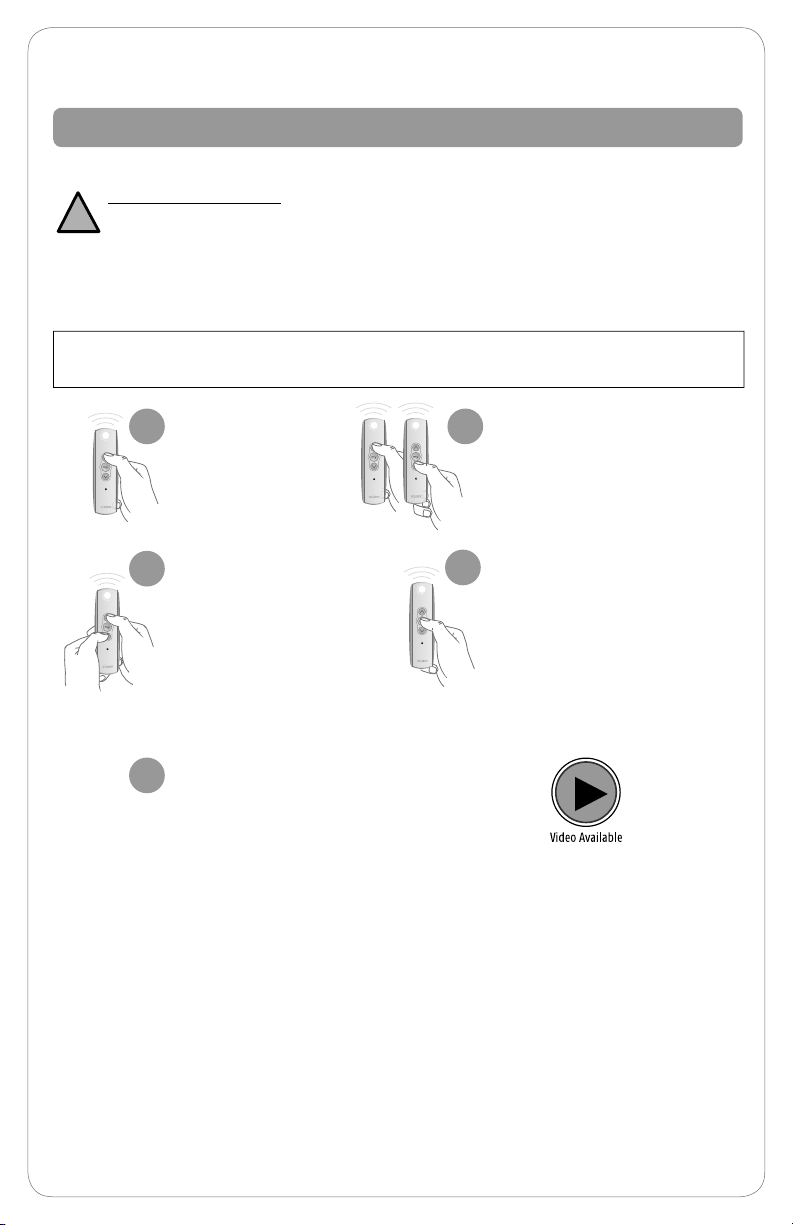
“MY”/STOP Button
“MY” button: Acts as a “STOP” button while shade is in motion. It can also be
programmed as a quick way to bring shades to your preferred intermediate position.
Pushing “MY” while
1
your shade is at rest will
bring your shade to your
“MY” position.
Pushing “MY” while the
2
shade is in motion will
simply STOP the shade.
NOTE: Pushing the “MY” button too long, if your shade is not in motion, will change
your preferred intermediate position.
4
Individual control of same shade with multiple controls
Shade Adjustments
Adjusting Your Shade’s Default Upper Limit (OPTIONAL)
If you would like to adjust your shade’s default upper limit
*PRODUCT SAFETY NOTE:
• For Cellular, Pleated, Roman, and Natural Shades - Adjusting the motor too
!
tight can cause the motor to fail and/or break/fray the internal cording.
• For Solar and Roller Shades - Be sure the hembar does not lift into the fascia or cassette,
this could cause the hembar to get stuck and/or damage the fabric.
• For Sheer and Layered Shades - Make sure the bottomrail does not lift into the cassette.
• If your shade will not raise to your desired upper limit, contact a customer service agent for assistance.
Before you start. If your remote currently operates a group of shades, you rst need to
disconnect power to all other shades to prevent unwanted adjustments.
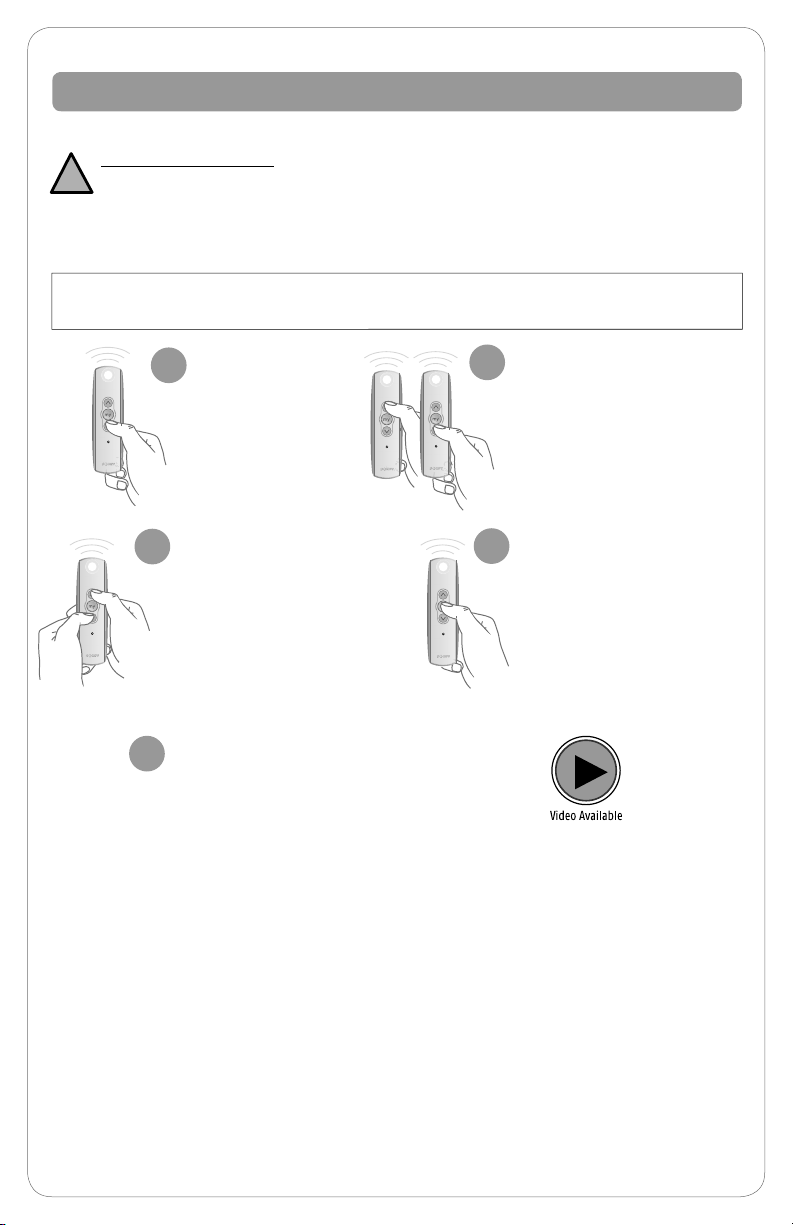
Briey press UP
1
and release. Allow
the shade to
reach its default
upper limit.
Once the shade stops, press
2
and hold UP and DOWN at the
same time for approximately
5 seconds. When the shade
jogs, release both buttons.
A jog is a brief up and down
movement of the shade. This
means you’ve put the shade
into programming mode.
If you need to adjust another
5
shade’s upper limit, go back to
the Before You Start section and
repeat the steps for
each shade.
Adjust your upper limit by using
3
UP or DOWN to move your shade
to your new desired upper limit.*
The shade will only move while UP
or DOWN is being pressed while
in this adjustment mode.
When the shade is stopped
4
at your new desired upper
limit, press and hold “MY”
for approximately 3 seconds.
When the shade jogs,
release the “MY” button.
You have now saved your
new upper limit.
5
Adjusting Your Shade’s Default Lower Limit (OPTIONAL)
If you would like to adjust your shade’s default lower limit
*PRODUCT SAFETY NOTE:
• For Cellular, Pleated, Roman, Roman and Natural Shades - Extending the shade beyond the ordered
!
limits can cause shade damage.
• For Sheer and Layered Shades - Changing the lower limits will change the “MY” position for the
shade. See following page to adjust “MY” position.
• If your shade will not lower to your desired lower limit, contact a customer service agent for assistance.
Before you start. If your remote currently operates a group of shades, you rst need to
disconnect power to all other shades to prevent unwanted adjustments.
Briey press
1
DOWN and
release. Allow the
shade to reach its
default lower limit.
Once the shade stops, press
2 4
and hold UP and DOWN at the
same time for approximately
5 seconds. When the shade
jogs, release both buttons.
A jog is a brief up and down
movement of the shade. This
means you’ve put the shade
into programming mode.
If you need to adjust another
5
shade’s lower limit, go back to
the Before You Start section
and repeat the steps for
each shade.
Adjust your lower limit by
3
using UP or DOWN to
move your shade to your
new desired lower limit.*
The shade will only move
while UP or DOWN is
being pressed while in
this adjustment mode.
When the shade is stopped
at your new desired lower
limit, press and hold “MY”
for approximately 3 seconds.
When the shade jogs,
release the “MY” button.
You have now saved your
new upper limit.
6
Adjusting Your Shade’s “MY” Position (OPTIONAL)
Your control has been programmed by Springs Window Fashions to control
your shade. The “MY” position has been set, and you may choose to adjust this
setting. When adjusting the “MY” position on your product sharing a channel,
it is important to adjust each individually. Disconnect the power to all products
that share a channel to avoid unwanted programming. After adjustments are
made, reconnect power to begin operation.
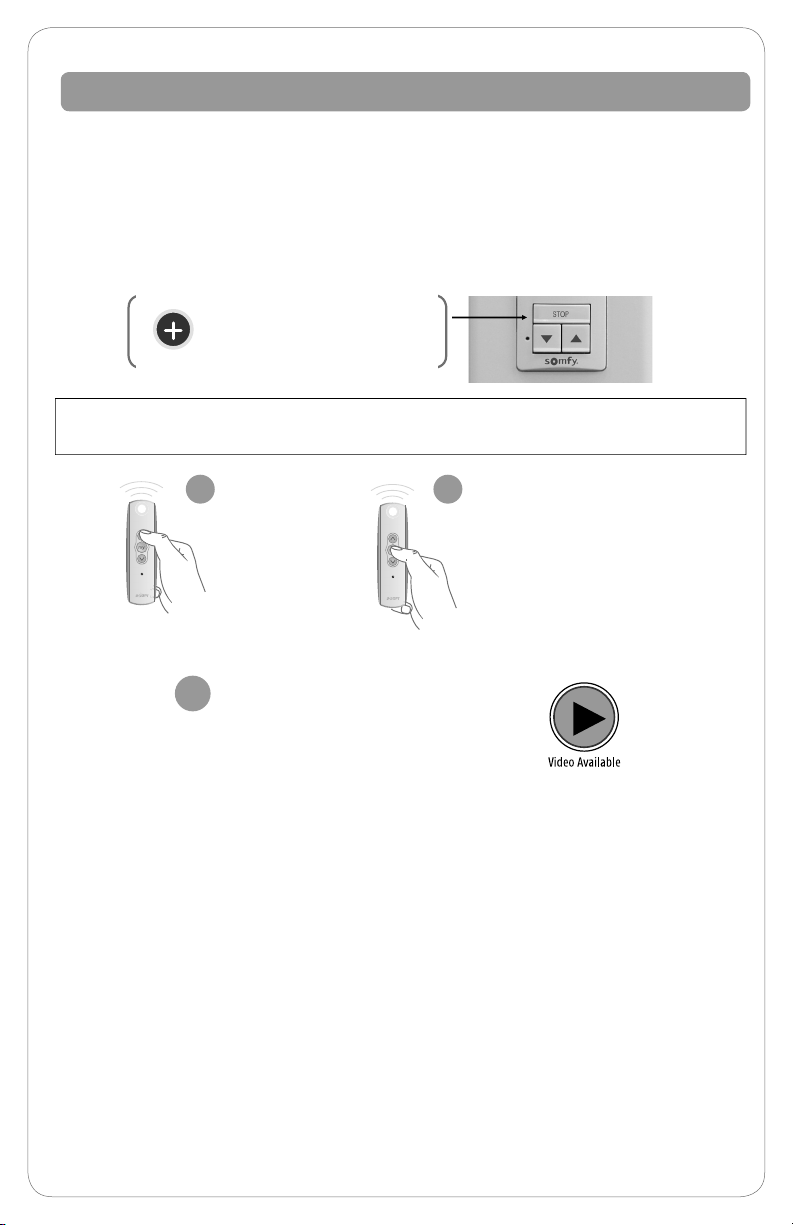
y
f
On the DecoFlex WireFree™ RTS
m
o
Wall Switch, the STOP button
s
functions and programs the same
as the “MY” button.
Before you start. If your remote currently operates a group of shades, you rst need to
disconnect power to all other shades to prevent unwanted adjustments.
Using UP or
1
DOWN, put your
shade in motion.
When it reaches
your desired “MY”
position, press and
release “MY”
to stop the shade.
If you need to adjust another
3
shade’s “MY” position, go
back to the Before You Start
section and repeat the steps
for each shade.
When the shade is
2
stopped at your new
desired “MY” position,
press and hold “MY” for
approximately 5 seconds.
When the shade jogs,
release the “MY” button.
You have now saved your
new “MY” position.
Sheer Shades - The default home position is preset to shade lowered and vanes closed.
Layered Shades - The default home position is preset to shade lowered and vanes open.
To change or adjust the home position, use the UP or DOWN button to reach the
desired position and then press and hold the “MY” until the shade jogs.
7
Adding Additional Controls
The Copy & Paste Sequence
The basic sequence of copy and paste allows you to add new remotes to your shade
and to create groups of shades that will operate together.
y
f
m
o
s
In this sequence, you may copy and paste from one control to another control or
from one channel on a control to any other channel either on the same control or
on a new control.
A channel is used to operate motorized shades with
controls. A channel is either associated with a single
motorized shade covering or group of motorized shades.
8
 Loading...