


Spreedbox
Getting Started Guide
Last Updated: September 2017

Getting Started Guide
Spreedbox Pty. Ltd. Page 2
CONTENTS
1. Introduction .................................................................................................................................... 3
2. Prerequisites ................................................................................................................................... 4
3. Opening the box .............................................................................................................................. 5
4. USB Manual, Quick Start Guide & MAC Sticker .............................................................................. 6
5. International Power Plugs, Wireless USB Adapter & Micro SD Memory Adapter.......................... 7
6. Preparing Wi-Fi and Ethernet (CAT5) cable .................................................................................... 8
7. Connecting the Power Supply ......................................................................................................... 9
8. Connecting to your Network ......................................................................................................... 10
9. Spreedbox is ready to run ............................................................................................................. 11
10. Accessing your Spreedbox from the Internet ........................................................................... 18
11. SSH Access ................................................................................................................................. 19
12. Allowing access to your Spreedbox .......................................................................................... 20
13. TURN server .............................................................................................................................. 21
14. Wi-Fi Hotspot Connection ......................................................................................................... 23
15. Links .......................................................................................................................................... 24
16. Terminology .............................................................................................................................. 24
17. Advanced................................................................................................................................... 25
Adjusting the Time Zone ................................................................................................................... 26
18. Troubleshooting ........................................................................................................................ 26
Identifying the Local IP Address of your Spreedbox ......................................................................... 26

Getting Started Guide
Spreedbox Pty. Ltd. Page 3
1. Introduction
This Guide will help you get your Spreedbox up and running in minutes. There are extensive
tips contained in this Guide that will make setting up your Spreedbox quick and easy.
You should think of your Spreedbox as another computer that you are adding to your
organization’s network. The same considerations will apply - such as using network cables
(CAT5) or using wireless, configuring your network router, configuring firewalls, knowing
about DNS settings, port redirections and anti-virus settings. Having this knowledge of your
network and network security handy will let you configure your Spreedbox quickly.
This Guide is supplementary to the official “Quick Start Guide” manual [url] - which should
be used as the main guide for installing your Spreedbox. Once you have your Spreedbox
connected on your network, then you should be able to access your Spreedbox’s
configuration page using any web browser via the following URL:
https://spreedbox
NOTE: Some manuals in older versions of Spreedbox may not be up to date and may reference
http://spreedbox:8000. Contact your Reseller to clarify the version of your Spreedbox
firmware.
In some cases, the above URL will not be able to access your Spreedbox’s configuration page.
The reason is typically your organisation’s network and settings are not allowing
https://spreedbox to be exposed on your network. In such situations, the primary challenge
for you to successfully install your Spreedbox is to find out the IP address of your Spreedbox
on your network. This Guide will provide several ways to help you obtain that knowledge and
complete the process of installation.

Getting Started Guide
Spreedbox Pty. Ltd. Page 4
2. Prerequisites
Become familiar with your organisation’s network. You may need to know about
wired or wireless connection points, username/passwords to access your network,
DNS servers, gateways, your network router(s), your firewall, etc.
Make sure you can access your network’s router configuration page. You will need to
know its URL and username/password.
Make sure you can access your organisation’s firewall in case you need to configure it
so that your Spreedbox can access the internet.
Use a desktop or laptop computer connected to your local network so you can use a
web browser to access Spreedbox configuration page, router configuration page, etc.
A smartphone or tablet is also be suitable.
Make sure you have a working internet connection and that it is available to
computers on your network.
Find out the public / static IP address(es) or domain name of your network if you wish
to access your Spreedbox outside of your network.
Getting Started Guide
Spreedbox Pty. Ltd. Page 5
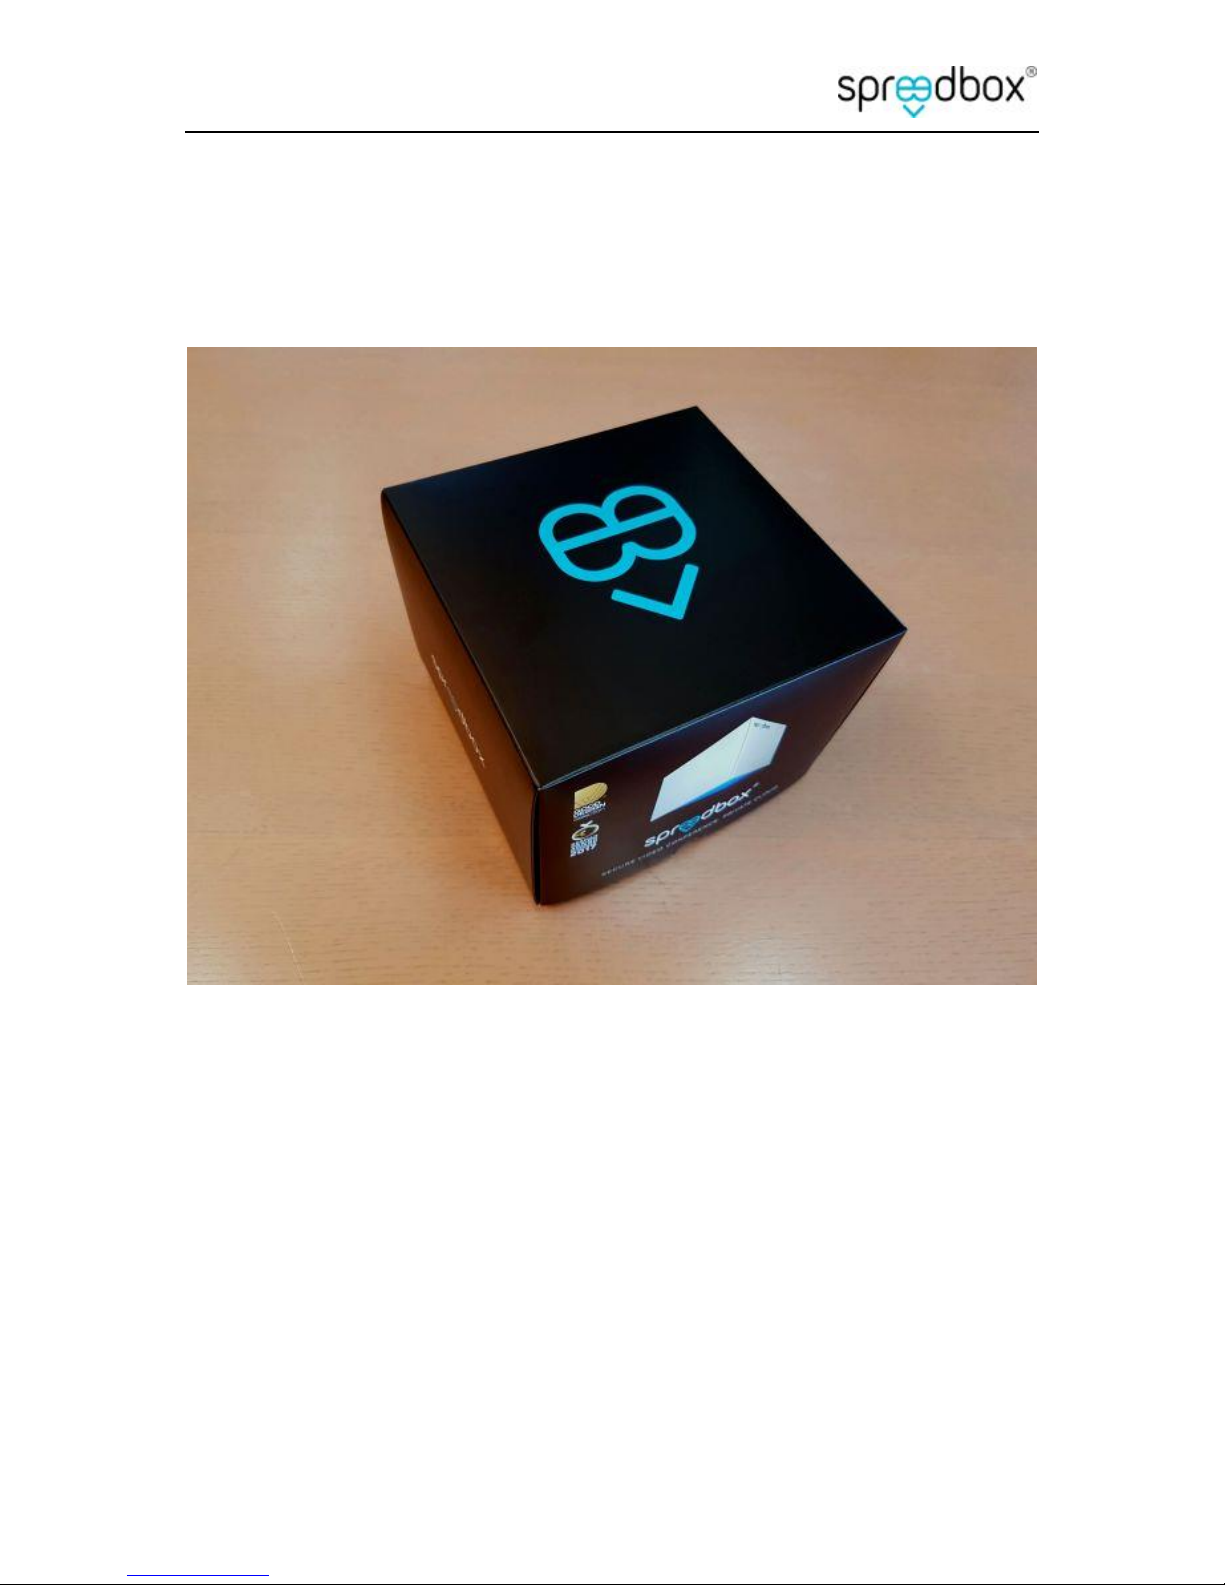
3. Opening the box
Getting Started Guide
Spreedbox Pty. Ltd. Page 6
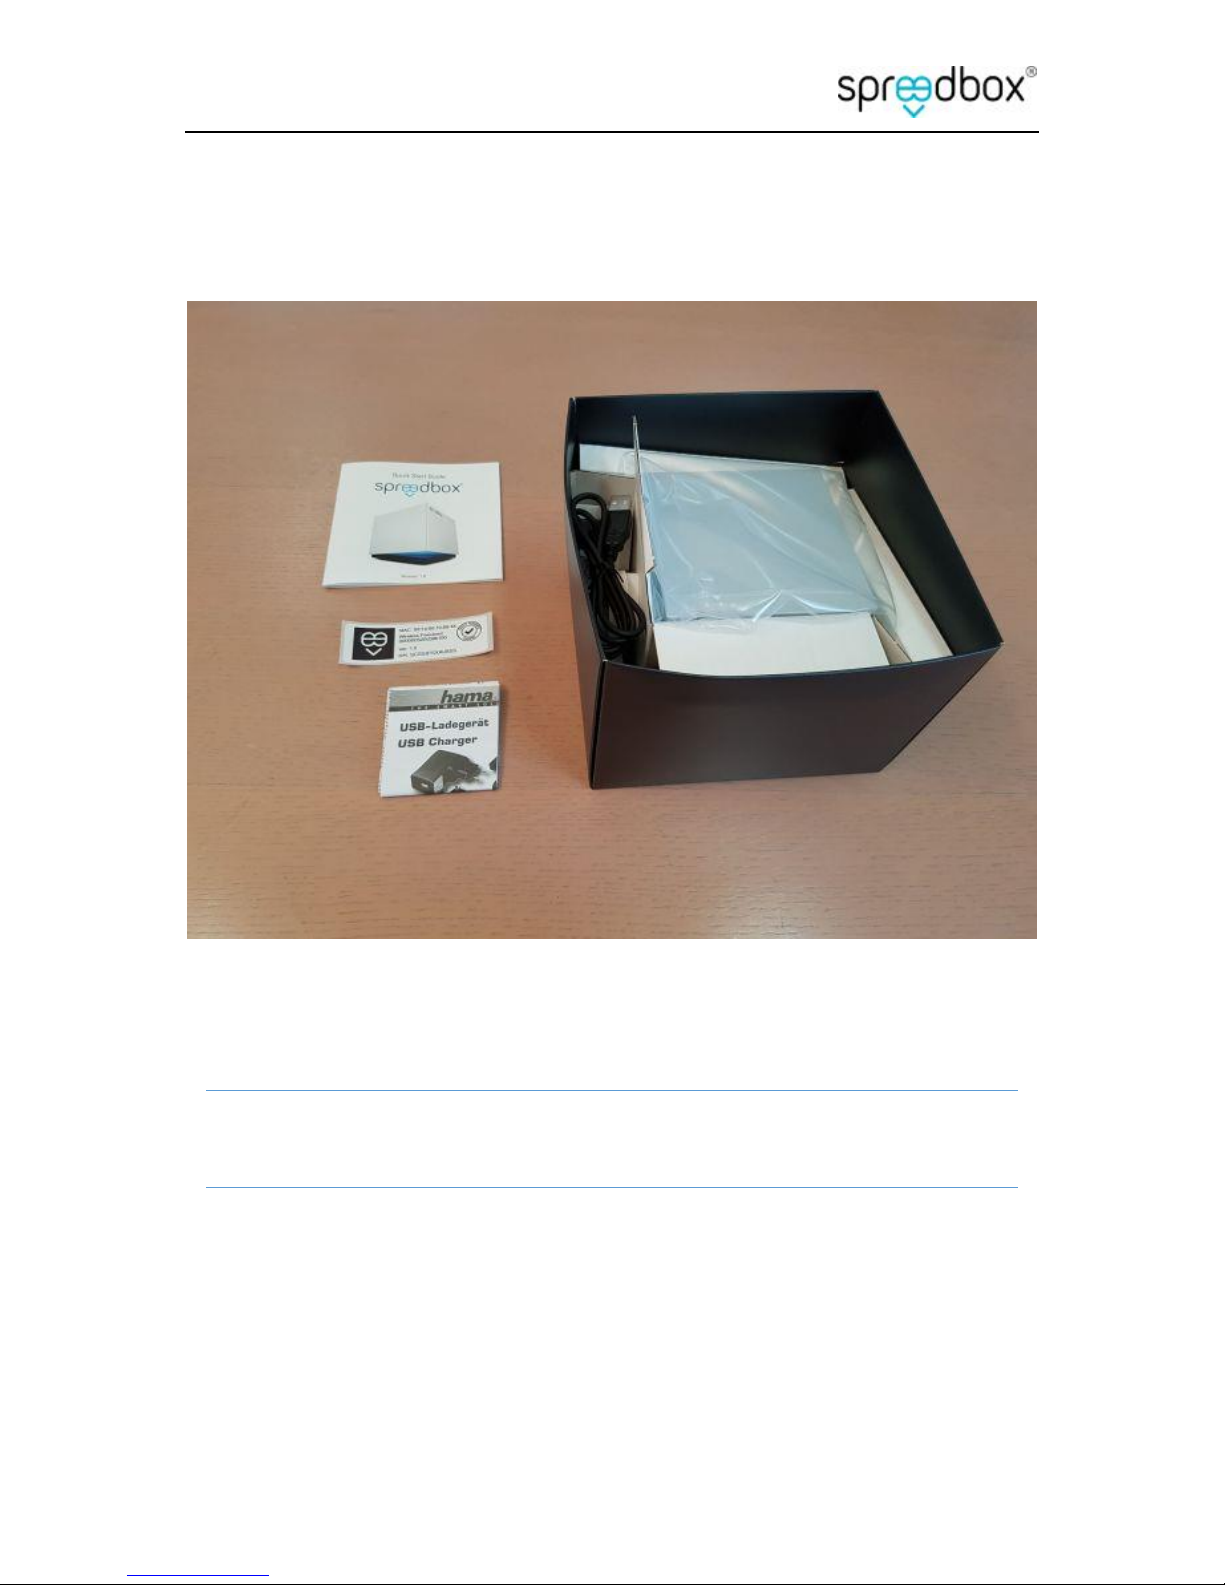
4. USB Manual, Quick Start Guide & MAC Sticker
Keep your purchase receipt, Spreedbox manual and warranty card in a safe place.
Affix your unique serial number sticker onto the bottom of your Spreedbox.
TIP: Page 3 of the “Quick Start Guide” booklet contains the MAC address, Wireless
communication password and Serial number for your Spreedbox

Getting Started Guide
Spreedbox Pty. Ltd. Page 7
5. International Power Plugs, Wireless USB Adapter & Micro
SD Memory Adapter
Micro SD Memory Adapter – used when updating Spreedbox firmware.
Wireless USB Mini Adapter - insert USB dongle adapter into one of Spreedbox’s USB
ports.

Getting Started Guide
Spreedbox Pty. Ltd. Page 8
6. Preparing Wi-Fi and Ethernet (CAT5) cable
Wireless USB Mini Adapter has been inserted to a USB port.
Ethernet cable (CAT5) is connected into your Spreedbox and connected to your
network.

Getting Started Guide
Spreedbox Pty. Ltd. Page 9
7. Connecting the Power Supply

Getting Started Guide
Spreedbox Pty. Ltd. Page 10
8. Connecting to your Network

Getting Started Guide
Spreedbox Pty. Ltd. Page 11
9. Spreedbox is ready to run
Power up your Spreedbox.
Wait until the LED light at the base of your Spreedbox turns to steady blue color.
Open a web browser on your computer, laptop, smartphone or tablet and go to the
following URL:
https://spreedbox
or if you have bonjour or zeroconf on your computer you can try:
https://spreedbox.local

Getting Started Guide
Spreedbox Pty. Ltd. Page 12
NOTE: Make sure your computer, laptop, smartphone or tablet are connected to your network.
If the web page is not found, see the Troubleshooting section.
TIP: Ignore any web browser warnings about not secure connection. It is normal and expected
behaviour since your Spreedbox is not equipped yet in all required SSL Certificates. Settings SSL
certificates is described in further tutorials.
You will need to specify a username and password to create an admin account to access the
Spreedbox, after entering the username and password click ‘Finish Setup’.
Getting Started Guide
Spreedbox Pty. Ltd. Page 13
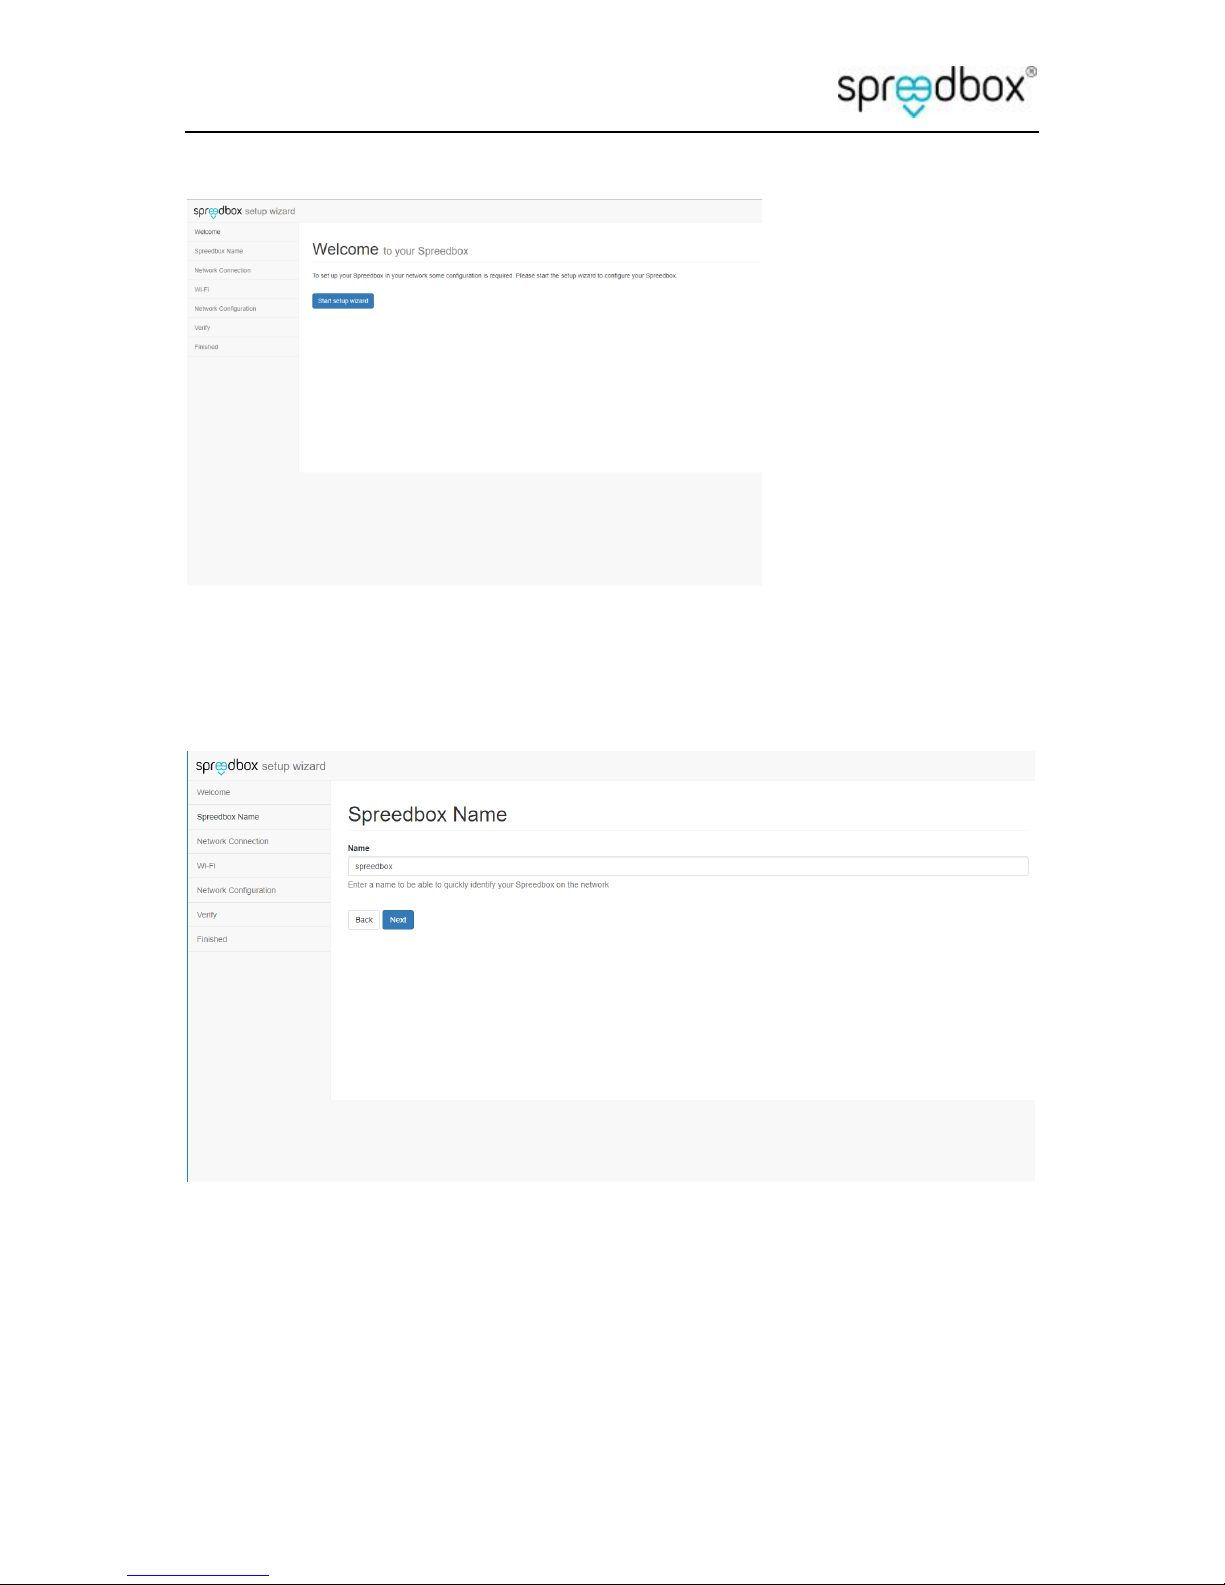
You will then be taken to the setup wizard where you can specify the name and network
configuration for the Spreedbox, click ‘Start setup wizard’ to begin
You can specify a unique name for your spreedbox or leave the name as the default spreedbox
then click ‘Next’.

Getting Started Guide
Spreedbox Pty. Ltd. Page 14
Select the network interface you wish to use to connect the Spreedbox to your network and click
‘Next’.
If you selected eth0 you will see:
You will have the choice of using DHCP to connect to the network or you can check the box to
‘Configure manually’ to specify the network settings yourself.

Getting Started Guide
Spreedbox Pty. Ltd. Page 15
If you selected wlan0 you will see:
Select the wifi network you want to connect to, or enter the SSID if it is hidden, and then enter the
passphrase then click ‘Next’
To configure manually you will need to enter the IP address, network mask, gateway and DNS servers
(check with your network administrator if you do not know these details) then click ‘Next’.

Getting Started Guide
Spreedbox Pty. Ltd. Page 16
Review the information then click ‘Apply configuration’ to active the settings. Optionally you can
check the box to apply the configuration without automated validation, this is useful if there are
problems validating the configuration.
You will then see a page with a countdown indicating that the configuration is being checked, if all
goes well a page indicating that the configuration was successfully applied will be shown. If a
problem occurs you will see a page stating that the configuration could not be validated and you can
go back and check your settings.

Getting Started Guide
Spreedbox Pty. Ltd. Page 17
Once the setting are applied you will see a page where you have the option to ‘Start using your
Spreedbox’ or ‘Advanced setup’, click on ‘Advanced setup’.
Advanced setup allows you to modify LED settings, re-configure the network and activate services
like SSH. Select Services so that we can activate SSH.

Getting Started Guide
Spreedbox Pty. Ltd. Page 18
Check the box to enable SSH then click ‘Save’ then select ‘Home’ and click on ‘Start using your
Spreedbox’.
Your Spreedbox is ready! You can now use the features of your Spreedbox on your
network.
NOTE: Accessing your Spreedbox from outside your network requires a static IP address or
domain name and some further configuration. See below.
10. Accessing your Spreedbox from the Internet
If you have a public IP address that can be accessed from the Internet then you can setup your
network to allow requests to be forwarded to your Spreedbox. Go to the configuration page for
your router and either set the IP address of your Spreedbox in the DMZ section or in the port
forwarding section add rules to forward the ports to the IP address of the Spreedbox.
The Spreedbox uses the following ports for network traffic:
80 – For verifying certificates from Lets Encrypt
443 – For SSL traffic to and from the Spreedbox
3478 – For the Spreedbox’s internal TURN server
5222 – For the SecureIM server
5269 – For federated SecureIM messages

Getting Started Guide
Spreedbox Pty. Ltd. Page 19
Advanced Users. If port 80 or 443 is already in use by another web server on the network
then you may need to install a reverse proxy that will forward requests based upon the host
header.
The Spreedbox will require a public host name to be configured so that an SSL certificate can
be requested to remove the warning you see when accessing the Spreedbox. You can
purchase a domain name or use an existing domain name if you have one, you will need to
configure the domain name to point to your public IP address. If you do not have a domain
name you can use a service like no-ip.com to get a public domain name. If your Internet
connection uses a dynamic IP address then you will need to configure the Spreedbox to
update the DNS server with the current public IP address, see
https://help.ubuntu.com/community/DynamicDNS for information on how to set this up on
the Spreedbox.
11. SSH Access
If you are using a Windows PC then you will need to install SSH software so that you can connect
to the Spreedbox via a command line. You can download the putty client from
http://www.putty.org/
After successful installation, run the PuTTY application and enter the Spreedbox IP Address
into “Host Name (or IP address”. Click [Open] to connect to Spreedbox. A successful
connection will open a black Terminal Window and show a warning about the certificate of
the Spreedbox, you will need to accept the warning to continue connecting. You will be
prompted in the terminal window for the user name and the password, enter spreedbox for
both the username and password.
The default SSH username is spreedbox with password spreedbox.
Important: Change your password!
Change your common password right now. With SSH services enabled as above
Spreedbox may be vulnerable by anyone having access to your local network.
To change your Spreedbox password use SSH Terminal, with commands:
$ sudo passwd spreedbox
Enter new UNIX password: myNewPassord9876

Getting Started Guide
Spreedbox Pty. Ltd. Page 20
Close current SSH session, and open a new one using the new password at the
prompt.
12. Allowing access to your Spreedbox
The Spreedbox only allows access from trusted domain names so you will need to edit a text
file on the Spreedbox to allow access using your domain name. First you should install the
nano text editor by running:
sudo apt-get install nano
Press the y key if prompted to allow the installation.
In the SSH Terminal Window, type:
$ cd /etc/nextcloud [ENTER]
$ sudo nano additional_trusted_domains.conf
Using the text editor, add your Public Domain Name to the list, example:
#
# Run "spreedbox-update-trusted-domains" after …
my.domain.com
Save the file by pressing the CTRL key and X then press y to confirm the save and
enter to confirm the filename.
Run the command:
sudo spreedbox-update-trusted-domains
You will need to do the same for the file in /etc/letsencrypt.sh/domains.txt, edit this file with
nano and add your domain then save the file.
Run the following command to generate an SSL certificate:
letsencrypt.sh --cron
This will take several minutes while the keys are generated and the challenge request is sent
to verify that you control the domain that you are requesting a certificate for. Once this
completes you can try going to your domain in a web browser to test the new certificate.

Getting Started Guide
Spreedbox Pty. Ltd. Page 21
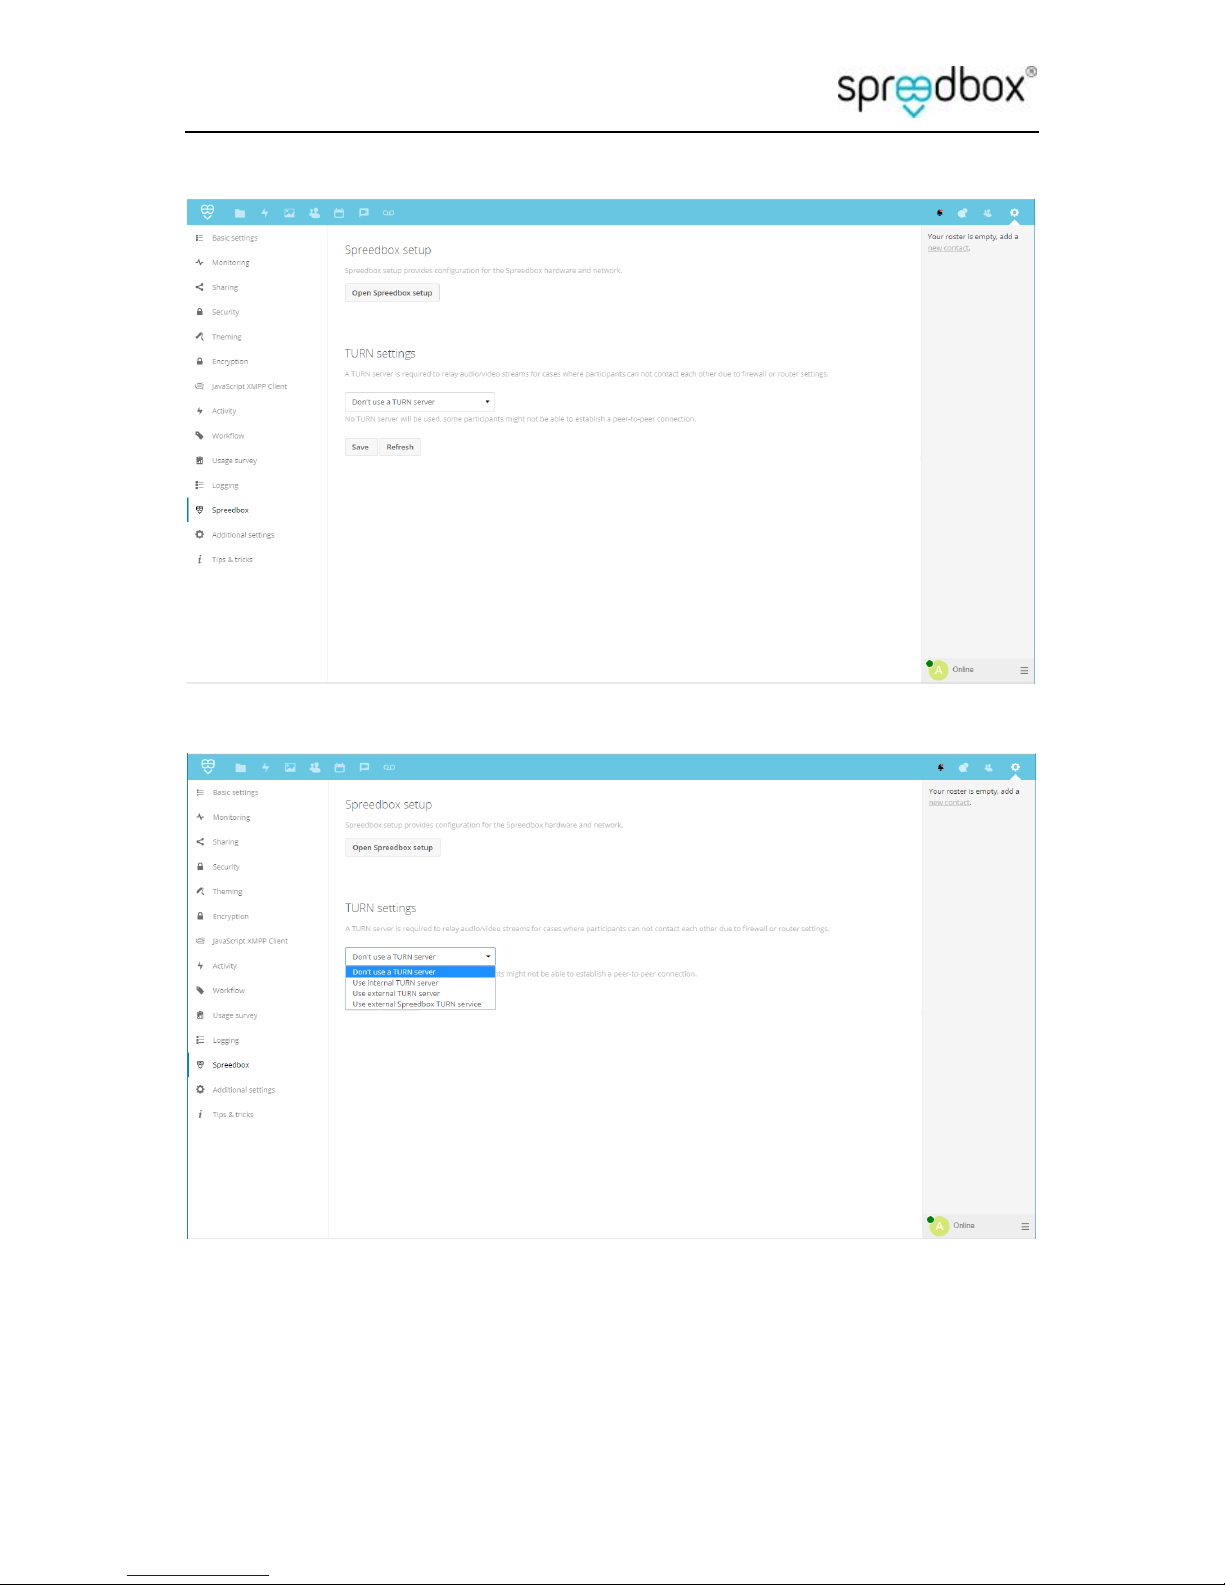
13. TURN server
The Spreedbox contains an internal TURN server to allow establishing peer to peer connections
when clients cannot determine their public IP address and port.
The TURN server can be configured by going to Admin settings on the Spreedbox by selecting Admin
from the menu in the top right-hand corner of the page.
Getting Started Guide
Spreedbox Pty. Ltd. Page 22
then under the Spreedbox menu item on the left you can select to use the Internal TURN server.
You also have the option of using an external TURN server on a remote server.

Getting Started Guide
Spreedbox Pty. Ltd. Page 23
Enter the public domain name and the port (3478 by default).
14. Wi-Fi Hotspot Connection
Spreedbox will automatically start WiFi Hotspot service after 1 minute without a network
(Ethernet) connection; it is reported by LED with purple colour. Hotspot allows connect ion
from any WiFi based network, particularly a smart Mobile Phone can be used to access
Spreedbox configuration and its services. To connect follow the steps:
Access configuration of your Mobile Phone.
Locate setting for Wi-Fi and switch off current connection.
Switch on Wi-Fi connection, usually a list of available connection is presented
Locate and nominate “spreedbox” item on the list.
Access to Hotspot may require password, refer to “Quick Start Guide” page 3 for the
password specific for your Spreedbox.
Enter the password and select [OK] to connect.
Close Mobile Phone configuration, and open your default Web Browser (“Internet”)
Enter URL with local address to your Spreedbox:
https://spreedbox/

Getting Started Guide
Spreedbox Pty. Ltd. Page 24
Welcome page of the Spreedbox should be loaded, asking to create an administrator
account for the first time, follow the steps as recommended by GUI interface.
Use Admin section of the Spreedbox to continue with the configuration settings.
Hotspot allows many users to connect to the Spreedbox in the same time. Use
configuration settings to create some user accounts, and share it with other
participants connected to your Spreedbox. You may try now all Spreedbox services,
including video conference, cloud file managements, etc.
NOTE: The Wi-Fi Hotspot service is designed to work as a local network. Access to the internet
may not be available when using the Wi-Fi Hotspot.
15. Links
Getting Started: https://github.com/spreedbox/spreedbox/wiki/Getting-Started
Wi-Fi Settings: https://github.com/spreedbox/spreedbox/wiki/Getting-Started#wifi
PuTTY Software: http://www.putty.org/
Windows application to automatically detect Spreedbox on your network:
http://spreedbox.me/downloads/FindMySpreedbox.exe
16. Terminology
CAT5
Ethernet network cables found in offices and homes for connecting
computers and devices on networks
DNS
Domain Name System for naming computers and devices on a
network
DNS Server
A server that provide DNS details to computers and devices on your
network

Getting Started Guide
Spreedbox Pty. Ltd. Page 25
HTTP
Hypertext Transfer Protocol widely used by World Wide Web (e.g.
http://www.spreedbox.me)
HTTPS
Secure HTTP Protocol using TLS/SSL (e.g.
https://www.spreedbox.me)
IP address
Internet Protocol Address (e.g. 192.168.0.1)
ISP
Internet Service Provider
LAN
Local Area Network
LED
Light Emitting Diode (light found at the base of your Spreedbox)
Local IP address
IP address of a device on your LAN
MAC address
Media Access Control address – each hardware device (including
your Spreedbox) has a unique MAC address
Public IP
IP address of a device outside your LAN
SN
Serial Number – each Spreedbox has a unique serial number
SSL
Secure Socket Layer – a secure method of communicating over the
internet
TCP
Transmission Control Protocol – a method of communicating over
the internet
TLS
Transport Layer Security – a secure method of communicating over
the internet
UDP
User Datagram Protocol – a method of communicating over the
internet
URL
Uniform Resource Locator (e.g. http://192.168.0.5 or
https://spreedbox)
WAN
Wide Area Network
Wi-Fi
Wireless local area networking often provided by routers with
wireless features enabling devices to communicate using a wireless
LAN
WWW
World Wide Web concept of interlinked documents accessed over
the internet
17. Advanced
At this stage, you may wish to plug in other devices into your Spreedbox. For example, a
keyboard and monitor to help you debug any issues you are having.
Add a USB keyboard to one of the remaining USB ports on your Spreedbox.
Add a monitor to the HDMI port on your Spreedbox.

Getting Started Guide
Spreedbox Pty. Ltd. Page 26
Accessing your Spreedbox directly using a keyboard and monitor lets you enter Ubuntu
commands directly into Spreedbox. This is recommended only if you are familiar with Linux.
For example, to adjust the keyboard repetition rate, use the Ubuntu command:
$ kbdrate -r 2 -d 200
For a permanent change, you can modify the system configuration using:
$ sudo nano /etc/rc.local
kbdrate -r 2 -d 200
Adjusting the Time Zone
Advanced Users:
Changing time zone to your own, right now, may help with tracking changes and reporting
by log files by admini9strator of Spreedbox. Use SSH Terminal Window:
Check available time zone regions and cities
$ ls /usr/share/zoneinfo
Africa Australia Cuba Iceland Japan Mexico Pacific ...
$ ls /usr/share/zoneinfo/Australia
ACT Brisbane Canberra Hobart Lindeman Melbourne ...
Change Timezone by editing configuration file:
$ sudo nano /etc/timezone
Australia/Melbourne
Verify current Timezone:
$ sudo dpkg-reconfigure --frontend noninteractive tzdata
Current default time zone: 'Australia/Melbourne'
Local time is now: Wed Dec 7 14:00:26 AEDT 2016.
Universal Time is now: Wed Dec 7 03:00:26 UTC 2016.
18. Troubleshooting
Identifying the Local IP Address of your Spreedbox

Getting Started Guide
Spreedbox Pty. Ltd. Page 27
Automatic Procedure: If you have a Windows-based computer or laptop that is connected
to your network, then you can use our (free) FindMySpreedbox application:
On your Windows computer or laptop, download:
http://spreedbox.me/downloads/FindMySpreedbox.exe
Run the application (allow it to run if Windows “User Account Control” is asking for
permission). Wait a few minutes until scanning of your network has completed.
All Spreedbox units on your network will be detected and the corresponding IP
addresses will be loaded into your default web browser. Make a note of the IP
address. This is what you will use in future to access your Spreedbox.
Your Spreedbox should respond with the Login Page. Now you can follow the steps
contained in the “Quick Start Guide”.
Refer back to the “Spreedbox is ready to run” section to complete your Spreedbox
configuration.
Manual Procedure: The following notes are for Windows computers or laptops to identify
Spreedbox on your network. If you are running computers with Linux or Mac OS, then you
will need to use corresponding substitutes for Windows commands below:
Open Page 3 in your “Quick Start Guide” manual, there is a section “Your
Spreedbox details” with its unique MAC address. For example:
MAC: 00:1e:06:11:80:10
Using your Windows computer or laptop:
Click on Start menu and type in the input box [Search programs and files]:
cmd
Wait until “cmd.exe” is listed at the top of the menu.
Press down the SHIFT key on your keyboard and use mouse right-click to
access the popup menu.
Click “Run as Administrator”. This will run a Windows command window in
Administrator mode.
In the Command window, type:
> arp –a [ENTER]
Text such as below will be displayed (it will not be exactly the same as below since your network
and devices will have different IP addresses and MAC addresses):

Getting Started Guide
Spreedbox Pty. Ltd. Page 28
Interface: 192.168.0.59 --- 0xa
Internet Address Physical Address Type
192.168.0.4 00-23-8b-41-d5-09 dynamic
192.168.0.51 00:1e:06:11:80:10 dynamic
192.168.0.255 ff-ff-ff-ff-ff-ff static
224.0.0.251 01-23-5e-00-00-fb static
The Internet Address (or IP address) and the Physical Address (or MAC address) should
be listed for each device on your network.
If they are not listed, then try to refresh the cache by typing:
> netsh interface ip delete arpcache [ENTER]
> FOR /L %i IN (1,1,254) DO ping -n 1 192.168.0.%i [ENTER]
Now repeat the “arp –a” step. Your devices should not be listed.
From the list of MAC addresses, you should match up the MAC address from the
“Quick Start Guide”. This will tell you the IP address of your Spreedbox.
Open a web browser on your computer or laptop and now enter the URL as
https://Your_IP_Address/. For example::
https://192.168.0.51/
Your Spreedbox should respond with the Login Page. Now you can follow the steps
contained in the “Quick Start Guide”.
Refer back to the “Spreedbox is ready to run” section to complete your Spreedbox
configuration.
 Loading...