

Page 1
CS10000 HVLP Spray System
CAPSpray
1770 Fernbrook Lane
Minneapolis, MN 55447
Technical Assistance: 1-800-292-4637
Order Entry: 1-800-443-4500
Fax: 1-800-525-9501
www.spraytechinc.com
Owner’s Manual
Printed in the U. S. A.
Model No. 0295636
0201 © 2001 CAPSpray. All rights reserved. Form No. 0295640D
Page 2
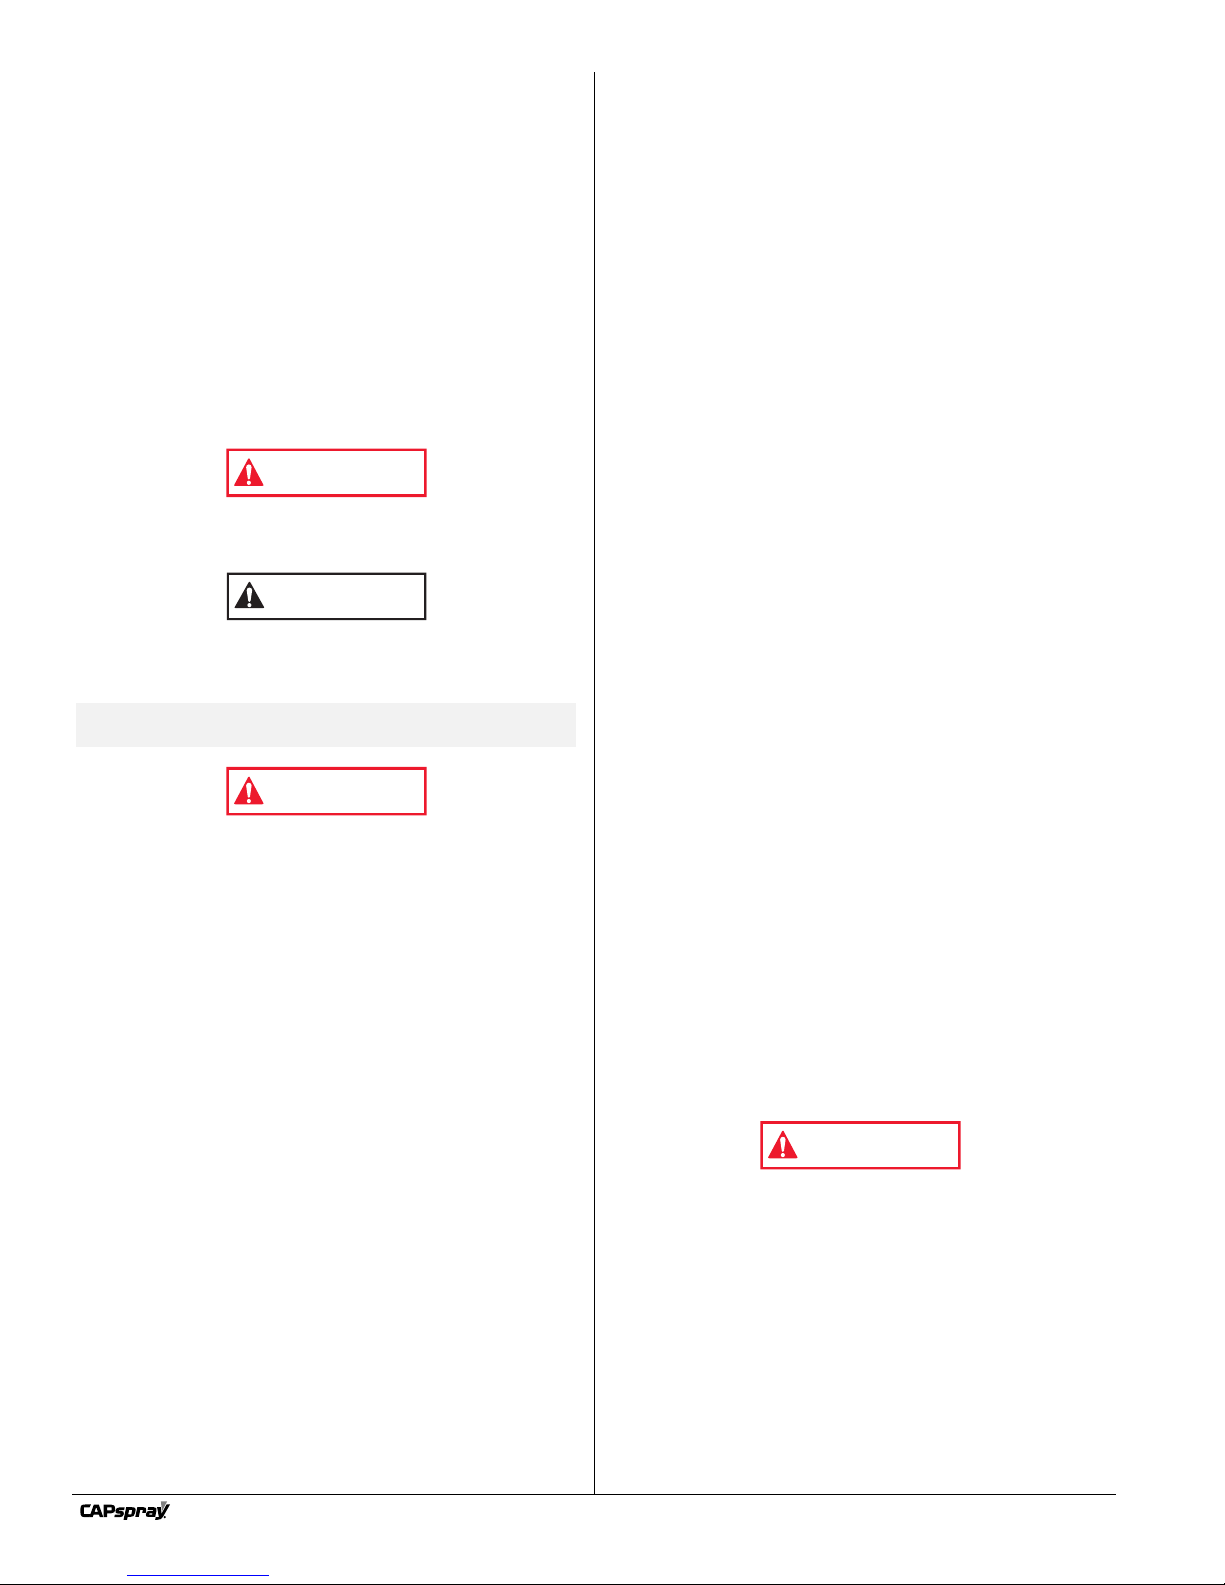
Table of Contents
WARNING
CAUTION
WARNING
Safety . . . . . . . . . . . . . . . . . . . . . . . . . . . . . . . . . . . . . . . . . 2
Introduction. . . . . . . . . . . . . . . . . . . . . . . . . . . . . . . . . . . . . 3
Setup . . . . . . . . . . . . . . . . . . . . . . . . . . . . . . . . . . . . . . . . . . 3
Connecting the Spray System . . . . . . . . . . . . . . . . . . . . . . 3
Operation . . . . . . . . . . . . . . . . . . . . . . . . . . . . . . . . . . . . . . 4
Startup . . . . . . . . . . . . . . . . . . . . . . . . . . . . . . . . . . . . . . . 4
Shutdown . . . . . . . . . . . . . . . . . . . . . . . . . . . . . . . . . . . . . 4
Spray Charts . . . . . . . . . . . . . . . . . . . . . . . . . . . . . . . . . . . . 4
Français . . . . . . . . . . . . . . . . . . . . . . . . . . . . . . . . . . . . . . . 5
Español . . . . . . . . . . . . . . . . . . . . . . . . . . . . . . . . . . . . . . . . 5
Parts List . . . . . . . . . . . . . . . . . . . . . . . . . . . . . . . . . . . . . 5–6
Warranty . . . . . . . . . . . . . . . . . . . . . . . . . . . . . . . . . . . . . . . 8
Safety
This manual contains information that must be read and
understood before using the equipment. When you come to
an area that has one of the following symbols, pay particular
attention and make certain to heed the safeguard.
This symbol indicates a potential hazard that may cause
serious injury or loss of life. Important safety information will
follow.
This symbol indicates a potential hazard to you or to the
equipment. Important information that tells how to prevent
damage to the equipment or how to avoid causes of minor
injuries will follow.
NOTE: Notes give important information that should
be given special attention.
HAZARD: GENERAL — May cause property damage or
severe injury.
PREVENTION:
• Read all instructions and safety precautions before
operating any equipment.
• Comply with all appropriate local, state and national codes
governing ventilation, fire prevention, and operation.
• The United States Government Safety Standards have
been adopted under the Occupational Safety and Health
Act (OSHA). These standards, particularly Part 1910 of
the General Standards and Part 1926 of the Construction
Standard should be consulted.
• This equipment is designed to be used with authorized
parts only. When using this equipment with parts that do
not comply with the minimum specifications and safety
devices of the equipment manufacturer, the user assumes
all risks and liabilities.
• Check all hoses for cuts, leaks, abrasion or bulging of
cover, as well as damage or movement of couplings
before each use. If any of these conditions exist, replace
the hose immediately. Never repair a paint hose.
• Never aim the spray gun at any part of the body.
• Wear protective eyewear.
HAZARD: SKIN BURN INJURY— Heated parts can cause
severe skin burn injury.
PREVENTION:
• Quick-disconnect fittings on the hose and the spray gun
become hot during use. Avoid skin contact with any
quick-disconnect fittings when they are hot. Allow the
quick disconnect fittings to cool before disconnecting the
spray gun from the hose
• The compressor becomes hot during use. Allow the
compressor to cool before touching it.
HAZARD: HAZARDOUS VAPORS — Paints, solvents,
insecticides, and other materials may be
harmful if inhaled causing severe nausea,
fainting, or poisoning.
PREVENTION:
• Use a respirator or mask whenever there is a chance that
vapors may be inhaled. Read all instructions with the
mask to insure that it will provide the necessary protection
against the inhalation of harmful vapors.
HAZARD: EXPLOSION — Compressed air has great force
and may cause injury.
PREVENTION:
• The maximum operating range of the unit is 125 PSI air
pressure.
• The pressure pot assembly is protected from overpressurizing by a safety valve. Pull the ring on the safety
valve occasionally to make sure that the valve operates
freely. The valve must be replaced if it does not operate
freely or if it does not release air when the ring is pulled.
• Never modify the pressure pot or the compressor.
• All accessories must be rated at or above 125 PSI. This
includes spray tips, guns, extensions, hoses, and other
tools.
HAZARD: EXPLOSION OR FIRE — Solvent and paint
fumes can explode or ignite causing property
damage and or severe injury.
PREVENTION:
• Exhaust and fresh air introduction must be provided to
keep the air within the spray area free from the
accumulation of flammable vapors.
• Keep the turbine at the maximum distance possible from
the spray area.
• Avoid all ignition sources such as static electricity sparks,
open flames, pilot lights, hot objects, cigarettes, and
sparks caused by connecting and disconnecting power
cords and operating light switches.
• Keep the motor away from spray area to avoid solvent
and paint fumes. Motor contains arcing parts which emit
sparks.
• Fire extinguishing equipment must be present and in
working order.
• The power cord must be connected to a grounded circuit.
• Follow the material and solvent manufacturer's safety
precautions and warnings.
Grounding Instructions
This product must be grounded. In the event of an electrical
short circuit, grounding reduces the risk of electric shock by
providing an escape wire for the electric current. This product
is equipped with a cord having a grounding wire with an
appropriate grounding plug. The plug must be plugged into an
outlet that is properly installed and grounded in accordance
with all local codes and ordinances.
WARNING
Improper installation of the grounding plug can result in a
risk of electric shock.
If repair or replacement of the cord or plug is necessary, do not
connect the green grounding wire to either flat blade terminal.
The wire with insulation having a green outer surface with or
without yellow stripes is the grounding wire and must be
connected to the grounding pin.
Check with a qualified electrician or serviceman if the
grounding instructions are not completely understood, or if you
are in doubt as to whether the product is properly grounded.
Do not modify the plug provided. If the plug will not fit the
outlet, have the proper outlet installed by a qualified
electrician.
This product is for use on a nominal 120 volt circuit and has a
grounding plug that looks like the plug illustrated below.
2 © CAPSpray. All rights reserved.
Page 3
Extension Cord Selection
Grounded Outlet
Grounding Pin
Cover for grounded outlet box
Pressure Pot Outlet
Material Hose
Air Hose
Spray Gun
Material
Inlet
Spray Gun
Air Inlet
Pressure Pot Air Inlet
Compressor Hose
If an extension cord is used, make sure that it is of the 3conductor type with NEMA connectors so a continuous
grounding circuit is provided from the tool to the power circuit
receptacle. Also, be sure that the conductor size is large
enough to prevent excessive voltage drop which will cause
loss of power and possible motor damage to the unit. A table
of recommended extension cord sizes is shown below.
If an extension cord is to be used outdoors, it must be marked
with the suffix W-A following the cord type designation. For
example, SJTW-A to indicate that it is acceptable for outdoor
use.
Use only a 3-wire extension cord that has a 3-blade grounding
plug and a 3-slot receptacle that will accept the plug on the
product. Make sure your extension cord is in good condition.
When using an extension cord, be sure to use one heavy
enough to carry the current your product will draw. An
undersized cord will cause a drop in line voltage resulting in
loss of power and overheating. A 14 or 12 gauge cord is
recommended.
NOTE: Do not use more than 100 feet of extension
cord. If you need to paint further than 100 feet
from your power source, use more paint hose,
not more extension cord. Shorter extension
cords will ensure maximum electrical power
for proper operation.
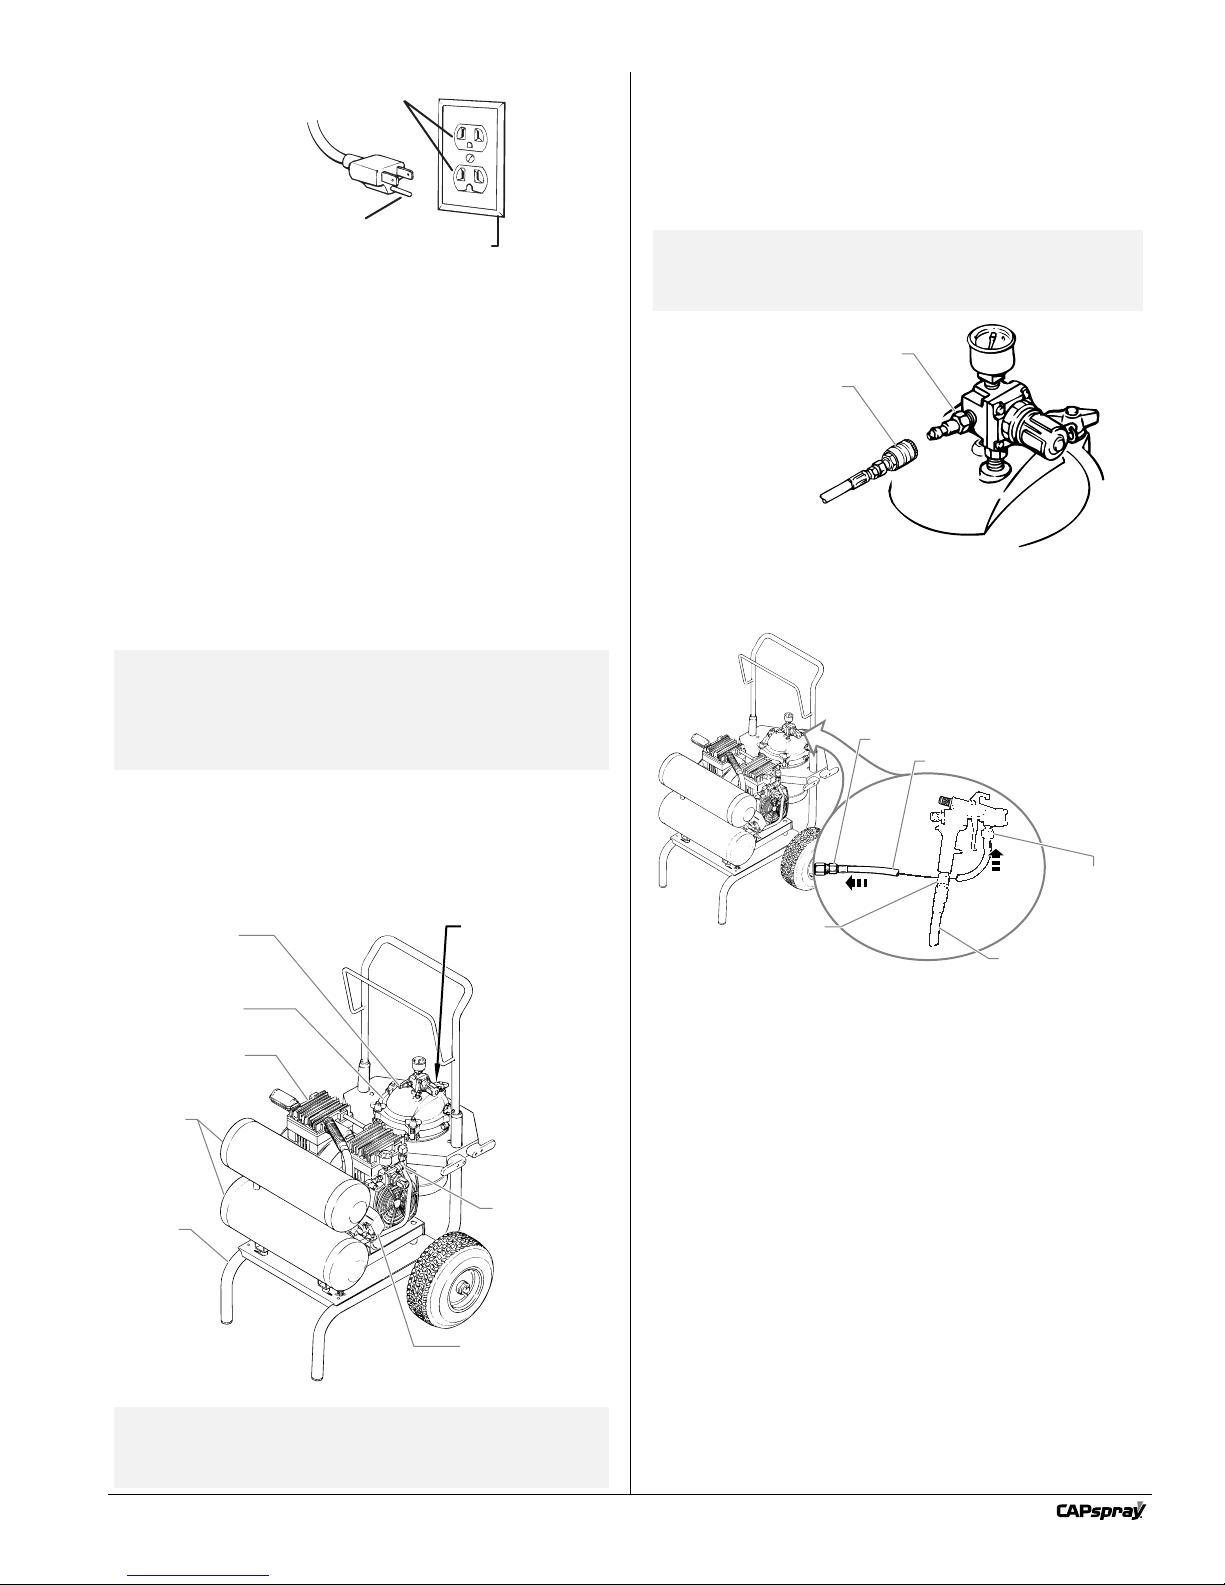
Setup
Connecting the Spray System
1. Make sure the ON/OFF lever on the pressure switch is on
the OFF position.
2. Connect the compressor hose from the lower storage tank
to the pressure pot air inlet.
NOTE: The hose features quick-disconnect fittings.
To use, pull back on the spring-loaded collar
of each fitting. Slide the hose fitting over the
correct connection and release the collar.
3. Thread the end of the material hose onto the pressure pot
material outlet and tighten.
4. Thread the other end of the material hose onto the spray
gun material inlet and tighten.
Introduction
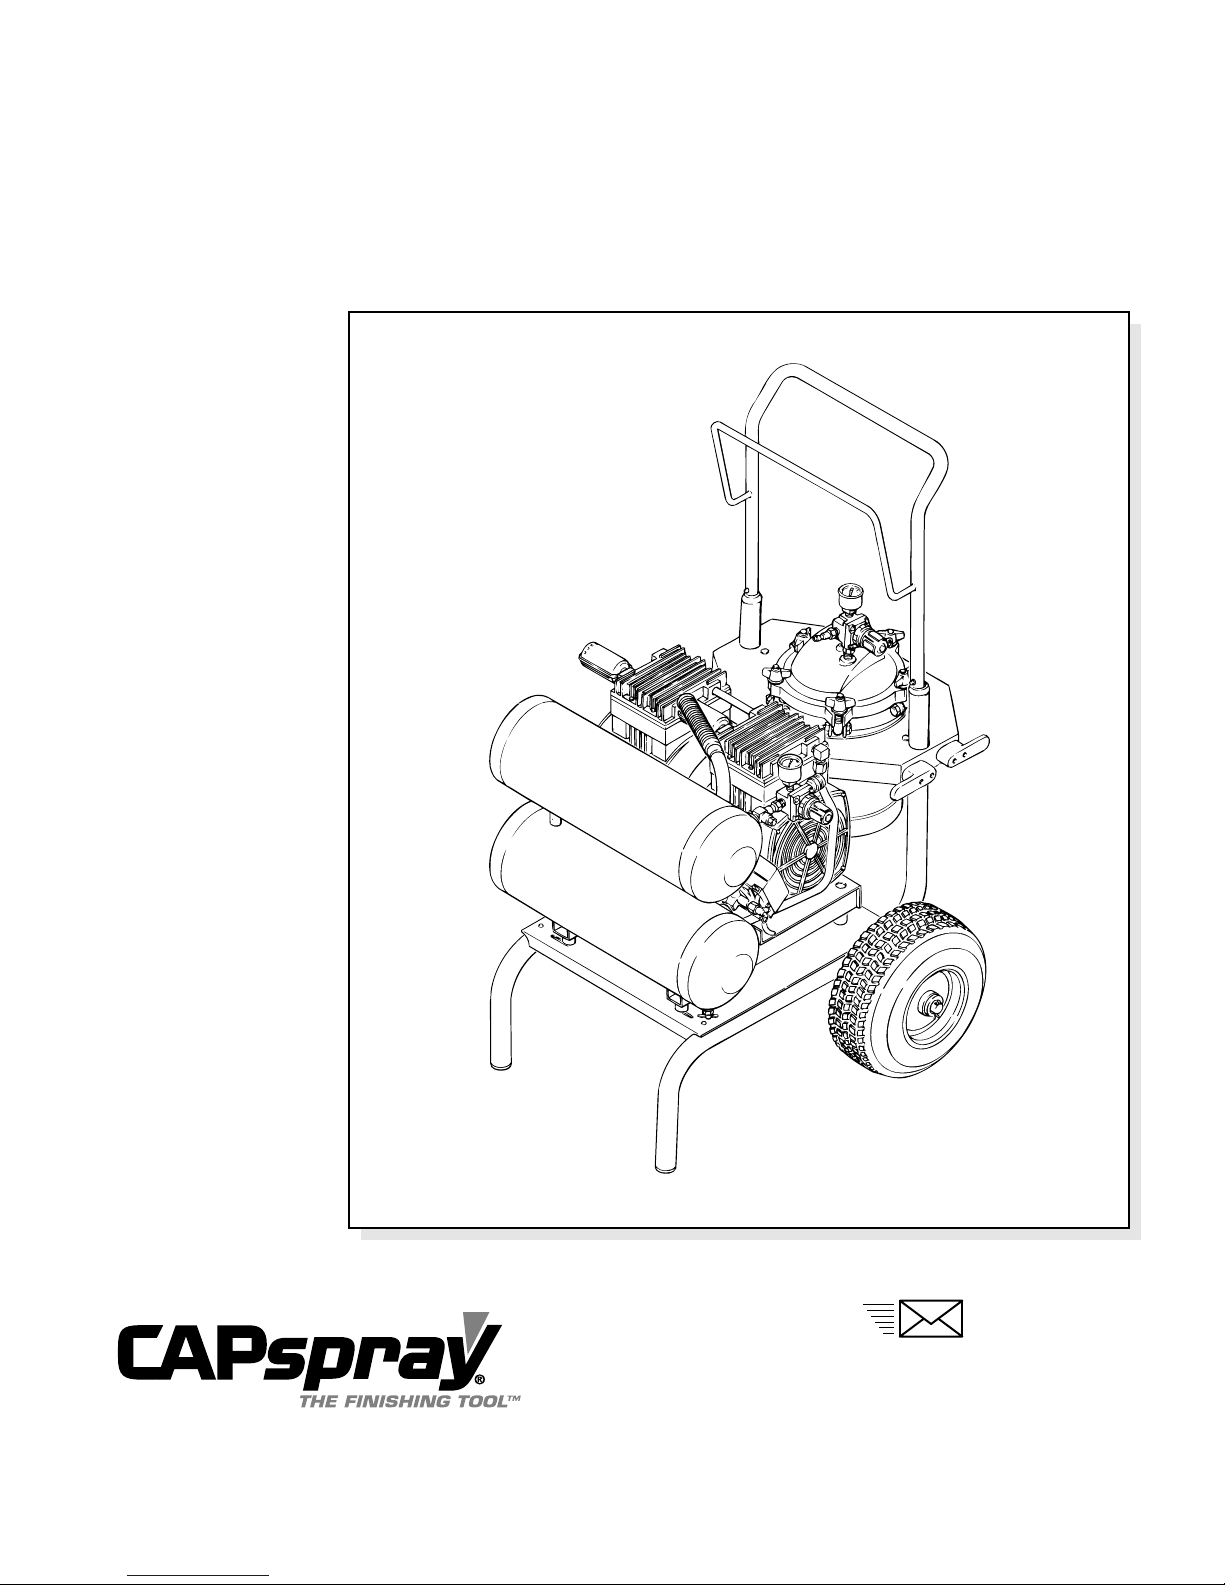
The CS10000 HVLP spray system is designed for use as a
large capacity, fine finish spray painting tool. Components of
the spray system include a dual-head compressor, a cart, a
compressor air outlet, a pressure switch, a pressure pot, a
pressure pot air inlet, and a pressure pot material outlet.
Pressure Pot
Air Inlet
Pressure Pot
Dual-Head
Compressor
Storage
Tanks
Cart
NOTE: The dual-head compressor can be used to
© CAPSpray. All rights reserved. 3
supply air for other air-powered tools. A tee
fitting on the compressor air outlet allows the
installation of an additional regulator.
Pressure Pot
Material Outlet
(behind regulator)
5. Connect the air hose to compressor air outlet.
6. Thread the other end of the air hose onto the spray gun
air inlet and tighten.
Compressor
Air Outlet
Pressure Switch
Page 4

Operation
Compressor
Air Outlet
Pressure
Control Knob
Pressure Gauge
Cover
Groove
Seal
Locking Clamp
Pressure Pot
Pressure
Control Knob
Pot Liner
(optional)
Spraying Pressure Air Consumption
Pressure
Inside Cap
Compressor Pressure*
Air CFM
6 PSI 6.5 9
15
18
20
24
7.5
7.8
8
8.5
8 PSI
10 PSI
12 PSI
14 PSI
*The pressure at the compressor air outlet
when spraying gun.
Startup
1. Place the unit in a clean, dry and well-ventilated area.
The compressor should be located at least 12” from walls
or other obstructions that could interfere with the flow of
air.
2. Fill the pressure pot
with spray material.
3. Fasten the cover
securely onto the
pressure pot by
placing the five
locking clamps into
the cover grooves
and rotating each
clockwise until hand
tight. Be certain that
the seal is in place.
4. Plug in the power
cord for the
compressor.
5. Move the ON/OFF
lever on the pressure
switch to the ON
position to start the
compressor. Allow
the tank pressure to
build. When the
motor stops, the
compressor has
reached cut-out
pressure, and the
system is ready for
use.
6. Pull out the pressure
control knob on the
pressure pot and
turn it until the pressure pot pressure is set properly for
the type of material you are using.
• For thin materials, set to 8 PSI.
• For thicker materials, set to between 8 and 14 PSI.
7. Pull out the pressure control knob on the compressor air
outlet and turn it until the gun pressure is set properly for
the type of material you are using.(see spray chart for
reference).
Shutdown
1. Move the ON/OFF lever on the pressure switch to the
OFF position.
2. Allow the compressor to cool.
3. Drain the storage tanks (refer to compressor manual for
procedure).
Spray Charts
8. Practice spraying on a piece of scrap wood or cardboard
until you are satisfied with the pot pressure, gun air
pressure, spray pattern, and spray shape. The spray
pattern adjustments and spray shape selections are
described in your gun manual.
4 © CAPSpray. All rights reserved.
Page 5

Français
AVERTISSEMENT
DANGER: GÉNÉRAUX — Risques de dommages matériels et de
PRÉVENTION:
• Lire toutes les directives et mises en garde avant de faire
• Se conformer à tous les codes locaux, provinciaux et nationaux
• Les normes de sécurité adoptées par le gouvernement américain
• Cet équipement est conçu pour fonctionner avec les pièces
• On doit s'assurer que les tuyaux soient exempts de coupures, de
• On ne doit jamais orienter le pistolet vers une partie du corps.
DANGER: DANGER DE BRÛLURE — Les pièces chauffées
PRÉVENTION:
• Les raccords à dégagement rapide du tuyau flexible et du pistolet
• Le compresseur devient chaud à l'utilisation. Le laisser refroidir
DANGER: ÉMANATIONS DANGEREUSES — Les peintures, les
PRÉVENTION:
• Utiliser un masque ou un respirateur en présence de risques
DANGER: EXPLOSION — L'air comprimé est très puissant et
PREVENTION:
• L'ensemble réservoir est protégé contre la surpression par une
• Ne jamais modifier le réservoir sous pression ni le compresseur.
• Ne connecter aucun autre outil pneumatique au compresseur.
DANGER: D'EXPLOSION OU D'INCENDIE — Les émanations de
PRÉVENTION:
• On doit assurer la ventilation et l'introduction d'air neuf dans la
• Placer la turbine le plus loin possible de la zone de pulvérisation.
• Il faut éviter les sources de combustion comme l'électricité statique,
• Placer le moteur le plus loin possible de la zone de pulvérisation
• On doit avoir à portée de la main de l'équipement d'extinction en
• Le cordon d'alimentation doit être raccordé à un circuit mis à la
• S'assurer de suivre les directives en matière de sécurité et de lire
© CAPSpray. All rights reserved. 5
blessures graves.
fonctionner l'équipement, quel qu'il soit.
qui régissent la ventilation, la prévention des incendies et le
fonctionnement des dispositifs.
l'ont été en vertu de sa Occupational Safety and Health Act
(OSHA); ces normes, particulièrement les parties 1910 des
normes générales et 1926 des normes de construction, devraient
toujours être consultées.
autorisées seulement. Si on l'utilise avec des pièces non
conformes aux spécifications et exigences en matière de sécurité
du fabricant, on devra accepter les responsabilités et risques
inhérents.
fuites, d'abrasions ou de renflements et que les raccords ne
soient ni endommagés ni mal assujettis avant chaque usage. Le
cas échéant, il faut remplacer le tuyau sur le champ, en ne
tentant jamais de le réparer.
peuvent causer de graves brûlures cutanées.
peuvent s'échauffer en cours d'utilisation; il faut alors éviter les
contacts cutanés, en attendant que les raccords refroidissent avant
de séparer le pistolet du tuyau.
avant d'y toucher.
solvants, les insecticides et autres substances
peuvent être dangereuses si inhalées, entraînant de
graves nausées, des pertes de connaissance ou une
intoxication.
d'inhalation. Lire toutes les directives relatives au dispositif de
protection afin d'en assurer l'efficacité dans l'usage auquel il est
destiné.
peut provoquer des blessures.
soupape de sécurité. De temps en temps, tirer sur l'anneau de la
soupape de sécurité pour vérifier qu'elle fonctionne normalement.
Remplacer la soupape si elle ne fonctionne pas bien ou si elle ne
laisse pas passer l'air quand on tire sur l'anneau.
solvants et de peintures peuvent exploser ou
s'enflammer, entraînant des dommages matériels ou
des blessures graves.
zone de pulvérisation afin d'éviter les accumulations de vapeurs
inflammables.
les flammes nues, les veilleuses de bec de gaz, les objets chauds,
les cigarettes et les étincelles provoquées par la
connexion/déconnexion de cordon d'alimentation et la commutation
d'interrupteurs d'éclairage.
pour l'éloigner des vapeurs de solvant et de peinture. Le moteur
contient des pièces qui peuvent émettre des étincelles.
bon état de marche.
terre.
les mises en garde du fabricant des solvants et des produits
utilisés.
Español
ADVERTENCIA
PELIGRO: GENERAL — Puede causar daños en la propiedad o
PREVENCIÓN:
• Lea todas las instrucciones y advertencias de seguridad antes de
• Cumpla con todos los códigos locales, estatales y nacionales de
• Los Estándares de Seguridad del Gobierno de los Estados Unidos
• Este equipo está diseñado para usarse solamente con piezas
• Cada vez, antes de usarlo, revise todas las mangueras para ver
• Nunca apunte la pistola hacia alguna parte del cuerpo.
PELIGRO: QUEMADURA DE LA PIEL — Las piezas calientes
PREVENCIÓN:
• Las conexiones de desconexión rápida de la manguera y la
• El compresor se calienta durante el uso. Permita que el
PELIGRO: VAPORES PELIGROSOS — Las pinturas, solventes,
PREVENCIÓN:
• Use un respirador o una mascarilla siempre que exista el riesgo
PELIGRO: EXPLOSION — El aire comprimido tiene una gran
PREVENCION:
• El ensamble del tanque de presión está protegido con una
• Nunca modifique el tanque de presión o el compresor.
• Nunca conecte otras herramientas de aire al compresor.
PELIGRO: INCENDIO O EXPLOSIÓN — Los vapores de los
PREVENCIÓN:
• Se deberá contar con un escape y entrada de aire fresco para
• Mantenga la turbina a la máxima distancia posible del área de
• Evite que haya cualquier fuente de ignición como la electricidad
• Mantenga el motor alejado del área de pintado para evitar
• Debe haber equipo para extinción de incendios que además
• El cable de energía debe conectarse en un circuito que esté
• Siga las medidas de precaución y advertencias de seguridad del
lesiones severas.
hacer funcionar cualquier equipo.
ventilación, prevención de incendios y operación que rijan.
se han adoptado bajo el Decreto de Seguridad y Salud
Ocupacionales (OSHA por sus siglas en inglés). Deben consultarse
estos estándares, particularmente la parte 1910 de los Estándares
Generales y la parte 1926 de los Estándares de la Construcción.
autorizadas por el fabricante. Cuando se use este equipo con
piezas que no cumplan con las especificaciones mínimas ni con
las de los dispositivos de seguridad del fabricante de la bomba,
el usuario asumirá todos los riesgos y responsabilidades legales.
que no tengan cortadas, fugas, una cubierta desgastada por
abrasión o con abolladuras, así como uniones dañadas o que se
hayan movido. Si existiera cualquiera de estas condiciones,
reemplace la manguera inmediatamente. Nunca repare una
manguera de pintura.
pueden causar lesiones de quemadura de la piel
severas.
pistola de atomización se llegan a calentar mientras se usan.
Evite que la piel tenga contacto con las conexiones de
desconexión rápida cuando se calienten. Deje que las
conexiones de desconexión rápida se enfríen antes de
desconectar la pistola de atomización de la manguera.
compresor se enfríe antes de tocarlo.
insecticidas y otros materiales pueden ser peligrosos
si se inhalan; pueden causar náuseas, desmayos o
envenenamientos severos.
de poder inhalar los vapores. Lea las instrucciones de la
mascarilla para asegurarse de que proporcionará la protección
necesaria contra la inhalación de vapores dañinos.
fuerza y pudiera causar lesiones.
válvula de seguridad en caso de una sobre presurización.
Ocasionalmente jale la argolla de la válvula de seguridad para
asegurarse que la válvula opere libremente. En caso de no
operar con libertad o si la válvula no libera aire cuando se jala la
argolla, debe cambiarse.
solventes y pinturas pueden explotar o encenderse y
causar con esto daños en la propiedad y/o lesiones
severas.
mantener el aire del área de atomización libre de acumulaciones
de vapores inflamables.
pintado.
estática, llamas abiertas, flamas de pilotos, objetos calientes,
cigarros y chispas que provengan de conectar y desconectar
cables de energía e interruptores de luces que estén funcionando.
vapores de solvente y pintura. El motor contiene partes que al
arquear producen chispas.
funcione bien.
conectado a tierra.
fabricante del material y del solvente.
Page 6

Parts List
Main Assembly
NOTE: Refer to the air compressor
manual included with this
unit for air compressor
replacement parts.
8
2
9
10
11
12
13
14
From compressor
1
2
11
3
To gun
15
16
17
18
19
20
4
5
6
7
Item Part # Description Quantity
1 0295689 Air hose.....................................................1
2 0275696 Fitting, air, 1/4" male, quick connect.........2
3 0295691 Compressor...............................................1
4 ---------- Cart assembly (see separate listing) ........1
5 9820206 Washer......................................................4
6 9821503 Lock washer..............................................4
7 0295695 Screw ........................................................4
8 0275721 Check valve ..............................................1
9 0279427 Pressure gauge, 60 psi.............................1
10 0275693 Regulator...................................................2
11 05045 Fitting, 1/4” x 1/8”......................................1
Item
6 © CAPSpray. All rights reserved.
Part # Description Quantity
12 0277348 Hose, material (connects to gun)..............1
13 0295700 Relief valve ...............................................1
14 0295701 Fitting, fluid................................................1
15 0295702 Lid .............................................................1
16 0295703 Tube, pick up ............................................1
17 0508943 Pot gasket .................................................1
18 0275702 Pot liner.....................................................1
19 0279284 Pressure pot..............................................1
20 0295040 Pressure pot assembly
(Includes Items 8–11 and 13–19).....................1
21 0279647 Pot liner “Caution” label (not shown) ........1
Page 7

1
2
3
4
6
7
8
9
10
11
12
13
14
15
13
5
Cart Assembly
Item
1 0295611 Hole trim ...............................................1
2 0295725 Cart weldment, CS10000 .....................1
3 9885571 Plug.......................................................2
4 0508144 Handle ..................................................1
5 0295610 Roll pin..................................................2
6 9841504 Snap button ..........................................2
7 0295607 Sleeve...................................................2
8 0295609 Washer..................................................2
Part # Description Quantity
Item
9 0295608 Screw....................................................4
10 0509386 Washer..................................................4
11 0293357 Screw....................................................4
12 0279437 Cord wrap .............................................2
13 0294534 Spacer washer......................................4
14 0507379 Wheel....................................................2
15 9890104 Hub cap ................................................2
Part # Description Quantity
© CAPSpray. All rights reserved. 7
Page 8

Limited Warranty - High Volume, Low Pressure Spray Equipment
What Is Covered By This Warranty:
This product, manufactured by CAPspray, is warranted against defects in material and workmanship for one (1) year following
date of purchase if operated in accordance with CAPspray's printed recommendations and instructions.
Within the applicable warranty period, CAPspray will repair or replace, at our option, defective parts without charge if such parts
are returned with transportation charges prepaid to the nearest Authorized Service Center or to CAPspray Corporation, 1770
Fernbrook Lane, Minneapolis, MN 55447. If CAPspray is unable to repair this product as to conform to this Limited Warranty after
a reasonable number of attempts, CAPspray will provide, at our option, either a replacement for this product or a full refund of the
purchase price of this product. These remedies are the sole and exclusive remedies available for breach of express and implied
warranties.
What is Not Covered By This Warranty:
1. This Warranty does not cover any defects or damages caused by either:
a) the use or installation of repair or replacement parts or accessories not manufactured by CAPspray, or
b) repair performed by anyone other than a CAPspray Authorized Service Center.
2. The Warranty does not cover equipment and accessories supplied to CAPspray from an original equipment manufacturer,
including but not limited to: hoses, tips, or accessories. CAPspray will provide the purchaser with copies of the original
equipment manufacturer’s express warranties provided to CAPspray along with the name and address of the appropriate
manufacturer. In the case of the compressor, the manufacturer has extended the warranty — first year for parts and service,
second year on parts only.
3. This Warranty does not cover damage or defects caused by or related to abrasion, corrosion, abuse, misuse, negligence,
accident, normal wear, faulty installation or tampering in a manner which impairs normal operation.
Limitation of Remedies:
IN NO CASE SHALL CAPSPRAY BE LIABLE FOR ANY INCIDENTAL, SPECIAL OR CONSEQUENTIAL DAMAGES OR LOSS,
INCLUDING TRANSPORTATION COSTS, WHETHER SUCH DAMAGES ARE BASED UPON A BREACH OF EXPRESS OR
IMPLIED WARRANTIES, BREACH OF CONTRACT, NEGLIGENCE, STRICT TORT, OR ANY OTHER LEGAL THEORY.
Disclaimer Of Implied Warranties:
THE FOREGOING WARRANTIES ARE IN LIEU OF ALL OTHER WARRANTIES, EXPRESS OR IMPLIED, INCLUDING BUT
NOT LIMITED TO THE IMPLIED WARRANTIES OF MERCHANTABlLlTY AND FITNESS FOR A PARTICULAR PURPOSE.
No Ability To Transfer:
This warranty is extended to the original purchaser only and is not transferable.
Your Rights Under State Law:
Some states do not allow limitations on how long an implied warranty lasts or the exclusion of incidental or consequential
damages, so the above limitation and exclusion may not apply to you. This warranty gives you specific legal rights, and you may
also have other rights which vary from state to state.
Patents
These products are covered by one or more of the following U.S. patents:
5,423,395 D322,790 5,181,832 D338,208 5,174,610 5,550,336 D365,569
5,556,255 5,639,222 5,702,131 5,558,492 5,573,371 5,772,711
SprayTECH 30-Day Satisfaction Guarantee
If, within a 30-day period from the date of purchase, you are not totally satisfied with a SprayTECH/CAPSpray unit, you
may return it for full credit toward another SprayTECH or CAPSpray product of equal or greater value.
8 © CAPSpray. All rights reserved.
 Loading...