

Sprada FUTURE One Touch Cappuccino Operating Instructions And Useful Tips

i
Dear Customer,
Congratulations on purchasing a high-quality SPRADA coee machine.
To get the most out of your SPRADA machine, please read this manual
carefully before use.
Please start by reading the safety notes. Keep this manual in a safe place as
a reference guide or to give to any other users of your machine.
The SPRADA team is here to support you as we are dedicated to your
enjoyment of great coee from this high-quality SPRADA product.
Welcome to the Sprada One Touch Cappuccino
Retailer:
Date & Place of Purchase:
FUTURE One Touch Cappuccino
Fully Automatic Coffee Centre
Operating Instructions and Useful Tips
ii
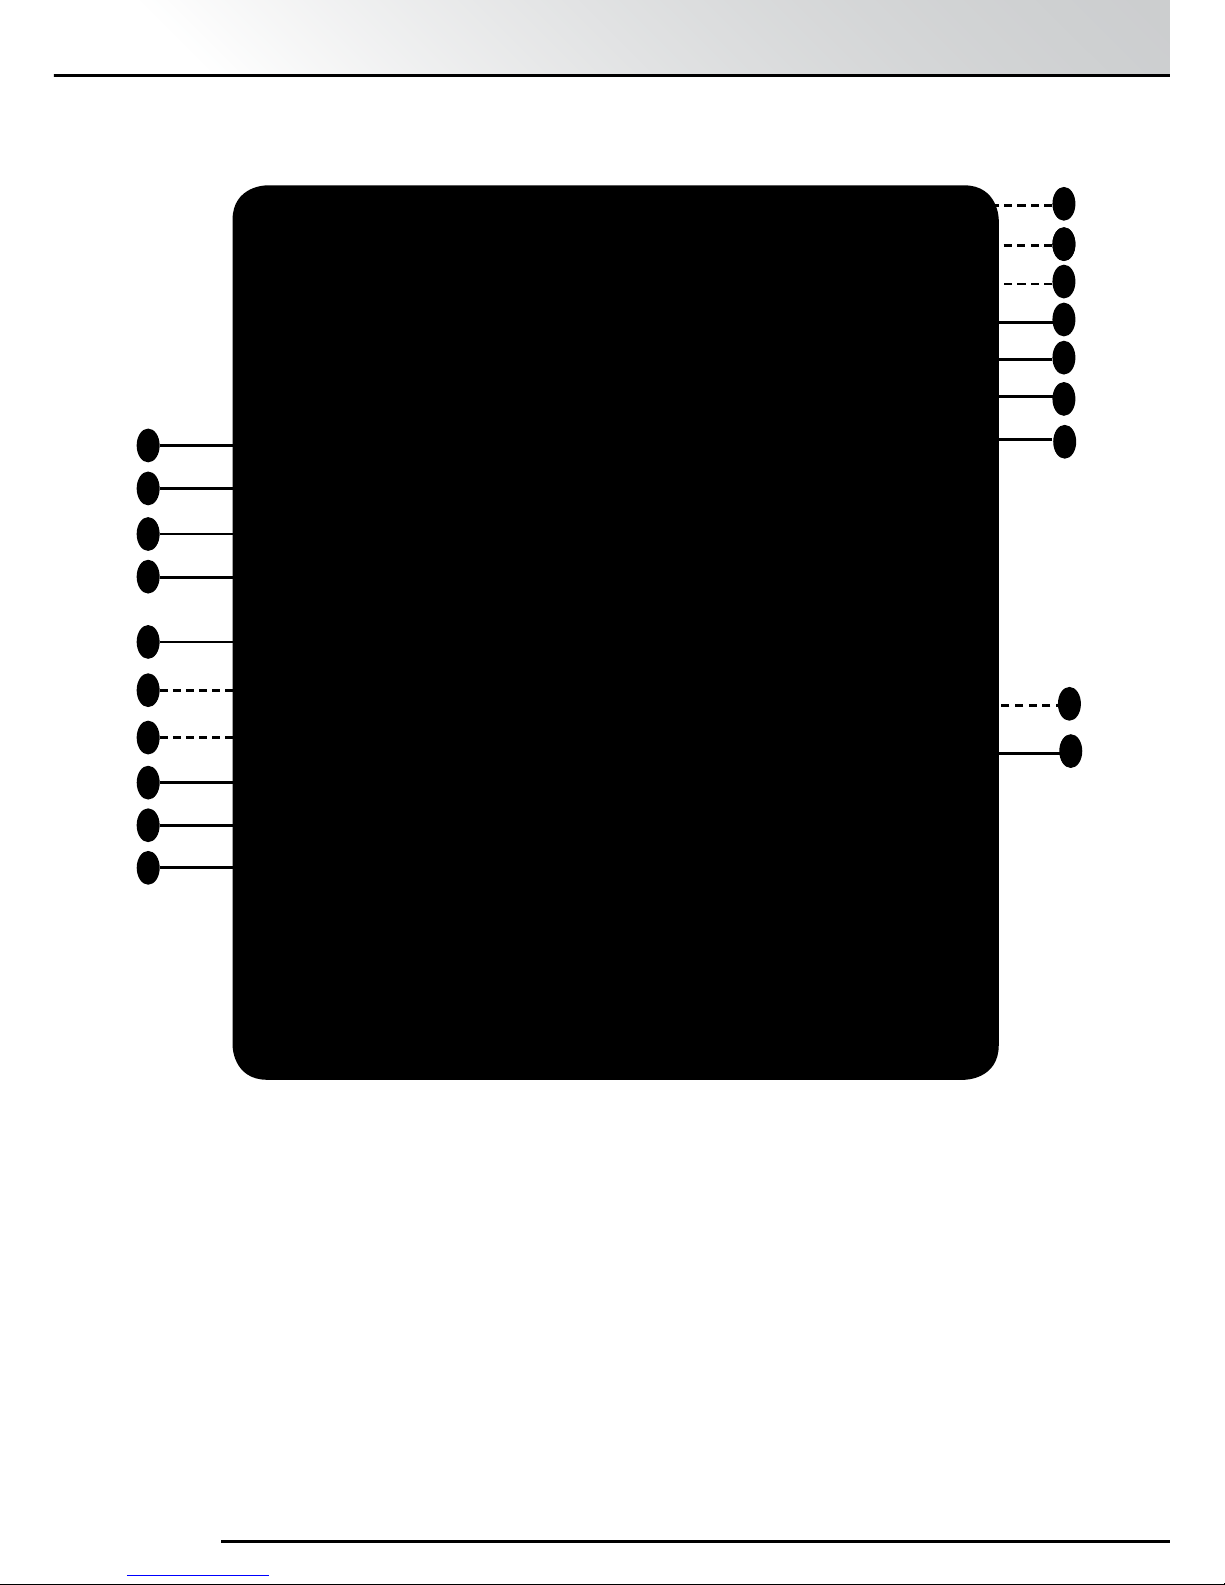
Familiarising yourself with your Future OTC
A
B
C
D
E
H
N
J
G
I
Q
K
M
ML
F
K. Removable Water Reservoir
L.
Bean C
ontainer (inside)
M.
Pr
e-Ground Coee Chamber (inside)
N.
Cup Holding P
late
O.
Cup
Warming On/O Button
P. On/O Switch
Q.
Ser
vice Door (side panel)
R.
Rear R
ollers (underneath at the back)
S.
Milk C
ooler Thermos
A. Display
B.
Rotar
y Control Knob
C.
Button “>”
D
.
Butt
on “Exit”
E.
Height A
djustable Spout
F. Nameplate with Specications (inside)
G.
Co
ee Grounds Container (inside)
H.
Mains S
witch (on side panel)
I.
Co
ver Panel
J.
Drip T
ray
O
P
R
S
iii
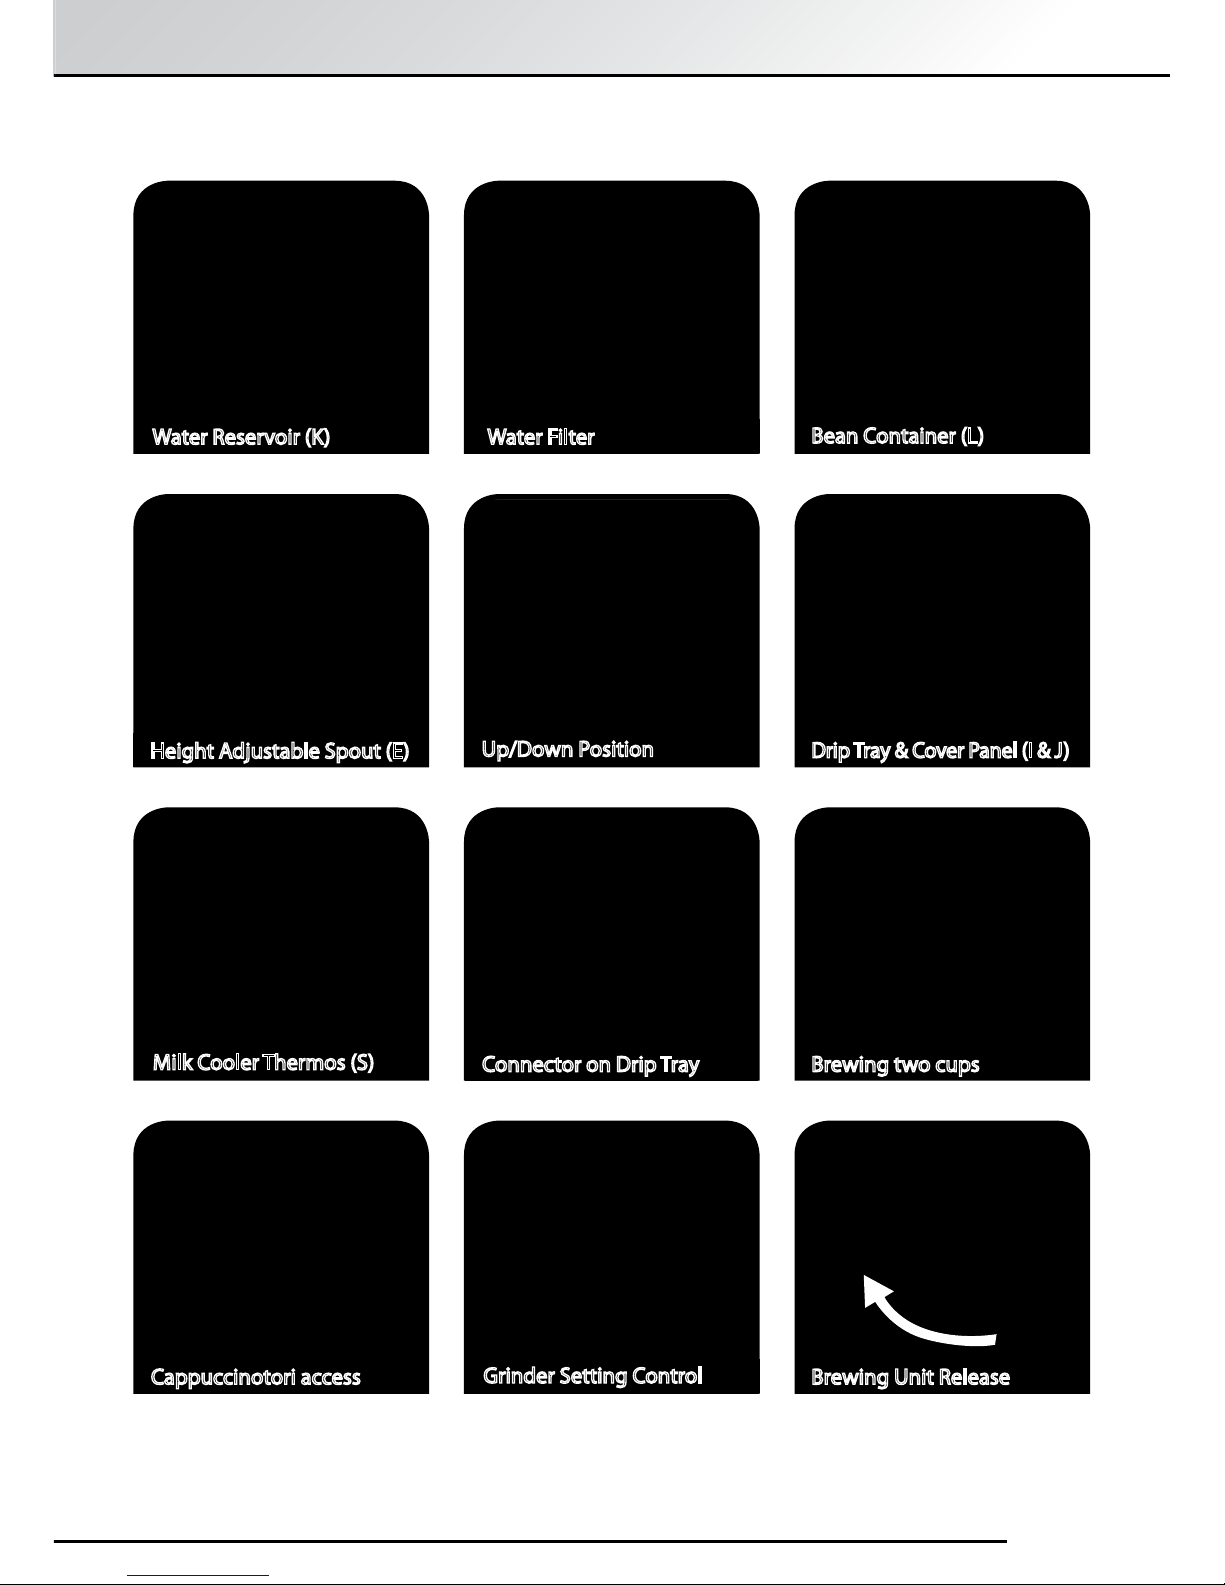
Important areas on your Future OTC
Water Reservoir (K)
Bean Container (L)
Water Filter
Connector on Drip Tray Brewing two cups
Height Adjustable Spout (E)
Up/Down Position
Milk Cooler Thermos (S)
Drip Tray & Cover Panel (I & J)
Cappuccinotori access Brewing Unit Release
Grinder Setting Control

iv

v
1. SAFETY INSTRUCTIONS 1
2. SETUP 3
2.1 Preparing the Machine 3
2.2 The most important Controls 3
2.3 Adding Water and Beans 4
2.4 The Cappuccinotori (Milk Frother) 4
2.5 Pre-Warming your Cups 5
3. SWITCHING ON AND GETTING STARTED 6
3.1 Mains Switch 6
3.2 On/O Switch 6
3.3 Brewing with Factory Settings 6
3.4 Brewing two Cups of Coee 7
3.5 Emptying the Drip Tray and the Coee Grounds Container 8
3.6 Hints for First Time Users 18
4. ADVANCED SETTINGS FOR BREWING Speciality Coees 9
4.1 The Main Menu 9
4.2 Coee Recipes 9
5. THE SETTINGS MENU 11
5.1 Coee Recipes - using the Settings Menu 11
5.2 Operating the Machine with or without the Water Filter 12
5.3 Setting the Water Hardness Level 14
5.4 Setting the Temperature 14
5.5 Setting Time and Timer Functions 15
5.6 Setting the Language 16
5.7 Setting the Switch-OFF Rinsing Function 16
5.8 Setting the ECO Mode 17
5.9 Reading Statistics 17
6. MANUAL ADJUSTMENTS 18
6.1 Setting the Grinder 18
6.2 Preparing Pre-Ground Coee 18
7. CARE: CLEANING AND MAINTENANCE 20
7.1 Rinsing the Cappuccinotori (Milk Frother) 20
7.2 Cleaning the Cappuccinotori (Milk Frother) 20
7.3 Rinsing the Spout 21
7.4 Cleaning the System 21
7.5 Descaling the System 22
7.6 Regular Manual Cleaning of the Machine 24
7.7 Cleaning the Brewing Unit 25
7.8 Changing the Water Filter 25
8. SYSTEM MESSAGES 26
9. TROUBLESHOOTING 27
10. ACCESSORIES 28
11. FURTHER INSTRUCTIONS 29
12. GUARANTEE 29
Contents

1
• TheSPRADAFutureOneTouchCappuccino(OTC)isadomesticmachine
and not guaranteed for commercial use - see guarantee conditions.
• Operatingvoltageis220-240V.
• Do not operate the machine if the Power Cord or machine case is
damaged. If damaged it should be replaced by a qualied technician.
• Do not pull or let the Power Cord come into contact with hot parts.
• Do not pull on the Power Cord to disconnect the machine.
• Observe the cleaning & descaling instructions provided. Otherwise,
claims under the guarantee may not be accepted.
• Make sure to switch o and unplug the machine before maintenance or
cleaning.
• The SPRADA Future OTC is for indoor use only and should be located on
a rm and level surface.
• Do not place the machine on a hot surface or near an open ame.
• Keep out of reach of children and ensure that they do not play with the
appliance.
• Unplug the machine during extended periods of absence.
• Do not leave the machine switched on unnecessarily.
• Never allow the machine to become submerged in water.
• Do not use a dishwasher to clean the machine or individual parts.
• Unplug immediately if there is a defect.
• Liability for damage cannot be accepted if the machine is incorrectly
operated or serviced by non-accredited service agents.
• Make sure there is nothing but roasted coee beans in the beans
container.
• This machine is not suitable for individuals (including children) with
physical, sensory or mental impairments, including individuals who do
not have sucient experience or knowledge, unless they are shown how
to operate the machine or initially supervised by someone responsible
for their safety.
• Please contact the retailer from whom you purchased the machine
for repair or send the machine to a SPRADA national customer service
centre.
1. Safety Instructions
1. Safety Instructions

2
Caution: Electrical appliances should be repaired only by qualied
personnel as non-professional repairs can expose the user to
signicant risk. Liability for damages cannot be accepted if the
machine is used for anything other than the intended purpose or is
incorrectly maintained or serviced.
Caution: Using the On/O Switch or Mains Switch during brewing can
damage the machine. Only switch o the appliance when in Standby
mode.
Caution: Splashes from the Spout can cause scalding when drawing
steam or hot water. Leave to cool for a few minutes before touching.
Specications
Mains voltage: 220 - 240 V
Power requirement: 1465 W
1. Safety Instructions
!
!
!

3
The following items are packaged with the machine:
• UserManual
• MilkCoolerThermoswithseparateConnectingPipe
• MeasuringSpoonwithAssemblyToolforFilter
• 2CleaningTablets
• 1ClarisWater-Filter
• 1WaterHardnessTestStrip
Unpacking:
• Carefullyremovethemachineandallpartsfromthepackaging.Please
keep all packaging including the styrofoam inserts in case you need to
return the machine for service.
• Place the machine on a level, dry and stable work surface.
• Connect the machine to a properly installed mains socket.
• Place the Milk Cooler Thermos upright next to the machine and connect
pipe.
2. Set up
2. Set up
2.1 Preparing the machine
2.2 The most important controls
Your SPRADA One Touch brews a range of Speciality Coees according
to your own personal taste. For easy use, the most important controls are
common to the various Speciality Coees and machine setup functions.
• The Main Power Switch is on the lower left-hand front side of the
machine.
• TheOn/OSwitchisonthetopofthemachine.
• The multi-function turn-and-press control knob (Rotary Control Knob
for short) is the most important control. Rotating it selects options and
menu items while pressing it conrms the selection or initiates the
machine cycles.
• The “>” Button: Press the “>” Button to move to the next menu or item.
• The “Exit” Button: Press the “Exit” Button to move one menu level back or
abort a process in progress.
• The Height Adjustable Spout moves up and down to accommodate
dierent sizes of cups or glasses.
DOWN
UP

4
Water:
• Open the cover on the left side of the machine and remove the Water
Reservoir.
• Rinse and ll the Water Reservoir with cold water up to the maximum
mark and click into place on the machine.
Caution: only fill the Water Reservoir with cold, clear water! Never use
carbonated water or other liquids!
Note: The machine will not function if the water level is too low. The
display will indicate “Fill up water”.
Beans:
• Open the cover on the right-hand side of the machine. Remove the Bean
Container lid and ll with untreated, roasted coee beans. Close the lid
and the cover.
Caution: Do not use beans treated with supplements, such as sugar,
either during or after roasting. Supplements can damage the grinding
mechanism.
Note: The machine automatically detects when the bean level is low
and will not function. The display will indicate “Fill up beans”.
2. Set up
2.3 Adding water and beans
2.4 The Cappuccinotori (Milk Frother)
The SPRADA One Touch is supplied with an insulated Milk Cooler Thermos
which attaches directly to the machine to make delicious milky coffee and
hot milk drinks.
Connect one end of the pipe to the top of the Milk Cooler Thermos. Make
sure it is pushed down firmly into the grommet on the removable lid of the
container.
Connect the other end of the pipe to the grommet on the right-hand side
of the Height Adjustable Spout.
Unscrew the top of the Milk Cooler Thermos and make sure that the steel
pipe is firmly inserted in the grommet from the inside. This ensures that
milk is sucked up right to the bottom of the container.
Fill the Thermos with cold milk.
Screw the lid back on the Milk Cooler Thermos and make sure the pipe is
not stretched tight as this might impede the flow of milk. The milk in the
container should remain cold for some hours because of the high quality
insulation.
!
!
i
i

5
Your machine is equipped with a high-quality active Cup-Warming
Function that can be switched on and off while power is applied.
Press the button to turn on the Cup-Warming Function. (The Mains
Switch must also be on.)
The Display Screen will show the message “Cup Heater On”.
By pressing the button again you can turn the Cup-Warming Function
o.
The Display Screen will show the message “Cup Heater Off”.
Tip: Use the warming function to optimise the temperature and aroma
of your coffee to enhance your coffee experience.
2. Set up
2.5 Pre-Warming your cups
Always empty and clean the Milk Cooler Thermos a minimum of once a
day. Rancid milk can cause blockages that will cause malfunction of the
machine.
Caution: Do not wash the Milk Cooler Thermos in a Dishwasher as this
will damage it.
Hand wash the Milk Cooler Thermos with warm soapy water to keep it in
perfect condition.
!
6
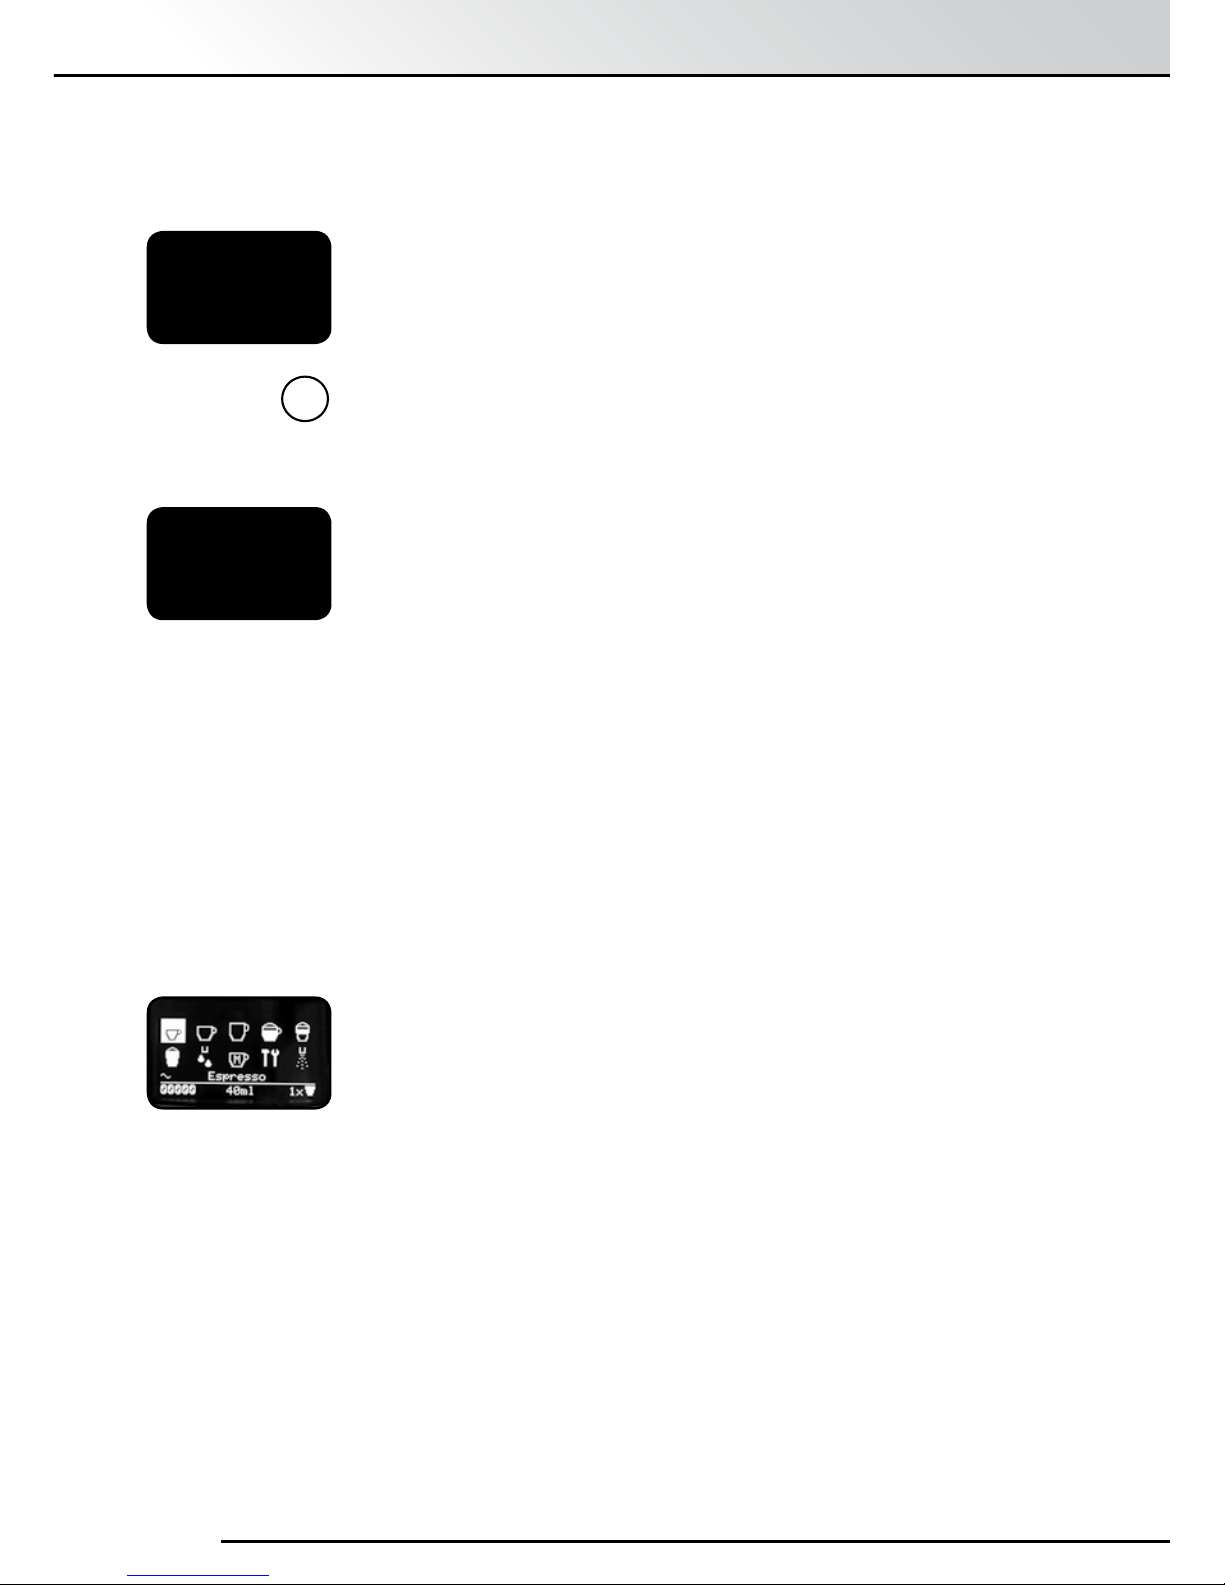
The Main Menu on the Display Screen is a visual representation of the
different Speciality Coffees that your SPRADA One Touch can make.
You can start making coee immediately as each icon represents a coee
brewed according to Factory Settings.
• Espresso - the world’s best
• Café Crème - black with superior crème and aroma
• Cae Lungo - for the BIG coee lover
• Cappuccino - delicious frothy coee
• Latte Macchiato - layered milk and coee as you like it
• Warm Milk - for hot chocolate
• Hot Water - for tea
…… all at the touch of one button.
Place the cup under the Height Adjustable Spout
Turn the Rotary Control Knob to highlight an icon.
Press the Rotary Control Knob to start the brewing process.
The brewing light will illuminate and a delicious cup of coee will be
dispensed.
3. Switching on and getting started
3.2 On/O Switch
Press the On/O Switch on top of the machine to bring the machine
out of Standby.
The message “Heating” will appear on the Display Screen, accompanied by
a rotating hourglass icon to indicate that an action is happening inside the
machine.
If the machine has been off for more than a few minutes a message, “Please
rinse”, will appear on the Display Screen, accompanied by a flashing semicircular icon in the bottom centre of the display to indicate that the Rotary
Control Knob should be pressed.
Press the Rotary Control Knob.
The system rinses and the Main Menu is displayed.
3.3 Brewing with Factory Settings
3.1 Mains Switch
Switch on the Mains Switch, located at the lower left-hand front side of the
machine, to put the machine in Standby Mode. An on/off symbol will move
across the display if the Clock Function has not been setup. If the Clock
Function has been initialised, the time will be displayed.
Note: If you are switching on a brand new machine, first skip forward
to Section 5 to set up the basic functions.
3. Switching on and getting started
i
 Loading...