

SpotOn SMART COLLAR Quick Start Manual

ROOM TO ROAM
VIRTUAL SMART FENCE
QUICK START GUIDE
1

WELCOME!
Dear SpotOn Virtual Smart Fence™ Owner,
Congratulations and welcome to the SpotOn family! You’ve made a wise decision to invest in the
only virtual fence system that keeps your dog safe and happy both at home and when you’re on the
go.
Only SpotOn:
• Uses three different global navigation satellite systems and cellular technology to keep your
dog safe anywhere in the world.
• Gives you 100% flexibility to create custom Virtual Smart Fences™ wherever and
whenever you want.
• Provides instant smartphone notifications and GPS tracking* if your dog ever escapes a Virtual
Smart Fence.
This brief Quick Start Guide has been provided to ensure your initial SpotOn experience is trouble-free. We encourage you to use this guide together with the training materials at SpotOnCollar.
com to give you a comprehensive understanding of how your new SpotOn system works.
If you have any problems or questions, visit our website at SpotOnCollar.com/support or call us
directly at 603-488-1504 and we’ll get you back on track quickly.
We wish you and your dog many happy adventures.
Sincerely,
The SpotOn Team
* Notifications and tracking require a cellular subscription and cellular connectivity
2 1
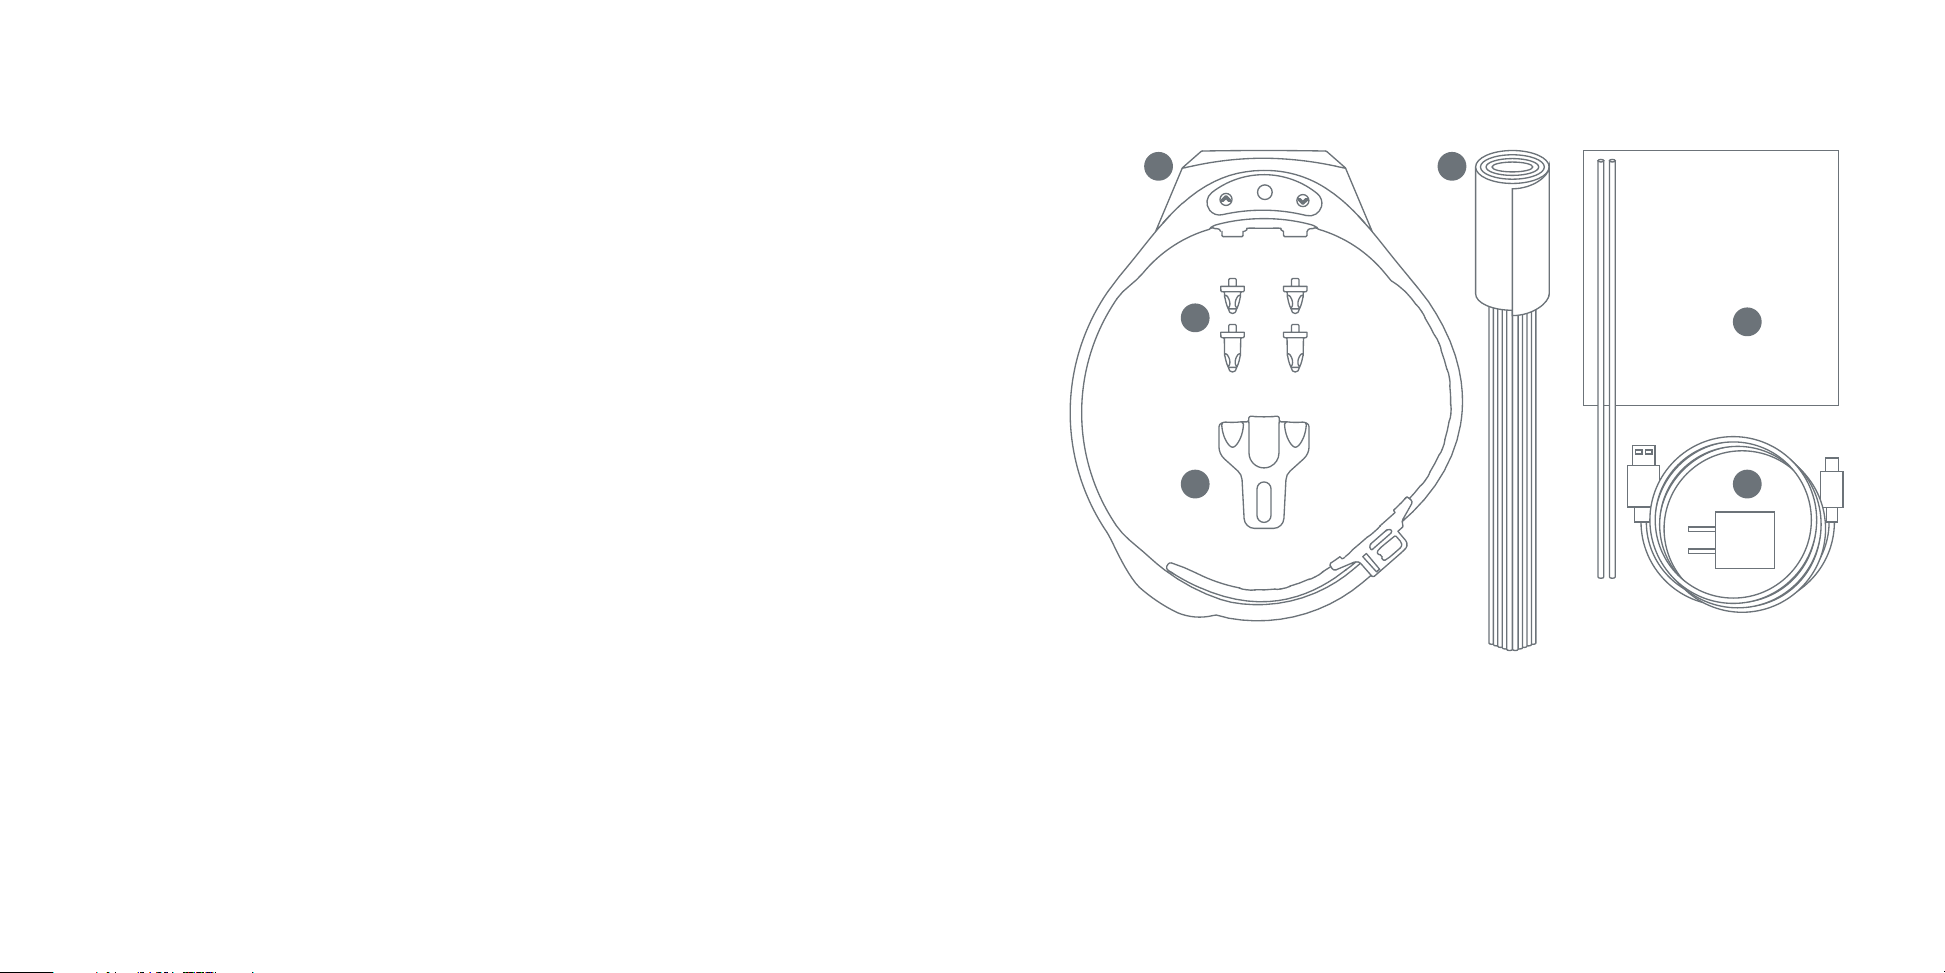
HELPFUL HINTS AND CAUTIONS INSIDE THE BOX
• The SpotOn collar is shipped without the contact points installed and the static
correction level set to zero. If you are training with Plans B or C, view the online training
video, The Use of Static Correction, to determine the lowest effective correction level.
• Do not attach a leash to the SpotOn collar or use it to physically restrain your dog as it may
irritate your dog’s neck and/or damage the collar. If a leash is required, attach it to a conventional collar fitted to your dog’s neck below the SpotOn collar.
• Once tracking is activated, your SpotOn Collar’s screen will double as an identification tag.
Ensure your dog’s name and owner contact details are up-to-date in the app.
• Pets should be properly trained before being left unattended inside a Virtual Smart Fence. If
you are unsure your dog is ready, take the Passport Quiz at SpotOnCollar.com.
• If a map is activated, the Bluetooth connection will not function. To use Bluetooth, deactivate
your map.
• Do not create a Virtual Smart Fence within 15 feet of a hazardous area, such as a street.
• Track My Pet and Compass features impact the collar’s battery performance.
• Always remove the SpotOn Collar from your dog as soon as he enters the house or when it is
not in use to help prevent irritation.
• If the collar is too loose or too tight, the contact points can irritate your dog’s neck. Contact
points should be cleaned regularly with a damp cloth or removed and cleaned in warm, soapy
water.
• Frequently inspect your dog’s neck. If you notice irritation from the SpotOn Collar,
temporarily discontinue use until the irritation has subsided.
• The SpotOn Collar is waterproof to IP67 standards. Before exposing to wet environments,
inspect the collar for nicks, cuts, cracks, or other damage that could enable water intrusion.
Rinse collar with tap water after exposure to salt or chlorine water.
• For an electronic version of this guide and more helpful hints, visit SpotOnCollar.com.
1 4
2
3
1. SpotOn Smart Collar
2. 2 Sets of Contact Points
3. Contact Point Tester/Insertion Tool
™
5
6
4. 50 Training Flags
5. Training Target and Stakes
6. Wall Charger and USB Cable
2 3

A CLOSER LOOK AT YOUR SpotOn SMART COLLAR
™
QUICK START GUIDE
STEP 1: CHARGE YOUR SMART COLLAR’S BATTERY
2
6
3
1
5
4
1. Multi-Color OLED Display)
2. ON/OFF & Menu Selector Buttons
3. Battery Charging Port
4 5
4. Contact Points
5. GPS Antenna
6. Collar Clasp
Before setting up your SpotOn system, charge the Smart Collar’s battery to 100%. This takes about
an hour. The charging port is located on the underside of the collar, as shown above. Simply plug
one end of the USB cable into the collar’s charging port, and the other end into a computer USB
jack or the wall charger provided.
 Loading...