

Sport-thieme SunVolley Plus Assembly Instructions Manual
SunVolley® Plus Assembly instructions
for prod. code 11 117 8500
Beach volleyball unit
Thank you very much for choosing a Sport-Thieme product!
Please read the instructions fully before you assemble the equipment so you can enjoy the product and safety is
guaranteed.
We are happy to respond to your questions and requests.
Included:
1 bag
1 net
2 lower post sections (Ø 5 cm) with 5 holes for height
adjustment
2 middle post sections (Ø 4.5 cm)
1 upper post section (Ø 5 cm) with pulley
1 upper post section (Ø 5 cm) without pulley
2 ground plate for posts
4 pegs for posts
1 border marking (only with complete system)
7 pegs for border marking (6 +1 spare) (only with complete system)
• If necessary, mallet (preferably rubber or plastic), can be put in the
bag
Assembly instructions
The system is suitable for use on grass. On sand, sand anchors should be used instead of pegs. A special sand
kit is available from SunVolley®. Whilst it is of course easier and faster to set up the outdoor volleyball system
with 2 or more people, it can also be assembled by one person only.
Marking the court (9 m x 18 m)
1. Mark out the volleyball court with the border marking. Use the corresponding pegs.
Placing the posts
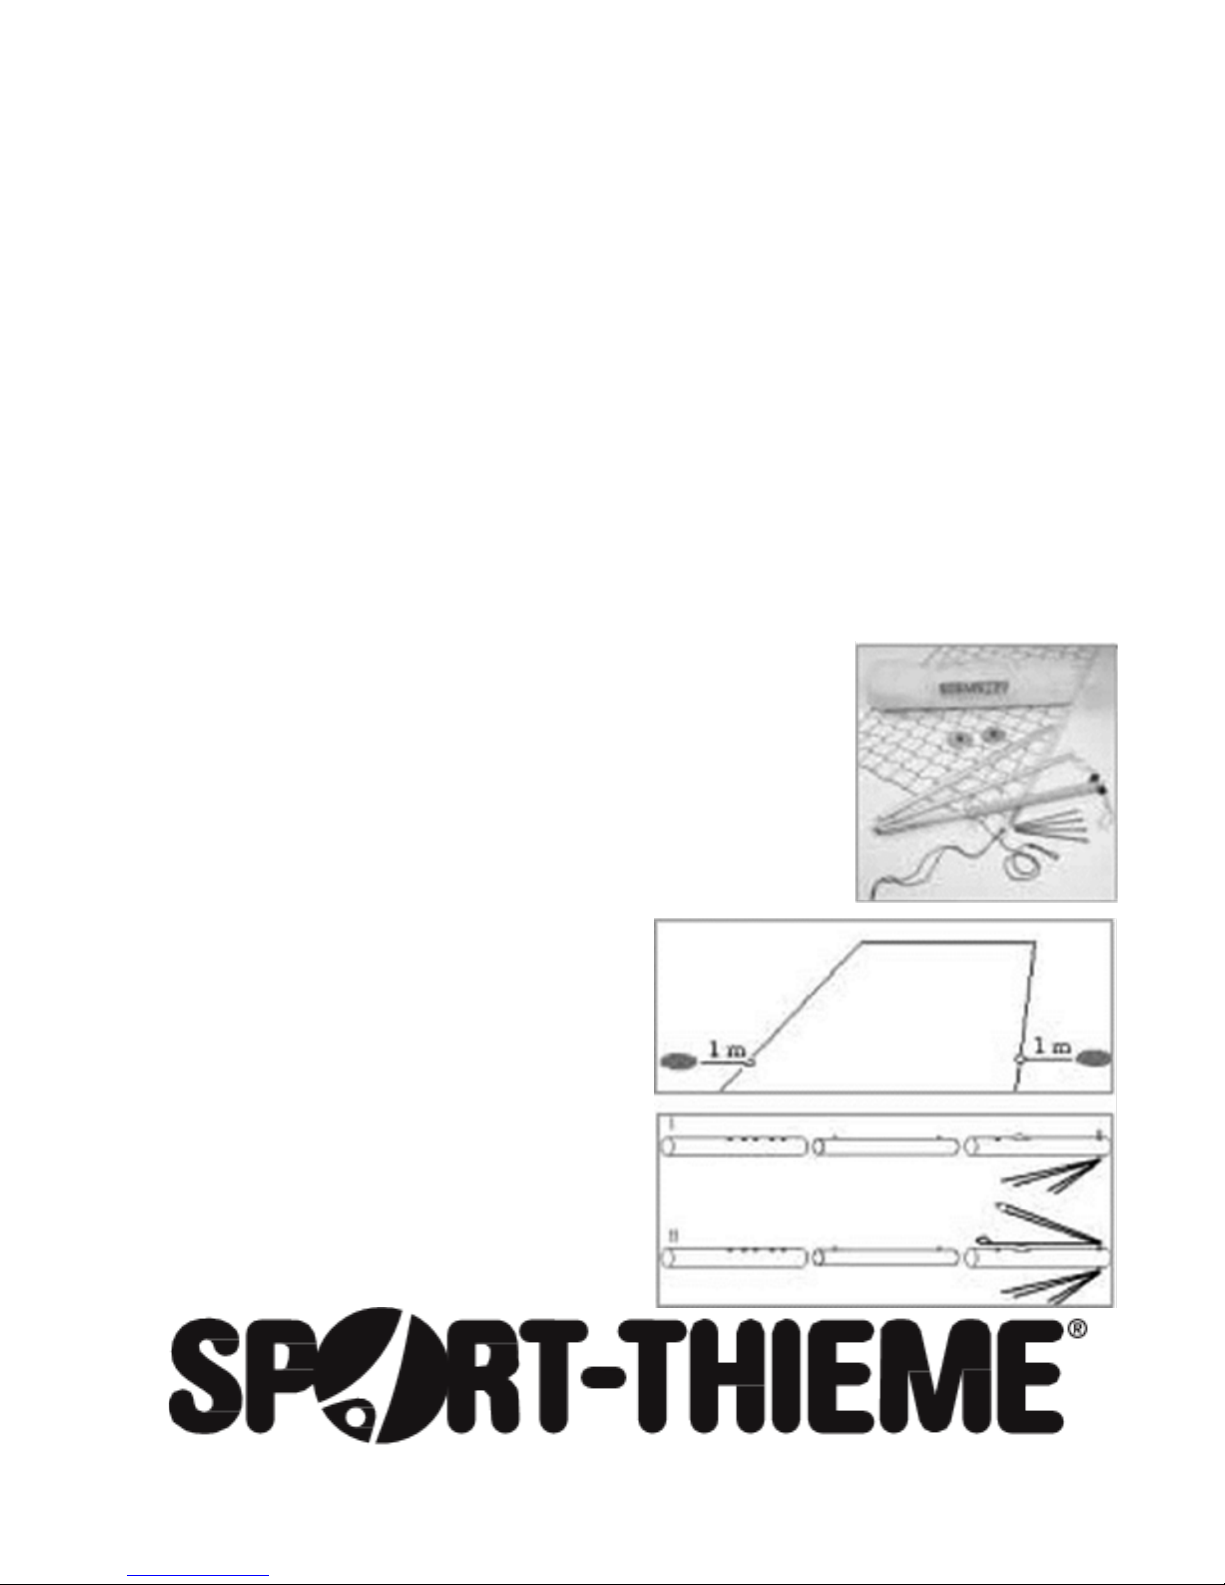
2. Take one section of the post – no matter which one, they are all 1 m
long – and lay it in the middle of a court’s long side at a right angle to the
outside. At the end of the post section, push a ground plate into the
ground. Do the same with the second plate on the other side of the court.
3. Put the post sections together as shown. Set the desired height on the
lower post sections. Use the maximum height for men.
Sport-Thieme GmbH · 38367 Grasleben / Germany · www.sport-thieme.com
Tel. +49 (0) 5357 57 181 81 · Fax +49 (0) 5349 57 181 90 · info@sport-thieme.com

Assembly instructions: SunVolley® Plus Beach volleyball unit
2 www.sport-thieme.com • info@sport-thieme.com
4. Place the posts next to the ground plate. Hammer the pegs approx. one post
section length from the ground plate and roughly as shown into the ground.
Hammer the pegs completely into the ground to prevent injuries from
protruding parts. Only completely sunk pegs guarantee optimum anchoring.
5. Feed the post cord into the integrated Clamcleat. Place the posts, not
yet on the ground plates, at an angle so you can feed in the net cords
comfortably later on.
6. Do the same with post II.
Attaching and tensioning the net
7. Open the net. Place the net on the ground between the two posts.
8. Pull the upper cord from above through the ring on post I. Secure it in the Clamcleat on the post.
9. Move over to post II. Hook the strap of the upper cord to the pulley on post II.
10. Place the posts onto the ground plates. Tighten the post cords in such way that both posts stand straight and are slightly inclined to the outside. Make sure that
the post cords do not cross on the ring.
11. Pull strongly on the pulley to tighten the upper net cord. Secure it with the Clamcleat. Double check that the posts are standing vertically.
12. Tighten both of the upper net side cords (yellow). Secure the net with these cords in the Clamcleats so that it is equidistant from the posts.
13. Feed the bottom net cord around the posts. Tighten this cord with the integrated Clamcleat as well.
14. Feed the upper and lower side net cords (yellow) around the posts. Tighten these cords with the integrated Clamcleats as well in order to pull the net taut.
15. After playing for some time, check the net tension and the positioning of the pegs in the ground. Retighten if necessary.
Dismantling and storage in the bag
• After use, clean the pegs and store 1 in each end of the lower sections of the posts.
• First, put the post sections into the bag.
• Put the ground plates vertically at either end of the bag.
• After use, fold the net neatly and store in the bag.
• If used, put the mallet back into the bag.
 Loading...