

Sports Sensors gloveRADAR GR360 Owner's Manual
OWNER’S MANUAL
0123
MODEL
NO. GR360
Congratulations................................................................................ 2
Features......................................................................................... 2
Glove Attachment Reference.......................................................... 3
Using the Glove Radar
Throwing Preparations................................................................... 4
Proper Throwing Techniques.......................................................... 4
Specifications................................................................................... 6
Emission & Safety Standards........................................................... 6
Care of Your Glove Radar
Problems/Troubleshooting.............................................................. 7
Battery Replacement....................................................................... 7
Replacement Parts......................................................................... 7
Attachment to Any Glove................................................................. 8
Variables of Radar Measurements.................................................. 11
Warranty and Service..................................................................... 15
®
.................................................................. 3
®
.............................................................. 6
RoHS

Congratulations on purchasing your Glove Radar.® If used and cared-for
as described in this Manual, you should enjoy many hours of fun and
constructive use.
The Glove Radar
®
is a small inexpensive Doppler radar velocity sensor which
attaches to a baseball or softball glove to measure the speed of the ball just
before it is caught. It is easily attached to, and removed from, virtually any
ball glove. Clever design results in a small, versatile low-cost device
affordable for youth and senior level teams and individual players.
The purpose of the Glove Radar
®
is to assist in developing players’ throwing
capabilities by providing a measure of velocity improvement which results
from using proper throwing techniques. By learning the proper way to
condition, train, warm-up and throw, players can achieve their best accuracy
and velocity performance, while reducing the risks of injury to their arm and
body.
The Glove Radar
pitchers and catchers, throwing from any distance. Professional and highlevel amateur players can use the Glove Radar
®
can aid any player--infielders and outfielders, as well as
®
when warming-up. Young
ballplayers will benefit from velocity information when
tossing or training. Everyone will have fun using it.
Worn by the receiver of the ball, or by multiple tossing partners in
non- game situations, the Glove Radar
®
"sees" through the glove and
responds to the approaching ball just before it reaches the glove. Thus,
unlike most “radar speed guns”, a long range capability is not required.
Powered by a single cell lithium battery, the Glove Radar
®
transmission level
is well below that of most “wireless” consumer products such as cellular and
portable telephones, for example. Transmission characteristics are well within
FCC requirements and prescribed safety levels. The Glove Radar
®
is
microprocessor controlled, like a mini-computer, and indicates calculated
kilometers-per-hour ball speed on a liquid crystal display.
FEATURES
The Glove Radar
to protect the internal electronics from the dust, dirt and moisture
encountered during normal use. However, the unit is not hermetically sealed
and is not intended to be immersed in water. Two screws hold the cover in
place, which can be removed to replace the internal battery. A rubber pad,
molded onto the housing surface adjacent to the glove, absorbs ball impact
“shock” forces.
The internal electronics are in the “sleep” mode until activated by depressing
the push-button “on” switch. This action applies electrical power from the
battery to the Doppler radar transmitter. The liquid crystal MPH display will
indicate the last velocity reading. Depressing the push-button again will
cause the display to show a flashing “00”, indicating that the Glove Radar
is transmitting.
®
is packaged in a rugged plastic housing assembly, sealed
2
®
Upon receipt of a velocity signal produced by a ball about to be caught
in the glove, the ball speed is calculated and shown on the display in
kilometers-per-hour. Receipt of a velocity signal turns-off the radar transmitter
until the “on” switch is depressed. If a velocity signal is not received within
twenty seconds after depressing the push-button “on” switch, electrical
power is automatically removed from the radar transmitter until the switch
button is again depressed. Limiting the “on” time of the radar transmitter
conserves battery power in order to maximize battery life. The last velocity
reading continues to be displayed. However, after prolonged inactivity (about
one minute) battery power is also removed from the display and the
electronics go into the “sleep” mode.
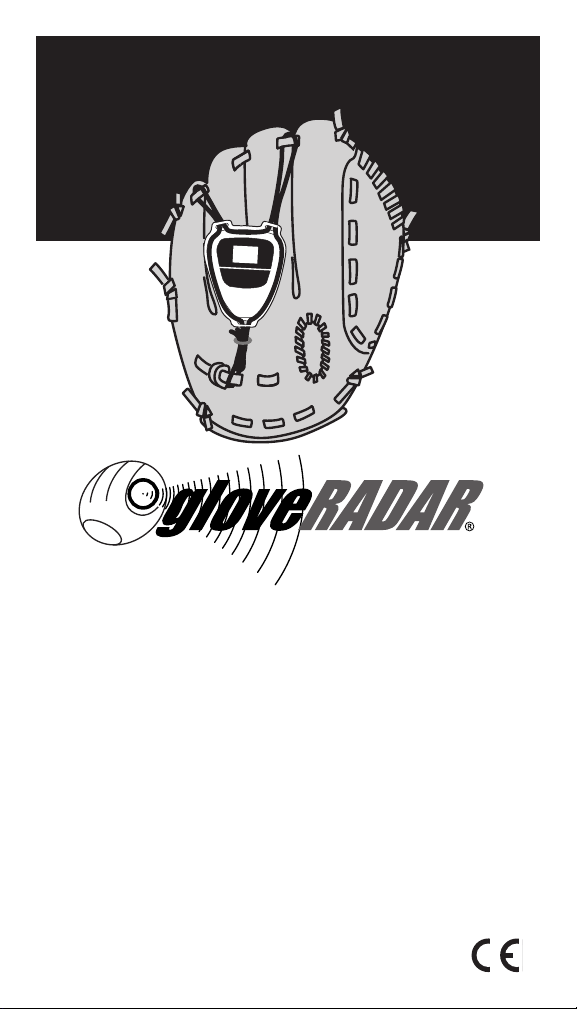
GLOVE ATTACHMENT REFERENCE
Instructions for attaching the Glove Radar® to any ball glove/mitt are
described later in this Manual. The prescribed attachment techniques have
been developed to assure safe, reliable operation of the Glove Radar
®
while
experiencing the significant impact forces created when catching balls thrown
at very high velocities.
USING THE GLOVE RADAR®
1. Attach the Glove Radar® to the glove, as explained in the GLOVE
ATTACHMENT instructions.
2. Press the push button “on” switch (denoted by the Glove Radar
to energize the Doppler radar transmitter. The MPH display will show
the last reading.
3. Press the push button “on” switch a second time. Two flashing zeros
indicate that the radar is transmitting. The Glove Radar
for measuring the velocity of a ball being caught.
4. After the ball is caught, observe the MPH display to read the ball speed.
5. Before returning the ball back to the thrower, reset the radar
transmitter by depressing the push button “on” switch. This sequence
is recommended to avoid the situation where the person catching the ball
will not be concentrating on the next throw, when the thrower is preparing
to throw. (The push button “on” switch is large and conveniently located
such that it can be found and depressed without actually looking at it.)
6. If the next throw does not occur within twenty seconds, the power-saving
timer will turn off the radar transmitter. Therefore, when preparing to
receive the next throw, again depress the push button “on” switch. Flashing
zeros on the MPH display indicate that the radar is transmitting and ready
to record the ball speed.
7. When speed-measuring throwing activities have been concluded, and the
Glove Radar
into the “sleep” mode, which conserves battery power. The display will then
®
is dormant for about one minute, it will automatically switch
be blank until the sequence in 2. above is resumed.
3
®
logo)
®
is now ready

THROWING PREPARATIONS
Taking care of your arm and body and learning proper techniques are vital
to achieving success in throwing/pitching. Consult your coach, trainer, doctor
or parent for guidance. The following steps are strongly recommended:
1. Undertake a conditioning program to get your arm and body in shape
for baseball/softball.
2. Before throwing, stretch and warm-up your arm and body.
3. Begin throwing at slow speeds and over short distances. Gradually extend
the distance and increase the speed. The Glove Radar
®
can help monitor
this process.
4. Be sure you know and practice the proper throwing/pitching techniques.
By throwing correctly, you will be able to achieve your best velocity and
hit your target, while reducing the likelihood of injuring your arm or body.
As you learn and master the proper techniques, you will see improve-
ments in your performance. The Glove Radar
®
will provide the measure-
ments by which velocity performance improvements can be readily seen.
This reinforcement creates player enthusiasm for seeking improve-
ment by applying proper throwing/pitching techniques.
5. If you experience pain while throwing/pitching, or afterward, consult
your doctor, trainer, coach or parent immediately. Do not ignore pain!!
SUMMARY OF PROPER THROWING TECHNIQUES
1. By learning the proper throwing techniques, players can achieve their
best velocity and accuracy while reducing the risk of injury to their arm
and body.
2. Learning the proper throwing techniques when young allows a player’s
muscles and mind to develop the correct memory. Proper throwing
can therefore become a good habit that will stay with players through
out their playing lives.
3. Proper throwing starts with conditioning activities well before the ball
season begins.
4. Stretching and warming-up the entire body, as well as the shoulders and
arms, is necessary before actually starting to throw. “Warm-up to throw;
don’t throw to warm-up,” as stated by the American Sports Medicine
Institute.
5. Start throwing slowly, over a short distance. Gradually lengthen the
distance and increase velocity. This warm-up period will vary with the
individual, but will be typically 10--20 minutes
.
6. Proper throwing techniques can be summarized as follows:
•Plantthebackfoot,onthesideofyourthrowingarm,andstepwiththe
front foot toward the receiver.
•Asyoustep,turntheshoulderofyourglovedhandalsotoward
the receiver.
•Reachdownandbackforpower,keepingyourhandontopoftheball,
palm facing downward.
•Extendthearmoftheglovedhandforward,forbalance,generallywith
the elbow somewhat bent and your thumb down.
•Keepyoureyesonthetargetasyou“comealmostoverthetop”withthe
ball. Sidearm throws are sometimes necessary in game situations, but
maximum velocity and accuracy can be achieved with an overhand
throwing motion. Let this be your natural motion.
•Releasetheballoutinfrontofyourbodyafteryourarmpasses
your head.
•Followthroughwithyourarmandbody—donotletyourthrowing
side stay back.
•Yourarmfollow-throughwillbeasmootharcdownandacrosstothe
opposite side of your body to allow your arm to slow down after releasing
the ball.
•Theentirethrowingmotionshouldbesmooth,notherky-jerky.
•Startoffslowlyuntiltheentiresequencebecomesnaturaland
comfortable.
7. Practice throwing from your position on the field.
•Workonreceivingtheballcomingtoyouoneitherside,highorlow.
•Getintoyourthrowingpositionasyouarereceivingtheball.
•Tobebestpreparedtomakeaquickthrow,catchtheballwithboth
hands so that the ball can be transferred easily to your throwing hand.
—Getyourbodymovingasyoureceivetheballsothatyourstep
toward the receiver is a natural part of making the catch. A short hop or
“crow-step” will give your body momentum to make the throw.
•Getsetwhenmakingathrow;trytoavoidthrowingoff-balance,
although occasionally it will be necessary.
•Practicegettingridoftheballquickly—infielderstogetafastrunner
and outfielders to nail the runner tagging-up or stretching a hit. Imagine
various game situations as you toss and practice.
8. The three things that make a good ballplayer are:
•PRACTICE •PRACTICE, •andPRACTICE!!
4 5
 Loading...