

Sportsliter Solutions 4024SLS User Manual
4024SLS CROSSARM BRACKET MOUNTING
Installation Instructions
INSTALLATION AND SERVICING INSTRUCTIONS
WARNING!
To reduce the risk of injury: Install and maintain to meet applicable codes; ensure that
all supporting structures are securely fastened before installing crossarm brackets and
luminaires; make safety first.
NOTE:
Luminaire must be installed with enough cord to allow the installer to make wiring
connections at the wiring access hole at the bottom of the pole. Use minimum 90°C
SOWA, STWA or SEOWA supply cord.
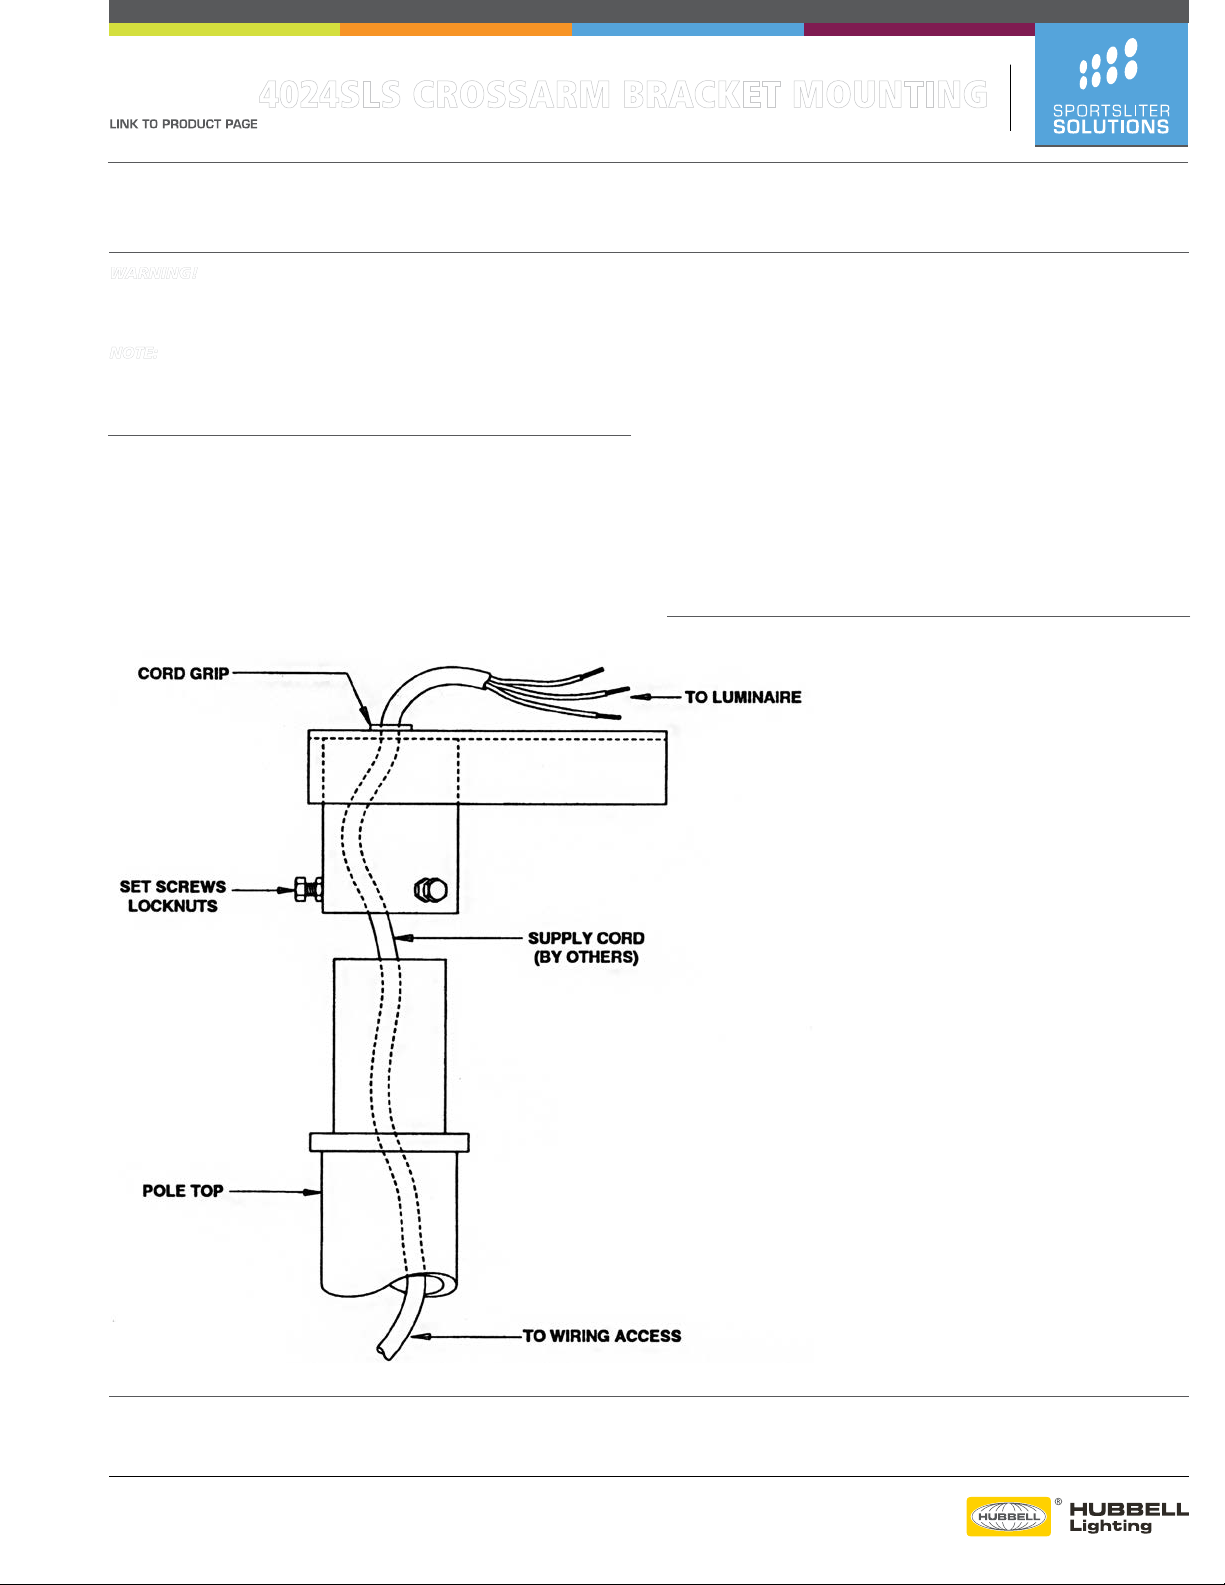
4024SLS Crossarm Bracket Installation:
1. Pull supply (by others) up through the hole in the top of the 4024SLS
bracket and install the cord grip as shown on the supplied instruction
sheet. Be sure to allow enough cord for connection to luminaire.
2. Mount the 4024SLS bracket to the pole top and tighten the set screws.
3. Attach the luminaire to the 4024SLS bracket. Ensure that the luminaire
mounting, wiring and aiming instructions are followed closely.
4. Once the luminaire is mounted and aimed on the desired location, check
to make sure that the set screws are tight, and tighten the locknuts
against the 4024SLS bracket.
NOTE: To ensure that the luminaire does not rotate under high wind conditions, the
following additional steps are recommended:
a. Remove (1) set screw
b. Drill a shallow,
5
⁄16” dia. hole in the pole tenon using the set screw hole as a guide.
c. Replace the set screw and retighten.
5. Make supply connections at the bottom of the pole using approved
wirenuts (by others).
Due to our continued efforts to improve our products, specifications are subject to change without notice.
Copyright © 2013 Hubbell Lighting All Rights Reserved.
For more information visit our web site: http://www.sportslighting.com/
SLS0031 SLS Crossarm Bracket Instruction-A 1/14
Drawing Number: 268-0920-9901
 Loading...