

SportsArt Fitness T613 Owner's Manual

2010.12
T613

TABLE OF CONTENTS
CHAPTER 1: SAFETY INSTRUCTIONS
CHAPTER 2: UNPACKING THE TREADMILL
CHAPTER 3: PRODUCT ASSEMBLY
CHAPTER 4:
CHAPTER 5:
CHAPTER 6:
1.1 SAFETY PRECAUTIONS....................................................................................
1.2 ABOUT THIS MANUAL.......................................................................................
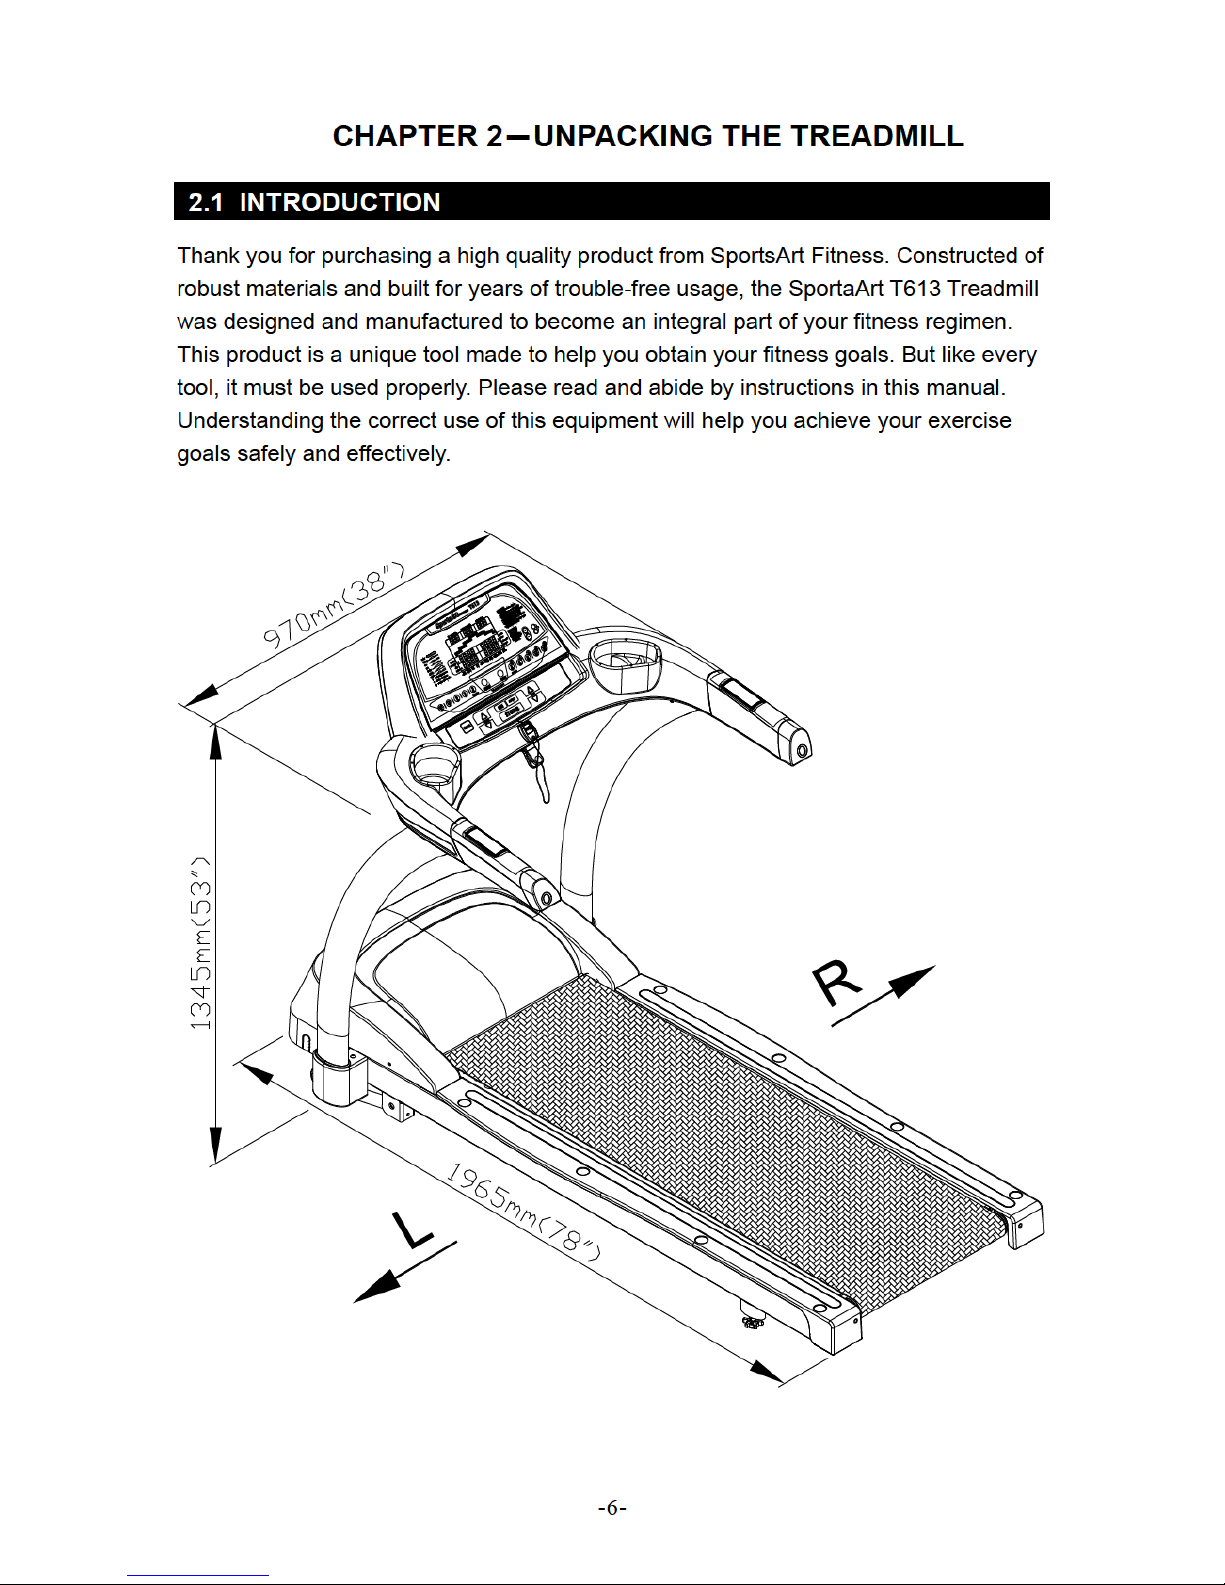
2.1 INTRODUCTION.................................................................................................
2.2 SPECIFICATIONS...............................................................................................
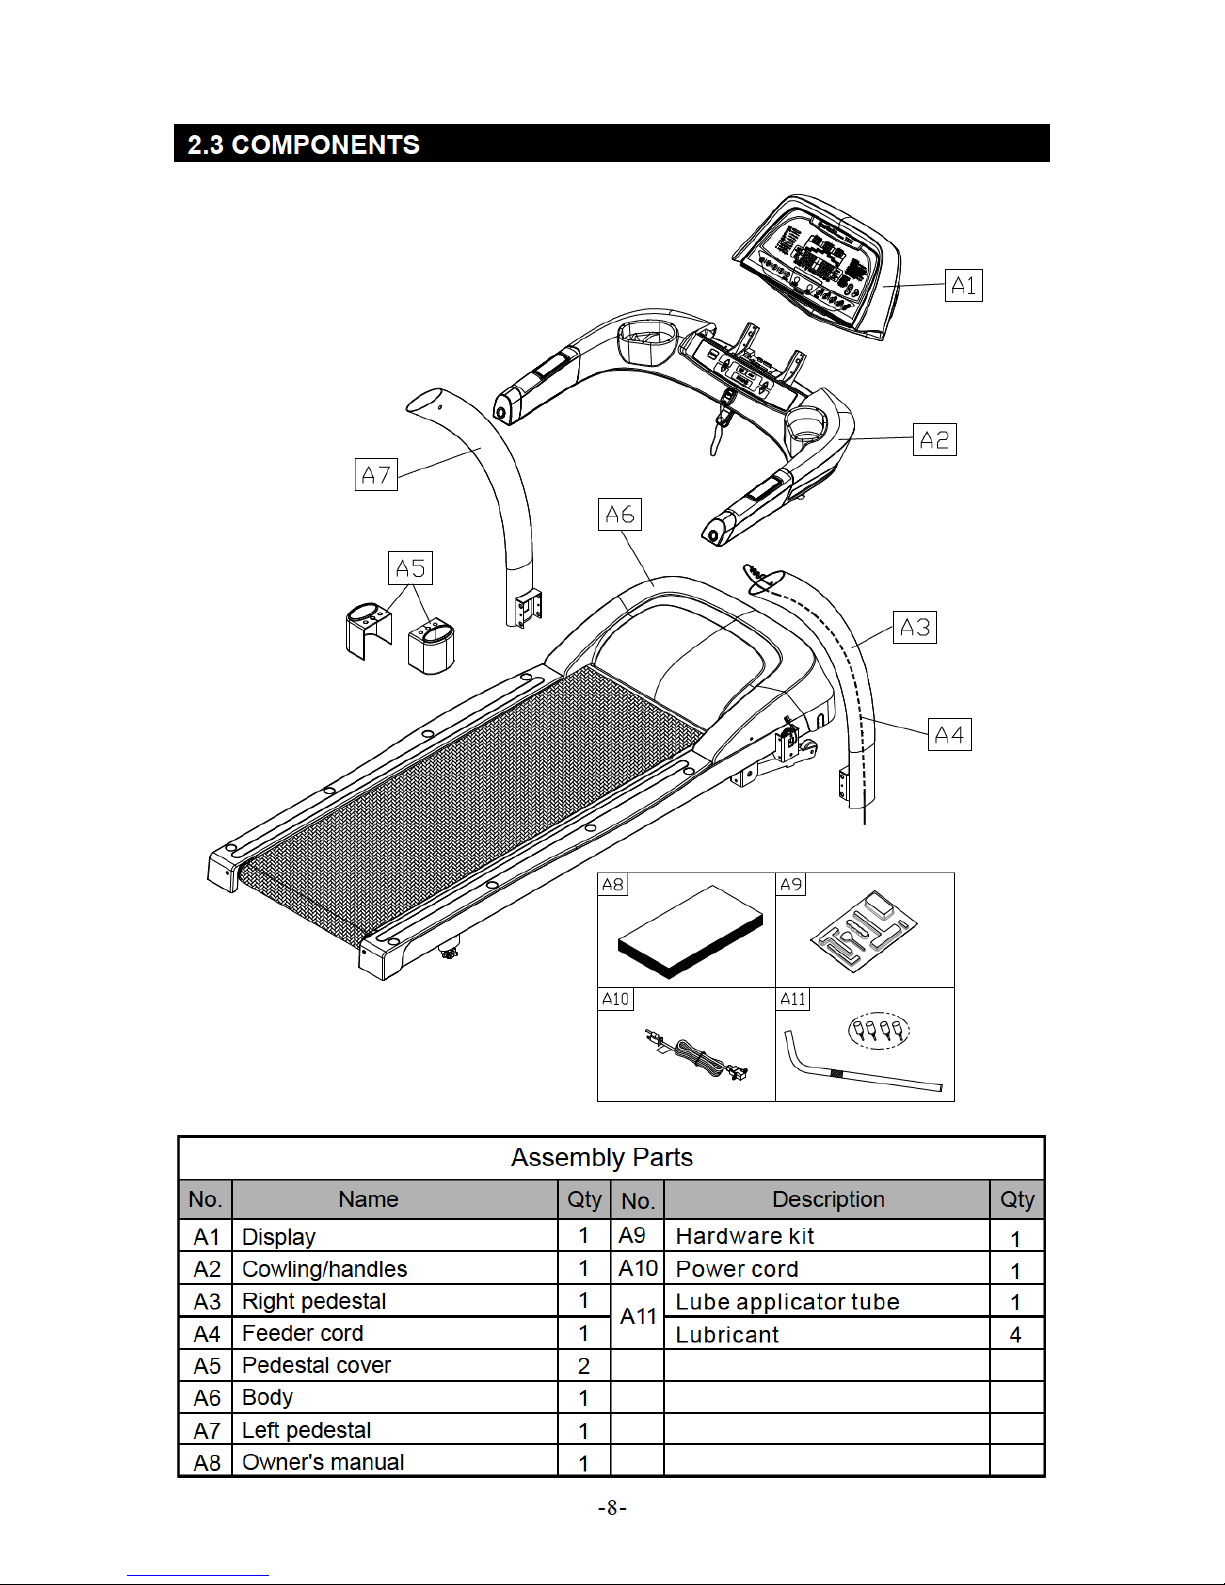
2.3 COMPONENTS IN THE CARTON......................................................................
2.4 COMPONENTS IN THE HARDWARE KIT..........................................................
2.5 COMPONENTS ON THE PRODUCT..................................................................
3.1 INSTALLATION REQUIREMENTS....................................................................
3.2 ASSEMBLY INSTRUCTIONS.............................................................................
4.1 DISPLAY LAYOUT...............................................................................................
4.2
4.3
4.4
T613 DISPLAY
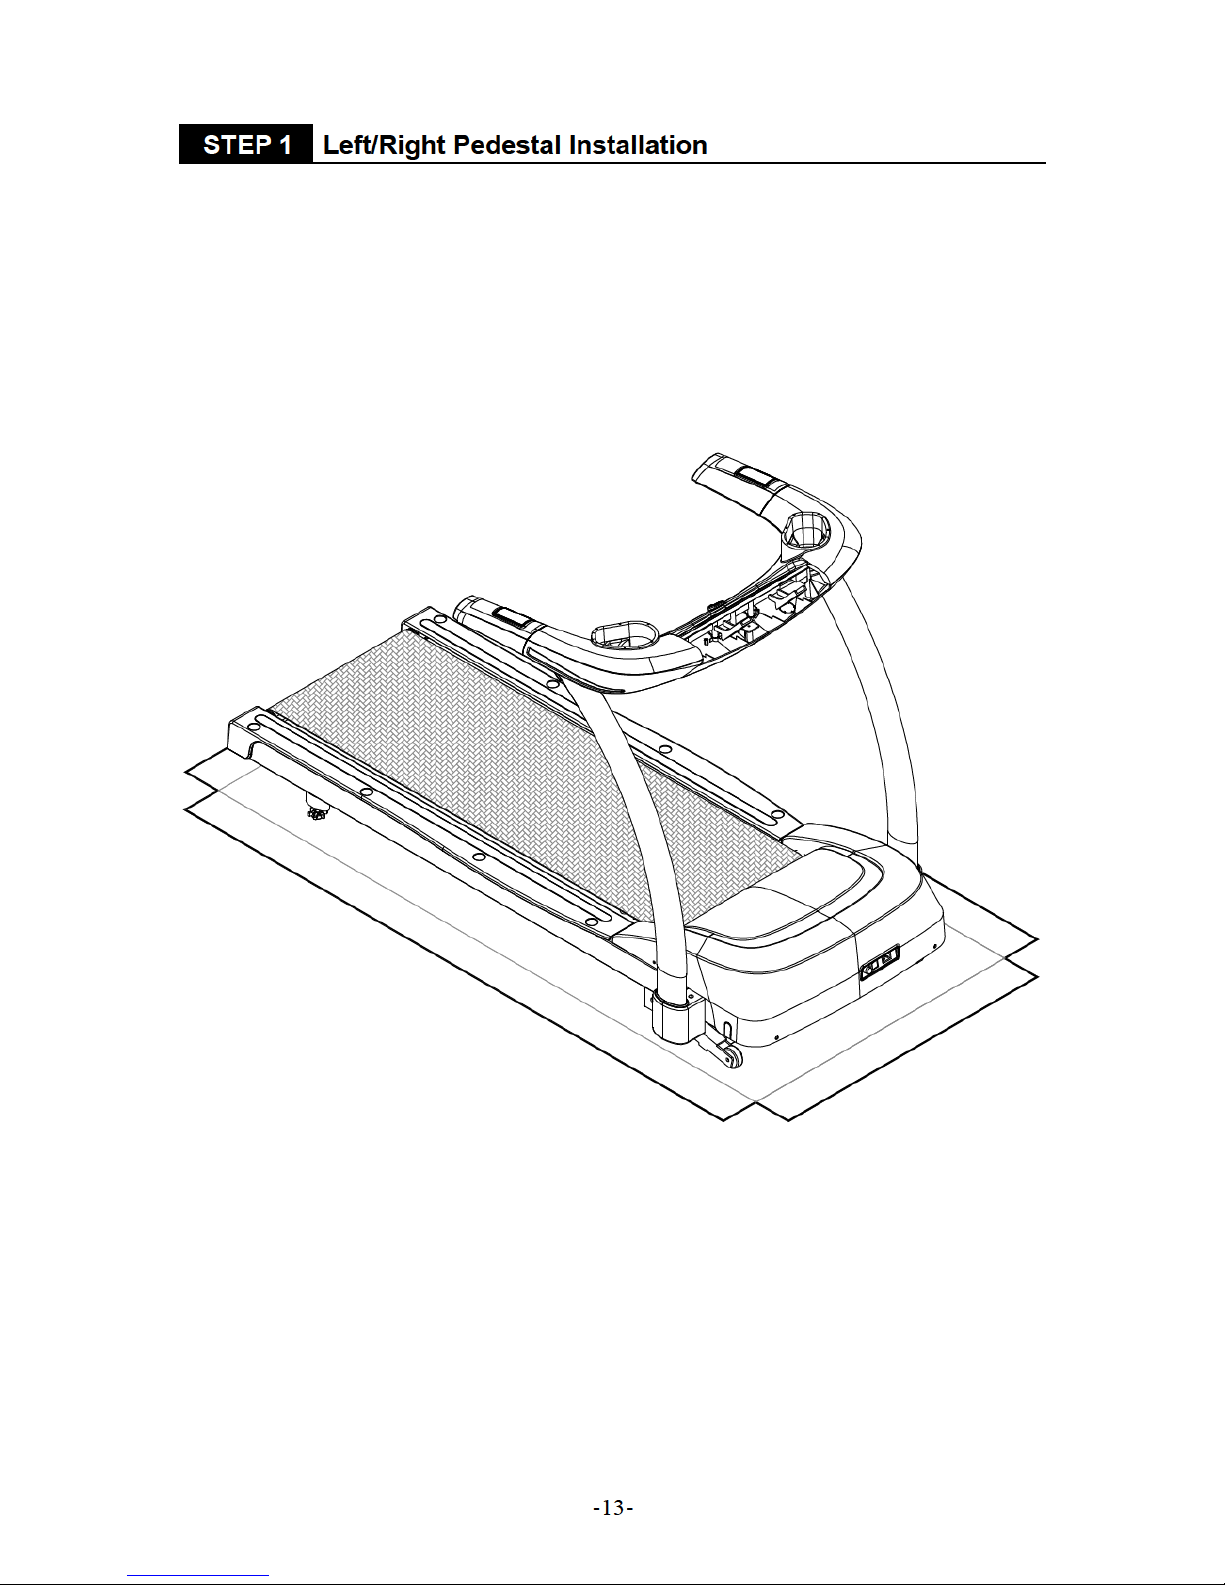
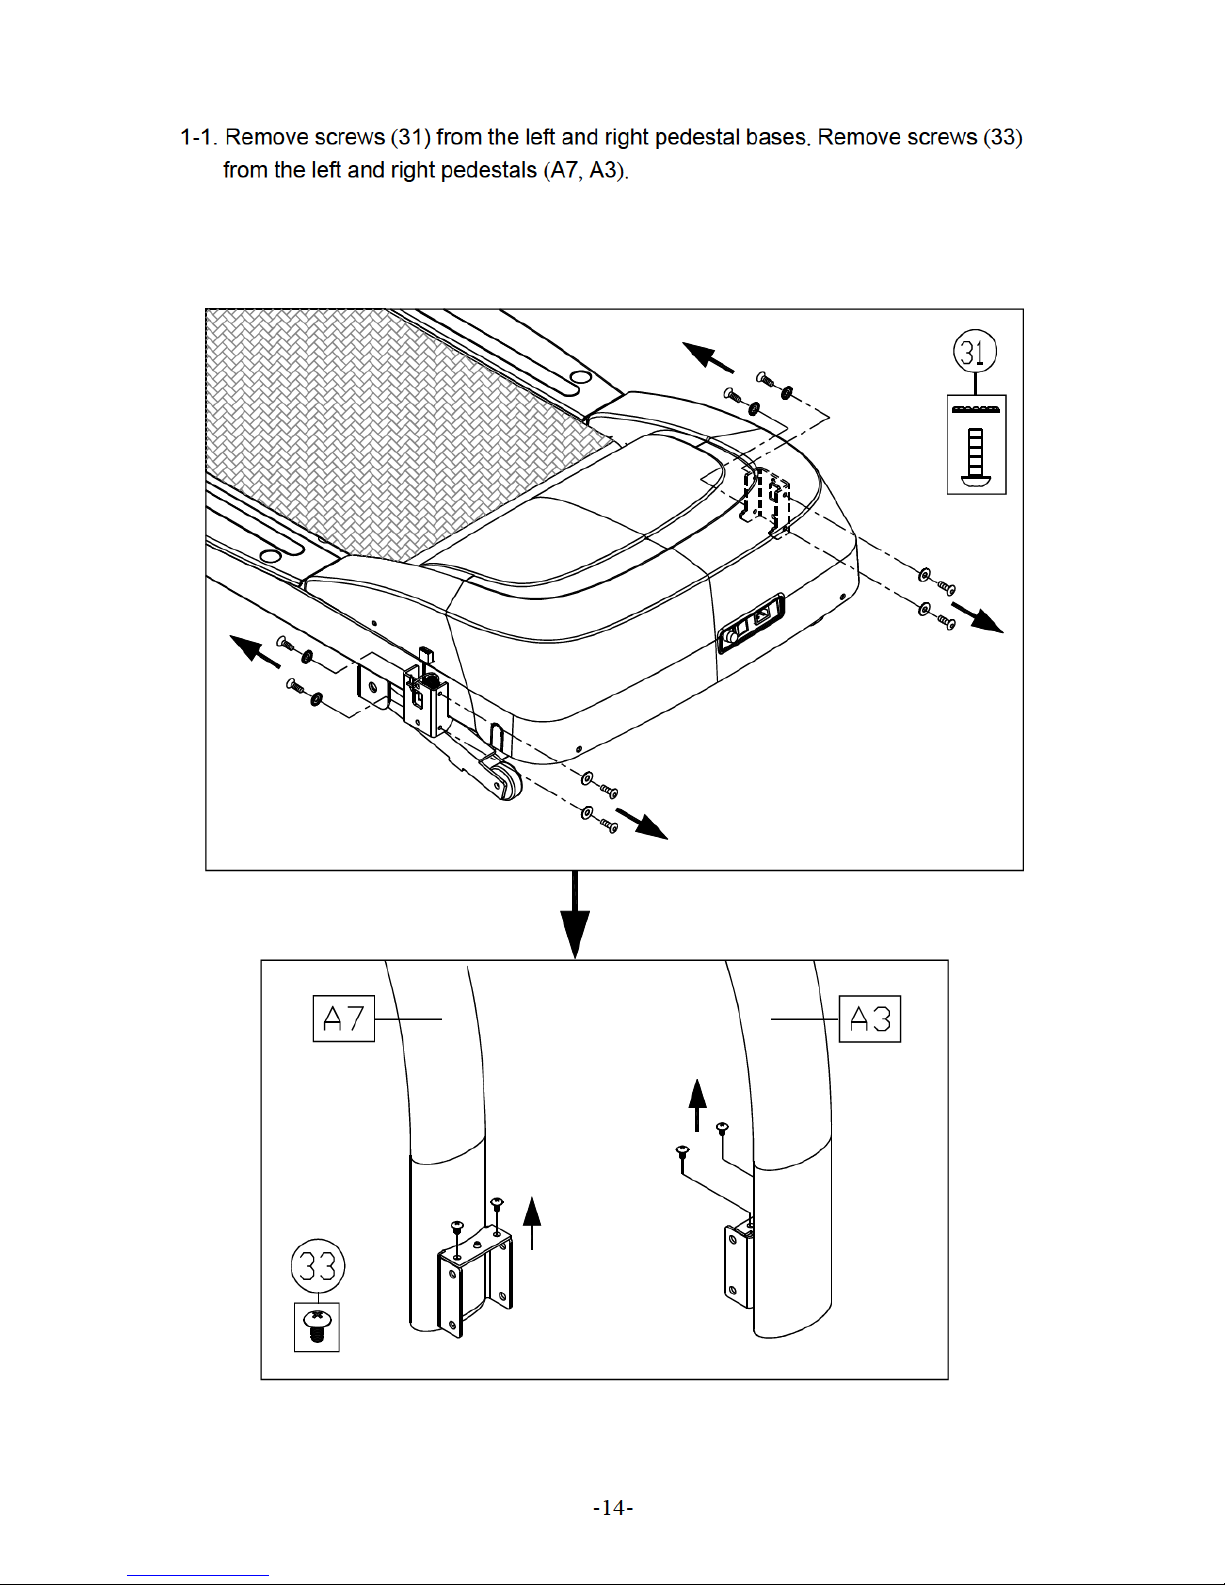
STEP 1 Left/Right Pedestal Installation.............................................................
STEP 2 Display Installation................................................................................
STEP 3 Moving the Treadmill............................................................................
STEP 4 Leveling the Unit...................................................................................
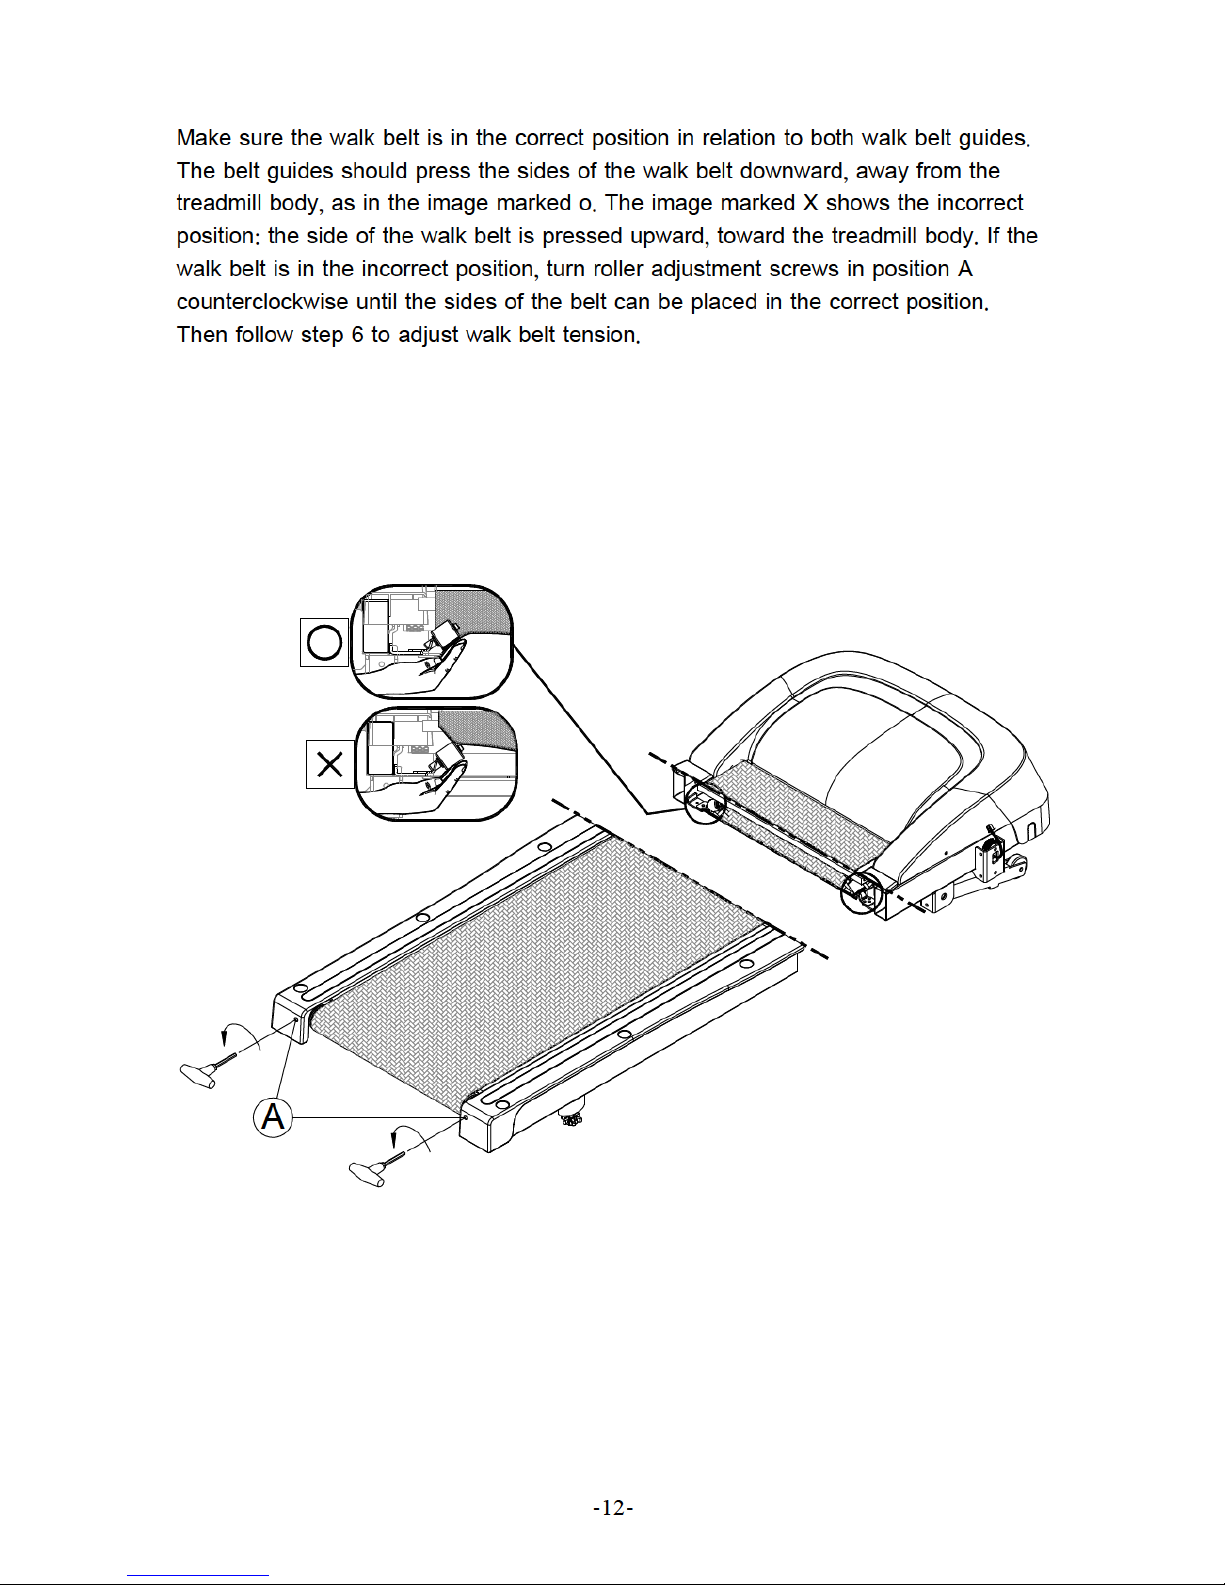
STEP 5 Treadmill Walk Belt Tracking................................................................
STEP 6 Treadmill Walk Belt Tightness Adjustment............................................
STEP 7 Power Cord Installation........................................................................
SCREEN DISPLAYS AND RANGE SPECIFICATIONS......................................
SAFETY FEATURES..........................................................................................
KEY FUNCTIONS...............................................................................................
4.5 OPERATION AT START UP.................................................................................
5.1 QUICK START Mode...........................................................................................
5.2 START Mode.......................................................................................................
5.3 OPERATION DURING EXERCISE......................................................................
5.4 COOL DOWN.......................................................................................................
5.5 PROGRAM Functions..........................................................................................
5.6 USER SETTING..................................................................................................
HOW TO USE YOUR T613 TREADMILL
STEP 8 Fuse Replacement...............................................................................
6.1 HEART RATE TELEMETRY................................................................................
6.2 CONTACT HEART RATE....................................................................................
1
5
6
7
8
9
9
10
10
13
20
23
24
25
26
27
28
29
29
30
30
31
32
32
33
33
33
35
37
37
ABOUT HEART RATE DETECTION AND PRESENTATION

CHAPTER 7: GUIDELINES FOR EXERCISE
ERROR MESSAGE AND OTHER MESSAGE
7.1 HOW HARD SHOULD I EXERCISE?.................................................................
7.2 HOW LONG SHOULD I EXERCISE?..................................................................
7.3 HOW OFTEN SHOULD I EXERCISE?................................................................
8.1 TREADMILL LUBRICATION KIT.........................................................................
8.2 THE LUBRICATION PROMPT............................................................................
8.3 CLEARING THE SERVICE NEEDED MESSAGE..............................................
8.4 MANUAL LUBRICATION PROCEDURE............................................................
8.5 MAINTENANCE SCHEDULE..............................................................................
8.6 MAINTENANCE TASK LIST (TREADMILLS)......................................................
8.7 MAINTENANCE ONE-YEAR MAINTENANCE LOG...........................................
9.1 ERROR MESSAGES.........................................................................................
9.2 OTHER MESSAGES..........................................................................................
...........................................................................................
CHAPTER 8: MAINTENANCE
CHAPTER 9:
WIRING SCHEMATIC
39
39
39
40
40
44
44
45
46
48
49
49
50


1.2 ABOUT THIS MANUAL
This manual provides instructions for the assembly, installation, and operation of the
SportsArt T613 Treadmill. Please study this manual thoroughly to prevent injury to
exercisers and damage to the product. Please save these instructions for future
reference. Make sure that product users abide by instructions in this manual.
This manual uses the following conventions for identifying special information:
Indicates additional information.
Indicates information to which you should pay special attention.
Indicates information to prevent harming the user or damaging the
product.
Note:
Important:
CAUTION:
-5-

T613 Specifications
Running surface: 20" x 58" inches
Speed Range: 0.1- 12 mph; 0.2- 20 kph; Motor: 2.8 HP
Incline Range: 0-15%
Programs:
Feedback:
Display Type: LCD
Heart Rate Control: Yes
Maximum User Weight: 400 lbs; 180 kgs
Dimensions : 1965mm x 970mmx 1345mm78" X 38" X 53")(
TRACK, RANDOM, HILL, INTV, BRUCE, GERKIN, GLUTE, Custom HR,
HRC 65%, HRC 80%.
INCLINE, DISTANCE, TIME, METS, SPEED, PACE, CALORIES, CAL/HR,
HEART RATE, WT LOSS 65%, CARDIO 80%.
-7-
2.2 SPECIFICATIONS


The challenge of product installation depends highly on the area in which the product
will be used. Stairs, doorways and other obstacles must be considered in planning for
product installation. Please ensure the safety of people and property in planning the
installation of any product.
Pay attention to instructions in this manual. Get help if you feel instructions are not
clear. Prevent injury to people and damage to the product.
Do not install this
equipment in an area of high humidity. Exposure to extensive water vapor, chlorine,
bromine, ammonia, and other chemicals could adversely affect this equipment.
Install this product in a safe,
secure location. A solid, level, smooth surface is required to ensure user safety
and proper product operation.
Leave space around the
equipment to allow users to safely mount and dismount the product. Ensure
enough space above the product to allow for comfortable, safe operation.
Before moving this equipment, removing covers, or
accessing electronic components, make sure the power switch is off and the
product is disconnected from the power outlet. Be aware that some electronic
components retain an electric charge for a few seconds after power supply is
disconnected.
˙
˙
˙
˙
˙
Be cautious during the installation and assembly of this equipment.
Think about the installation site and product location.
Set up the equipment on a solid, level surface.
Provide enough space around the equipment.
Avoid electric shock.
CHAPTER 3PRODUCT ASSEMBLY-
3.1 INSTALLATION REQUIREMENTS
3.2 ASSEMBLY INSTRUCTIONS
This product is designed for assembly by one person. But in some cases, depending
on personal strength and experience, two people may be needed for product assembly.
Please follow product assembly instructions carefully.
Not abiding by instructions in this manual may result in injury to people,
damage to the product, and void the product warranty.
Throughout this manual, the words left and right are used in reference to the
product and its parts. As such, the words left and right refer to the left and
right sides, respectively, of someone exercising on the product. In addition,
some parts are marked for left or for right.
CAUTION:
Important:
LR
-10-

 Loading...