

SportsArt Fitness 3110 PERFORMANCE SERIES Owner's Manual

PDF created with FinePrint pdfFactory Pro trial version http://www.pdffactory.com

TABLEOFCONTENTS
1.SAFETYGUIDELINES.........................................................................................
2.ASSEMBLINGYOURTREADMILL
InstallationRequirements.....................................................................................
Listofparts...........................................................................................................
Stepbystepinstructions......................................................................................
Floorleveladjustment..........................................................................................
3.OPERATINGINSTRUCTIONS
Safetykey............................................................................................................
4.UNDERSTANDINGTHEELECTRONICSPACKAGE
MANUALmode...................................................................................................
INTERVALcourse...............................................................................................
PROGRAMmode...............................................................................................
HRC65%mode/HRC80%mode.....................................................................
5.KEYFUNCTIONS
Whateachofthecategoriesmeans...................................................................
1
2
3
4
8
9
10
11
12
13
14
6.RUNNINGONTHETREADMILL.......................................................................
7.GUIDELINESFOREXERCISE
HowlongshouldIexercise?..............................................................................
HowoftenshouldIexercise?.............................................................................
8.MAINTAININGYOURTREADMILL
Cleaningthetreadmill.........................................................................................
Adjustingtherunningbelt...................................................................................
9.TROUBLESHOOTING
ERRMessages...................................................................................................
ERRmessageforheartratecontact...................................................................
Blankdisplay.......................................................................................................
Electronicspackageandmotorfusefailure........................................................
10.Wiringschematic...............................................................................................
16
17
17
18
19
22
22
23
24
25
PDF created with FinePrint pdfFactory Pro trial version http://www.pdffactory.com

SAFETYGUIDELINES:
Pleasereadandfollowthefollowingsafetyguidelines:
Beforebeginninganyexerciseprogram,youshouldconsultwithyourdoctor.Itis
recommendedthatyouundergoacompletephysicalexamination.
Readthisowner'smanualcarefullyandfollowtheinstructions.
•
Assembleandoperatethetreadmillonasolid,levelsurface.Keepthearea
•
behindthetreadmillclear.
Neverallowchildrenonornearthetreadmill.Therunningbeltwillnotstop
•
immediatelyifanyobjectbecomescaughtinthebeltorrollers.
Checkthetreadmillbeforeeveryuse.Makesureallpartsareassembled,andall
•
nutsandboltsaretightened.Donotusethetreadmilliftheunitisdisassembled
inanyway.
Keephandsawayfrommovingparts.
•
Theweightlimitforthistreadmillis300lb.(135kg).
•
Wearproperworkoutclothing:Donotwearlooseclothing.Donotwearshoes
•
withleathersolesorhighheels.Tiebackalllonghair.
Don'trocktheunitfromsidetoside.Careshouldbetakenwhenmountingand
•
dismountingtheunit.
Straddlethemachinewithyourfeetontherightandleftstagingplatformbefore
•
startingtherunningbelt.
Donotplaceanyliquidsonanypartofthetreadmill.
•
Topreventshock,keepallelectriccomponentssuchasthemotor,cord,and
•
switchawayfromwater.
Turnoffthetreadmillwhileadjustingorworkingneartheroller.
•
Donotuseanyaccessoriesthataren'tspecificallyrecommendedbythe
•
manufacturer,thesemightcauseinjuriesorcausetheunittofail.
Workwithinyourrecommendedexerciselevel,doNOTworktoexhaustion.
•
Ifyoufeelanypainorabnormalsensation,STOPYOURWORKOUTandconsult
•
yourphysicianimmediately.
Thetreadmillisdesignedforyouruseandenjoyment.Byfollowingtheabove
precautionsandusinggoodjudgmentandcommonsense,youwillenjoysafeand
pleasurableexercisewiththistreadmill.
PDF created with FinePrint pdfFactory Pro trial version http://www.pdffactory.com
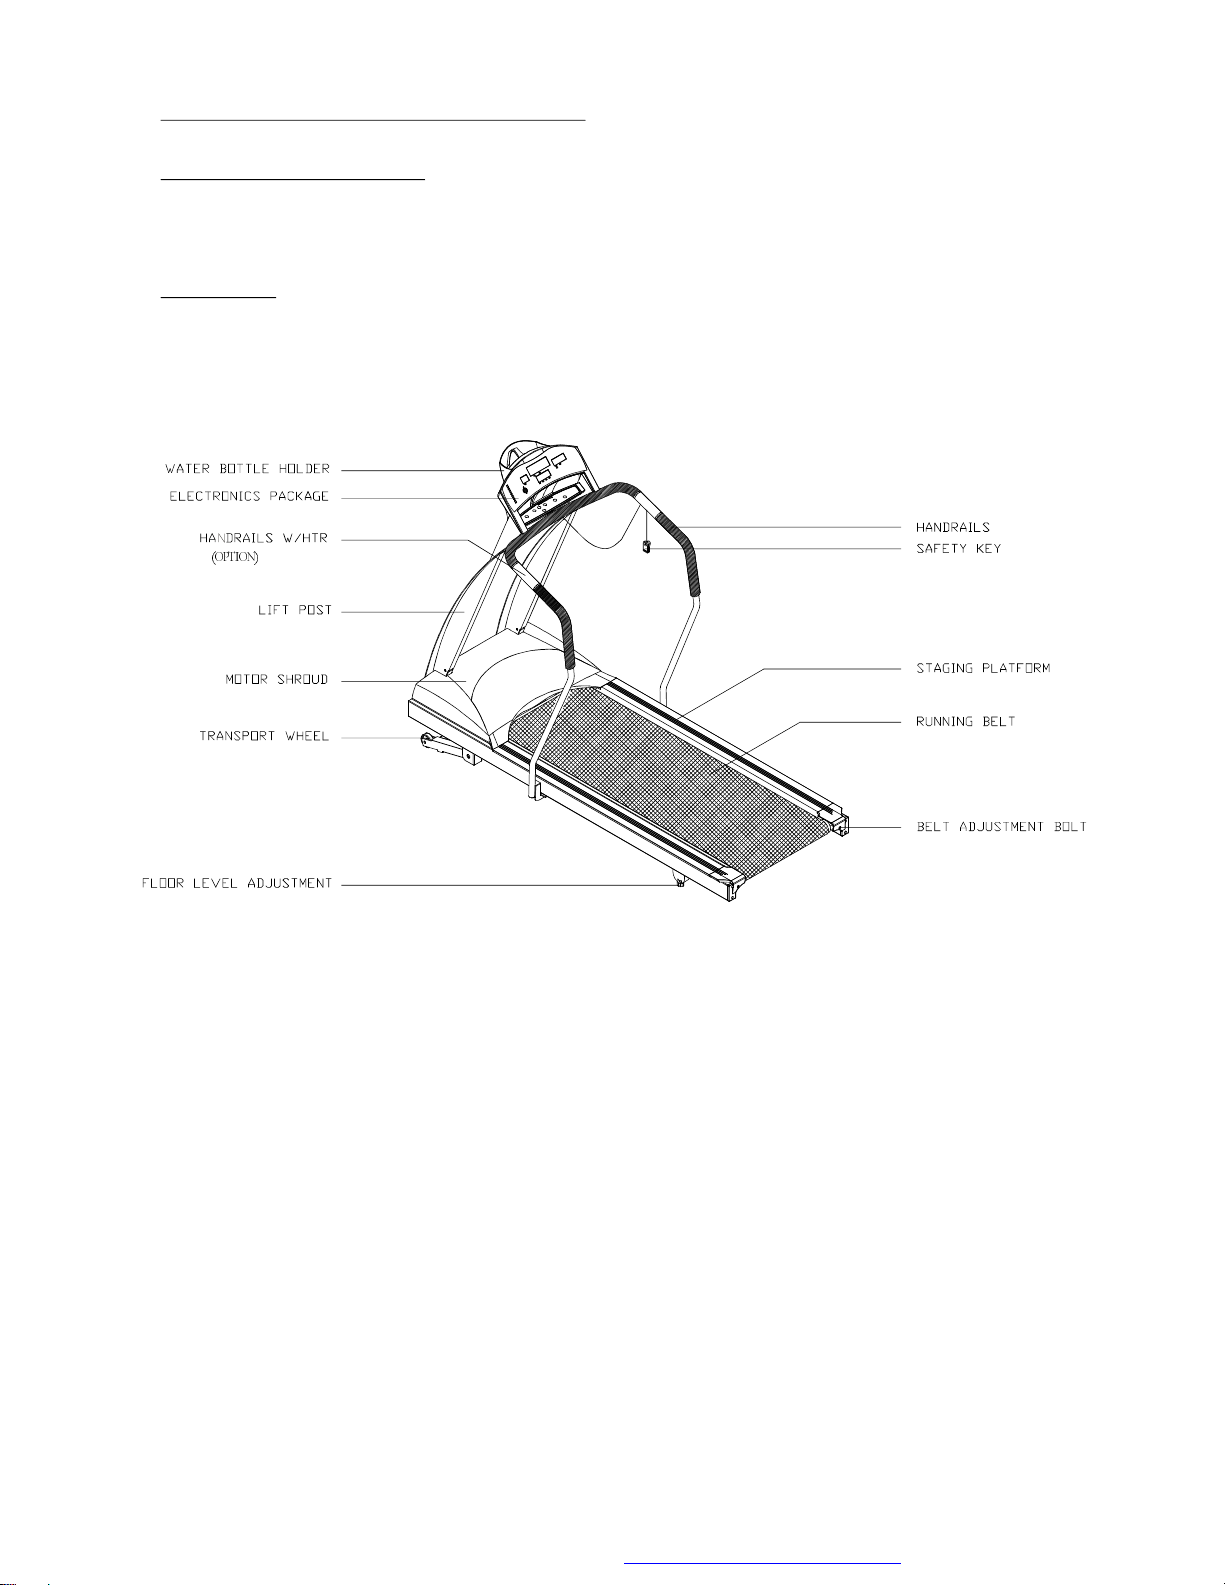
ASSEMBLINGYOURTREADMILL:
Installationrequirements
Readthisowner'smanualandfollowtheinstructionscontainedherein.
CAUTION:
Toavoidbackstrain,andtoensuresafetytotheunitandyourself,we
suggestyoumayneedahelpertoremovetherunningdeckassembly
frombox.
PDF created with FinePrint pdfFactory Pro trial version http://www.pdffactory.com

Listofparts
Beforeassemblingyourtreadmill,makesurethatyouhaveallthefollowingitems:
1.Onesafetykey
2.OnehexAllenwrench(M6)withT-handle
3.OnehexAllenwrench(M5)withT-handle
4.OnehexAllenwrench(M5)
5.OnehexAllenwrench(M4)withT-handle
6.Onefuse-15ampfor100-120voltuse;10ampfor200-240voltuse
7.FourM4xL12Philipsscrews-electronicspackage
8.One2-wayScrewdriver
Ifanyitemsaremissing,contactyourauthorizedservicedealer.
IMPORTANT:
Thepackingforthistreadmillisdesignedtoprotectitduringshipment.
Pleasestoretheoriginalpackaginginasafeplaceincaseyouneed
toshipthetreadmillinthefuture.
PDF created with FinePrint pdfFactory Pro trial version http://www.pdffactory.com
Stepbystepinstructions
Thefollowingstepsexplainhowtoassembleyourtreadmill.Pleasereadeverystep
thoroughlyandfollowthedirectionscompletelytoensurecorrectassembly.
1.ThereareimportantpartsenclosedinsideoftheStyrofoam,pleasecheckthe
Styrofoamcompartmentsbeforediscarding.Makesureallpackingmaterialsare
removedfromthetreadmilldeck.
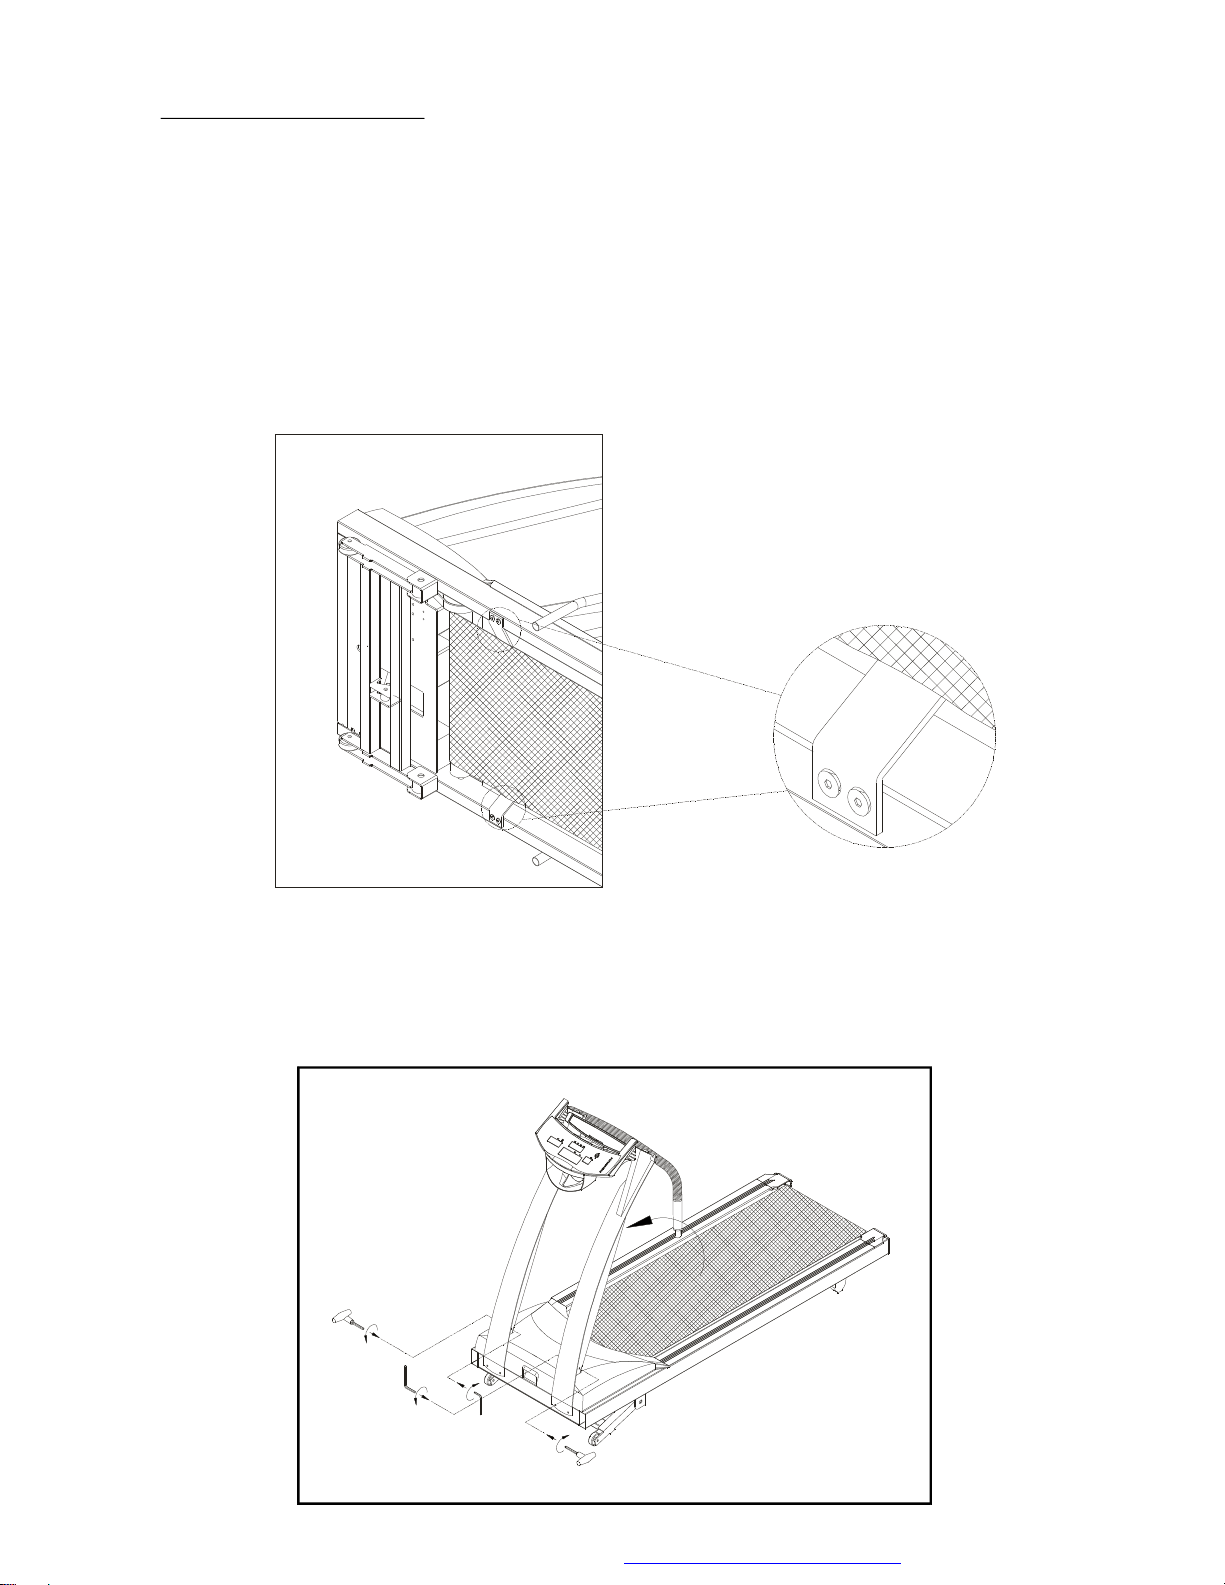
2.Laythetreadmillonitsside.Makesuretherunningbeltispositionedinthetracks
ofthetwoBELTALIGNMENTROLLERundersideofthemachine(seeFig.1).
Fig.1
3.Then,placethetreadmillonalevel,flatsurface.
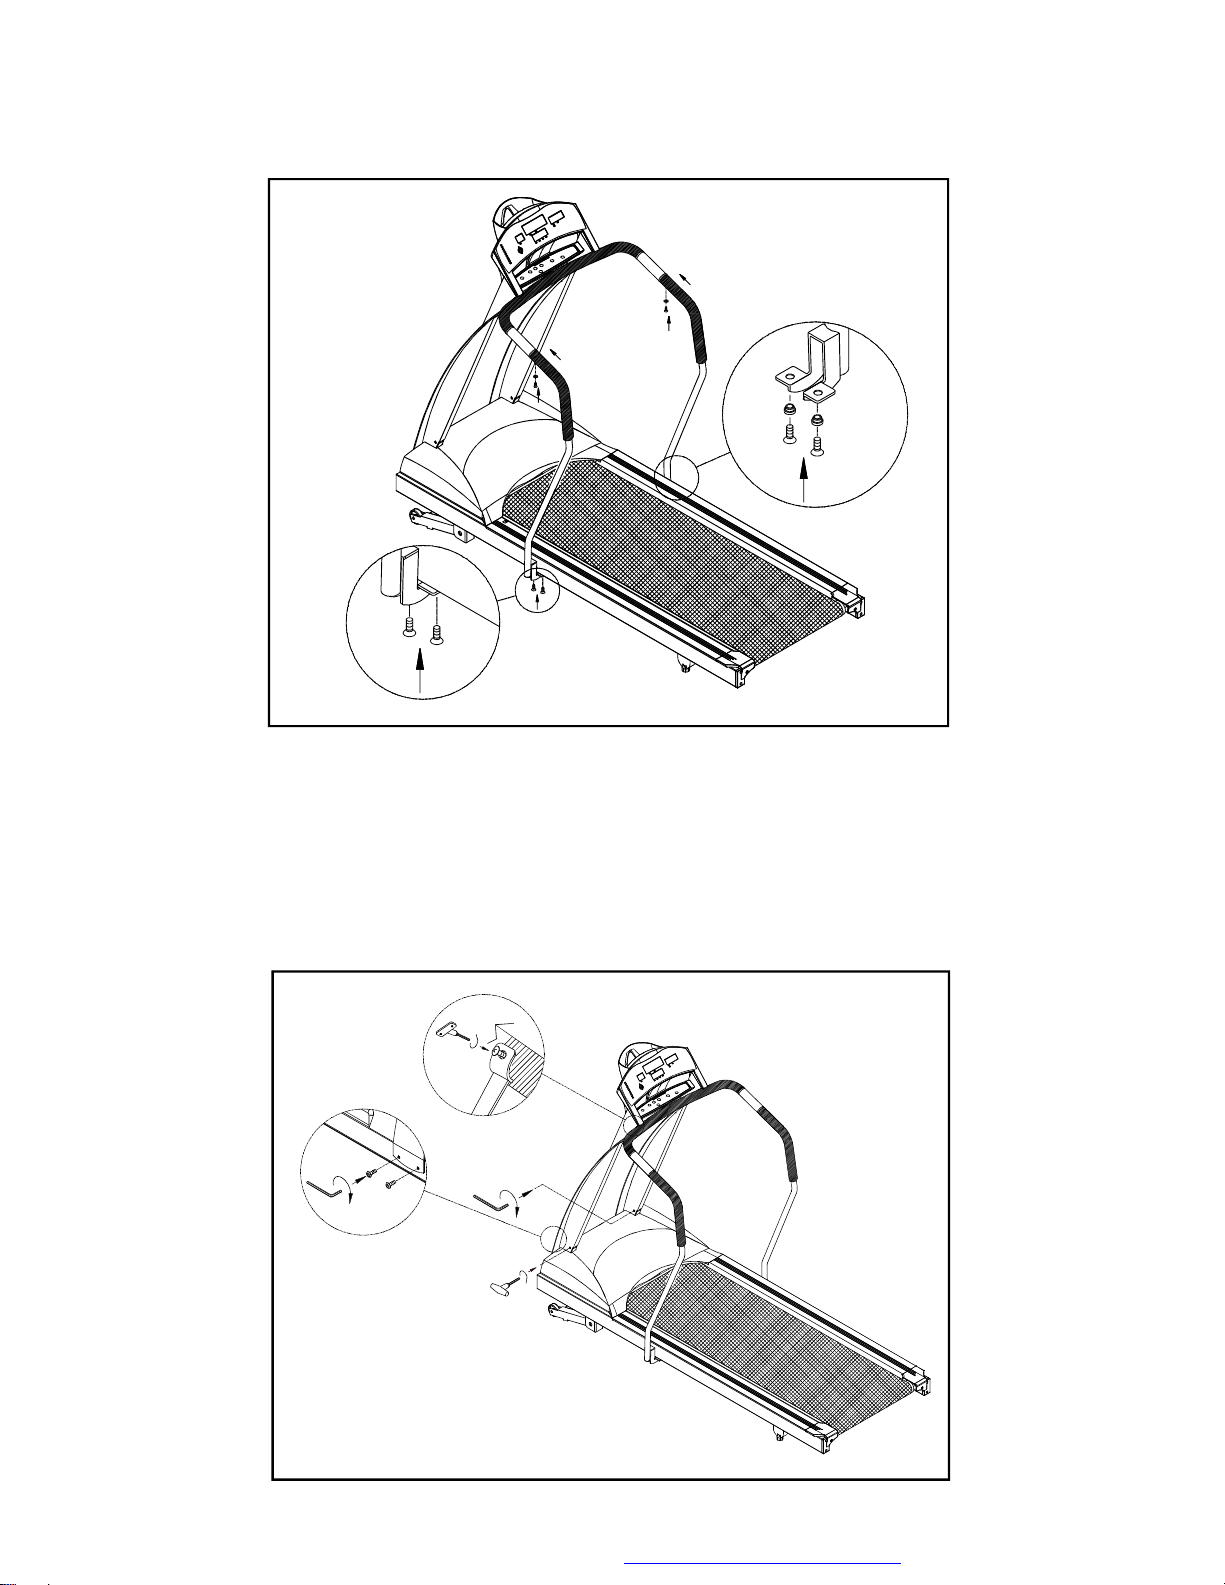
4.Bringthesideposttotheiruprightpositions(includingthehandlebarandthe
electronicspackage).Attachthescrewstotheliftpost.Donottightenyet.(See
Fig.2)
PDF created with FinePrint pdfFactory Pro trial version http://www.pdffactory.com
Fig.2
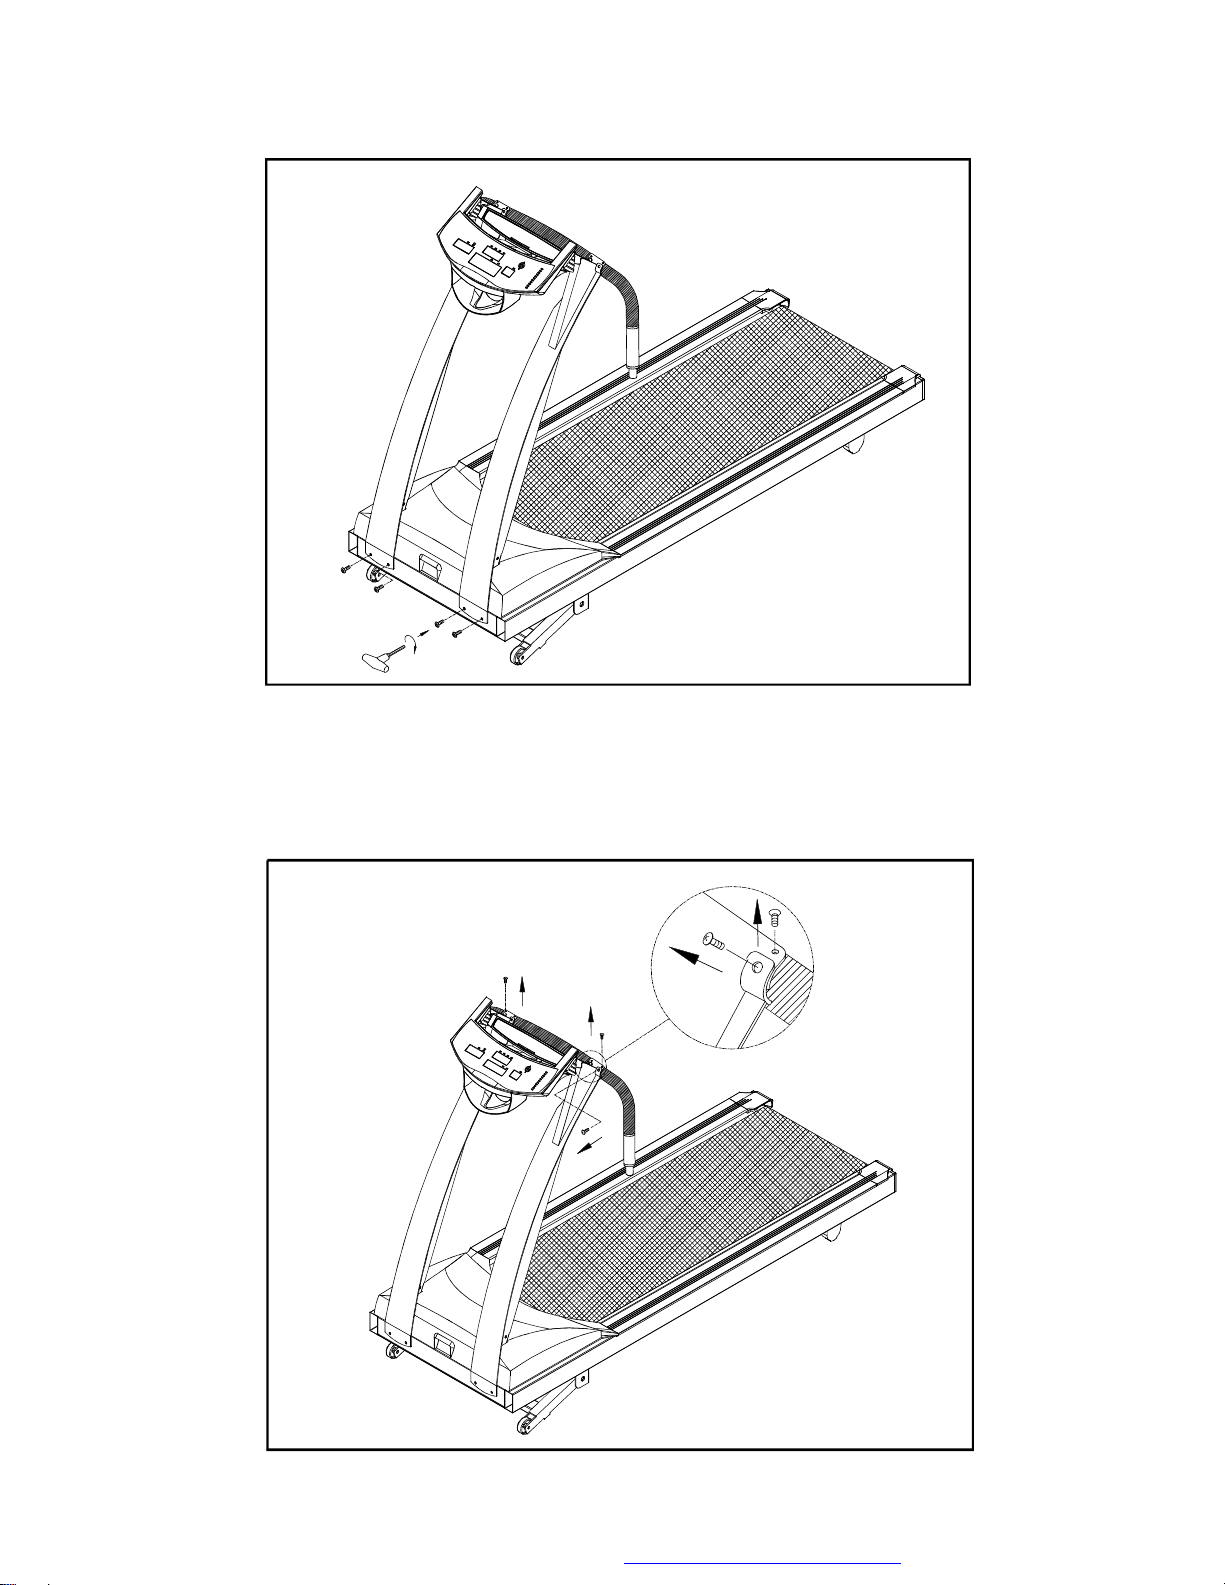
5.Usingtwo5/16"screwsprovidedoneachpost.Donottightenyet.(seeFig.3)
Fig.3
6.Loosenthescrewsoffixingthehandlebarandremovethesteelplate.(seeFig.4)
PDF created with FinePrint pdfFactory Pro trial version http://www.pdffactory.com
Fig.4
7.Turnupthehandlebarandfastenthescrews.Donottightenyet.
IfyourtreadmillisequipedwithHandTouchReadout(HTR),beforefasteningthe
screws,connectthewiresfromthedisplayandtheHandTouchReadout
handlebarsecurely,asshowninFig5.Thenfastenthescrewsofthehandlebar.
Donottightenyet.
Caution:
Note:
8.Usethescrewdrivertotightenallscrewssecurely(seeFig.6).
Pleasemakesuretoconnectthewirescorrectly,RtoRandLtoLwhich
aremarkedonthewiresthemselves.
Theabovetwoscrewstothehandlebararespeciallyprovidedby
manufacturer.Donotattempttosubstituteanyotherscrew.
Fig.5
PDF created with FinePrint pdfFactory Pro trial version http://www.pdffactory.com
Fig.6
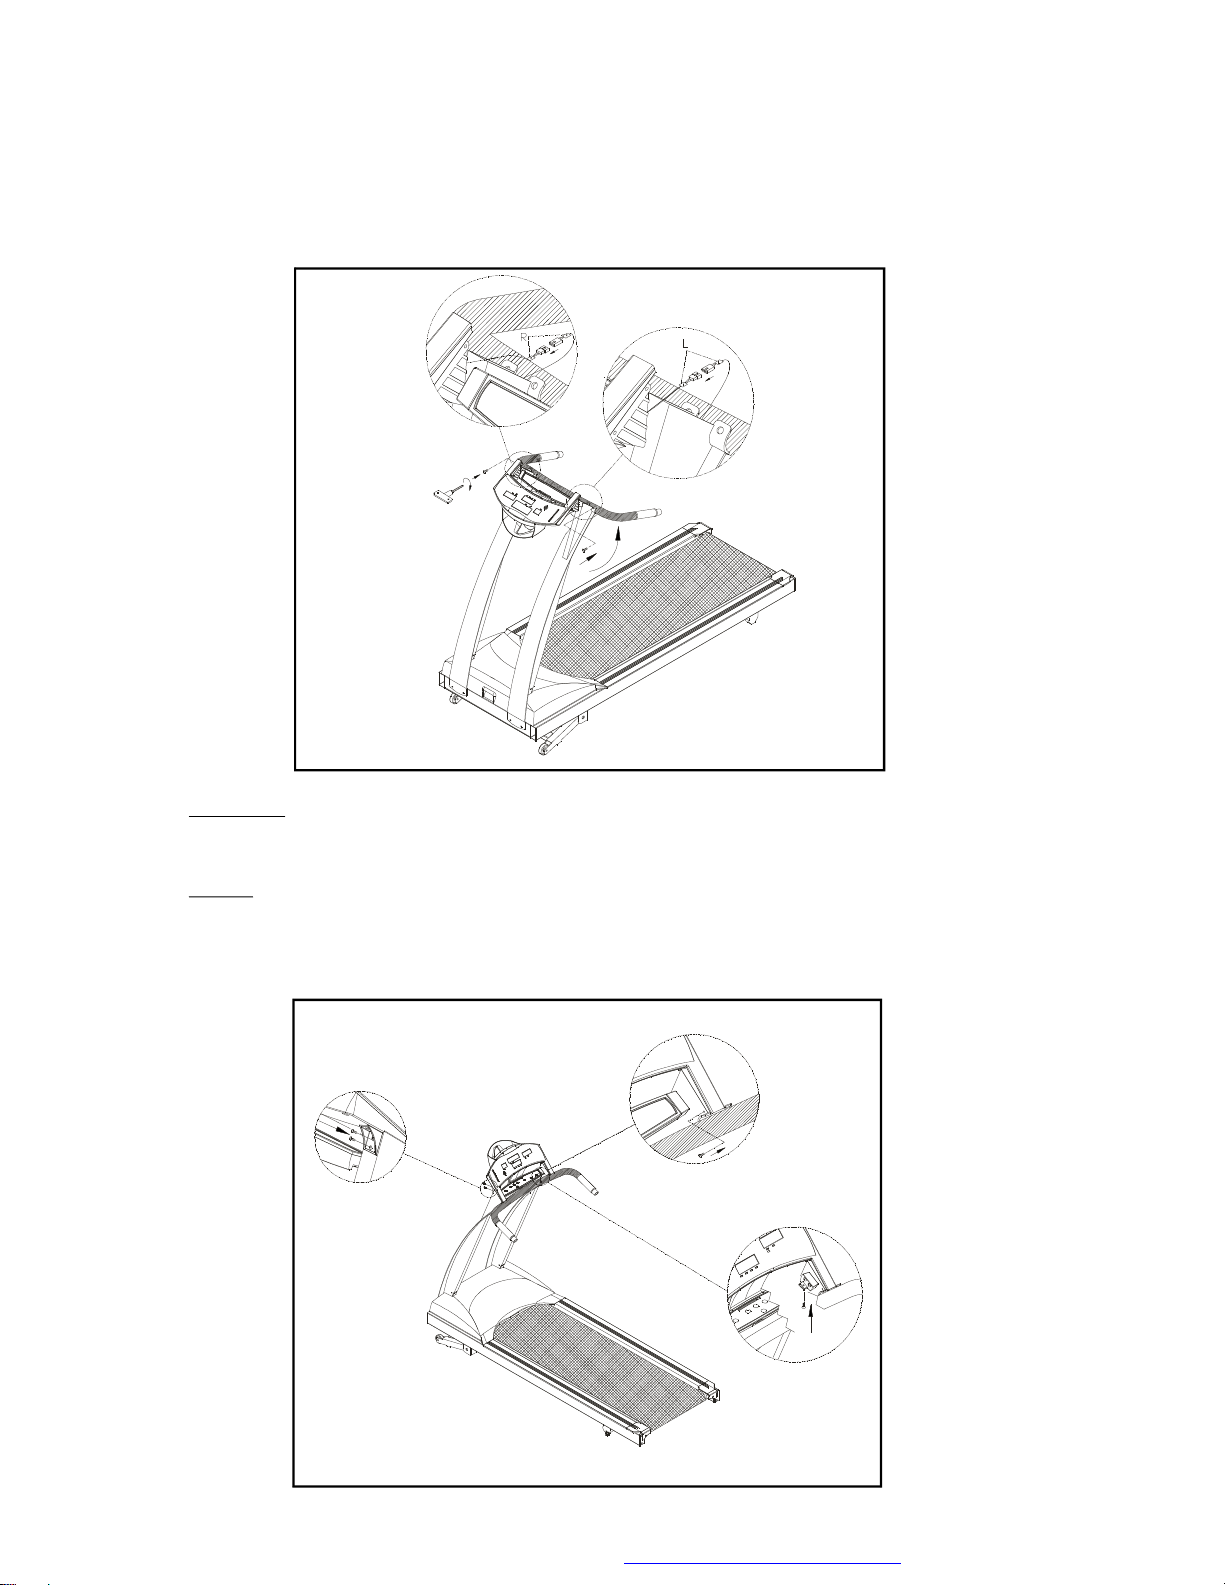
9.Insertthetwohandrailsintothehandlebarsandthenfastenthescrewsprovided.
Lastlysecurethehandrailclampbyfasteningthescrews(seeFig.7).
Fig.7
Pleasenote:Thescrewstothehandrailclamp(Fig.7)arespeciallyprovidedby
manufacturer.Donotattempttosubstituteanyotherscrews.Any
questions,pleasecontactyourdealer.
10.Securethescrewsinfrontoftheliftpostsandhandlebartightly,Securethe
screwstotheliftpoststightly(seeFig.8).
PDF created with FinePrint pdfFactory Pro trial version http://www.pdffactory.com
Fig.8
 Loading...