

SportsArt C530u User Manual

SPORTSART C530U UPRIGHT CYCLE
TABLE OF CONTENTS
A. SAFETY GUIDELINES..........................................................................................
B. INTRODUCTION...................................................................................................
C. ASSEMBLING YOUR CYCLE..............................................................................
Installation requirements......................................................................................
List of parts...........................................................................................................
Step-by-step instructions......................................................................................
Floor level adjustment..........................................................................................
Seat adjustment...................................................................................................
D. EXERCISING ON YOUR CYCLE ........................................................................
Understanding the electronics package...............................................................
Electronic display...............................................................................................
Terminology.......................................................................................................
Display function...............................................................................................
Basic operation................................................................................................
System default setting.....................................................................................
E. PROGRAMS.........................................................................................................
Manual program...................................................................................................
CUSTOM program...............................................................................................
Hill program..........................................................................................................
Random program.................................................................................................
INT1 program.......................................................................................................
INT2 program.......................................................................................................
Plateau program..................................................................................................
WT loss (HRC 65%) / Cardio (HRC 80%) programs...........................................
Cool down mode..................................................................................................
Power standby mode...........................................................................................
Importance notice................................................................................................
1
2
3
3
3
4
7
8
10
10
10
11
12
13
15
16
16
17
18
18
18
19
20
20
22
22
23
F. MAINTAINING C530U CYCLE................................................................................
G. EXERCISE GUIDELINES....................................................................................
How long should I exercise?................................................................................
How often should I exercise?...............................................................................
24
24
24
24

A. SAFETY GUIDELINES
Please read and observe the following safety guidelines:
Keep this owner's manual for future use and reference.
˙
Read this owner's manual and follow the instructions.
˙
Assemble and operate the bike on a solid, level surface.
˙
Never allow children on or near the cycle.
˙
Check the machine before use. Make sure all parts are assembled, and all nuts
˙
and bolts are tightened. Do not use the machine if the unit is disassembled in any
way.
Keep your hands away from moving parts.
˙
Wear proper workout clothing: Do not wear overly loose clothing. Do not wear
˙
shoes with leather soles or high heels. Tie all long hair back.
Do not rock the unit from side to side, and use care when mounting and
˙
dismounting the unit.
Do not stand on the unit.
˙
Do not use accessories that are not specifically recommended by the
˙
manufacturer as these might cause injuries or cause the unit to fail.
Allow sufficient space on both side of the cycle for users to mount and dismount
˙
the machine.
If any parts fail or are defective, please stop your workout immediately and
˙
contact your authorized dealer for repairs.
Work within your recommended exercise level; do NOT work to exhaustion.
˙
CAUTION:
Before beginning any exercise program, you should consult with your doctor. It is
recommended that you undergo a complete physical examination.
‧‧1
B. INTRODUCTION
Congratulations on the purchase of one of the finest pieces of exercise equipment on
the market, the SportsArt C530U. Constructed of high quality materials and designed
for years of trouble free usage, the C530U will be an integral part of your fitness
regimen.
Before using your C530U cycle, we recommend that you familiarize yourself with this
Owner's Manual. Whether you are a first time user of an exercise cycle or a
seasoned "pro", understanding the correct use of the equipment will enhance your
ability to achieve your exercise goals safely and successfully.
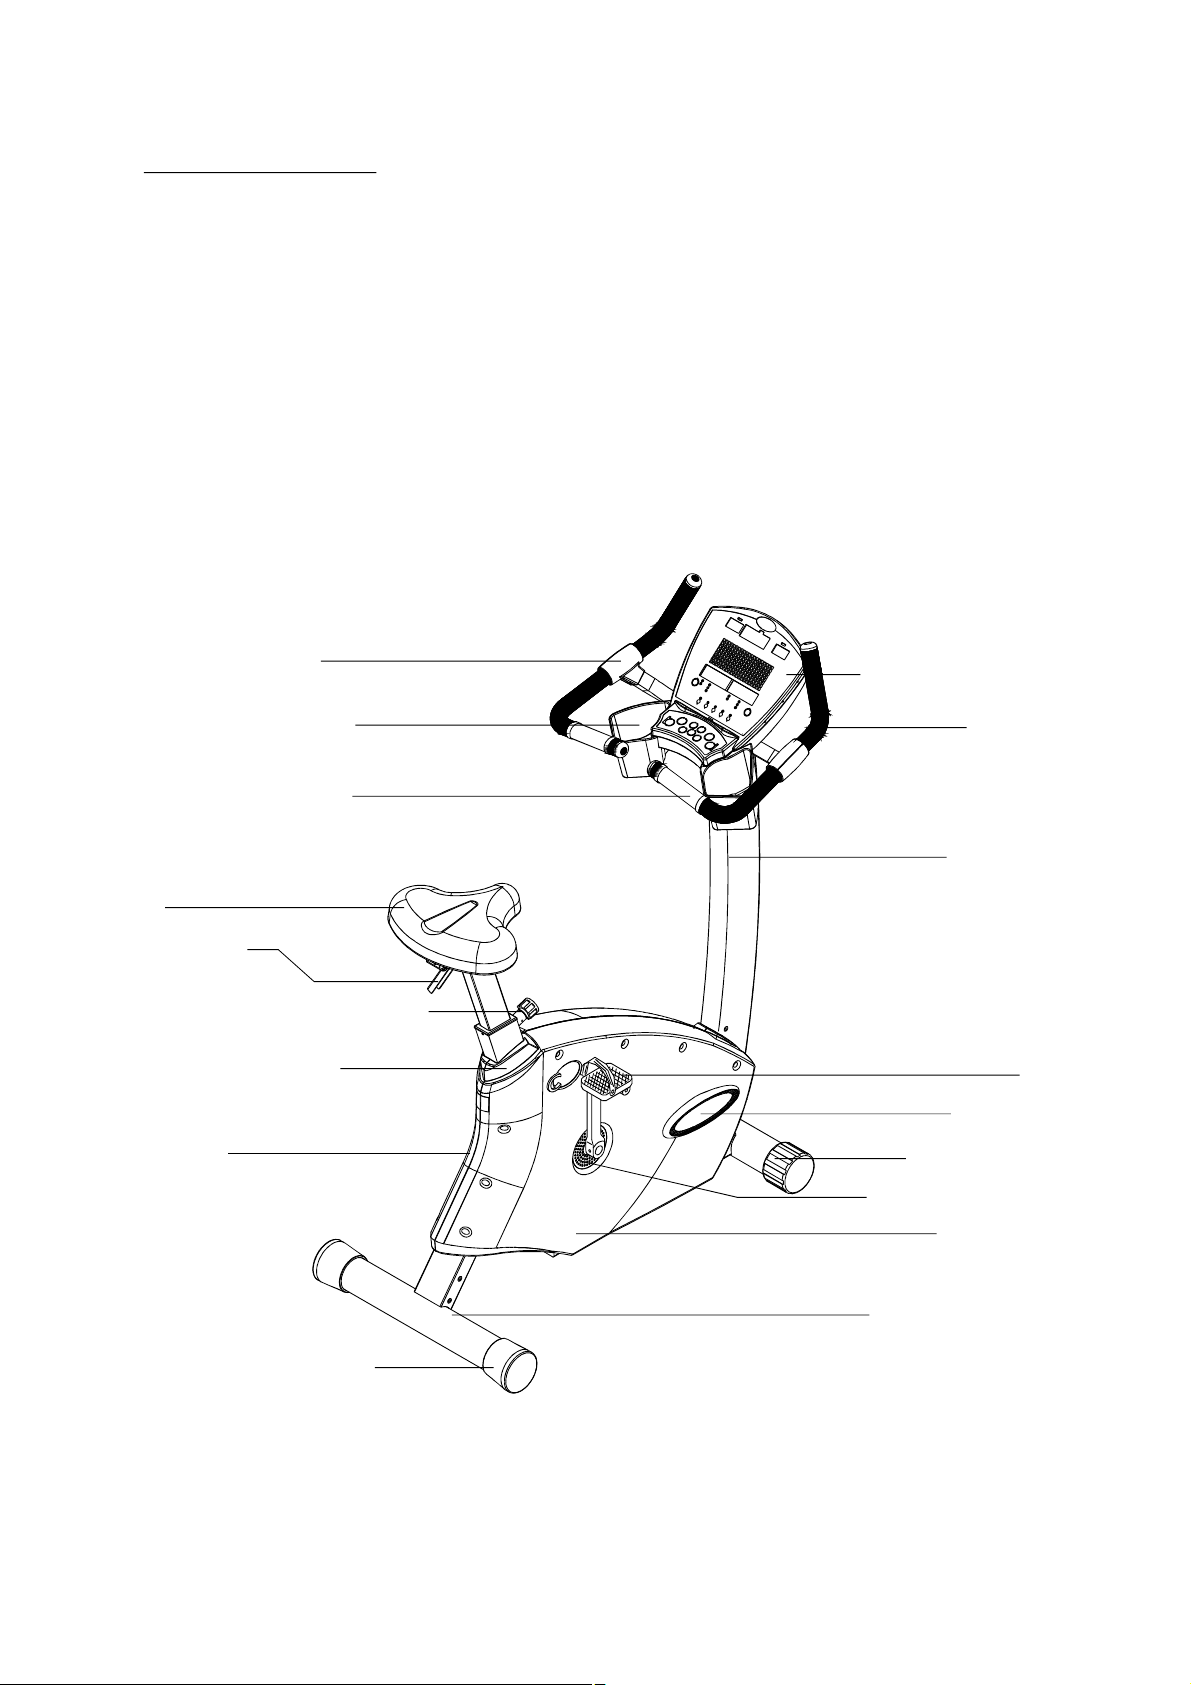
TRANSITION PLASTIC
WATER BOTTLE HOLDER
HAND TOUCH READOUT
SEAT
SEAT POSITION
ADJUSTMENT LEVER
SEAT HEIGHT ADJUSTMENT KNOB
SEAT SUPPORT WEDGE
COVER, LEFT
ELECTRONICS PACKAGE
HANDLEBAR
UPRIGHT POST
PEDAL
COVER LEBAL
TRANSPORT WHEEL
CRANK ACCESS COVER
COVER, RIGHT
FLOOR LEVEL ADJUSTMENT
REAR CROSS FRAME
‧‧2

C. ASSEMBLING YOUR CYCLE
INSTALLATION REQUIREMENTS:
Read this owner's manual and follow the instructions contained herein.
Important:
LIST OF PARTS:
1. Four 1/4" x L1/2" boltsHandle Bar Assembly
2. Four 1/4" internal serrated washerHandle Bar Assembly
3. Six 5/16" x L1/2" boltsRear Cross Frame
4. Five 5/16" x L1/2" boltsUpright Post Assembly
5. One 5/16" serrated washerUpright Post Assembly
6. Three 5/16" nylon nutsSeat Assembly
7. Three 5/16" spring washerSeat Assembly
The packaging for this unit was designed to protect it during shipment.
Please store the original packaging in a safe place in case you need to
ship the unit in the future.
–
–
–
–
–
–
–
8. One pair of pedals
9. One M4 hex Allen wrench
10. One M6 hex Allen wrench
11. One 13mm x 15mm combination wrench
Is there any chance for actual size images of the fasteners, washers, etc? Our
customers do not understand thread sizes and dimensions.
‧‧3
STEP-BY-STEP INSTRUCTIONS:
When you remove the cycle from its box, first check to make sure all of the parts are
present. Then, read the assembly instructions thoroughly before you begin.
1. Take out the cycle frame and make sure all packing materials are removed from
the unit.
2. Place the cycle upright on a level, flat surface.
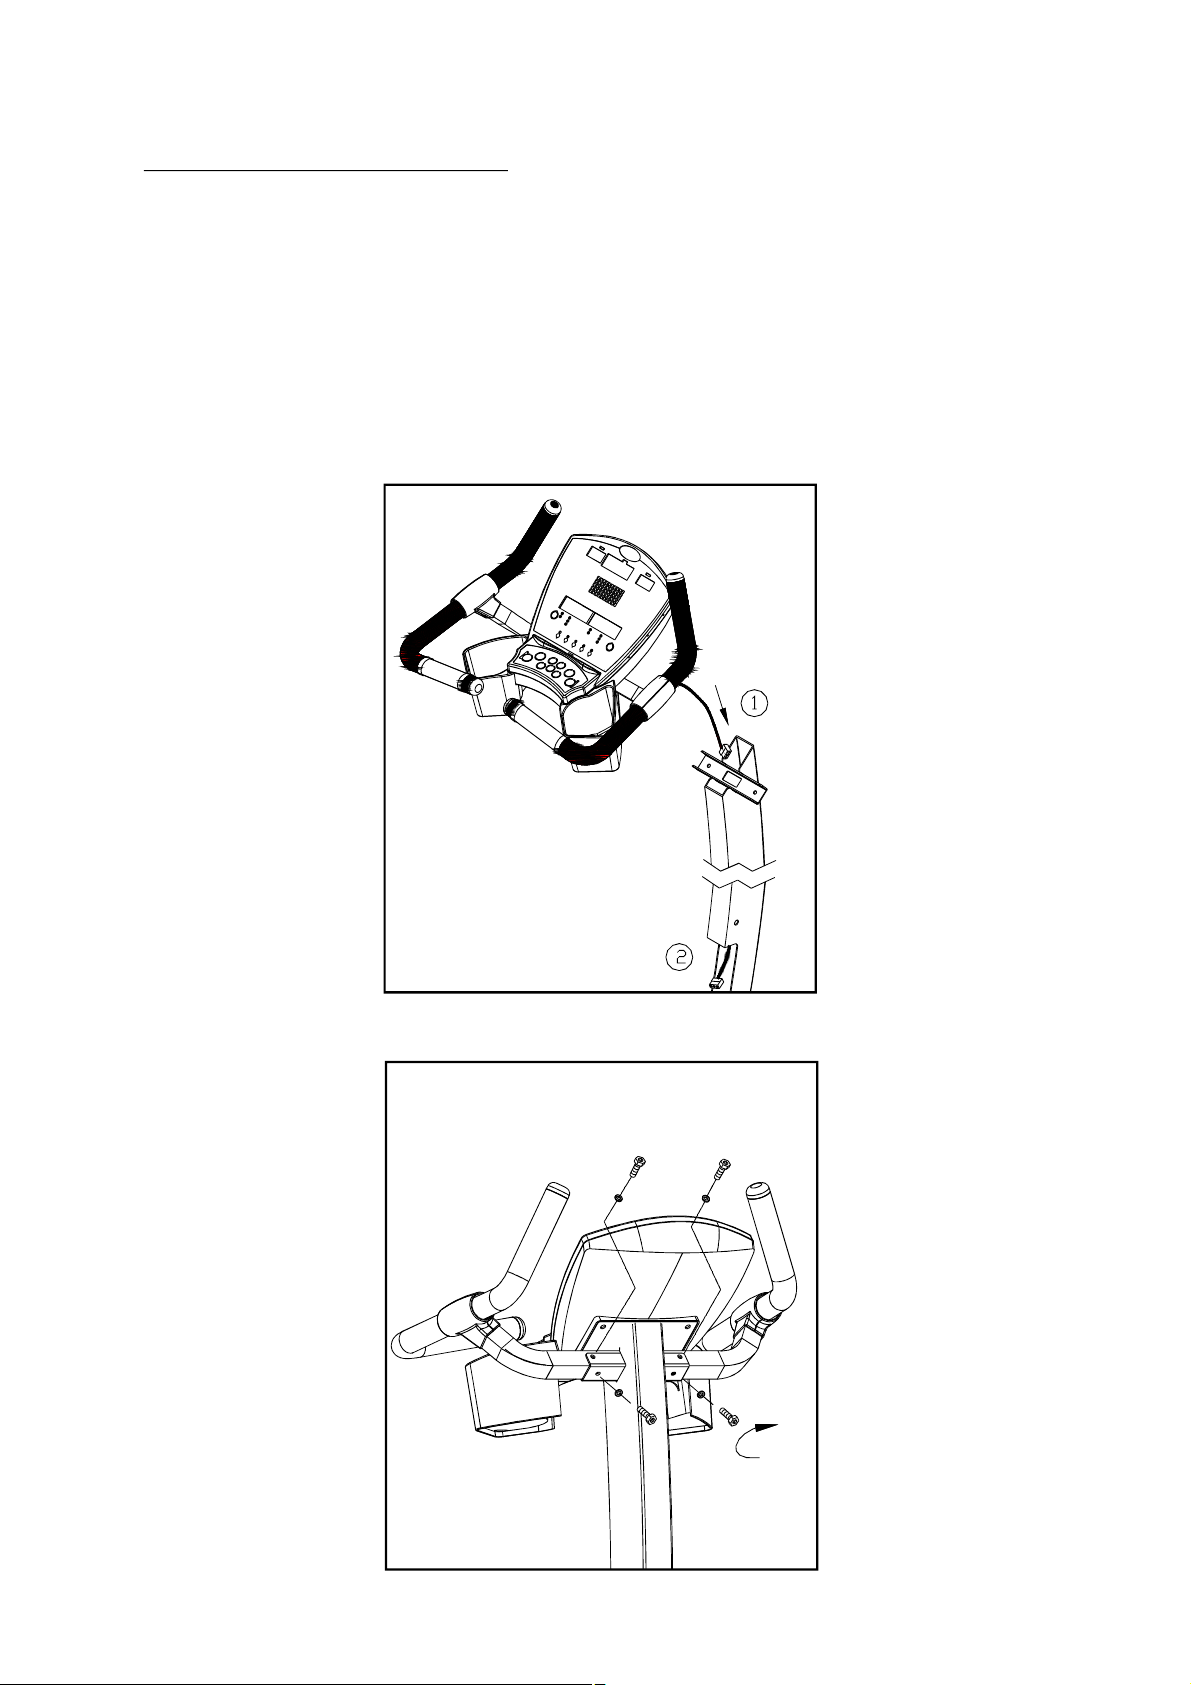
3. Thread the ribbon cable through the upright post. (See Fig. 1)
Fig.1
4. Attach the handlebars to the upright post assembly, and fasten the bolts on both
sides. (See Fig. 2)
‧‧4
Fig.2

5. Attach the rear cross frame to the main frame, and fasten the bolts. (See Fig. 3)
Fig.3
6. Connect the ribbon cable into the socket, and fasten the upright post with its bolts.
(See Fig. 4)
Fig.4
Note:
2. Place serrated washer A between the bolt and upright post as indicated.
1. When connecting upright post to main frame, please make sure that
ribbon cable is free from it.
Ensure the serrated side is attached to upright post.
‧‧5
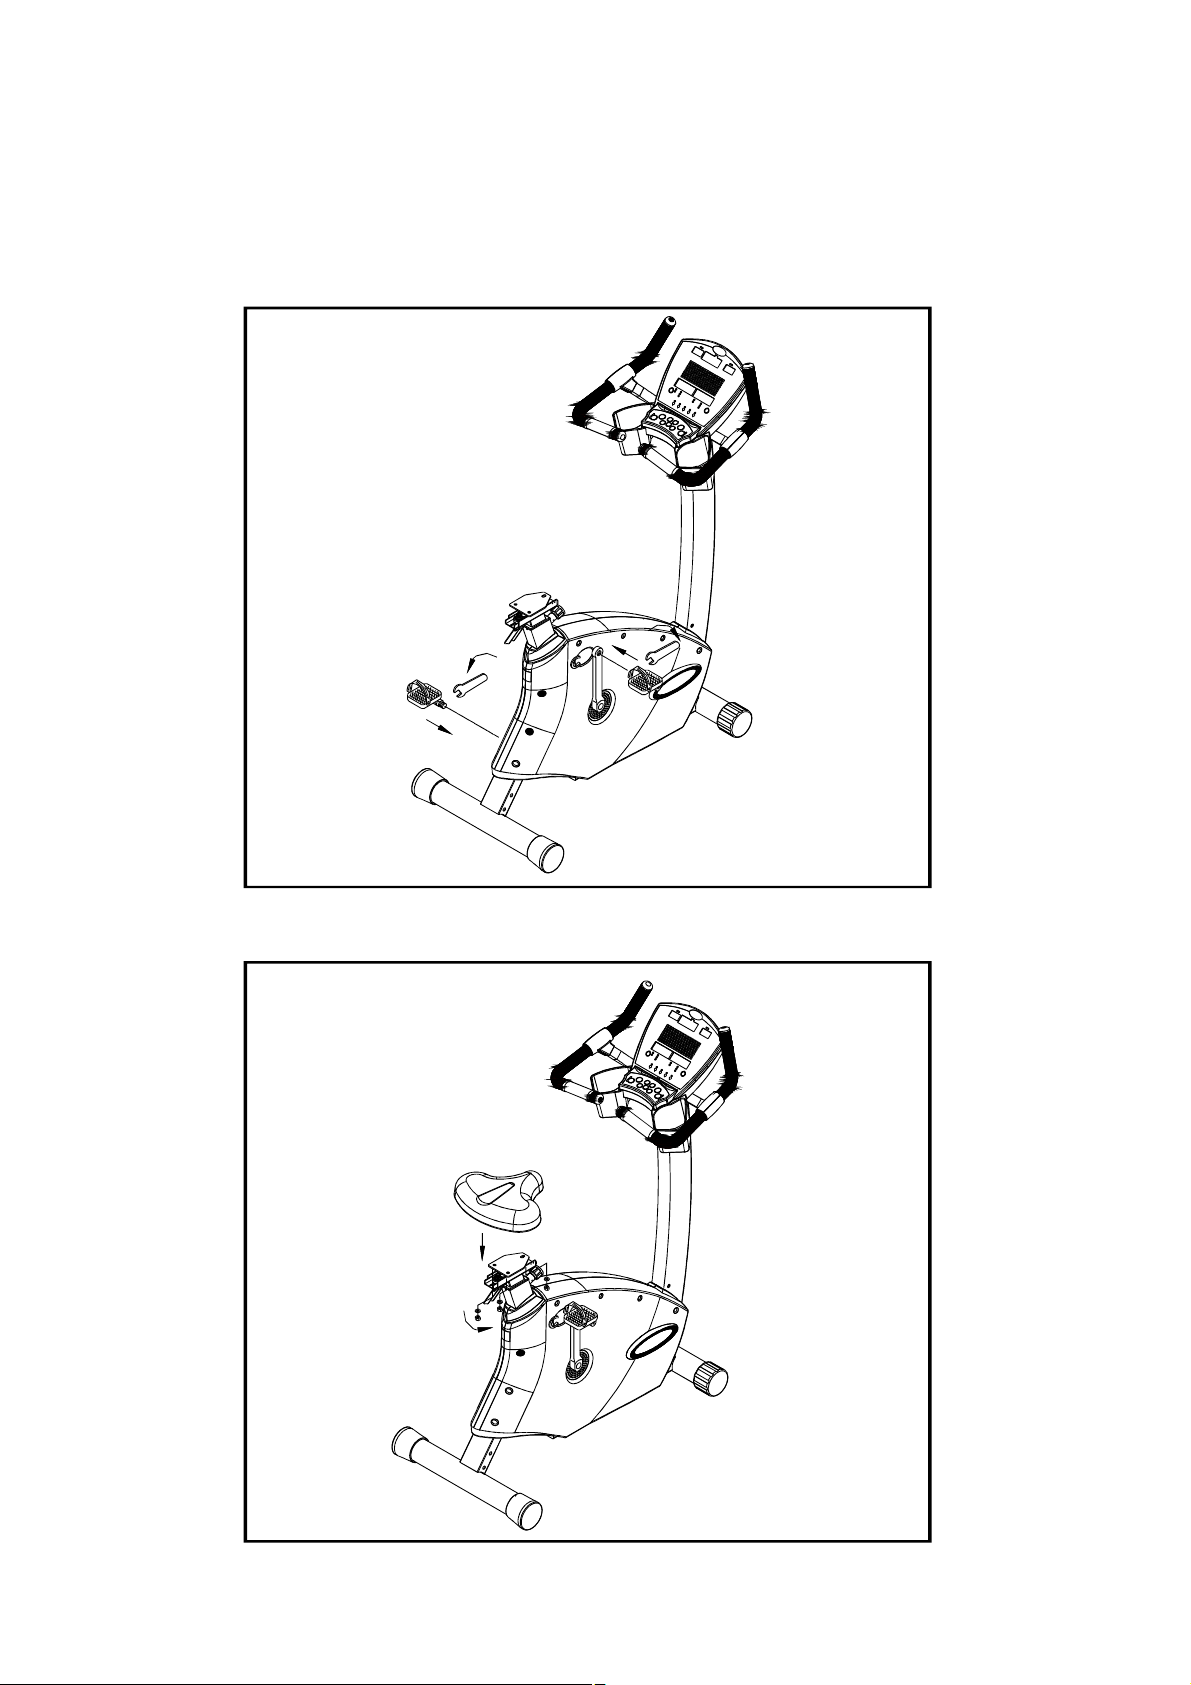
7. Note that pedals are marked "R" for right and "L" for left. (The bike's right side is
your right side as you sit riding the unit.) Pedals should be installed on the crank
arms. Install pedals on the correct side of the bike. Tighten the left pedal by
turning counterclockwise. Tighten the right pedal by turning clockwise. A
combination wrench is included in the tool kit provided for this work. (See Fig. 5)
8. Fasten seat to support assembly as indicated. (See Fig. 6)
Fig.5
‧‧6
Fig.6
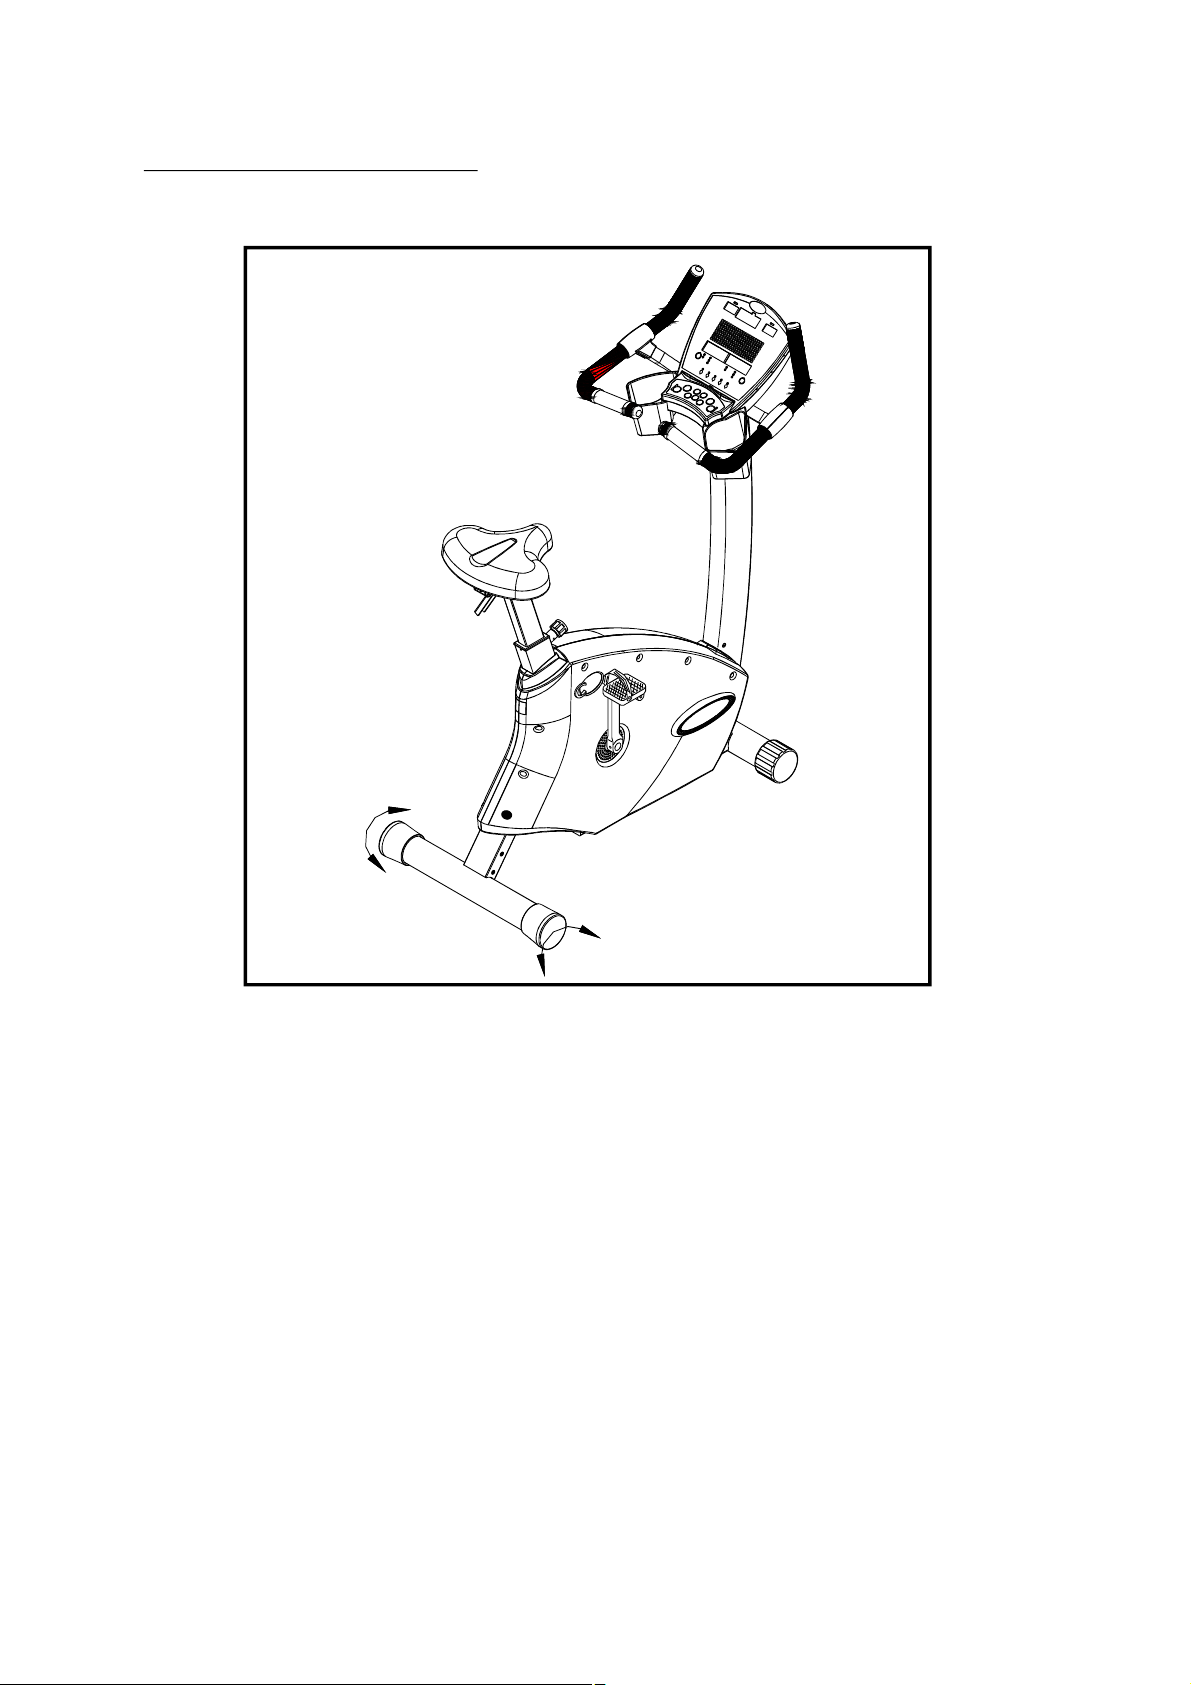
FLOOR LEVEL ADJUSTMENT:
Adjust the rear adjustment wheels to steady the bike. (See Fig. 7)
Fig.7
‧‧7
 Loading...