

Sportcraft A-bike User Manual
USER MANUAL
PLEASE READ BEFORE
ATTEMPTING TO OPEN THE BIKE
Design registered and patented
2 A-bike User Manual
3

Designed for short trips and mixed mode transport the A-bike is
unique in concept and design. This booklet will introduce you to,
show you how to use, take care of and to make repairs to your
A-bike. It is vital that you use and maintain the bike correctly to
avoid damaging the product and harming yourself.
Please pay particular attention to notes highlighted in a box as these
are especially important and must be remembered at all times.
Introduction
Box contents
4 A-bike User Manual
The geometry of the A-bike is quite different from any other bike
and hence may feel a little strange at first. After a bit of practice we
are sure you will find the bike easy and comfortable to ride. Getting
to know your A-bike will enable you to get the most out of it and
know the limits, enabling you to use it safely.
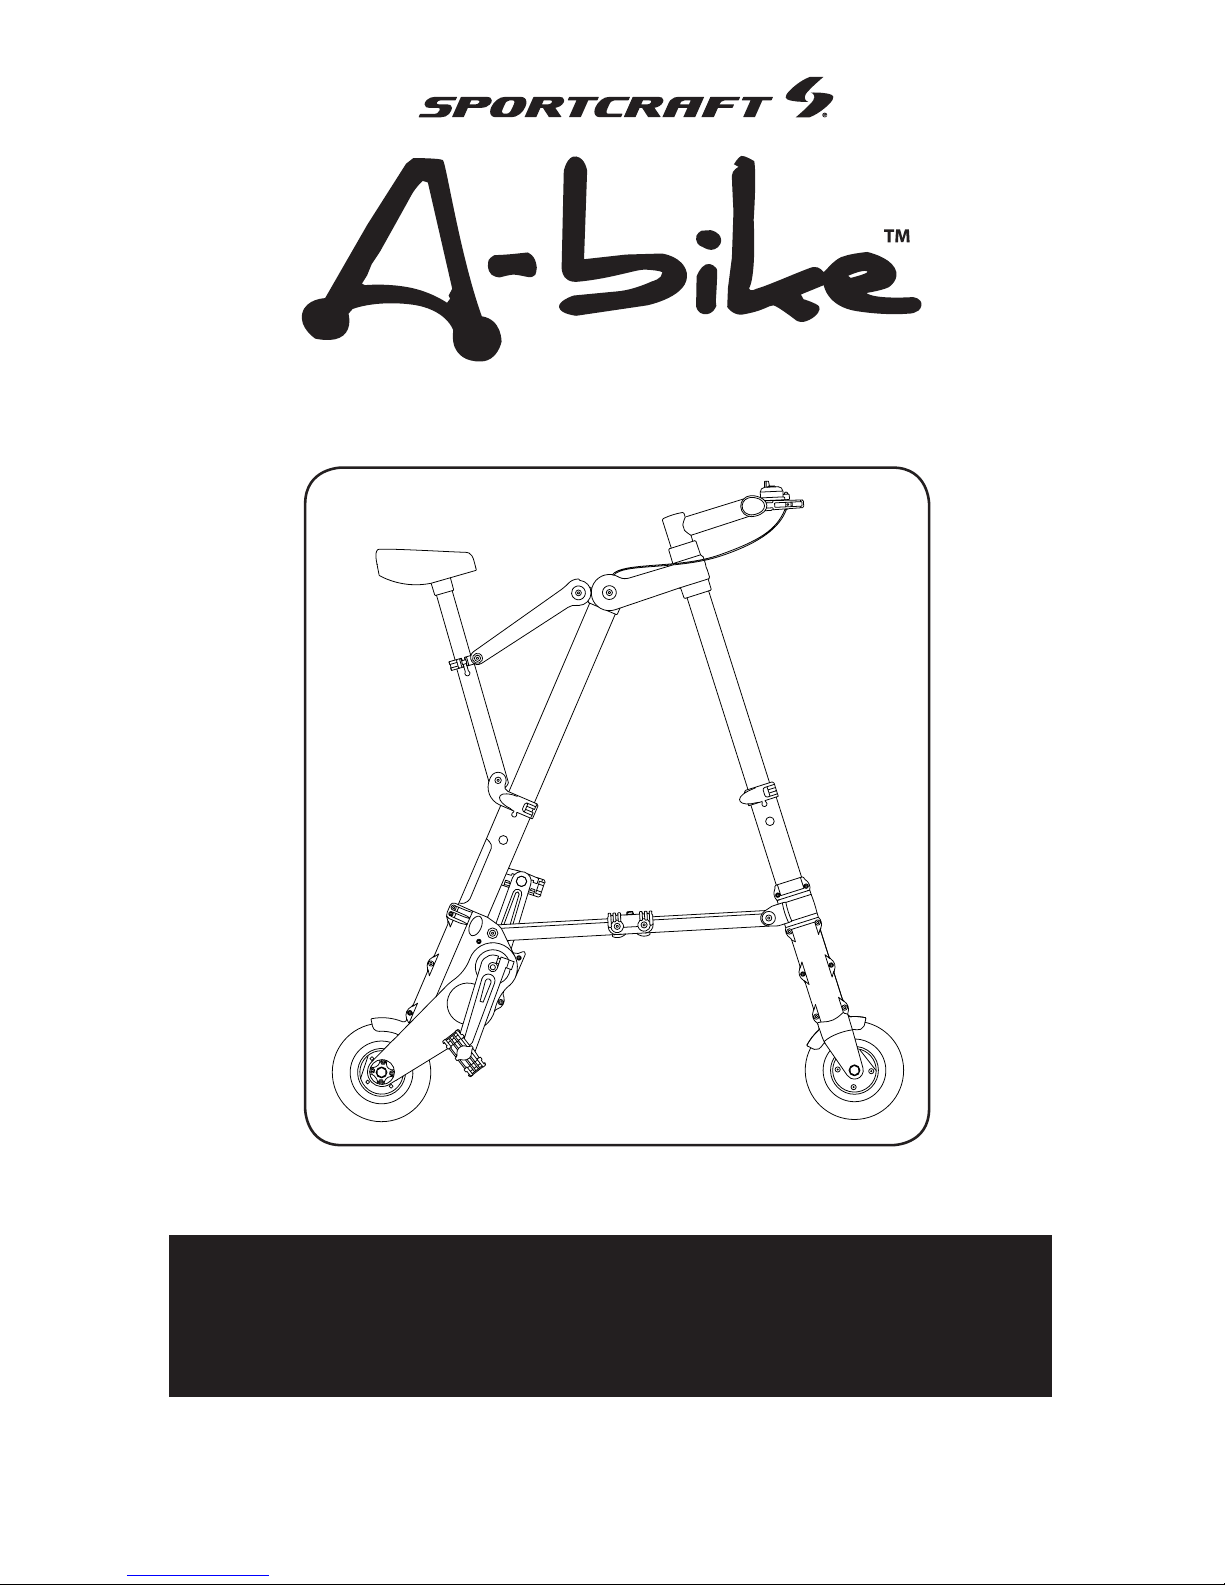
Congratulations and welcome to the A-bike, the
world’s lightest and smallest folding bicycle. Before
using the bike you must
read these instructions.
• A-bike folding bicycle
• A-bike toolkit
• A-bike user manual

5
Warnings
Rider weight limit
The bike has a maximum weight limit of 95 kg (210 lbs), this
includes the rider and anything the rider is carrying, for example a
back pack.
Not a mountain bike
The A-bike is designed for smooth roads and it’s lightweight
construction means it’s not suitable for rough surfaces or off-road
riding. Do not attempt stunts on the bike and avoid sudden drops
or rises such as curbs.
No maintenance tires
The A-bike uses tubeless tires with a sealed, internal air chamber
for shock absorption. Air pressure cannot be adjusted.
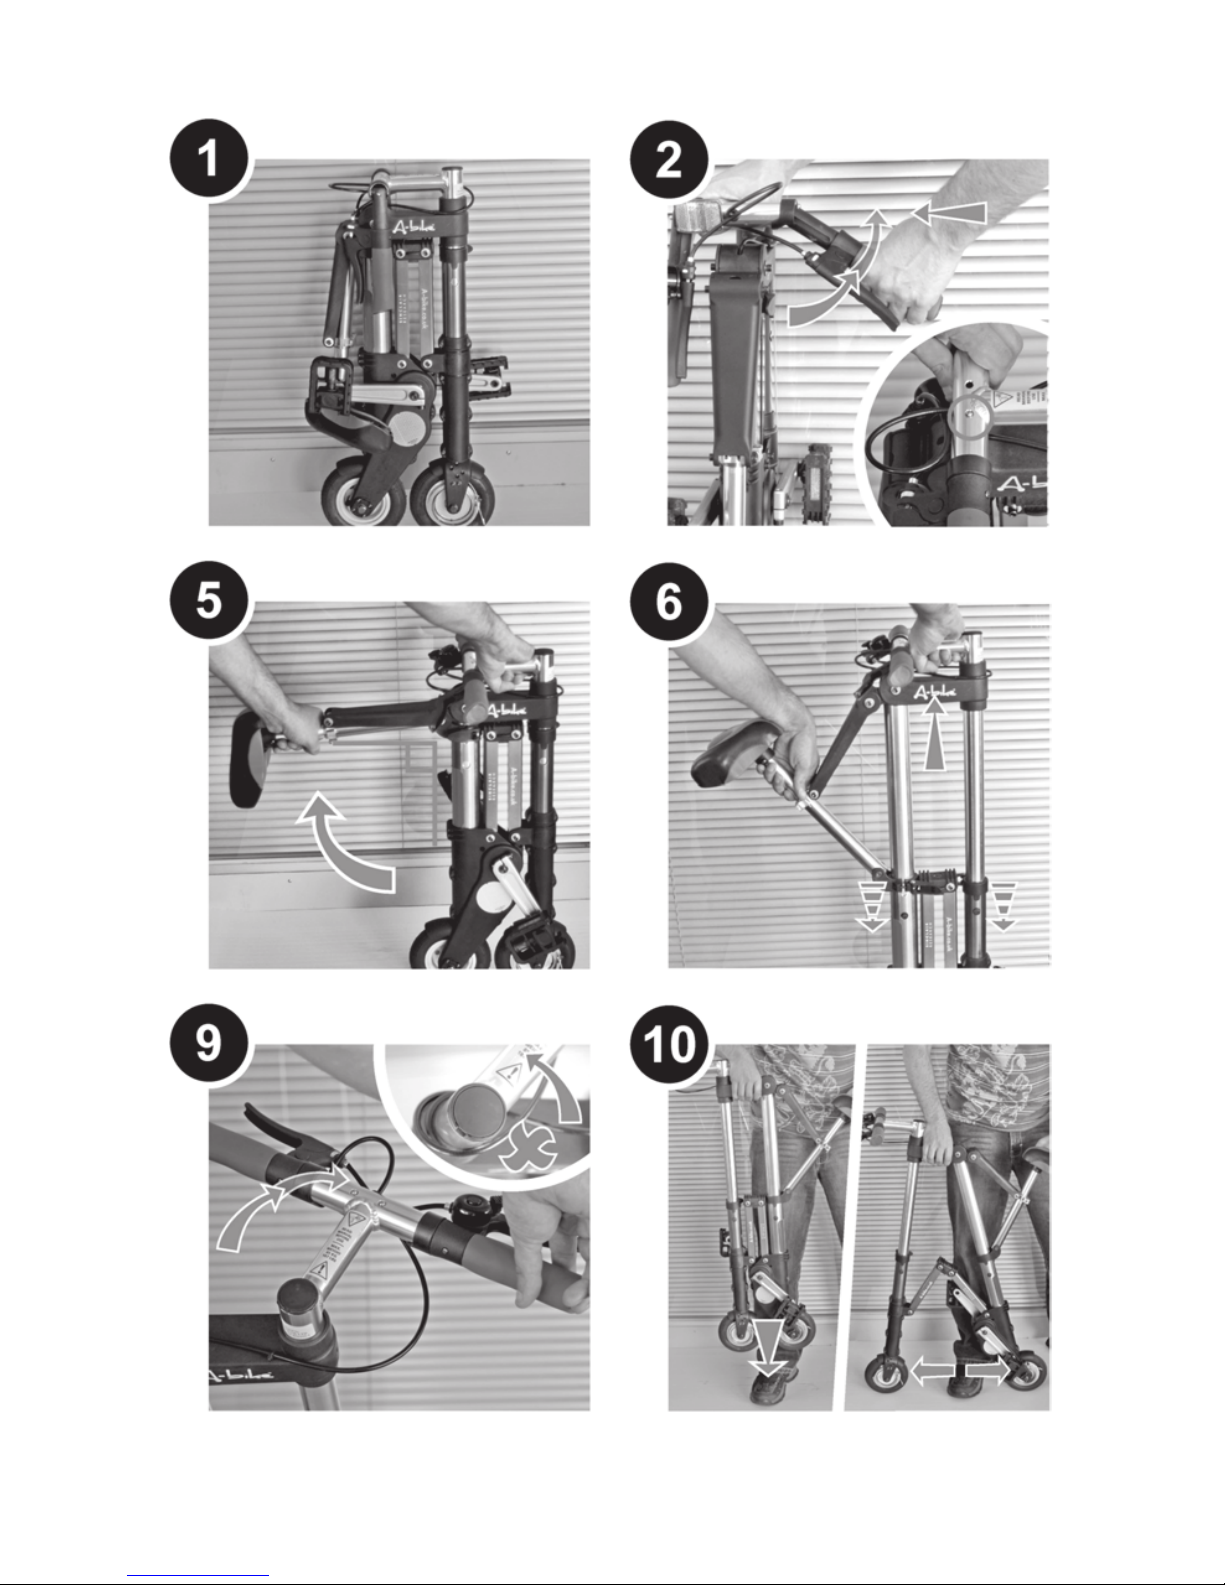
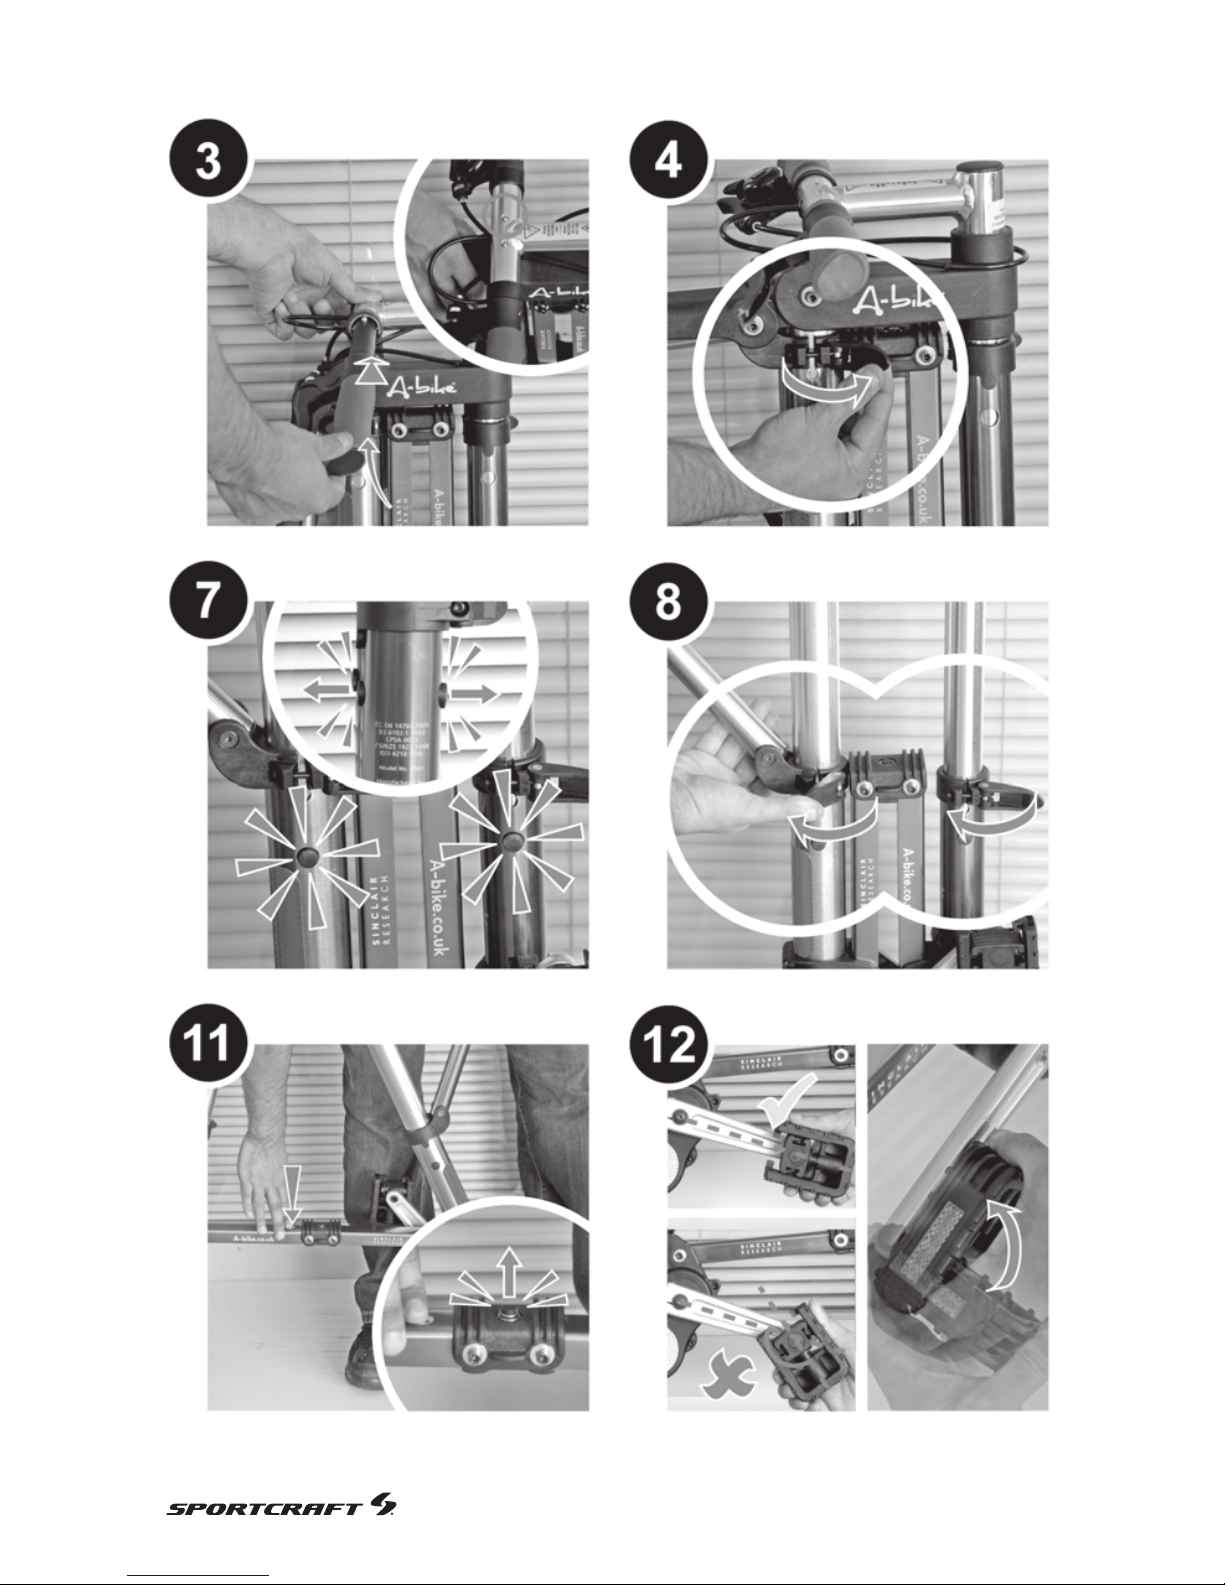
Quick release levers and locking buttons
When opening the bike ensure that all the locking buttons pop out.
The two quick release levers should be hand tight and firmly
secured.
Donʼt step on the crosspiece
The crosspiece is not designed to bear any load. Do not stand on
or attach anything to this beam.
Important
Ages 5+. Choking hazard: contains small parts. Keep away from
small children. Assembly and use should always be under adult
supervision. Please retain retail receipt for date and purchase
location verification. See page 31 for warranty information.

Labelled diagram
6 A-bike User Manual
Diagram
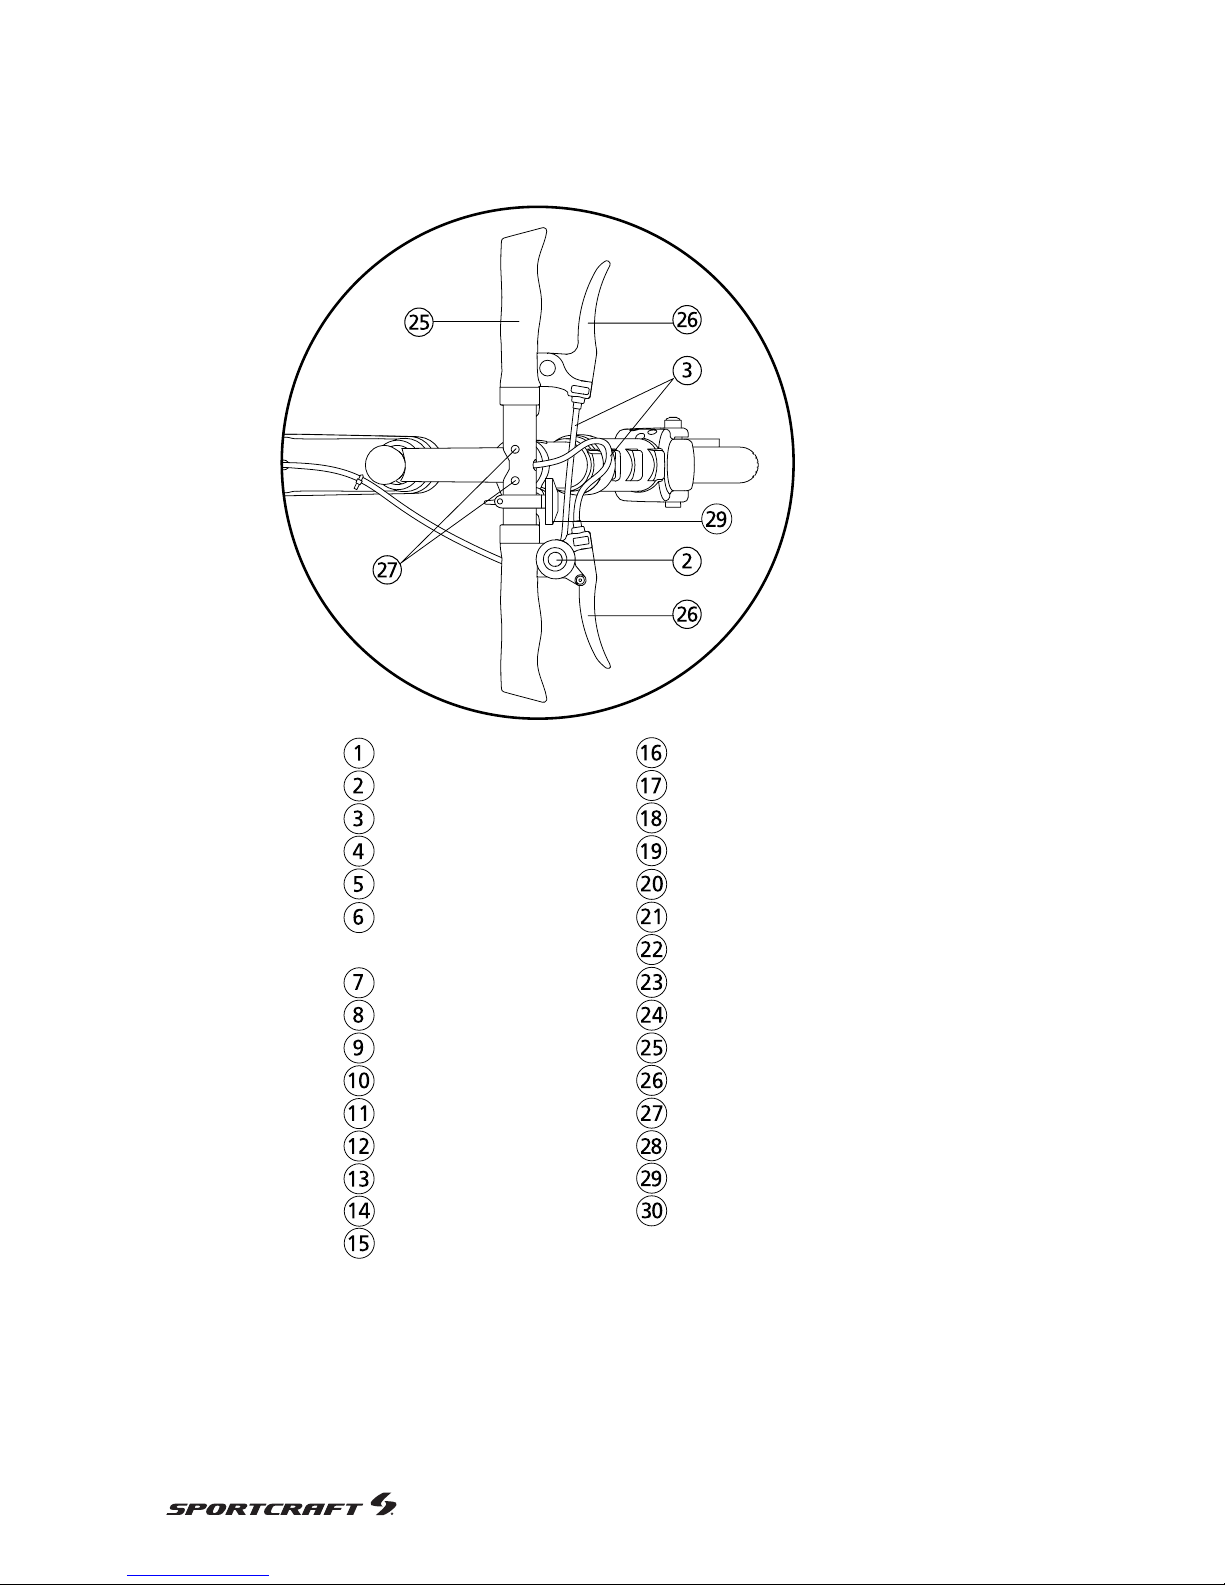
Top view
Handle Bar
Bell
Brake Cable
Front Upper Tube
Quick Release Clamp
Main Locking Buttons
(on both side)
Front Lower Tube
Lower Steering Joint
Front Fork
Crosspiece Button
Tire
Brake Band
Wheel Hub
Pedal (on both sides)
Crank (on both sides)
Crank Case
Rear Lower Tube
Rear Upper Tube
Outer Seat Tube
Seat Clamp
Seat Post
Saddle
Seat Stay
Upper Steering Joint
Handlebar Grip
Brake Lever
Handlebar Locking Buttons
Handlebar stem
Reflectors
Crosspiece
7
(on both sides)

8 A-bike User Manual
Riding Safely
When riding the A-bike it is important to remember to abide by
local bicycle riding laws.
Ride defensively and be vigilant of other road users. Always leave
a large enough gap between you and obstacles, slow down and
stop if necessary.
Watch out for uneven surfaces and pot holes.
When riding in the dark you should wear high visibility clothing and
use lights when appropriate.
Wet weather will reduce grip and increase stopping distances; ride
slower if necessary. Icy conditions should be avoided entirely.
Windy conditions can severely effect riding stability.
Always wear a helmet when riding.
Always wear suitable shoes. Sandals are not appropriate.
Avoid loose clothing and anything that may get caught in the
mechanisms of the bike.
Become familiar with riding your bike slowly and in a safe
environment before heading into areas with other traffic.
Store your bike securely and safely in a clean and dry area to
avoid damaging the bike.
If there are any broken parts, they must be replaced before riding.
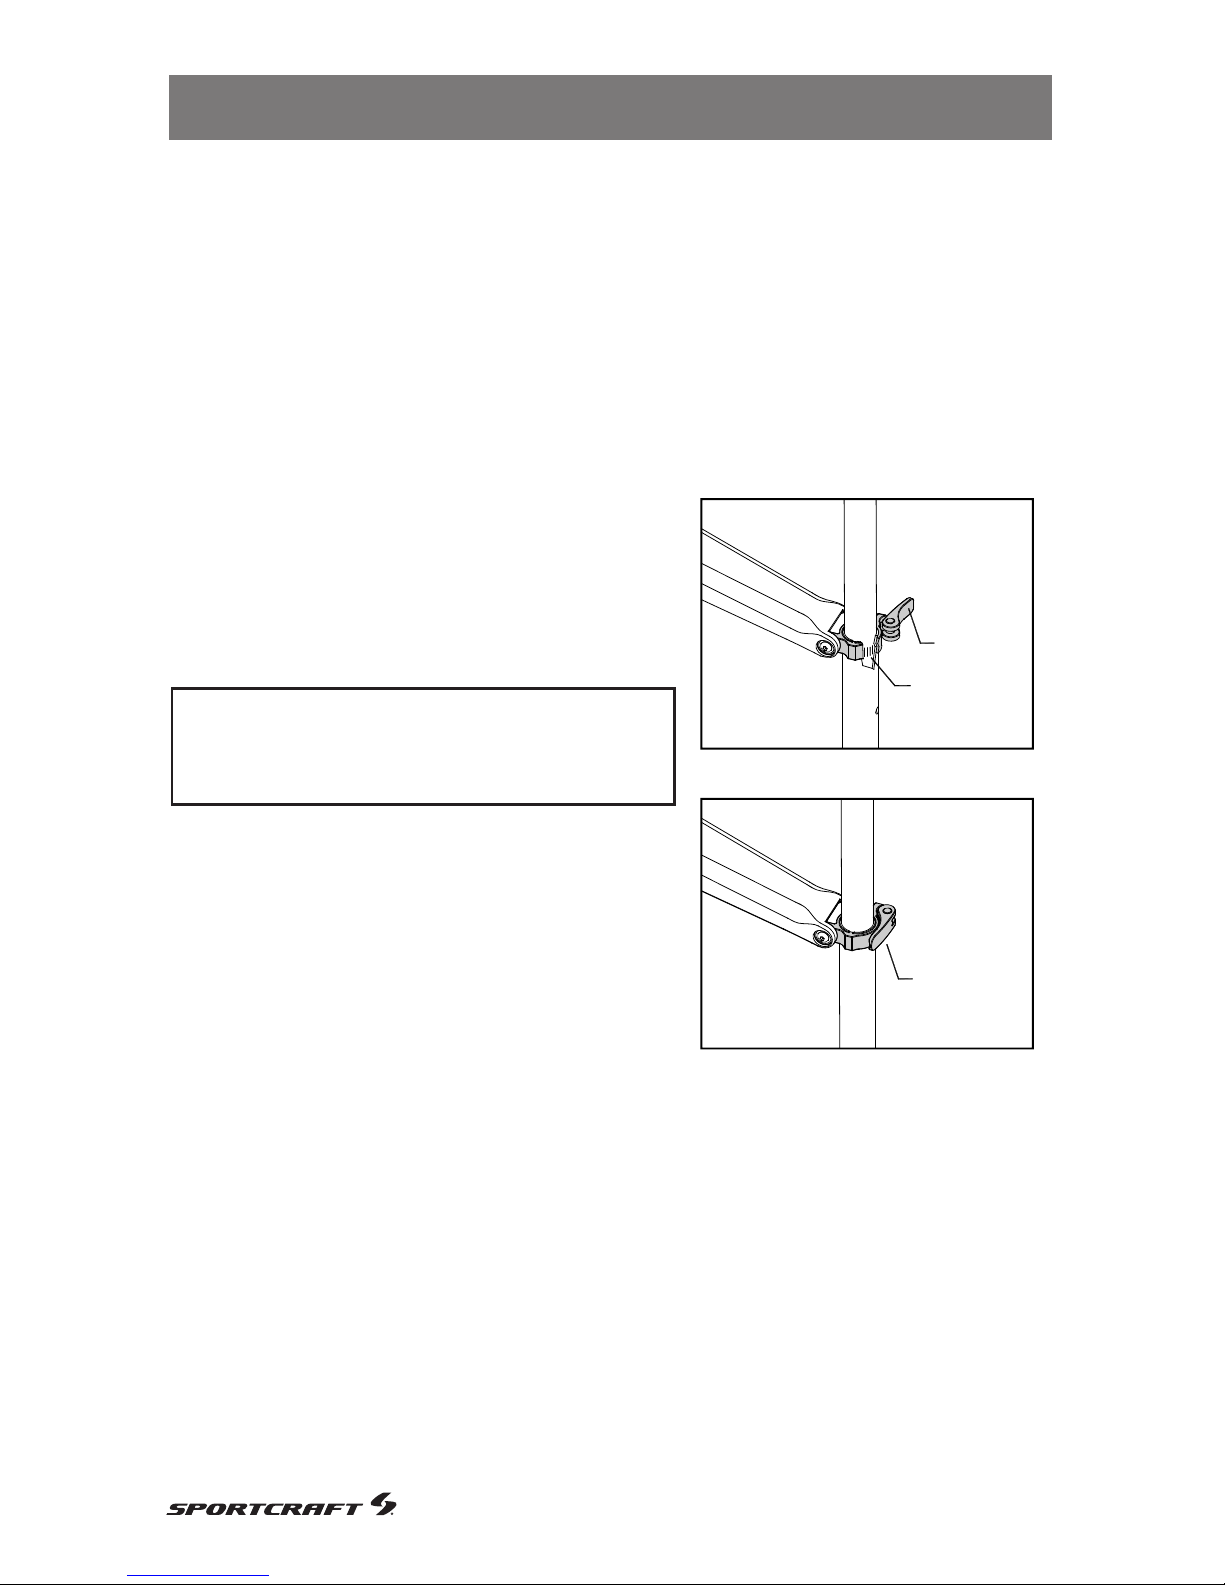
Adjusting saddle height
Choosing the Correct Saddle Height
:LWKERWKIHHWÁDWRQWKHJURXQGDGMXVWWKHVDGGOHKHLJKWVRWKDW
you can comfortably sit on the saddle.
1. Unlock the Seat Post quick release
clamp.
2. Slide the Seat Post vertically to
DGMXVWWKH6DGGOHSRVLWLRQDVUHTXLUHG
The minimum insertion line should
NOT be visible, it should be inside the
outer tube.
3. Once the desired Saddle position
has been selected, make sure the
saddle is positioned forward and then
lock the Seat Post quick release clamp
so that you cannot twist the saddle out
of alignment.
If the saddle can twist then unlock the quick release lever and
tighten with an allen key before locking the quick release again and
re-testing.
Unlocked
Locked
Minimum
insertion
line
Before riding the bike, check that the seat height is
DGMXVWHGWKHWiUHVDUHLQÁDWHGDQGWKHEUDNHVZRUN
9
Adjusting saddle height
Before riding the bike, check that the seat height is
adjusted and that the brakes work.
If the brake band is knocked it is possible for it to become
misaligned with the braking hub and wheel. If this happens it may
be necessary to gently bend the band back into shape. Care must
be taken not to cause strain around the brake band mounts. If the
brake band rubs against the wheel it can be gently bent away.
Hot brake bands and brake fade
The band brakes will become hot when used, be aware of this when
storing and handling the bike, allow the brakes to cool.
Brake fade may occur when used for long periods of time.
Adjusting the brakes
10 A-bike User Manual
Adjust the brakes ONLY when the bike is fully unfolded and
extended as this can effect the brake cables.
 Loading...