

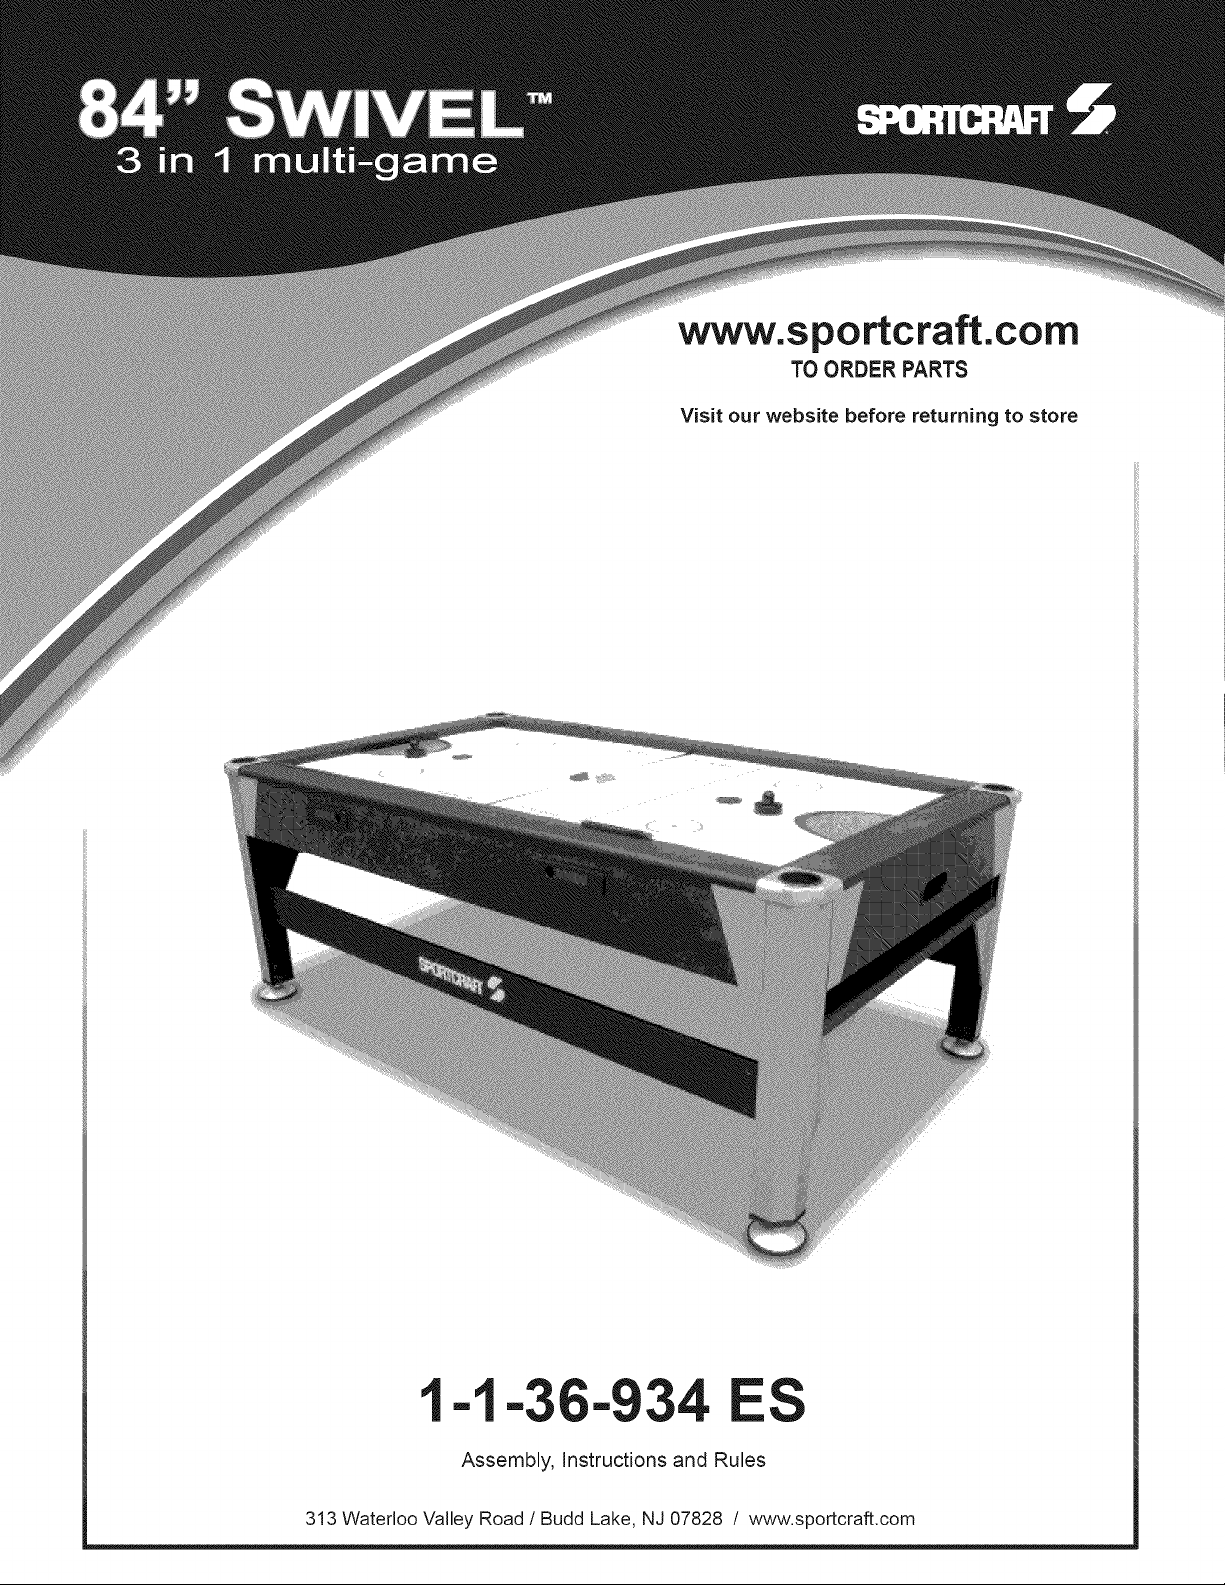
Sportcraft 1-1-36-934ES Installation Guide
www.sportcraft.com
TO ORDER PARTS
Visit our website before returning to store
1-1-36-934
Assembly, instructions and Rules
313 Waterloo Valley Road / Budd Lake, NJ 07828 / www.sportcraft.com
_ratulations! We hope you will have many hours of enjoyable use with your new Sportcraft
Multi-Game Table!
_} PLEASE KEEP YOUR INSTRUCTIONS!
• Your Model number is necessary should you need to contact us.
• Please read through this instruction book to familiarize yourself with all the parts and assembly steps.
• Refer to the Parts identifier and verify that all parts have been included.
• For questions that may arise or for missing parts, PLEASE CONTACT US BEFORE RETURNING THE
GAME TO THE STORE.
CONTACT INFORMATION:
Hours: Mon.-Fri., 9:00am to 5:00pm EST
Replacement Parts: order online at: www.sportcraft.com
Technical Support: customerservice@sportcraft.com t (800) 526-0244
WARNING!
This is not a child's toy. Adult supervision is required for children playing this game. Please read instructions carefully.
Proper use of this set can avoid damage or injury.
WARNING!
This product contains (a) small magnet(s). Swallowed magnets can stick together across intestines causing serious
infections and death. Seek immediate medical attention if magnet(s) are swallowed or inhaled. Toy contains small balls
and/or parts.
_] BEFORE ASSEMBLY:
• Did you receive 1==!=.box?
• Did you inspect your playfield/main table frame before assembly? It is not replaceable and must be returned to the
original place of purchase if damaged.
[_ TOOLS REQUIRED FOR ASSEMBLY:
• Phillips and Slotted Head Screwdrivers / or Power Driver (not included)
• Allen Key and Wrench (included)
0709 - H @2009Sportcraft, Ltd.
1-1-36-934 ES P. 1 www.sportcraft.com

PARTS iDENTiFiER
_'_) to the box [_-]to indicate receipt of each part.)
FOR MISSING OR DEFECTIVE PARTS_ VISIT
www.sportcraft.com.
_9_3_36_9!B801 12 I RIGHT LEG PANEL
uu LEG SIDE BRACE
9-3-36-934ES05 (2)
-36-934ES09 (4) |
-34-012SS06 (16)1
I 9-3-32-531SSll (24)!
- - HEAD SCREW
uu LOWER BALL BOARD
13_ 1 6.5 X 38 MMALLBNKEYBOLT
- - SCREW - SILVER
[ 9-3-36-934ES19 (24) 1
BARREL NUT
1
I 9-3-34-068SS17 (16)!
-36-934ES29(4)1
• ® @ • ® @ • • • @ • • @ • ® @ • ® ® • • • • • ® @ • ® @ • • • @ • • @ • ® @ • ® ® • • • • • ® @ • ® @ • • • @ • • @
ACCESSORIES/Pre4nstailed Parts (AVAILABLE FOR PURCHASE ONLINE,)
=__
4 MM ALLEN KEY
A2_ ; LOCK COVER
u (PRE INSTALLED)
_ EZ:A}[__[8MMCROSS
[ 9-3-36-933BS17 (8) J
3-36-569SS24 (2) J
METAL WRENCH
EVA PAD
'!
9-3-35-500ss48 (1)
1-1-36-934 ES (Continued on the next page.) P.2 www, sportcraft.com
9-3-36-885SSll (4) 9-3-36-830SS42 (1)
6-934ES42 (4)
@2009 Sportcraft, Ltd.

Ah_ i METAL WRENCH
A7_ i 48" 2- PC BILLIARD
.... CUE
CHALK(RED)
9-3-32-531 SS27 (1)
AL_ i 2.25" TRIANGLE
9-3-36-559SS35 (I)
9-3-36-934ES4 t (1)
F_ 20 MM HEX BOLT
I 9-3-36-830SSll (1)J
9-3-36-933ES30 (4)
=--
TABLE TENNIS NET
(PRE INSTALLED)
15" CUSHION
(PRE iNSTALLED)
9-3-36-559SS31 1
i PUSHER FELT
9-3-34-963ES25 (3)
PADDLE
9_-3-_ TABLE TENNIS
(2)
20 MM HEX BOLT I
HOLE (PRE INSTALLED)
9-3-36-934ES18 (1)
A22_ i BLOWER AND WIRE
9-3-34-730SS33 (1)
,__ {PRE INSTALLED)
9-3-36-771SS24 (2)
9-3-36-933ES23 (3)
©
9-3-36-039SS37 (2)
©
9-3-36-839SS12 (2)
i PUSHER-RED
TABLE TENNIS BALL
!0 MM PLASTIC WASHER
(PRE INSTALLED)
9-3-32-662SS25 (2)
[ ROUND PUCK - 116 G
,
9-3-25-236SS36 (4)
L
9-3-34-933ES35 (2)
©
9-3-36-839SS13 (2)
TABLE TENNIS POST
20 MM STEEL WASHER
(PRE - INSTALLED)
ASSEMBLY INSTRUCTIONS:
We recommend that two adults work together to assemble this table.
The table will be assembled upside down and then turned over onto its legs. This is a very heavy table and turning it over will require at least two strong adults.
We suggest that you use the bottom carton as a clean flat work area to protect the table.
FIG. 1:
Attach one Ball Pedestal - Right and Left (#7and #8) to the Lower Ball Board (#6) using two Screws (#18) per Ball Pedestal.
Repeat the above steps for the other Lower Ball Board.
OUTSIDE iNSiDE
1-1-36-934 ES (Continued on the next page.) P.3 www.sportcraft.com
@2009 Sportcraft, Ltd.
@ _=_ :f2/ ® ..... f2/ @
=(16)
@
=(8)
© © :_16_| _ :_1_
CABINET
=(1)
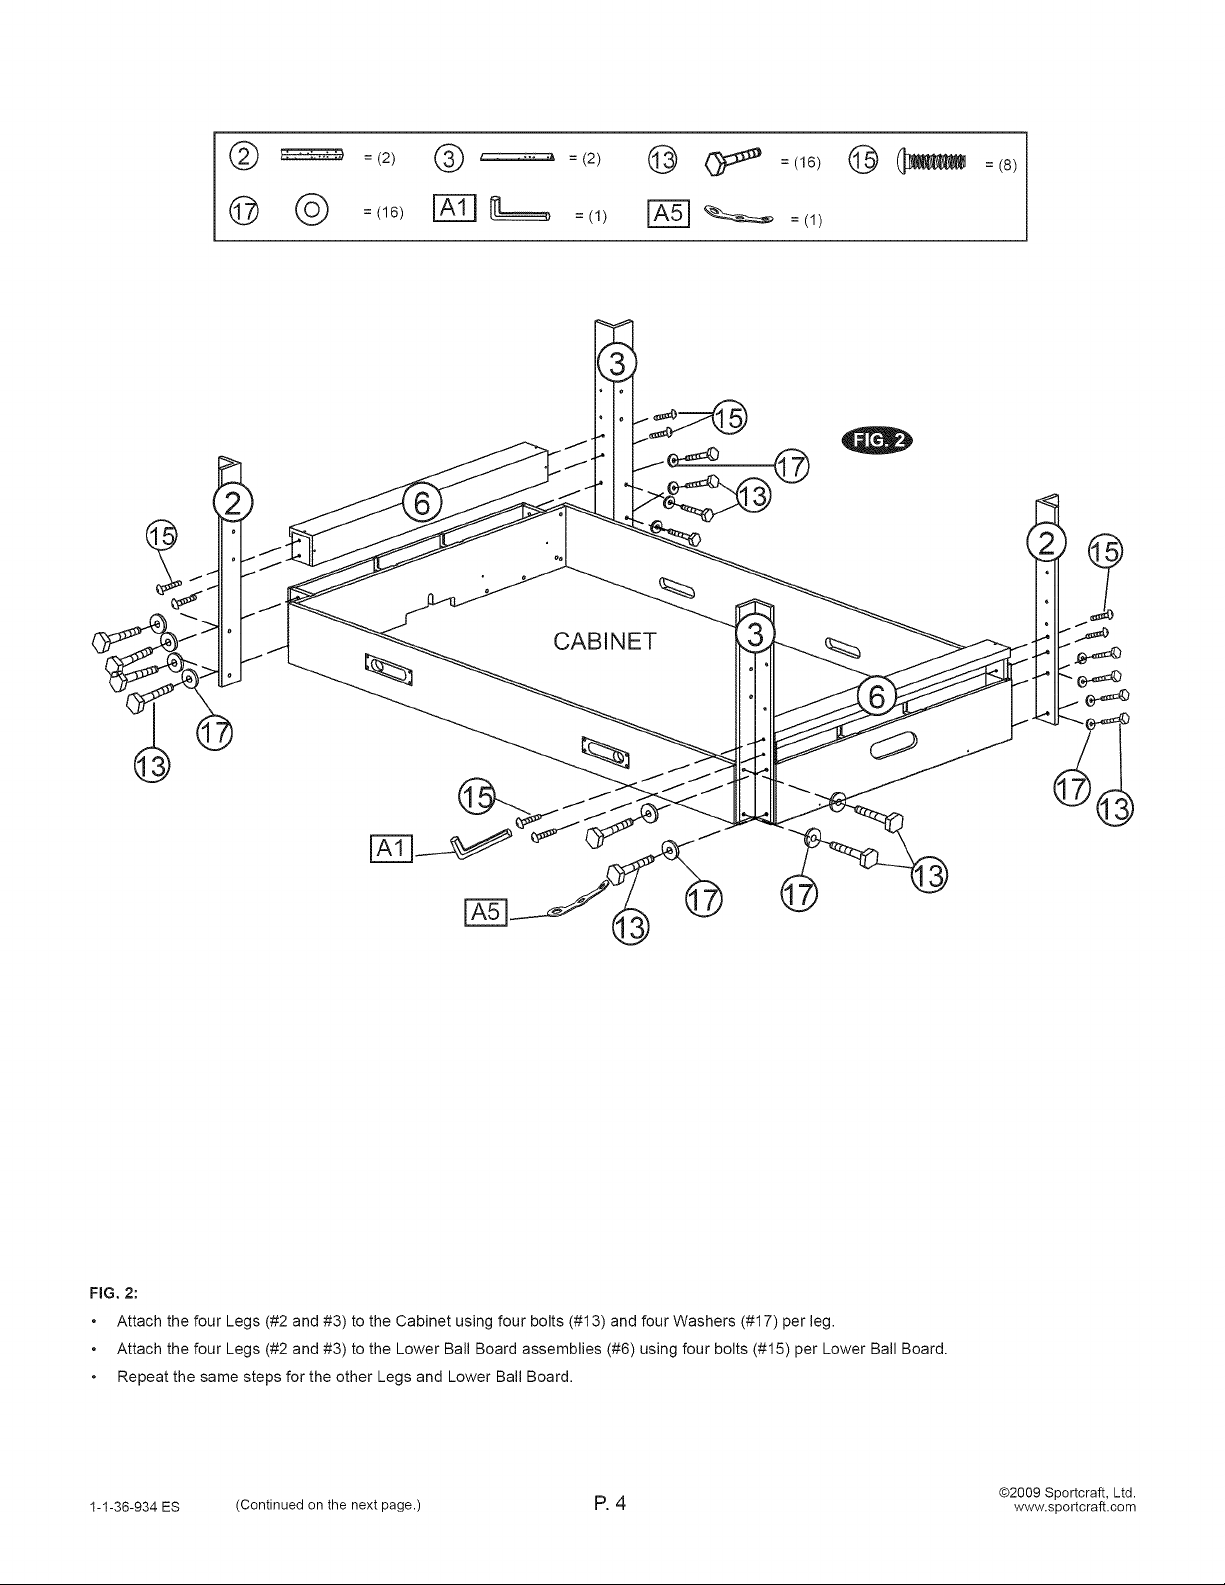
FIG. 2:
Attach the four Legs (#2 and #3) to the Cabinet using four bolts (#13) and four Washers (#17) per leg.
Attach the four Legs (#2 and #3) to the Lower Ball Board assemblies (#6) using four bolts (#15) per Lower Ball Board.
Repeat the same steps for the other Legs and Lower Ball Board.
1-1-36-934 ES (Continued on the next page.) P. 4 www.sportcraft.com
@2009 Sportcraft, Ltd.
 Loading...