

Page 1
Quick guide spo-book NANO H110
Please check before you start the device:
If the device temperature conforms to the recommended operating temperature.
If the power source is correctly connected.
If all adaptors and connectors are properly connected.
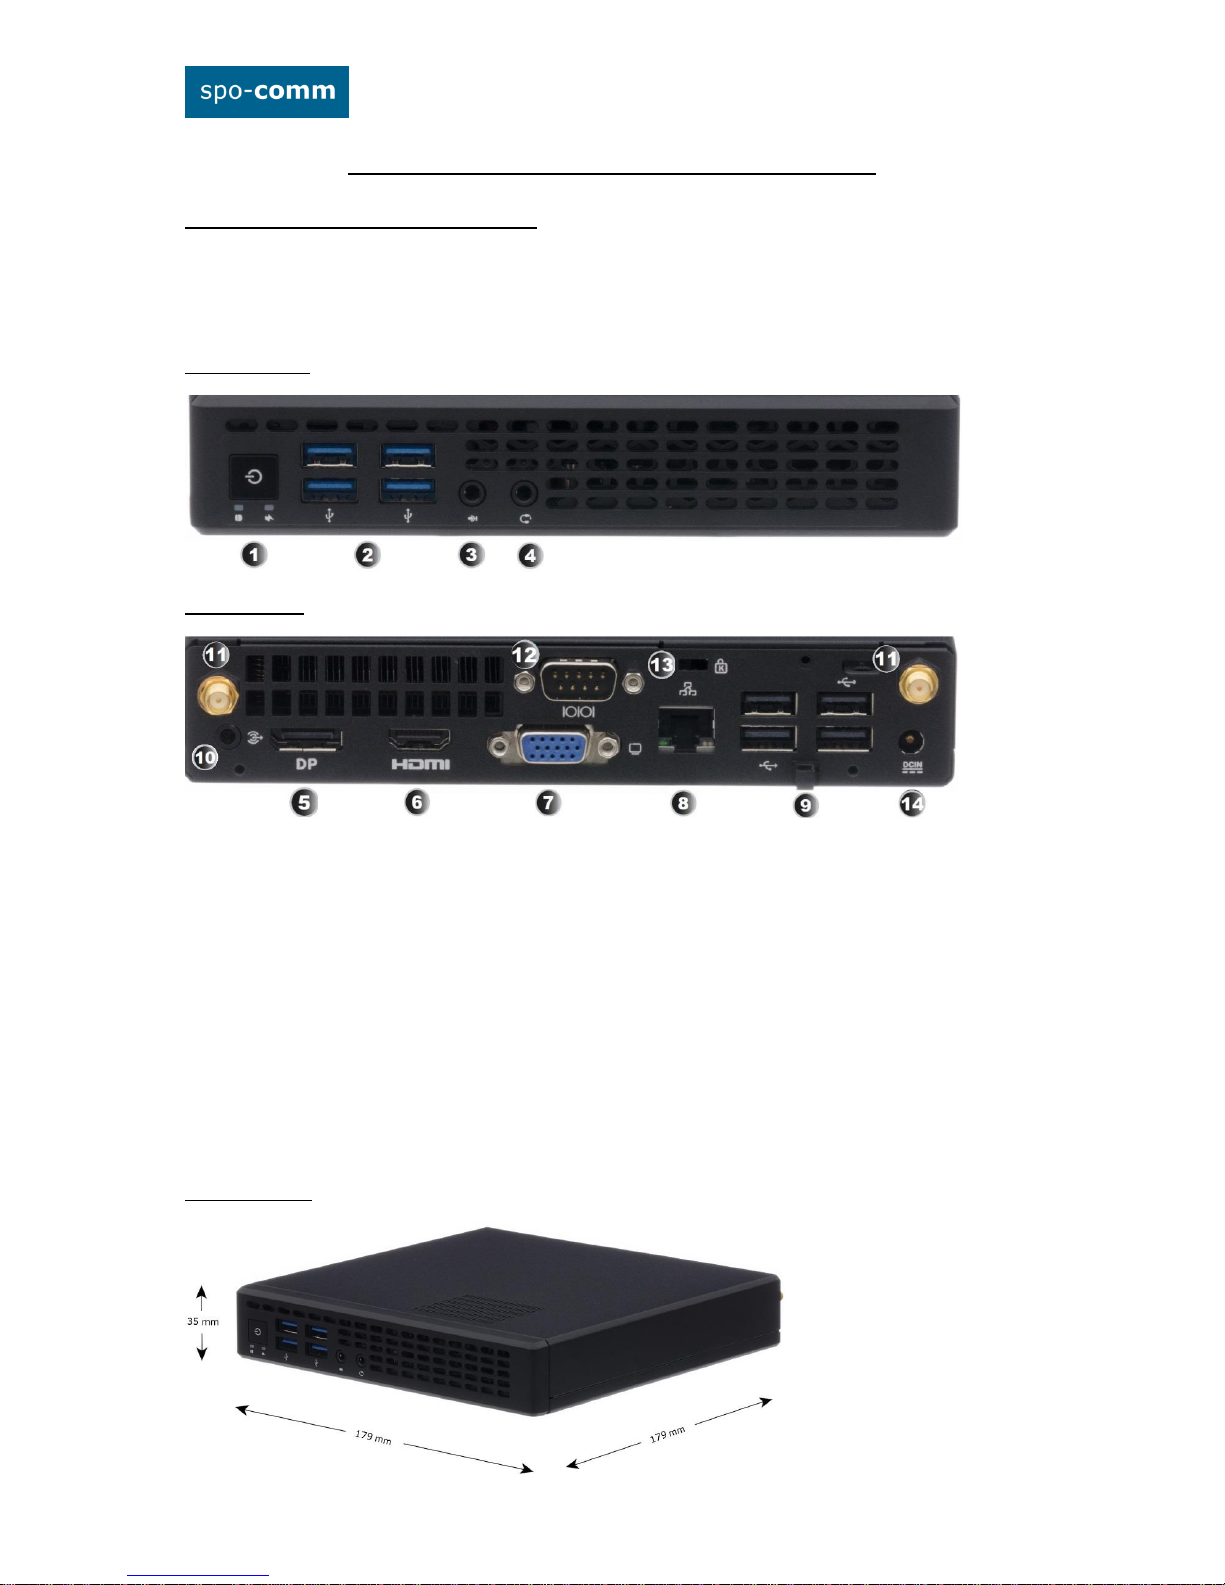
1. Front Panel:
2. Rear Panel:
1. Power Button / Power-LED, HDD-LED
2. USB 3.0 Port
3. Mikrophone-In
4. Audio-Out
5. DisplayPort
6. HDMI-Port
7. VGA-Port
8. RJ45-GbE-LAN
9. USB 2.0 Port
10. Audio-Out
11. WLAN-Antenna
12. RS-232 Port
13. Kensington-Lock
14. 19V DC In
3. Dimensions:
Page 2
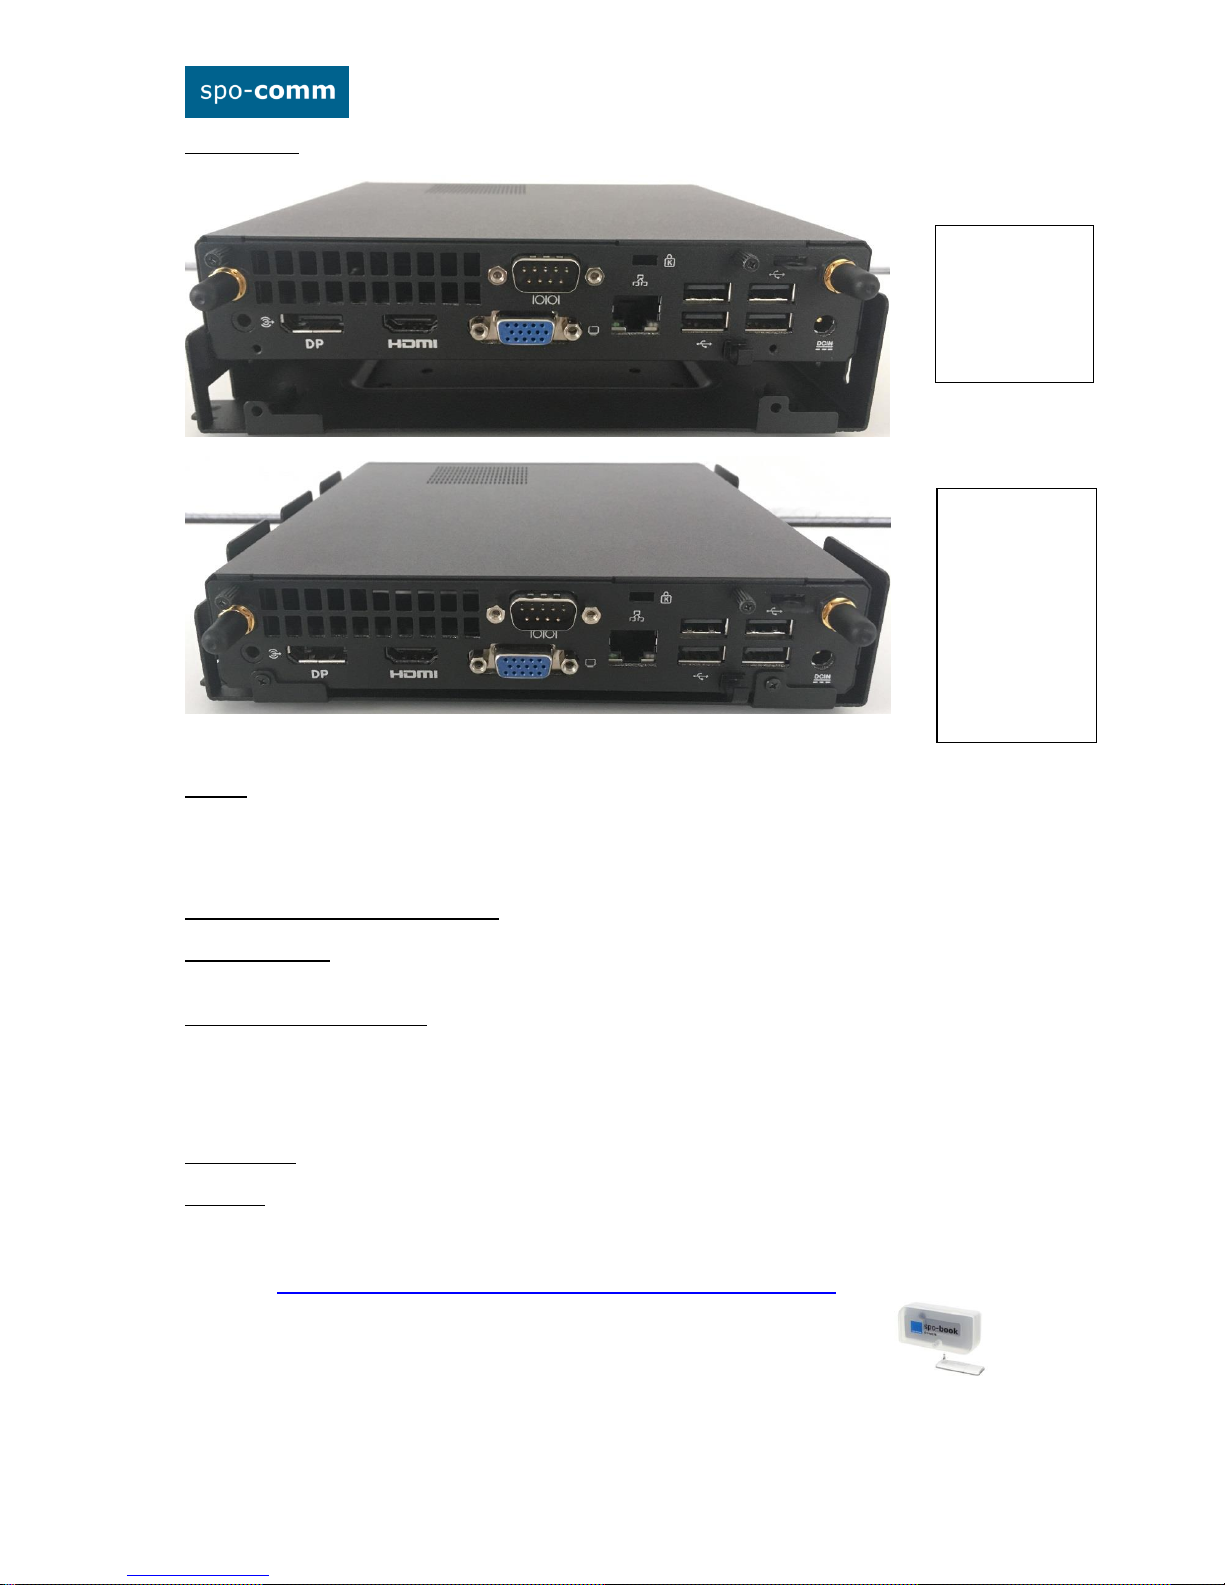
4. Assembling:
5. BIOS:
Power on the computer and the system will start POST (Power On Self Test) process. When the message below
appears on the screen, press „DEL“ to enter Setup.
To save the BIOS settings press „F10“.
Short description of some BIOS settings:
5.1. Wake On RTC: That allow a computer to 'wake up' after shut down to execute tasks every day or on a
certain day. -> Power-> APM Configuration ->Power on RTC Alarm
5.2. Restore on AC Power Loss: This setting specifies whether your system will reboot after a power failure or
interrupt occurs. -> Power-> APM Configuration -> AC Power Loss
[Power Off] Leaves the computer in the power off state.
[Power ON] Leaves the computer in the power on state.
[Last State] Restores the system to the previous status before power failure or interrupt occurred.
5.3. pxe-Boot: boot an OS via LAN and DHCP. -> Advanced -> Onboard Device Settings -> LAN Boot ROM
6. Drivers:
The drivers for the spo-book NANO H110 can be found in our product catalog on the product page under the
tab "Product Details and Downloads" and on the supplied driver stick.
direct link: https://www.spo-comm.de/products/en/mini-pcs/nano-ion-h110.html
1. Mount your
VESA kit on the
backside of the
monitor with
four screws in
the package.
2. Place the
NANO on the
VESA mounting
kit and then
tightening the
screws from the
holes on both
sides of the
VESA bracket.
 Loading...