

spo-comm BRICK J1900, MOVE N3160, spo-book NOVA CUBE Q87 Quick Manual
Quick guide spo-book BRICK J1900
Please check before you start the device:
• If the device temperature conforms to the recommended operating temperature.
• If the power source is correctly connected.
• If all adaptors and connectors are properly connected.
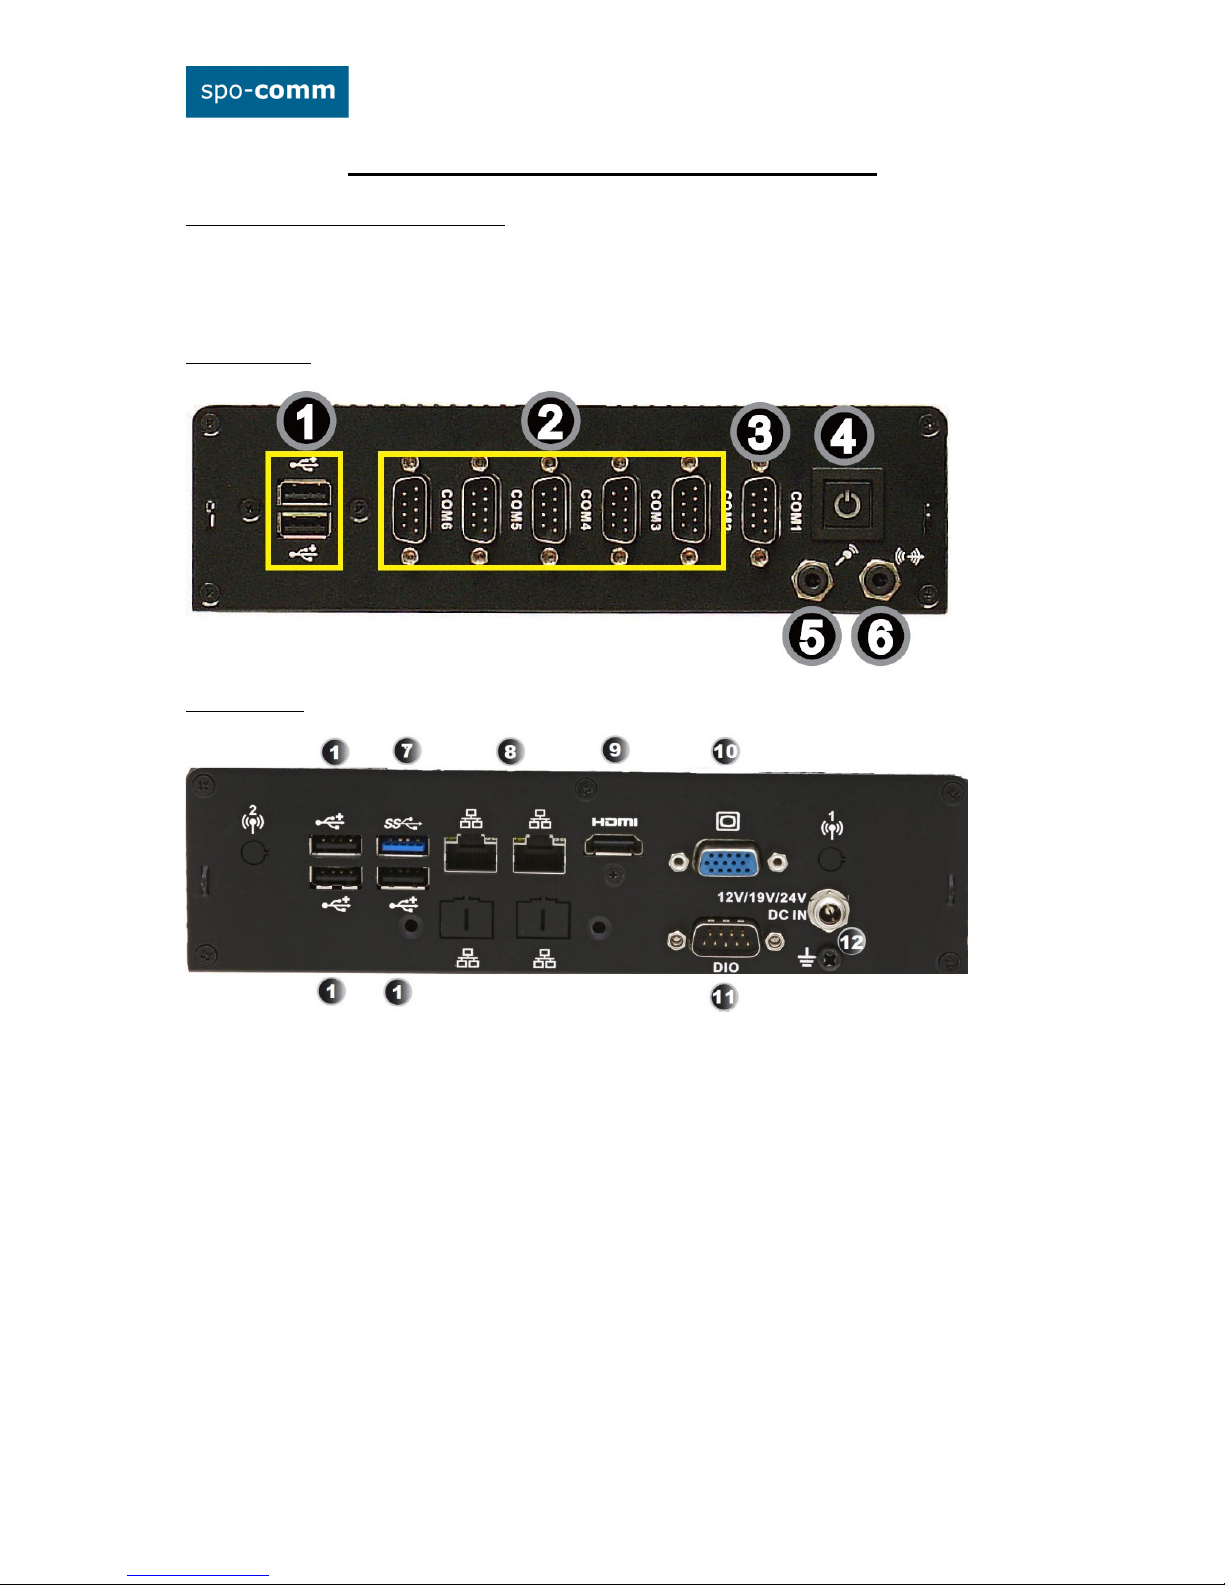
1. Front Panel:
2. Rear Panel:
1. USB 2.0 Port
2. RS-232 Serial Port
3. RS-232/422/485 Serial Port
4. Power button
5. Microphone In
6. Audio Out
7. USB 3.0 Port
8. RJ45-GbE-LAN
9. HDMI-Port
10. VGA-connector
11. DIO connector
12. 12V DC power connector
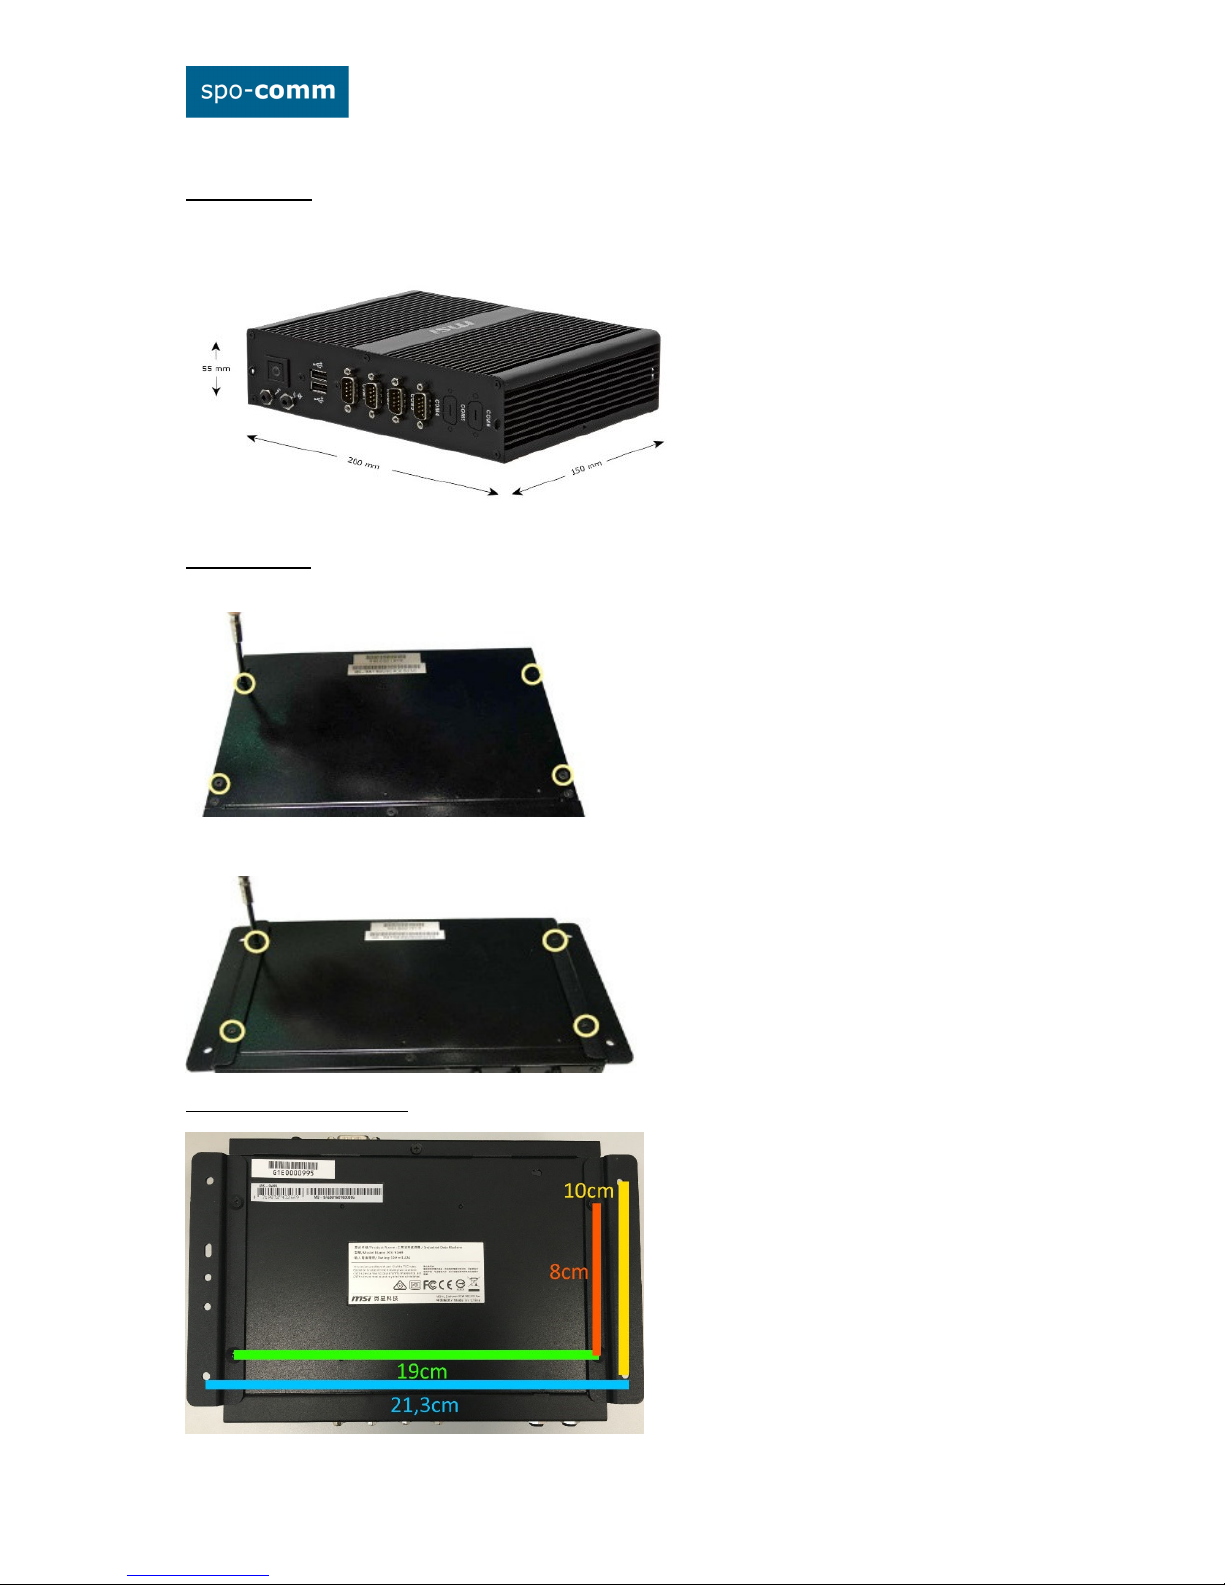
3. Dimensions:
4. Assembling:
Remove the four screws on the top of the chassis (as indicated by yellow circles).
Fasten the brackets to the chassis with the chassis screws.
dimensions of the boreholes:
 Loading...