

Splendor 5200, 6200 Installation Instructions Manual
M
Installation Instructions
Elite Series 5200 / 6200
E
M
J
I
D
N (4)
D
J
G
C
G
B
H
D
L
H
D
A
F
M
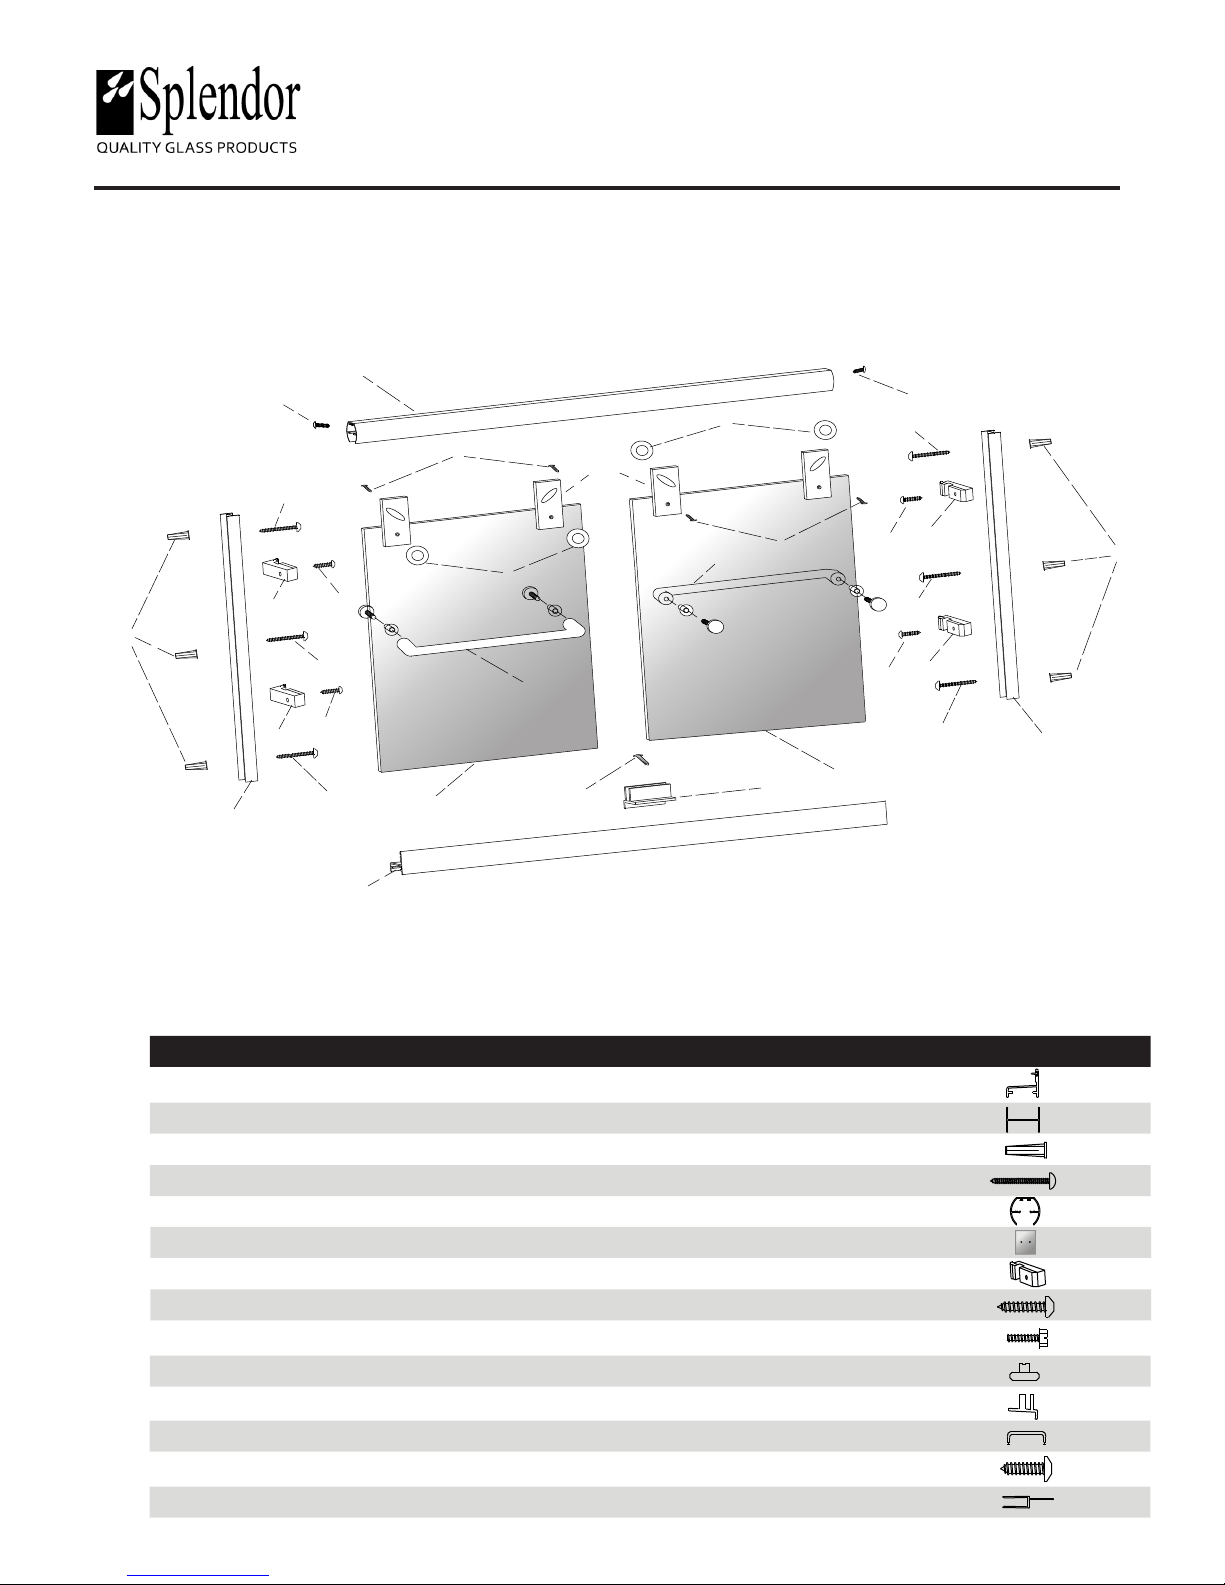
Parts
ITEM PART # QTY DESCRIPTION
A 882 1 Tub Track with T- Fin
B 884 2 Wall Jamb
C 113 6 Plastic Wall Anchor
D 110 6 #8 x 1 1/2” Pan Head Screw
E 880 1 Tub Header
F 2 Glass Panels
G 185 4 Vinyl Jamb Bumpers
H 115 4 #6 x 3/4” Pan Head Screws
I 116 4 #6 x 32-3/8” Hex Head Screws
J 132 4 Roller Bearing
K 153 1 Bottom Guide
L ETB 2 Towel Bar
L
I
F
K
G
H
D
G
H
D
B
C
M 119 3 #6 X 1/2” Pan Head Screws
N 886 4 Hanger Bracket - Attached
Page 1
REV-08/2017

Tools
Hacksaw Philips Screwdriver Level #32 and 3/16” Drill Bit
Masking Tape
Safety Glasses
Tape Measure
Silicone
Installation Notes
.
Unpack your unit carefully. Lay out and identify all parts using the instruction sheets as a
reference. Before discarding the carton, check for any small hardware bags.
.
If any parts are damaged or missing, refer to the description noted in the instructions when
contacting your dealer for replacements.
.
Please wear safety glasses whenever drilling or cutting.
Drill
Mallet
.
Handle the glazed panels carefully; tempered glass is dicult to break, but the sharp corners
of the panels can damage tile and oor coverings.
.
Before installing, check the tub rim for level and both walls for plumb. If either are out of
plumb more than 3/8”, you may want to contact your dealer for tapered llers which can be
used to level tub track or plum the side jambs.
Caution: Tempered glass cannot be cut or drilled
Page 2
REV-08/2017
 Loading...