

Page 1

Manual
TDx
Transient Designer 500 Series Rack Module
Page 2

Note:
Click on a section or page number to immediately jump to that location.
Content
Content 2
Version 1.0 – 02/2016 3
Scope of Delivery 4
Scope of Delivery 4
Measurement & Weight 4
Introduction 5
Welcome 5
Specifications 6
General 6
Input 6
Output 6
Installation 7
Installation into a 500 series rack 7
Control Elements 8
On/Bypass 9
ATTACK 10
SUSTAIN 11
Applications 15
Drums & Percussions 16
Drums: Ambience 18
Guitars 19
Bass: Staccato vs. Legato 20
Backings 20
Keyboards & Sampler 21
Post Production 21
Mastering 21
Technolog y 22
Differential Envelope Technology (DET) 22
The ATTACK Control Circuitry 23
The SUSTAIN Control Circuitry 24
Symbols 25
Security Advices 26
Declaration of CE Conformity 31
Notes on Environmental Protection 32
MIX 12
OUTPUT 13
Signal-LED 14
TDx
Contact 33
2
Page 3

Version 1.0 – 02/2016
Developer: Wolfgang Neumann
This manual contains a description of the product Transient Design TDx. In no way it
represents a guarantee of particular characteristics or results of use.
The information in this document has been carefully compiled and verified and, unless
otherwise stated or agreed upon, correctly describes the product. Sound Performance
Lab (SPL) continuously strives to improve its products and reserves the right to modify
the product described in this manual at any time without prior notice.
This document is the property of SPL and may not be copied or reproduced in any manner, in part or fully, without prior authorization by SPL.
TDx
Content
3
Page 4

Scope of Delivery
TDx – 500 Series Rack Module
Quickstart/Product Overview
Measurement & Weight
Singe Slot 500 Series Rack Module
Weight: 1.53 lbs (0.65 kg)
Please keep the original packaging. In case of a service procedure the original packaging ensures a
safe transport. It also serves as a safe packaging for your own transports if you do not use special
transportation cases.
TDx
Content
4
Page 5

Welcome
and thank you for purchasing the Transient Designer TDx. With the Transient Designer
TDx the level-independent processing of signal paths is making headway into the world
of 500 series rack modules. However, the possibilities for studio and live application
are seemingly endless.
Technical foundation is SPL’s Differential Envelope Technology (DET) which allows level-independent dynamic processing by calculating differences in generated envelopes.
Introduction
In this it differs in principle from common compressors that are based upon processing
signals of a specific level. These envelopes are always tracking the curve of the original
signal to provide optimal results in every moment of the music.
Thanks to the level-independent processing DET the setting of a threshold is needless.
Other common controls of dynamic processing, such as ratio or parameters for time-constants are automated and optimized adaptively in a musical manner according to the
characteristics of the input signal.
Content
TDx
5
Page 6
General
Frequency Response: 10 Hz - › 100 kHz
Noise: -93 dBu (A-weighted)
Dynamic Range: 116 dB
Common Mode Rejection Ratio: > 80 dB (at 1 kHz)
Total Harmonic Distortion and Noise (THD+N): 0.03% (0 dBu input level/unity gain)
Current consumption: 30 mA at +/- 16 Volt DC
Specifications
Input
Electronically balanced
Impedance: approx. 20 kohms
Max. Input Level: +22 dBu
Output
Electronically balanced
Impedance: approx. 150 ohms
Max. Output Level: +22 dBu
Content
TDx
6
Page 7

Installation into a 500 series rack
• Please read the manual that comes with the 500 series rack. You should gain all
information necessary for the installation process.
• Your 500 series rack should be switched off and the power cable should not be
connected.
• Insert the TDx module into a free slot of your rack. Make shure the connector of the
TDx is precisely aligned with the rack connector.
Installation
• Press the TDx module carefully into the rack connector and tighten the screws.
• Connect the TDx module with your audio environment using the connections from
your 500 series rack.
• Insert the power cable to the 500 series rack and switch it on.
Content
TDx
7
Page 8

Control Elements
TDx
Content
8
Page 9
On/Bypass
With the ON/Bypass button you can switch the TDx into the signal path. If the button is
in position “On”, the TDx is active. If the button is in position “Bypass”, the audio signal
passes through unprocessed.
Control Elements
TDx
Content
9
Page 10
ATTACK
With the ATTACK control you can amplify or attenuate the attack of a signal by up to
15 dB. For more information on the operation of the ATTACK control please refer to “The
ATTACK Control Circuitry” on page 23.
The ATTACK control circuitry uses two envelope generators. One follows the shape of the
original curve and adapts perfectly to the dynamic gradient. The second envelope generator produces an envelope with a slower attack. From the difference of both envelopes
the VCA control voltage is derived. Positive ATTACK values emphasize attack events,
Control Elements
negative ATTACK values smooth out the attack envelopes of sound events.
For an extensive description and explanation of the possible applications of the ATTACK
control please refer to “Applications” on page 15 cont.
Content
TDx
10
Page 11

SUSTAIN
With the SUSTAIN control you can amplify or attenuate the sustain of a signal by up to
24 dB. For more information on the operation of the SUSTAIN control please refer to “The
SUSTAIN Control Circuitry” on page 24
The SUSTAIN control circuitry also uses two envelope generators. One follows the shape
of the original curve and adapts perfectly to the dynamic gradient. The second envelope
generator produces an envelope with a longer sustain. From the difference of both envelopes the VCA control voltage is derived. The gradient of the control voltage matches
Control Elements
the time flow of the original signal.
Positive SUSTAIN values lengthen the sustain, negative SUSTAIN values shorten the
sustain.
For an extensive description and explanation of the possible applications of the SUSTAIN
control please refer to “Applications” on page 15 cont.
Content
TDx
11
Page 12

MIX
You can continuously blend between the processed and the unprocessed signal (parallel mix).
In the center position (1:1), the volume of the processed and the unprocessed signal is
balanced.
Turn the MIX control to the right in order to reduce the unprocessed signal. When set
hard right, you can only hear the processed signal.
Control Elements
Turn the MIX control to the right in order to reduce the processed signal. Hard left and
you can only hear the unprocessed signal.
Content
TDx
12
Page 13

OUTPUT
The OUTPUT control allows you to reduce the output signal. This ensures that following
devices receive an optimized level.
Control Elements
TDx
Content
13
Page 14

Signal-LED
The signal LED (Sig) indicates that an audio signal reaches the input with a level above
-20 dB. This LED helps the operator especially in complex setups to determine immedi-
ately whether the Transient Designer TDx actually receives a signal.
Control Elements
TDx
Content
14
Page 15

Applications
The Transient Designer TDx is ideally suited for use in professional recording, in project
or home studios and sound reinforcement applications.
For the first time you can manipulate and control the attack and sustain characteristics
of a signal regardless of level in the most intuitive and simple way. Usually equalizers
are used to separate instruments in a mix – the tonal aspect of the signal is considered,
but not the temporal aspect.
Applications
The Transient Designer TDx opens this further dimensions in signal processing. By manipulating the attack and sustain curves of a sound event, the mix can be made to sound
more transparent. Instruments can be mixed at lower levels while still maintaining their
positions in the mix – but occupying less space.
During a remix or in general after miking you can arrange new positions of instruments.
Reduce ATTACK and increase SUSTAIN to move signals back into the mix that are too
present. Additionally the FX parts of too dry signals are strengthened.
The following examples are given as suggestions and examples. The described procedures with specific instruments can of course be transfered to others which are not
mentioned here.
Content
TDx
15
Page 16

Drums & Percussions
Processing drum and percussion sounds is probably the Transient Designer’s most typical range of application, both from samples to live drum sets:
• Emphasize the attack of a kick drum or a loop to increase the power and presence
in the mix.
• Shorten the sustain period of a snare or a reverb-flag in a very musical way to obtain
more transparency in the mix.
Applications
• When recording a live drum set, shorten the toms or overheads without physically
damping them. Usual efforts to damp and mike are reduced remarkably. Since muffling of any drum also changes the dynamic response, the Transient Designer TDx
opens up a whole new soundscape.
• Miking live drums is considerably faster and easier because you can correct the
apparent ‘distance’ of the microphone by simply varying the ATTACK and SUSTAIN
values.
Content
TDx
16
Page 17

• The Transient Designer TDx is a perfect alternative to noise gates in live drum miking.
Adaptively reacting to the duration of the original signal, the sustain is shortened
more musically than with fixed release times and a drumset is freed from any crosstalk quickly and effectively.
• Create unusual dynamic effects including new and interesting pan effects. For example, patch a mono loop through two channels of the Transient Designer TDx and pan
fully left and right in the mix. Process the left channel with increased ATTACK and
reduced SUSTAIN while you adjust the right channel the opposite way and you get
very special stereo loop sounds. You have to try this to appreciate what it sounds
Applications
like, but expect to hear a lot of unusual stereo movement.
• Enjoy an amazingly simple integration of drum sounds into a mix. If the acoustic
level of a snare is expanded to approximately +4 dB by increasing the attack value,
the effective increase of peak levels in the overall mix is merely about 0.5 dB to 1 dB.
Content
TDx
17
Page 18

Drums: Ambience
If your drums happen to sound as if the room mics have been placed in a shoe closet,
the Transient Designer can immediately turn that sound into the ambience of an empty
warehouse. Just send the stereo room mics through two Transient Designer TDx modules
and crank the ATTACK controls to emphasize the first wave.
Now slowly increase SUSTAIN values to bring up a “all-buttons-in-1176-sound” room
tone – but without pumping cymbals. For a solid and driving rhythm track just fine-tune
the SUSTAIN control to make sure that the room mic envelope ends more or less exactly
Applications
on the desired upbeat or downbeat.
Content
TDx
18
Page 19

Guitars
Use the Transient Designer TDx on guitars to soften the sound by lowering the ATTACK.
Increase ATTACK for in-the-face sounds, which is very useful and works particularly well
for picking guitars. Or blow life and juice into quietly played guitar parts.
Distorted guitars usually are very compressed, thus not very dynamic. Simply increase
the ATTACK to get a clearer sound with more precision and better intonation despite
any distortion.
Applications
Heavy distortion also leads to very long sustain. The sound tends to become mushy;
simply reduce SUSTAIN to change that. If you, however, want to create soaring guitar
solos that would make even David Gilmour blush, just crank up the SUSTAIN control to
the max and there you go.
With miked acoustic guitars you can emphasize the room sound by turning up SUSTAIN.
If you want the guitars to sound more intimate and with less ambience, simply reduce
SUSTAIN.
Content
TDx
19
Page 20
Bass: Staccato vs. Legato
Speaking of bass: Imagine a too sluggishly played bass track. You may not have to re-record it: Reduce the SUSTAIN until you can hear clear gaps between the downbeats – the
legato will turn into a nice staccato, driving the rhythm-section forward.
Backings
A common problem especially with tracks that are recorded and mixed in different stu-
Applications
dios: Backings lack of ambience, and finding a reverb that “matches” takes time. So
simply emphasize the original ambience by turning up the Transient Designer’s SUSTAIN
control.
And the opposite problem, too much ambience, is similarly simply solved with the opposite processing – just reduce SUSTAIN.
Content
TDx
20
Page 21
Keyboards & Sampler
Sounds in keyboards and samples are usually highly compressed and maintain only little of natural dynamics. Increase the ATTACK values to re-gain a more natural response
characteristic. The sounds occupy less space in the mix and appear more identifiable
even at lower volumes.
Post Production
Applications
When dealing with overdubs in movies you can easily add more punch and definition
to effect sounds from any sample library.
The same applies to outdoor recordings that suffer from poor microphone positioning
– simply optimize them afterwards.
Mastering
Like with any good thing, you also have to know where not to use it. For example, using
a Transient Designer TDx in mastering is not recommended, as it is rarely a good idea
to treat a whole mix at once. Instead, treat individual elements within the mix.
Content
TDx
21
Page 22
Differential Envelope Technology (DET)
SPL‘s DET is capable of level-independent envelope processing and thus makes any
threshold settings unnecessary. Two envelopes are generated and then compared. From
the difference of both envelopes the VCA control voltage is derived. The DET ensures
that both low and loud signals (pianissimo to fortissimo) are treated the same way.
Both ATTACK and SUSTAIN control circuitries operate simultaneously and don‘t affect
each other.
Technology
TDx
Content
22
Page 23

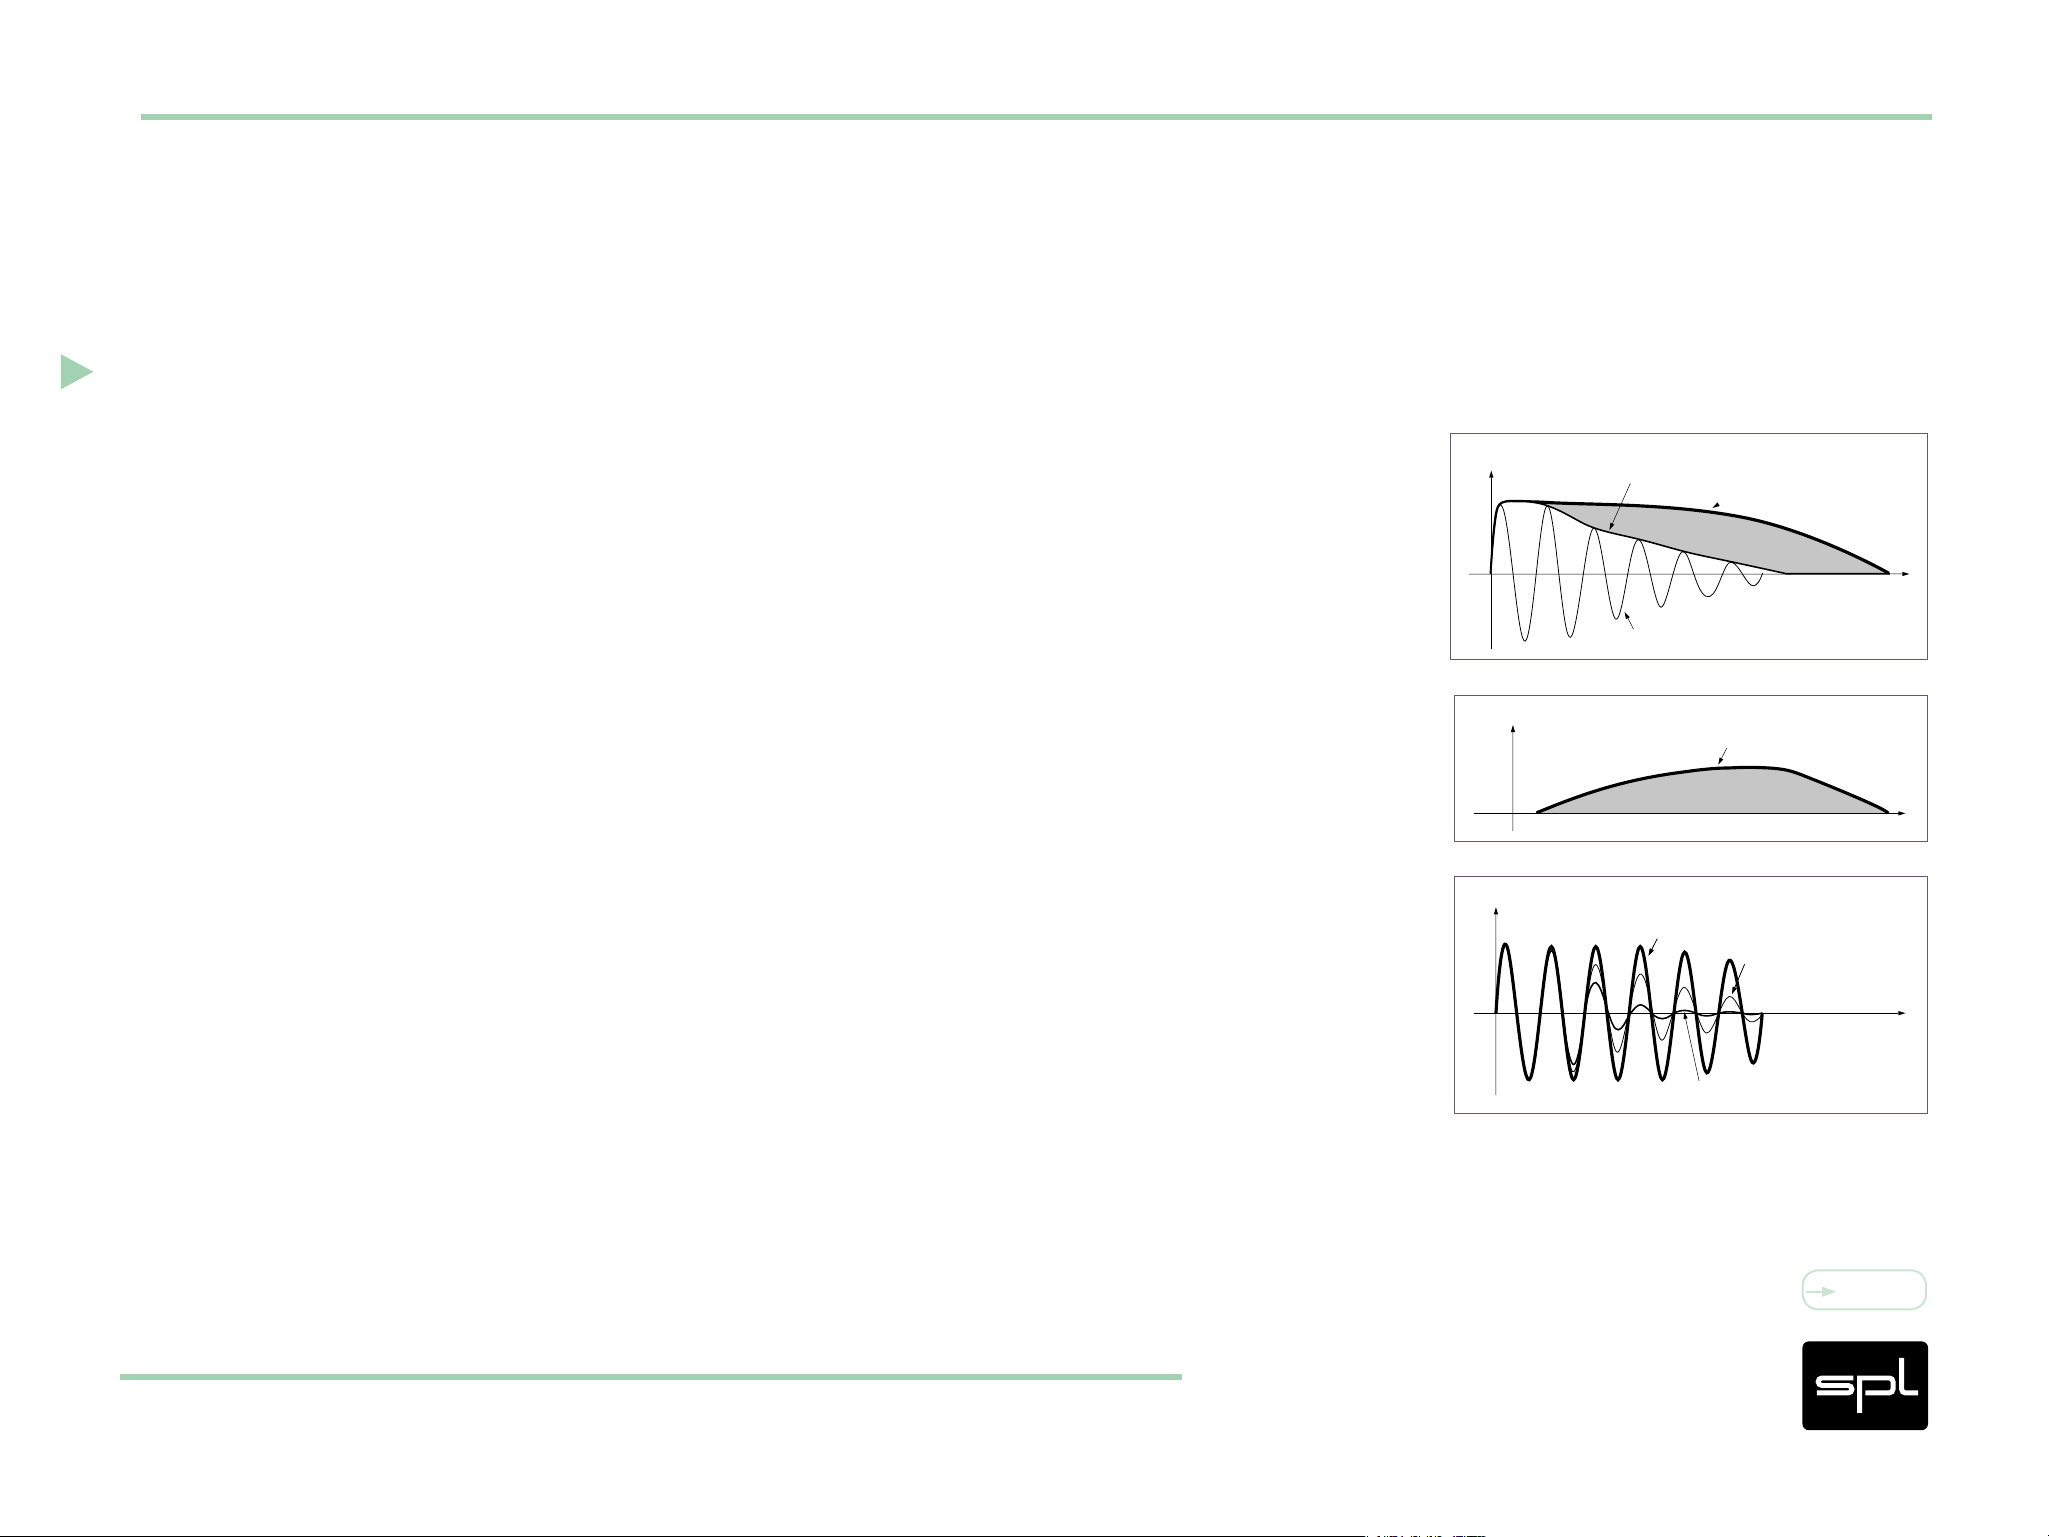
The ATTACK Control Circuitry
Technology
The ATTACK control circuitry uses two envelope generators. The first one generates a
voltage (Env 1) that follows the original waveform. The second envelope generator creates the envelope Env 2 with a slower attack envelope.
Diagram 1 illustrates the original curve and the two created envelopes that control the
ATTACK processing. Envelope generator Env 1 follows the original waveform. Env 2 is
generated with reduced attack.
Diagram 2 shows the difference between Env 1 and Env 2 that defines the control voltage
of the VCA. The shaded area marks the difference between Env 1 and Env 2 that controls the control voltage of the VCA. The amplitude of the attack is increased if positive
ATTACK values are set. Negative ATTACK values reduce the level of the attack transient.
Diagram 3 displays the processed waveforms with maximum and minimal ATTACK to
compare against the original waveform in diagram 1.
%JBHSBN(FOFSBUFE&OWFMPQFT"UUBDL
67
%JBHSBN$BMDVMBUFE$POUSPM7PMUBHF"UUBDL
6N7
%JBHSBN1SPDFTTFE8BWFGPSNT"UUBDL
67
&OW
&OWTMPXFSBUUBDL
%JGGFSFODF&OW&OW
&RVBMT7$"$POUSPM7PMUBHF
.BYJNVN"UUBDL
0SJHJOBM8BWFGPSN
0SJHJOBM8BWFGPSN
UNT
UNT
TDx
UNT
.JOJNVN"UUBDL
Content
23
Page 24
The SUSTAIN Control Circuitry
Technology
The SUSTAIN control circuitry also plays host to two envelope generators. The envelope
tracker Env 3 again follows the original waveform. The envelope generator Env 4 maintains the level of the sustain on the peak-level over a longer period of time.
The control voltage of the VCA is again derived from the difference between the two
voltages. Sustain amplitude is increased for positive SUSTAIN settings and reduced for
negative settings.
Diagram 4 illustrates the original waveform and the envelope creation to control the
SUSTAIN processing. Envelope generator Env 1 follows the original waveform, Env 2 is
generated with prolongued sustain.
Diagram 5 shows the difference between Env 4 and Env 3 that defines the control voltage of the VCA.
%JBHSBN(FOFSBUFE&OWFMPQFT4VTUBJO
67
%JBHSBN$BMDVMBUFE$POUSPM7PMUBHF4VTUBJO
6N7
%JBHSBN1SPDFTTFE8BWFGPSNT4VTUBJO
67
&OW
&OW1SPMPOHVFE4VTUBJO
0SJHJOBM8BWFGPSN
.BYJNVN4VTUBJO
%JGGFSFODF&OW&OW
&RVBMT7$"$POUSPM7PMUBHF
0SJHJOBM8BWFGPSN
UNT
UNT
UNT
Diagram 6 displays the processed waveforms with maximum and minimal sustain to
compare against the original waveform in diagram 4.
TDx
.JOJNVN4VTUBJO
Content
24
Page 25

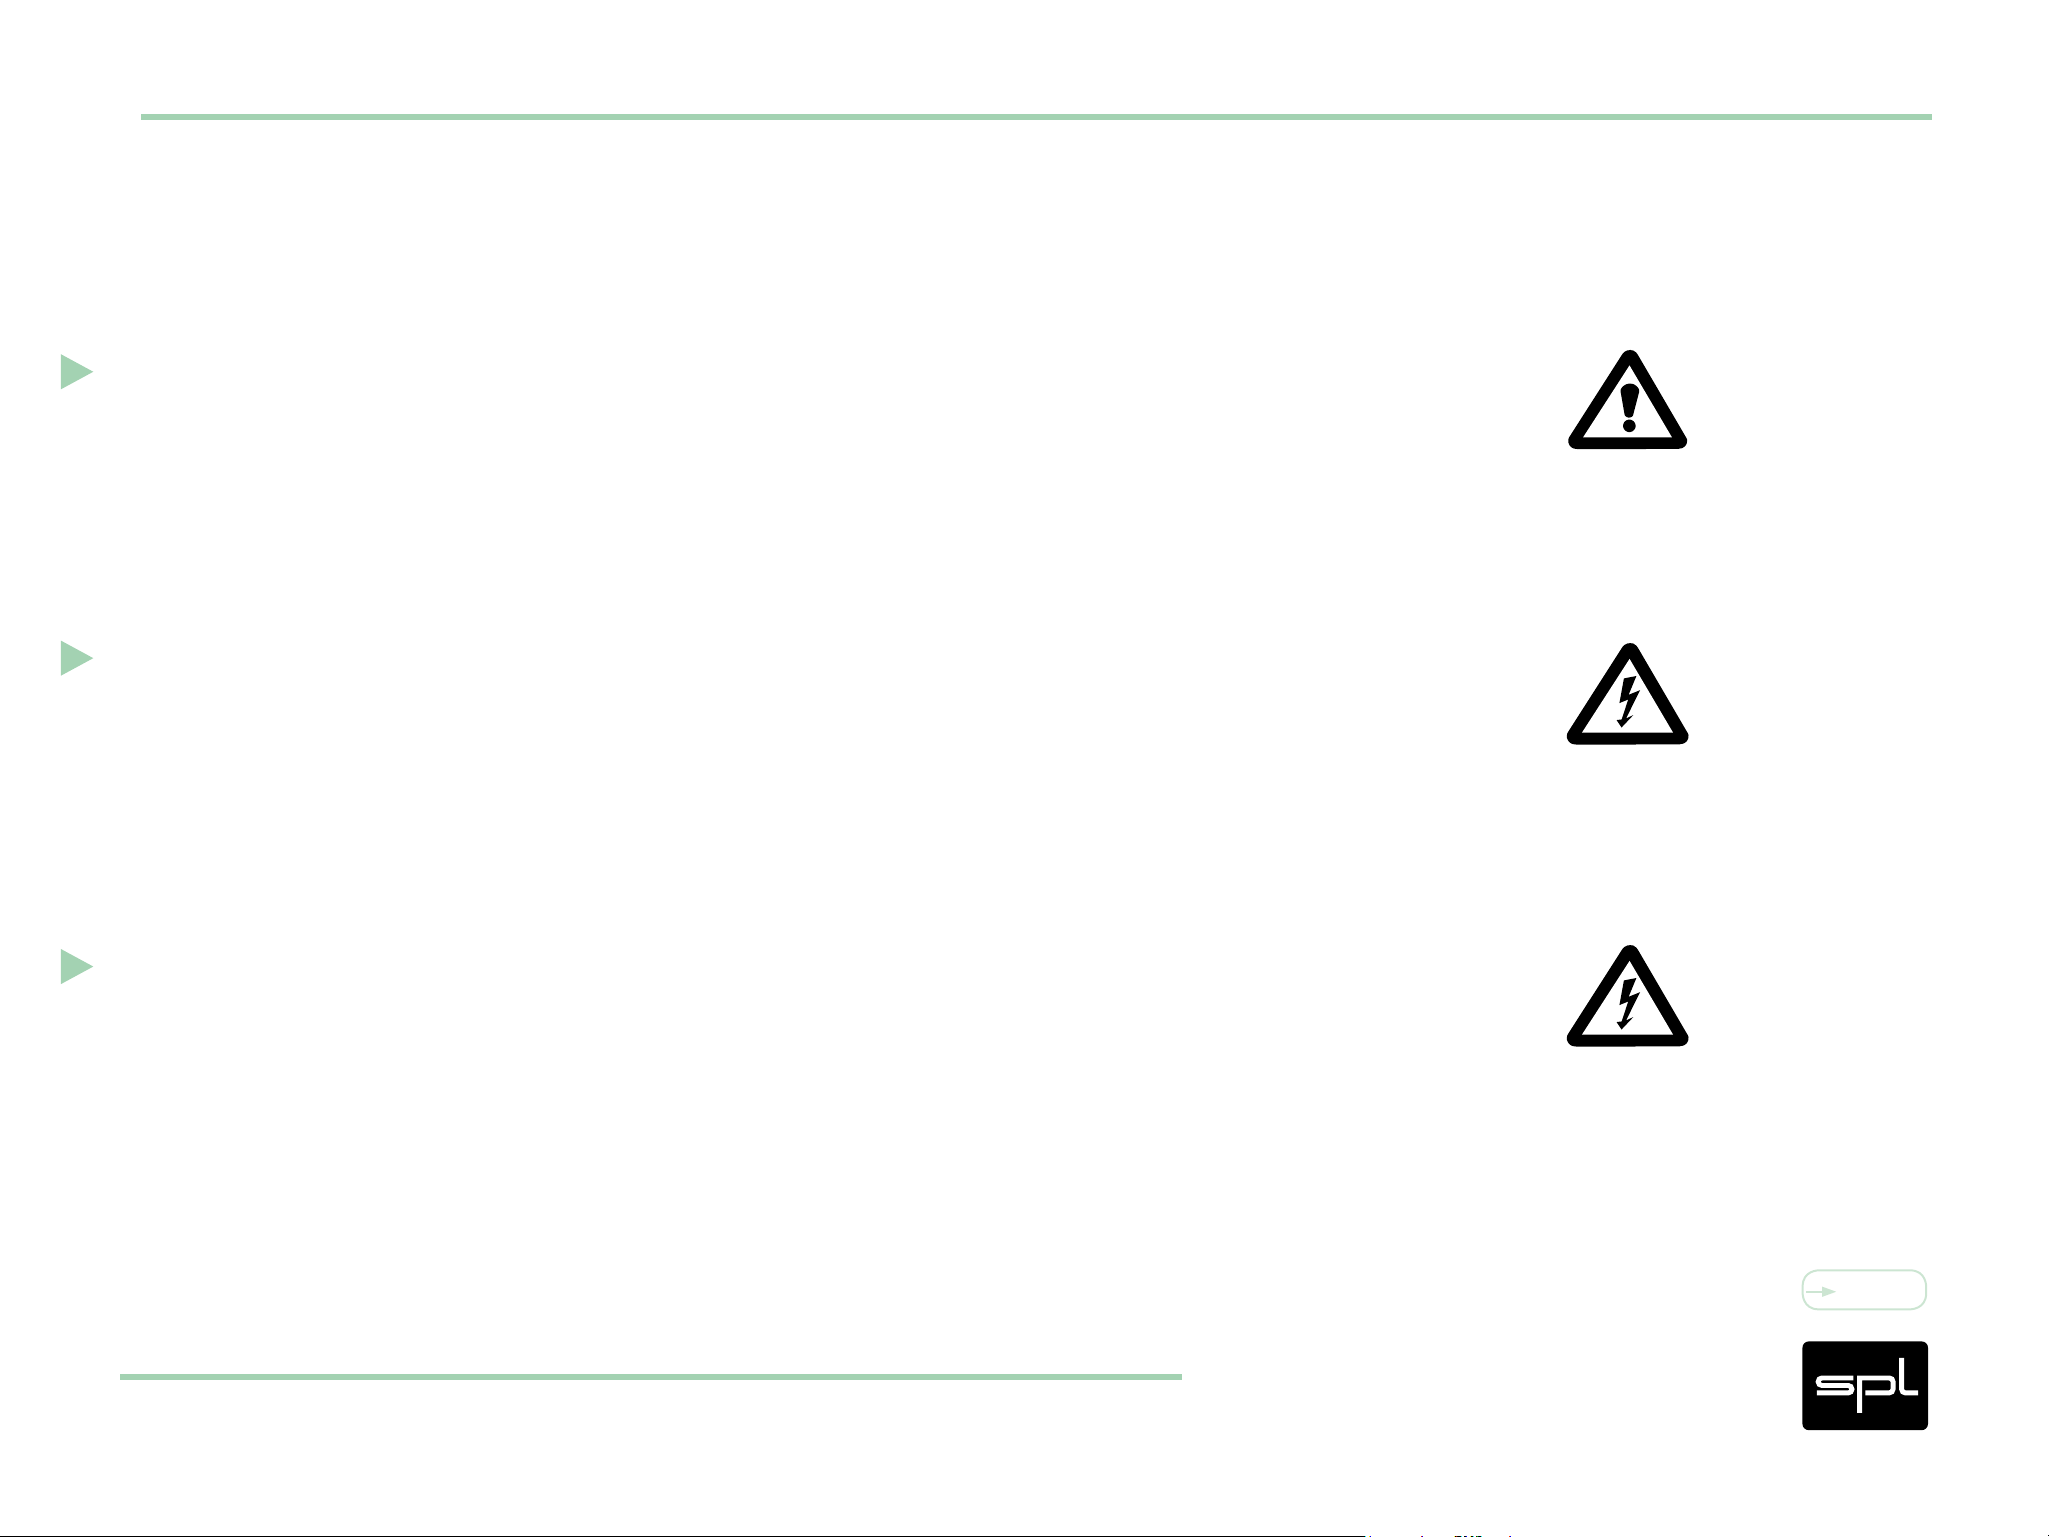
Exclamation mark within a triangle
An exclamation mark within a triangle is intended to make you aware of important operational advice and/or warnings that must be followed.
Be especially attentive to these and always follow the advice they give.
Lightning symbol within a triangle
Symbols
In this Manual a lightning symbol within a triangle warns you about the potential for
dangerous electrical shocks – wich can also occur even after the device has been disconnected from a power source.
Symbol of a lamp
The symbol of a lamp directs your attention to explanations of important functions or
applications.
Content
TDx
25
Page 26
Connections
Only use the connections as described.
Other connections can lead to health risks and damage the equipment.
Water and humidity
Do not use this device anywhere near water (for example in a bathroom, a damp cellar,
Security Advices
near swimming pools, or similar environments). Otherwise your are dealing with an
extremely high risk of fatal electrical shocks!
Insertion of objects or uids
Be careful to not insert any object into any of the chassis openings. You can otherwise
easily come into contact with dangerous voltage or cause a damaging short circuit.
Never allow any fluids to be spilled or sprayed on the device. Such actions can lead to
dangerous electrical shocks or fire!
Content
TDx
26
Page 27

Air ventilation
Chassis openings offer ventilation and serve to protect the device from overheating.
Never cover or otherwise close off these openings. Never place the device on a soft
surface (carpet, sofa, etc.).
Electrical power
Operate the device only from power sources that can provide proper power. When in
Security Advices
doubt about a source, contact your dealer or a professional electrician. To be certain
you have isolated the device, disconnect all power and signal connections. Make sure
that the power supply plug is always accessible. When not using the device for a longer
period, make sure to unplug it from your wall power socket.
Opening the unit
Simply put: DON’T, if you are not a certified SPL technician or engineer. Really: Do not
open the device housing, as there is great risk you will damage the device, or – even
after being disconnected – you may receive a dangerous electrical shock.
Content
TDx
27
Page 28
Power connection overloads
Avoid any kind of overload in connections to wall sockets, extension or splitter power
cords, or signal inputs. Always keep manufacturer warnings and instructions in mind.
Overloads create fire hazards and risk of dangerous shocks.
Lightning
Security Advices
Before thunderstorms or other severe weather, disconnect the device from wall power;
do not do this during a storm in order to avoid life threatening lightning strikes.
Similarly, before any severe weather, disconnect all the power connections of other
devices and antenna and phone/network cables which may be interconnected so that
no lightning damage or overload results from such secondary connections.
Content
TDx
28
Page 29
Controls and switches
Operate the controls and switches only as described in the manual. Incorrect adjustments
outside safe parameters can lead to damage and unnecessary repair costs. Never use
the switches or level controls to effect excessive or extreme changes.
Repairs
Unplug the unit from all power and signal connections and immediately contact a quali-
Security Advices
fied technician when you think repairs are needed – or when moisture or foreign objects
may accidentally have reached inside the housing, or in cases when the device may have
fallen and shows any sign of having been damaged. This also applies to any situation in
which the unit has not been subjected to any of these unusual circumstances but still
is not functioning normally or its performance is substantially altered.
In cases of damage to the power supply and cord, first consider turning off the main
circuit breaker before unplugging the power cord.
Content
TDx
29
Page 30

Replacement/substitute parts
Be sure that any service technician uses original replacement parts or those with identical specifications as the originals.
Incorrectly substituted parts can lead to fire, electrical shock or other dangers, including
further equipment damage.
Safety inspection
Security Advices
Be sure always to ask a service technician to conduct a thorough safety check and ensure
that the state of the repaired device is in all respects up to factory standards.
Cleaning
Do not use any solvents, as these can damage the chassis finish.
Use a clean, dry cloth (if necessary, with an acid-free cleaning oil).
Disconnect the device from your power source before cleaning.
Content
TDx
30
Page 31
Declaration of CE Conformity
The construction of this unit is in compliance with the standards and regulations of the
European Community.
TDx
Content
31
Page 32
Notes on Environmental Protection
At the end of its operating life, this product must not be disposed of with regular household waste but must be returned to a collection point for the recycling of electrical and
electronic equipment.
The wheelie bin symbol on the product, user’s manual and packaging indicates that.
The materials can be reused in accordance with their markings.
Through reuse, recycling of raw materials, or other forms of recycling of old products,
you are making an important contribution to the protection of our environment.
Your local administrative office can advise you of the responsible waste disposal point.
WEEE Registration: 973 349 88
TDx
Content
32
Page 33
Contact
SPL electronics GmbH
Sohlweg 80
41372 Niederkrüchten
Germany
Phone +49 2163 9834-0
Fax +49 2163 9834-20
E-Mail: info@spl.info
Contact
Or follow us on our Blog, Facebook, Twitter and YouTube:
Website & Blog: spl.info
Videos: youtube.spl.info
Twitter: twitter.spl.info
Facebook: facebook.spl.info
TDx
Content
33
 Loading...