

SPK ELECTRONICS CO., LTD.
GPS Photo Tracker
SPK-GL3080
We Add More Fun to Photo Sharing!
Add:10F,NO.510,SEC.5,CHUNG HSIAO E. RD, TAIPEI, TAIWAN
Tel:02-2346-2323 Fax:02-2346-3939
E-mail:spktw@ms34.hinet.net WEB:http://www.spkecl.com

SPK-GL3080 GPS Photo Tracker
User
Manual V2.2
Table of Content
T ABLE OF CONTENT ..................... ........... ........ ........... ............ ........... ........... ............ ........... ....... . 2
OVERVIEW ......... ....................... ...................... ....................... ...................... ................... ................ 3
U
NIQUE
I
N
CASE
FEATURES
YOU
.............................................................................................................................................. 3
DON’T
KNOW
YET
- W
HAT IS
GPS? .............................................................................................. 4
SPK-GL3080 OPERATION ................................................................................................................... 4
P
OWER
ON/OFF
S
TATUS
LED’
S
ET
UP
MODE
I
NSTALL/REPLACE
USING THE ACCOMPANYING SPK PHOTO TRACKER SOFTWARE TO T AG YOUR
PHOTOS ............... .............................. .............................. .............................. ........................... ........ 7
I
NSTALLATION
APPENDIX - STATUS LED...........................................................................................................21
G
ENERAL
STATUS LED IN SET UP MODE ................................................................................................. 22
APPENDIX – PREPARATIONS . .................................................................................................. 23
A
TTACH THE
I
NSTALL
BATTERY
DEVICE
..................................................................................................................................... 4
S
.................................................................................................................................................... 4
...................................................................................................................................................... 6
BATTERY
..................................................................................................................................................... 7
OPERATION
HANGING
............................................................................................................................................. 23
............................................................................................................................... 7
....................................................................................................................................... 21
STRIP
............................................................................................................................ 23
TROUBLE SHOOTING................................................................................................................. 25
HARDWARE SPECIFICATION................................................................................................... 26
PACKAGE CONTENTS ................................................................................................................26
CERTIFICATIONS ................................... ........... ........... ............ ........... ....... ............ ........... .......... 27
TRADEMARKS AND COPYRIGHTS...................................... ............... ........... ........... .............. 27
May 2009 V2.2
Add:10F,NO.510,SEC.5,CHUNG HSIAO E. RD, TAIPEI, TAIWAN
Tel:02-2346-2323 Fax:02-2346-3939
E-mail:spktw@ms34.hinet.net WEB:http://www.spkecl.com
2
SPK-GL3080 GPS Photo Tracker
User
Manual V2.2
Overview
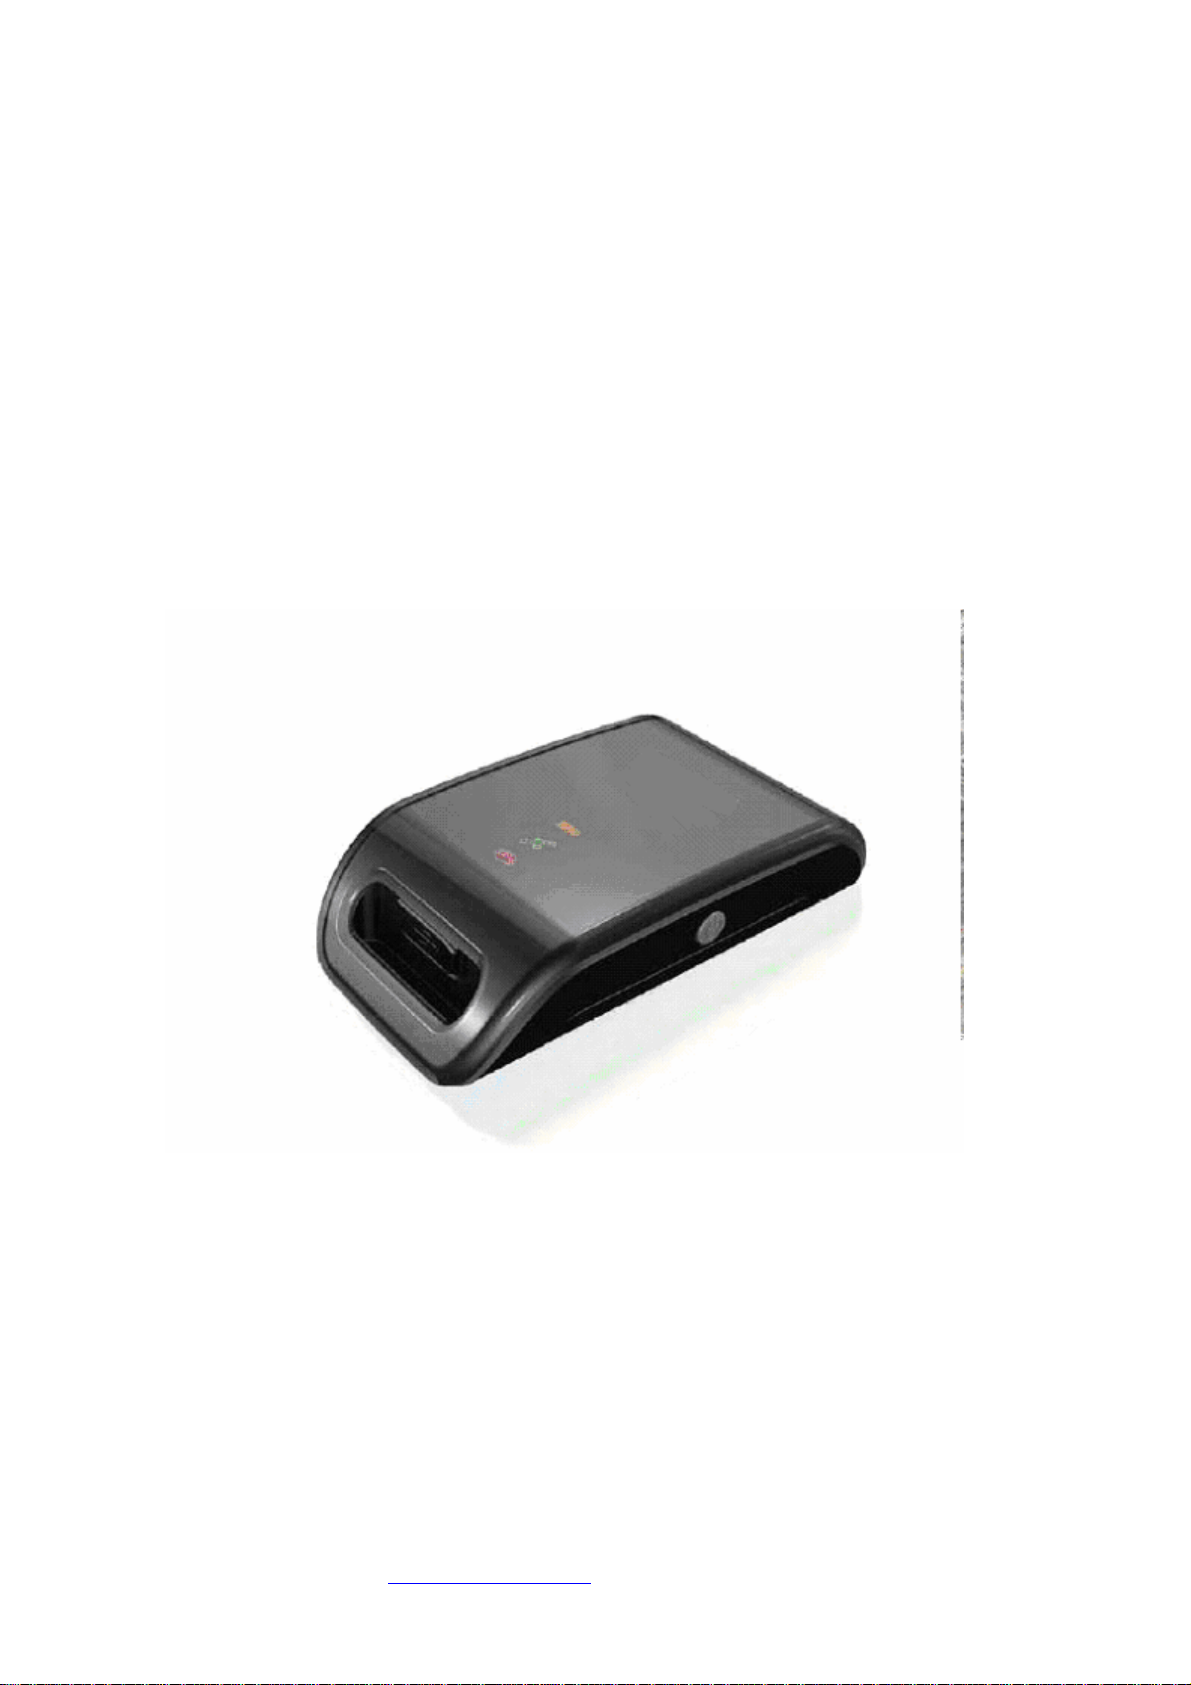
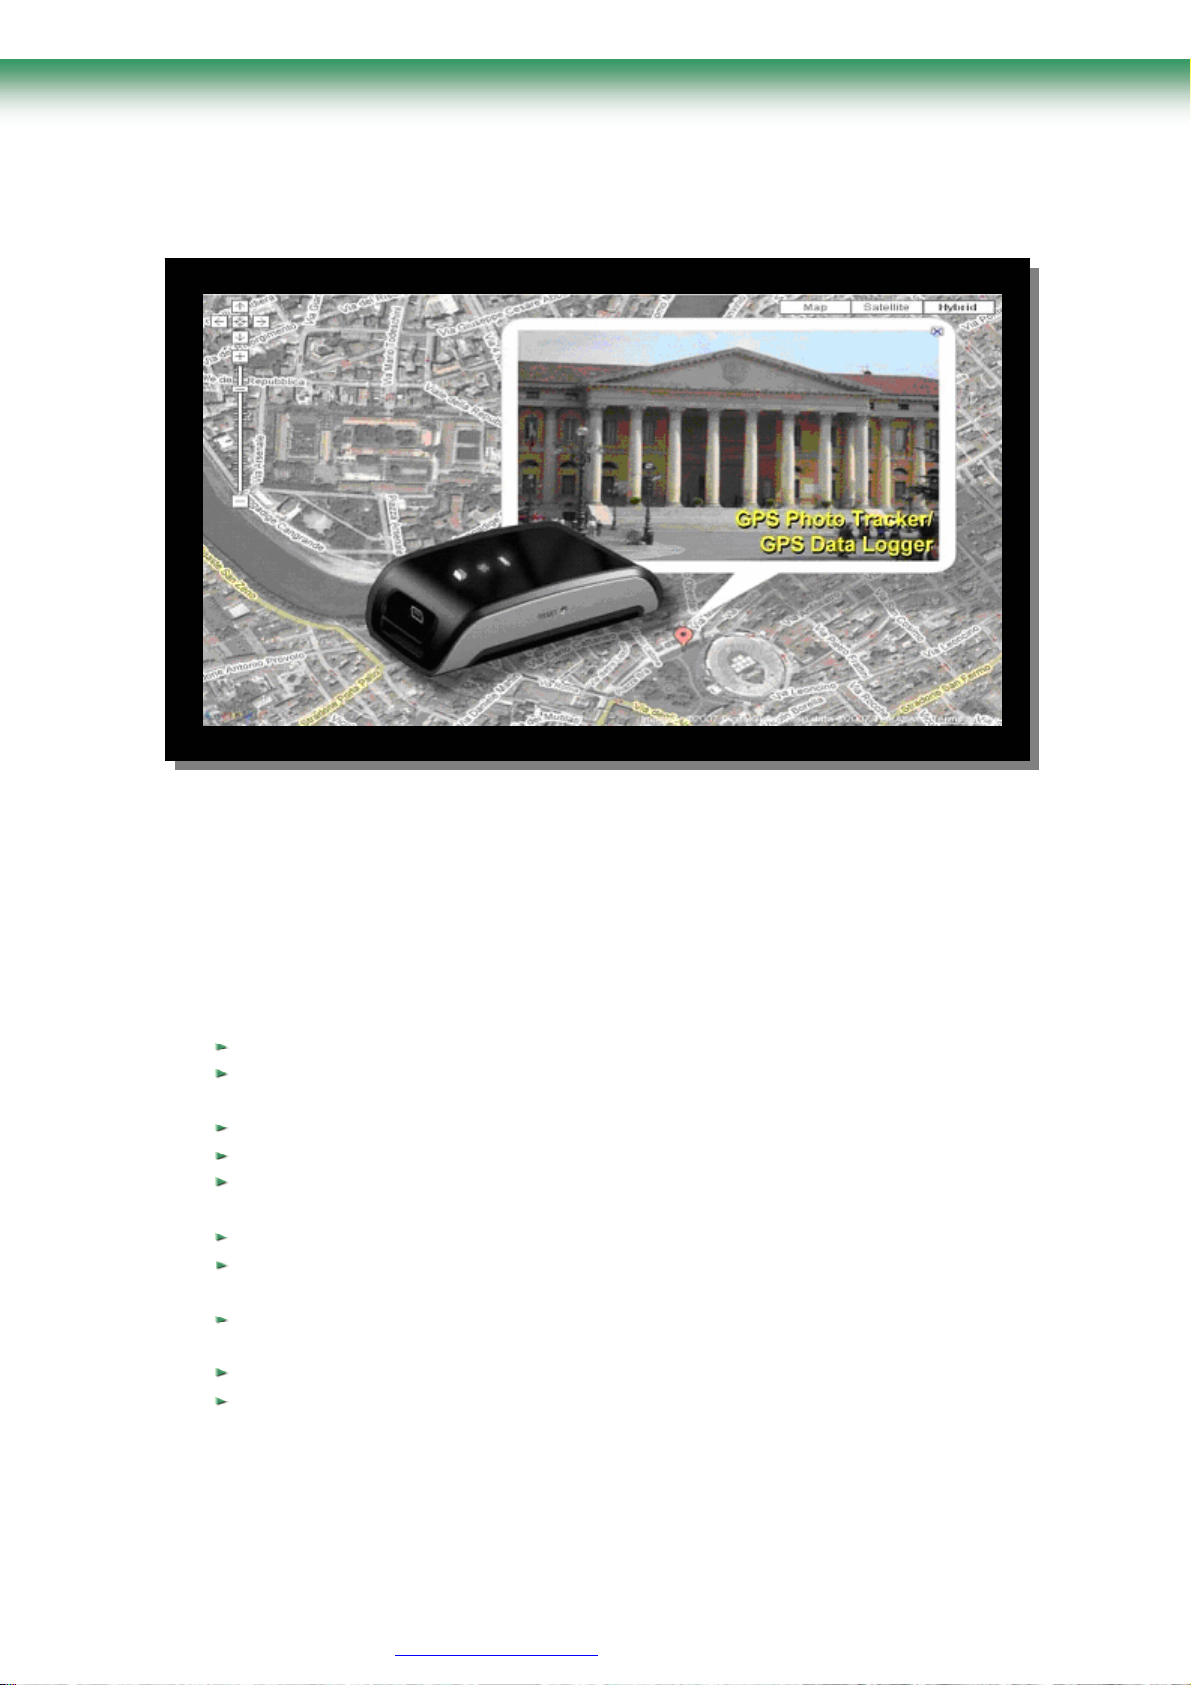
SPK-GL3080 photo tracker is a GPS-based data logger designed to provide location
information for digital photos (in EXIF 2.0 or later format) from all DSCs and camera phones. It can help
making photo-taking more fun – show not just the great picture but also where it is taken! It is extremely
easy to use – just take it along and turn it on with your photo-taking trip. When uploading the pictures to the
PC, the accompanying software will do the tagging and saving of GPS location information. After that all
you need to do is to click at the GPS-tagged picture and it will show its location on Google Map or other
internet maps – let SPK-GL3080 tag your picture so you can enjoy more!
Unique Features
time
set-up
logged
sharing
GPS – based on SiRF Star III chipset
Log GPS output in NMEA0183 format at one record per second rate – full rate logging for best
resolution and flexible to use
Standard USB 2.0 interface / Double up as an USB Flash Disk
Works with Windows, Mac, or Linux -based machines
GPS logs can be accessed directly by application software as files, no more awkward COM port
procedures
Long operating time – over 15 hours with three standard AAA batteries
Large log capacity – store over 1,040,000 data records, equivalent to 2,880 hours of continuously
GPS data
User-friendly PC-based software is provided for photo tagging (EXIF 2.0 and later format) and
Tagged photos can be viewed on Google Map and other internet maps
Works with many on-line tools such as JetPhoto,
GPSVisualizer,
etc.
Add:10F,NO.510,SEC.5,CHUNG HSIAO E. RD, TAIPEI, TAIWAN
Tel:02-2346-2323 Fax:02-2346-3939
E-mail:spktw@ms34.hinet.net WEB:http://www.spkecl.com
3

y
SPK-GL3080 GPS Photo Tracker
User
Manual V2.2
In Case You Don’t Know Yet - What is GPS?
GPS is a 24-satellite network of Navstar navigational satellites that transmit signals to users, giving
an
them
was originally developed in the 1970s as a navigational aid for submarine-based
Trident nuclear missiles, its commercial use has expanded well beyond vehicle and
hiker navigation to include network timing control for accurate delivery of packet
communications.
accurate position in three dimensions along with a time stamp. While it
SPK-GL3080
Operation
ON/OFF device
Hold the POWER ON/OFF button for one (1) second until all three LED’s blink simultaneously once. Then
the Green LED (GPS Status) will be on. This indicates the device has been turned on and starts to search GPS
satellites.
Power
Power On
Power ON/OFF button
When sufficient numbers of GPS satellites are found and the position can be fixed, the Green LED
will begin to blink, indicating good GPS signal reception and GPS data is being logged
Now you can concentrate on and enjoy taking photos!
Power Off
To turn the power off, just hold the POWER ON/OFF button again for about three (3) seconds. All three
LED’s will be lit once and then off, and the device is now turned off.
Status LED’s
There are three status LED’s on SPK-GL3080 – Red (Storage Full), Green (GPS Status), and Amber (Battery
Storage Full
GPS Status
Battery Power
Ma
2009 V2.2
4

y
SPK-GL3080 GPS Photo Tracker
User
Manual V2.2
Power).
Status LED
indicates good reception of satellite signal and GPS position data is being logged. Constant
on indicates satellite signal reception is poor and position can not be fixed and logged.
facing open sky. Normally, after adjustment, the position can be fixed very quickly and the GPS Status LED
(Green) will again blink.
more
The
operation
battery power level becomes low (< 20% of full power). It is just a warning sign about battery power
The Green LED is the GPS Status LED. It is either constantly on or blinking. Blinking
To get a good reception of GPS signal, adjust the orientation of the SPK-GL3080 device to ensure it is
The Red LED is the Storage Full LED. When the storage space runs out, the Red LED will be on and no
GPS data be logged.
If this happens, turn the device off, download the logged data to the computer and clean up the storage disc.
storage disc can be cleaned either by deleting file(s) from the computer or by performing a CLEAN DISC
when turning the AGL3080 device on. Please see instructions below about CLEAN DISC.
The Amber LED is the Battery Power LED. The Amber LED will blink when the
level is getting low. The device still functions properly.
But when the battery power level is too low for the device to function normally, the
Amber LED will change from blinking to constant on, and both the GPS and data logging functions will
be turned off. When this happens, please turn the device off and replace battery immediately.
Special Functions
MARK button
Position Mark A position can be marked using SPK-GL3080 if the “
once. When doing so, the Storage Full LED will be on and the device will insert a MARK tag to the logged
GPS position data. If you press the Mark button right after taking a picture, the accompanying GPS Photo
Tracker software will use this “marked position data” to tag the picture.
GPS Reset During normal operation, you can press the “
MARK”
MARK”
button for about three to four (3 ~ 4)
button is firmly pressed
to
seconds
without using satellite information already on-hand and stored internally. Because the set of
GPS satellites data (the orbital and
Ma
2009 V2.2
reset the GPS – the SPK-GL3080 will re-start the GPS satellites searching
5

y
SPK-GL3080 GPS Photo Tracker
User
Manual V2.2
status information) will be valid only for around two hours, they need to be updated
regularly. These information are location-dependent – at two far enough locations the GPS receiver will
see different set of GPS satellites, hence different satellites data. GPS receivers assume the on-
internal satellites data is valid and will use it first in searching and tracking satellites. If wrong
hand
satellite data is used, the searching will tak e a long time or even fail. The GPS Reset function thus can help
speed up the position fix operation if the device was used previously at place(s) far away from the current
location or over some time (> two hours) ago.
Set Up Mode
SPK-GL3080 has 6 logging modes for user to choose from if it's desired. User can
configure the tracking modes in "
Entering "Set Up Mode"
At device power off status, hold both "POWER ON/OFF" button and "MARK" button simultaneously for
5 seconds. When you hold both buttons, the three LED will flash 5 times and stop at light on mode. You can
the buttons when three LED lights are all on.
release
Set Up Mode".
Setup mode function description
Logging mode setup SPK-GL3080 has 6 logging modes. You can change logging mode by pressing
"MARK" button. For each press of the "MARK", it enters to following logging mode. Pressing "MARK" at
"Mode 6" will bring you back to "Mode 1".
Logging Modes and corresponding LED status are described as below:
Mode 1 Memory Full Led ON GGA/GSA/RMC/VTG->1 sec
Mode 2 Memory Full Led Flash Only RMC->1 sec
Mode 3 GPS Led ON
Mode 4 GPS Led Flash
Mode 5 Battery Low Led ON
Mode 6 Battery Low Led Flash Only RMC->10 sec
Clear Disk Function Hold "MARK" button for 5 seconds to all three LEDs start blink sequentially, then
release the button to clear up the storage space.
Note:
(a) The device would power off during setup mode if you do not press any button after 1 minute.
LED Status
Output Format
GSV -> 5 sec
GGA/GSA/RMC/VTG/GSV->5 sec 260,000
Only RMC->5 sec
GGA/GSA/RMC/VTG/GSV->10 sec 260,000
Minimum
Records
260,000
Data Capacity
Hours
72 hours
1,040,000 288 hours
360 hours
1,040,000 1,440 hours
720 hours
1,040,000 2,880 hours
(b) If system power is low, the battery led will be on and then device will be powered off. At this time, users
have
to
replace new batteries.
Ma
2009 V2.2
6

y
SPK-GL3080 GPS Photo Tracker
User
Manual V2.2
(c) User's each change of the logging mode at the setup mode is recorded by the system. If thesystem is cut
off power unexpectedly, the last setting value before power off is recorded. Therefore, the system power on at
GPS mode, it will run at the last setting value.
Install/Replace Battery
The device requires three standard AAA size batteries to operate. NiH rechargeable batteries or
alkaline batteries are recommended.
accessories included in the package.]
To install or replace battery, please:
1.
Flip the device so that the bottom side is up.
2.
Find the latch of the battery compartment cover and slide it sideways to release the cover.
3.
Pull the cover out to open the battery compartment. The batteries can be easily inserted, but please
ensure
the correct polarity.
WARNING: Wrong polarity will cause permanent damage to the device.
A Note on Battery and SPK-GL3080’s Operating Time
Batteries have wide range of capacity (in mAh) and voltage level (even though they are specified as 1.5 V).
[Please note that batteries are not part of the
These
ensure the quality of batteries is meeting its specifications. We recommend using 1.5 V and 900
mAh AAA batteries. NiH type battery is recommended when using SPK-GL3080 in a low temperature
environment.
factors will cause variation of SPK-GL3080’s operating time. Please check to
Using the Accompanying SPK Photo Tracker Software to Tag Your
Photos
You can install the SPK Photo Tracker Software by clicking the Setup button (the setup
file) in the included CD-ROM. You can specify which directory to install the Photo
Tracker Software. An icon (short-c ut) will also be created at the Desktop for easy access to the software
tool.
[First, you need to download and store the pictures from your DSC to your PC. Usually
the DSC has accompanying photo management tools for photo downloading and storage.]
Installation
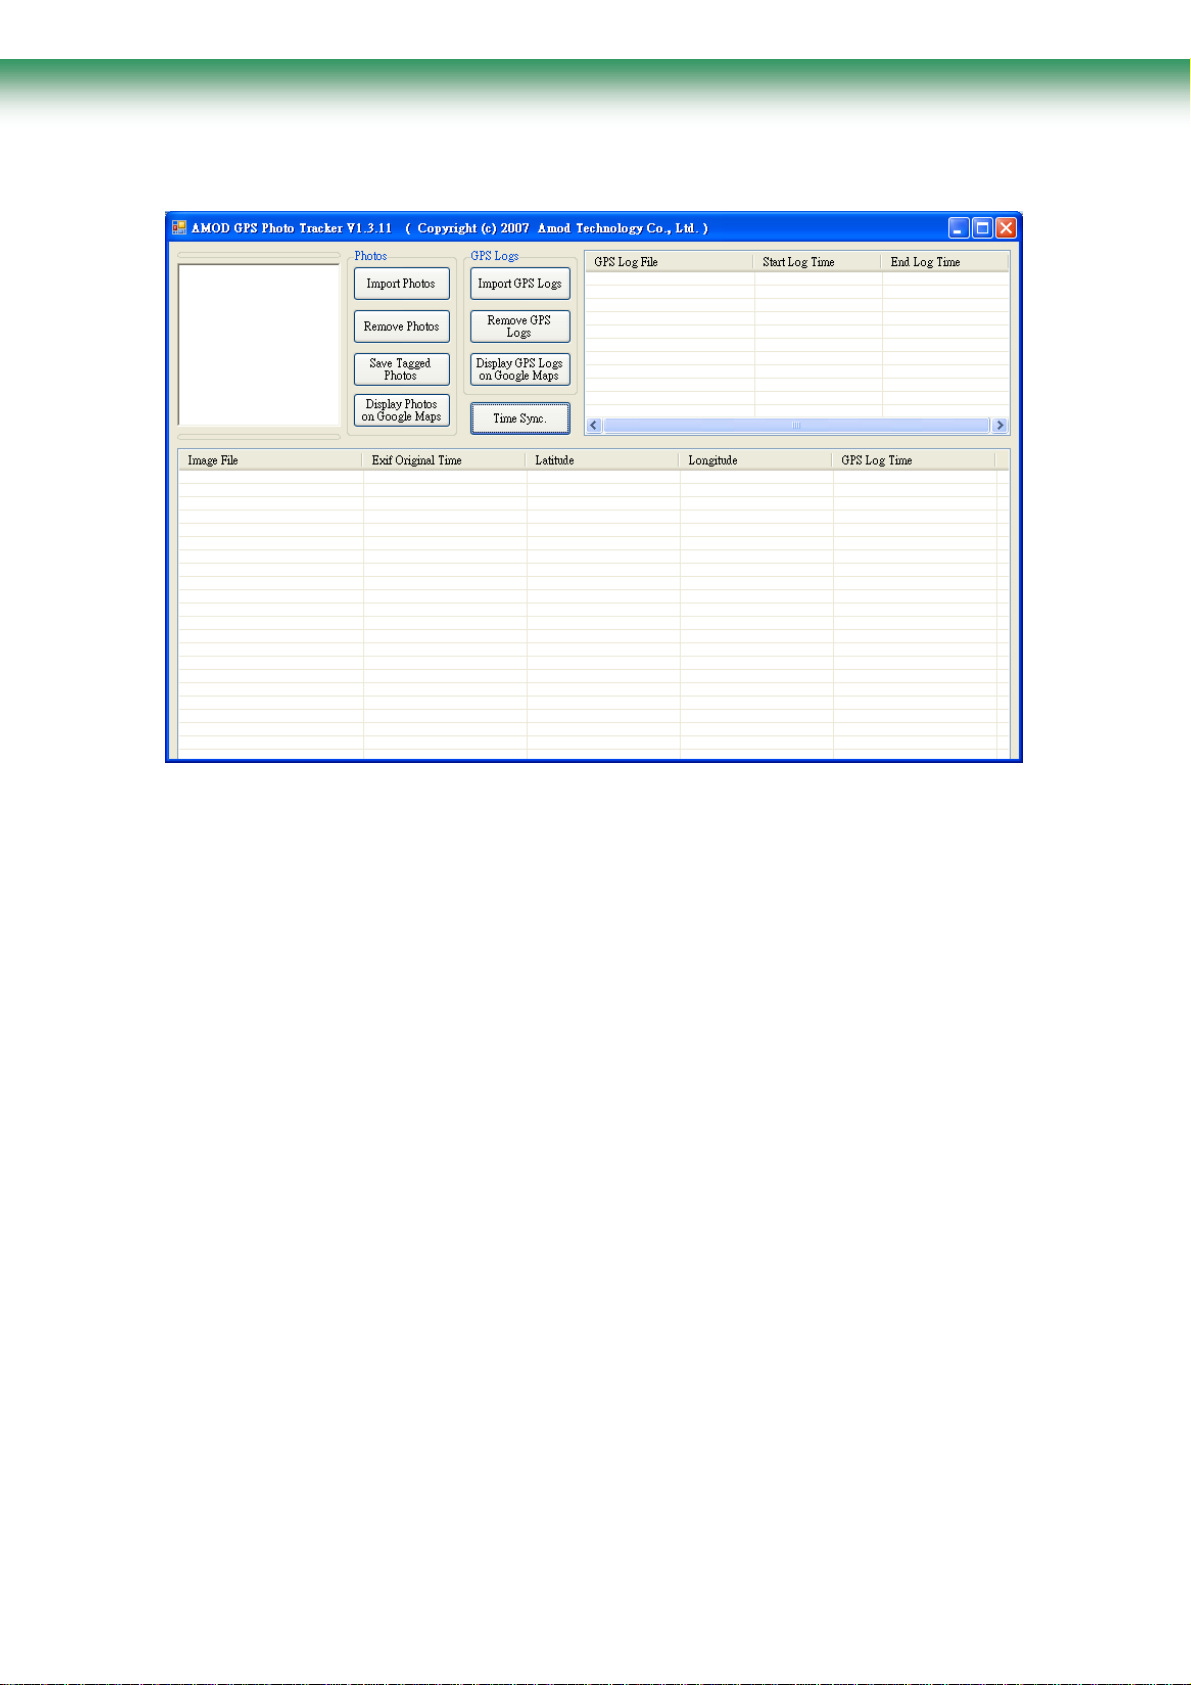
Plug the SPK-GL3080 to your PC’s USB port
Run the GPS Photo Tracker Software, and the following will be up:
Ma
2009 V2.2
7
y
SPK-GL3080 GPS Photo Tracker
User
Manual V2.2
Import the GPS log from SPK-GL3080 to PC
Then you can import the GPS log by selecting the SPK Photo Tracker Device. If you have
previously imported the GPS log files, you can go to the directory to import them. Multiple log
files can be selected
simultaneously for import.
Ma
2009 V2.2
8
y
SPK-GL3080 GPS Photo Tracker
User
Manual V2.2
Import photos
Go to the directory where DSC photos are stored. Then select photos to be tagged – multiple picture files can
be selected, for import.
Ma
2009 V2.2
9

y
SPK-GL3080 GPS Photo Tracker
User
Manual V2.2
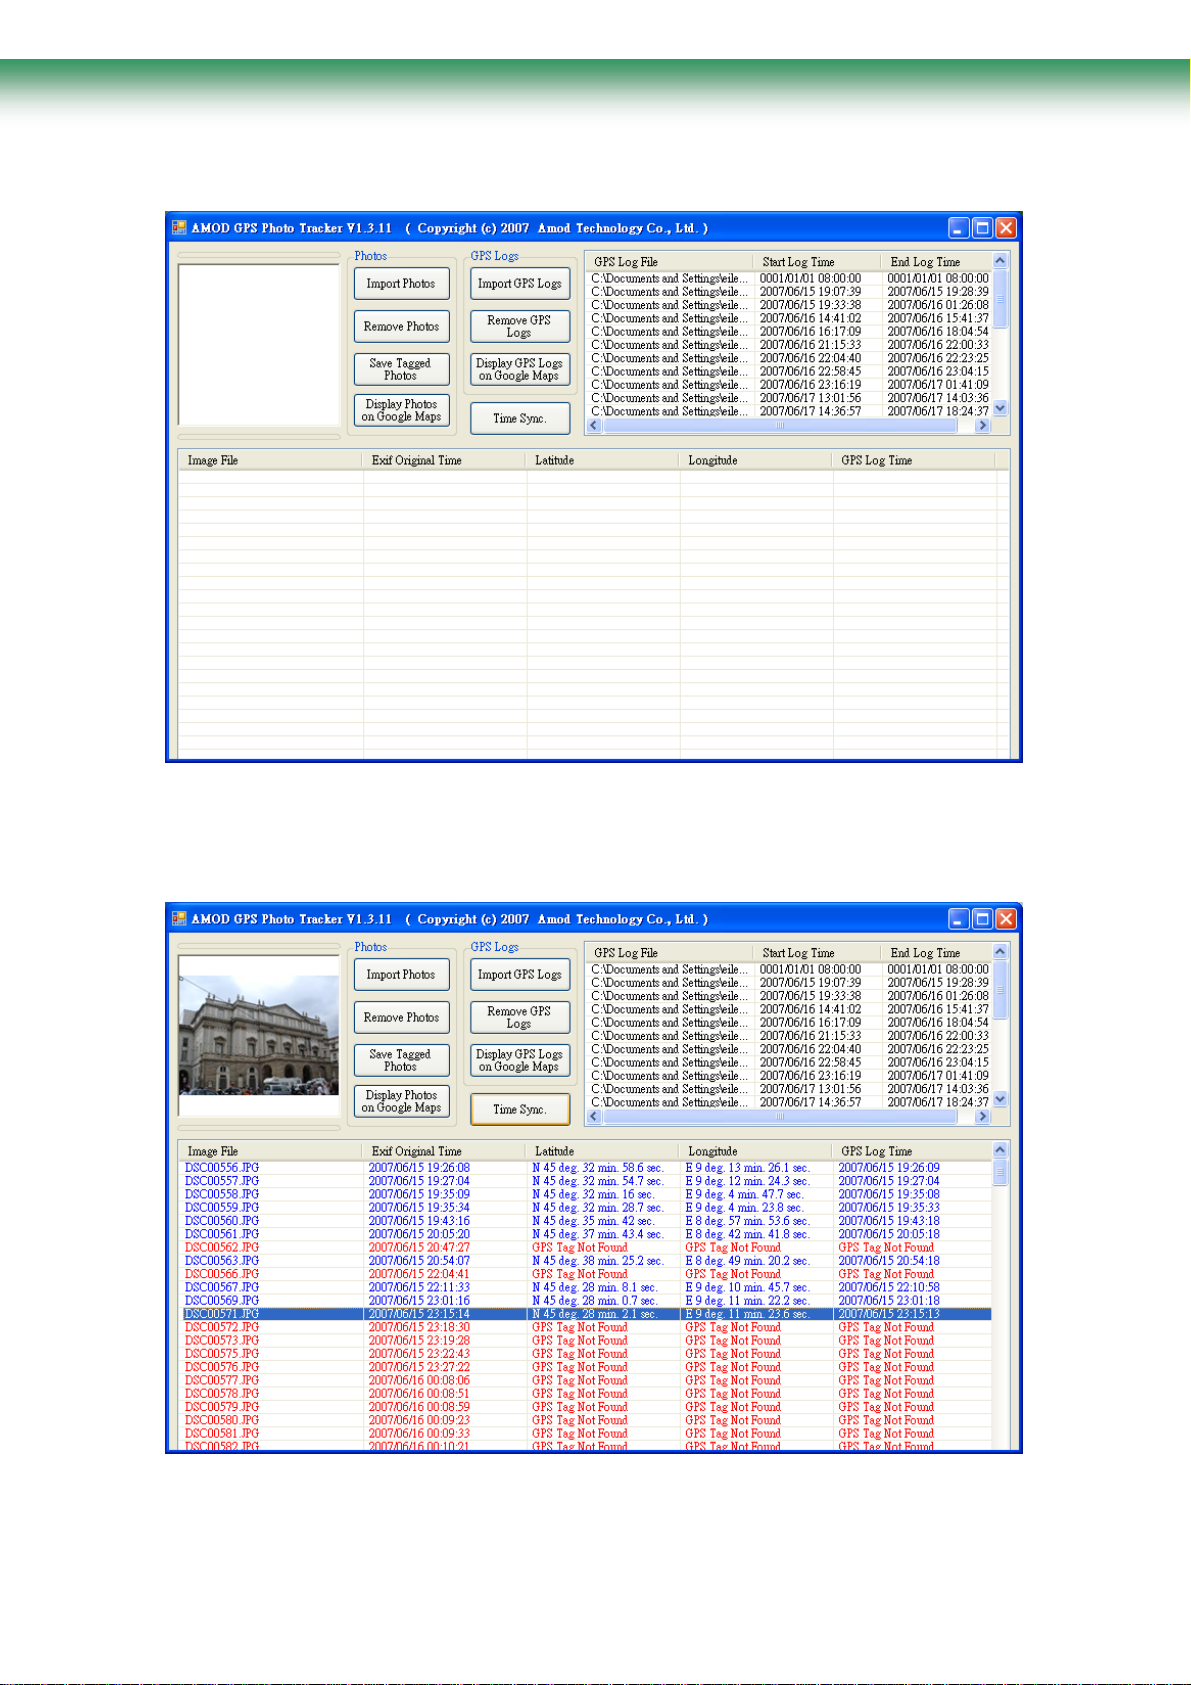
The Photo Tracker will automatically tag the selected photos with the GPS location information. When
complete, the photos will be shown in blue color. Those photos unable to be tagged will be shown in red
color. Those already have GPS tags will be shown in black color. Those photos that have been tagged by
depressing
Mark
Time Sync
Because the position tagging is done by cross relating the GPS time (UTC standard time) and DSC time
(DSC’s internal time), to find out accurately how much off is the DSC time is critical to the position accuracy
during
which may not be accurate and could be off, a Time Sync function is implemented.
reduce inaccuracy in the geo-location tagging process. However, Time Sync is an optional function – if the
can
the Time Sync step altogether. Before you enter the Time Sync operation, please check and adjust the time of
your
(the difference) between the DSC time (stored in the photo image file) and the standard time. Please
make sure your local time zone and time are both correct and accurate. You can conduct the Time Sync
the “Mark” button will be shown in green color. Please refer to the description about the Position
function in page 3 of this User Manual.
tagging. To offset the difference between GPS time, which is accurate, and the DSC internal time,
DSC time is accurate enough that the geo-location error is not significant or critical to you, you can skip
computer. This is necessary because the local computer time is used as the standard time to derive the offs et
This offset operation
by
operation
Sync.”
The Input DSC Time field is for you to enter the time that will be used to sync with the DSC time.
There
Adjust time zone
The pictures may be taken at places that belong to a different time zone. For these pictures, please
find
the time difference (in hours) and adjust the information in the Input DSC Time field. Please
clicking the Time Sync icon to bring up the following window and check the “Enable Time
button to begin the operation.
are two steps involved – adjust time zone and adjust actual time.
note this change may also involve the adjustment of the date information in the Input DSC Time field.
Ma
2009 V2.2
10

y
SPK-GL3080 GPS Photo Tracker
User
Manual V2.2
Adjust actual time
When the DSC time is off slightly, only the seconds and/or minutes fields need to be adjusted. Enter a
that is slightly ahead than the displayed DSC Time. When the DSC Time (which is constantly
time
counting
(synchronized)
With these adjustments in the Time Sync operation, the Photo Tracker Software can derive the
difference
timing
When traveling to a different time zone, if your DSC time is adjusted to the local time, then the
adjustment
need
groups
tedious for you, when you go on a trip that crosses several time zones, please do not adjust your DSC
time at all to avoid the complication/confusion this may cause.
up) reaches this pre-selected time, click Apply so that the DSC Time field is updated
between DSC Time and PC System Time. This time difference is then used to offset any
error that could exist between the DSC and GPS time.
needed to compensate the time difference becomes a tedious and complicated task – you
to
record each time zone. When tagging photos, they and the log files must be correlated into
first. For each group, adjust the time separately using Time Sync. If this process is too
to
the DSC’s system time. When this is done, just click OK to continue.
Display Photos on Google Maps
The GPS tagged pictures can be shown on Google Map by clicking the “
button.
Display Photos on Google Maps”
Ma
2009 V2.2
11

y
SPK-GL3080 GPS Photo Tracker
User
Manual V2.2
Select and Display Multiple Pictures
Multiple pictures can be displayed on the Google Map simultaneously too. This can be done
if they are selected simultaneously by clicking photo files while holding the Shift key.
Ma
2009 V2.2
12

y
SPK-GL3080 GPS Photo Tracker
User
Manual V2.2
Then click Display on Google Map button, these pictures will be displayed on Google Map simultaneous ly. By
clicking the push pin, each photo can selected to show on Google Map.
Ma
2009 V2.2
13

y
SPK-GL3080 GPS Photo Tracker
User
Manual V2.2
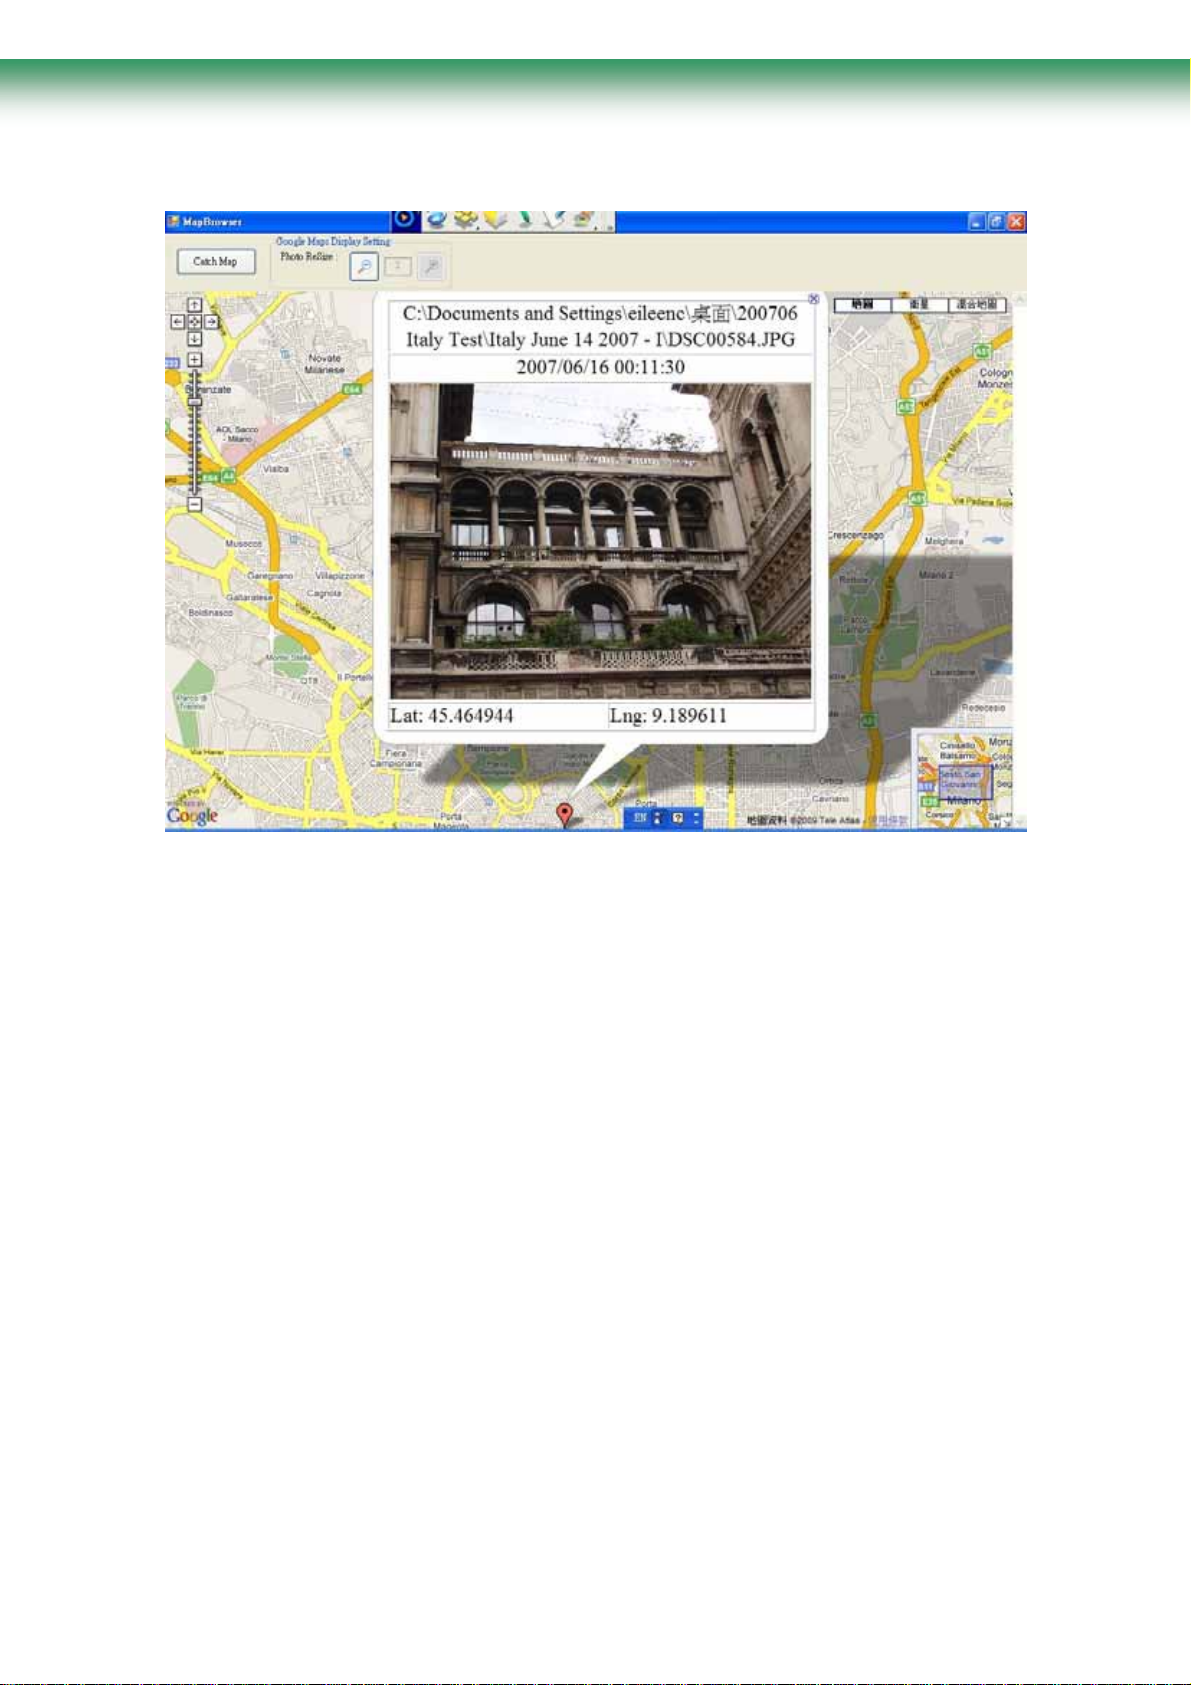
Resize and Save Displayed Photos with Google Map
To meet individual’s needs, SPK-GL3080 Photo Tracker Software provides five different sizes (relative to the
Google Map as background) of the photo pictures for user to select. The photo comes up with the default size
on the display window. When clicking the magnifying button or shrunk button, more sizes
Ma
2009 V2.2
14
y
SPK-GL3080 GPS Photo Tracker
User
Manual V2.2
(Enlarged)
Ma
2009 V2.2
15

y
SPK-GL3080 GPS Photo Tracker
User
Manual V2.2
(Shrunk)
Click the Catch Map Button, the display (picture with Google Map as background) can be saved.
Ma
2009 V2.2
16

y
SPK-GL3080 GPS Photo Tracker
User
Manual V2.2
Finally click the Save Tagged Photos button on the main menu of the Photo Tracker Software, the geo-tag
will be saved within the photo picture file for future viewing or sharing.
Ma
2009 V2.2
17

y
SPK-GL3080 GPS Photo Tracker
User
Manual V2.2
Display GPS Logs on Google Maps
By clicking the “
Display GPS Logs on Google Maps”
button, it will come up another window.
Click the “Play” Button, there will be a pink dot starts moving to display the tracking path you have walked
or drove through. You are allowed to click Pause and Stop buttons to stop or pause pink dot.
Ma
2009 V2.2
18

y
SPK-GL3080 GPS Photo Tracker
User
Manual V2.2
Or click the Display Tracking Path button, it will directly show up the whole tracking path on Google Map
pink highlight.
with
Ma
2009 V2.2
19

y
SPK-GL3080 GPS Photo Tracker
User
Manual V2.2
To clear some specific GPS logs, check the boxes aside the Record # first (multiple boxes are allowed), and
then click Clear GPS Records Checked Marks. Those GPS logs will be cleared in the record.
Click the Catch Map Button, the display (picture with Google Map as background) can be saved.
Ma
2009 V2.2
20

y
SPK-GL3080 GPS Photo Tracker
When all are done, exit the SPK Photo Tracker Software by right-clicking the top frame and select EXIT.
[NOTE: We are not responsible for any alteration or deletion of pictures during the operation. Please always
a
copy of the picture file as back up if needed.]
save
User
Manual V2.2
More Tools and Applications JetPhoto In addition to the supplied SPK GPS Photo Tracker, SPK-GL3080
can also be used with JetPhoto,
Atomix Technologies Limited (©2004 – 2007 Atomix Technologies.)
Microsoft’s Windows operating system or Apple’s MAC operating system. JetPhoto is included in the SPKGL3080
downloaded from http://www.jetphotosoft.com/web/home/.
Other Tools
Because the logged GPS data is in the standard NMEA0183 format and saved as text files, with the true generic
USB 2.0 interface, SPK-GL3080 is very simple and easy to use directly with many GPS software tools such as
GPSVisualizer (©2007 Adam Schneider, Schneider@pobox.com). The GPS tracks logged by SPK-GL3080
can then be converted into various formats such as GPX, KML, etc. This makes SPK-GL3080 a very
powerful and handy tool, not limited only for GPS tagging of photos.
CD-ROM as part of the photo organizing and management software tools package. They can also be
which is a photo organizing and management tool and service provided by
JetPhoto can be used either with
Ma
2009 V2.2
21

y
SPK-GL3080 GPS Photo Tracker
User
Manual V2.2
Appendix - Status LED
General Operation
There are three LED’s on the device representing Battery Power (amber), GPS Status (green), and Storage
Full (red) respectively. These LED’s can be Off,
device.
Status
Battery
Power
GPS Status
Storage
Full
Amber
Green
Red
Color
State
Off
Blinking
Constant
On
Off
Blinking
Constant
On
Off
Constant
On
Blinking, or
Normal operation
The battery power level is low, but the device can still
function normally. but GPS may take longer time to
get
a
position fix
The battery power level is extremely low, the GPS and
data log functions are turned
Replace battery immediately
Device is turned off
The device is tracking GPS satellites and logging GPS
data
The device is in the process of acquiring satellites, GPS
data not yet available
Storage space available
The device is out of storage space GPS data can not be
logged
Turn off the device and download the logged data
file(s).
Perform a DISC RESET operation to clean up
the disc storage during Power ON.
Constant On,
Status Represented
representing the status of the
Status LED in Set UP Mode
Mode 1 Memory Full Led ON
Mode 2 Memory Full Led Flash Only RMC->1 sec
Mode 3 GPS Led ON
Mode 4 GPS Led Flash
Mode 5 Battery Low Led ON
Mode 6 Battery Low Led Flash Only RMC->10 sec
Ma
LED Status
2009 V2.2
Output Format
GGA/GSA/RMC/VTG->1 sec
GSV -> 5 sec
GGA/GSA/RMC/VTG/GSV->5 sec 260,000
Only RMC->5 sec
GGA/GSA/RMC/VTG/GSV->10 sec 260,000
Minimum
Records
260,000
1,040,000 288 hours
1,040,000 1,440 hours
1,040,000 2,880 hours
Data Capacity
Operation Hours
72 hours
360 hours
720 hours
22

y
SPK-GL3080 GPS Photo Tracker
User
Manual V2.2
Appendix – Preparations
Attach the Hanging Strip
1.
1. Un-fasten the strip
2.
2. Inset the hanging strip through the side handle of the device
3.
3. Fasten the strip and the device can be carried conveniently
Install Battery
1. Open the bottom cover to reveal battery compartment
Incorrect
Ma
2009 V2.2
Please note the orientation of each battery is clearly marked.
battery placement may damage the device.
23

y
SPK-GL3080 GPS Photo Tracker
1.
2. Insert Three (3) AAA Size Batteries
2.
3. Close the Battery Cover
User
Manual V2.2
Either regular or rechargeable batteries can be used.
Ma
2009 V2.2
24

y
SPK-GL3080 GPS Photo Tracker
User
Manual V2.2
Trouble Shooting
GPS Status LED stays on / Poor GPS signal reception
Please kindly try below two countermeasures to see if the issue will be solved.
Solution One:
Entering "Set-Up" mode: At power off status, press "Power ON" and "Mark" buttons simultaneously for 5
seconds, and then the three LED will flash 5 times and stop at light on mode. You can release the buttons
3
when
Clear Disk Function: Hold "Mark" button for 5 seconds to all 3 LED lights blink sequentially, then release
button to clear disk storage space.
the
Solution 2: Upgrade SPK-GL3080 V2.3 firmware into SPK-GL3080.
Missing or lost GPS log file
Battery can not be removed while the SPK-GL3080 is still turned on and functioning. If this happened, the power
to the device will be out. This power outage will cause the logged GPS data not being properly saved and thus
permanently
the SPK-GL3080 is still on and functioning to avoid losing logged GPS data.
while
LED are all on.
lost. Please exercise caution not to open the battery compartment to remove or change the battery
Battery operating time too short
Batteries vary a lot in quality, affecting the SPK-GL3080’s operating time. Please make sure to use quality
batteries.
Ni-MH batteries.
Can not turn on the SPK-GL3080
The battery contact may be poor or the battery power level may be too low. This may happen when the
SPK-GL3080 was not used for a long time. The leakage in batteries drained the battery power. When not
using the SPK-GL3080, please take the batteries out and store them properly to maintain the battery’s
power level. If the batteries are too old, replace with new ones.
We
recommend 900 mAh batteries.
When using the SPK-GL3080 in a cold environment, please use
Ma
2009 V2.2
25

y
SPK-GL3080 GPS Photo Tracker
User
Manual V2.2
Hardware Specification
GPS
Chipset
SiRF Star III high performance low power GPS receiver IC
Frequency
Channels
GPS Tracking Sensitivity
LED Indicators
Power On/Off
GPS Fix
Memory Full
General
Storage Capacity
Interface
Battery
Operating Time
Operating Temperature
Storage Temperature
L1 1,575.42 MHz
20 parallel tracking channels
- 158 dBm
Amber
Green
Red
128 Mbytes (1 Gbit NAND flash memory)
USB 2.0 full speed
3 AAA standard size batteries
> 15 hours continuous operation (3 AAA 900 mAh
rechargeable
battery @ 25℃)
- 20 ~ 50 ℃
- 30 ~ 80 ℃
Humidity
Dimension
Weight
95 % non-condensing
90 mm × 45 mm × 23 mm
~ 50 g (not including battery)
Package Contents
Each box contains the following items:
SPK-GL3080 Hanging Strip & USB Cable CD-ROM (Manual, Software Tools)
Ma
2009 V2.2
26

y
SPK-GL3080 GPS Photo Tracker
User
Manual V2.2
Certifications
CE, FCC, VCCI certified, RoHS Compliant
FCC Notices
conditions.
.(1) This device may not cause harmful interference and,
.(2) This device must accept any interference received.
This Device complies with Part 15 of the FCC rules; operation is subject to the following two
Trademarks and Copyrights
Windows is registered trademark of Microsoft Corporation.
is
registered trademark of Apple Inc.
Mac
JetPhoto is registered trademark and copyrighted by Atomix Technologies Corp.
is
GPSVisualizer
registered and copyrighted by Adam Schneider, Schneider@pobox.com
Ma
2009 V2.2
27
 Loading...