

Page 1

DC5V
From AC Power Adaptor
Plug the Power Cable into the DC 5V port.
Note: Ensure the USB flash drive is inserted before powering up the
device, and your smartphone is ready to receive the BLUETOOTH
confirmation messages.
Also If using an Ethernet cable make sure it is plugged in before adding
power.
1. LOCATE ALL REQUIRED CABLES
You should have;
1 x Ethernet cable
1 x AC Power Adaptor
2. MOUNT UNIT TO THE WALL Use
the (optional) mounting
bracket supplied.
3. ATTACH ANTENNA
Screw in until finger-tight.
4. CONNECT ETHERNET CABLE
Connect the Ethernet cable from the
unit to a DHCP-enabled network
which allows public internet access.
NOTE: Not providing Ethernet
connectivity will result in limited fault
isolation in the event of a network or
probe failure
5. INSERT USB FLASH DRIVE
This contains the CONFIG File used to
boot-up the probe.
6. CONNECT POWER CABLE
Spirent TestCenter Live 4150 Installation Guide
(USB flash drive not included)
Page 2
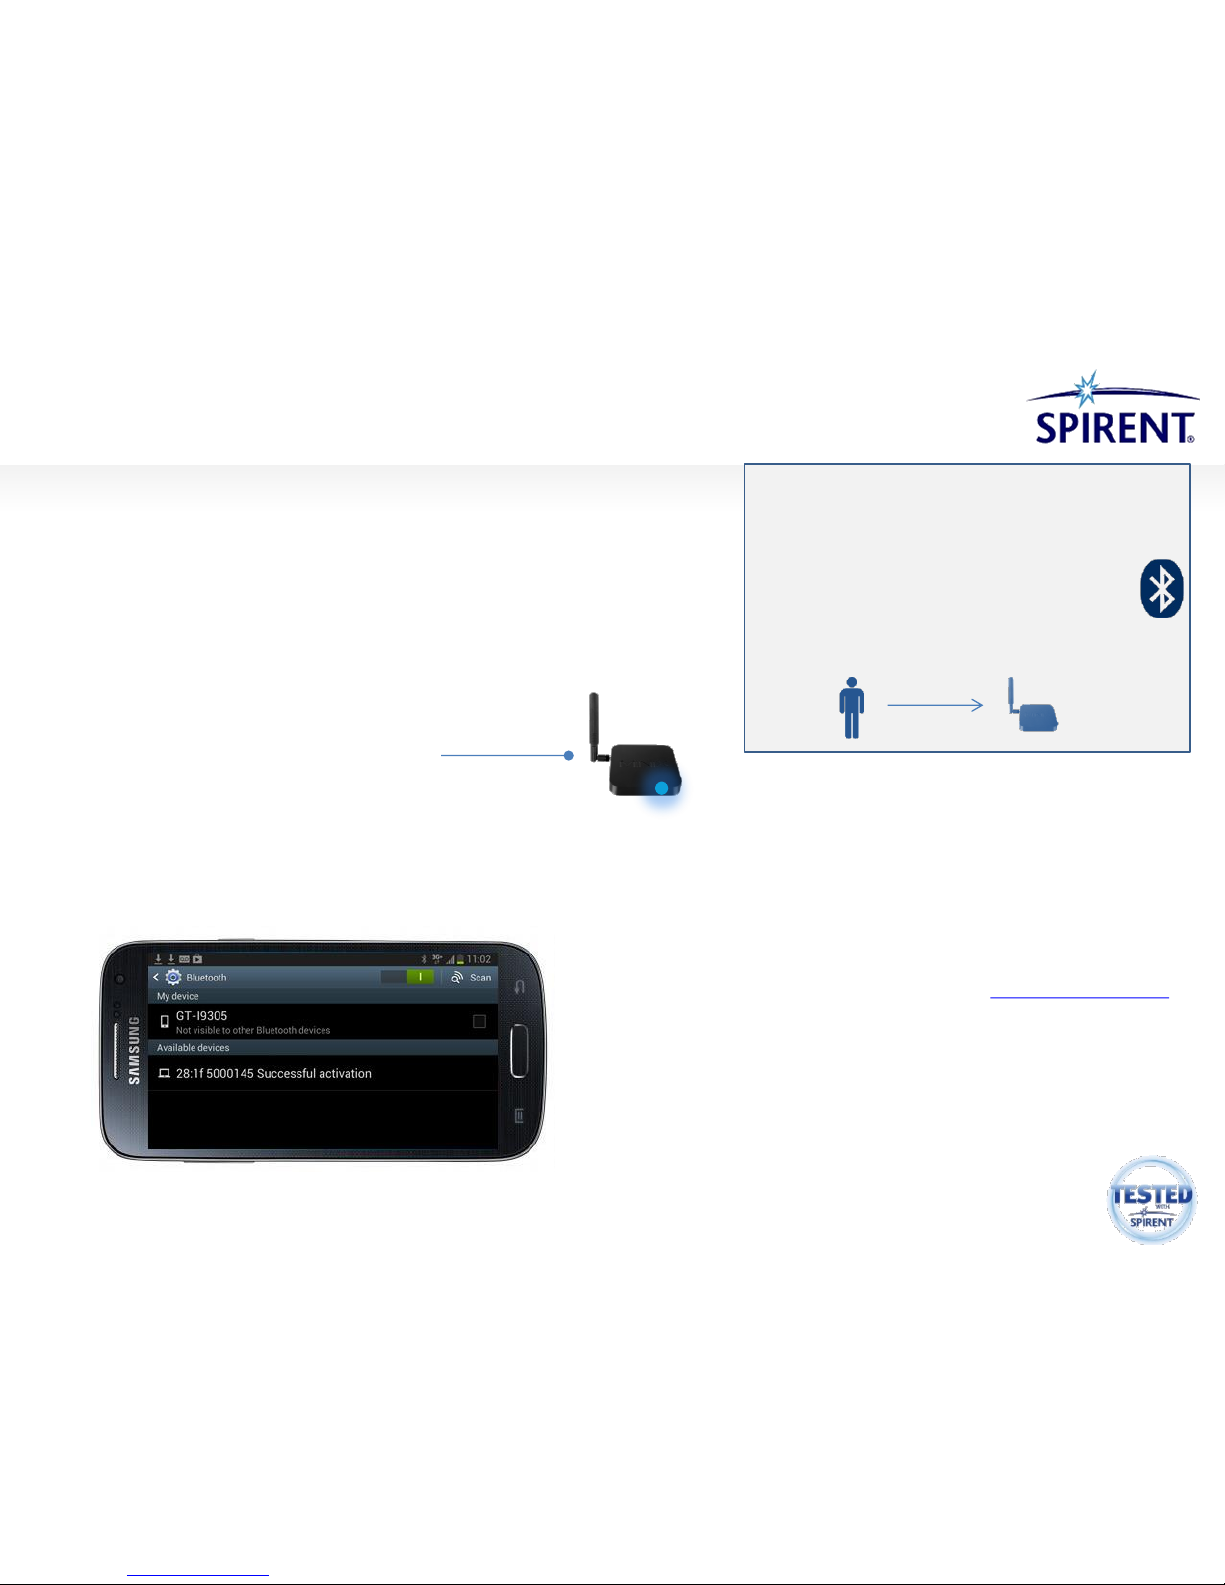
On your Android smartphone go to the BLUETOOTH page and
press SCAN.
During the activation process you should see the last 4 digits
of the 4150 MAC address. e.g. ’28:1F Loading…’
The probe contacts external servers to collect various files and
will reboot 3 times before completing full initialization. This is
indicated by the blue light going on and off.
6. CONFIRM PROBE IS ACTIVATING
Spirent TestCenter Live 4150 Installation Guide
© 2014 Spirent Communications, Inc. All of the company names and/or brand names and/or product names referred to in this document, in particular the name
“Spirent” and its logo device, are either registered trademarks or trademarks pending registration in accordance with relevant national laws. All rights reserved.
Specifications subject to change without notice.
PN 50-413-2002.001
Your smartphone is used to confirm the probe
is correctly activated.
Enable BLUETOOTH on your smartphone
Ensure your smartphone is within 5 feet
(1.5 meters) of the probe
SETTING-UP YOUR SMARTPHONE
7. CONFIRM SUCCESSFUL ACTIVATION
A successful activation will show the last 4 MAC address
digits and probe ID.
Note it only fits up to ‘Successful a..’ if the smartphone is
held in portrait position.
5’
1.5M
8. IF THE PROBE FAILS TO ACTIVATE
You will receive the following message if the probe
fails to activate: ‘28:1F Failed activation
Where a probe is in a non-activated state due to no
USB flash drive being present or a missing file you
will see: ‘28:1f Check USB
Failed Activation logs are saved to the USB Flash
drive. You can email these to support@spirent.com
for further assistance.
9. WHEN COMPLETE - REMOVE USB FLASH
DRIVE
The USB Flash Drive is only required once to
successfully activate a probe. It can be removed and
used to install other probes as required.
 Loading...