

Page 1

8100 Mobile Device Test System
Data Retry - LTE
User Manual
Page 2

Spirent
541 Industrial Way West
Eatontown, NJ 07724 USA
Email: sales@spirent.com
Web: http://www.spirent.com
AMERICAS 1-800-SPIRENT • +1-818-676-2683 • sales@spirent.com
EUROPE AND THE MIDDLE EAST +44 (0) 1293 767979 • emeainfo@spirent.com
ASIA AND THE PACIFIC +86-10-8518-2539 • salesasia@spirent.com
This manual applies to Data Retry - LTE Test Packs Version 1.3 or higher.
Page Part Number: 71-006376, Version A3
Copyright © 2011 Spirent. All Rights Reserved.
All of the company names and/or brand names and/or product names referred to in this document, in particular, the
name “Spirent” and its logo device, are either registered trademarks or trademarks of Spirent plc and its
subsidiaries, pending registration in accordance with relevant national laws. All other registered trademarks or
trademarks are the property of their respective owners.
The information contained in this document is subject to change without notice and does not represent a
commitment on the part of Spirent. The information in this document is believed to be accurate and reliable;
however, Spirent assumes no responsibility or liability for any errors or inaccuracies that may appear in the
document.
Page 3

Table of Contents
1. Introduction .......................................................................................... 3
1.1. Overview ........................................................................................... 3
1.2. Intended Audience ............................................................................. 3
1.3. Before You Get Started ....................................................................... 3
1.4. Security Information .......................................................................... 3
1.5. Accessing Documentation .................................................................. 5
1.5.1. Accessing Documentation from Windows Explorer ................................... 5
1.5.2. Accessing Documentation from Test Manager ......................................... 6
2. Data Retry - LTE Description .................................................................. 7
2.1. Overview ........................................................................................... 7
2.2. Description ........................................................................................ 7
3. Using the Data Retry - LTE Test Packs .................................................... 8
3.1. Overview ........................................................................................... 8
3.2. Configuring the Platform Parameters .................................................. 8
3.2.1. Supported Platforms ............................................................................... 8
3.2.2. 8100-B Series Platform Parameters ........................................................ 8
3.3. Configuring the UE Parameters ........................................................... 9
3.3.1. UE Interface Parameters .......................................................................... 9
3.3.2. UE Manual Interface Parameters ........................................................... 10
3.3.3. UE AT Interface Parameters .................................................................... 11
3.3.4. UE Capability Parameters ...................................................................... 13
3.4. Configuring the Session Parameters ................................................. 14
3.5. Selecting the Parameter Files for Session Execution .......................... 15
3.6. Locating the Test Suites and Test Cases ............................................ 16
3.6.1. Locating Pre-defined Module Test Suites ............................................... 16
3.6.2. Locating Module Test Cases ................................................................... 17
3.7. Creating a Custom Test Suite ............................................................ 18
3.8. Configuring Test Case Parameters .................................................... 20
3.9. Running a Test Suite ........................................................................ 21
Page 4

ii | 8100: Data Retry-LTE User Manual
4. Test Reference .................................................................................... 23
4.1. Overview ......................................................................................... 23
4.2. Test Suite Execution ......................................................................... 23
4.3. Data Retry - LTE Test Cases ............................................................... 24
4.3.1. 3GPP TS 36.331 RRC Scenarios .............................................................. 24
4.3.2. 3GPP TS 24.301 EMM Common Procedures ........................................... 26
4.3.3. 3GPP TS 24.301 EMM Specific Procedures ............................................. 28
4.3.4. 3GPP TS 24.301 EMM Connection Management Procedures .................. 30
4.3.5. 3GPP TS 24.301 EPS Session Management Scenarios ........................... 32
4.3.6. 3GPP TS 24.301 Network Initiated ESM Procedures ............................... 34
4.4. Description of Data Retry - LTE Module Test Parameters ..................... 36
4.4.1. General ................................................................................................ 36
4.4.2. Network Configuration .......................................................................... 36
4.4.3. Data Retry Options ............................................................................... 38
4.4.4. Test Criteria .......................................................................................... 40
Page 5

1. Introduction
1.1. Overview
This document provides information on the Data Retry - LTE Test Packs. You will become
familiar with the Test Pack Suites, Test Cases, and setting up LTE testing scenarios in the
Test Manager
documentation.
1.2. Intended Audience
This manual is intended for those who have a working knowledge of wireless
communication equipment, and are familiar with the automated testing of mobile
devices. It is assumed that the audience is familiar with the
environment. Those who are unfamiliar with the Test Manager should refer to the
Manager User Manual
environment by following the step-by-step procedures and Test Reference
before proceeding further.
Test Manager
GUI
Test
1.3. Before You Get Started
Before getting started with this guide, install all software and power up the test system.
The controller PC is shipped with the
Retry - LTE
Test Packs installed.
1.4. Security Information
The Data Retry - LTE Test Packs are shipped with the appropriate dongle and
software/hardware security passwords configured.
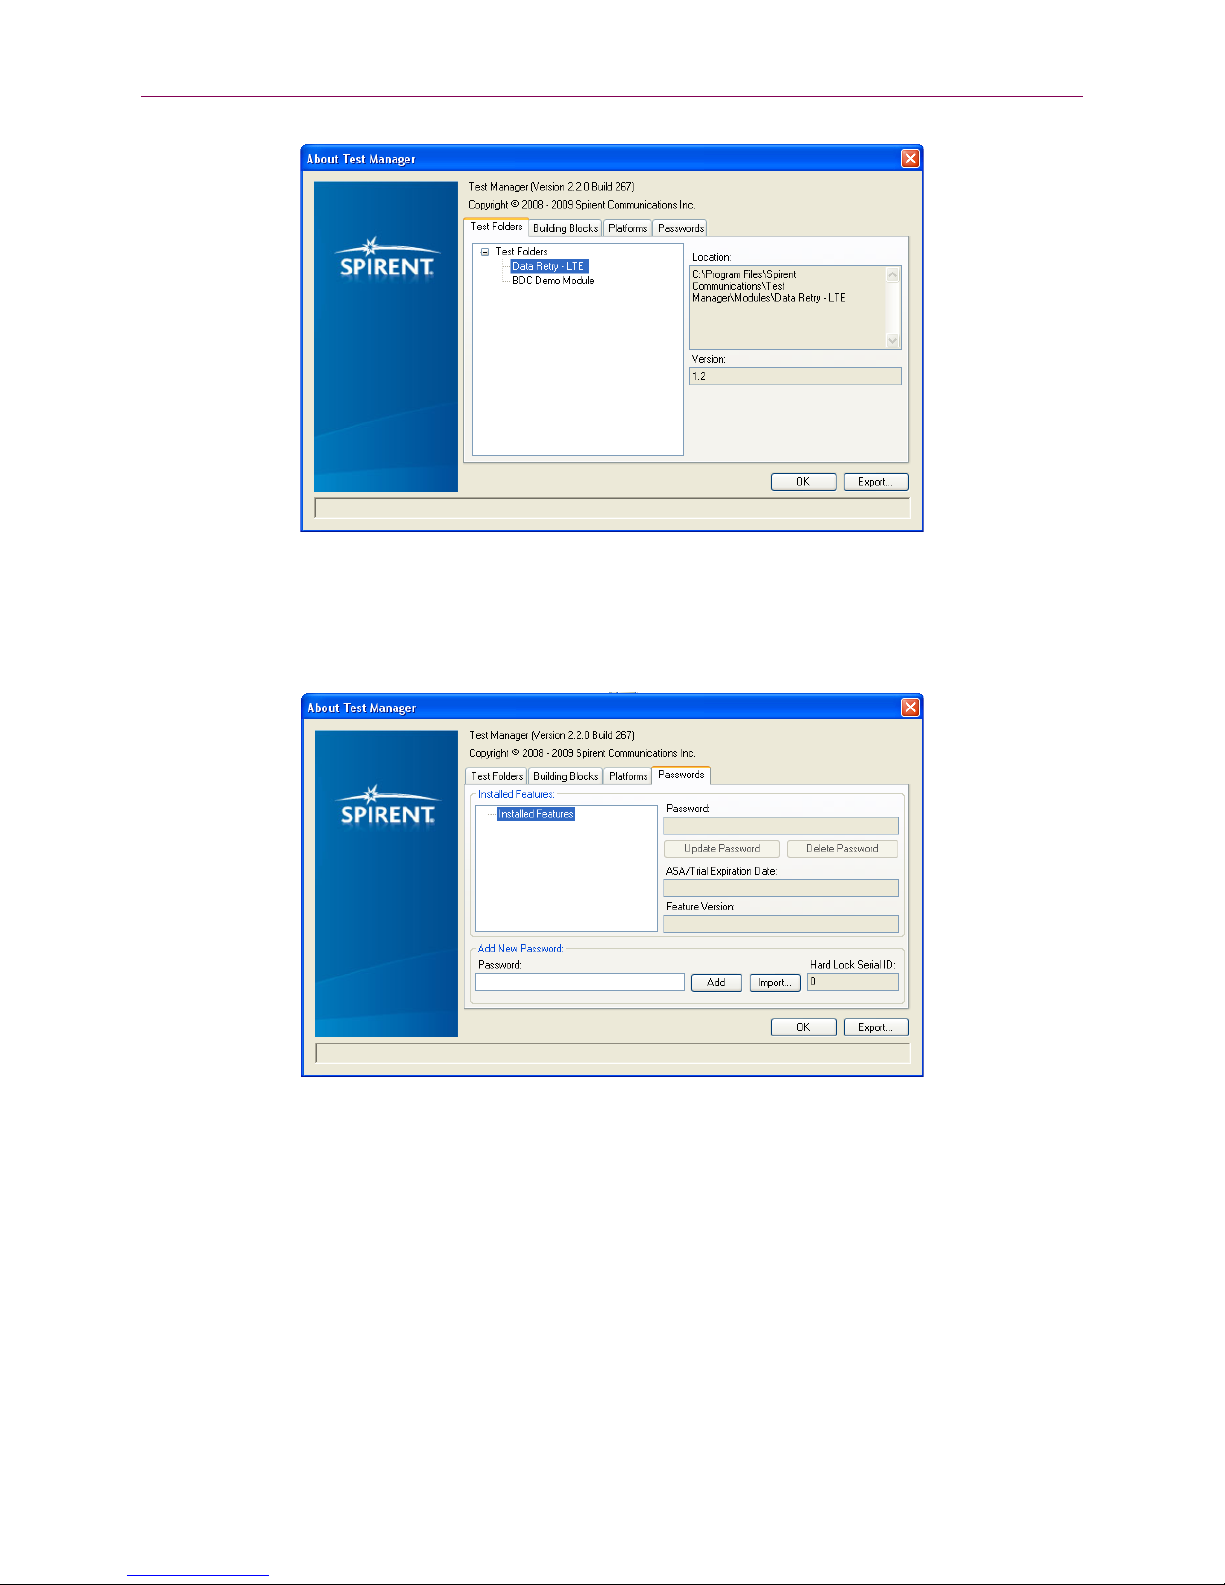
To verify the security information:
1. Open Test Manager and select Help>About.
About Test Manager
The
window displays, as shown in Figure 1-1.
Test Manager Test Executive
software and
Data
Page 6
4 | 8100: Data Retry-LTE User Manual
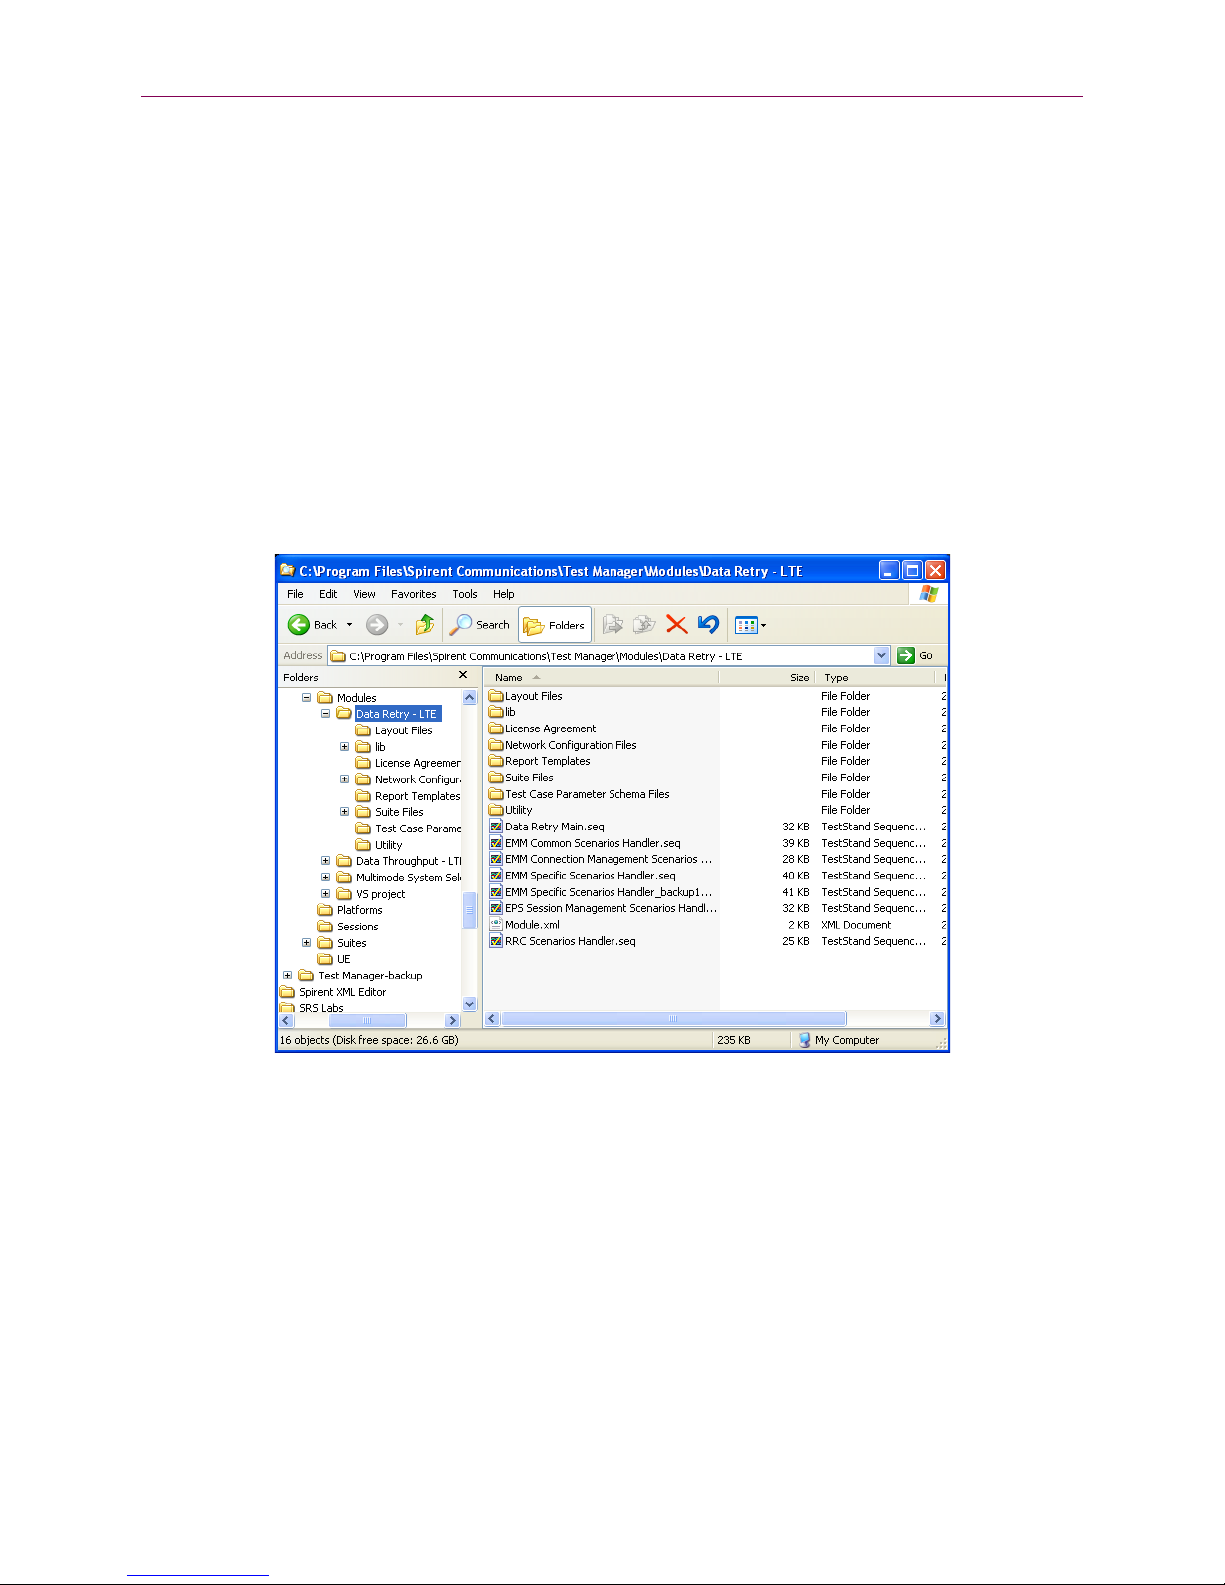
2. Select the Passwords tab.
3. Under Installed Features, confirm the Data Retry - LTE Test Packs are installed, as
shown in
Figure 1-2.
Figure 1-1: About Test Manager Window
Figure 1-2: About Test Manager Window – Installed Features
Password authentication is a pre-requisite to running any tests supported by these Test
Packs. This password is tied to security information provided by the USB hard-lock
dongle that comes with the module installation.
If you have any questions or concerns, contact Spirent Technical Support at
support.spirent.com, or by phone at 1-800-SPIRENT.
Page 7
Chapter One: Introduction | 5
1.5. Accessing Documentation
There are two ways to access this document from the Controller PC:
1. Windows Explorer
2. Test Manager
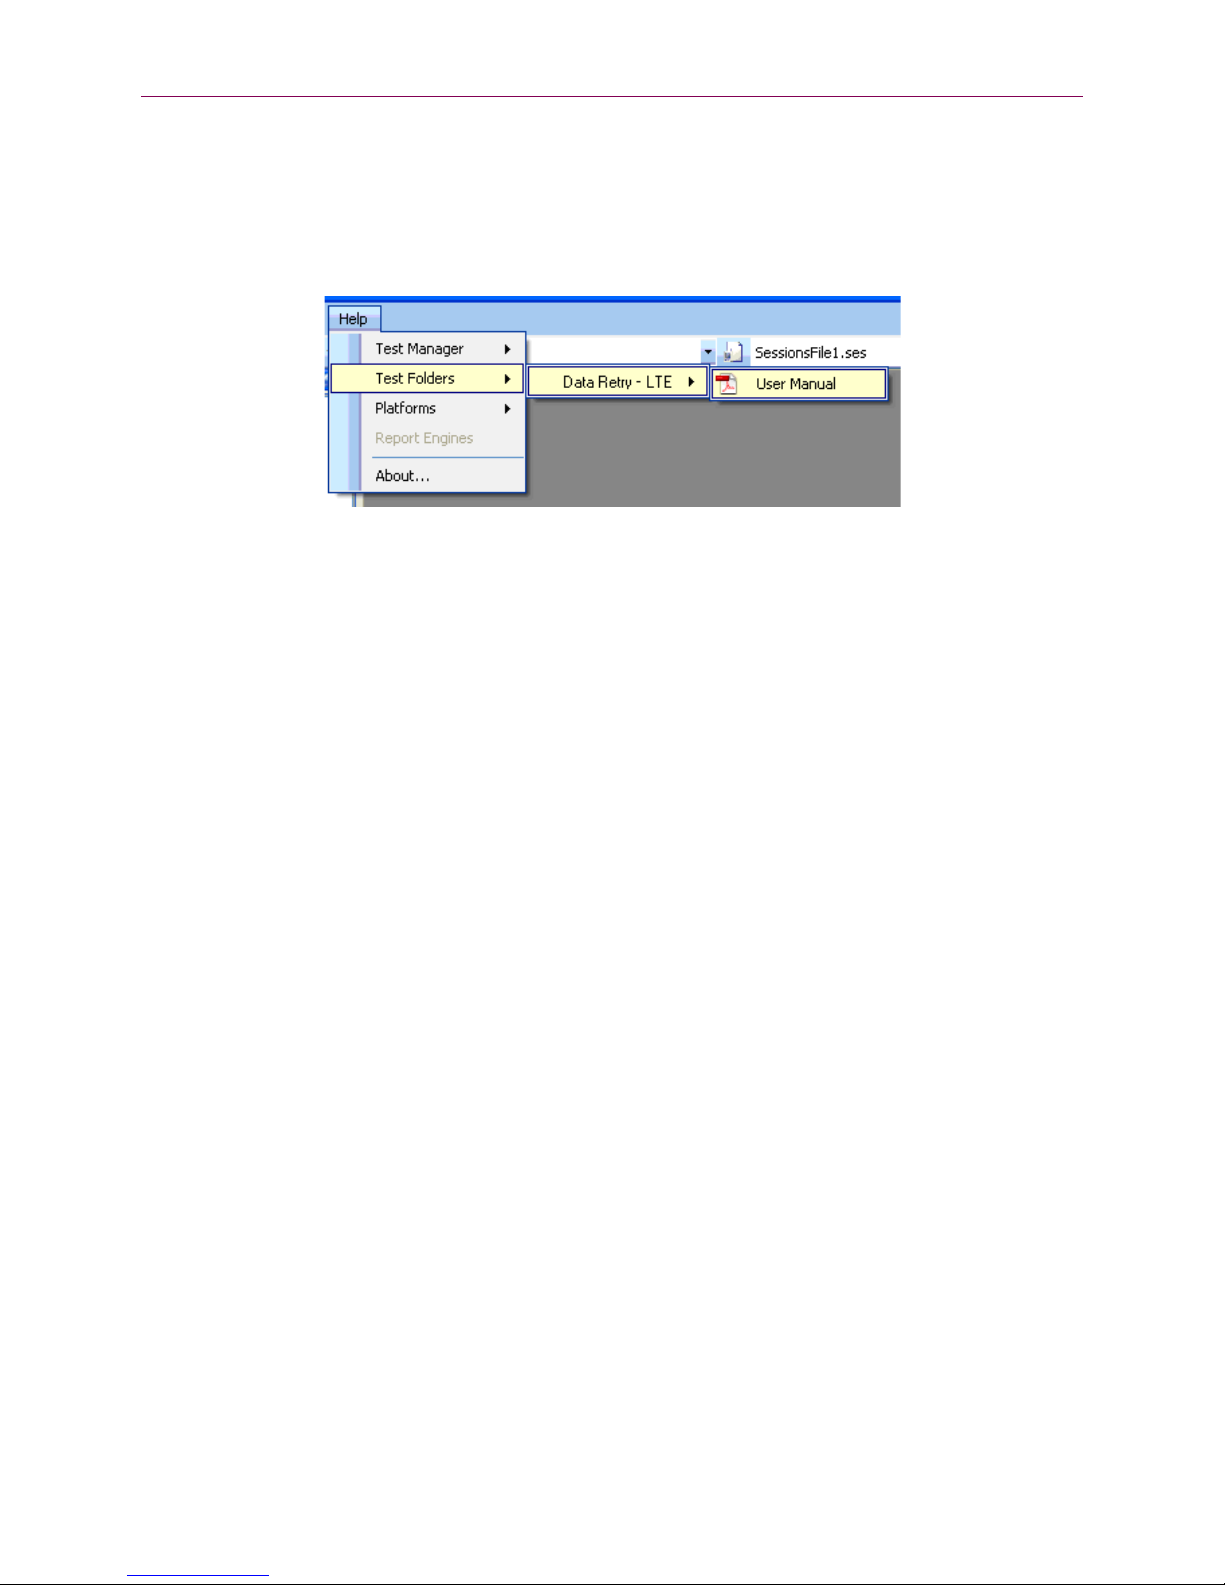
1.5.1. Accessing Documentation from Windows Explorer
Access this Manual offline by navigating to C:\Program Files\Spirent
Communications\Test Manager\Modules\Data Retry - LTE\User Manual.pdf” using
Windows Explorer, as shown in
Figure 1-3.
Figure 1-3: Accessing the Manual from Windows Explorer
Page 8
6 | 8100: Data Retry-LTE User Manual
1.5.2. Accessing Documentation from Test Manager
Access this Manual from the Test Manager menu by selecting:
Help>Modules>Data Retry - LTE>User Manual.pdf, as shown in Figure 1-4.
Figure 1-4: Accessing the Manual from Test Manager
Page 9

2. Data Retry - LTE Description
2.1. Overview
This chapter provides a high-level overview of the key software and hardware
components necessary to configure and use the Data Retry - LTE Test Packs.
2.2. Description
The Data Retry - LTE Module is an integrated software component that allows you to
perform interactive and automated testing of Data Retry scenarios on a UE device.
Support is provided for:
• LTE Bands: 1, 2, 4, 5, 7, 10, 12, 13, 14, 17, 20, 24, 25, and 26.
The Data Retry - LTE module test cases run with the Test Manager software. This provides
an easy way to automate test sessions with analysis and reporting capabilities.
Page 10

3. Using the Data Retry - LTE Test Packs
NOTE
It should not be necessary to modify
3.1. Overview
This chapter gives information on using Data Retry - LTE from
This includes the following steps:
1. Configuring the Platform Parameters
2. Configuring the UE Parameters
3. Configuring the Session Parameters
4. Selecting the Parameter Files for Session Execution
5. Locating the Test Cases
6. Creating a Custom Test Suite
7. Configuring Test Case parameters
8. Running a Test Suite
3.2. Configuring the Platform Parameters
3.2.1. Supported Platforms
Test Manager
.
The Data Retry - LTE Test Packs support the following platforms:
• 8100-B Series
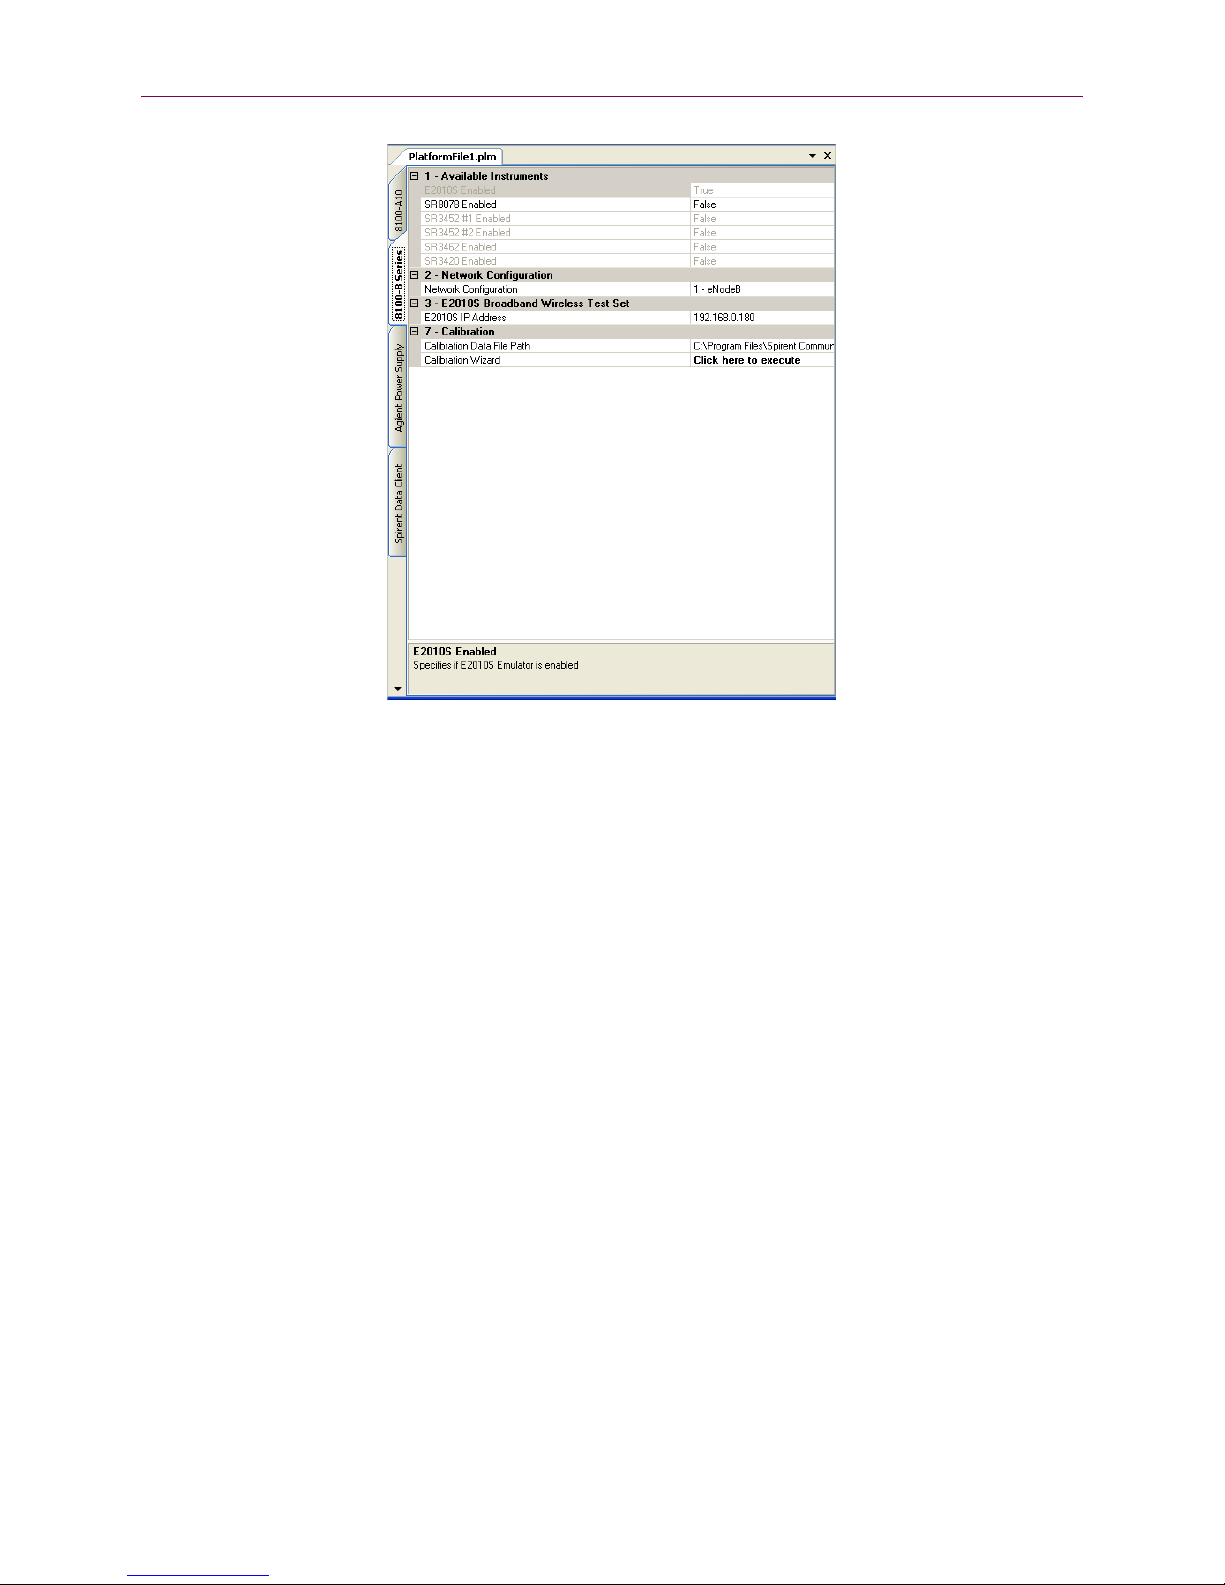
3.2.2. 8100-B Series Platform Parameters
The parameters for the 8100-B Series platform configure the technologies that are
present in the system, as shown in Figure 3-1
True to support LTE. The
depending if TCU is integrated in the Data Retry - LTE system.
: The platform parameters are correctly configured when the system is delivered.
SR8078 Enabled
them.
. Set the
parameter can be set as either True or False;
E2010S Enabled
parameter to
Page 11
Chapter Three: Using the Data Retry-LTE Test Packs | 9
Figure 3-1: 8100-B Series Platform Parameters
3.3. Configuring the UE Parameters
The level of automation and reliability of the system is heavily dependent on the ability
of the system to control the UE. UE parameters are configured to facilitate these
activities.
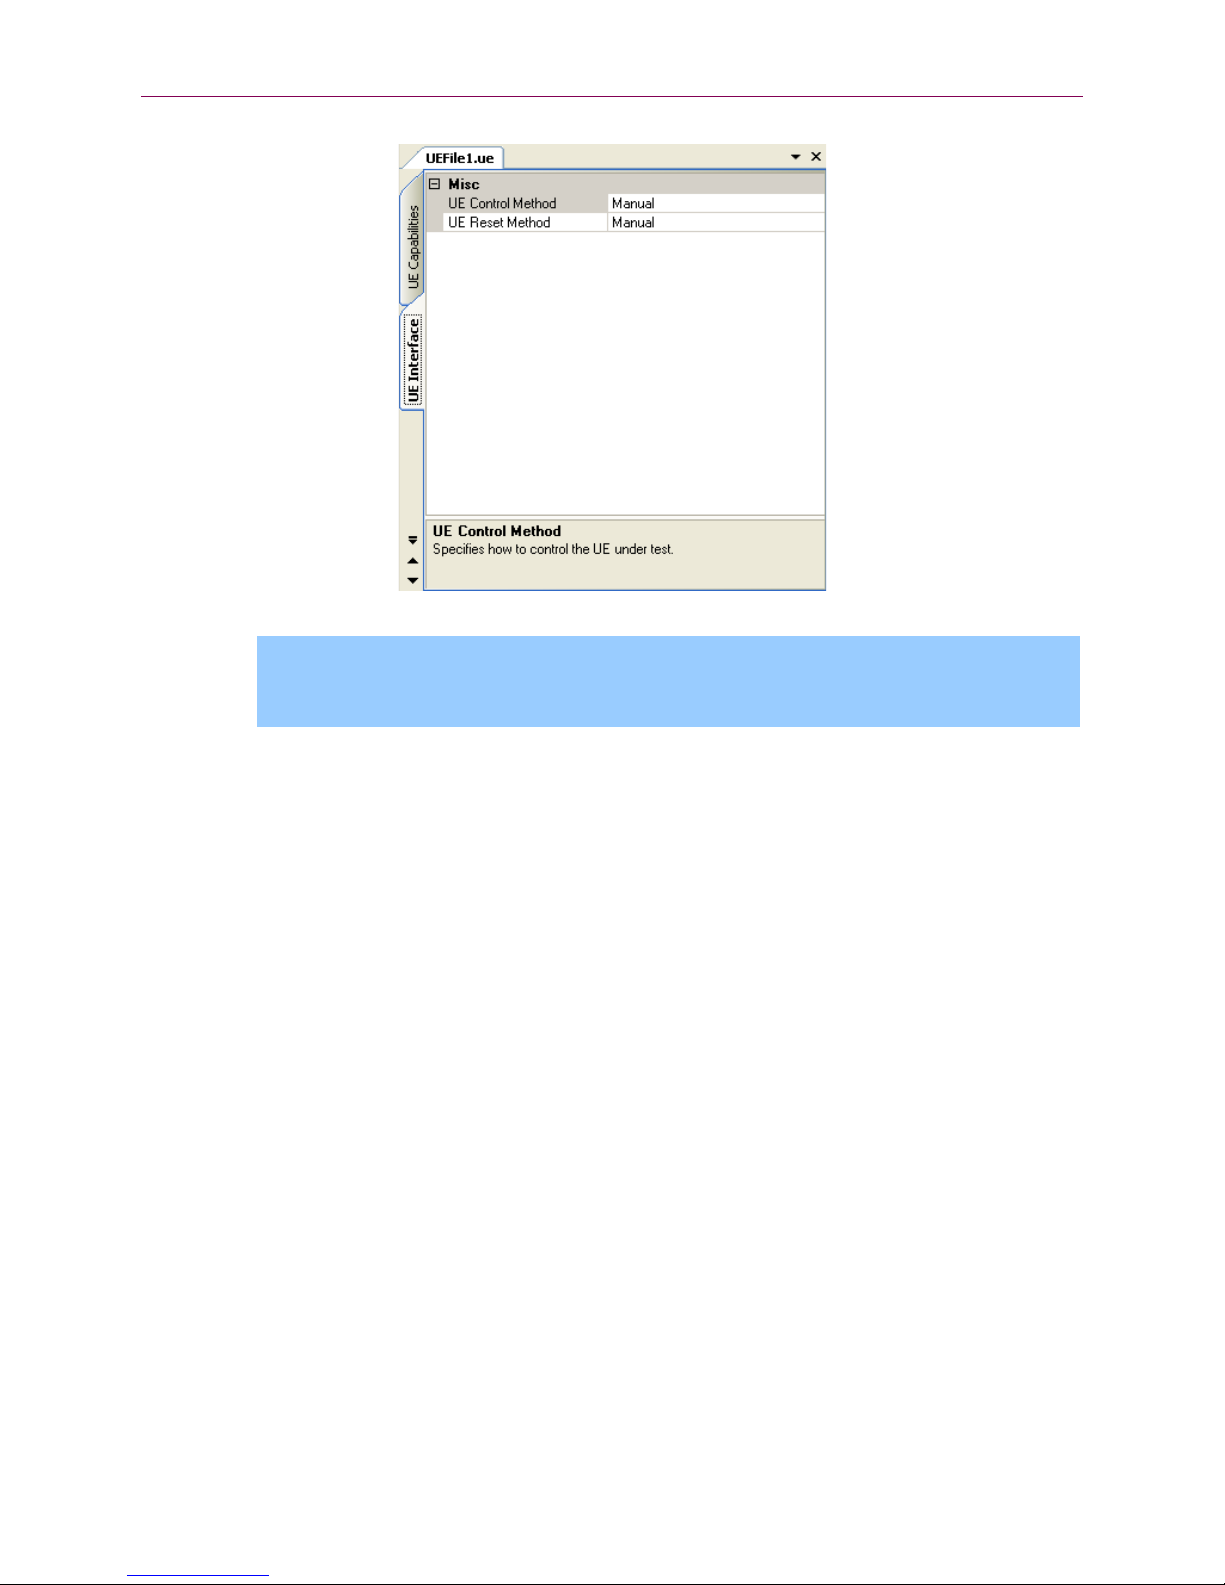
3.3.1. UE Interface Parameters
The UE interface parameters specify how the UE is controlled during test case execution.
The options for the
• Manual: The system prompts the operator to perform actions on the UE.
• AT: The system issues the specified AT commands to control the UE.
• Custom: (Advanced) Allows custom UE control. If Custom is selected, the UE Control
Sequence File parameter specifies the Control Sequence file used by the system.
The ability of the system to return the UE to a known state before execution of a test case
is important. If the UE supports a reliable reset command, set the
parameter to True.
UE Control Method
are:
Reset for Ensure Idle
Page 12
10 | 8100: Data Retry-LTE User Manual
NOTE
Figure 3-2: UE Parameters Window – UE Interface Parameters
: In cases where the UE Control Method is set to anything other than
“Manual”, the Manual method will be attempted as a fall-back if a command fails or
is not provided.
3.3.2. UE Manual Interface Parameters
If the UE Control Method parameter of the UE Interface tab is set to “Manual”, if a
command fails, or is not provided by the selected UE Control Method, the UE Manual
Interface parameters are used. In this case, a window displays prompting you to perform
the necessary action on the UE.
• Timeout Parameters: Specifies how long the system waits before automatically
selecting the defined Timeout Button. The timeout value is selected from a dropdown box providing a range from "Disabled" to "Indefinite."
A value of "Disabled" indicates no user prompt will be displayed and testing will
proceed as if the UE control was completed successfully. A value of “Indefinite”
indicates the function will wait indefinitely.
Note that even if Manual control is not selected, it may be used in case of failure. If
the timeout value is set to “Indefinite”, the system will wait indefinitely, which may
not be desirable.
• Timeout Button Parameters: If a timeout other than "Disabled" or "Indefinite" is
specified, these parameters specify if the
timeout expires.
OK or Cancel button is selected when the
Page 13

Chapter Three: Using the Data Retry-LTE Test Packs | 11
Figure 3-3: UE Parameters Window – UE Manual Interface Parameters
Configuring these parameters correctly can be effective in allowing some level of
automation; even if AT commands are not available or supported for the UE under Test.
For example, if the UE can be configured to auto-answer an incoming call, you can set
the timeout for
Timeout Button for
the
Answer Voice Call
Answer Voice Call
. This allows the UE time to auto-answer the call, and
can be set to OK. This configuration allows the
device to reliably answer network-initiated voice calls.
3.3.3. UE AT Interface Parameters
If the UE reliably supports AT commands, AT control can be very useful. The UE is
connected to the Data Client PC for AT control after the manufacturer's driver software is
installed.
The following parameters are provided:
• Client IP Address: Set this parameter to the IP address of the Data Client PC. NOTE:
The default address 192.168.0.61 should not be changed.
• Primary COM Port Settings/Secondary COM Port Settings: These parameters
configure the standard serial port parameters. Two COM ports can be used for
different commands. NOTE: The Data Retry - LTE Module only makes use of the
Primary COM Port.
Port: Set this parameter to the port on the Data Client PC assigned to the modem
when the UE is connected.
Bits per Second: Configure the baud rate.
Data Bits: Configure the number of data bits.
Parity: Configure the parity.
Page 14

12 | 8100: Data Retry-LTE User Manual
Stop Bits: Configure the stop bits.
Flow Control: Configure the flow control.
Enable DTR: Enables Data Terminal Ready Signaling.
Enable RTS: Enables Request To Send Signaling.
New Line: Specifies the new line terminator to use.
• Commands: Configure the available AT command strings.
• Test AT Commands: Use this wizard to test AT commands to check if the UE
responds correctly and reliably before testing.
Figure 3-4: UE Parameters Window – UE AT Interface Parameters
Page 15

Chapter Three: Using the Data Retry-LTE Test Packs | 13
3.3.4. UE Capability Parameters
UE Capability parameters configure the security and authentication settings for the UE as
shown in Figure 3-5. These parameters also include configuring the PDN number and
properties, as shown in Figure 3-6.
The following parameters are provided for security and authentication settings:
• AS Security: AS Security settings
• NAS Security: NAS Security settings
• NAS Authentication: NAS Authentication settings
• HSS Settings: HSS Settings
Figure 3-5: UE Parameters Window –Security and Authentication Parameters
The following parameters are provided for configuring PDN number and PDN properties:
• PDNs: Parameters for supported PDNs.
• PDN [N]: Specifies valid PDN settings.
• IP Address Type: Specifies the type of IP address the UE will request. Valid Values:
IPv4, IPv6, IPv4v6.
• APN: Specifies the Access Point Name (APN) the UE will communicate with.
• Services: Parameters for mapping services to PDNs.
• Service [N]: Parameters for mapping the service to the PDN.
• Service: Specifies the service. Valid Values: Administrative, Application, IMS, and
Internet.
• PDN: Specifies the PDN that carries this service.
Page 16

14 | 8100: Data Retry-LTE User Manual
NOTE
NOTE
are not used.
NOTE
during the test
Figure 3-6: UE Parameters Window – UE Capability Parameters for PDN
: There is great variability in the AT commands supported by UE vendors and
how reliably they work. Experimentation may be necessary to determine the best
settings.
3.4. Configuring the Session Parameters
Session Parameters control the execution of the session, as shown in Figure 3-7.
• Re-running Test Cases: These parameters control the automatic re-running of test
cases that end with a final result of “Incomplete” or “Failed”.
• Re-running Test Case Iterations: These parameters control the behavior of iteration-
based test cases.
: Because Data Retry – LTE test cases are not iteration-based; these parameters
• Reset UE between Test Cases: Resetting the UE between test cases can improve
system performance and stability in some cases.
: The Data Retry – LTE test cases automatically reset the UE at various points
; it is not necessary to set this parameter to “True”.
Page 17

Chapter Three: Using the Data Retry-LTE Test Packs | 15
Figure 3-7: Session Control Parameters Window
3.5. Selecting the Parameter Files for Session Execution
As indicated in the
unless it undergoes validation using the specified Platform, Session and UE Parameter
files.
In the
Execute Session
File. After the Platform File is selected, select the Platform as shown in Figure 3-8.
Test Manager User Manual
window, select the Session File, the UE File, and the Platform
, you cannot run a suite successfully
Page 18

16 | 8100: Data Retry-LTE User Manual
Figure 3-8: Selecting Parameter Files for Data Retry - LTE Module
3.6. Locating the Test Suites and Test Cases
3.6.1. Locating Pre-defined Module Test Suites
1. In the Test Manager, select the Suite Files tab in the File Cabinet and open the Suite
Files folder tree.
2. Open the Data Retry - LTE folder tree.
All of the pre-defined Suites available for Data Retry Testing display, as shown in
Figure 3-9.
Page 19

Chapter Three: Using the Data Retry-LTE Test Packs | 17
Figure 3-9: Locating Data Retry - LTE Module Pre-defined Suites
3.6.2. Locating Module Test Cases
1. In Test Manager, under the
2. Open the LTE-Data Retry sub-folder.
This folder contains the Data Retry - LTE Test Cases, as shown in Figure 3-10.
Modules
tab, open the Modules folder.
Figure 3-10: Data Retry - LTE Module Test Cases
Page 20

18 | 8100: Data Retry-LTE User Manual
3.7. Creating a Custom Test Suite
To set up a custom Data Retry - LTE test, you must create a Test Suite.
To create a Test Suite:
1. In Test Manager, select File>New>Suite File, as shown in Figure 3-11.
Figure 3-11: Creating a New Suite
2. You can also use the toolbar shortcuts available to create a new file, as shown in
Figure 3-12.
Figure 3-12: Creating a Suite File using the Toolbar Shortcut
3. A new
This window allows you to sequence and arrange the tests.
4. To add a test from the Data Retry - LTE Module, drag the desired test from the
Module Files tab of the File Cabinet on the left and move it over to the Suite File on
the right, as shown in
Test Suite
window opens with a default file name.
Figure 3-13 and Figure 3-14.
Page 21

Chapter Three: Using the Data Retry-LTE Test Packs | 19
Figure 3-13: Transferring a Test Case into a Suite
Figure 3-14: Successfully Transferred Test Case
5. Configure the parameters for each Test Case based on your testing needs.
Refer to Section 3.6 on page 19 and Chapter 4 on page 22 for additional information
on configuring Test Case Parameters.
6. When you have completed adding and sequencing the test cases, save the Suite file.
The custom suite file displays in the File Cabinet, as shown in
Figure 3-15.
Figure 3-15: Customized Suite Saved to the File Cabinet
Page 22

20 | 8100: Data Retry-LTE User Manual
3.8. Configuring Test Case Parameters
1. In Test Manager, select the desired Test Suite from the Parameters tab in the File
Cabinet.
2. In the
Suite Editor
, select the Test Case, as shown in Figure 3-16.
Figure 3-16: Configuring Test Case Parameters
3. Select the appropriate defining parameters for the test.
For more information on setting parameters, refer to Chapter 4 on page 22.
4. Save changes to the Suite File.
Page 23

3.9. Running a Test Suite
NOTE
After creating the custom Data Retry - LTE test suite and configuring the test case
parameters (refer to Section 3.6 on page 19 for details), or selecting a pre-defined test
suite, you must ensure the suite passes validation.
Chapter Three: Using the Data Retry-LTE Test Packs | 21
As discussed in the
Test Manager User Manual
, the key requirements to run a user-
defined suite are a valid Session, UE, and Platform file.
To run the test suite:
1. In the Test Manager, open the desired test suite from the Suite Files tab of the File
cabinet, as shown in
Figure 3-17.
: Each Test Case in a pre-defined Suite has test case parameters configured to
support the test definition. You do not have to alter them unless you are writing
your own test suite. For more information on configuring test case parameters, refer
to Section 3.6 on page 19 and Chapter 4: Test Reference on page 22.
2. In the Test Manager menu, select Execute>Start Session>Run All Test Cases to start
executing the entire Test Suite.
You also have the option of executing only the currently selected test case.
The Execute Session window displays.
3. Select the appropriate parameter files and platform. For more information on
selecting these files, refer to Chapter 4 on page 23.
Figure 3-17: Loading a Data Retry - LTE Test Suite
Page 24

22 | 8100: Data Retry-LTE User Manual
NOTE
4. If desired, specify the Tester Name, UE Manufacturer, and UE Model. These fields
display on all reports you create based on the results of this session.
: The Results folder and Platform File selections are already set, it is not
necessary to make changes to these fields.
5. Click OK to begin validation.
If successful, the test session begins, as shown in
Figure 3-18.
Figure 3-18: Test Session in Progress
Page 25

4. Test Reference
Validate Suite
Start Session
Connect to the Instruments
End Session
Success
Execute Tests
Disconnect from Instruments
Failure
Failure
Success
4.1. Overview
This chapter describes the Data Retry - LTE Module test cases in greater detail, including
the algorithms implemented during test execution.
The information is grouped into the following subsections:
1. Test Suite Execution
2. Data Retry - LTE Test Cases
3. Description of Data Retry - LTE Module Test Parameters
4.2. Test Suite Execution
This section describes the sequence of operations performed during the execution of a
Test Suite from the Test Manager.
Figure 4-1: Test Suite Execution Flowchart
Page 26

24 | 8100: Data Retry-LTE User Manual
4.3. Data Retry - LTE Test Cases
There are six types of test cases supported by the Data Retry - LTE Test Packs. This
section describes the test cases that facilitate the Testing functionality of the Data Retry LTE Test Packs.
1. 3GPP TS 24.301 EMM Common Procedurest
2. 3GPP TS 24.301 EMM Connection Management Procedures
3. 3GPP TS 24.301 EMM Specific Procedures
4. 3GPP TS 24.301 EPS Session Management Scenarios
5. 3GPP TS 24.301 Network Initiated ESM Procedures
6. 3GPP TS 36.331 RRC Scenarios
4.3.1. 3GPP TS 36.331 RRC Scenarios
4.3.1.1 Description
This test case is designed to verify the behavior of the UE when the
RRCConnectionReject
attach to the LTE network
message is received during the initial attempt of the UE to
.
4.3.1.2 Required Test Equipment
This test requires the following equipment:
• LTE network emulators; depending on the technologies specified in the configured
scenarios.
Page 27

Test Parameters
General
•
Network Configuration
• Configuration File Path
Data Retry Options
•
Test Criteria
• Acceptable Early Arrival Limit
Chapter Four: Data Retry-LTE Test Cases | 25
4.3.1.3 Test Parameters
The following test parameters are supported for this test.
Description
• Procedure Pathname
• PDN Gateway
o PDNs
o PDN[1]
o APN
o IP Address Type
o Default Bearer QCI
o Enable Dedicated Bearers
o Dedicated Bearers
o Dedicated Bearer
o QCI
• eNodeB 1
• Operating Band
• Downlink Channel Number
• Downlink Bandwidth
• MCC
• MNC
• Tracking Area Code
• Cell Identity
• RSTP
Retry Type
• Retry Scenarios
• RRC Scenarios
• RRC Connection Reject Type
• RRC Connection Reject Wait Timer
• Retry Monitor Timer
4.3.1.4 Test Results
The following results are generated for this test:
• Pass/Fail
• Acceptable Late Arrival Limit
• Expected Retry Interval
• Early Termination Enabled
• IMS Required
Page 28

26 | 8100: Data Retry-LTE User Manual
Testing Scenario
Test Result
.
Test Parameters
General
•
4.3.1.5 Pass / Fail Criteria
The test completes having performing each UE requirement as specified
within the time specified
The test completes without performing each UE requirement as specified
within the time specified.
The test cannot complete due to UE/Network Failures or an unknown
failure.
Pass
Fail
Incomplete (Other)
4.3.2. 3GPP TS 24.301 EMM Common Procedures
4.3.2.1 Description
This kind of test cases is designed to verify the UE’s behavior when the UE is unable to
authenticate the network because of an invalid MAC code in the NAS Authentication
Request message.
4.3.2.2 Required Test Equipment
This test requires the following equipment:
• LTE network emulators depending on the technologies specified in the configured
scenarios.
4.3.2.3 Test Parameters
The following test parameters are supported for this test.
Description
• Procedure Path name
Page 29

Chapter Four: Data Retry-LTE Test Cases | 27
Test Parameters
Network Configuration
•
Data Retry Options
•
Test Criteria
• Acceptable Early Arrival Limit
Configuration File Path
• PDN Gateway
o PDNs
o PDN[1]
o APN
o IP Address Type
o Default Bearer QCI
o Enable Dedicated Bearers
o Dedicated Bearers
o Dedicated Bearer
o QCI
• eNodeB 1
• Operating Band
• Downlink Channel Number
• Downlink Bandwidth
• MCC
• MNC
• Tracking Area Code
• Cell Identity
• RSTP
Retry Type
• Retry Scenarios
• EMM Common Scenarios
• UE Authentication Failure Type
• Retry Monitor Timer
• Initial Attachment Timer
• Internet PDN Timer
• Reconfiguration Timer
4.3.2.4 Test Results
The following results are generated for this test:
• Pass/Fail
• Acceptable Late Arrival Limit
• Expected Retry Interval
• Early Termination Enabled
• IMS Required
Page 30

28 | 8100: Data Retry-LTE User Manual
Testing Scenario
Test Result
.
Test Parameters
General
•
4.3.2.5 Pass / Fail Criteria
The test completes having performing each UE requirement as specified
within the time specified
The test completes without performing each UE requirement as specified
within the time specified.
The test cannot complete due to UE/Network Failures or an unknown
failure.
Pass
Fail
Incomplete (Other)
4.3.3. 3GPP TS 24.301 EMM Specific Procedures
4.3.3.1 Description
This kind of test cases is designed to verify the UE’s behavior when the UE receives a
NAS Attach Reject message while attempting to attach to the LTE network.
4.3.3.2 Required Test Equipment
This test requires the following equipment:
• LTE network emulators depending on the technologies specified in the configured
scenarios.
4.3.3.3 Test Parameters
The following test parameters are supported for this test.
Description
• Procedure Pathname
Page 31

Chapter Four: Data Retry-LTE Test Cases | 29
Test Parameters
Network Configuration
•
Data Retry Options
•
Test Criteria
• Expected Retry Interval
Testing Scenario
Test Result
.
Configuration File Path
• PDN Gateway
o PDNs
o PDN[1]
o APN
o IP Address Type
o Default Bearer QCI
o Enable Dedicated Bearers
o Dedicated Bearers
o Dedicated Bearer
o QCI
• eNodeB 1
• Operating Band
• Downlink Channel Number
• Downlink Bandwidth
• MCC
• MNC
• Tracking Area Code
• Cell Identity
• RSTP
Retry Type
• Retry Scenarios
• EMM Specific Scenarios
• EMM Cause Code
• Retry Monitor Timer
• Initial Attachment Timer
• Internet PDN Timer
• Reconfiguration Timer
4.3.3.4 Test Results
The following results are generated for this test:
• Pass/Fail
4.3.3.5 Pass / Fail Criteria
The test completes having performing each UE requirement as specified
within the time specified
• Early Termination Enabled
• IMS Required
Pass
Page 32

30 | 8100: Data Retry-LTE User Manual
Testing Scenario
Test Result
Test Parameters
General
•
The test completes without performing each UE requirement as specified
within the time specified.
The test cannot complete due to UE/Network Failures or an unknown
failure.
Fail
Incomplete (Other)
4.3.4. 3GPP TS 24.301 EMM Connection Management Procedures
4.3.4.1 Description
This kind of test cases is designed to verify the behavior of the UE when it receives a
NAS Service Reject message while attempting to re-connect to the LTE network.
4.3.4.2 Required Test Equipment
This test requires the following equipment:
• LTE network emulators depending on the technologies specified in the configured
scenarios.
4.3.4.3 Test Parameters
The following test parameters are supported for this test.
Description
• Procedure Pathname
Page 33

Test Parameters
Network Configuration
•
o
Data Retry Options
•
Test Criteria
•
Chapter Four: Data Retry-LTE Test Cases | 31
Configuration File Path
• PDN Gateway
o PDNs
o PDN[1]
o APN
o IP Address Type
o Default Bearer QCI
o Enable Dedicated Bearers
o Dedicated Bearers
o Dedicated Bearer
o QCI
• eNodeB 1
• Operating Band
• Downlink Channel Number
• Downlink Bandwidth
• MCC
• MNC
• Tracking Area Code
• Cell Identity
RSTP
Retry Type
• Retry Scenarios
• EMM Connection Management Scenarios
• EMM Cause Code
• Retry Monitor Timer
• Initial Attachment Timer
• Internet PDN Timer
• Reconfiguration Timer
Expected Retry Interval
• Early Termination Enabled
• IMS Required
4.3.4.4 Test Results
The following results are generated for this test:
• Pass/Fail
Page 34

32 | 8100: Data Retry-LTE User Manual
Testing Scenario
Test Result
.
Test Parameters
General
•
4.3.4.5 Pass / Fail Criteria
The test completes having performing each UE requirement as specified
within the time specified
The test completes without performing each UE requirement as specified
within the time specified.
The test cannot complete due to UE/Network Failures or an unknown
failure.
Pass
Fail
Incomplete (Other)
4.3.5. 3GPP TS 24.301 EPS Session Management Scenarios
4.3.5.1 Description
This kind of test cases is designed to verify the UE’s behavior when the network fails to
assign an IPv6 address to the UE.
4.3.5.2 Required Test Equipment
This test requires the following equipment:
• LTE network emulators depending on the technologies specified in the configured
scenarios.
4.3.5.3 Test Parameters
The following test parameters are supported for this test.
Description
• Procedure Pathname
Page 35

Test Parameters
Network Configuration
•
o
Data Retry Options
•
Test Criteria
•
Testing Scenario
Test Result
.
Chapter Four: Data Retry-LTE Test Cases | 33
Configuration File Path
• PDN Gateway
o PDNs
o PDN[1]
o APN
o IP Address Type
o Default Bearer QCI
o Enable Dedicated Bearers
o Dedicated Bearers
o Dedicated Bearer
o QCI
• eNodeB 1
• Operating Band
• Downlink Channel Number
• Downlink Bandwidth
• MCC
• MNC
• Tracking Area Code
• Cell Identity
RSTP
Retry Type
• Retry Scenarios
• EPS Session Management Scenarios
• ESM Cause Code
• Max Router Solicitation
• Router Solicitation Interval
• Initial Attachment Timer
Acceptable Early Arrival Limit
• Acceptable Late Arrival Limit
• Expected Number of Retries
• Early Termination Enabled
• IMS Required
4.3.5.4 Test Results
The following results are generated for this test:
• Pass/Fail
4.3.5.5 Pass / Fail Criteria
The test completes having performing each UE requirement as specified
within the time specified
Pass
Page 36

34 | 8100: Data Retry-LTE User Manual
Test Parameters
General
• Description
The test completes without performing each UE requirement as specified
within the time specified.
The test cannot complete due to UE/Network Failures or an unknown
failure.
Fail
Incomplete (Other)
4.3.6. 3GPP TS 24.301 Network Initiated ESM Procedures
4.3.6.1 Description
This test case is designed to verify the behavior of the UE when the network fails to set
up an EPS bearer or if the EPS bearer is deactivated.
4.3.6.2 Required Test Equipment
This test requires the following equipment:
• LTE network emulators depending on the technologies specified in the configured
scenarios.
4.3.6.3 Test Parameters
The following test parameters are supported for this test.
• Procedure Pathname
Page 37

Chapter Four: Data Retry-LTE Test Cases | 35
Test Parameters
Network Configuration
•
Data Retry Options
•
Test Criteria
•
Configuration File Path
• PDN Gateway
o PDNs
o PDN[1]
o APN
o IP Address Type
o Default Bearer QCI
o Enable Dedicated Bearers
o Dedicated Bearers
o Dedicated Bearer
o QCI
• eNodeB 1
• Operating Band
• Downlink Channel Number
• Downlink Bandwidth
• MCC
• MNC
• Tracking Area Code
• Cell Identity
• RSTP
Retry Type
• Retry Scenarios
• Network Initiated ESM Scenarios
• ESM Cause Code
• Retry Monitor Timer
• Initial Attachment Timer
Expected Number of Retries
• Early Termination Enabled
• IMS Required
4.3.6.4 Test Results
The following results are generated for this test:
• Pass/Fail
Page 38

36 | 8100: Data Retry-LTE User Manual
Testing Scenario
Test Result
Parameter
Description
Procedure Pathname
Parameter
Configuration File Path
NOTE:
4.3.6.5 Pass / Fail Criteria
The test completes having performing each UE requirement as specified
within the time specified.
The test completes without performing each UE requirement as specified
within the time specified.
The test cannot complete due to UE/Network Failures or an unknown
failure.
Pass
Fail
Incomplete (Other)
4.4. Description of Data Retry - LTE Module Test Parameters
Most testing tasks can be accomplished using the defined User Test Suites. For
individual testing needs, you can create custom Test Suites using the Module Test Cases
and user-defined parameters.
You can change the following Test Parameters to define your testing needs:
• Network Configuration
• Test Options
• Test Criteria
These parameters are described in detail in the following sections.
4.4.1. General
Specifies a short description for the test case.
Specifies a procedure pane file to be loaded. NOTE: A file browser is available to select the
desired file.
4.4.2. Network Configuration
Specifies the eAirAccess Configuration File to be loaded.
A file browser is available to select the desired file.
Page 39

Parameter
• PDN Gateway>PDNs>PDN[]
Sets the parameters for a PDN
PDN Gateway>PDNs>PDN[]>APN
PDN Gateway>PDNs>PDN[]>IP Address Type
PDN Gateway>PDNs>PDN[]>Default Bearer QCI
PDN Gateway>PDNs>PDN[]>Dedicated Bearers Enabled
PDN Gateway>PDNs>PDN[]>Dedicated Bearers
PDN Gateway>PDNs>PDN[]>Dedicated Bearer>QCI
eNodeB 1>Operating Band
eNodeB 1>Operating Downlink Channel Number
eNodeB 1>Operating Downlink Bandwidth
•
Specifies the APN of the PDN to configure. Valid Values: Refer to the UE Capabilities section.
•
Specifies the type of PDN to configure. Valid Values: Match UE Setting, IPv4, IPv6, IPv4v6.
•
Specifies QCI for the default bearer. Valid Range: 1 to 9.
•
Enables or disables the use of dedicated bearers.
•
Parameters for the dedicated bearers.
•
Specifies QCI for the dedicated bearer. Valid Range: 1 to 9
Sets the operating band
Supported values: 1, 2, 4, 5, 7, 10, 12, 13, 14, 17, 20, 24, 25, 26
Sets the downlink channel number.
Supported values:
• Operating Band 1: 0 – 599
• Operating Band 2: 600 – 1199
• Operating Band 4: 1950 – 2399
• Operating Band 5: 2400 – 2649
• Operating Band 7: 2750 – 3449
• Operating Band 10: 4150 – 4749
• Operating Band 12: 5000 – 5179
• Operating Band 13: 5180 – 5279
• Operating Band 14: 5280 – 5379
• Operating Band 17: 5730 – 5849
• Operating Band 20: 6150 – 6449
• Operating Band 24: 7700 – 8039
• Operating Band 25: 8040 – 8689
• Operating Band 26: 8690 – 9039
Sets the downlink bandwidth (MHz)
Supported values: 1.4, 3, 5, 10, 15, 20
Chapter Four: Data Retry-LTE Test Cases | 37
Page 40

38 | 8100: Data Retry-LTE User Manual
Parameter
Retry Type
Retry Scenarios
RRC Scenarios
RRC Connection Reject Type
RRC Connection Reject Wait Timer
EMM Common Scenarios
UE Authentication Failure Type
4.4.3. Data Retry Options
Sets the retry behavior.
Valid Values:
• Positive Data Call - Verifies the UE can successfully make a successful data call
• Time Based Retry - Verifies the UE doesn't retry after the initial failure or the UE retry pattern
matches the specified throttling interval
• Number Limited Retry - Verifies the UE retry attempts matches the specified number of retries
Sets the retry failure methods scenarios.
Valid Values:
• RRC - Specifies RRC Retry Scenarios
• EMM Common - Specifies EMM Common Retry Scenarios
• EMM Specific - Specifies EMM Specific Retry Scenarios
• EMM Connection Management - Specifies EMM Connection Management Retry Scenarios
• EPS Session Management - Specifies EPS Session Management Retry Scenarios
• Network Initiated ESM – Specifies Network-initiated ESM Scenarios
Sets the RRC failure methods.
Valid Values:
• RRC Connection Reject
Sets the RRC Connection Reject Scenarios
Valid Values:
• Initial Attach - Network sends RRC Connection Reject during the initial attach
• UE Initiated Traffic - Network sends RRC Connection Reject when UE sends data to a
connected PDN
• Network Initiated Traffic - Network sends RRC Connection Reject when UE responds to a page
Sets the wait timer in RRC Connection Reject Message (seconds)
Sets the EMM Common Procedures methods.
UE Authentication Failure - UE responds with the NAS Authentication Failure
Network Authentication Reject - Network responds with the NAS Authentication Reject
UE Security Mode Reject - UE responds with a Security Mode Reject
Sets the error fields in NAS Authentication Request message.
Valid Values:
• Invalid MAC Code
• Invalid Separation Bit
• Invalid SQN
Page 41

Parameter
Security Mode Reject Type
EMM Specific Scenarios
EMM Cause Code
EMM Connection Management Scenarios
Network Initiated ESM Scenarios
Chapter Four: Data Retry-LTE Test Cases | 39
Sets the scenario for UE to send a NAS Security Mode Reject message.
Valid Values:
• Initial Attach - UE is attempting an initial attach
• UE-Initialed Service Request - UE is attempting to transition from EMM-Idle to EMM-
Connected state
• PDN Connection Attempt - UE is attempting to connect to a PDN
• PDN Disconnection Attempt - UE is attempting to disconnect from a PDN
Sets the EMM Specific Procedures methods.
Valid Values:
• Network Attach Reject - UE receives a NAS Attach Reject message while attempting to attach
• Attach Request Failure - UE's attach counter reaches the maximum value while attempting to
attach to the LTE network
• Network Detach Request - UE receives a NAS Detach Request message from the network
Sets the EMM Cause Code.
Valid Values:
• "2 - IMSI unknown in HSS (0x02)"
• "3 - Illegal UE (0x03)"
• "6 - Illegal ME (0x06)"
• "7 - EPS services not allowed (0x07)"
• "8 - EPS services and non-EPS services not allowed (0x08)"
• "9 - UE identity cannot be derived by the network (0x09)"
• "10 - Implicitly detached (0x0A)"
• "11 - PLMN not allowed (0x0B)"
• "12 - Tracking Area not allowed (0x0C)"
• "13 - Roaming not allowed in this tracking area (0x0D)"
• "14 - EPS services not allowed in this PLMN (0x0E)"
• "15 - No Suitable Cells In tracking area (0x0F)"
• "19 - ESM failure (0x13)"
• "Custom Code": User can input a valid EMM Cause Code defined in 3GPP 24.301 Table
9.9.3.9.1.
Sets the EMM Connection Management Procedures Methods.
Valid Values:
• Network Service Reject - UE receives a NAS - Service Reject message while attempting to re-
connect to the LTE network
Set the Network Initiated ESM Scenarios
Valid Values:
• 2 PDN Connected when Deactivate EPS Bearer Context - UE receives deactivated EPS bearer
context request message from the network: 2 PDN connections open
Page 42

40 | 8100: Data Retry-LTE User Manual
Parameter
EPS Session Management Scenarios
Max Router Solicitation
Router Solicitation Interval
ESM Cause Code
Retry Monitor Timer
Parameter
Acceptable Early Arrival Limit
Acceptable Late Arrival Limit
Expected Retry Interval
Early Termination Enabled
Sets the EMM Cause Code defined in 3GPP 24.301 Table 9.9.3.9.1.
Valid value (decimal): 2,3,5-26,39,40,95-101,111
Sets the Max number of Router Solicitation messages.
Sets the timer between Router Solicitation messages (seconds).
Sets the ESM Cause Code.
Valid Values:
• "8 - Operator Determined Barring (0x08)"
• "29 - User authentication failed (0x1D)"
• "30 - Request rejected by Serving GW or PDN GW (0x1E)"
• "31 - Request rejected, unspecified (0x1F)"
• "32 - Service option not supported (0x20)"
• "33 - Requested service option not subscribed (0x21)"
• "34 - Service option temporarily out of order (0x22)"
• "38 - Network failure (0x26)"
• "Custom Code": User can input a valid EMM Cause Code defined in 3GPP 24.301 Table
9.9.4.4.1
Sets the monitor timer for retry attempts (in seconds).
4.4.4. Test Criteria
Sets the tolerance limit for a retry attempt that may occur earlier than what is specified in the
Expected Retry Interval (in seconds).
Sets the tolerance limit for a retry attempt that may occur later than what is specified in the
Expected Retry Interval (in seconds).
Defines the Throttling Interval (in seconds).
Example: 0, 0, 10, 20, 30
Enables or disables early termination of the test case.
If enabled, test case terminates as soon as the final outcome can be determined.
 Loading...