

Spinshot Player User Manual
SPINSHOT PLAYER
USER MANUAL


Section-1: Before Using the Machine
Introduction
Thank you for purchasing a SPINSHOT tennis ball machine. This
manual contains important information concerning the proper use and
care of your ball machine. Please read your owner’s manual
completely before operating your machine.
Tennis Balls To Be Used
Please take note that brand new tennis balls are not recommended to
be used especially during first ten hours of break-in period. The ink
and waxy coating on brand new tennis balls can leave a slick coating
on the new ball throwing wheels, resulting in inconsistent ball throws.
It is best to use balls that are slightly used to reduce the potential for
developing the slick coating on the wheels.
The consistency of ball throws will depend on the consistency of the
tennis balls used. A mixture of new and old balls will produce
inconsistent throws. Inconsistent ball throws may also be caused by
excess dirt and ink build up on throwing wheels. Cleaning the ball
throwing wheels as described in the section “Maintenance and
Cleaning” will restore consistent performance.
Important Warnings
WARNING: Do not reach or look into the ball exit hole without turning
the main power off and only after both wheels come to a complete
stop.
WARNING: Do not stand closer than 10 meters in front of the ball
machine when the power is on.
WARNING: Do not place balls or foreign objects into the ball hopper
while the power is on. It could cause a jam and damage the feeder
motor.
WARNING: The overloading of balls into the ball hopper may result in

the feeder becoming jammed. It is suggested that no more than 120
balls be put inside the ball hopper.
WARNING: Do not use machine while it is raining or in water. Do not
use wet tennis balls.
Section-2: Operating Machine
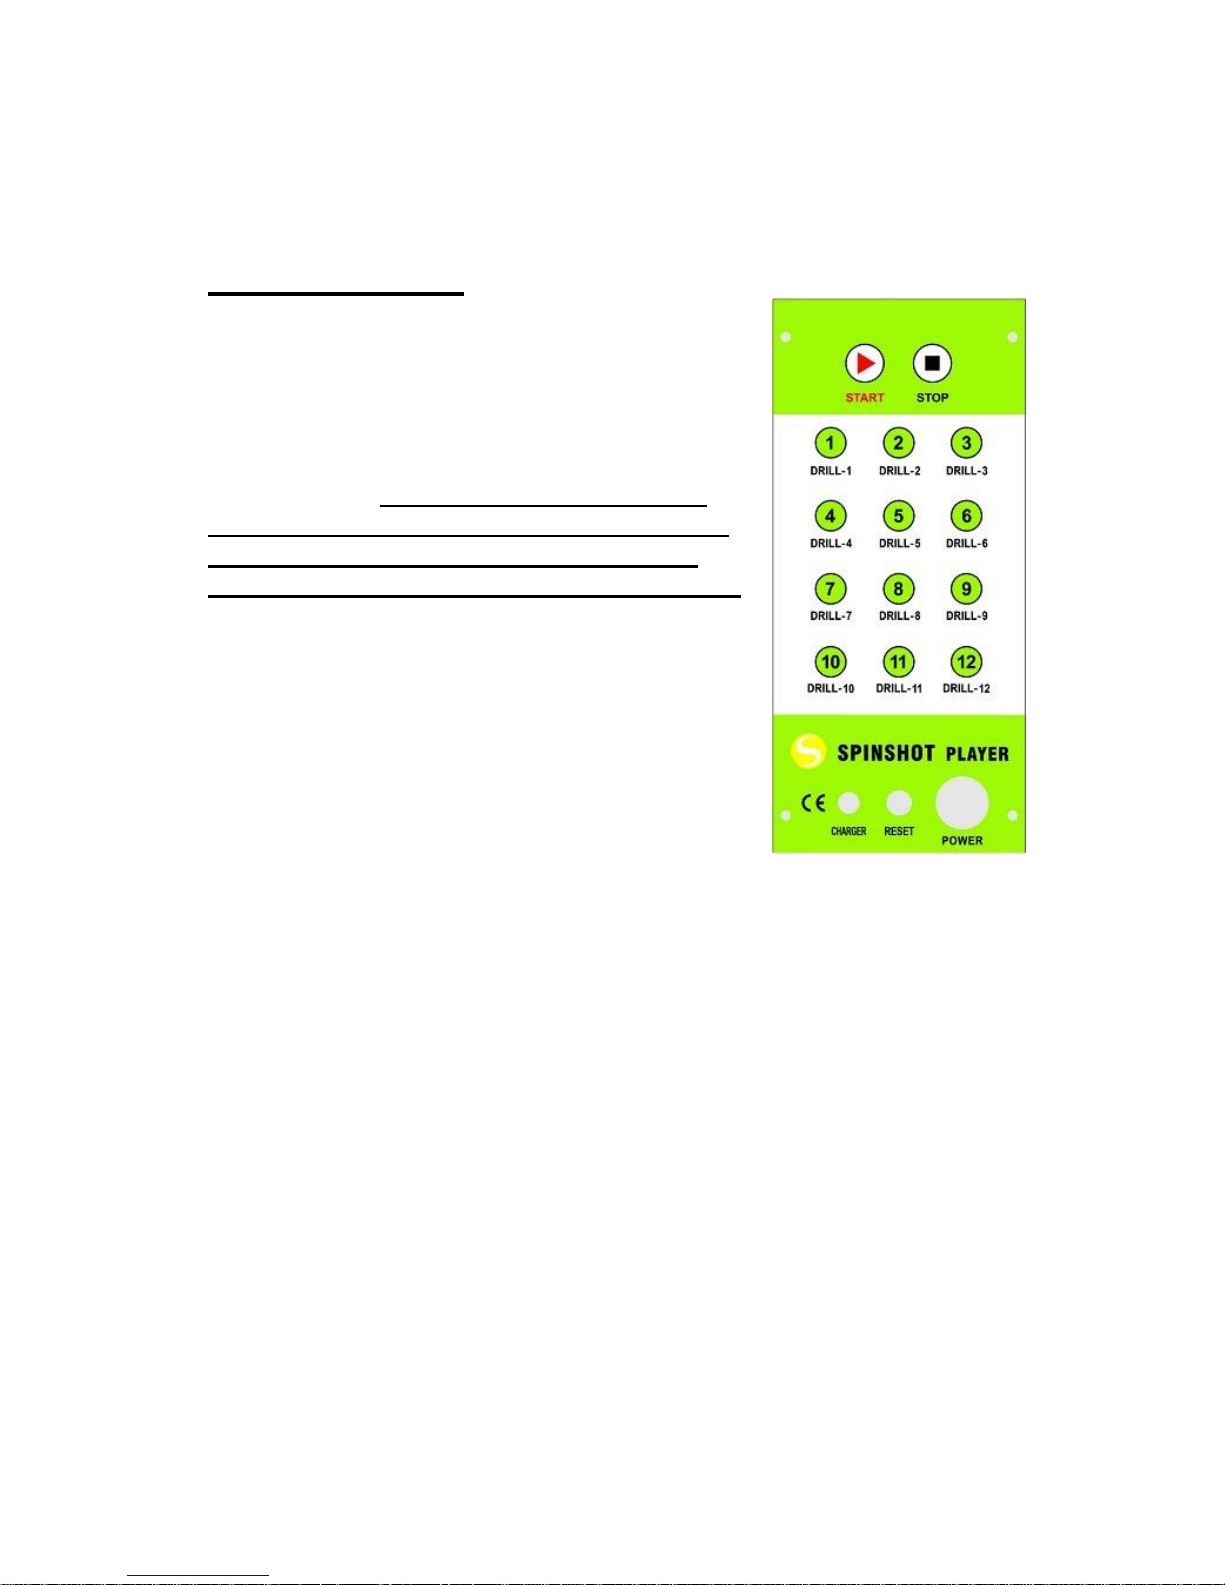
Control Panel
POWER: The switch is used to turn on or off
the machine. After you turn on the power, both
horizontal and vertical motors will perform a
functional initialization for proper functioning of
the device. After initialization, the machine will
keep beeping. Then the user needs to re-
position the machine perpendicular to the
baseline facing the opposite side of the
court (see Q3 in section-7 for more details).
Proper placement will make the machine sweep
the balls evenly across the court. Then the
user can press the START button to trigger the
machine to serve the balls. Each time after
powering up, the machine will recall the last
settings for drill mode and start its operations.
If at any time the machine functions incorrectly,
the user can turn off the power button to reset
the device’s control logic. Low battery voltage causes most of the
time, the improper working of the machine.
RESET: The white reset switch protects the electronics and motors.
When activated, this switch pops out approximately 6 mm. In the
event the reset is activated, turn off the central power, press the
reset switch, check any balls jammed inside machine and then turn
on the main power to normal operation status. The “reset” can be
caused by excessively dirty or slick ball throwing wheels, which can
prevent the wheels from properly grabbing the balls. Cleaning the ball
throwing wheels as described in the section “Maintenance and
Cleaning” will restore proper performance.
CHARGER: Plug the charger into the jack and the other end into a
power outlet to start the charging of your machine.
START: The button will trigger the machine to start.
STOP: The button will trigger the machine to stop. This process will
only halt the feeding of the ball but not the running of central service
motors. If a user wants to turn off the whole machine, it is required to
use the POWER button. User is not required to STOP the machine
when switching between the different drill modes.
DRILL: This includes the 12 buttons from D1 to D12. Pressing these
buttons will make the machine work in different drill modes. All drill
mode settings can be edited on your mobile phone and then
downloaded to your machine and be ready for use. Please find more
details in the section referred to as “Phone Remote”
Battery Charging (for Battery Model)
You will need to first connect the battery charger to a live electrical
outlet and then insert the battery charger into the socket labeled as
“CHARGER” on the control panel.
After 8 to 15 hours your battery is fully charged. The LED light on the
charger pack will turn green when the machine is fully charged. If LED
light stays red, the charging process is still continuing. A fully charged
battery will provide approximately 2-3 hours of practice time. Higher
ball speed requires more power and therefore will drain the battery
faster.
It is very important to CHARGE THE BATTERY IMMEDIATELY
AFTER EACH USE. Keeping the charger connected to the machine
will not overcharge the battery and the users don’t need to use up the
battery before charging it.
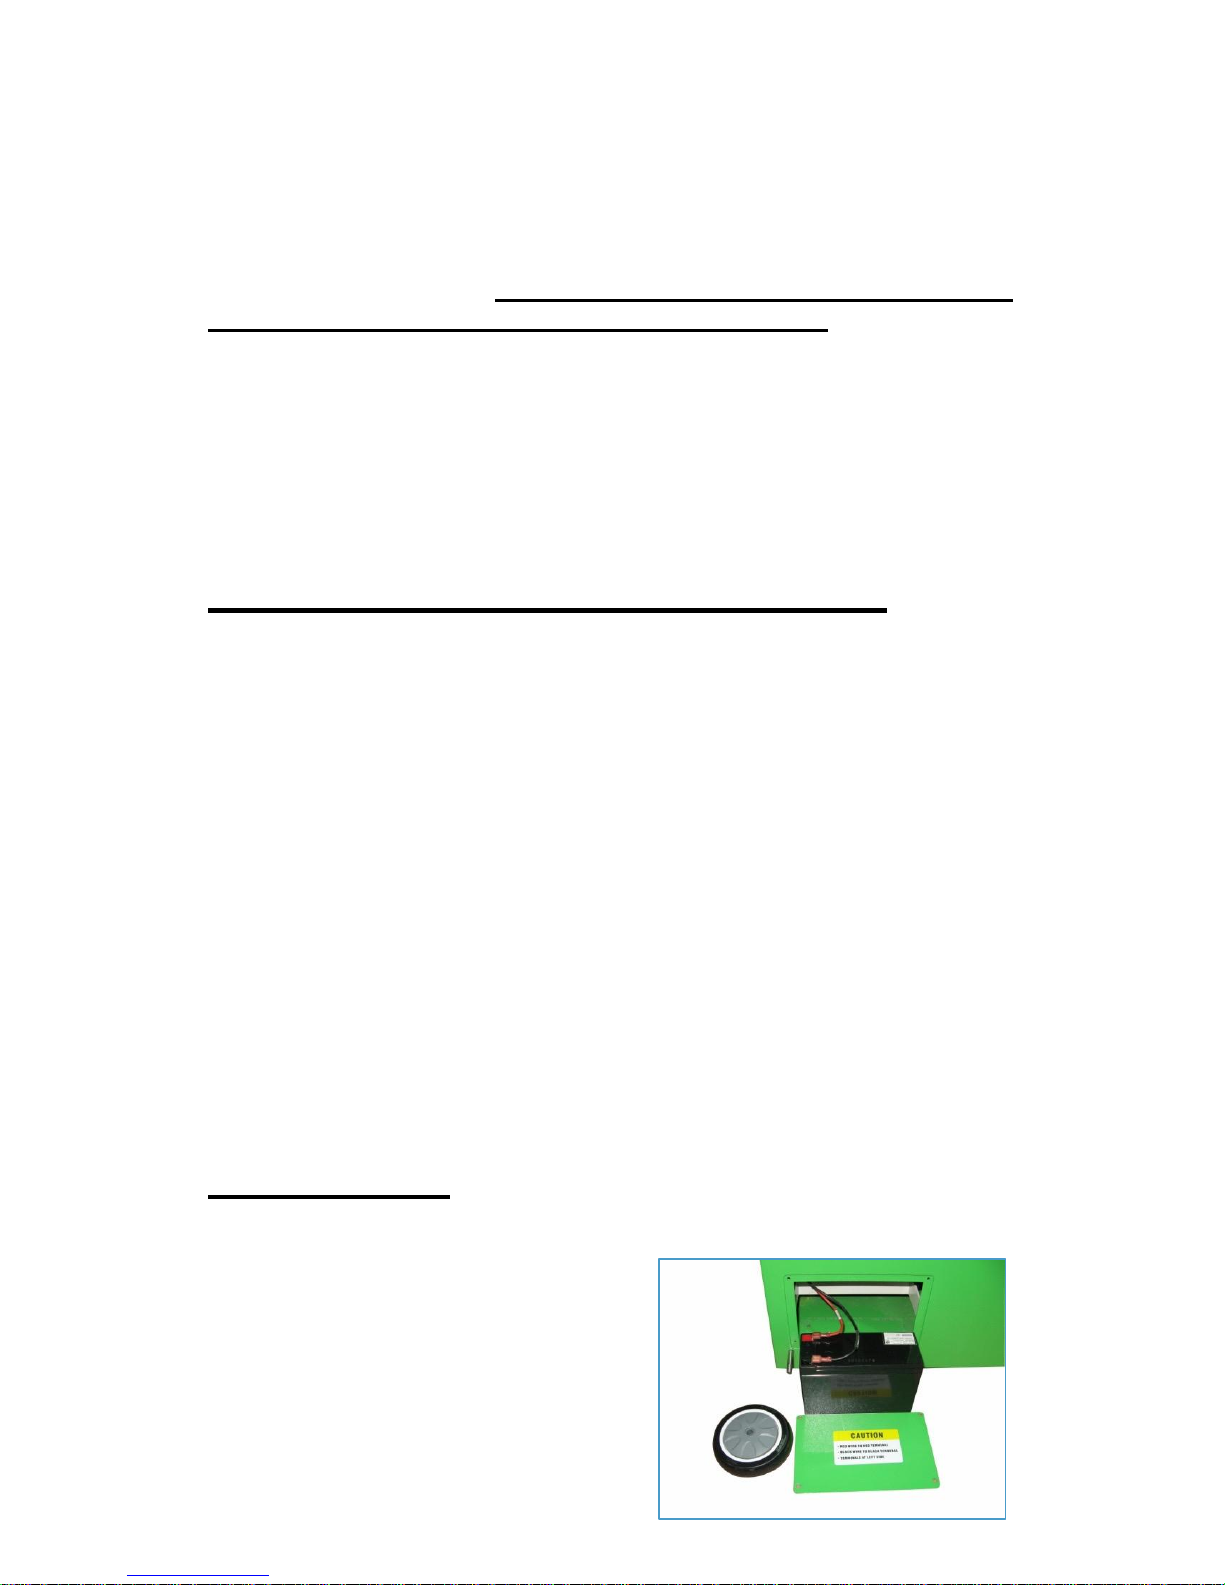
Battery Cage
The battery cage enables the user to
easily install and replace the battery
or an AC module. Remove the wheel
first before opening the battery cage
door. If a wheel was installed too
tight, screw it down. After opening the
 Loading...