

Spin Master Toys Far East 44354TX27145 Users Manual

®
INSTRUCTION GUIDE
The Air Hogs®F-14 Tomcat®is a revolutionary radio controlled jet that is a true backyard flyer. You can hand toss or take
off from the ground using the landing gear. The F-14 Tomcat®uses digital proportional control which provides hobby like
flight performance.
Controller/Charger
Antenna
ON/OFF/CHARGE
Switch
Throttle
Charge Door
(to access
Charge Nozzle)
Charge
LED
Power
LED
Left/Right
Toggle
Steering
Trim Knob
Main Wing
Propeller
F-14 Tomcat
®
Vertical
Tail Wings
Propeller
Fuselage Wheels
Main Wing
Nose Wheel
Fuselage
1
1. Open the battery door with a screwdriver.
2. If used batteries are present, remove these
batteries from the unit by pulling up on one
end of each battery.
3. Install new batteries as shown in the polarity
diagram (+/-) inside the battery compartment.
4. Replace battery door securely.
5. Check your local laws and regulations for correct
recycling and/or battery disposal.
Controller/Charger
Battery
Compartment
Door
6 x AA
1.5-V
Alkaline
Batteries
IMPORTANT TIP: TURN YOUR CONTROLLER
ON TO ENSURE THAT THE BATTERIES ARE
INSTALLED PROPERLY. THE RED LED LIGHT
ON THE FRONT OF THE CONTROLLER
SHOULD TURN RED.
After each flight, store the jet in the package to
prevent damage.
REPAIRS
CONTROLLER/CHARGER BATTERY INSTALLATION
If the wings on your jet
get damaged they can
be easily repaired with
clear tape as shown.
ADDING WHEELS TO THE F-14 TOMCAT
®
Repair
Attach the front and rear wheels to the jet as shown. The wires on the wheels
slide into the slots on the jet and clip into place.
Battery
Compartment
Your
F-14 Tomcat
®
jet has a
preinstalled
rechargeable
battery in the
jet’s fuselage.
Because
the Controller’s
AA batteries
are used for
2 functions –
charging and
controlling,
they will need to
be replaced
every so often.
Antenna
rePLICA SERIES
Contents:
1 x Air Hogs®F-14 Tomcat
®
1 x Remote Control/Charger, 1 x User Instruction Guide
1 x Landing Gear, 1 X Spare Props
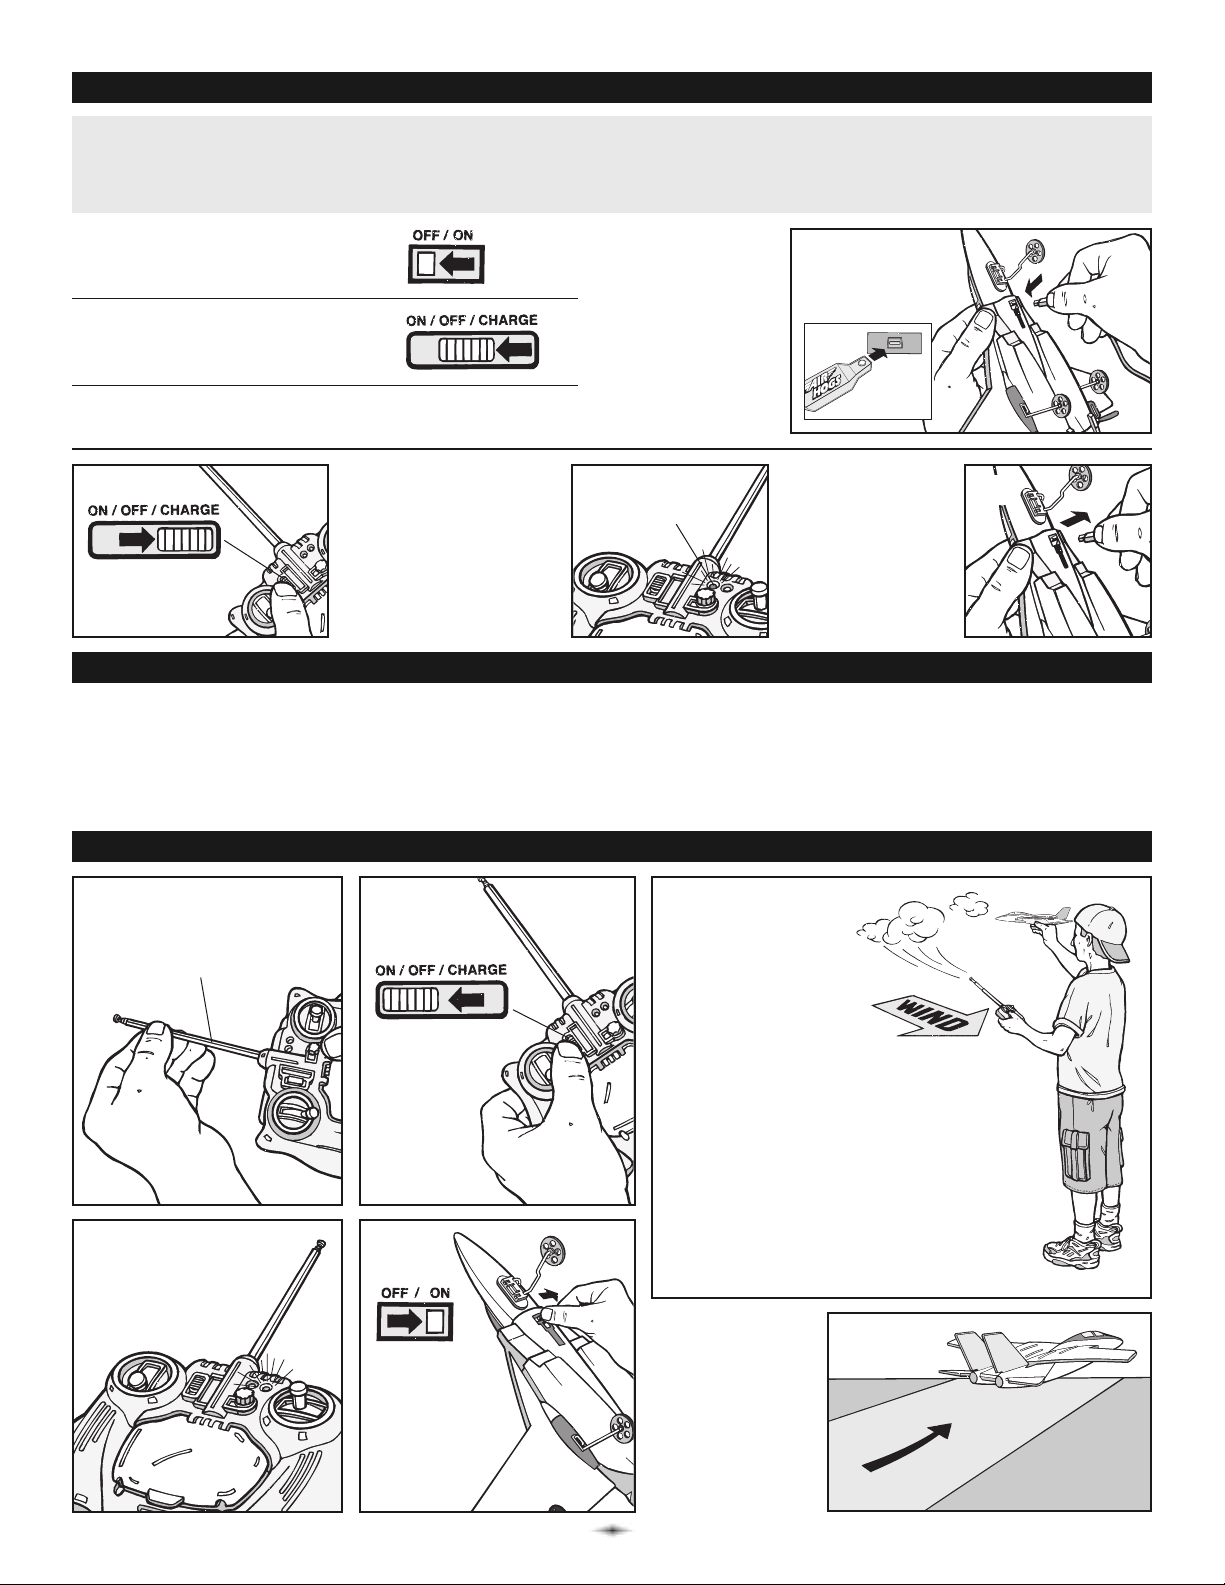
PRE-FLIGHT ENVIRONMENT CHECK
CHARGING YOUR F-14 TOMCAT
®
Set the controller/
charger switch
to CHARGE.
4. Carefully
push the charge
nozzle all the
way into the jet’s
charge port
located on the
bottom of the jet.
FLYING INSTRUCTIONS
Fully extend
controller/charger
antenna.
Push the
controller/
charger
switch to
ON.
Power light will
turn RED.
1
2
3
5
5. During the charging
process, the green
charge light will turn
ON. When the jet is
completely charged,
the green charging
light will turn OFF.
6. Remove charge
nozzle gently
from the jet’s
charge port.
Store charge
nozzle and
close the
charge door.
5
Important Charging Information:
• Before taking your initial flight, charge the jet for a complete charge cycle on your charger.
• Depending upon the length of future play, you will not need to complete a full charge before each flight.
NOTE: A shortened charge results in a shorter playtime (may take up to 30-40 minutes to fully charge).
Green
Charge Light
1. Location – Fly in a large wide open, grassy location that is free of buildings, trees, overhead wires, and other
obstructions. Do not fly near people or animals.
2. Weather – Fly on mild, sunny days. Do not fly in electrical storms, rain, sleet, snow or other adverse weather
conditions. Do not fly if the temperature is below 7°C/45°F. In very cold temperatures, the jet will become fragile and the
engine performance will decrease.
3. Wind Conditions – Do not fly in strong winds. Strong winds may overpower the aircraft and make it difficult to control.
5
NOTE:
We recommend that
you start flying by
hand launching to
get used to the controls.
When preparing for take-off,
check the direction of the wind.
Always launch the jet
against the wind for best
take-off and flight results.
Use your left hand to apply at least
half throttle on the controller/charger.
Gently toss the jet forward into the
wind and parallel to the ground.
Refrain from using the directional
toggle while launching the jet.
1. Push the ON/OFF switch on the
bottom of the jet to the LEFT to
turn the jet OFF.
2. Set the controller/charger
switch to OFF.
3. Flip the charge door open to
reveal the charge nozzle.
6
If you are taking
off from the
ground, make
sure you are on a
smooth paved
surface, and put
the throttle all the
way forward for
fast acceleration.
4
Push the
jet’s ON/OFF
switch to the
right to turn
the jet to ON.
2
4
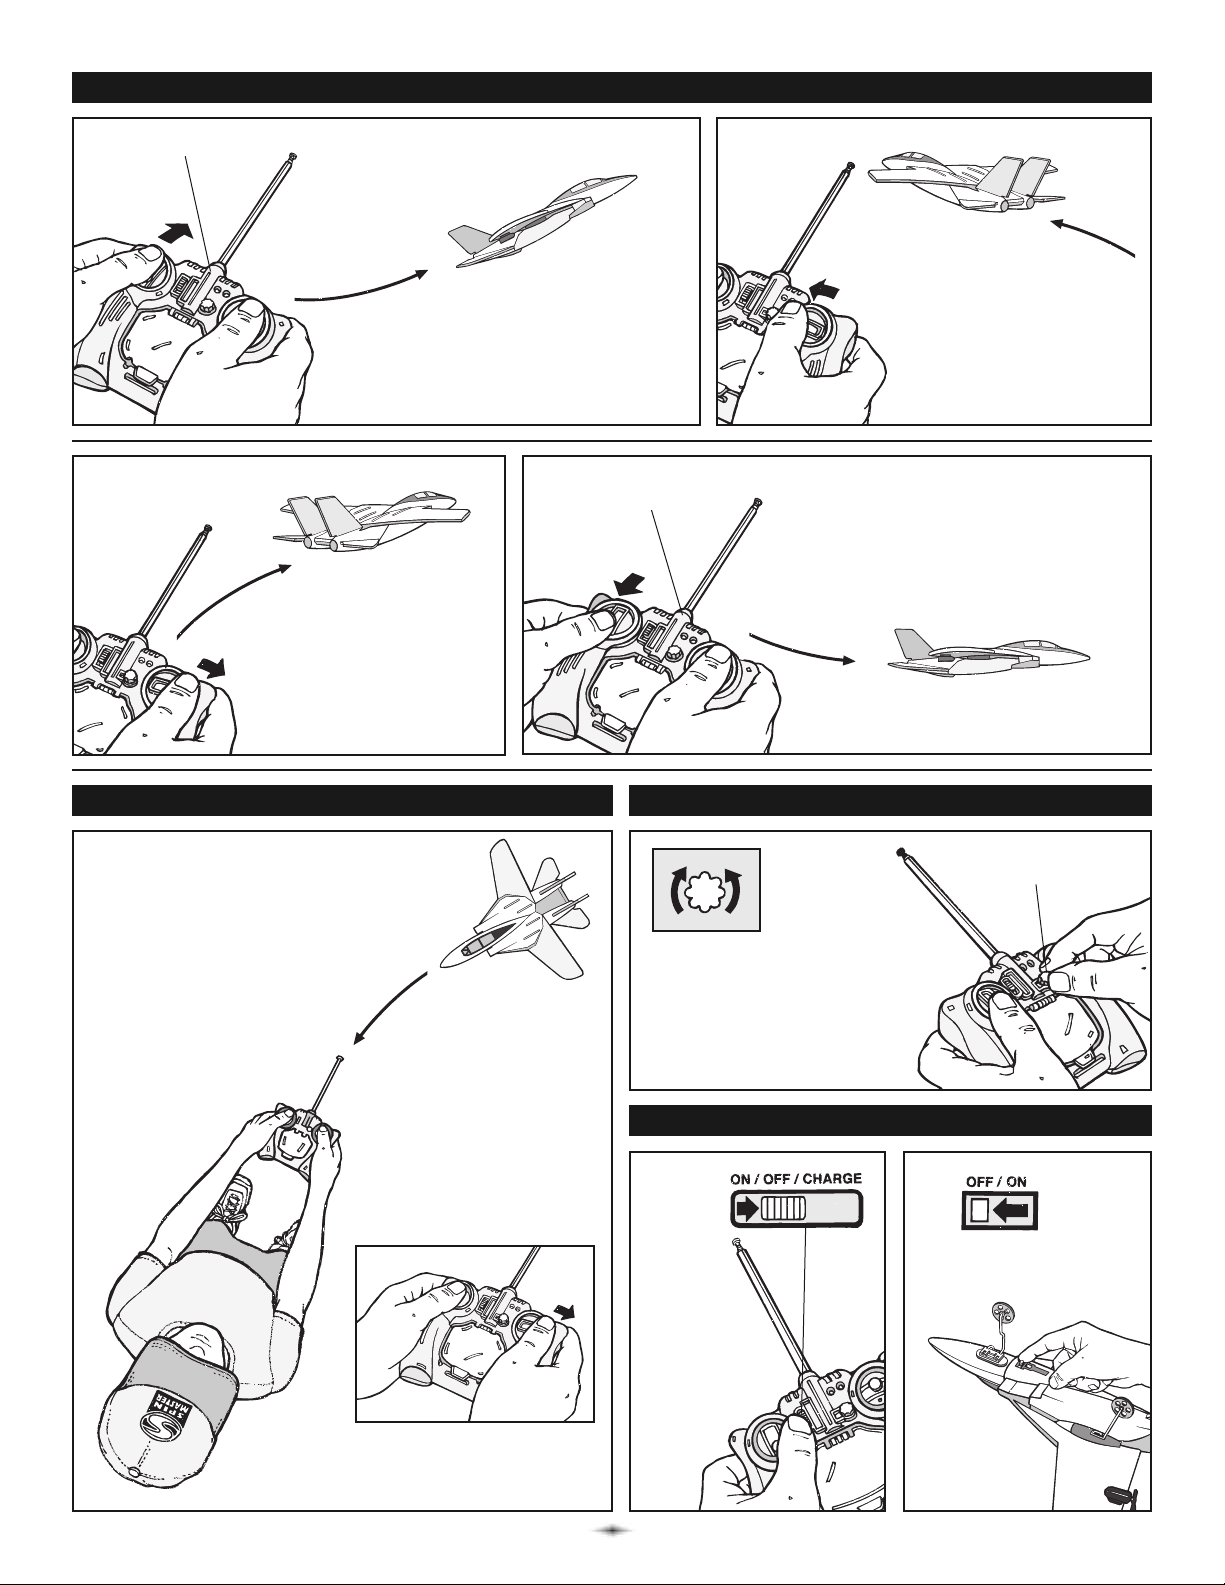
CONTROLLING JET FLIGHT
Turn the
controller/
charger
OFF by
pulling
the switch
down.
LEFT TURN
Move the direction toggle
to the left.
If you want to straighten out
your flight path, turn the
Steering Trim Knob to the
left or right during flight.
FLIGHT ADJUSTMENTS
ONCE THE JET HAS LANDED
Steering
Trim Knob
Controller/Charger
2
1
To ACCELERATE or climb
Push the throttle (left toggle) forward.
RIGHT TURN
Move the direction toggle
to the right.
Controller/Charger
TO LAND
Select a soft grassy area and pull
the throttle (left toggle) back slowly
and then release.
For example: To make the jet
move to the LEFT, move the
toggle to the RIGHT.
CONTROL REVERSAL
IMPORTANT:
When the jet is flying towards
you, the controls are reversed.
Turn jet OFF by
pushing switch to
the left.
3
 Loading...