

Spin Master Toys Far East 44344TX49, 44344TX27, 44344RX49 User Manual
®
TM
INSTRUCTION
MANUAL
ADULT SUPERVISION IS STRONGLY RECOMMENDED WHEN OPERATING THIS TOY
WARNING: Do not fly this toy near tall buildings, trees, or other objects that may cause the toy to
become entangled. Do not operate this toy in high winds, thunderstorms, or wet weather! Do not fly
near airports. Do not fly near overhead power lines. NEVER try to retrieve the kite from power lines
or a power pole. Call your local power company for help. Do not fly over people or pets.
IMPORTANT BATTERY INFORMATION:
Batteries should be installed by an adult.
Ensure battery polarity is correct (”+” positive & negative “-” orientaion).
New alkaline batteries are recommended for best performance.
Do not mix old and new batteries.
Do not mix alkaline, standard, rechargeable or different types of batteries.
Always turn Wind Chaser™ off before installing or removing batteries.
Battery compartment may be hot after use – allow to cool before handling.
Remove used up batteries.
Remove batteries from kite & remote when not in use or when storing kite.
Battery life may vary depending on battery brand.
Do not dispose of batteries in fire as batteries may explode or leak.
Do not recharge non-rechargeable batteries.
Do not short-circuit terminals.
Dispose of batteries safely.
1
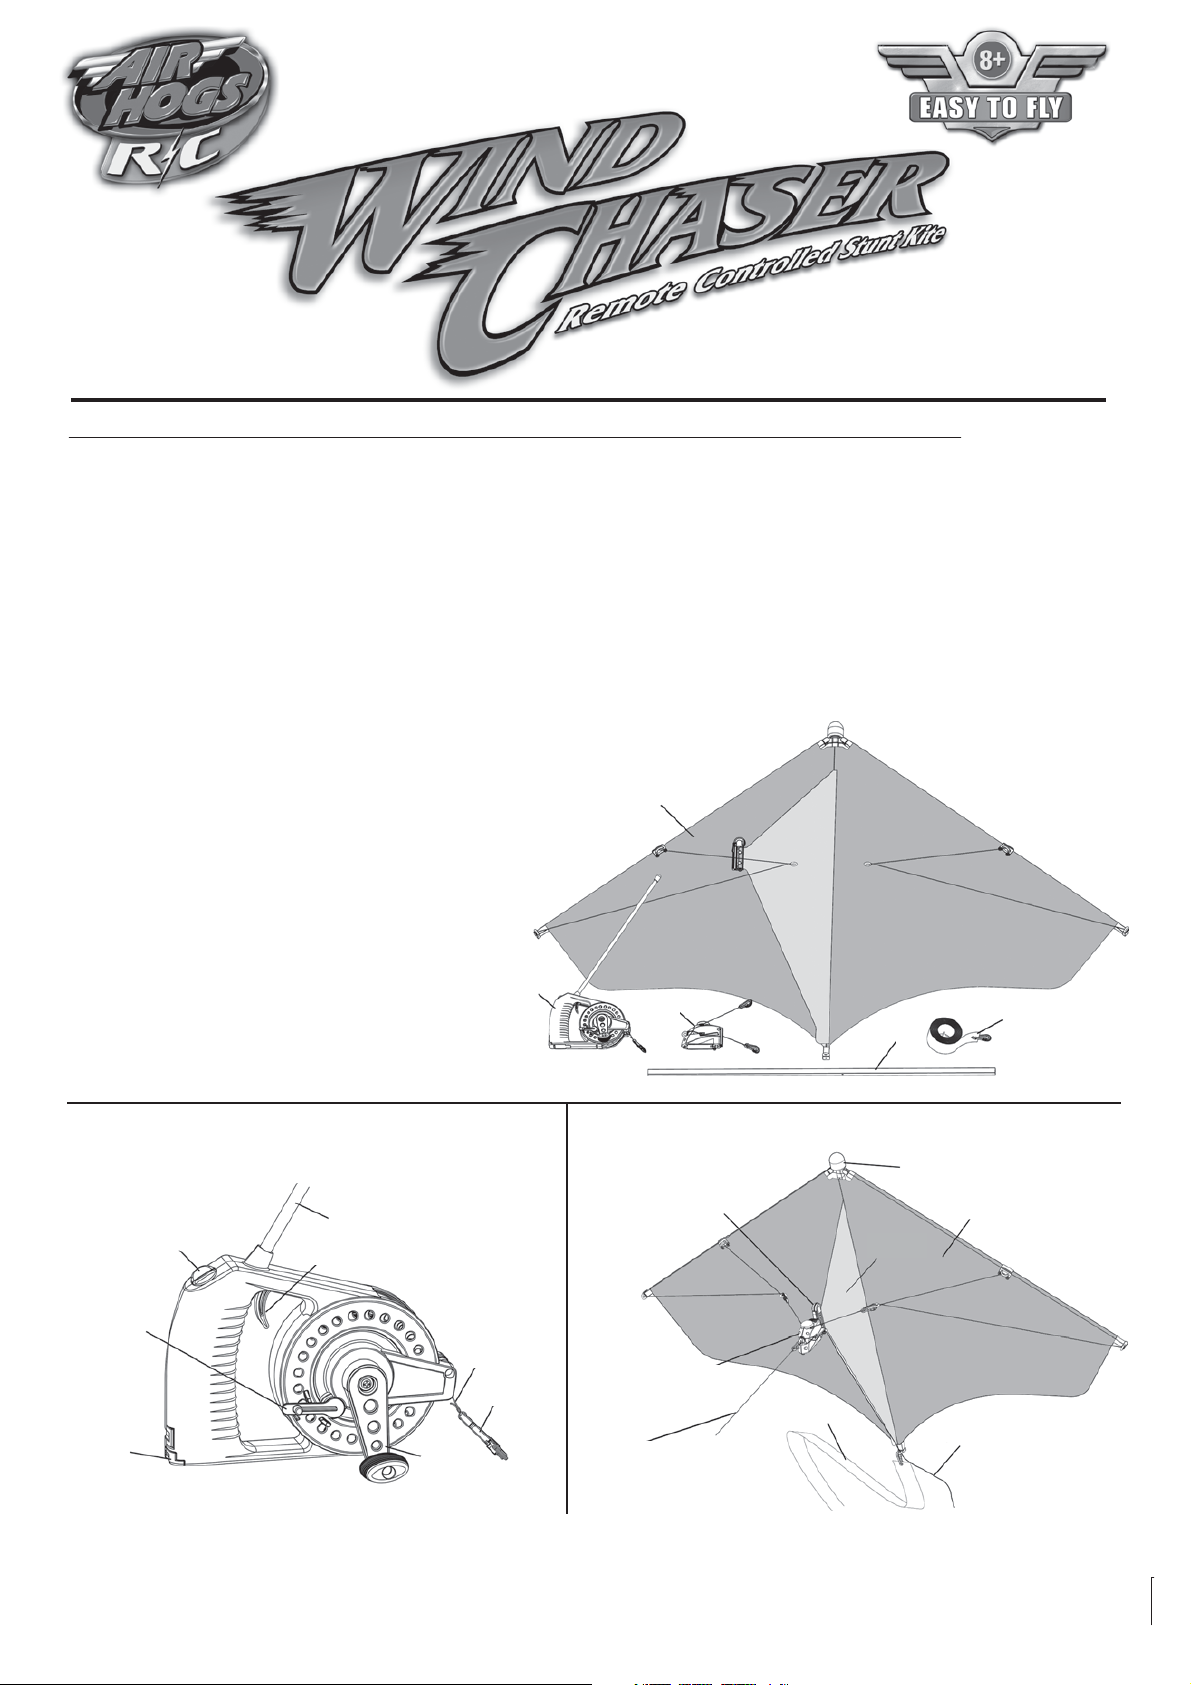
CONTENTS:
Carefully unpack
all contents and
identify the parts
and features shown.
BATTERIES REQUIRED (not included)
2 x AAA alkaline batteries for the kite
1 x 9 volt alkaline battery for the remote
LINE WINDER REMOTE
Radio Control
Stunt Switch
1. Kite
2. Line Winder Remote
3. Steering Servo
4. Horizontal Rod
5. Tail Ribbon
Flexible Antenna
Spool Tension Trigger
2
3
KITE
Steering Servo
Attachment
to Keel
Please read all warnings
and instructions completely
before assembling
and operating this toy.
Keep this instruction
manual for future reference.
5
4
Soft Foam Nose
Kite
Keel
Spool
Lock Lever
Sliding
Battery
Door
1 x 9 volt alkaline
battery required
String
Connector
Spool
Crank Handle
Steering Servo
String from
Line Winder
Remote
Tail
Ribbon
Antenna Wire
(do not cut)
Page 1
Side Rod
Battery Door
New 9 volt alkaline battery
Connector
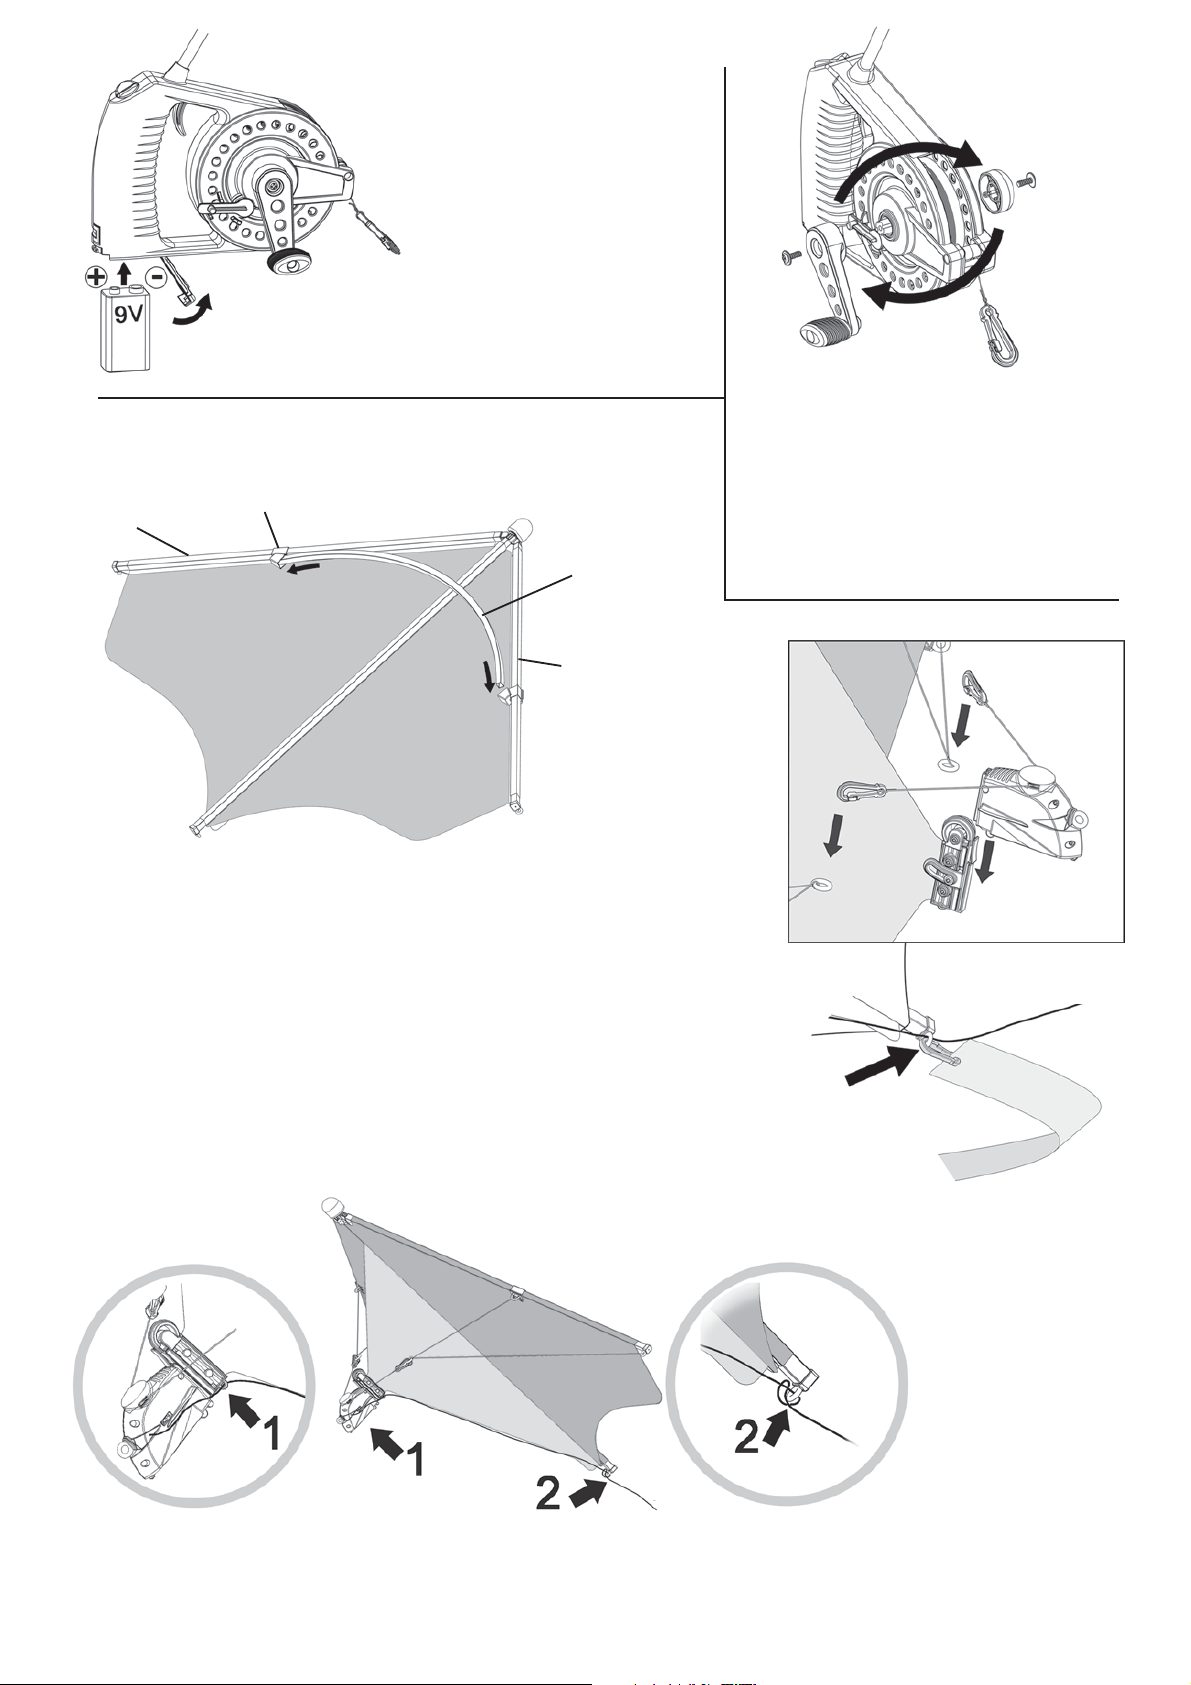
HOW TO INSTALL
THE 9 VOLT BATTERY
IN THE REMOTE
1. Start with a new 9 volt
alkaline battery.
2. Push & slide battery door open.
3. Insert battery following the
polarity (+) & (-) orientation
shown in the drawing.
4. Close battery door & slide to
lock in place.
Horizontal
Rod
OPTIONAL
LEFT HANDED
CONVERSION
Left-handed cranking is possible by
switching the cranking handle to the
opposite side of the remote (remove
two screws as shown).
NOTE: Left side cranking will prevent
Spool Lock Lever from locking
automatically when crank is turned.
Spool Lock Lever must be operated
manually.
Side Rod
Figure 2
Figure 1
HOW TO ASSEMBLE THE KITE
1. Open kite up.
2. Slightly bend Horizontal Rod & insert rod ends into Connectors
located on the Outside Rods as shown in Figure 1.
3. Slide Steering Servo onto attachment point on tip of Keel as shown in
Figure 2. (Steering Servo must slide all the way down to LOCK in place)
4. Attach left & right side Steering Clips from Steering Servo to left & right side
Rings on strings attached to the kite as shown in Figure 2.
5. Carefully insert RC antenna wire in the ring on the Steering Servo & then into
the ring at the bottom of the center rod of the kite as shown in Figure 3.
6. Attach Tail Ribbon onto the ring at bottom of center rod as shown in Figure 4.
(Tail Ribbon is necessary for stable flight)
Figure 3
RC Antenna Wire Routing
(do not cut)
Ring
KITE
Clip on at
bottom eyelet
TAIL RIBBON
Steering Clip
Steering
Servo
Keel
RC WIRE
Figure 4
Steering Servo
Loosely
Tie Antenna
Wire to
Ring
Wire
Page 2
 Loading...