

Page 1
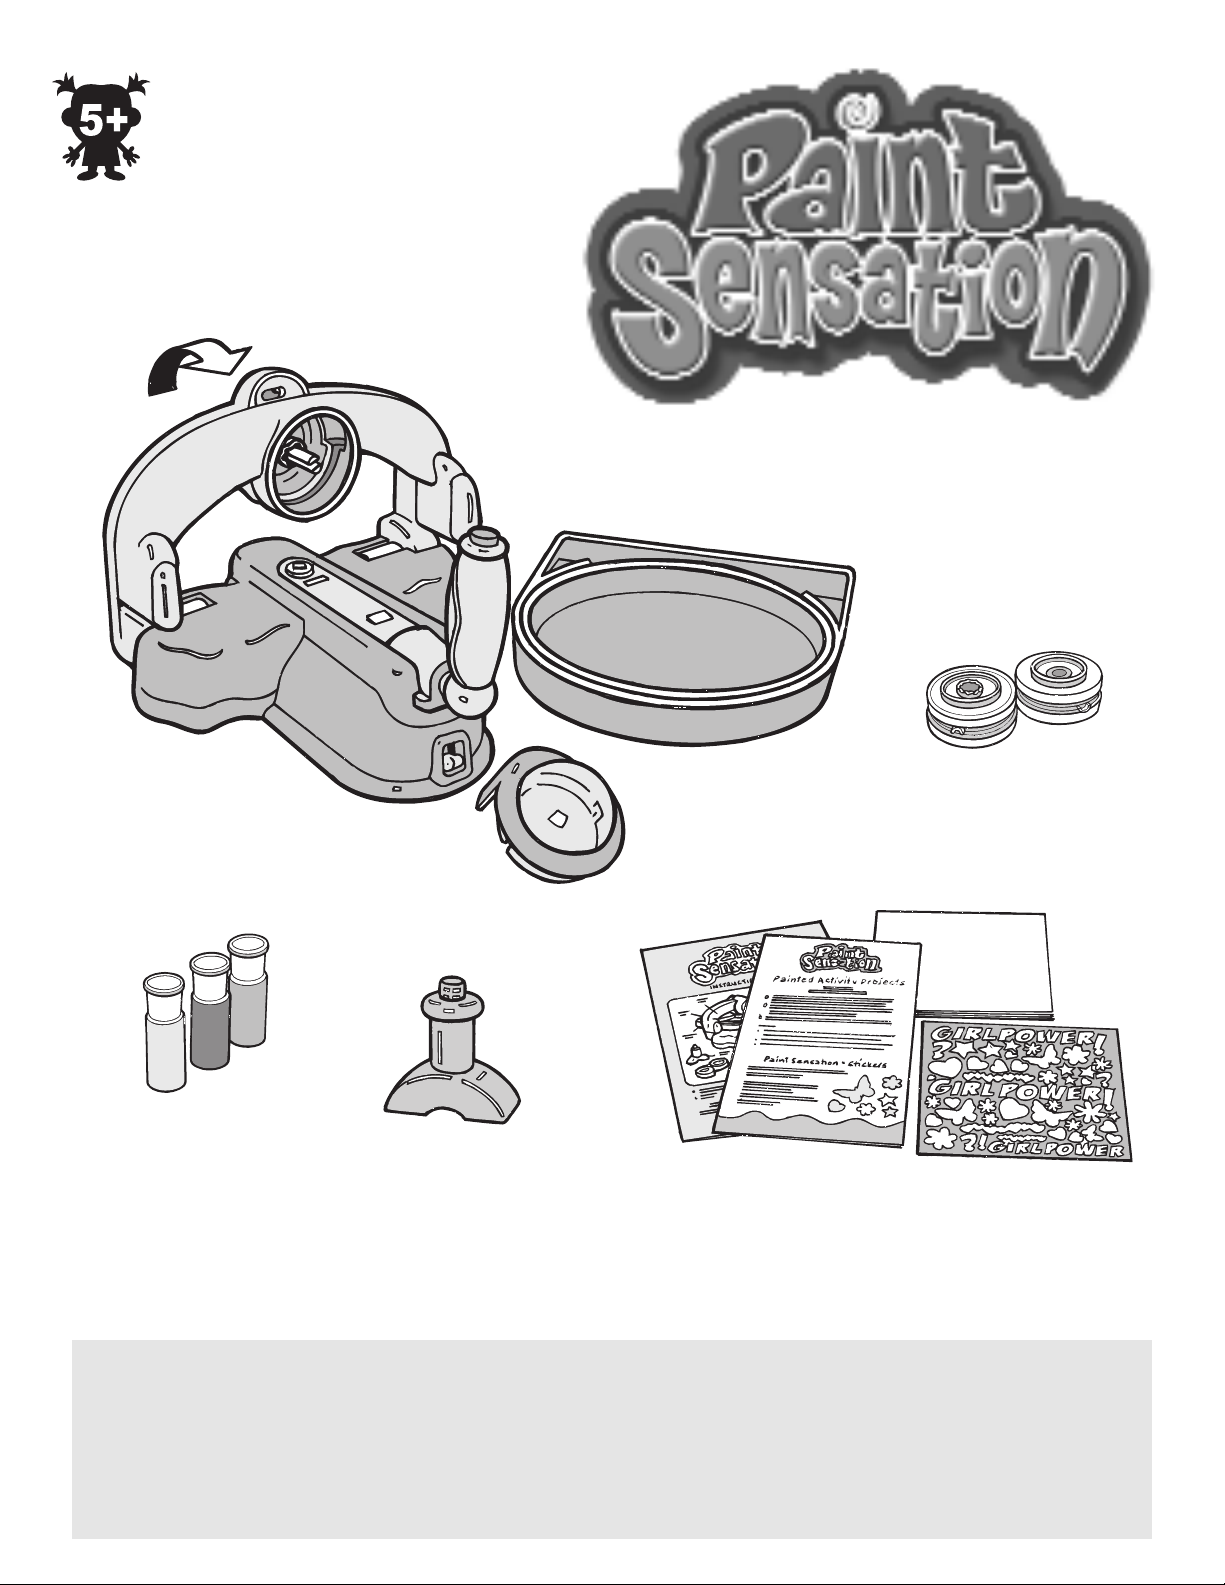
Arm
Cover
Axle
Paint
Button
Control
Handle
Spinning
Tray
Button
Paint Containers
• Design COOL ART and CRAFTS with Paint Sensation™!
Swirl
Clear
Control
Arm
“ON/OFF”
Switch
Cleaning Tool
Dome
• Paint on whatever you can fit into the Spinning Tray!
2-sided Paint
Canisters
Please remove everything from the packaging and compare to the contents shown on this page.
If any items are missiont, please call Spin Master’s customer care hotline: 1-800-622-8339.
Product and colours may vary
.
Keep these instructions for future reference as the contain important information.
Page 2
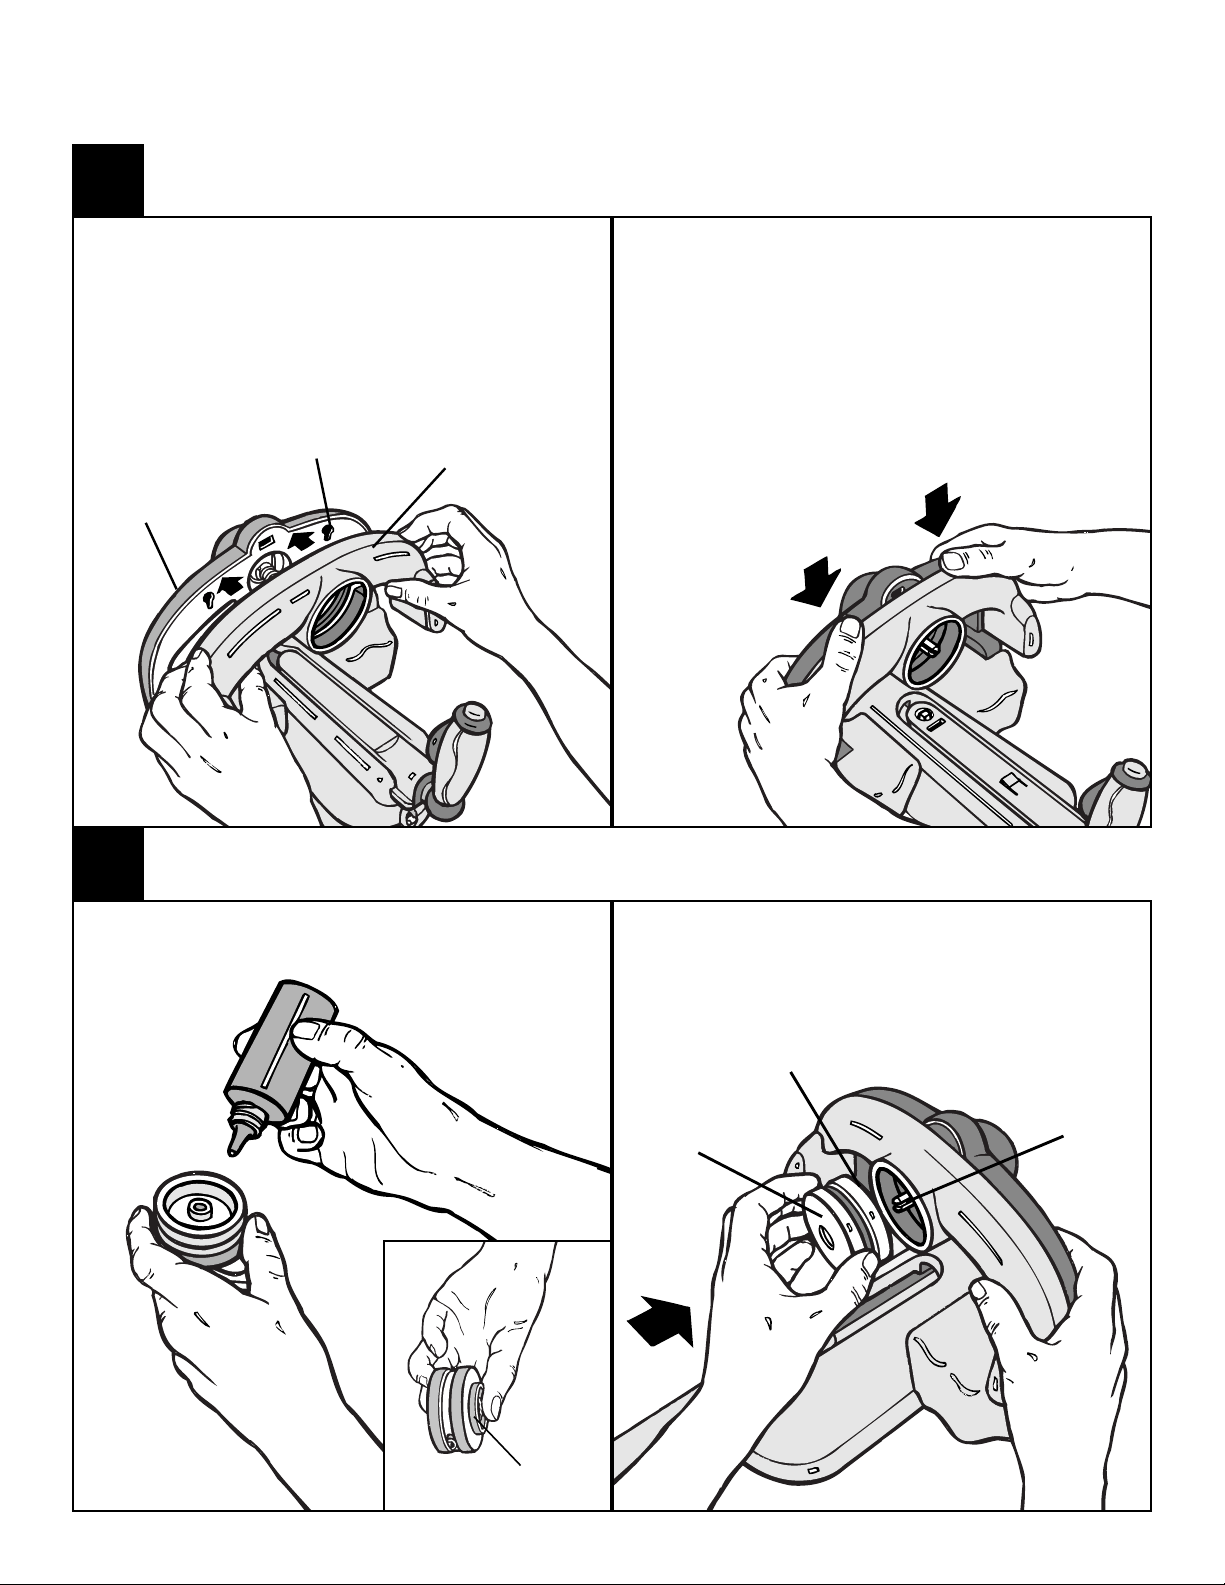
ASSEMBLY
1
A. Raise the Paint arm to an upright position.
Key Hole Slot
Arm Cover
Paint Arm
B. Push down until the Arm Cover clicks into
position.
Push Down
2
A. Remove lid. Fill Paint Canister 3/4 full.
Note: The orange gear in the centre of the
canister must face the axle. Push until you
hear a click.
Orange Gear
Paint Canister
Axle
Orange Gear
Page 3

ASSEMBLY (CONTINUED)
3
Cover the Paint Canister
with the Clear Dome,
turning it clockwise,
until it locks into place.
Clear Dome
4
Pull the Control Arm out and position the
Bottom Paint
the control arm, as shown.
Control Arm
Tray into the slot in the centre of
Bottom Paint Tray
Place Spinning Tray into the Bottom Paint
Tray and rotate it until it slides down and into
place.
our Own Paint
ou are ready to Create
Y
Sensations
™
!
Y
Spinning Tray
Page 4

CREATING
Try experimenting with each of the 3 controls. Experimenting will lead you to discover how
to make endless designs with Paint Sensation™! Paint Sensation™has 3 control locations:
1
Pressing or Pulsing the Paint Button
“ON/OFF” Switch
DESIGN TIP: You will get
different designs depending
on how you use the Control
Arm, Paint Button and
Swirl Button.
controls how fast paint comes out
of the Paint Canister.
Place paper or any 3D
object less than 1” high
into the Spinning Tray.
Turn Unit “ON”.
2
Pressing the Swirl Button controls the
Spinning Tray. Slowly pulse the Swirl
Button. This will move the tray a little at
a time and will give you straight paint
lines. Or hold the swirl button down for
longer bigger swirls.
3
Moving the Control Arm in or out lets you control
where the paint goes onto your art.
Page 5

CLEANING
1
Each Paint Canister has tiny holes that the paint
comes out of. If these holes get blocked you
can’t paint. The Cleaning Tool unblocks the
Paint Holes. To use the Cleaning Tool, insert as
shown. Align half-moon curve on the Paint
Canister with the docking curve in the Cleaning
Tool.
• Remove the Arm Cover, Trays, Clear Dome and Paint Canisters from Paint Sensation™.
• Rinse or soak each one with warm water and soap.
Hold the Arm Cover upside down under warm running water.
•
• Rinse until all parts are clean.
Allow to dry.
•
Half Moon Curve
Paint Hole
2
Wiggle the Paint Canister until the raised Center
Circle on the Paint Canister lid fits snugly into
the half circle in the Cleaning Tool base.
Raised Center Circle
3
Press the button on the Cleaning Tool to clean
the hole.
Always release button on the Cleaning Tool
before removing Paint Canister from the
Cleaning T
hole in the Paint Canister
WARNING: Cleaning Tool contains a
functional sharp point.
Cleaning
ool. Repeat to clean the second
.
ool
T
Press Button
to clean Paint Hole
Half Circle
Page 6

TROUBLESHOOTING
Paint is not coming out when I press the
Paint Button.
The Paint Canister does not have enough paint in it. Refill with fresh paint.
•
• The Paint Canister holes are blocked. Read the section on Cleaning Tool
under Cleaning Paint Canisters in these instructions.
Paint is dripping onto my creations.
• Paint can build up in the Arm Cover after frequent use. Remove
the Arm Cover and rinse with warm soapy water. Reattach to the Paint Arm.
The paint comes out too fast.
I can’t make my designs look
• Try pulsing the Paint Button
• Slow down how fast you are moving the Control Arm back and forth.
like swirls.
Paint SensationTM has no power.
• Make sure the ON/OFF button is in the ON position.
• Batteries may need replacing. Ask a parent to replace the batteries.
I can’t get water out from inside the Arm
Cover after it has been washed.
Cleaning Tool button will not depress.
• Shake out as much water as possible after cleaning. Residual water will
evaporate and will not affect the toy’s performance.
• The Half Moon Tool Guide has not connected with the Tool Guide inside the
Cleaning Tool. Reposition and reinsert until the Cleaning Tool Button
depresses.
BATTERY INSTALLATION
1. Use a phillips screwdriver (not provided) to loosen the battery compartment door hold down screws.
Remove the battery compartment door.
2. Install four 1.5-Volt “C” alkaline batteries (not included). Be careful to align the positive (+) and (-) polarities with the
corresponding markings inside the battery compartment.
3. Replace the battery compartment door and refasten the screws.
4. Batteries are not included.
IMPORTANT BATTERY INFORMATION
Paint-Sensation
turned over to access the
Battery Compartment
™
• Battery installation and change of battery should always be performed by an adult.
• Be careful to install the batteries with the correct polarity as indicated.
• Do not mix alkaline, standard (carbon zinc), rechargeable (nickel cadmium or
Battery
Compartment
Door
nickel-metal hydrate) batteries.
• Different types of batteries or new and used batteries are not to be mixed.
• Use Alkaline batteries for better performance.
• Non-rechargeable batteries are not to be recharged.
• Rechargeable batteries are to be removed from the toy before being charged
Four
1.5-Volt
“C”
Batteries
(if removable).
• Exhausted batteries are to be removed from the toy.
• Only batteries of the same or equivalent type as, recommended are to be used.
• The supply terminals are not to be short circuited.
• Do not mix old and new batteries.
• Products with non-replaceable batteries are not to be disposed of in a fire
as the batteries inside may explode and leak.
• Dispose of batteries safely.
• Do not use rechargeable batteries.
Battery Compartment
CAUTION: Changes or modifications to this product not expressly approved by party responsible for compliance may
void the user’s authority to operate the equipment. This product may stain or stick to some surfaces. Protect play area
before use. Use damp cloth with warm water and soap to remove stains from clothing, carpeting and other surfaces that
the item is likely to come in contact with. SAFETY
TESTED. Remove all packaging material before giving the toy to your
child. Please retain this information for future reference.
Spin Master Ltd., 450 Front Street West, Toronto, ON M5V 1B6 Canada
Web: www.spinmaster.com Email: toys@spinmaster.com
Manufactured for and distributed by Spin Master Ltd.
Conforms to safety standards ASTM F963-03, ASTM D-4236 & EN71,
Regulatory Requirements. Products and colors may vary. MADE IN CHINA.
Item #70658 US-ENG-70658-IS-5
 Loading...