

Page 1
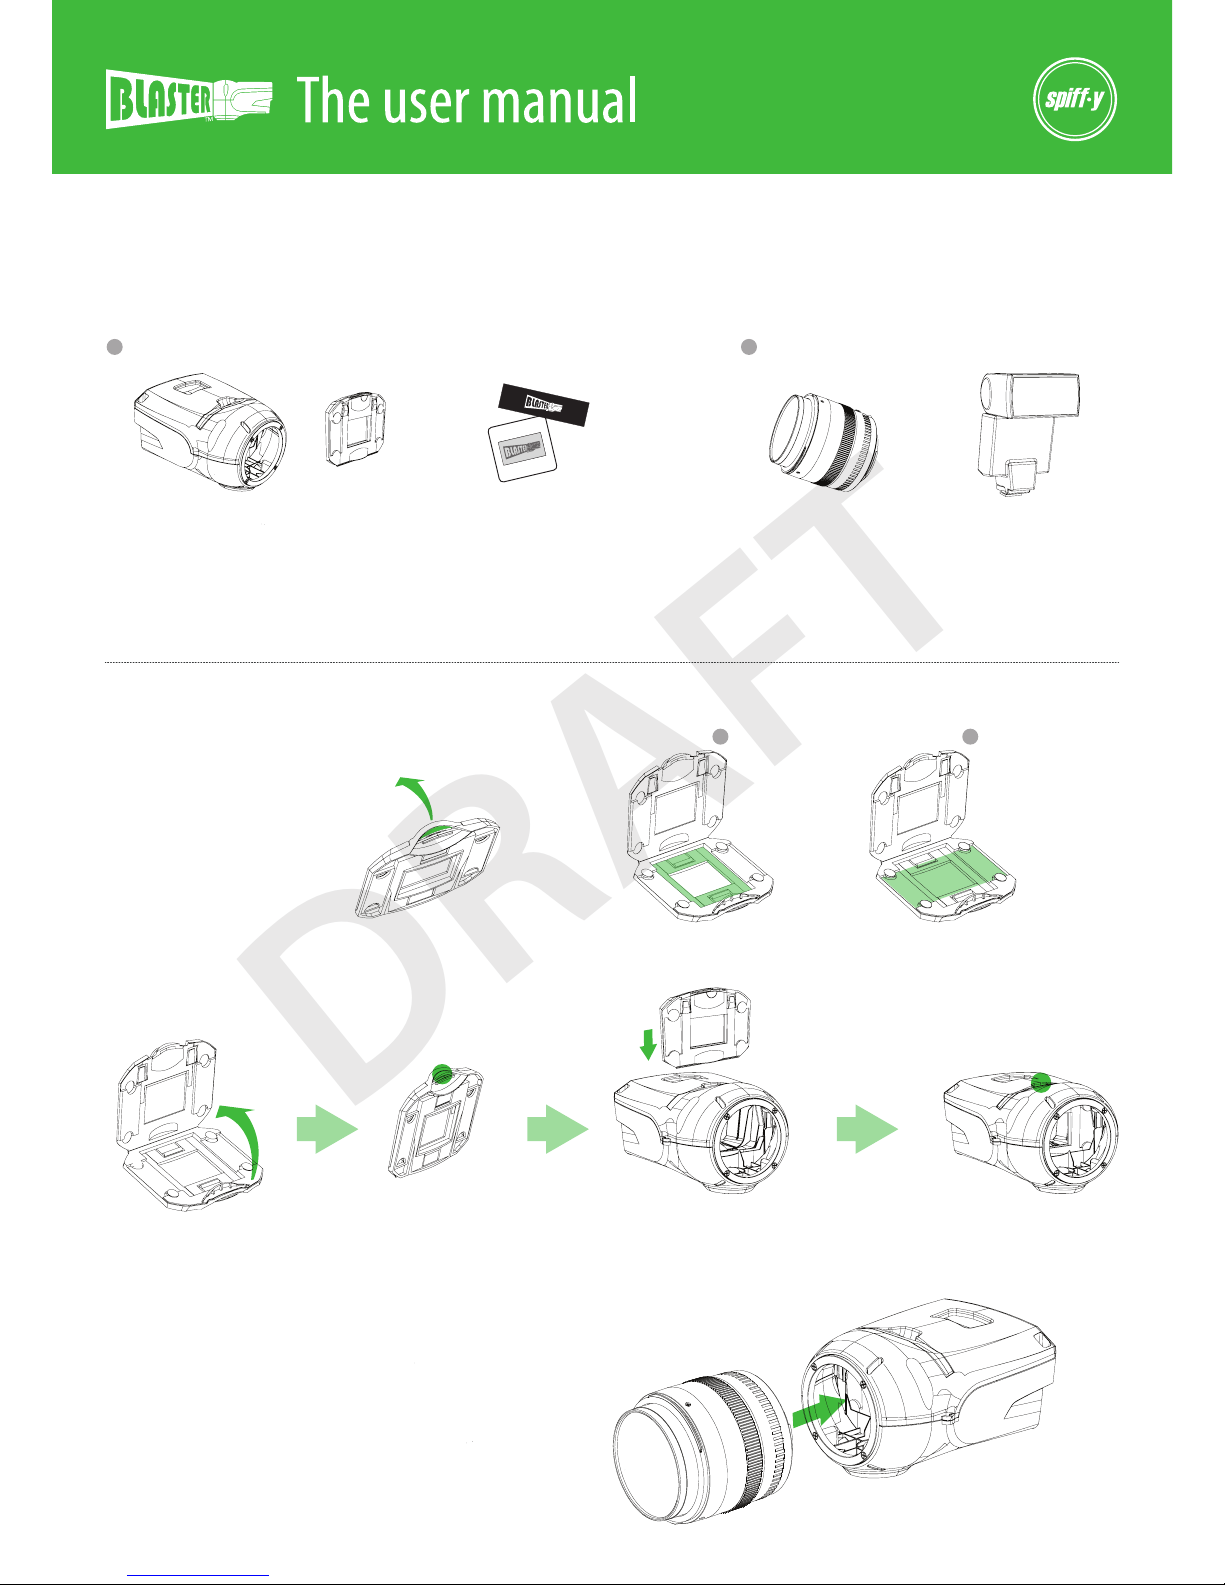
Congratulations! You have just opened the box of the most
creative piece of photography gear on earth – The Blaster™
Here is what you need to get started:
1 Slide cartridge
Before we start, a quick warning. The blaster is a powerful creative tool. It can be used for projecting on walls, seamless
backdrops, rocks and even human beings. As such, it is capable of altering reality, use it with caution.
“With great power, comes great responsibility”
Placing a Slide or a Transparency:
Mounting a Lens:
Slides Transparencies/
unframed lm
From Us: From You:
1. Open the slide cartridge by pressing down
the area (marked here in green).
If you own a diernt type of lens, you can mount it to the Blaster with a relevant lens adapter (e.g., Nikon to Canon adapter, sold separately).
2. Place the slide/transarency/unframed film in the right socket.
Push it into the cartridge slot...
A strobe
3. Close the cartridge.
...till you hear the click.
The Blaster™
Use the metal bayonet on the front side of the blaster to place and rotate a
Canon lens. You should rotate the lens until it fits firmly.
The Blaster is compatible with all EF and EF-S Canon lenses. The larger the max
aperture is the more light the blaster will pass through.
A lens
Note that there will not be an audible click
as the one you hear when you mount a lens
on a camera.
Slide or transparency
click!
DRAFT
Page 2
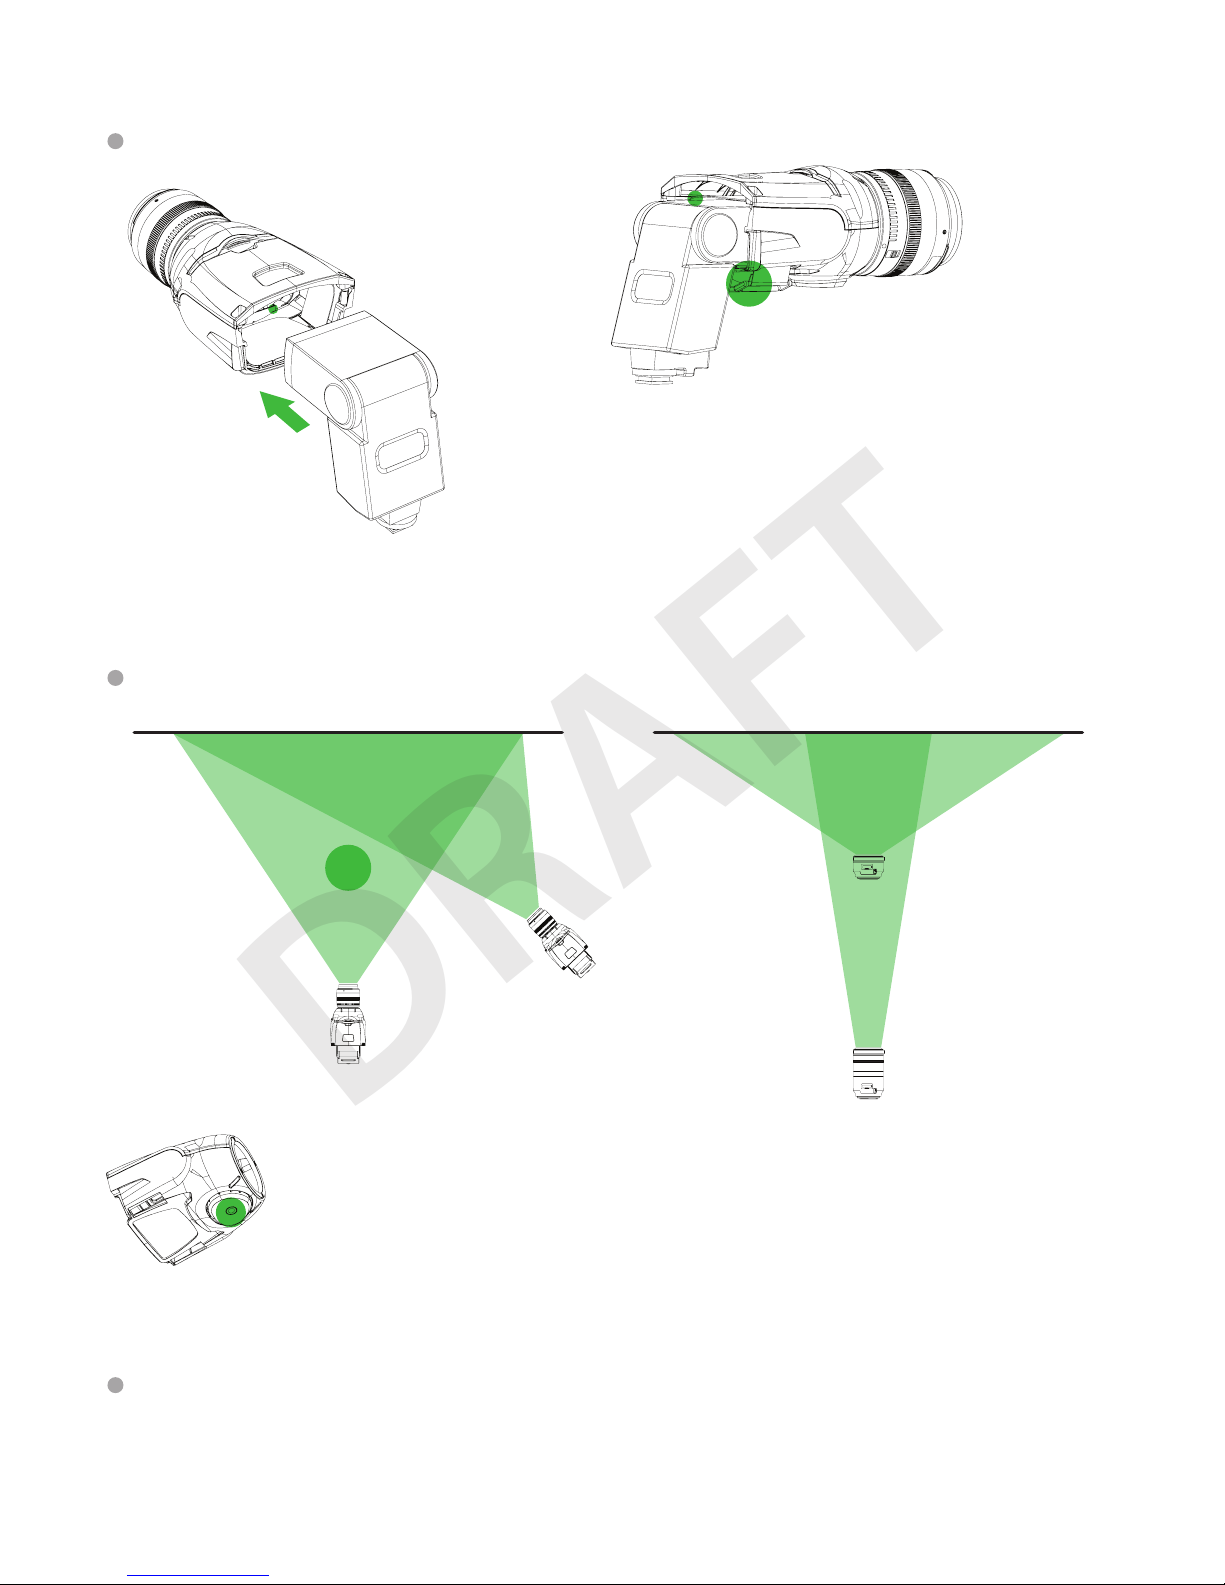
Mounting a Strobe:
The Blaster is compatible with most commercial hot shoe strobes.
Projecting Images:
Once you have the lens, strobe and slide mounted, it is time to project slides.
Printing Slides:
1. Place the strobe in the back of the blaster
and slide it in until the stopper prevents
it from moving forward.
2. Use the attached strap to lock it into position.
To get the strobe ring when you shoot , the strobe should be synced to the camera via
a cable, a wireless trigger or a camera syncing mechanism like Nikon CLS or Canon
wireless ETTL.
Focusing: Use the attached transparencies to focus the lens; set the lens's focus so the projected patterns will be sharp.
You can now use your slide or transparency.
* Our team searched the earth for interesting slides. We went high and low, across valleys, mountains and remote markets to bring you the best collection of totally random slides.
Feel free to use these slides for your personal work. If people appear in the slides, you will need to obtain a model release from them before publishing the work.
* Nikon and Canon Trademarks are the property of their respected owners.
Ver006_22042013
The Blaster can be mounted on a tripod
or light stand using the tripod thread on the
bottom of the unit.
If you want to explore more creative options, you can use one of the Blaster
creative kits found on www.light-blaster.com/creative-kits or print your
own slides. You can use the template located at http://light-blaster.com to
print and cut transparencies to match your creative vision.
A long focal lens (i.e., a tele lens)
creates a tighter projected image
suitable for projecting a small or
distant area.
Placing the Blaster to the side
of the model will provide a
projection that does not spill
on the subject.
Placing the Blaster in front of the
projected surface will provide
the straightest projection.
A short focal lens (i.e., a wide lens)
projects onto a larger area.
DRAFT
 Loading...