

Spieltek Admiral Gaming Chair, Berserker Gaming Chair User Manual
Lift
Lock
Unlock
Lock/
Unlock
Lift
Gaming Chair
Precautions
•
Make sure this product is intact and that there are no missing parts.
• Do not sit close to the front of the chair—sit all the way back.
• Do not dismantle the gas lift for any reason.
• Clean the chair with only a soft, dry cloth.
• Make sure everything is secure before use.
• Use the chair on a flat surface only.
• Do not stand on the chair.
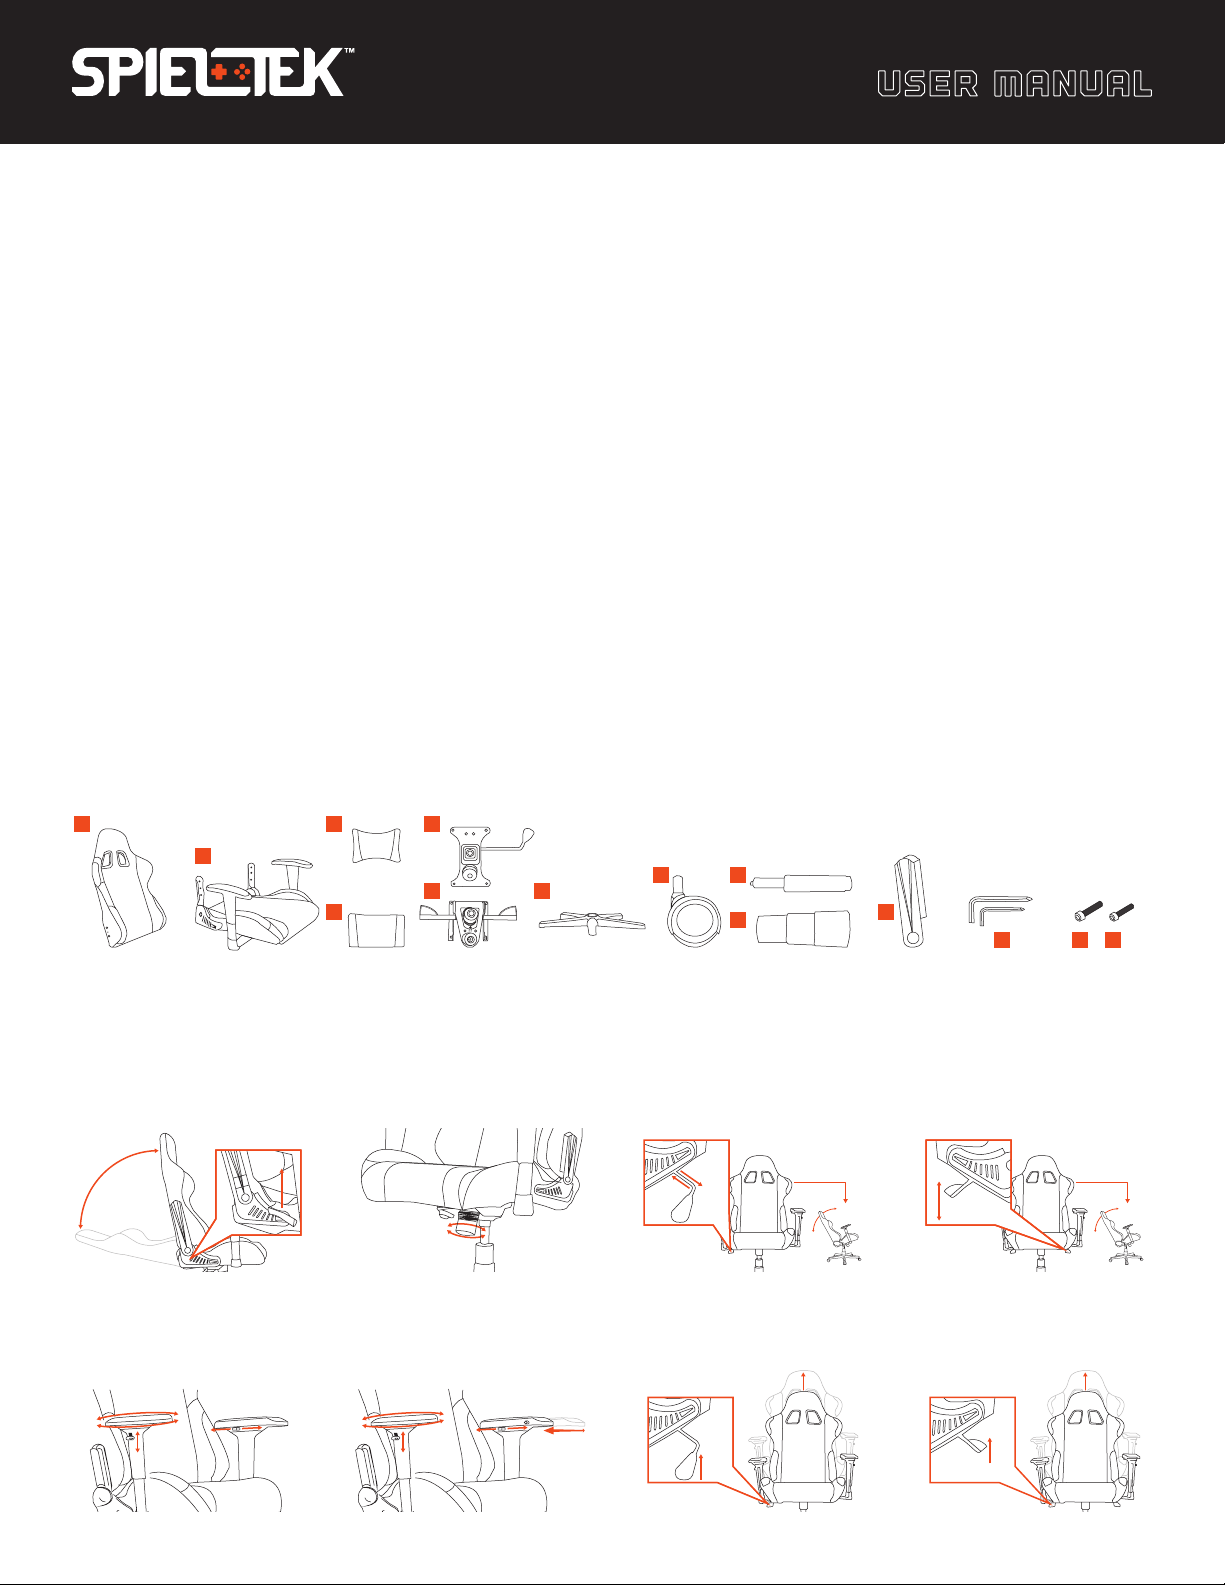
Parts and Supplies
A. Seat back
B. Seat base
C. Headrest pillow
D. Lumbar pillow
1
Some screws may arrive preinstalled.
A
B
E. Tilt mechanism
F. Five-star wheel base
G. Casters × 5
H. Gas lift piston
C
D
•
Do not put your weight only on the backrest while the chair is in a
fully reclined position.
• Do not let anyone press down on the backrest while the chair is in a
fully reclined position.
• Do not seat more than one person at a time in this chair.
• All images are for illustrative purposes only.
I. Piston cover
M. M6 screw × 2
1
J. Upper side covers × 2
K. Hex key × 2 (M8)(M6)
L. M8 screw × 8
E1
E2
F
G H
1
I
J
K L M
Adjusting the Chair
Seat-Back Tilt Adjustment Chair Tilt Tension Chair Tilt
Single-Arm Mechanism Dual-Arm Mechanism
Armrest Adjustments Chair Height Adjustment
3D Armrest 4D Armrest Single-Arm Mechanism Dual-Arm Mechanism
Rotate
Up/Down
Forward/
Backward
Rotate
Up/Down
Forward/
Backward
Inward/
Outward
Gaming Chair
Assembly Instructions
To avoid scratching, lay down a towel or other soft material
where you’re going to assemble the chair. The chair shown
in the photos might be a different model, but assembly is
the same for all models. It may be necessary to remove
the preinstalled screws before assembling some parts
of the chair. We recommend assembling the chair with
two people.
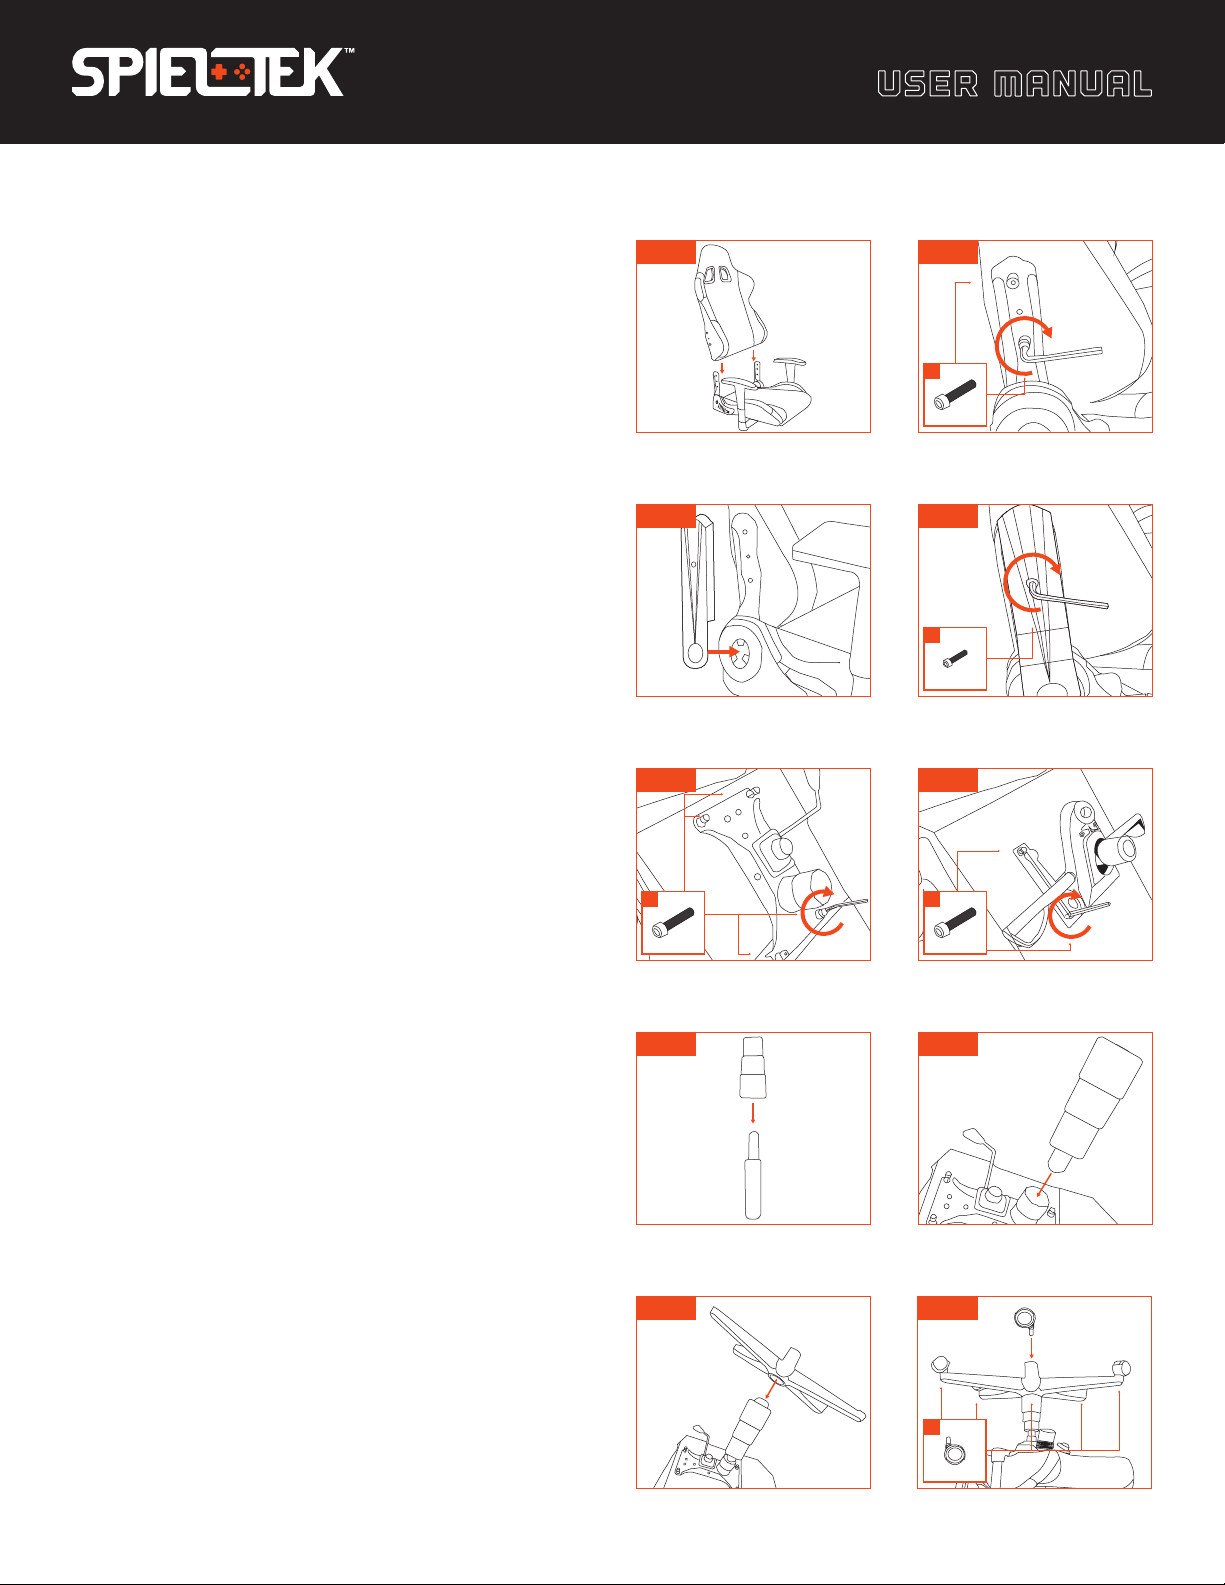
1. Place the seat base flat on a soft surface.
2.
Align the seat back with the seat-back brackets
attached to the seat base. Make sure the brackets are
pointing up at 90°. It may be necessary to remove any
fabric to ensure the screws can be inserted properly
[ Fig. 1 ].
3.
Use the M8 hex key and screws to secure the seat
back to the seat-back brackets on each side [ Fig. 2 ].
4.
Attach the upper side covers into the lower side cover’s
snap fastener [ Fig. 3 ].
5.
Secure the upper side covers using the M6 screws
and hex key [ Fig. 4 ]. Make sure not to overtighten the
screws.
Fig. 1 Fig. 2
L
Fig.3
Fig. 4
M
Fig. 5 Fig. 6
x
4
x
2
6. Flip the chair over.
7.
Align the tilt mechanism with the four M8 holes on the
bottom side of the seat base. Make sure the tilt tension
knob is toward the front of the chair.
8.
Use the M8 screws and hex key to fasten the tilt
mechanism to the underside of the seat base
(Single-Arm Mechanism [ Fig. 5 ], Dual-Arm Mechanism
[ Fig. 6 ]).
9. Place the piston cover over the gas lift piston [ Fig. 7 ].
10.
Insert the smaller end of the gas lift piston into the
center port of the tilt mechanism, and press down
firmly [ Fig. 8 ].
11.
Align the hole in the wheel base with the base of the
gas lift piston, and press firmly until secure [ Fig. 9 ].
12.
Insert the casters into the holes on the wheel base
[ Fig. 10 ].
13.
Flip the chair upright onto the wheels and make sure
everything is secure before use.
L
x
4
L
x
4
Single-Arm Mechanism Dual-Arm Mechanism
Fig. 7 Fig. 8
Fig. 9 Fig. 10
G
x
5
www.spieltekgaming.com
GG2
 Loading...