

Page 1
Page 2

WWeellccoommee
D-90 is a dual-GSM mobile phone, which supports GPRS (hereafter referred to as
“phone” or “phoneset”) . It is able to support two different SIM cards from different networks,
with 262K color TFT display, 64 polyphonic ringtones, MP3/MP4 multimedia player and
2.0 megapixel camera, WAP service, Opera Mini 3, Bluetooth, common PDA functions,
and can be used as a USB mass storage.
This phone has two SIM slots for two different SIM cards. The SIM card inserted in the slot
1 is called Master SIM, and the other one in the slot 2 is Slave SIM. With this phone, you
can select which SIM you want in operation. This is a great idea if you have a business
SIM card and a personal SIM card, for you won’t have to carry two phones or two SIM
cards anywhere.
The mode of Slave SIM can’t support EMS, STK, Chat, Voice Mailbox, Fixed Dialing,
Opera Mini 3, Three-party call and conference call.
Note: In this user manual, to “press” a key means to press shortly; to “long press”
a key means to press and hold for a while (> 2 seconds).
² Please carefully read this manual before you use the phone.
² For a newly bought phone, charge it for 4 hours before the first time of use, and
charge the second time only after the power has been used up. Repeat this several
times, and the battery will reach the best use effect.
² This manual is for illustration purposes only. The phone and its accessories are
subject to update without notice.
Page 2 of 58 Copyright©2008 Spice Mobiles Ltd.
Page 3

Table of Contents
Welcome.....................................................................................................................2
1 Safety.......................................................................................................................7
1.1 Notice to the Use of Phone..........................................................................7
1.2 Notice to the Use of Battery and Charger .................................................8
2 Introduction........................................................................................................10
2.1 Phone and Accessorie s...............................................................................10
2.2 Specifications...............................................................................................10
2.3 Standby Time / Max. Talk Time.................................................................10
2.4 Name and Functions of the Parts of the Phone...................................... 11
2.5 Description of Display Contents................................................................12
2.6 About SIM Card and the Battery...............................................................13
2.7 To switch on and off....................................................................................17
2.8 Standby Mode..............................................................................................17
2.9 View the phone info....................................................................................17
2.10 Operation in idle........................................................................................17
2.11 To make calls..............................................................................................18
2.12 Key Lock......................................................................................................18
3 Phone Book ..........................................................................................................19
3.1 To add name cards......................................................................................19
3.2 To search the phone book..........................................................................19
3.3 To dial a number from the phone book...................................................19
3.4 To view a name card...................................................................................19
3.5 To modify a name card...............................................................................20
3.6 To delete a name card................................................................................20
3.7 To Multi Delete name cards........................................................................20
3.8 To copy / move / duplicate a name card.................................................20
3.9 To send SMS/MMS.......................................................................................20
3.10 To send name cards..................................................................................20
3.11 To import / outport name cards..............................................................21
3.12 To set Caller Group....................................................................................21
3.13 Memory Status of Phone Book................................................................21
3.14 To set storage location .............................................................................21
3.15 Fields Setup................................................................................................21
4 Calling....................................................................................................................22
4.1 To make an Emergency Call.......................................................................22
4.2 To answer a call...........................................................................................22
Page 3 of 58 Copyright©2008 Spice Mobiles Ltd.
Page 4

4.3 To reject a call..............................................................................................22
4.4 To send SMS when a call is incoming.......................................................22
4.5 To dial international numbers....................................................................23
4.6 To insert a pause symbol when dialing....................................................23
4.7 Speed Dialing................................................................................................23
4.8 Fixed Dialing.................................................................................................24
4.9 SIM Card Location Dialing..........................................................................24
4.10 To redial......................................................................................................24
4.11 To dial from the Phone Book...................................................................24
4.12 To call the sender from the Inbox...........................................................25
4.13 To be mute during a call...........................................................................25
4.14 To adjust volume of the receiver during a call......................................25
4.15 To search a phone number during a call...............................................25
4.16 To activate/deactivate handsfree earpiece............................................25
4.17 DTMF (Dual Tone Multi-Frequency) Tone..............................................25
4.18 An incoming call from another network during a call..........................25
4.19 Simultaneous incoming calls from two networks.................................25
4.20 Call Divert...................................................................................................26
4.21 Call Hold......................................................................................................26
4.22 Call Waiting.................................................................................................26
4.23 Three-party Calling....................................................................................26
4.24 Restrict Calls...............................................................................................27
5 Call History...........................................................................................................28
5.1 Missed Calls/Dialed Calls/Received Calls..................................................28
5.2 Delete Call Log.............................................................................................28
5.3 Call Time.......................................................................................................28
5.4 SMS/GPRS Counter......................................................................................28
6 Message................................................................................................................29
6.1 Send Master SIM SMS.................................................................................29
6.2 Send Slave SIM SMS...................................................................................29
6.3 SMS Inbox.....................................................................................................29
6.4 SMS Sentbox.................................................................................................30
6.5 SMS Draftbox................................................................................................31
6.6 PUSH Message.............................................................................................32
6.7 SMS Setup.....................................................................................................32
6.8 To send MMS................................................................................................32
6.9 MMS Notify....................................................................................................33
6.10 MMS Inbox..................................................................................................33
Page 4 of 58 Copyright©2008 Spice Mobiles Ltd.
Page 5

6.11 MMS Sentbox.............................................................................................34
6.12 MMS Draftbox.............................................................................................34
6.13 MMS Setup..................................................................................................35
6.14 Use Template..............................................................................................35
6.15 Chat.............................................................................................................35
6.16 Voice Mail....................................................................................................36
6.17 Cell Broadcast Message (SMS-CB)..........................................................36
7 Settings .................................................................................................................37
7.1 Phone Setting...............................................................................................37
7.2 Call Setting....................................................................................................38
7.3 Network Setting............................................................................................38
7.4 Security Setting............................................................................................39
7.5 USB Link........................................................................................................40
7.6 Phone Number..............................................................................................41
7.7 Standby Mode...............................................................................................41
7.8 Restore Factory Setting...............................................................................41
8 Multimedia ...........................................................................................................42
8.1 Capture Image.............................................................................................42
8.2 View Image...................................................................................................43
8.3 Record Video................................................................................................43
8.4 Video Player..................................................................................................44
8.5 Audio Player..................................................................................................44
8.6 Sound Recorder ...........................................................................................46
8.7 FM Radio.......................................................................................................46
8.8 Fun & Games................................................................................................46
9 User Profiles........................................................................................................48
10 Organizer...........................................................................................................49
11 Services..............................................................................................................50
11.1 STK Services...............................................................................................50
11.2 SpiceGang...................................................................................................50
11.3 WAP Browser..............................................................................................50
11.4 WAP Setting................................................................................................51
11.5 Connection Setting....................................................................................51
11.6 Bluetooth....................................................................................................51
12 File Manager.....................................................................................................53
13 Maintenance.....................................................................................................54
14 Troubleshooting..............................................................................................55
Page 5 of 58 Copyright©2008 Spice Mobiles Ltd.
Page 6

15 After Services...................................................................................................56
16 Inputting Text ..................................................................................................57
16.1 Keys and Characters Table.......................................................................57
16.2 ABC/abc Input Method.............................................................................57
16.3 To input digits............................................................................................57
16.4 To input symbols........................................................................................58
16.5 ENG/eng Input Method.............................................................................58
Page 6 of 58 Copyright©2008 Spice Mobiles Ltd.
Page 7

11 SSaaffeettyy
11..11 NNoottiiccee ttoo tthhee UUssee ooff PPhhoonnee
l Before you use the phone, please carefully read this section to grasp the correct
method of use and ensure the safety of the holder, others and properties.
l All the screens in this manual are for reference only, and some contents actually
displayed may depend on the presetting of the service provider or the network operator,
or the SIM card. If any functions referred to in this manual are different from those of
your phone, please follow your phone.
l The specifications and appearance of this product are subject to change due to
improvement of functions without notice.
l For GSM service-related problems, consult your GSM service provider.
l Please back up your important data timely and keep them properly. The company is not
liable for any failure to call or loss of data due to misoperation, poor signal or power cut,
etc.
l Do not use the phone in an environment of extremely high or low temperature,
otherwise, malfunctions may be caused. Use the phone in temperatures between 5ºC
and 35ºC and a humidity of 35% to 85%.
l Using the phone in an environment of moist or high humi dity may cause malfunctions
of the phone, the charger and the battery.
l Do not drop or strongly impact the phone, otherwise, malfunctions may be caused and
the phone can’t be used.
l Turn your phone off when you are near electrical blasting caps, in a blasting area, or at
the gas station. Obey all signs and instructions.
l Do not use the phone near any electronic device vulnerable to interference. Otherwise,
malfunctions of electronic device may be caused. Such electronic devices include
medical electronic devices, such as hearing aids and pacemaker, fire alarms, auto
doors and other automatic equipment. If you have to use the phone near such devices,
please first consult the manufacturers and dealers of these devices to avoid
interference.
l Switch off the phone when you are on the plane or in the hospital where the use of
mobile phones is prohibited to avoid interfering with electronic and medical equipment.
If you have to use the phone in such places, please follow the regulations of the sites.
l Don’t use your phone while driving, as this is dangerous and could cause a traffic
accident. Pull over and park in a safe place before making or answering a call. Use
hands-free operation, if available.
l The phone has an internal antenna. When switched on, do not hold the antenna area
on the top of the phone, otherwise, the quality of connection and the performance of
the antenna may be influenced, and the max. talk time may be reduced.
l To avoid degaussing, do not put financial cards, phone cards or other magnetic cards
near the charger and the phone to avoid failure of use due to the cards.
l Do not place the phone and the battery under direct sunlight or in a car under burning
sun or other places of high temperature to avoid injury due to overheating, leakage,
Page 7 of 58 Copyright©2008 Spice Mobiles Ltd.
Page 8

cracking, distortion, or even fire of the battery.
l Do not put the phone in a place with excessive dust or vibration (which may cause
failure) to avoid malfunctions of the phone.
l Do not take apart the phone, the charger and the battery, or modify the internal
structure without permission to avoid malfunctions and accidents.
l Do not let children fiddle with the phone or the accessories to avoid injuring themselves
or others, or damaging the phone or the accessories. The phone or the accessories
may contain small removable components which may easily cause suffocation of
children。
l If the phone is contaminated, please wipe it with a dry cloth. Do not use organic solvent
such as gasoline to wipe the phone to avoid causing damages of the outer surface.
l If smoke or peculiar sme ll is produced during use, please immediately switch off the
phone and remove the battery. Please have the phone repaired as arranged by the
store where you bought the phone. Do not continue to use to avoid causing injury.
l Do not dispose the phone as urban waste. For details, please refer to the local
regulations for the disposition of waste electronics.
11..22 NNoottiiccee ttoo tthhee UUssee ooff BBaatttteerryy aanndd CChhaarrggeerr
l The time for using the battery is an estimated time under 25 and stable signal. If ℃
used in a place with weak signal, extremely high or low temperature, or outside the
service area, the consumption of battery power will be faster, thus the standby time and
max. talk time may be reduced.
l Please use the accessories, such as battery and charger, specified by the company to
avoid risks due to overheating, leakage, explosion, or even fire of the battery caused
by non-compliance with the specifications.
l The battery should be put in a cool, ventilative and sunlight-free place. If the battery is
in the exhausting status for a long time, it can’t be charged. Therefore, if you do not use
the phone for long, please charge the battery periodically.
l The battery is expendable goods. All the batteries have a certain life. If the
performance of the battery can’t be improved after repeated charging, the battery may
be discarded as useless and must be replaced with a new one.
l Please fully charge the battery before you use the newly bought phone.
l Do not charge the battery in a place with direct sunlight, a temperature equaling to or
below 0 or equaling to or above 45 , high humidity, excessive dust or vibration ℃ ℃
(which may cause failure), or a place near TV or radio (as it may produce noise
interference to video or sound signal).
l Please switch off the phone and wait over 2 seconds before removing the battery.
l Do not dismantle the phone and the charger for modification without permission to
avoid malfunctions or injury.
l Do not strongly impact or throw the phone or the battery to avoid leakage or
overheating of the battery, or malfunctions of the phone.
l Do not short the two polarities of the battery to avoid leakage, overheating, fire or
explosion of the battery.
l If leakage of the battery enters the eyes accidentally, please immediately wash the
Page 8 of 58 Copyright©2008 Spice Mobiles Ltd.
Page 9

eyes with fresh water and go to a doctor. If it is not treated quickly, it may cause serious
injury, such as blindness.
l If the battery is contaminated with liquid, it may cause burn or malfunctions due to
overheating of the battery. The charger may also cause overheating, damages, electric
shock and malfunctions. If the charger is accidentally sunk in water, or smoke or
peculiar smell is produced during charging, please immediately switch off the phone
and unplug the AC cable from the socket. Please have the phone repaired as arranged
by the store where you bought the phone. Do not continue to use to avoid causing
injury.
l Do not put the charger and the AC cable in a place with flame or ovens to avoid
causing injury due to overheating, leakage or fire of the battery.
l Do not touch the charger, the power cable and the plug of AC power supply with wet
hands to avoid electric shock or malfunctions.
l Do not strongly pull the wire of the charger, or put heavy objects on the power cable, or
change the power cable optionally, otherwise, electric shock or fire may be caused.
l When the battery is fully charged, please unplug the charger from the socket.
l Do not dispose the used battery together with daily waste. Please dispose the used
battery in accordance with the regulations issued by the local authority.
Page 9 of 58 Copyright©2008 Spice Mobiles Ltd.
Page 10
n
22 IInnttrroodduuccttiioon
22..11 PPhhoonnee aanndd AAcccceessssoorriieess
Open the packing box of the phone and check that you have all the accessories to the
phone. If anything is missed, or any mistake is found in the user manual, such as missing
pages, please contact the local dealer.
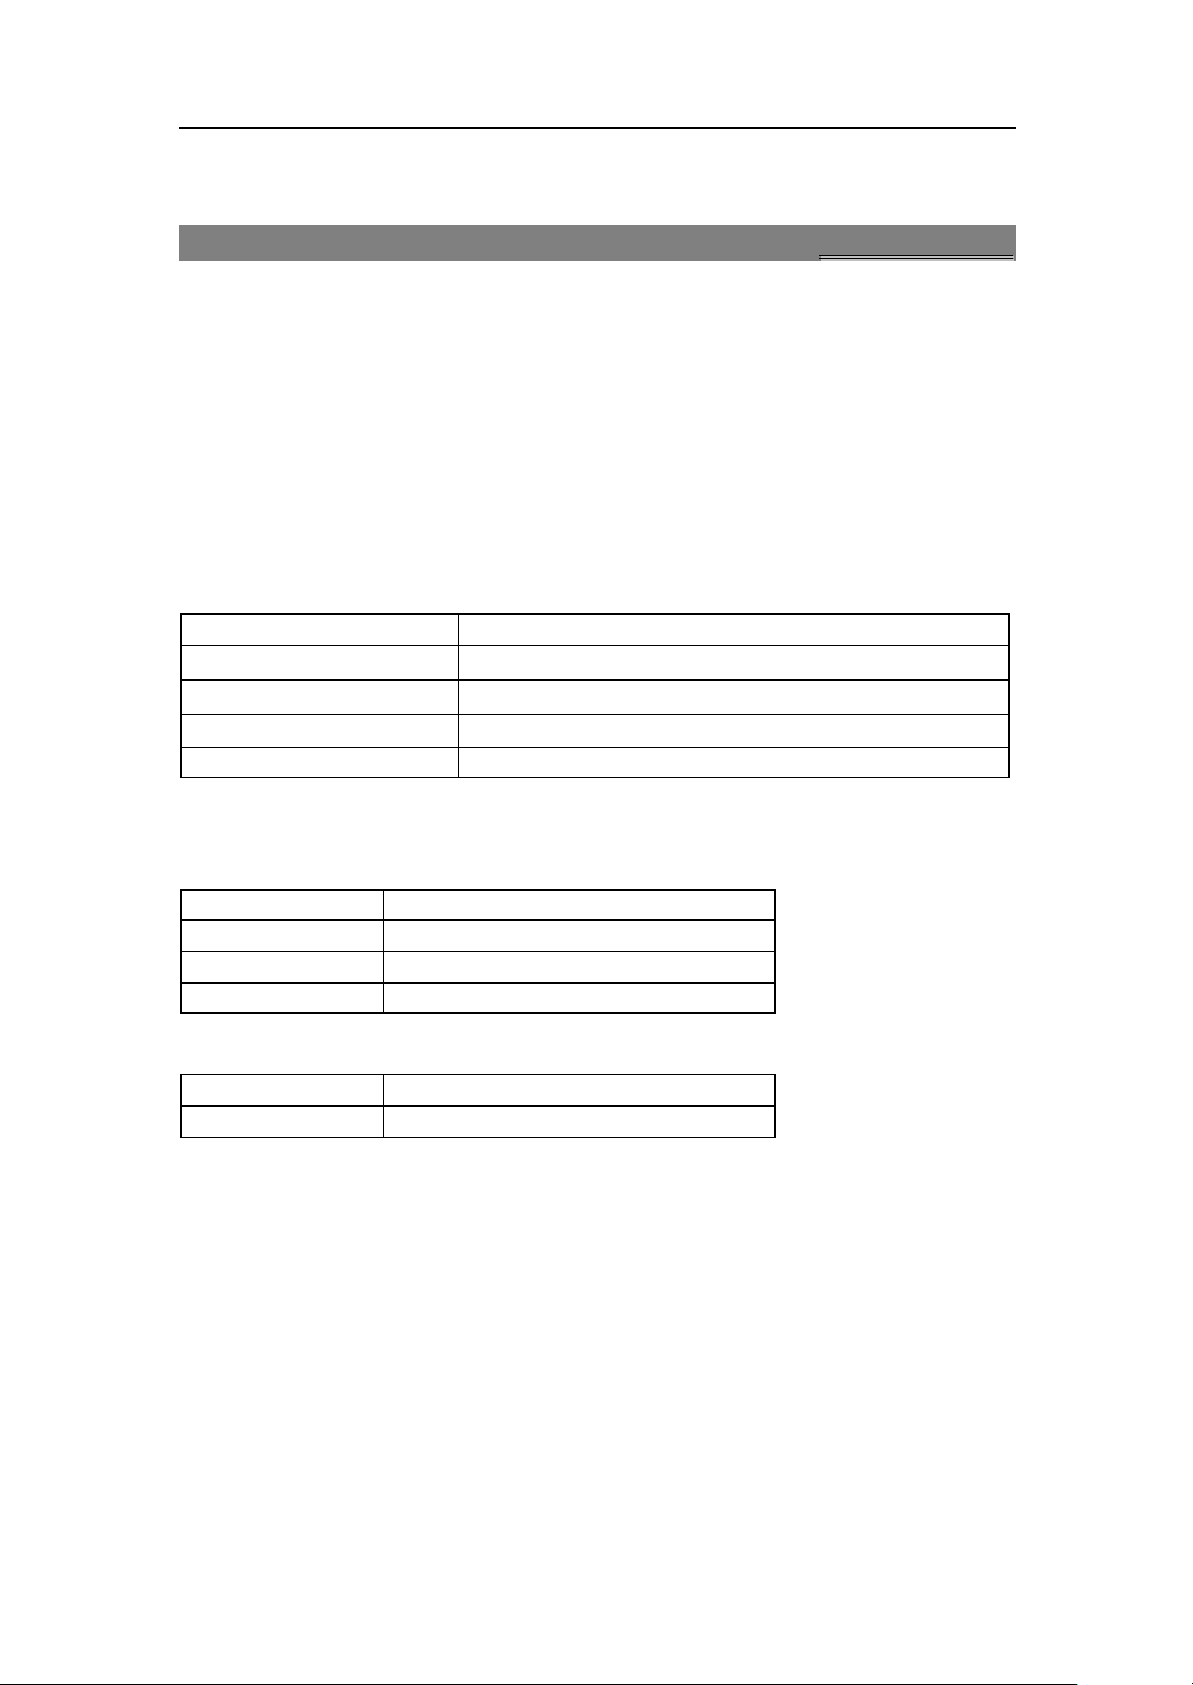
One transceiver Two batteries One Dual Channel Corded Headset
One USB Data Cable One Charger One 256 Micro SD Card
One User Manual One after sales service list
22..22 SSppeecciiffiiccaattiioonnss
Network GSM/GPRS: 900/1800/1900MHz
Battery
Charger
Dimension
Weight About 93g (battery included)
22..33 SSttaannddbbyy TTiimmee // MMaaxx.. TTaallkk TTiimmee
Standby Time
Standby Mode Standby Time
Dual Mode About 100 hours
Master SIM Mode
Slave SIM Mode About 100 hours
Max. Talk Time
Master SIM Mode
Slave SIM Mode About 3-7 hours
*The standby time is the time for continuous working when the phone is not in any
call or moved. The Standby time and max. Talk time depend on the specific
network.
Rechargeable Li-ion Battery 800 mAh 3.7V
Input: 100-240VAC 50/60Hz Output: 5V~500mA
106.85(L)x47.15(W) x15.80(D) (mm)
About 100 hours
About 3-7 hours
Page 10 of 58 Copyright©2008 Spice Mobiles Ltd.
Page 11
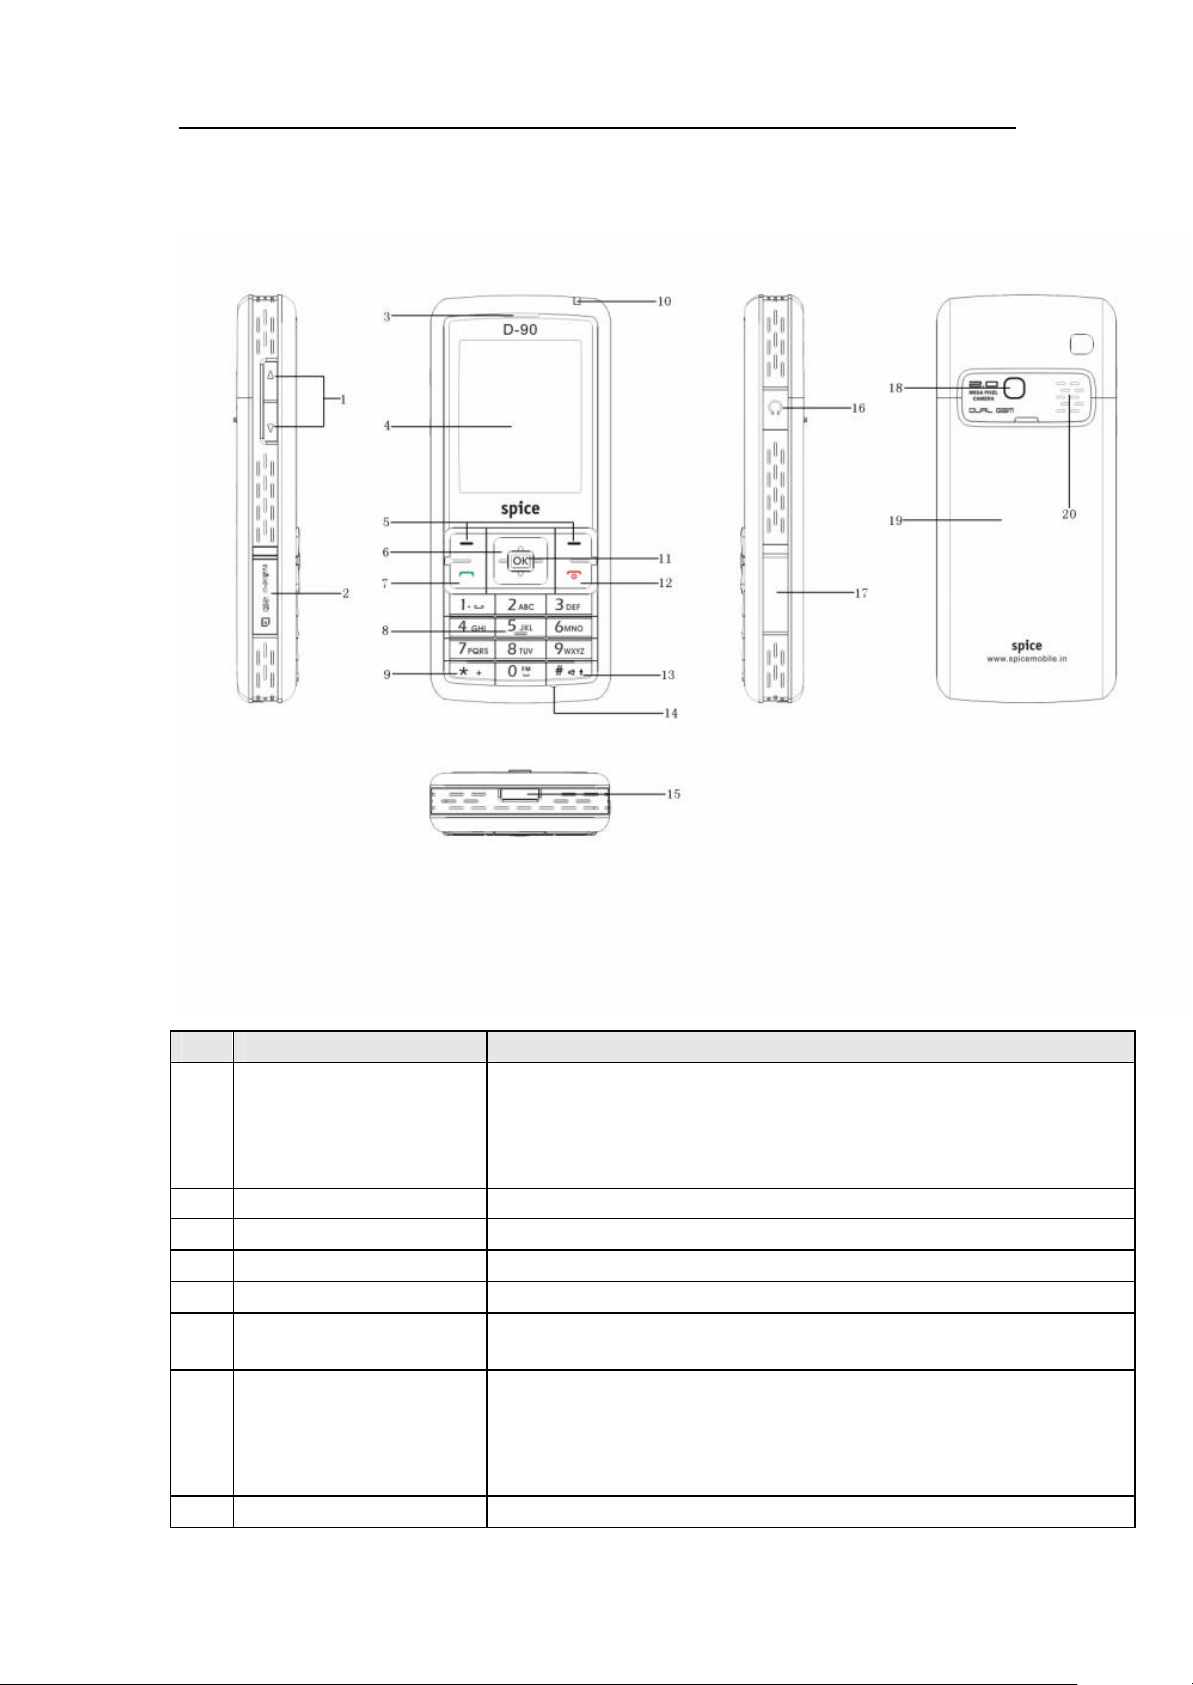
22..44 NNaammee aanndd FFuunnccttiioonnss ooff tthhee PPaarrttss ooff tthhee PPhhoonnee
Parts of the Phone Description of Functions
l To adjust the volume.
1 Volume key
l To move the focus.
l On the view finding screen, press the key to switch the frames
when the photo size is 176*220 pixels.
2 Micro SD card slot
3 Receiver
4 Display
5 Left/Right function key
Navigation key (Up,
6
Down, Left, Right)
7 Send key
8 Number/letter keys
l The functions on the left/right of the various screens.
l To move the cursor.
l To perform the operation designated to the navigation key in idle.
l To answer a call.
l To dial a number.
l To call out the list of dialed numbers in the standby mode.
l To snap the screen display in video playing.
l To input phone numbers, text, symbols or perform the selected
Page 11 of 58 Copyright©2008 Spice Mobiles Ltd.
Page 12
is divided into 5 grades, and the specific display content depends on the
function.
l When dialing in idle, press the key once to input “*”; press it twice
to input “+”; press it thrice to input “P”; or press it 4 times to input
“W”.
l When editing a message number, press the key once to input “,”
l In the edit screen, to open the list of symbols (when there are no
9 * key
10 LED l
11 OK key
12 End key l To end a call.
characters in the character selection section).
l To switch between capture image and record video modes.
l To rotate the screen clockwise by 90° to realize full-screen play
or restore the normal status.
l To set whether to repeat, repeat one or repeat all tracks in audio
player.
l In the standby mode, press the key to enter capture image.
l In the standby mode, long press the key to enter the standby
mode.
l In the calculator, it equals to “=”.
l To confirm an operation.
l To switch between input methods.
l To input a radix point.
13 #key
l In idle, long press to activate the mute mode or return to the
previous mode.
l To set whether to shuffle the tracks in audio player.
14 Mic l
15 Battery cover button l
16 Earphone interface l
17 USB/charger interface l
18 Camera l
19 Battery cover l
20 Speaker l
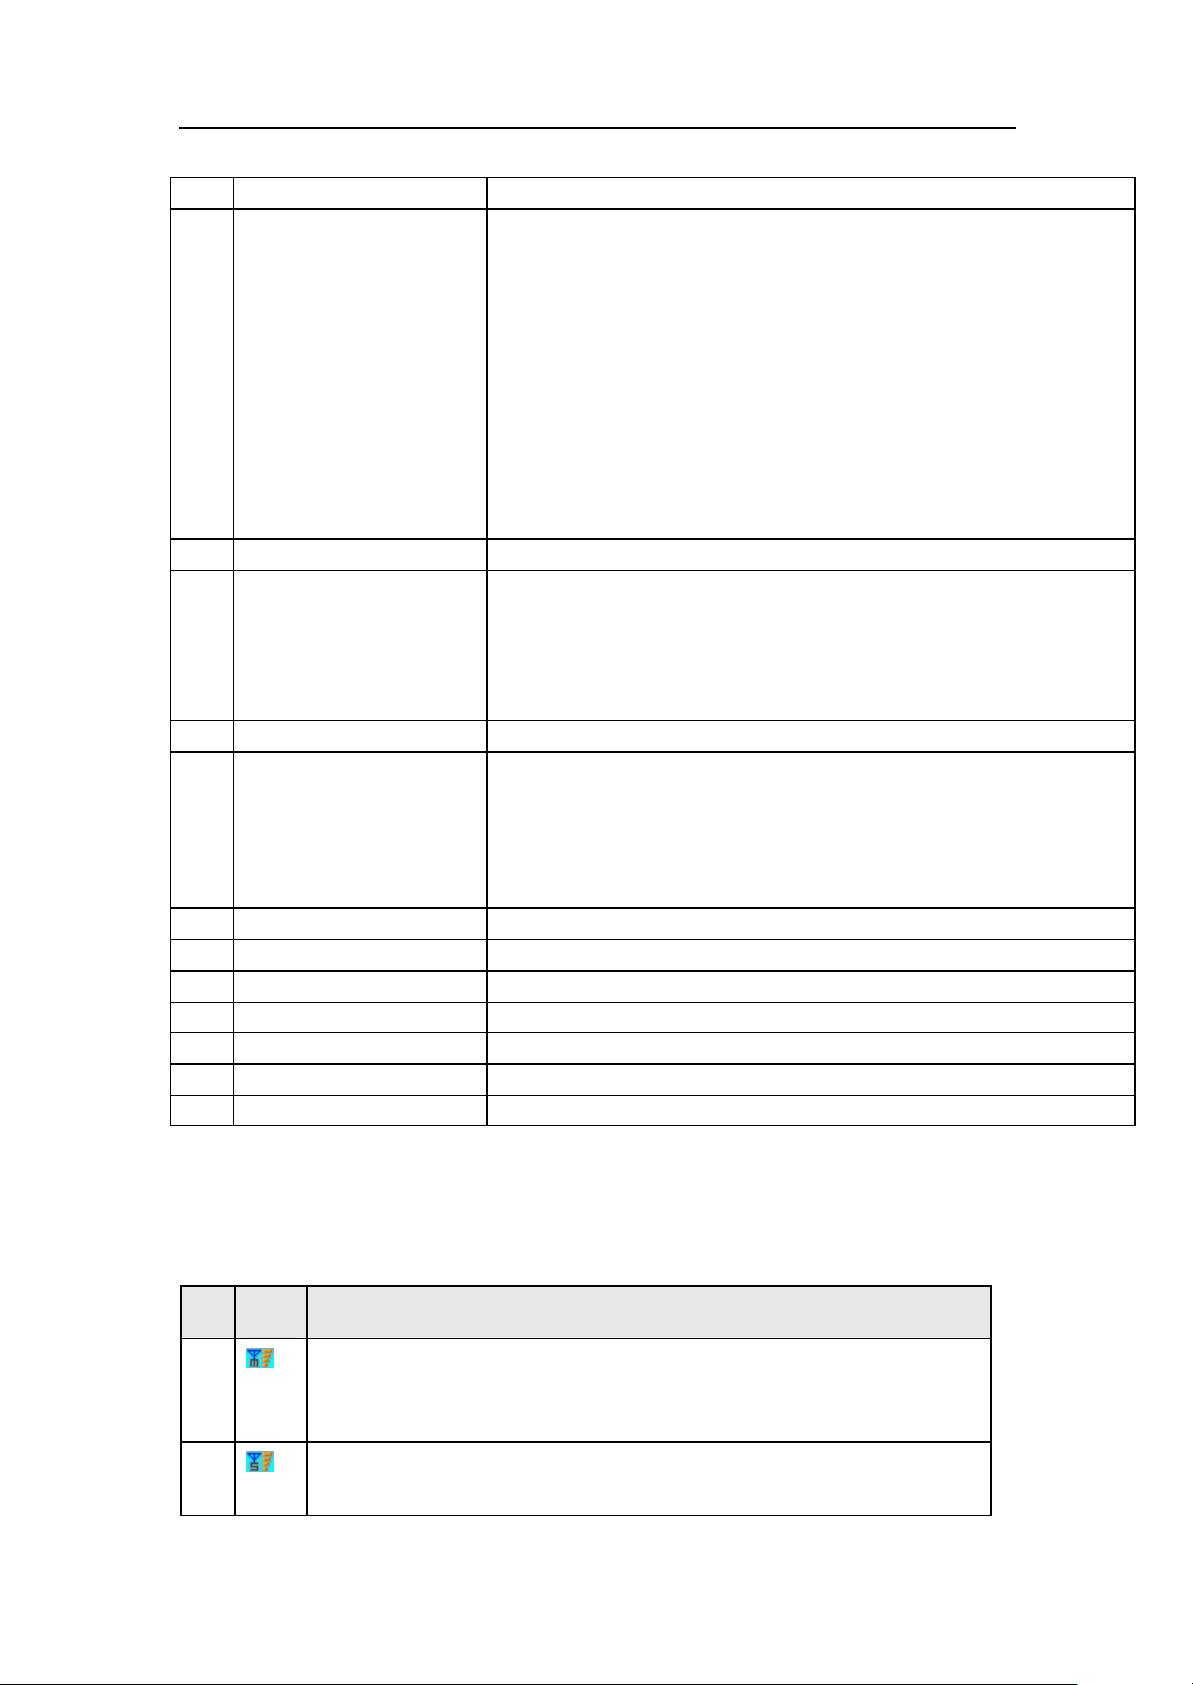
22..55 DDeessccrriippttiioonn ooff DDiissppllaayy CCoonntteennttss
The table below lists the icons that may appear on the status bar. Except the icons for
modes and the power icon, other icons are sorted according to the current mode and
priority of the phone.
1
Icon
s
It appears when the phone has activated the modes containing Master
SIM, and when the phone is in related service area. The signal strength
Description
is divided into 5 grades, and the specific display content depends on the
signal strength of the area where the phone set is located.
2
It appears when the phone has activated the modes containing Slave
SIM, and when the phone is in related service area. The signal strength
Page 12 of 58 Copyright©2008 Spice Mobiles Ltd.
Page 13
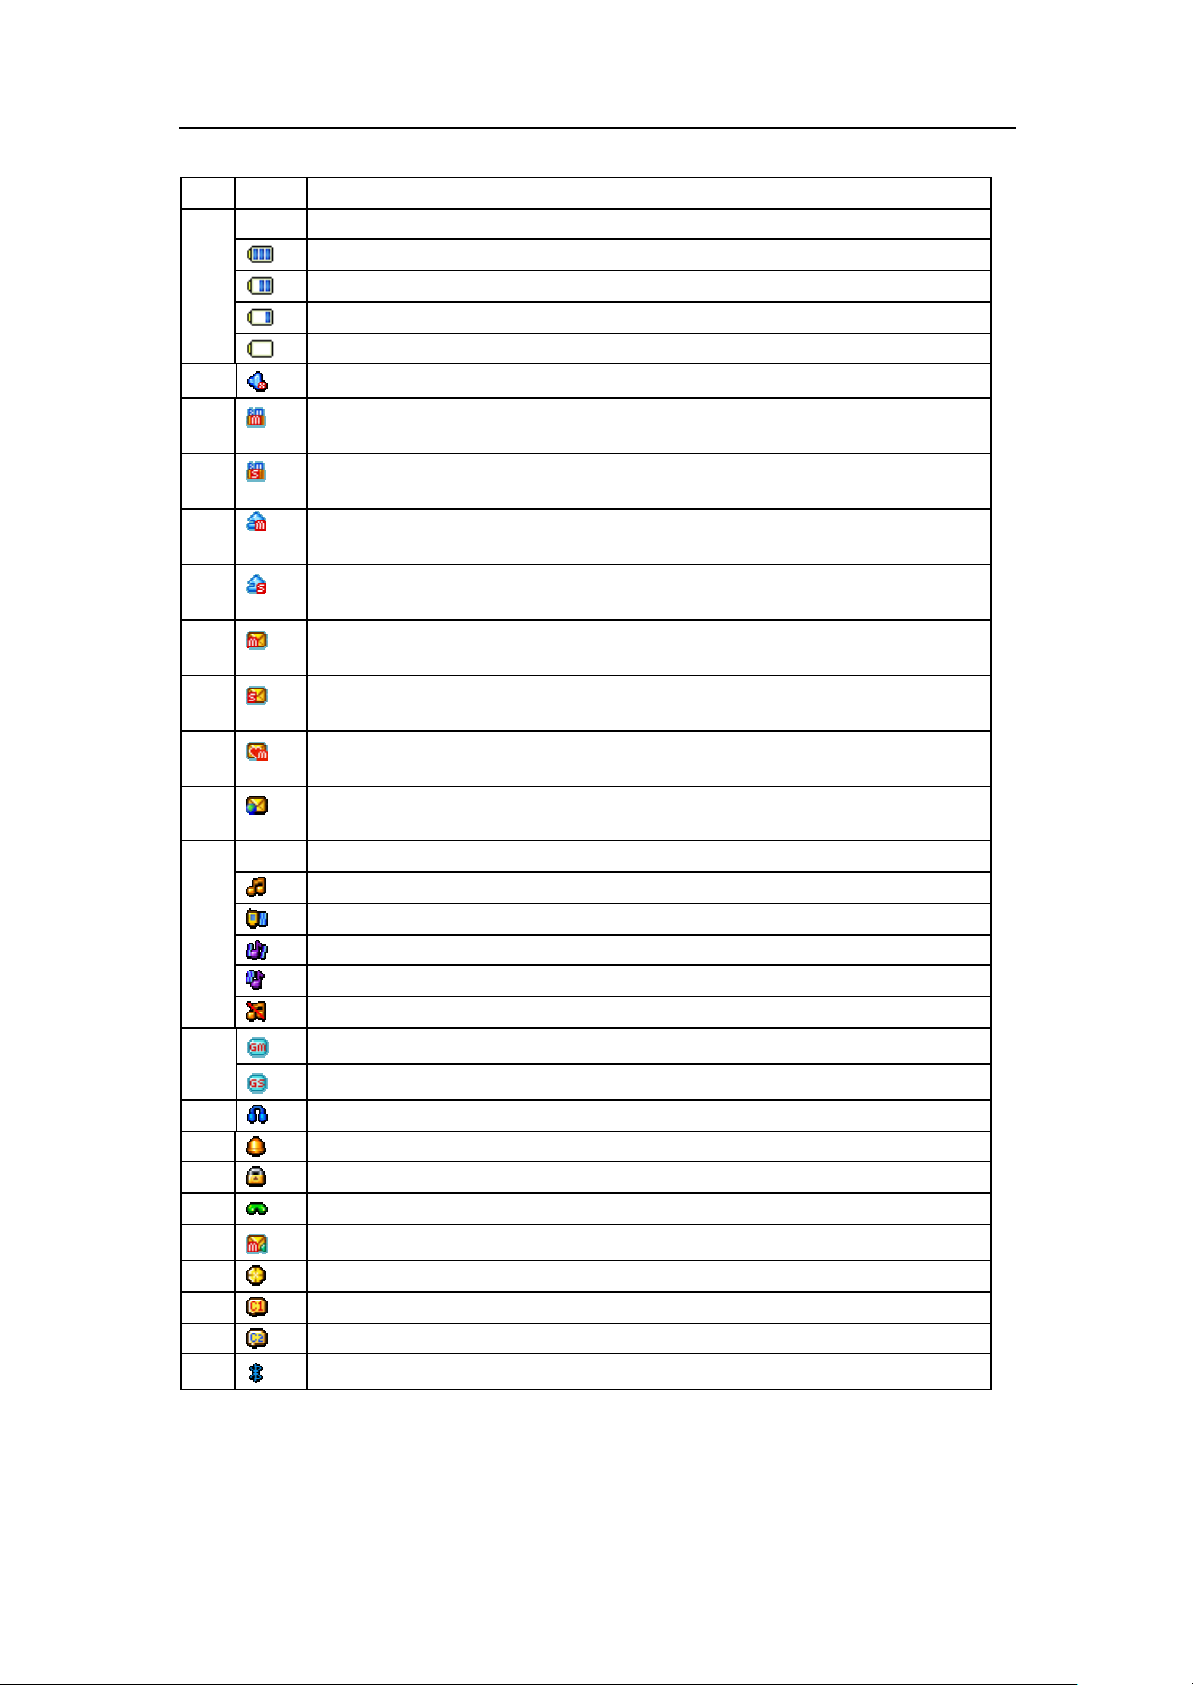
signal strength of the area where the phone set is located.
Indicates the current residual battery power:
3
The power is full.
The power is moderate.
The power is low.
The power is to be used up.
4
5
6
7
8
9
10
11
12
Indicates the current profile:
13
15
16
17
18
19
20
21
22
23
It appears when the phone is set to mute during a call.
It appears when the phone is in Master SIM roaming status. The
function needs the support from the network operator.
It appears when the phone is in Slave SIM roaming status. The function
needs the support from the network operator.
It appears when the GSM Divert All Calls function of Master SIM is
activated.
It appears when the GSM Divert All Calls function of Slave SIM is
activated.
Indicates you have unread SMS of Master SIM. If the message capacity
is full, it will blink.
Indicates you have unread SMS of Slave SIM. If the message capacity
is full, it will blink.
Indicates you have unread MMS of Master SIM. If the message
capacity is full, it will blink
Indicates you have unread push messages of Master SIM. If the
message capacity is full, it will blink
The means of prompt is “Ring”.
The means of prompt is “Vibration Only”.
The means of prompt is “Vibra and Ring”.
The means of prompt is “Vibra then Ring”.
The means of prompt is “Silent”.
The Master SIM GPRS is in use. 14
The Slave SIM GPRS is in use.
It appears when the earphones are plugged in.
It appears when the alarm is activated.
It appears when the key lock is activated.
There are any missed numbers.
Indicates you have unread Master SIM voice messages.
The stopwatch is counting.
The Master SIM chat room 1 is in use.
The Master SIM chat room 2 is in use.
Bluetooth connectivity is on.
22..66 AAbboouutt SSIIMM CCaarrdd aanndd tthhee BBaatttteerryy
Please store the cards out of the reach of children.
Page 13 of 58 Copyright©2008 Spice Mobiles Ltd.
Page 14
The cards and the contacts are vulnerable to damages due to scratching or bending.
Therefore, be careful when using, inserting or removing the cards.
Be sure to switch off the phone before you insert or remove the battery or the cards,
otherwise, the phone may be damaged.
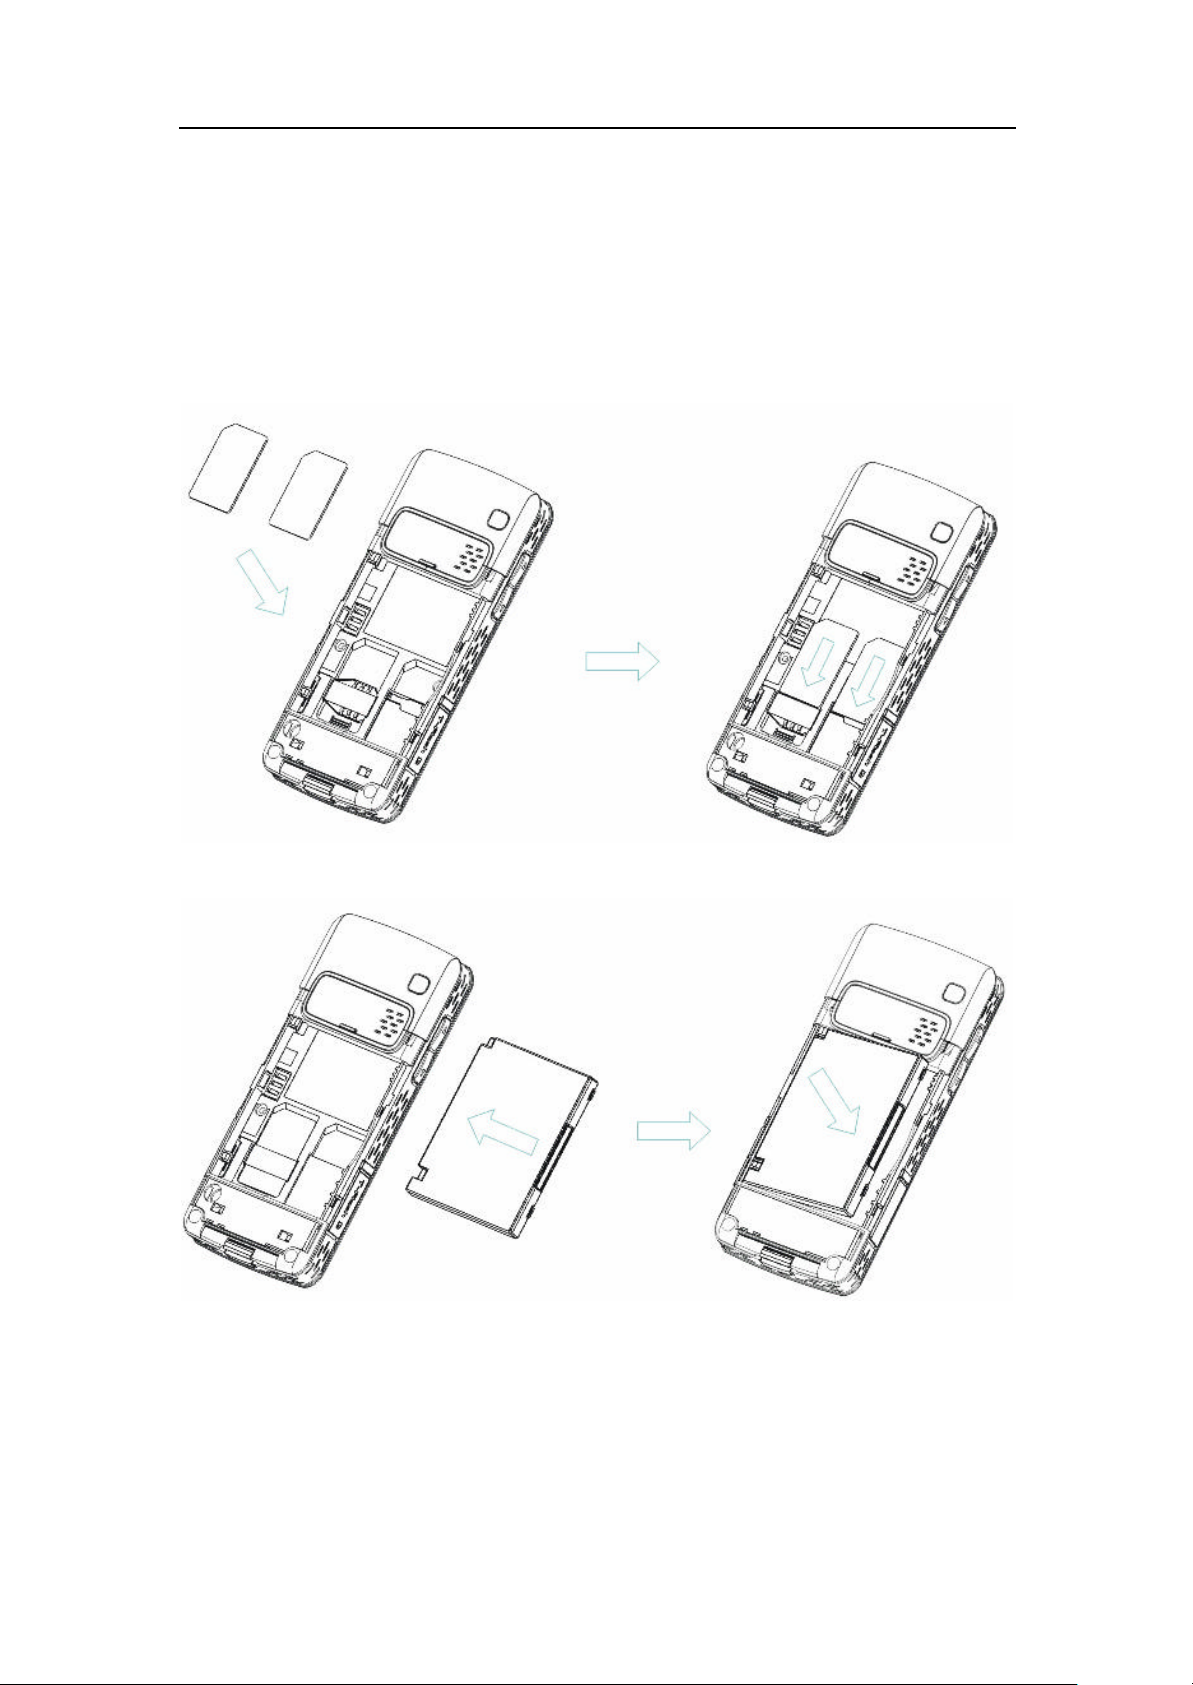
To insert SIM card and battery
1. Insert the card in the slot in the direction indicated by the arrow. (Left: the card slot for
Master SIM. Right: the card slot for Slave SIM.) Please insert the card with the metal
contact of the card facing downwards.
2. Insert the battery.
3. Replace the battery cover.
Page 14 of 58 Copyright©2008 Spice Mobiles Ltd.
Page 15
Tip: Be sure to use the original battery.
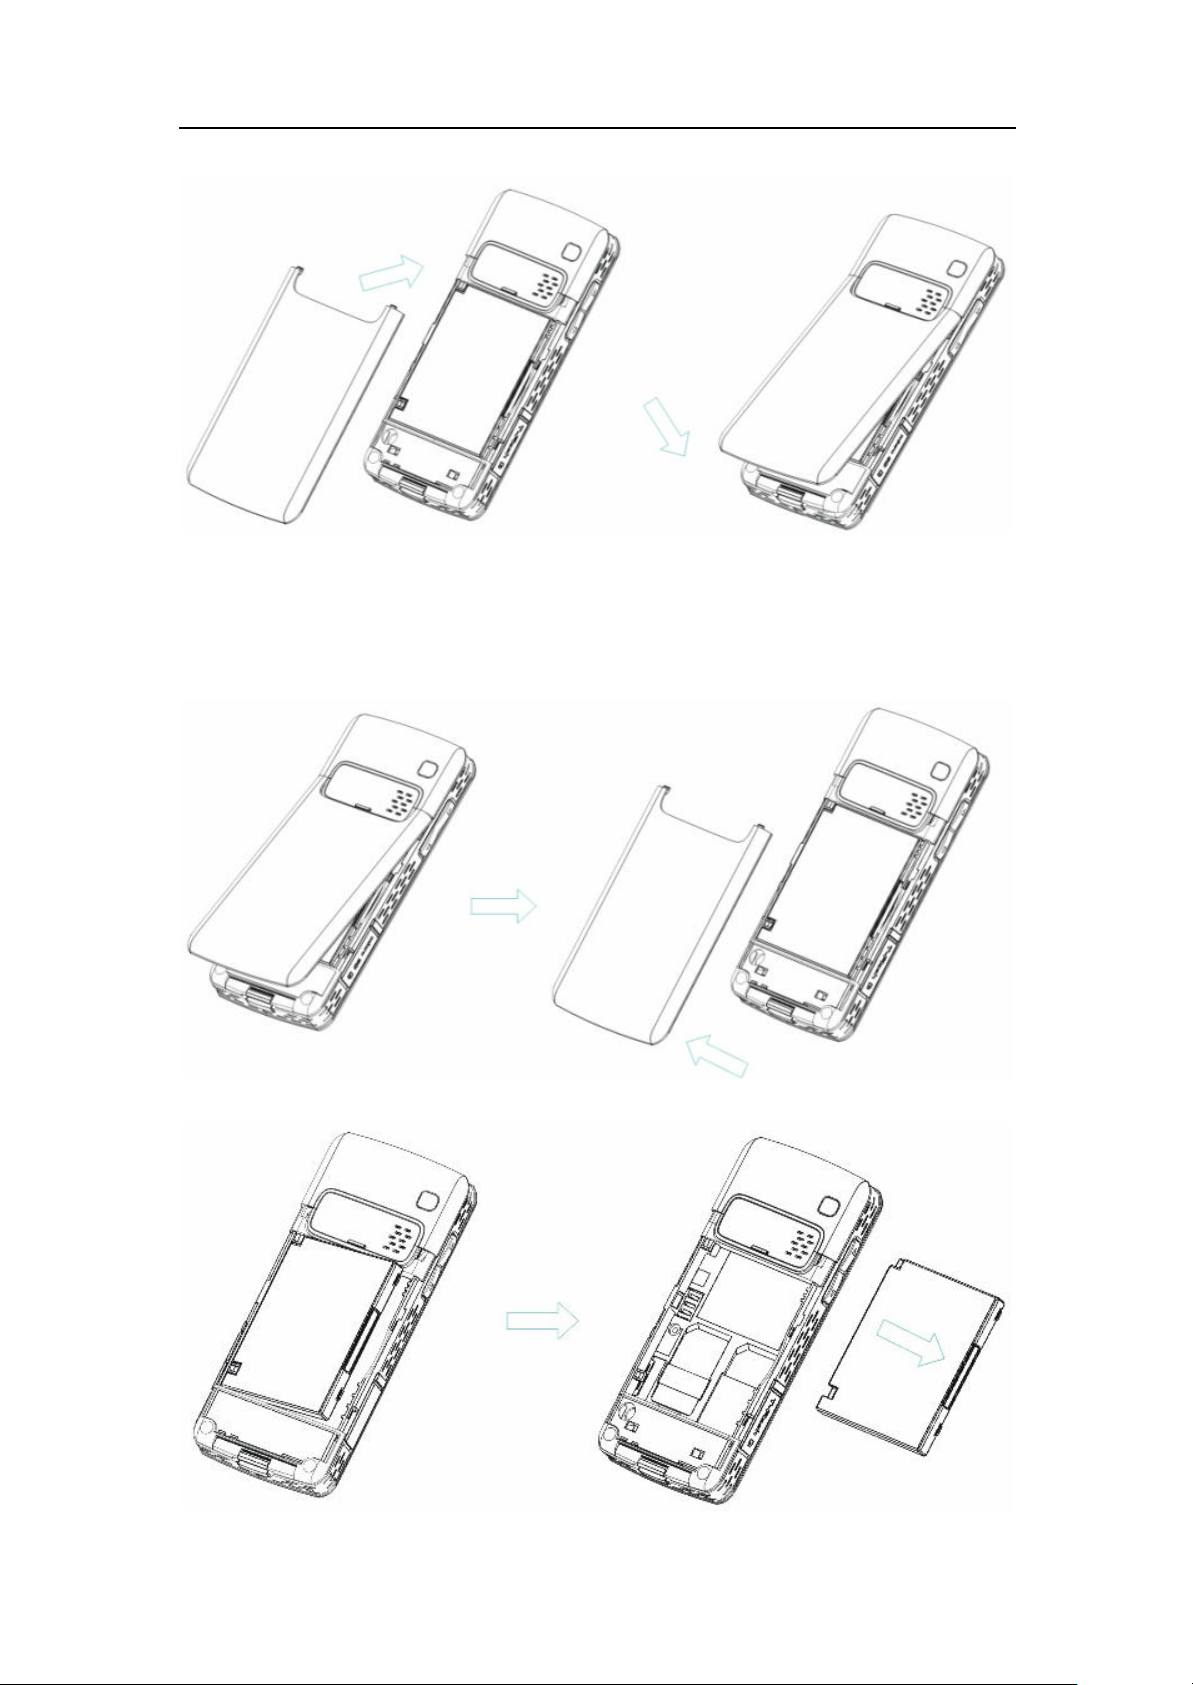
To remove the battery and SIM card
1. Switch off the phone.
2. Push and remove the battery cover.
3. Remove the battery.
Page 15 of 58 Copyright©2008 Spice Mobiles Ltd.
Page 16
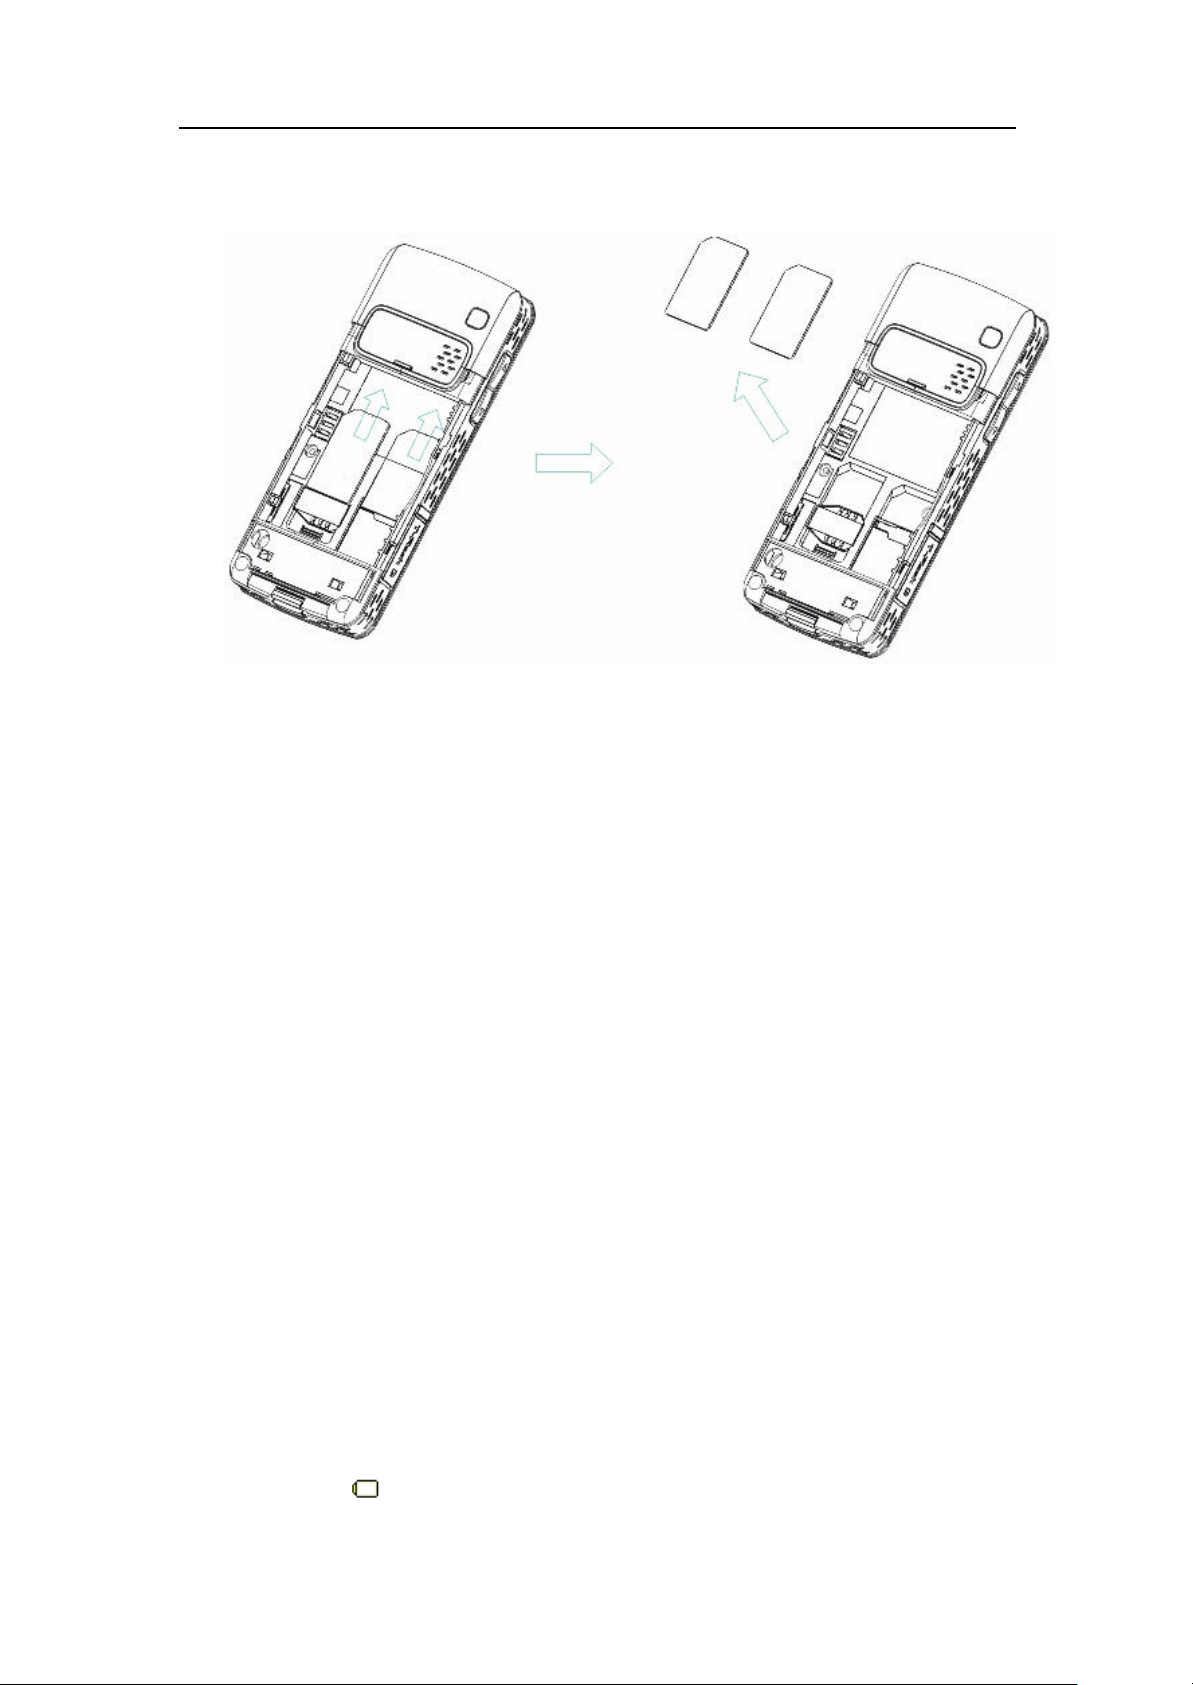
4. Push out the card from the slot with a finger in the direction indicated by the arrow.
(Left: the card slot for Master SIM. Right: the card slot for Slave SIM.)
To remove the Micro SD card
1. Open the Micro SD card slot cover on the bottom-left corner of the phone.
2. Push inwards the Micro SD card with the fingertip and release, and the Micro SD card
will be ejected.
3. Pull out the Micro SD card.
Tip: When any application of the phone or the Micro SD card is running, do not insert or
pull out the Micro SD card, otherwise, data may be lost or the Micro SD card ma y be
damaged!
To insert the Micro SD card
1. Push the Micro SD card in the direction indicated by the sign printed on the card into
the card slot of the phone, with the metal contact of the card facing down.
2. Replace the Micro SD card slot cover.
Tip: Some Micro SD Cards have poor compatibility. Please buy and use tested and
certified Micro SD cards.
To charge the battery
1. Insert the plug of the charger into the interface of the phone, and insert the charger
into the power socket carefully. The battery icon will blink.
2. The red light is lit during charging. When the battery icon stops blinking or the green
light is lit, it indicates that the charging is finished.
3. After the charging, unplug the charger from the socket, and press and hold the left and
right buttons on the plug of the charger to pull out the plug from the phone.
Tip:
The battery icon displayed on the screen indicates that the battery power is low.
Please charge the battery following the steps above.
Page 16 of 58 Copyright©2008 Spice Mobiles Ltd.
Page 17

Please charge the battery before you use the newly bought phone. We suggest you
charge the battery for 4 hours continuously for the first time.
Charging when the phone is in the ON mode will not influence the normal dialing and
answering, but this needs to consume power, thus the tim e of charging will increase.
We suggest you recharge the battery when the power is used up so as to prolong the life
of the battery.
22..77 TToo sswwiittcchh oonn aanndd ooffff
To switch on: Long press End key when the phone is in the OFF mode.
If the phone lock has been activated, you need to input the 4-digit password to unlock.
(The preset unlock code is 1122.)
If the SIM card has been inserted in the phone, and the related PIN code protection is
activated, you need to input the 4-8 passwords to unlock.
Warning: If you input three wrong PIN codes in a row, the SIM card will be locked and you
need to input the PUK code to unlock. Both the PIN code and PUK code are provided by
the network operator.
To switch off: In idle, long press End key.
22..88 SSttaannddbbyy MMooddee
Menu > Settings > Standby Mode
There are four standby modes:
l Slave SIM/Master SIM: Both SIM cards can receive incoming calls or messages, but
Slave SIM network is prior to Master SIM network. when you make calls.Use Send
key to dial a phone number or send a message from the network of Slave SIM. If you
want to make a call from the network of Master SIM, you should input the phone
number and press (Option) key, select Master SIM Dial, and press (OK). Then the
number will be dialed through the network of Master SIM.
l Master SIM/Slave SIM: Both SIM cards can receive incoming calls or messages, but
Master SIM network is prior to Slave SIM network. when you make calls. Use Send
key to dial a phone number or send a message from the network of Master SIM. If
you want to make a call from the network of Slave SIM, you should input the phone
number and press (Option) key, select Slave SIM Dial, and press (OK). Then the
number will be dialed through the network of Slave SIM.
l Master SIM: To make/answer calls and receive/send messages through the network
of Master SIM. The send key is available for making call and sending message.
l Slave SIM: To make/answer calls and receive/send messages through the network of
Slave SIM. The send key is available for making call and sending message.
22..99 VViieeww tthhee pphhoonnee iinnffoo..
Menu > Settings > Phone Number
22..1100 OOppeerraattiioonn iinn iiddllee
The so-called “idle mode” refers to the standard mode where the phone has been
normally switched on and logged in the network, but no calls are in process or no menu is
Page 17 of 58 Copyright©2008 Spice Mobiles Ltd.
Page 18
used.
In idle:
Menu > Main Menu
Name> Quick Search
Press the Navigation key to enter the corresponding functions.
Press Send key to call out the list of dialed numbers.
Press Right Function Key and #key to lock/unlock the keypad.
Long press the number keys 2-9 to display the set speed Dial numbers.
Long press # key to activate the mute mode or return to the previous mode.
Press Volume key to adjust the volume of key tone.
Tip: The function of each Navigation key can be modified in Settings > Phone Setting >
Shortcut Key.
22..1111 TToo mmaakkee ccaallllss
If the icon or is displayed on the screen, you can make or answer calls.
Tip: The signal strength may influence the quality of connection.
Press To
1 number keys input phone numbers
2 Clear clear the inputs
3 Send key make calls
4 End key end calls
Tip1: In dual standby mode, Send key is destined for making a call from the preferential
network. If you want to make a call from another network, press Option, and select the
correspinding network you disired after you input the phone number.
In single mode, the send key is available for making call from current standby network.
Tip2: In dual standby mode, when you are in a call from the network of one SIM, you
cannot dial a new call from the other SIM.
22..1122 KKeeyy LLoocckk
You can use the keypad lock function to prevent unwilling key-in actions when you put the
phone in a bag. In locked mode, you can still answer calls.
To lock, press Right Function Key and #key in idle, or select Menu > Setting s > Security
Setting > Auto Keypad Lock, select the time for the auto keylock and press Left soft key
(OK). The default is None.
When the keypad is locked, press Right Function Key and #key to unlock the keypad.
Page 18 of 58 Copyright©2008 Spice Mobiles Ltd.
Page 19
33 PPhhoonnee BBooookk
You can store names and phone numbers in the memory of the phone or SIM cards. The
phone memory stores up to 1000 entries, each of which contains name, 4 phone numbers
(mobile, home, office and fax), company name, email address and birthday. You can set
photo caller ID, ringtone and groups for each.
Menu > Phone Book
33..11 TToo aadddd nnaammee ccaarrddss
In idle, input numbers directly:
Option > Save > Select the location for saving
Or: Menu > Phone Book > Add New Entry > Select the location for saving
You can edit the name, number, home number, company name, email address, office
number, fax number, birthday, photo caller ID, ringtone and group of each contact. (You
may set the number of columns in the [Fields] in the [Phone book Settings].
33..22 TToo sseeaarrcchh tthhee pphhoonnee bbooookk
Functions Description
Quick Search Menu > Phone Book > Quick Search
Search Entry Menu > Phone Book >Search Entry > Input characters > OK
View Phonebook Menu > Phone Book > View Phonebook > select the
The phone will display the corresponding entry.
The phone will display the contact list of the phone book, and the
corresponding entry will be highlighted. If there is no matching
entry, the cursor will be placed on the entry most similar to the
characters input.
categories
33..33 TToo ddiiaall aa nnuummbbeerr ffrroomm tthhee pphhoonnee bbooookk
Menu > Phone Book > Quick Search
Or Menu > Phone Book > View Phonebook > Select the categories
The desired contact will be highlighted.
Press Send key to make a call. If the entry contains more than one numbers, the number
selection screen will be displayed. You can select one and press Send key to dial.
33..44 TToo vviieeww aa nnaammee ccaarrdd
In the contact list of the phone book, select the required name card:
Option > View
Tip: When viewing an entry, you may press Send key to dial the number of the contact.
Page 19 of 58 Copyright©2008 Spice Mobiles Ltd.
Page 20

33..55 TToo mmooddiiffyy aa nnaammee ccaarrdd
In the contact list of the phone book, select the name card to be modified:
Option > Edit
33..66 TToo ddeelleettee aa nnaammee ccaarrdd
There are two ways to delete entries.
l In Contacts list, select the entry you want to delete: Option > Delete
l Select Menu > Phone Book > Delete All > From Master SIM/From Slave
SIM/From Phone and input the phone password to delete all entries stored in the
phone memory.
33..77 TToo MMuullttii DDeelleettee nnaammee ccaarrddss
You can Use OK key to select/ cancel entries stored in the phone, and press Done to delete the
selected ones.
Menu > Phone Book >Multi Delete
33..88 TToo ccooppyy // mmoovvee // dduupplliiccaattee aa nnaammee ccaarrdd
In the contact list of the phone book, select the name card to be copied/moved/duplicated:
Option > Copy / Move / Duplicate
Tip: “Copy” means copying to other storage location, “Duplicate” means creating a
duplicate in the same storage location.
You can copy all entries stored in the SIM cards to the phone memory, or copy all entries
stored in the phone memory to the SIM cards:
Select Menu > Phone Book > Copy All > From Master SIM to Phone/From Slave SIM
to Phone/From Phone to Master SIM/From Phone to Slave SIM.
33..99 TToo sseenndd SSMMSS//MMMMSS
In the contacts list, select the entry which you need to send SMS/MMS:
Option > Send Master SIM SMS/Send Slave SIM SMS/Send Master SIM MMS
33..1100 TToo sseenndd nnaammee ccaarrddss
You can send a vCard through Master SIM SMS. The phone book entries can’t be sent
through Slave SIM SMS.
Option > Send vCard > Send by Master SIM SMS
You can send a vCard to another compatible device by Bluetooth
Option > Send vCard > Send by Bluetooth
You can also send a vCard to File Manager (with the format of .vcf).
Page 20 of 58 Copyright©2008 Spice Mobiles Ltd.
Page 21

Option > Send vCard > Save to File
33..1111 TToo iimmppoorrtt // oouuttppoorrtt nnaammee ccaarrddss
You can outport the phone book entries by batch to the File Manager (with the format
of .vcf), or vice versa.
Menu > Phone Book > Import & Outport > Outport to File
You can outport all the phone book entries stored in the phone memory and SIM card to
the folder Contacts under File Manager. The existing data in this folder will be deleted
before outporting.
Menu > Phone Book > Import & Outport > Import from File
You can import all the phone book entries from the folder Contacts under File Manager to
the phone book of the phone memory. The entries can’t be imported to SIM card.
33..1122 TToo sseett CCaalllleerr GGrroouupp
Menu > Phone > Phone Book > Caller Group
Select the group to be set:
To edit the name: Highlight the name and select Edit.
To select a ringtone: Press Navigation key (Left/Right) to select a ringtone for this
group. If you select none, when a call from the number of a group comes in, the default
ringtone designated by system will be played.
To select a picture: Press Navigation key (Left/Right) to select a picture for this group.
If you select none, when a call from the number of a group comes in, the default picture
designated by system will be displayed.
To select incoming call light color: Press Navigation key (Left/Right) to select a color
for this group. If you select none, when a call from the number of a group comes in, the
default color designated by system will be lit.
To select a group member: Enter the list of group members, and select Option > Add.
Tip: You can select group members from the entries stored in the phone only.
33..1133 MMeemmoorryy SSttaattuuss ooff PPhhoonnee BBooookk
Menu > Phone Book > Settings > Memory Status
The screen will display the current memory status of the phone books of the SIM cards
and the phone memory.
33..1144 TToo sseett ssttoorraaggee llooccaattiioonn
Menu > Phone Book > Settings > Preferred Storage> Master SIM / Slave SIM/ Phone
33..1155 FFiieellddss SSeettuupp
Menu > Phone Book > Settings > Fields
Tip: When adding entries in the phone book of the phone memory, the columns that can
be edited depends on the setting here.
Page 21 of 58 Copyright©2008 Spice Mobiles Ltd.
Page 22

44 CCaalllliinngg
44..11 TToo mmaakkee aann EEmmeerrggeennccyy CCaallll
Enter 112 (the international emergency number) and press Send key. The call will be sent
out. (This 112 number can be used in any country whether a SIM card is available or not,
as long as you are included in a GSM network).
44..22 TToo aannsswweerr aa ccaallll
When the phone prompts that a call is coming in:
Press To
Silence turn off the ring/vibration
Send key/Answer answer the call
When a call comes in, if an entry in the phone book corresponds to the number, the
related information will be matched.
If the number has been saved in the phone book and has a name, the screen will display
the name when a call from the number comes in.
If the number has been saved in the phone book and belongs to a caller group, the
ringtone and picture corresponding to the group will be played or displayed when the
number comes in.
If the number has been saved in the phone book and belongs to a caller group, but you
have specified a photo call ID or ringtone for this entry, then the specified photo call ID or
ringtone will be displayed or played when the number comes in.
Tip: If you have plugged the earphones in the phone, you need to long press the button
on the earphones to answer the incoming call (except when you have set to automatic
answering). To end a call, you also need to long press the same button.
44..33 TToo rreejjeecctt aa ccaallll
When the phone prompts that a call is coming in, after you press Silence, you can:
Press To
Reject reject the call
Tip: The send SMS when a call is coming function has been deactivated.
Menu > Settings > Call Setting > Send SMS When a Call is Coming
Set the status to Off.
44..44 TToo sseenndd SSMMSS wwhheenn aa ccaallll iiss iinnccoommiinngg
When you have an incoming call, you can send a SMS you desired to the caller, and the
caller will know your status.
Press Menu > Settings > Call Setting > Send SMS When a Call is Coming to activate
this function..
Page 22 of 58 Copyright©2008 Spice Mobiles Ltd.
Page 23

When the phone prompts that a call is coming in, after you press Silence, you can:
Press To
SMS Send a SMS
Tip: You can also define the SMS in Template of messages, for example, I am busying… ,
Call back to you soon… , and so on.
44..55 TToo ddiiaall iinntteerrnnaattiioonnaall nnuummbbeerrss
Y ou need to insert the local international connection code “+”.
In idle, press * key twice to input “+”, then enter your country code and the phone number.
44..66 TToo iinnsseerrtt aa ppaauussee ssyymmbbooll wwhheenn ddiiaalliinngg
There are two methods to dial an extension number with a pause symbol: to dial the
extension number automatically (the pause time is controlled automatically); to switch
manually (the pause time is controlled manually). The phone supports both of the two
applications of the pause symbol.
To dial the extension number by automatic switching:
Input a phone number in idle.
Press * key thrice to input the pause symbol P.
Input the extension number.
Press Send key to dial the phone number, then the phone will dial the extension number
after P automatically.
Tip: The pause time depends on the number of “P“ input.
To dial the extension number by manual switching:
Input a phone number in idle.
Press * key four times to input the pause symbol W.
Input the extension number.
Press Send key to dial the phone number, then the phone will prompt whether to continue
dialing the extension number after W.
Tip: This lets you select whether to dial an extension number by pressing a key when
appropriate.
44..77 SSppeeeedd DDiiaalliinngg
You can specify speed dial numbers to frequently used phone numbers.
Long press the number keys 2-9 on the dial plate to display a corresponding phone
number on the screen, and press Send key to dial the phone number. (The 1 key
correspond with Master SIM Voice Mail.)
Tip: You must have set a speed dial number for that number key, and the Speed Dial
function has been activated.
Menu > Settings > Phone Setting > Speed Dial
Page 23 of 58 Copyright©2008 Spice Mobiles Ltd.
Page 24

Set the status to ON.
Set the speed dial codes, each of which corresponds to the number key 2 – 9.
44..88 FFiixxeedd DDiiaalliinngg
The Master SIM card supports fixed dial function. You can set limitations on the numbers
you can call. SIM PIN2 is required to activate it.
When the Fixed Dialing function is activated, from the Fixed Dialing List, you can only see
the entries in the SIM cards that have been set in the Fixed Dialing section.
When the Fixed Dialing function is activated, you can still dial emergency numbers.
To activate or deactivate the Fixed Dialing function:
Menu > Settings > Security Setting > Master SIM Fixed Dial
Switch on/off about this Fixed Dial function and edit the fixed-dial numbers.
44..99 SSIIMM CCaarrdd LLooccaattiioonn DDiiaalliinngg
Input the location serial number of the contact stored in the SIM card, and press # key to
display the entry corresponding to the location. Press Send key to dial.
If you want to dial according to the location serial number:
Press To
1 number keys input the location serial number of the contact stored in the
SIM card
2 # key display the entry corresponding to the location serial
number
3 Send key dial the phone number of the entry
Tip:
This function is supported by Master SIM card and Slave SIM card.
If you have input a location serial number outside the storage range of the SIM card or
exceed the allowable numeration (1-999) of the phone, the phone will not find any entry.
44..1100 TToo rreeddiiaall
Press To
1 Send key view the list of outgoing calls
2 Navigation key
(Up/Down)
3 Send key dial the phone number
44..1111 TToo ddiiaall ffrroomm tthhee PPhhoonnee BBooookk
highlight the desired phone number
Enter the Phone Book, select an entry from the entry list and press Send key to dial.
Tip: If the entry contains more than one numbers, the number selection screen will be
displayed. You can select one and press Send key to dial.
Page 24 of 58 Copyright©2008 Spice Mobiles Ltd.
Page 25

44..1122 TToo ccaallll tthhee sseennddeerr ffrroomm tthhee IInnbbooxx
When viewing a message in the Inbox:
Option > Call Back
44..1133 TToo bbee mmuuttee dduurriinngg aa ccaallll
During a call, you can prevent the other party from hearing you:
Option > Mute > On/ Off
44..1144 TToo aaddjjuusstt vvoolluummee ooff tthhee rreecceeiivveerr dduurriinngg aa ccaallll
You can press the side volume key to adjust the volume of the receiver during a call.
44..1155 TToo sseeaarrcchh aa pphhoonnee nnuummbbeerr dduurriinngg aa ccaallll
You can search a phone number from the phone book during a call:
Option > Phone Book
44..1166 TToo aaccttiivvaattee//ddeeaaccttiivvaattee hhaannddssffrreeee eeaarrppiieeccee
During a call, press (H-Free) to activate handsfree earpiece.
To deactivate handsfree earpiece, press (H-Held).
44..1177 DDTTMMFF ((DDuuaall TToonnee MMuullttii--FFrreeqquueennccyy)) TToonnee
During a call, you can select to turn on or off the DTMF tone. When the DTMF tone is
turned off, the digits input will not be regarded as a DTMF signal response.
During a call:
Option > DTMF > On / Off
44..1188 AAnn iinnccoommiinngg ccaallll ffrroomm aannootthheerr nneettwwoorrkk dduurriinngg aa ccaallll
If there is an incoming call from another netwo rk during a call, the phone will sound an
alert and display the information of the incoming call on the display.
You may select to answer or reject the incoming call. If you select to answer it, you may
also select to hold or end the current call.
If you hold the current call and answer the incoming call from another network, you may
switch the modes (talk or hold) of the two calls. If, at this time, there is another incoming
call from Master SIM you can answer it only after you end the call of Slave SIM.
Tip: If, during a multiparty call of Master SIM, there is an incoming call from Slave SIM,
you can answer it only after you end all the calls of Master SIM.
44..1199 SSiimmuullttaanneeoouuss iinnccoommiinngg ccaallllss ffrroomm ttwwoo nneettwwoorrkkss
If, when there is currently no calls in progress or you are in a call from Master SIM, two
calls from two different networks come in at the same time; you may select to answer
either call after you end and reject the calls of the other network.
Page 25 of 58 Copyright©2008 Spice Mobiles Ltd.
Page 26

44..2200 CCaallll DDiivveerrtt
With the Call Divert function (needs network support); you may divert incoming calls to
another mobile phone or a direct line telephone, but not any extensions of a fixed
telephone.
Menu > Settings > Call Setting > Master SIM Call Divert / Slave SIM Call Divert
44..2211 CCaallll HHoolldd
During an Master SIM call:
Option > Hold / Retrieve
Tip: The function needs the support from the local network.
44..2222 CCaallll WWaaiittiinngg
This function of Master SIM mode allows you to put the current call on hold and then
answer a second one.
If, during a Master SIM call, a new call comes in, you will hear a special alert sound and
the screen will display the number of the new incoming call, which indicates that a
third-party call is coming in and waiting for your answer.
To answer the new call: Press Send key or select Option > Answer
To reject the new call: Press Reject or End key
To end the current call: Select Option > End
If you answer the new call, the first call will be held and you will hear the hold alert sound.
To switch between calls: Press Send key or select Option > Swap
To end the select call:Select Option > End Single
To end the current call: Press End key
To end both calls: Option > End All
The function needs the support from the local network. In some districts, you can use the
function only after you apply with the local network operator.
Menu > Settings > Call Setting> Master SIM Call Waiting
44..2233 TThhrreeee--ppaarrttyy CCaalllliinngg
The Master SIM mode supports Three-party Calling. A Three-party Calling, also called a
multiparty call or a conference call, is a service based on call waiting.
The function needs the support from the local network. In some districts, you can use the
function only after you apply with the local network operator.
During a call, you may dial other numbers without hanging up the current call, and use the
functions provided during the call to connect new parties and make a three -way calling.
You may conduct a three-way calling containing up to five parties.
1. Ask the other party of the current call not to end, and select Option > Hold to hold the
current call.
Page 26 of 58 Copyright©2008 Spice Mobiles Ltd.
Page 27

2. Dial a new number, and talk with him after he answers your call.
3. Select Option > Conference to connect all the parties and form a conference.
4. Continue to dial new numbers, and repeat the steps above to add more parties to the
conference.
Tip: After a conference is formed, if you press End key, you will end all the calls.
44..2244 RReessttrriicctt CCaallllss
The function is a GSM network service and can restrict outgoing and incoming calls
selectively. If you need to change the settings of Restrict Calls, please contact your
network operator to obtain the password for opening this service.
Menu > Settings > Call Setting > Master SIM Call Barring / Slave SIM Call Barring
Page 27 of 58 Copyright©2008 Spice Mobiles Ltd.
Page 28

55 CCaallll HHiissttoorryy
55..11 MMiisssseedd CCaallllss//DDiiaalleedd CCaallllss//RReecceeiivveedd CCaallllss
The phone registers the phone numbers of missed, received, dialed calls and call time.
Menu > Call History > Missed Calls / Dialed Calls / Received Calls
You may select
Delete: to delete the entry.
Save To Phone Book: to save the number to the phone book
Dial: to dial the number.
Send Master SIM SMS: to enter the screen for writing Master SIM SMS.
Send Slave SIM SMS: to enter the screen for writing Slave SIM SMS.
Send Master SIM MMS: to enter the screen for writing Master SIM MMS.
55..22 DDeelleettee CCaallll LLoogg
Menu > Call History > Delete Call Log
You may select to delete Missed Calls, Dialed Calls, Received Calls or Delete All calls.
55..33 CCaallll TTiimmee
Menu > Call History > Master SIM Call Time/ Slave SIM Call Time
You may view the last call time, total time of outgoing calls and total time of answered
calls.
Reset Timers:
Menu > Call History > Master SIM Call Time/ Slave SIM Call Time > Reset All Time
55..44 SSMMSS//GGPPRRSS CCoouunntteerr
Menu > Call History > Master SIM SMS Counter/Slave SIM SMS Counter/ Master SIM
GPRS Counter/ Slave SIM GPRS Counter
Page 28 of 58 Copyright©2008 Spice Mobiles Ltd.
Page 29

66 MMeessssaaggee
66..11 SSeenndd MMaasstteerr SSIIMM SSMMSS
Menu > Message > Master SIM SMS > Write Master SIM SMS
Or, open a phone book name card, and select Option > Send Master SIM SMS
1. Write the content of the SMS, and select Option >
Message Template: To select a phrase from the list and insert it in the SMS.
Insert PHB Number: To select a phone number from the phone book and insert it in
the SMS.
Insert Object:To select an object and insert it in the SMS.
Format Text: To embellish the characters of text.
2. When the writing is finished, you can select Option >
Edit Number: To enter the number edit screen. You may input one or select from the
phone book.
Save: To save the message in the Draft.
Tip:
The phone supports multiple-sending. If you input more than one numbers, press *
key to input “,” between the numbers for separation.
66..22 SSeenndd SSllaavvee SSIIMM SSMMSS
Menu > Message > Slave SIM SMS > Write Slave SIM SMS
Or, open a phone book name card, and select Option > Send Slave SIM SMS
1. Write the content of the SMS, and select Option >
Message Template: To select a phrase from the list and insert it in the SMS.
Insert PHB Number: To select a phone number from the phone book and insert it in
the SMS.
2. When the writing is finished, you can select Option >
Edit Number: To enter the number edit screen. You may input one or select from the
phone book.
Save: To save the SMS in the Draft.
Tip:
The phone supports multiple-sending. If you input more than one numbers, press *
key to input “,” between the numbers for separation.
66..33 SSMMSS IInnbbooxx
Menu > Message > Master SIM SMS/ Slave SIM SMS > Inbox
Indicates the Master SIM SMS stored in the master card has not been read.
Indicates the Master SIM SMS stored in the phone has not been read.
Indicates the Master SIM SMS stored in the master card has been read.
Page 29 of 58 Copyright©2008 Spice Mobiles Ltd.
Page 30

Indicates the Master SIM SMS stored in the phone has been read.
Indicates the Slave SIM SMS stored in the slave card has not been read.
Indicates the Slave SIM SMS stored in the Phone has not been read.
Indicates the Slave SIM SMS stored in the slave card has been read.
Indicates the Slave SIM SMS stored in the Phone has been read.
When viewing the inbox list, select Option >
View: To read the highlighted SMS.
Delete: To delete the highlighted SMS.
Multi Delete: Use Menu key to select/ cancel entries, and press Done to delete the
selected ones.
Delete All: To delete all the messages from the Inbox.
Copy All: To copy all the messages stored in the SIM to the phone memory, or vice versa.
This function is available to Master SIM.
Move All: To move all the messages stored in the SIM to the phone memory, or vice versa.
This function is available to Master SIM.
Tip:
1. Press Send key for the highlighted SMS in the Inbox and you can view its content.
2. When reading a SMS, press Navigation key (Left/Right) to browse the
previous/next SMS.
When reading a SMS, you can select Option >
Reply: To reply the entry.
Call Back: To dial the number of the sender.
Forward: To forward the entry to others.
Delete: To delete the entry.
Use Number: To extract the number of the sender and the number(s) contained in the
SMS into a list (up to 6 numbers), and select to dial or save it/them in the phone book.
Besides the functions mentioned above, the Master SIM mode supports:
Copy to Phone: Copy the SMS stored in the Master SIM to the phone memory.
Copy to SIM: Copy the SMS stored in the phone memory to the Master SIM.
Move to Phone: Move the SMS stored in the Master SIM to the phone memory.
Move to SIM: Move the SMS stored in the phone memory to the Master SIM.
Save Objects : To view and save the objects contained in the SMS.
66..44 SSMMSS SSeennttbbooxx
SMS which have been sent are stored in the Sentbox.
Menu > Message > Master SIM SMS / Slave SIM SMS > Sentbox
When viewing the Sentbox list, select Option >
View: To read the highlighted SMS.
Delete: To delete the highlighted SMS.
Multi Delete: Use Menu key to select/cancel entries, and press Done to delete the
selected ones.
Delete All: To delete all the messages from the Sentbox.
Copy All: To copy all the messages stored in the SIM to the phone memory, or vice versa.
This function is available to Master SIM.
Page 30 of 58 Copyright©2008 Spice Mobiles Ltd.
Page 31

Move All: To move all the messages stored in the SIM to the phone memory, vice versa.
This function is available to Master SIM.
Tip:
1. Press Send key for the highlighted SMS in the Sentbox and you can view its content.
2. When reading a SMS, press Navigation key (Left/Right) to browse the previous/next
SMS.
When reading a SMS, you can select Option >
Send: To edit and send the SMS.
Forward: To forward the SMS to others.
Delete: To delete the SMS.
Use Number: To extract the number of the receiver and the number(s) contained in the
SMS into a list (up to 6 numbers), and select to dial or save it/them in the phone book.
Besides the functions mentioned above, the Master SIM mode supports:
Copy to Phone: Copy the SMS stored in the Master SIM to the phone memory.
Copy to SIM: Copy the SMS stored in the phone memory to the Master SIM.
Move to Phone: Move the SMS stored in the Master SIM to the phone memory.
Move to SIM: Move the SMS stored in the phone memory to the Master SIM.
66..55 SSMMSS DDrraaffttbbooxx
SMS that can’t be sent and those saved during editing are stored in the Draftbox , in which,
the SMS saved during editing have no numbers.
Menu > Message > Master SIM SMS / Slave SIM SMS > Draftbox
When viewing the draft list, select Option >
View: To read the highlighted SMS.
Delete: To delete the highlighted SMS.
Multi Delete: Use Menu key to select/cancel entries, and press Done to delete the
selected ones.
Delete All: To delete all the entries from the Draftbox.
Copy All: To copy all the drafts stored in the SIM to the phone memory, or vice versa. This
function is available to Master SIM.
Move All: To move all the drafts stored in the SIM to the phone memory, or vice versa.
This function is available to Master SIM.
Tip:
1. Press Send key for the highlighted SMS in the Draftbox and you can view its content.
2. When reading a SMS, press Navigation key (Left/Right) to browse the previous/next
SMS.
When reading a SMS, you can select Option >
Edit: To edit the entry.
Delete: To delete the entry.
Use Number: To extract the number of the receiver and the number(s) contained in the
SMS into a list, and select to dial or save it/them in the phone book.
Besides the functions mentioned above, the Master SIM mode supports:
Page 31 of 58 Copyright©2008 Spice Mobiles Ltd.
Page 32

Copy to Phone: Copy the SMS stored in the Master SIM to the phone memory.
Copy to SIM: Copy the SMS stored in the phone memory to the Master SIM.
Move to Phone: Move the SMS stored in the Master SIM to the phone memory.
Move to SIM: Move the SMS stored in the phone memory to the Master SIM.
66..66 PPUUSSHH MMeessssaaggee
Menu > Message > Master SIM SMS > PUSH Message
The push messages you received are stored in this box.
When viewing the entries list, select Option >
View: To read the highlighted entry.
Delete: To delete the highlighted entry.
Delete All: To delete all the entries.
When reading a push message, you can select Connect to activate the browser and link
to the URL.
66..77 SSMMSS SSeettuupp
Menu > Message > Master SIM SMS / Slave SIM SMS > Message Settings
SC Address: Edit the SMS center code. After the SIM card is inserted, the phone will
search the relevant SMS center code automatically. You need to check and confirm the
SMS center code before you are allowed to receive/send SMS.
Valid Period: Select the SMS retention time. The retention time is the period during witch
the SMS center tries to send the SMS. For details, consult the network operator.
Delivery Report: Set SMS reports, that is, you will receive a status report when the SMS
arrives at the receiver.
Memory Status: To view the SMS storage capacity of the SIM cards and the phone.
Preferred Storage: To select whether you prefer to save a SMS in the SIM cards or the
phone memory.
66..88 TToo sseenndd MMMMSS
MMS, which contains text, picture, image and ringtone, is sent through the MMS center to
another mobile phone or an e-mail account.
The phone supports sending and receiving MMS by GPRS, and multiple-sending.
Tip :You must insert the Micro SD card before using the MMS function.
Menu > Message > Master SIM MMS > Write MMS
Or, open a phone book name card, and select Option > Send Master SIM MMS
Select Option:
Add Text: To write text.
Add Audio: To select an Audi o from File Manager and add to the MMS.
Add Image: To select an image from File Manager and add to the MMS.
Add Video: To select a Video from File Manager and add to the MMS.
Insert New Frame: To add a new page.
Delete Frame: To delete the page.
Page 32 of 58 Copyright©2008 Spice Mobiles Ltd.
Page 33

Previous Frame: To browse the previous page.
Next Frame: To browse the next page.
After the editing, select Option >
Save: To save the MMS to Draftbox.
Edit Number: To enter the number edit screen.
Tip:
1. The phone supports multiple-sending (up to 20 numbers). If you input more than one
numbers, you need to input “,” between the numbers for separation.
66..99 MMMMSS NNoottiiffyy
When new MMS arrives, if you set to delay it, or set to receive it at once but the network is
busy or the memory card is not exist currently, you can receive a notify.
Menu > Message > Master SIM MMS > MMS Notify
Select Option >
View: To incept the highlighted MMS.
Delete: To delete the highlighted MMS.
Multi Delete: Use Menu key to select/cancel entries, and press Done to delete the
selected ones.
Delete All: To delete all the entries.
66..1100 MMMMSS IInnbbooxx
Indicates the MMS in Master SIM has not been read.
Indicates the MMS in Master SIM has been read.
Menu > Message > Master SIM MMS > Inbox > Option
View: To read the highlighted MMS.
Delete: To delete the highlighted MMS.
Multi Delete: Use Menu key to select/cancel MMS, and press Done to delete the
selected ones.
Delete All: To delete all the entries from the Inbox.
When reading a MMS, you can select Option >
Reply: To reply the MMS.
Call Back: To dial the number of the sender.
Auto Play: Play the MMS automatically.
Forward: To forward the MMS to others.
View Objects: To view, play and save the objects contained in the MMS.
Save Phone Number: To save the number of the sender in the phone book.
Delete: To delete the MMS.
Previous Frame: To browse the previous page.
Next Frame: To browse the next page.
Tip:
1. In auto play mode, press Navigation key (Up/Down/Left/Right) will stop auto play.
2. When reading a MMS, press Navigation key (Up/Down) to browse the previous/next
screen, press Navigation key (Left/Right) to browse the previous/next page.
Page 33 of 58 Copyright©2008 Spice Mobiles Ltd.
Page 34

66..1111 MMMMSS SSeennttbbooxx
MMS which have been sent or can’t be sent are stored in the Sentbox.
Menu > Message > Master SIM MMS > Sentbox > Option
View: To read the highlighted MMS.
Delete: To delete the highlighted MMS.
Multi Delete: Use Menu key to select/cancel MMS, and press Done to delete the
selected ones.
Delete All: To delete all the entries from the Sentbox .
When reading a MMS, you can select Option >
Resend: To send the MMS again.
Forward: To edit and forward the MMS to others.
Auto Play: Play the MMS automatically.
Delete: To delete the MMS.
View Objects: To view the objects contained in the MMS.
View To: To view the detailed information on the sender.
Previous Frame: To browse the previous page.
Next Frame: To browse the next page.
Tip:
1. In auto play mode, press Navigation key (Up/Down/Left/Right) will stop auto play.
2. When reading a MMS, press Navigation key (Up/Down) to browse the previous/next
screen, press Navigation key (Left/Right) to browse the previous/next page.
66..1122 MMMMSS DDrraaffttbbooxx
MMS saved during editing are stored in the Draftbox.
Menu > Message > Master SIM MMS > Draftbox > Option
View: To read the highlighted MMS.
Delete: To delete the highlighted MMS.
Multi Delete: Use Menu key to select/ cancel MMS, and press Done to delete the
selected ones.
Delete All: To delete all the entries from the Draftbox.
When reading a MMS, you can select Option >
Edit: To edit the MMS.
Auto Play: Play the MMS automatically.
Delete: To delete the MMS.
View Objects: To view the objects contained in the MMS.
Previous Frame: To browse the previous page.
Next Frame: To browse the next page.
Tip:
1. In auto play mode, press Navigation key (Up/Down/Left/Right) will stop auto play.
Page 34 of 58 Copyright©2008 Spice Mobiles Ltd.
Page 35

2. When reading a MMS, press Navigation key (Up/Down) to browse the previous/next
screen, press Navigation key (Left/Right) to browse the previous/next page.
66..1133 MMMMSS SSeettuupp
Menu > Message > Master SIM MMS > MMS Setting
1. Set MMS Access to always On, or always Off, or receive MMS only after you have
registered with the network.
2. Set, when a MMS arrives, to receive at once, or delay receiving, or reject receiving.
3. Set whether to receive anonymous MMS. (This needs the support from the network
operator.)
4. Set whether to receive advertisement. (This needs the support from the network
operator.)
5. Expiry Period: To set the period during which the MMS is stored at the service center.
(For details, consult your network operator.)
66..1144 UUssee TTeemmppllaattee
The phone has preset frequently used phrases which may be selected and added to the
text when you are editing SMS. Preset phrases may be modified.
Menu > Message > Template
Tip: Master SIM SMS and Slave SIM SMS use the same set of frequently used phrases.
66..1155 CChhaatt
This function is only for Master SIM. The phone provides two chat rooms. The contents of
chat will be sent as SMS. If the receiver’s mobile phone does not support the chat function,
the chat messages you send will be received as common SMS.
Menu > Message > Master SIM Chat
Select either chat room and enter the setup screen. Edit My Nickname . During the chat,
this nickname will be used and sent with the text to the person you chat with. Edit the
number of the person you want to chat with.
After setting, you can begin chatting. The chat contents between you and the other party
will be displayed in lines on the screen, and the screen will also display the number of the
other party.
In the chat screen, select Option >
Reply: To reply a message to the person you are chatting with.
Use Number: To extract the number of the person you are chatting with and the number(s)
contained in the chat contents into a list, and select to dial or save it/them in the phone
book.
Clear Chat: To clear the contents from the chat room.
Temp Leave: Leave the chat room for a while. If you do not switch off the phone, you can
come back and select to continue chatting.
Quit: To end the chat.
Chat Room Info: To enter the setup screen of the chat room in use.
Page 35 of 58 Copyright©2008 Spice Mobiles Ltd.
Page 36

66..1166 VVooiiccee MMaaiill
This function is only for Master SIM.
Menu > Message > Master SIM Voice Mail
Set the voice mail numbers. When connecting, you can call and listen to the voice mail.
Tip: If you have set the voice mail number, press and hold 1 key to dial the corresponding
number.
66..1177 CCeellll BBrrooaaddccaasstt MMeessssaaggee ((SSMMSS--CCBB))
Broadcast message is supported by GSM network. Broadcast messages provided by the
phone are single-way messages sent to the users of the network operators by the
message service center. For the contents and channel setup of broadcast messages,
consult your network operator.
Menu > Message > Master SIM CB
This function is only for Master SIM. You need to set Receive Broadcast Message to On
before you can use Broadcast Message.
Tip: If you have opened and turned on Broadcast Message, you can select Read
Message to browse the broadcast messages received. The phone will display 5
broadcast messages at most, since old messages will be replaced by the messages
newly received.
Page 36 of 58 Copyright©2008 Spice Mobiles Ltd.
Page 37
77 SSeettttiinnggss
77..11 PPhhoonnee SSeettttiinngg
Functions Description
Set Predictive Text Main Menu > Settings > Phone Setting > Predictive Text
Set Time and Date Menu > Settings > Phone Setting > Time and Date
Schedule Power On/Off Menu > Settings > Phone Setting > Schedule Power
Select language Menu > Settings > Phone Setting > Language
Set the wallpaper Menu > Settings > Phone Setting > Display > Wallpaper
Set the screen saver Menu > Settings > Phone Setting > Display > Screen
Set the Power On/Off
Display
Select to display the
date and time
Select to display the
Operator Name
Set the greeting Menu > Settings > Phone Setting > Greeting Text
Set speed dial Menu > Settings > Phone Setting > Speed Dial
Specify the Dedicated
key
Auto update of date and
time
Turn ON/OFF the Signal
LED
Adjust the brightness of
the screen
On/Off
To set whether to activate/deactivate, switch on/off, and
time in turn.
Choose one picture you like and set it as the wallpaper.
Saver
Choose one picture you like and set it as the Screen saver.
Menu > Settings > Phone Setting > Display > Power On
Display/Power Off Display
Choose one picture you like and set it as the Power On
Display/Power Off Display.
Menu > Settings > Phone Setting > Display > Show
Date and Time
Menu> Settings > Phone Setting > Display > Show
Operator Name
Menu > Settings > Phone Setting >Shortcut key
By default:
Navigation key (Up) > Master SIM SpiceGang;
Navigation key (Down) > Audio Player;
Navigation key (Left) > Write Master SIM SMS;
Navigation key (Right) > Bluetooth;
The function of each Navigation key can be modified
Press Navigation key (Up/Down) to select a function from
the list and press OK.
Menu > Settings > Phone Setting > Auto update of date
and time
The function can update date and time automatically from
network.
Menu > Settings > Phone Setting > Misc Setting>
Signal LED
Menu > Settings > Phone Setting > Misc Setting >
Backlight Setting
Page 37 of 58 Copyright©2008 Spice Mobiles Ltd.
Page 38
77..22 CCaallll SSeettttiinngg
Set whether to send the
owner number
Set Master SIM Call
Waiting
Set to divert Master SIM/
Slave SIM calls
Restrict calls Menu > Settings > Call Setting > Master SIM Call
Activate the talk time
alert
Activate / deactivate the
call time display
Send SMS When a Call is
Coming
Menu > Settings > Call Setting > Master SIM Caller ID /
Slave SIM Caller ID
Menu > Settings > Call Setting > Master SIM
Call Waiting
This function needs the network support and please contact
the network operator for more information.
Menu > Settings > Call Setting > Master SIM Call Divert/
Slave SIM Call Divert
Tip: You can select Cancel All Divert to cancel all the
divert settings.
This function needs the network support and please contact
the network operator for more information.
Barring / Slave SIM Call Barring
Restrict Calls is a GSM network service. Please contact
your network operator to obtain the password for opening
this service.
Menu > Settings > Call Setting > Call Time Reminder
You can select Off , Single or Periodic.
Menu > Settings > Call Setting > Call Time Display > On
/ Off
Menu > Settings > Call Setting > Send SMS When a Call
is Coming > On / Off
77..33 NNeettwwoorrkk SSeettttiinngg
Select GSM network for
Master SIM
Select GSM network for
Slave SIM
Select GSM preferred Menu > Settings > Network Setting > Master SIM
Menu > Settings > Network Setting > Master SIM
Network Selection
New Search: The phone will select a new network
automatically.
Select Network: The phone will search and display the list
of known networks for you to select the desired one, after
which, the phone will try to log in the selected network. If
the selected network is registered successfully, it will
prompt so.
Selection Mode: To switch search methods.
Menu > Settings > Network Setting > Slave SIM
Network Selection
Automatic: The phone will select a network automatically.
Manual: The phone will search and display the list of
known networks for you to select the desired one, after
which, the phone will try to log in the selected network. If
the selected network is registered successfully, it will
prompt so.
Page 38 of 58 Copyright©2008 Spice Mobiles Ltd.
Page 39
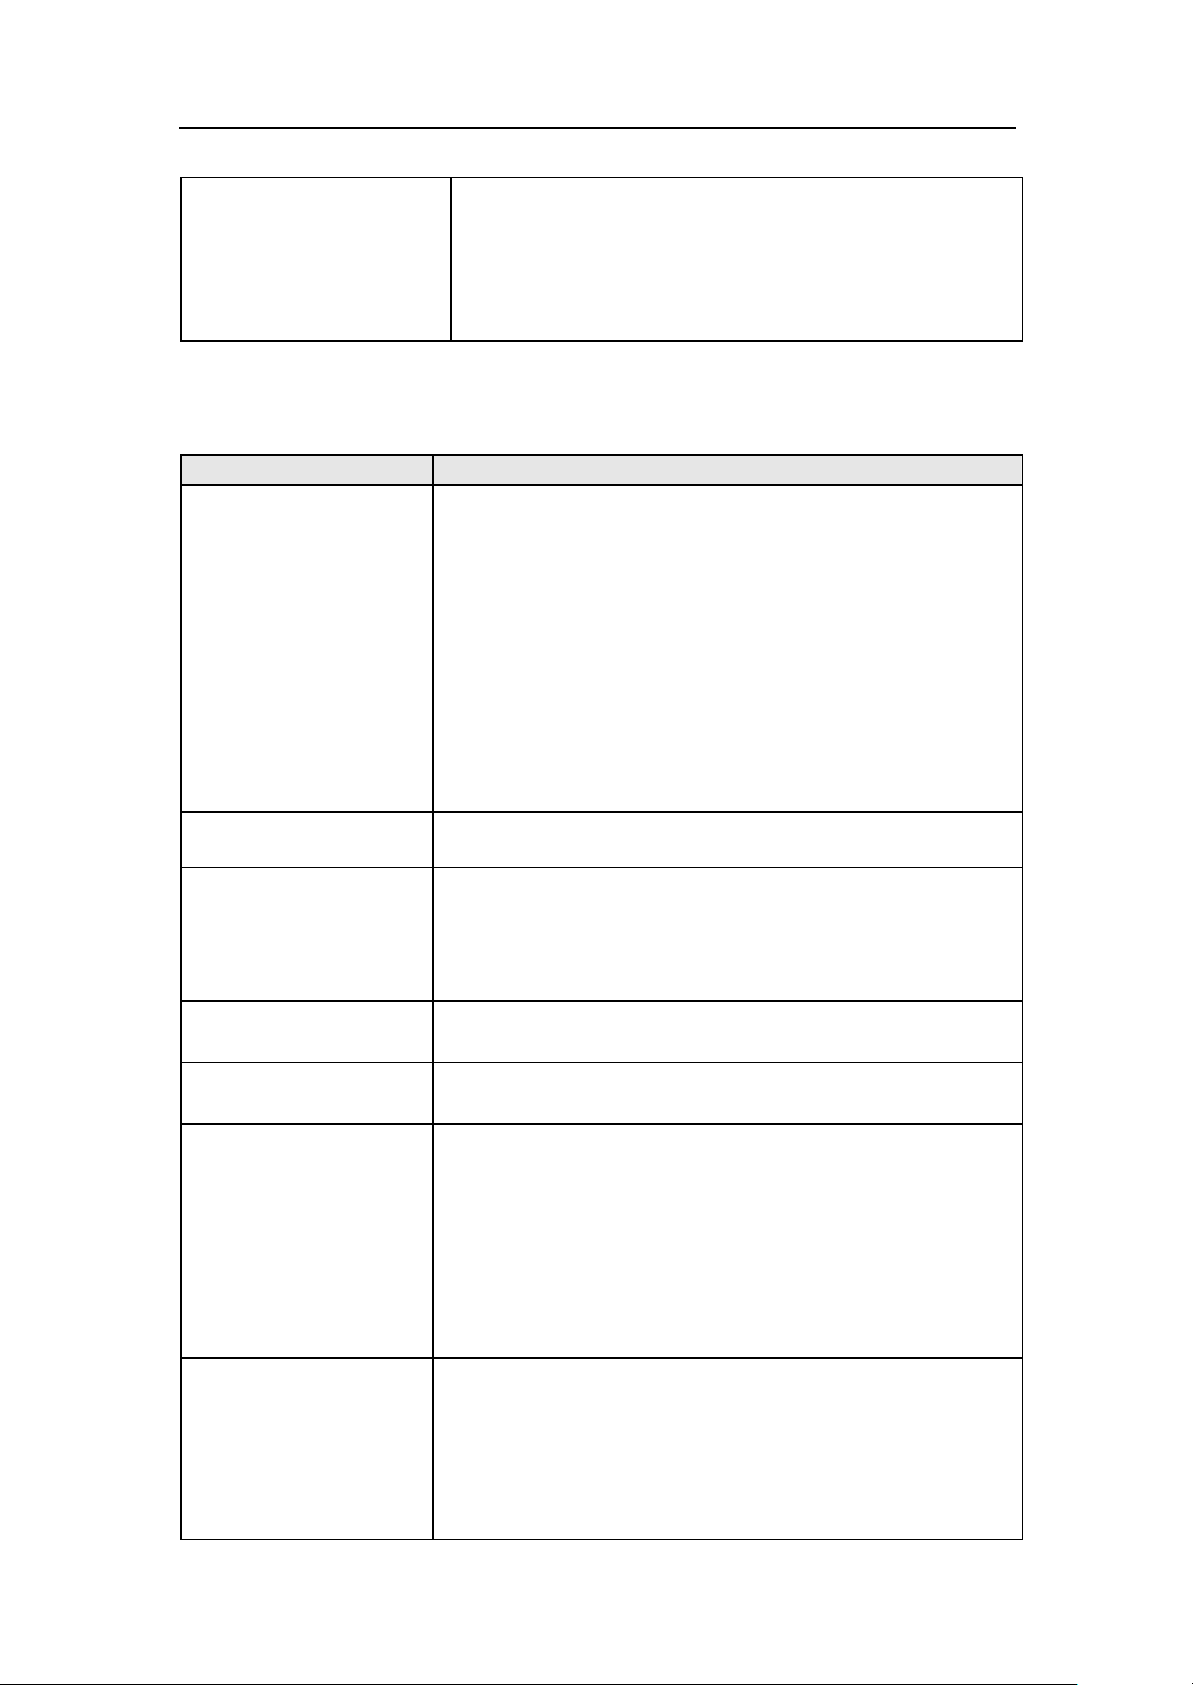
network Preferred Networks / Slave SIM Preferred Networks
The phone will search and display the available preferred
networks, with the serial number 1 indicating the highest
level of priority.
You can add new networks, or delete the existing ones, or
change the priority of the networks.
77..44 SSeeccuurriittyy SSeettttiinngg
Functions Description
Mobile Tracker Menu > Settings > Security Setting > Field Phone
Mobile Tracker Lock Menu > Settings > Security Setting > Field Phone
SIM lock Menu > Settings > Security Setting > Master SIM Lock /
Phone lock Menu > Settings > Security Setting > Phone Lock
Auto Keypad Lock Menu > Settings > Security Setting > Auto Keypad Lock
Incoming Call Firewall Menu > Settings > Security Setting > Phone Guard
Outgoing Call Firewall Menu > Settings > Security Setting > Phone Guard
Page 39 of 58 Copyright©2008 Spice Mobiles Ltd.
Security >Mobile Tracker No.
Please enter and save any other mobile number to which
default SMS will be sent.
As soon as you insert a new sim in the phone and a SMS will
be sent to the mobile number you set.
You need to set the Mobile tracker Lock to on before you use
the function.
by using the new sim and the default message will be
“Dear customer, Your Phone (IMEI**************) is now used
by the SMS sender No. If your phone is stolen or lost, please
inform to the concern authorities.”
Security >Mobile Tracker Lock
Slave SIM Lock
Warning: If you input three wrong PIN codes in a row, you
need to input the PUK code to unlock. PIN code and PUK
code are provided by the network operator.
The preset password is 1 122.
Set the time for the auto keylock or disable this function.
>Incoming Call Firewall
You can set the mode of Master SIM or Slave SIM, and edit
the list of numbers which can only be rejected or accepted.
Reject List: When this mode is activated, the phone will reject
the numbers in the Reject List.
Permit List: When this mode is activated, the phone will reject
all numbers except those in the Permit List.
>Outgoing Call Firewall
If you have a business SIM card and a personal SIM card, the
contacts of your two numbers are different, and a separate
management is important.
With this function, each number will not be leaked to
another’s contacts. That is to say, if you activate this function
Page 40
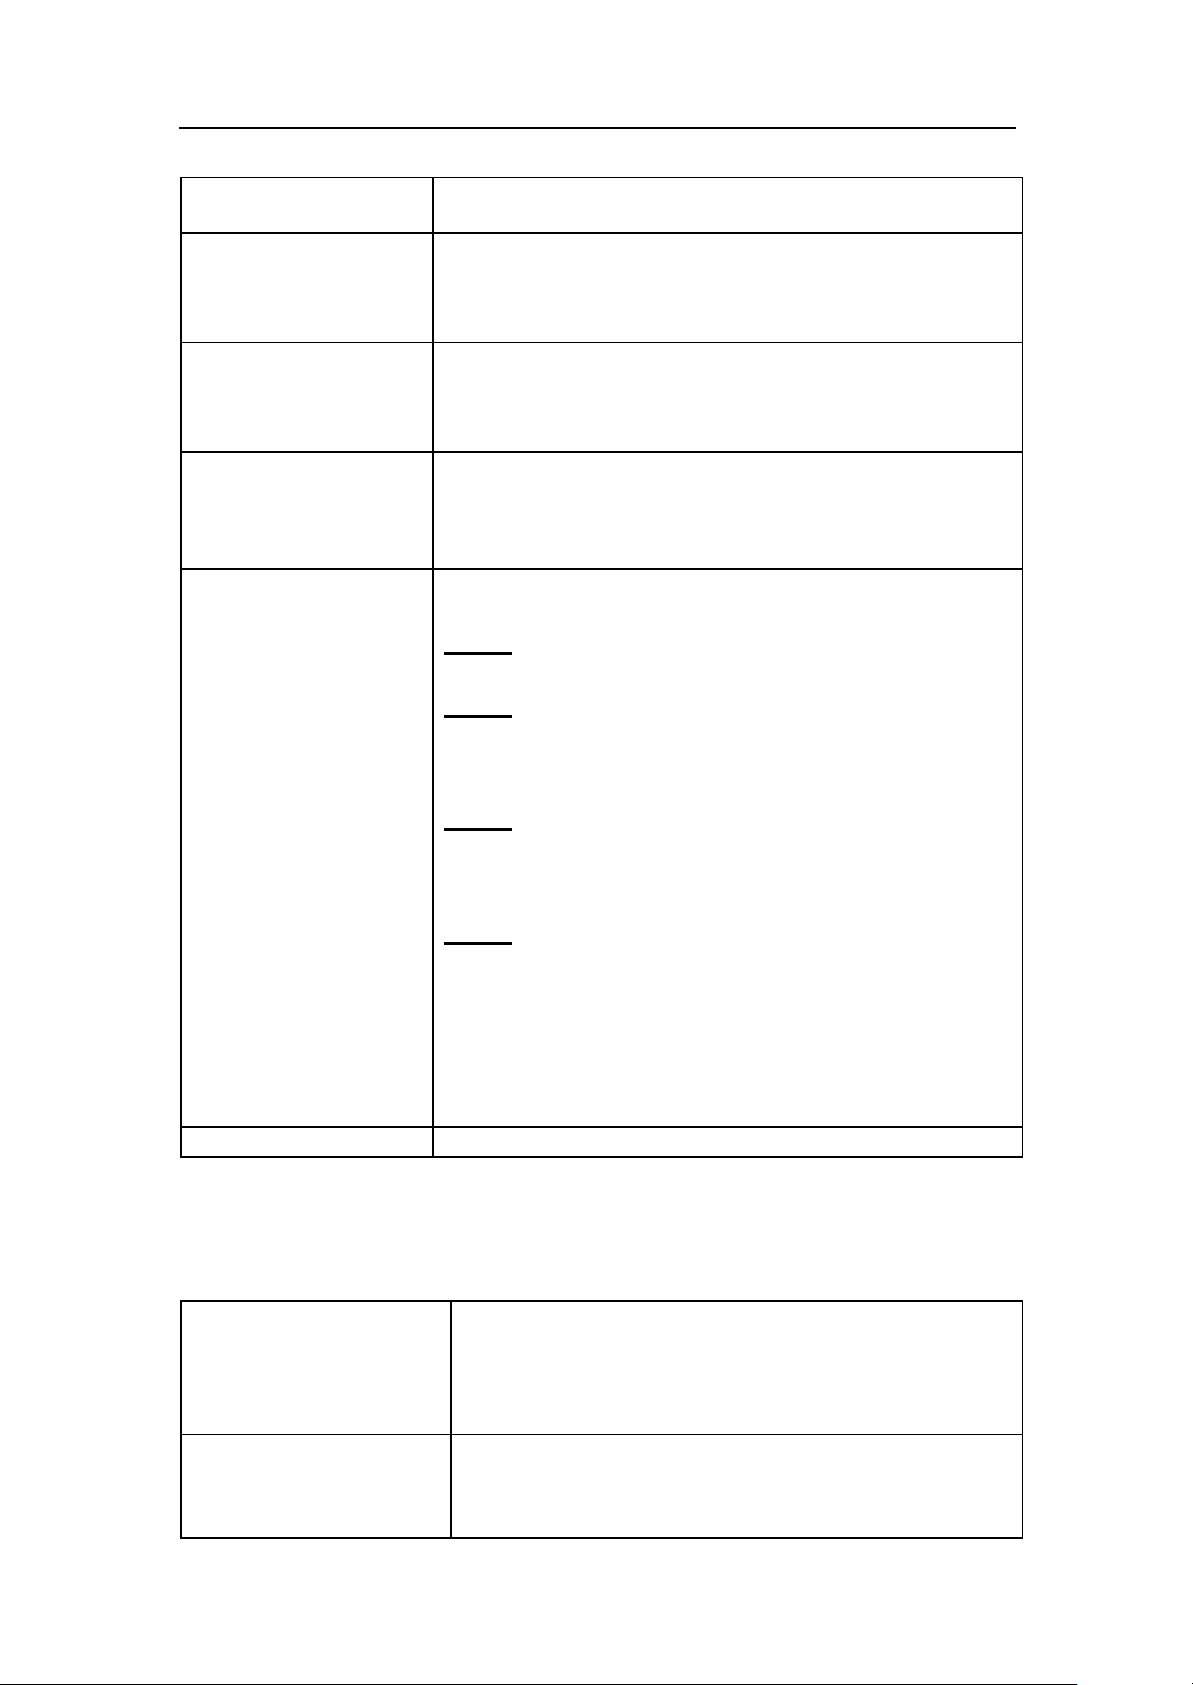
Menu > Setting
s > Phone Setting
> USB
Link
> PC
for one SIM card, the numbers set in the relevant list will
cannot be dialed from this SIM.
Received SMS Firewall Menu > Settings > Security Setting > Phone Guard >
Received SMS Firewall
For the relevant operations about Received SMS Firewall,
please refer to Incoming Call Firewall.
Sent SMS Firewall Menu > Settings > Security Setting > Phone Guard > Sent
SMS Firewall
For the relevant operations about Sent SMS Firewall, please
refer to Outgoing Call Firewall.
Set Fixed Dial for
Master SIM
Panic Button Main Menu > S ettings > Security Setup > Panic Button
Change password Menu > Settings > Security Setting > Change Password
Menu > Settings > Security Setting > Master SIM Fixed
Dial
Switch on/off about this Fixed Dial function and edit the
fixed-dial numbers.
Step1: Switch on Panic Button mode
Step2: Enter the message that you would like to go at the
time of Panic or Emergency. The number of characters
must be less than 140
Step3: Add the Mobile Number(s) which will receive the
message (that you defined in Step2) at the press of Panic
Button. The total numbers cannot exceed 5
Step4: Come out of the application.
Now whenever you feel uneasy or in case of any
emergency long press of 5 key will send the panic
message to the mobile numbers defined by you.
77..55 UUSSBB LLiinnkk
Mass Storage With the Micro SD card inserted, you can select to use the
PC Camera When the phone is switched on and the USB cable is
Page 40 of 58 Copyright©2008 Spice Mobiles Ltd.
phone as a U SB mass storage.
Plug the USB cable and select Menu > Settings >Phone
Setting > USB Link > Mass Storage , then press Yes to
switch off the phone.
connected, you can select to use the phone as a PC
Camera.
Page 41

Camera
Modem Fun You can use the phone as a Modem.
Menu > Settings > Phone Setting > USB Link >
Modem Fun
77..66 PPhhoonnee NNuummbbeerr
To view the phone information, select Menu > Settings > Phone Number.
77..77 SSttaannddbbyy MMooddee
If you want to switch the standby mode, select Menu > Settings > Standby Mode.
77..88 RReessttoorree FFaaccttoorryy SSeettttiinngg
Menu > Settings > Restore Factory Setting
Tip: You need to input the phone password when you want to restore factory default. The
preset phone password is 1122. Please bear your password in mind. If you have forgotten,
contact the local dealer or an authorized service center.
Page 41 of 58 Copyright©2008 Spice Mobiles Ltd.
Page 42

88 MMuullttiimmeeddiiaa
Tip: Before you insert the Micro SD card, the phone only provides FM Radio and Games
function, and other functions can’t be used.
88..11 CCaappttuurree IImmaaggee
With the Micro SD card inserted, select Multimedia > Capture Image.
When the camera is activated, the phone enters the view finding status.
l On the view finding screen, you can find the view from any angle, and press Send
Key to shoot photos. After that, you can select whether to save the photos according
to the message on the screen. However, if Multiple shot has been set, the phone will
save the photos automatically without prompting you.
l If you need to switch to the record video mode, you can press * key on the view
finding screen.
l On the view finding screen, the functions of the keys as follows:
Keys Functions
# To activate/deactivate the indication display
1 Effect Setting
2 White Balance
3 Delay Timer
4 Multiple Shot
5 Scene Mode
6 Image Quality
7 Image Size
8/ Volume key Add Frame (It is valid only when the photo size is 176 *
Navigation key
(Left/Right)
Navigation key
(Up/Down)
Before shooting, you can set the following as needed. Press Option >
Album: To switch to View Image.
220.)
To adjust the EV value (0 ~ +/-4)
To adjust the Optical Zoom Ratio (1.0 ~ 4.0)
Camera Setting: To set Shutter Sound, EV, Banding,Delay Timer, Multiple Shot, and
whether to activate Full Screen.
Image Setting: To set the size and quality of photos.
White Balance: To set White Balance.
Scene Mode: To set scene mode.
Effect Setting: To set the special effects of photos, such as Grayscale, Sepia, Sepia
Green, etc.
Page 42 of 58 Copyright©2008 Spice Mobiles Ltd.
Page 43

Add Frame: To select whether to add a frame for a photo. It is valid only when the photo
size is 176 * 220.
Restore Default: To restore default settings.
Tip: If you shoot in weak light, such as night or indoor scene, the ISO Sensitivity may
increase, which will cause noise or mottle.
88..22 VViieeww IImmaaggee
With the Micro SD card inserted, select Menu > Multimedia > View Image
Or on the view finding screen, select Option > Album
The phone will automatically read the entries with the format supported by the phone
under the folder Photos of File Manager and display a list of entries. If there is no entry,
the list is blank.
On the view Image list screen, select Option>
View: To view the highlighted photo.
Browse Style: To select the style of viewing.
Forward: To set the highlighted photo as wallpaper, screen saver, Display of Power
On/Off, the photo caller ID of a phone book entry. You can also add it to a new MMS, or
send it to another compatible device by Bluetooth.
Rename: To rename the highlighted file.
Delete: To delete the highlighted file.
Delete All: To delete all the files from the list.
Sort: To sort the files in the list.
88..33 RReeccoorrdd VViiddeeoo
With the Micro SD card inserted, select Menu > Multimedia > Record Video
l Press Send Key to begin recording. During the recording, press Stop to end the
recording and save the video automatically; or press Pause to pause the recording,
and press Resume to resume recording.
l On the view finding screen, press Navigation key (Left/Right) to adjust the EV value
(0 ~ +/-4); press Navigation key (Up/Down) to adjust the Optical Zoom Ratio (1.0 ~
4.0).
l If you need to switch to the capture image mode, you can press * key on the view
finding screen.
Before recording, you can set the following as needed. Press Option >
To Player: To switch to Video Player.
Camcorder Setting: To set EV, White Balance, Night Mode and Banding. In which, “Night
Mode” can also be set by pressing the number key “3” on the view finding
screen, “White Balance” can also be set by pressing the number key “2” on
the view finding screen.
Video Setting: To set the Video Quality, File Size Limit, Rec Time Limit and Record Audio.
Effect Setting: To set the special effects, such as Grayscale, Sepia, Sepia Green etc. The
Effects can be set by pressing the number key “1” on the view finding screen.
Page 43 of 58 Copyright©2008 Spice Mobiles Ltd.
Page 44

Restore Default: To restore default settings.
Tip: If you shoot in weak light, such as night or indoor scene, the ISO Sensitivity may
increase, which will cause noise or mottle.
88..44 VViiddeeoo PPllaayyeerr
With the Micro SD card inserted, select Menu > Multimedia > Video Player
Or on the view finding screen, select Option > To Player
The phone will automatically read the entries with the format supported by the phone
under the folder Video of the File Manager and display a list of entries. If there is no entry,
the list is blank.
On the video player list screen, select Option>
Play: To enter the play screen of the highlighted file.
n Press OK key to begin playing; press Stop to end the playing. When playing, press
OK key to pause/resume the playing.
n Press Volume key to adjust the volume; Press Navigation key (Up) to begin playing;
press Navigation key (Left/Right) to adjust the progress, press the number key 2/8
to adjust playing speed, press Send key to snap the screen and save the picture
automatically; press * key to rotate the screen clockwise by 90° to realize full-screen
play or restore the normal status.
n Select Option > Video Settings to set brightness, contrast and repeat mode for
video.
n Select Option > Bluetooth Settings to set whether to active BT Stereo Output, and
select BT Stereo Headset.
Forward: To set the highlighted file as Display of Power On/Off. You can also send it to
new MMS, or other Bluetooth device.
Rename: To rename the highlighted file.
Delete: To delete the highlighted file.
Delete All: To delete all the files from the list.
Sort: To sort the files in the list.
88..55 AAuuddiioo PPllaayyeerr
With the Micro SD card inserted, select Menu > Multimedia > Audio Player
The music player supports these formats: MP3, Midi, WAV, AWB, AMR and IMY.
Create Play list
Before enjoying music for the first time, you need to create a play list. Depending on your
settings, the play list can be a list of tracks or a list of folders.
You may create a play list with these two means.
Auto Update:
1. In Player Settings, activate List Auto Gen.
2. On the play list screen, select Option > Refresh Play list.
3. The phone will add the tracks with the format supported by the phone under the folder
Page 44 of 58 Copyright©2008 Spice Mobiles Ltd.
Page 45

My Music of the File Manager to the play list automatically.
Manual Update:
1. In Player Settings, close the List Auto Gen.
2. On the play list screen, select Option > Add / Remove/Remove All
3. Add new tracks or new folders from the File Manager, or delete the tracks from the
play list.
Player Settings
Set whether to activate the List Auto Gen.
Set whether to repeat, repeat one or repeat all tracks.
Set whether to shuffle the tracks.
Set whether to play background.
Set whether to play a list of tracks or a list of folders.
Display Settings
Set whether to display the Spectrum.
Set whether to display Lyrics.
Bluetooth Settings
Set whether to active BT Stereo Output.
Set whether to select BT Stereo Headset.
When playing
Navigation key (Left): To play the previous track.
Navigation key (Right): To play the next track.
Navigation key (Up): To pause or resume playing.
Navigation key (Down): To stop playing.
Volume key: To adjust the volume.
* Key: To set repeat modes.
# Key: To set play at random or in order.
Send key: To switch between the previous and next folders (if it is playing a list of folders).
To view the information on a track
In the play list screen, select a track and select Option > Detail
Add to Rings
Rings are the list of ringtones selectable in the profile mode setup. You can select a single
track and add it to the Rings.
On the play list screen, select a track and select Option > Add To Rings
Page 45 of 58 Copyright©2008 Spice Mobiles Ltd.
Page 46

88..66 SSoouunndd RReeccoorrddeerr
Menu > Multimedia > Sound Recorder
On the Sound Recorder list screen, you can select:
Record: To begin recording. The recordings will be saved in the folder VoiceRecorders
under the File Manager automatically.
Play: To play the highlighted recording.
Append: To continue to record the highlighted recording. (The format must be AMR or
AWB).
Rename: To rename the highlighted recording.
Delete: To delete the highlighted recording.
Delete All: To delete all the recordings from the list.
Settings: To set the format of the recording.
Forward: To send the highlighted recording to the ringtone list for profiles, or add it to the
MMS you are editing. You can also send it to another compatible device by Bluetooth.
88..77 FFMM RRaaddiioo
Plug the earphone into the jack of the phone, and select Menu > Multimedia > FM Radio
Navigation key (Up): To play or stop.
Navigation key (Left/Right): To decrease or increase the frequency, or search the
previous or next radio station automatically in Auto Search mode.
Navigation key (Down):Set the search automatically on or off. If search automatically:
Search automatically and play; if no: search channel manually.
Volume Key: To increase or decrease volume.
Press Menu key (Option) for the following options:
Channel List: View and edit the channel.
Manual Input: Directly input a frequency for FM radio.
Preset Auto S earch: Auto search and preset the channel.
Settings: Play FM background or not. Switch the speaker on or off. Select the record
format.
Record: record during the playing.
Append: Continue to record.
File list: view the recordings under the File Manager.
88..88 FFuunn && GGaammeess
Menu > Multimedia > Fun & Game s> Java> Run Java>Install Application
You can expand phone functionalities by in stalling Java applications
You may download add-on applications with these two means :
l Download the applications to PC, and transfer them to the phone via USB config.
l Download the applications via WAP.
You should insert the TF Card with the application of Opera Mini 3 inside first.(The application
of Opera Mini 3 has been fixed in TF Card)
Press Menu > Multimedia > Fun & Game s > Java > Run Java >Opera Mini 3
Page 46 of 58 Copyright©2008 Spice Mobiles Ltd.
Page 47

When surfing the web, select Menu>
Enter address: To enter address you desired.
Start page : To view the web page.
Bookmarks: To display the bookmarks you have saved.
Tools: To make the relevant settings.
Exit: To exit the Opera Mini 3.
Tip: You need to make the relevant settings in Connect Settings and Java Settings before you use
the Opera Mini 3 to surf the web.
Menu > Multimedia > Fun & Game s > Games
The phone contains three games by default: Snake, Puzzle and Panda.
Before playing games, you can
l Set the games: Select Menu > Multimedia > Fun & Game s > Games > Game
Setting and you can set the BGM and Sound Effect.
l View instructions: Select Menu > Multimedia > Fun & Games > Game s
>Snake/Puzzle /Panda > Game Help.
l For the game Snake and Puzzle, you can select the difficulty level.
Start the games following the instructions. When a game ends, you can view the score list
(highest scores).
Page 47 of 58 Copyright©2008 Spice Mobiles Ltd.
Page 48
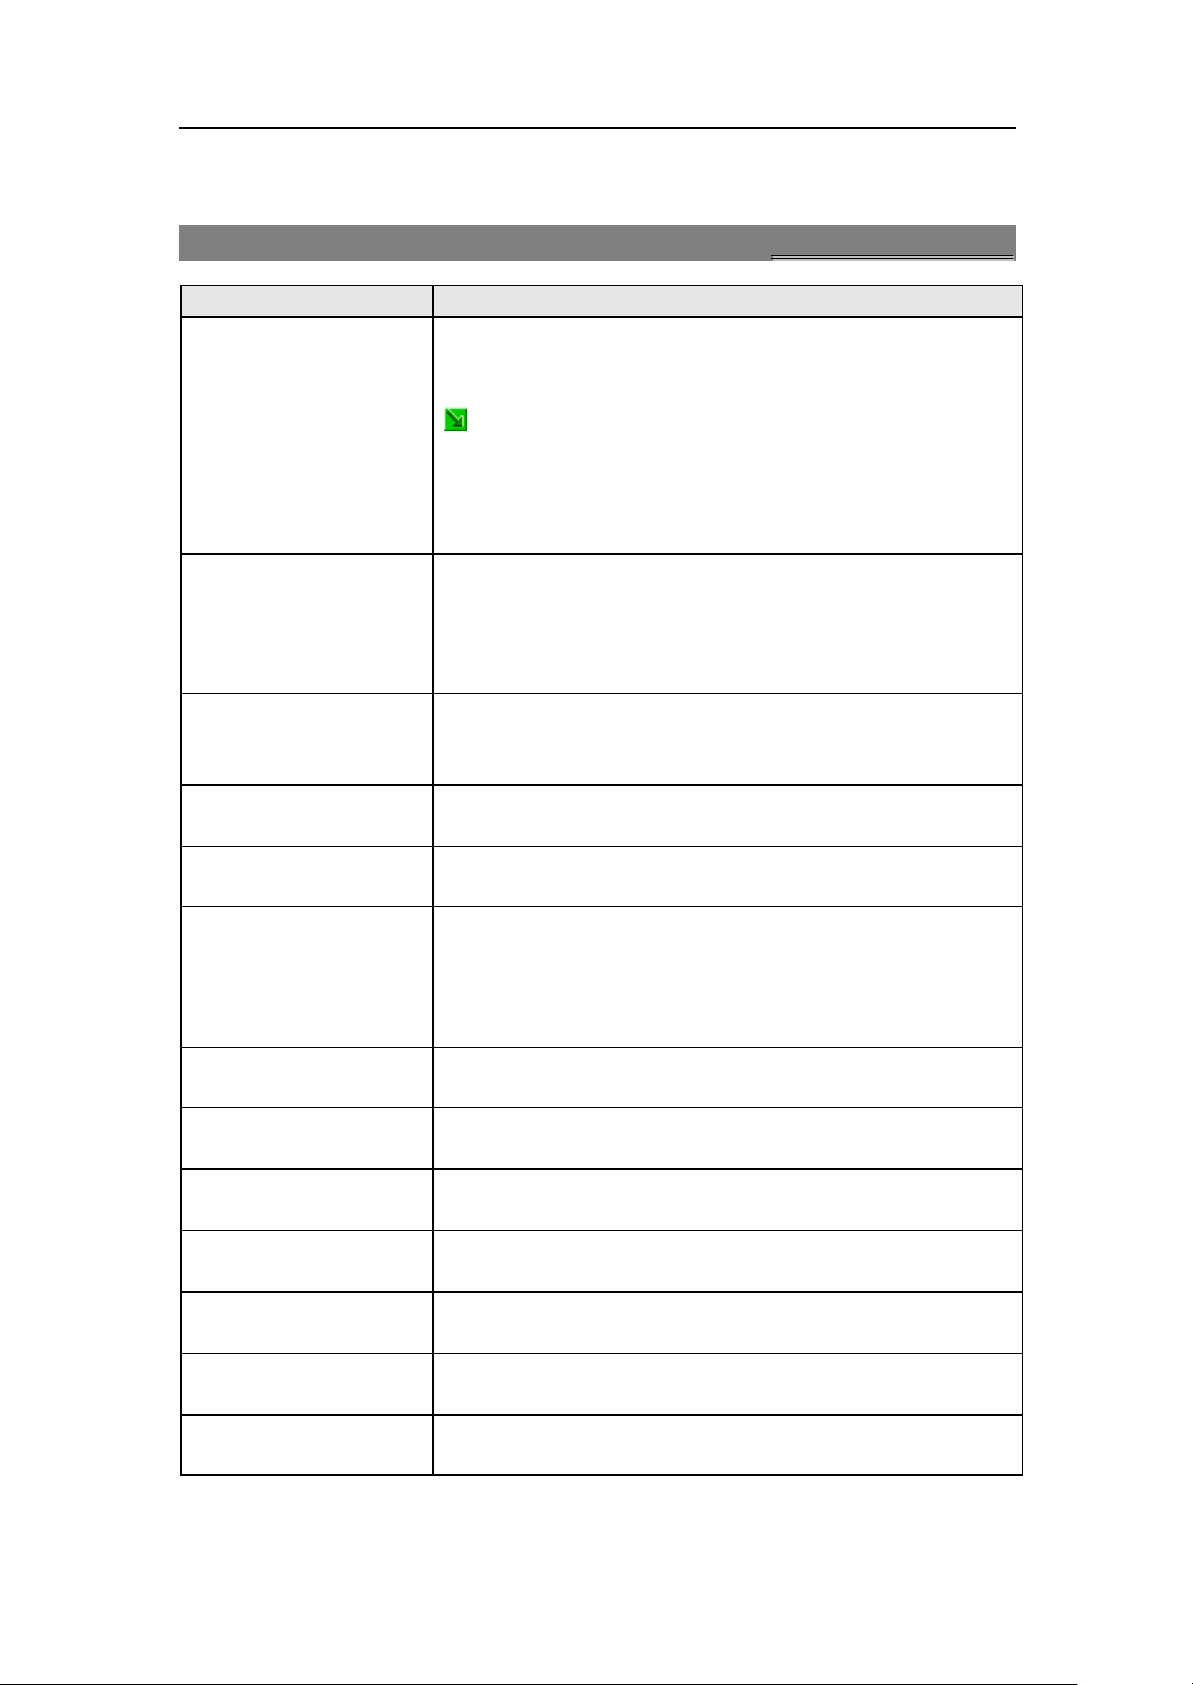
99 UUsseerr PPrrooffiilleess
Functions Description
Activate the profile
mode
Set the ringtone for
incoming calls
Set the alarm ringtone
for event
Set the ringtone for
Switch On sound
Set the ringtone for
Switch Off sound
Set the ringtone for
messages
Set the ringtone for
key sound
Adjust the volume of
Ring Tone / Key Tone
Set Alert Type of
ringing
Set the ringtone type Menu > User Profiles > Desired Mode
Set the Extra Tone Menu > User Profiles > Desired Mode
Set the answer mode Menu > User Profiles > Desired Mode
Set the light color for
incoming call
Menu > User Profiles > Desired Mode
Option > Activate
Or press Send key to activate it.
Indicates the mode activated currently.
Tip1: When you insert the earphones, the earphone mode
will be activated automatically.
Tip2:In idle, long press # key can activate the silent mode or
return to the previous mode.
You can set different ring tones for the incoming call from
Master SIM and Slave SIM.
Menu > User Profiles > Desired Mode
Option > Customize> Tone Setup> Master SIM Incoming
Call/ Slave SIM Incoming Call
Menu > User Profiles > Desired Mode
Option > Customize > Tone Setup > E vent
Menu > User Profiles > Desired Mode
Option > Customize > Tone Setup > Power On
Menu > User Profiles > Desired Mode
Option > Customize > Tone Setup > Power Off
You can set different ring tones for the incoming message
from Master SIM and Slave SIM.
Menu > User Profiles > Desired Mode
Option > Customize > Tone Setup > Master SIM Message
Tone/ Slave SIM Message Tone
Menu > User Profiles > Desired Mode
Option > Customize > Tone Setup > Keypad Tone
Menu > User Profiles > Desired Mode
Option > Customize > Volume
Menu > User Profiles > Desired Mode
Option > Customize >Alert Type
Option > Customize > Ring Type
Option > Customize > Extra Tone
Option > Customize > Answer Mode
Menu > User Profiles > Desired Mode
Option > Customize > Status LED
Page 48 of 58 Copyright©2008 Spice Mobiles Ltd.
Page 49
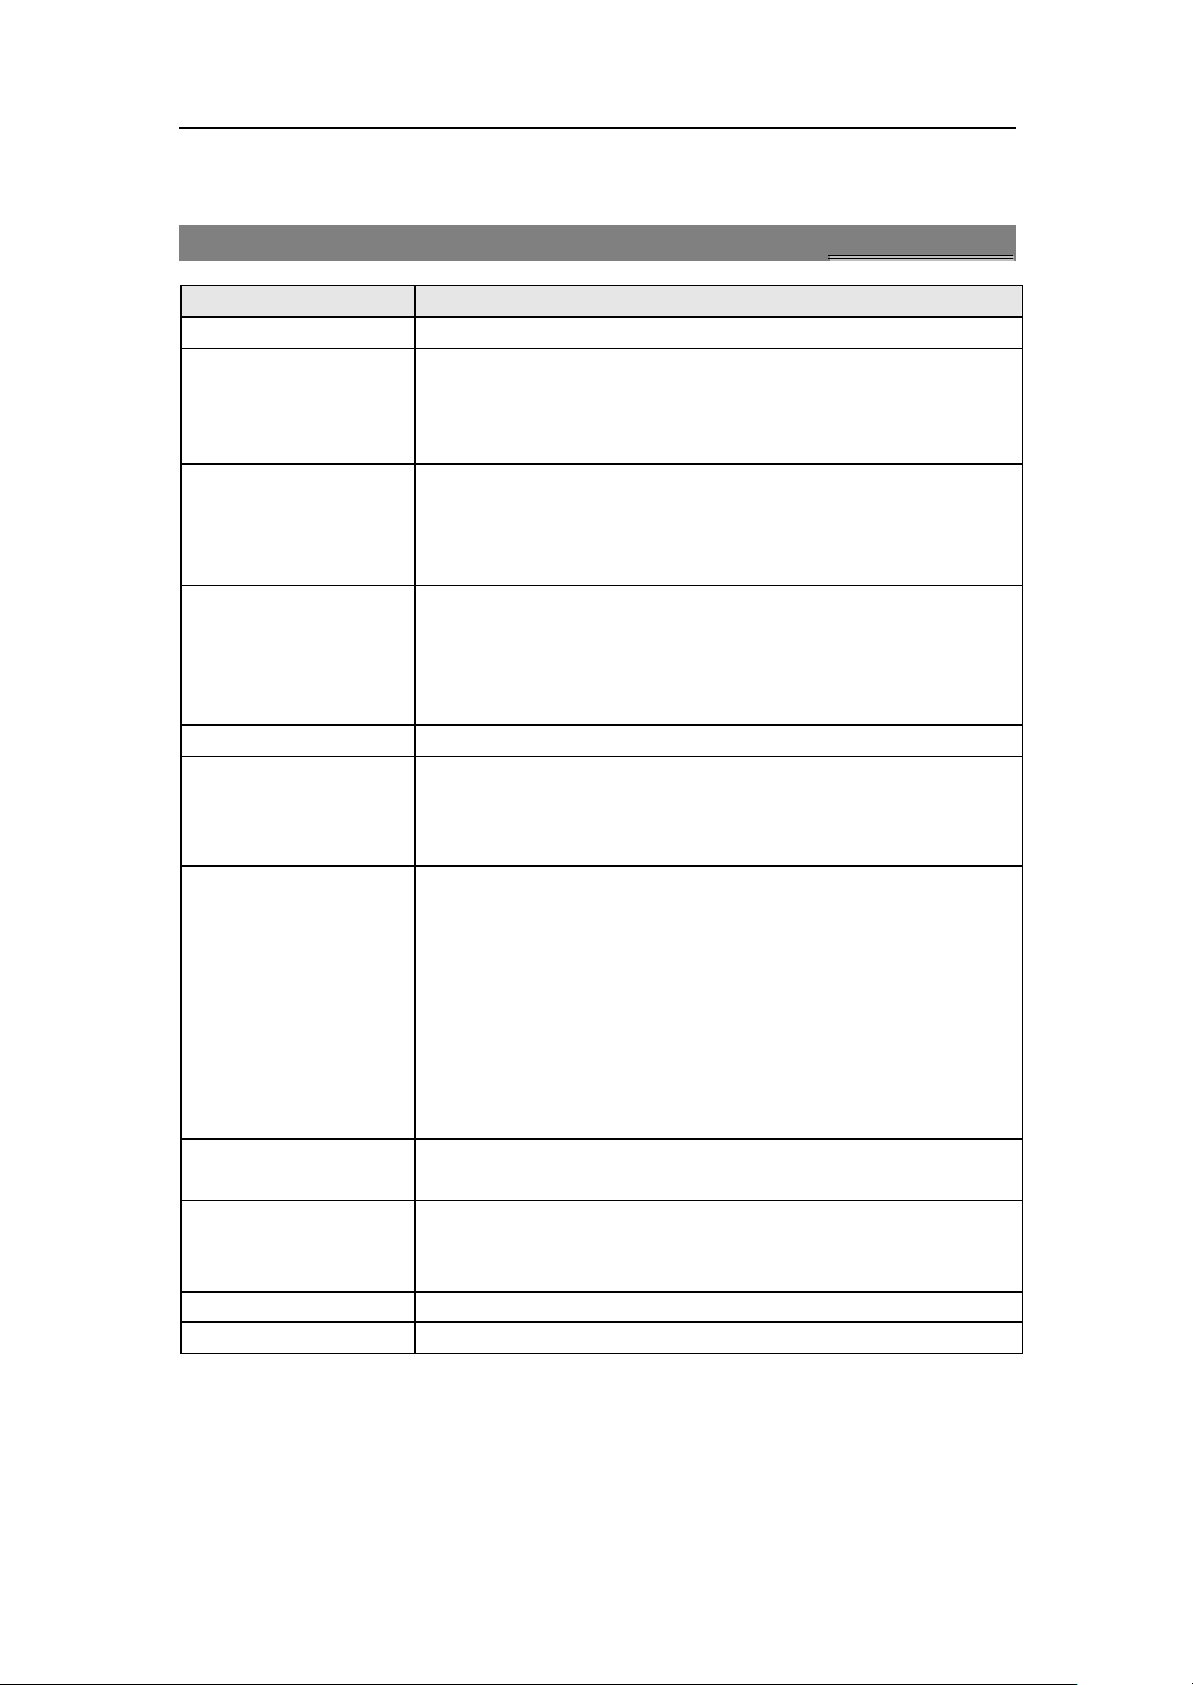
1100 OOrrggaanniizzeerr
Functions Description
View the calendar Menu > Organizer > Calendar
Add To Do List Menu > Organizer > To Do List
Option > Add
You can create and check your schedule and set alarms to
remind you of upcoming events. You can store up to 50 entries.
View the events in
the To Do List
Set the Alarm Menu > Organizer > Alarm > Edit
World Clock Menu > Organizer > World Clock
Calculator Menu > Organizer > Calculator
Stopwatch Menu > Organizer > Stopwatch > Typical Stopwatch > Split
Units Converter Menu > Organizer > Units Converter > Weight / Length
Currency Converter Menu > Organizer > Currency Converter
BMI Menu > Organizer > Health > BMI
Menstrual Menu > Organizer > Health > Menstrual
Menu > Organizer > To Do List
Option > View
Or: Menu > Organizer > Calendar
Option > View Tasks
This function allows you to set 5 alarm clocks. When the alarm
time reaches, the phone rings or vibrates.
When set the repeat mode, you can choose the exact days.
Then the phone reminds you in these days every week.
This calculator supports add, subtracts, multiply and divide, and
the calculated numbers cannot exceed 12 digits due to
accuracy limitation.
Timing/Lap Timing / View Record
Press Start to start timing, and press Split / Lap continuously
to record more than one time. Press Save to save the time.
Menu > Organizer > Stopwatch > nWay Stopwatch
Press Start to start timing, and press the corresponding
Navigation key to activate the sub-timing. The main timing will
continue to add. Select Stop to stop the main timing and the
sub-timing.
Tip: Long press Resume to clear all the time.
Select the unit to be converted, and input the figure.
Input the exchange rate and press OK.
Select the exchange rate, input the figure and press OK.
Page 49 of 58 Copyright©2008 Spice Mobiles Ltd.
Page 50

1111 SSeerrvviicceess
1111..11 SSTTKK SSeerrvviicceess
If your Master SIM card supports STK, you may use the corresponding value-added
services.
Menu > Services
1111..22 SSppiicceeGGaanngg
Main Menu > Services >Master SIM SpiceGang/Slave SIM SpiceGang
You need to make the relevant settings in WAP Setting before you use the SpiceGang to surf the
web.
When the SpiceGang is activated, homepage is set as default, the phone will link the website
indicated by the homepage.
Tip: The phone has an internal default homepage and you can’t modify it.
When surfing the web, select Option >
Homepage: To view the homepage.
Stop: To stop loading a web page.
Forward/Backward: To turn to the next / previous page.
Refresh: To refresh the web page.
Input URL: To input a website.
Set Homepage: To set the address of the current web page as the address of the homepage.
English/Unicode: To change the front.
Exit: To exit the browser.
1111..33 WWAAPP BBrroowwsseerr
Menu > Services > Master SIM WAP Browser / Slave SIM WAP Browser
You need to make the relevant settings in WAP Setting before you use the WAP browser
to surf the web.
When the WAP browser is activated, if a homepage is set in Settings, the phone will link
the website indicated by the homepage; otherwise, you may input a website and the
phone will connect to it.
When surfing the web, select Option >
Homepage: To link the homepage.
Stop: To stop loading a web page.
Page 50 of 58 Copyright©2008 Spice Mobiles Ltd.
Page 51

Forward/Backward: To turn to the next / previous page.
Input URL: To input a website.
Refresh: To refresh the web page.
Set Homepage: To set the address of the current web page as the address of the
homepage.
English/Unicode: To change the front.
Exit: To exit the browser.
When surfing the web, you can press Navigation key (Up/Down) to move the cursor,
press “2” or “8” to browse the previous/next screen.
1111..44 WWAAPP SSeettttiinngg
WAP settings are required for surfing the web with WAP.
Menu > Services > WAP Setting
You can set the following:
Connect Type: To set to HTTP or WSP.
Auto Offline: To set whether to go off-line automatically and the time of going off-line.
1111..55 CCoonnnneeccttiioonn SSeettttiinngg
Menu > Services > Connection Setting > Master SIM/ Slave SIM
You can change the default settings or edit the user -defined accounts.
1111..66 BBlluueettooootthh
Tip:
1. The device is compliant with Bluetooth Specification 2.0 supporting the following
profiles: Handsfree Profile, SPP Profile, OPP Profile, FTP Profile, A2DP Profile,
AVRCP Profile, and HID Profile. To ensure interoperability between other devices
supporting Bluetooth technology, select and use the accessory applying to this type
mobile telephone or consult your service provider.
2. You can connect wirelessly to other compatible device with Bluetooth technology.
Compatible devices may include computers, mobile phones. You can use Bluetooth
connectivity to send images, music and sound clips, video clips, and vCard or
vCalendar.
3. Since devices with Bluetooth wireless technology communicate using radio waves,
your devices and the other devices only need to be within 10 meters of each other, but
the connection may be subject to interference from obstruction from such as wall or
from other electronic devices. Use the wireless technology of Bluetooth to be able to
consume battery quantity of electric charge. If you are restricted by something when
using Bluetooth technology, consult local authorities please.
Page 51 of 58 Copyright©2008 Spice Mobiles Ltd.
Page 52

To
activate/deactivate
Bluetooth
connectivity
To inquiry Audio
Device
To inquiry New
Device
To view the
previous matching
device
To view the online
device
Bluetooth Setting Menu>Services>Connection Setting > Bluetooth > Settings
Menu>Services>Connection Setting>Bluetooth>Power(On/Off)
Menu>Services>Connection Setting>Bluetooth>Inquiry Audio
Device
Tip: Please activate the Bluetooth first.
Menu>Services>Connection Setting>Bluetooth>My
Device>Option>Inquiry New Device
Tip: Please activate the Bluetooth first.
Menu>Services>Connection Setting >Bluetooth > My Device
Menu>Services>Connection Setting > Bluetooth > Active Device
Visibility: This lets you select whether your phone can be found by
another device.
Change Device Name : To view and edit the name of your phone.
Authentication: If other devices do not exist in the "My Device" and
Authentication is activated, the password is required when transmitting
files between your phone and other devices or when the phone is
connected to other devices as the FTP server (that is sharing files with
other devices via FTP)
Audio Path: To select the call voice through the phone or the BT
headset.
FTP Setting: To set the path of the shared folder and access right.
Page 52 of 58 Copyright©2008 Spice Mobiles Ltd.
Page 53
1122 FFiillee MMaannaaggeerr
With the Micro SD card inserted, when the phone is switched off and the USB cable is
connected, you can use the phone as a USB mass storage.
To use the phone as a USB mass storage when the phone is switched on and the USB
cable is connected, you need to select Menu > Settings > Phone Setting > USB Link >
Mass Storage and press Yes to switch off the phone.
Functions Description
View folders Menu > File Manager
Option > Open
Tip: Press Navigation key (Left/Right) to return to the
previous level of folder or enter the next level of folder.
Create folders Menu > File Manager > Option > Create Folder
View files Menu > File Manager > Option > Open
Option >Detail
Send by Bluetooth Menu > File manager > Option > Open
Option > Forward> To Bluetooth
Tip: You should activate Bluetooth first.
Format Menu > File Manager > Option > Format
Tip: The Format function will delete the data you have created
and saved. Please back up important data and keep them
properly.
Page 53 of 58 Copyright©2008 Spice Mobiles Ltd.
Page 54

1133 MMaaiinntteennaannccee
Use a dry soft cloth to wipe general dirt. For a large amount of dirt, use a soft towel soaked
with neutral scour and twisted to gently wipe the dirt and use a dry soft cloth to wipe the
phone.
Do not use a hard cloth, benzene or thinner to wipe the phone, otherwise, the surface of
the phone will be scratched, change color or fade.
Page 54 of 58 Copyright©2008 Spice Mobiles Ltd.
Page 55
1144 TTrroouubblleesshhoooottiinngg
If any problem occurs in your phone, please refer to the help information in the table below.
If the problem continues, contact the dealer.
Problem Possible Causes Solutions
l Is the battery power low? l Charge the battery.
Unable to switch
on
Unable to make
a call
Communication
interrupted
suddenly
l Do you press End key for adequate
time?
l Is the battery inserted correctly? l Insert the battery
l Is the phone outside of the service
area?
l Is the phone number correct? l Check that the number is
l Are you in a place with weak
signal?
l Is there any object around that
obstructs signal transmission?
l Are you moving in high speed
during conversation?
l Press End key for over 2
seconds.
correctly.
l Move to a place where
signal can be received
strongly.
correct.
l Move to a place with
strong signal.
l Go to another place.
l The signal will interrupt
when the phone switch
between 2 cell station.
Please move in low
speed.
l Is the charger plugged to the phone
correctly?
Unable to
charge the
battery
Insert the SIM
card
Page 55 of 58 Copyright©2008 Spice Mobiles Ltd.
l Is the power cable of the charger
disconnected from the socket?
l Is the battery too old?
l Do you insert the SIM card
correctly?
l Is the SIM card connector dirty? l Please clean the SIM
l Is the SIM card damaged? l Please check the SIM
l Plug the charger to the
phone correctly.
l Check the connection.
l Contact the seller to
replace the phone with a
new battery.
l Please insert the SIM
card correctly.
card.
card and return it to the
service provider.
Page 56

1155 AAfftteerr SSeerrvviicceess
For details, see the After Service Guide supplied with the phone.
Page 56 of 58 Copyright©2008 Spice Mobiles Ltd.
Page 57
1166 IInnppuuttttiinngg TTeexxtt
You can input Eng lish, digits and symbols. The input methods include Multitap ABC (English capital), Multitap abc (English – lower case), Numeric (digits), ENG and eng.
Press # key to switch input methods.
1166..11 KKeeyyss aanndd CChhaarraacctteerrss TTaabbllee
Input Methods Keys Characters or Functions
English letters
1 To open the common symbol list:
“.”/“,”/“-”/“?”/“!”/“’”/“@”/“:”/“#”/“$”/“/”/“_”/“(”/“)
_”/“1”.
2
3
4 g/h/i/4(G/H/I/4)
5 j/k/l/5(J/K/L/5)
6 m/n/o/6(M/N/O/6)
7 p/q/r/s/7(P/Q/R/S/7)
8 t/u/v/8(T/U/V/8)
9 w/x/y/z/9(W/X/Y/Z/9)
a/b/c/2(A/B/C/2)
d/e/f/3(D/E/F/3)
0 Space, 0
* To open the symbol list
#
Digits
ENG/eng 2 - 9 To input English letters
* To open the symbol list
0 - 9 0 ~ 9
* To open the symbol list
#
#
To switch input methods
To switch input methods
To switch input methods
1166..22 AABBCC//aabbcc IInnppuutt MMeetthhoodd
We now describe how to input “OK” with ABC input method.
1. Press # key to switch to ABC input method.
2. Press 6 thrice to input “O”.
3. Press 5 twice to input “K”.
1166..33 TToo iinnppuutt ddiiggiittss
Press # key to switch to 123 (Digits) input method. Press the corresponding number keys to
input digits.
Page 57 of 58 Copyright©2008 Spice Mobiles Ltd.
Page 58

1166..44 TToo iinnppuutt ssyymmbboollss
Press * key to enter the symbol list.
When ABC/abc input method is used, you can press 1 to input frequently used symbols and press
1 repeatedly to select symbols.
1166..55 EENNGG//eenngg IInnppuutt MMeetthhoodd
1. Press # key to switch to ENG input method.
2. Press the key corresponding to the letter you want to input, and the phone will match the most
similar words and highlight the letter being input. If, after the last letter is input, the phone has
matched words, the edit section will display the words normally and the left function key will
be changed to Select for you to confirm inputting. Use Navigation key (Up/Down) to switch
the various words for the input letters and press 0 to confirm inputting the word.
3. If, after the last letter is input, the phone has not matched a word, the edit section will display
a word last matched normally with “?” and the left function key will be changed to Spell for
transferring to the Spell screen.
4. When the input letters match a word correctly, press Select or 0 to confirm inputting the word.
When the word is added to the edit section, a space will be added automatically.
5. Spell Screen: add the wrongly spelled words to this screen! In this screen, you can only use
abc/ABC input method. Press OK to finish inputting and save the word in small case in the
user-defined word list. And add the input to the edit section.
Note: Spice does not take responsibility of printing mistake in this User Manual.
This User Manual is being provided to help the user.
Page 58 of 58 Copyright©2008 Spice Mobiles Ltd.
Page 59

 Loading...