

Page 1

Spice QT-60
User’s Manual
1
Page 2

Spice Mobiles Ltd. All rights are reserved. No part of
this document may be reproduced without permission.
All trademarks and brand names mentioned in this
publication are property of their respective owners.
While all efforts have been made to ensure the
accuracy of all contents in this manual, we assume no
liability for errors or omissions or by statements of any
kind in this manual, whether such errors are omissions
or statements resulting from negligence, accidents, or
any other cause. The contents of this prior manual are
subject to change without notice.
2
Page 3

Protect your environment! We strive to produce
products in compliance with global environmental
standards. Please consult your local authorities for
proper disposal of the handset.
Note: User’s Manual is just to guide the user about
functionality of the phone. This should not be seen as
any certificate of technology. Some functions may
vary due to modifications and up gradations of
software or due to printing error.
3
Page 4

1. ....................................9 SAFETY PRECAUTIONS
2. ..........................................14 PHONE OVERVIEW
3. .........................................21 GETTING STARTED
4. ......................................................33 TEXT ENTRY
5. .............................................................36 CALLING
6. .................................................................42 MENUS
.........................................................42 6.1 PHONE BOOK
..........................................................45 6.2 MESSAGING
.......................................................55 6.3 CALL CENTER
..................................................55 6.3.1 Call History
..................................................58 6.3.2 Call settings
4
Page 5

.....................................................63 6.4 USER PROFILES
.....................................................65 6.5 MEDIA CENTER
.........................................................65 6.5.1 Camera
................................................66 6.5.2 Image Viewer
..............................................68 6.5.3 Video Recor der
..................................................69 6.5.4 Video Player
.................................................70 6.5.5 Audi o Player
.............................................71 6.5.6 Sound Re corder
......................................................71 6.5.7 FM Radio
6.5.8 Sound Effects.................................................72
......................................................72 6.6 FUN & GAMES
..............................................................74 6.7 SETTINGS
...........................................74 6.7.1 Dual SI M Swi t c h
5
Page 6

........................................74 6.7.2 Multi SIM Settings
..............................................75 6.7.3 Phone Settings
...........................................78 6.7.4 Network Settings
............................................80 6.7.5 Security Setti ngs
..................................................82 6.7.6 Connectivity
...............................83 6.7.7 Restore Factory Settings
.....................................................83 6.8 FILE MANAGER
...........................................................84 6.9 ORGANIZER
.......................................................84 6.9.1 Calendar
............................................................85 6.9.2 Alarm
6.9.3 Tasks..............................................................85
..................................................86 6.9.4 World Clock
.........................................................86 6.10 FUN SPICE
6
Page 7

..................................................86 6.10.1 Spice Gang
6.10.2 Opera Mini..................................................87
........................................................87 6.10.3 Reuters
............................................................88 6.10.4 ibibo
.................................................88 6.10.5 Email2SMS
......................90 6.10.6 Instant Messenger (Nimbuzz)
..........................................................91 6.10.7 Ngpay
................................................92 6.10. 8 Free Videos
....................................................92 6.10.9 MGurujee
........................................93 6.10.10 Cricket Updates
...................................................93 6.10.11 Free SMS
..........................................94 6.10.12 Mobile Tracker
.................................................................94 6.11 EXTRA
7
Page 8

...................................................94 6.11.1 Calculator
.............................................95 6.11.2 Unit converter
.....................................95 6.11.3 Currency converter
....................................................95 6.11.4 Stopwatch
..............................................96 6.11.5 Ebook Reader
............................................................97 6.12 SERVICES
.............................................................97 6.12.1 STK
............................................................97 6.12.2 WAP
..............................................98 6.12.3 Data Account
7. ............100 APPENDIX I TROUBLESHOOTING
8. APPENDIX II ABBREVIATIONS AND
EXPLANATION
...................................................111
8
Page 9
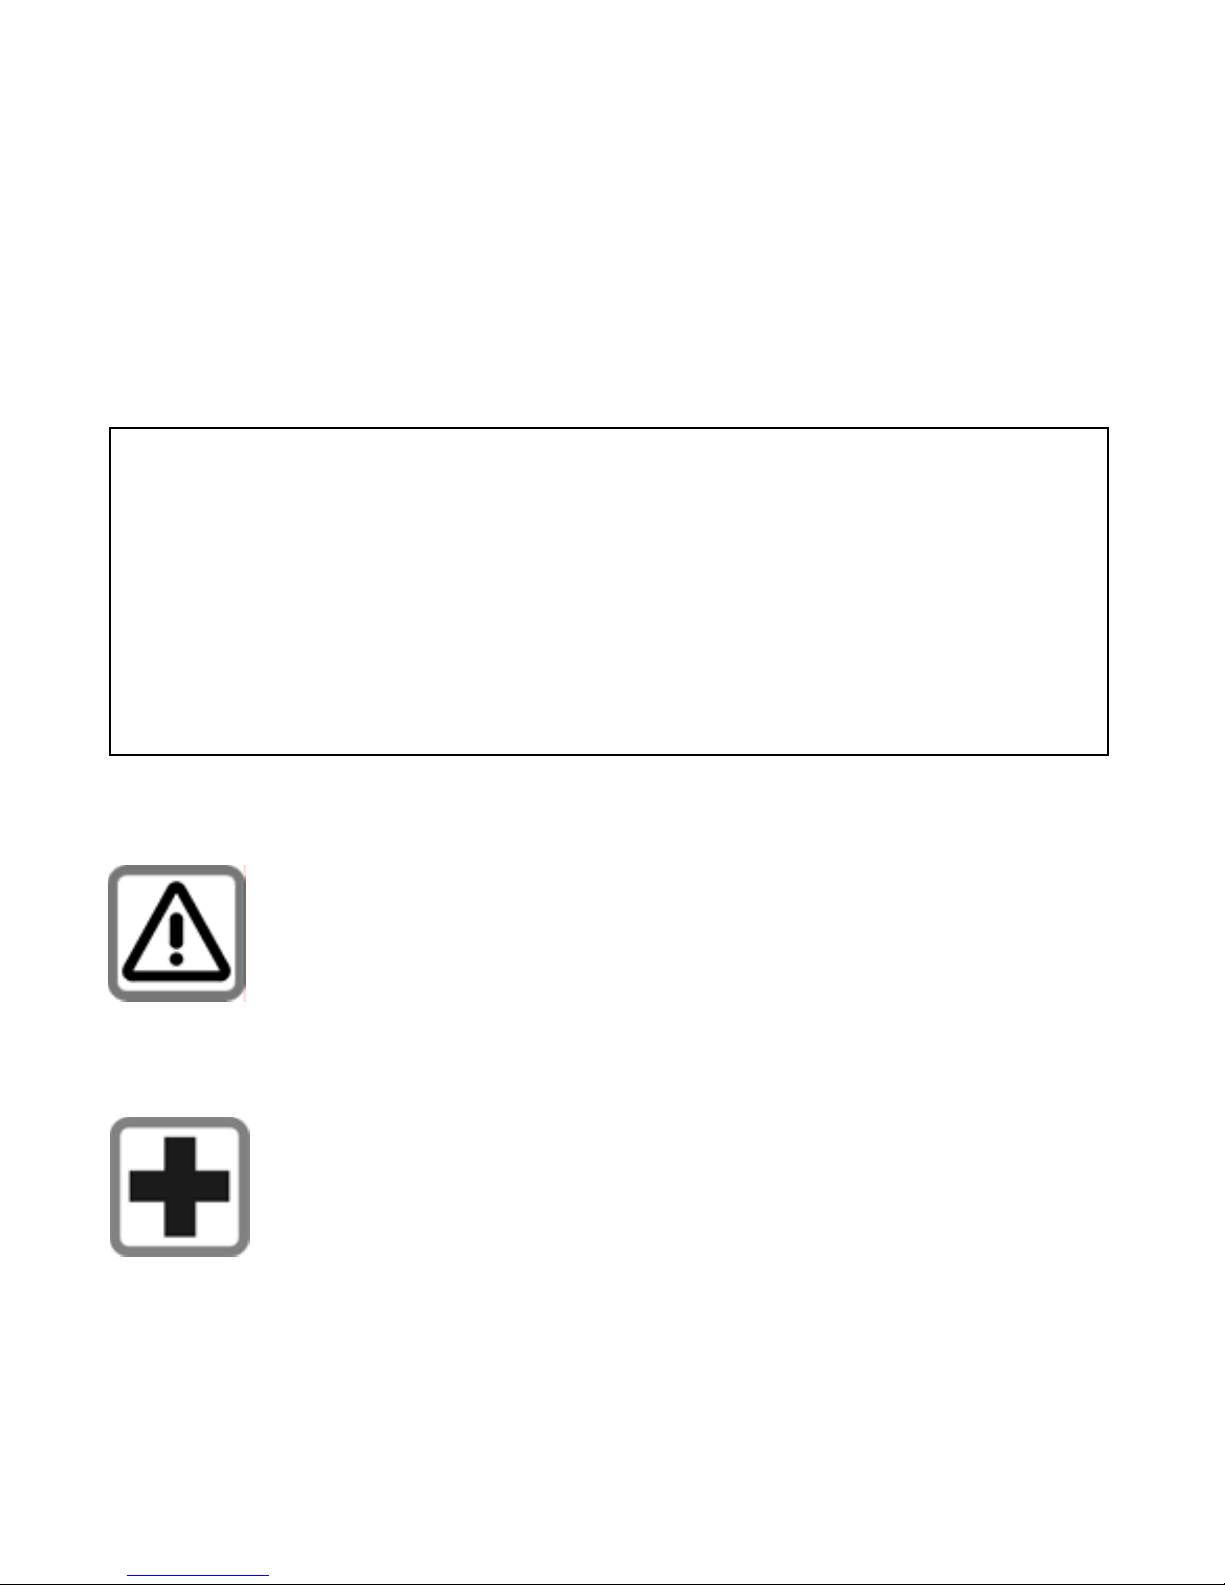
1. Safety Precautions
Information for parents
Please read the operating instructions and safety precautions
carefully before use.
Explain the content to your children and the hazards
associated with the phone.
Remember to comply with legal requirements and
local restrictions while using the phone, for example,
in airplanes, petrol stations, hospitals or while
driving.
Mobile phones can interfere with the functioning of
medical devices, such as hearing aids or pacemakers.
Keep at least 20 cm (9 inches) distance between the
9
Page 10
phone and the pacemaker. While using the mobile phone hold it
to the ear which is furthest away from the pacemaker. For more
information, consult your doctor.
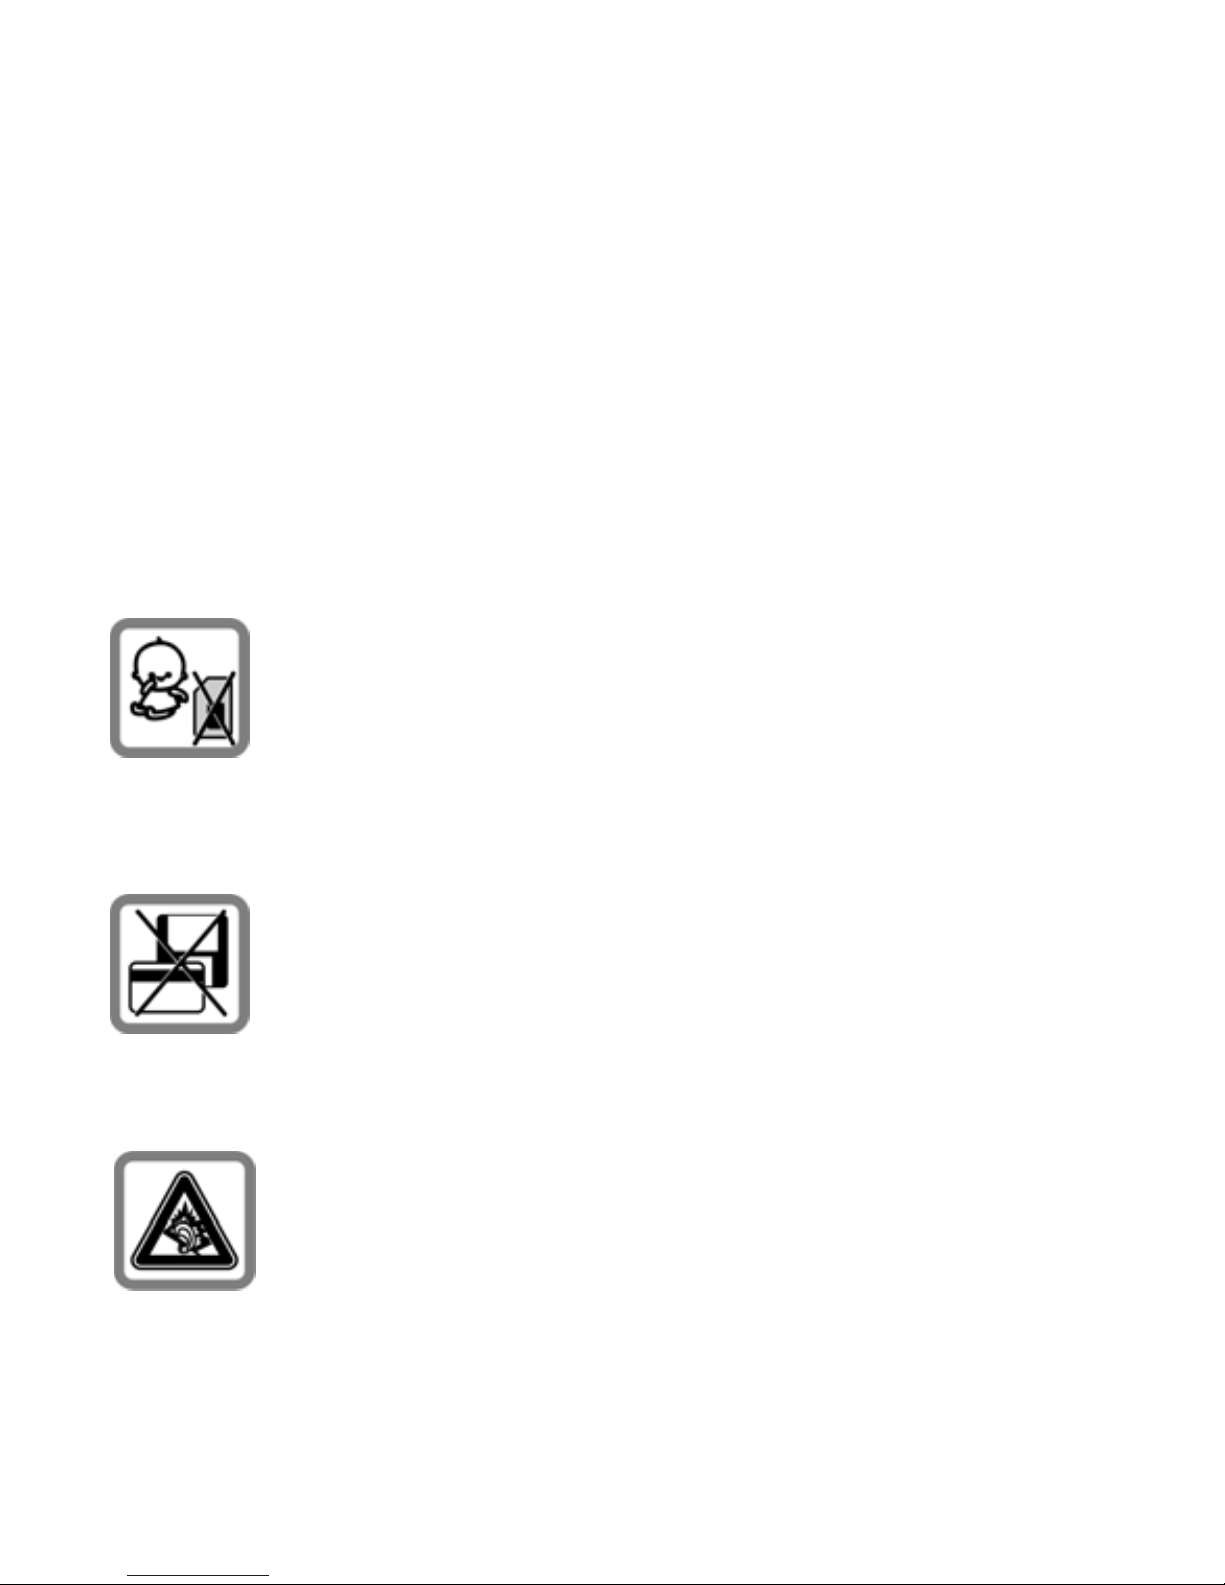
Always keep the phone and accessories out of the
reach of small children.
Small parts, such as the SIM card, dust cap, lens ring
and lens cap as well as the microSD card can be
dismantled and swallowed by small children.
Do not place the phone near to electromagnetic data
carriers, such as credit cards and floppy disks.
Information stored on them could be lost.
Permanent hearing loss may occur if you use
earphones or headphones at high volume. You can
adapt over time to a higher volume, which may
10
Page 11
sound normal but can be damaging to your hearing. Set the
volume of the earphones to a safe level. If you experience
discomfort or buzzing in your ears, reduce the volume or
discontinue using earphones or headphones.
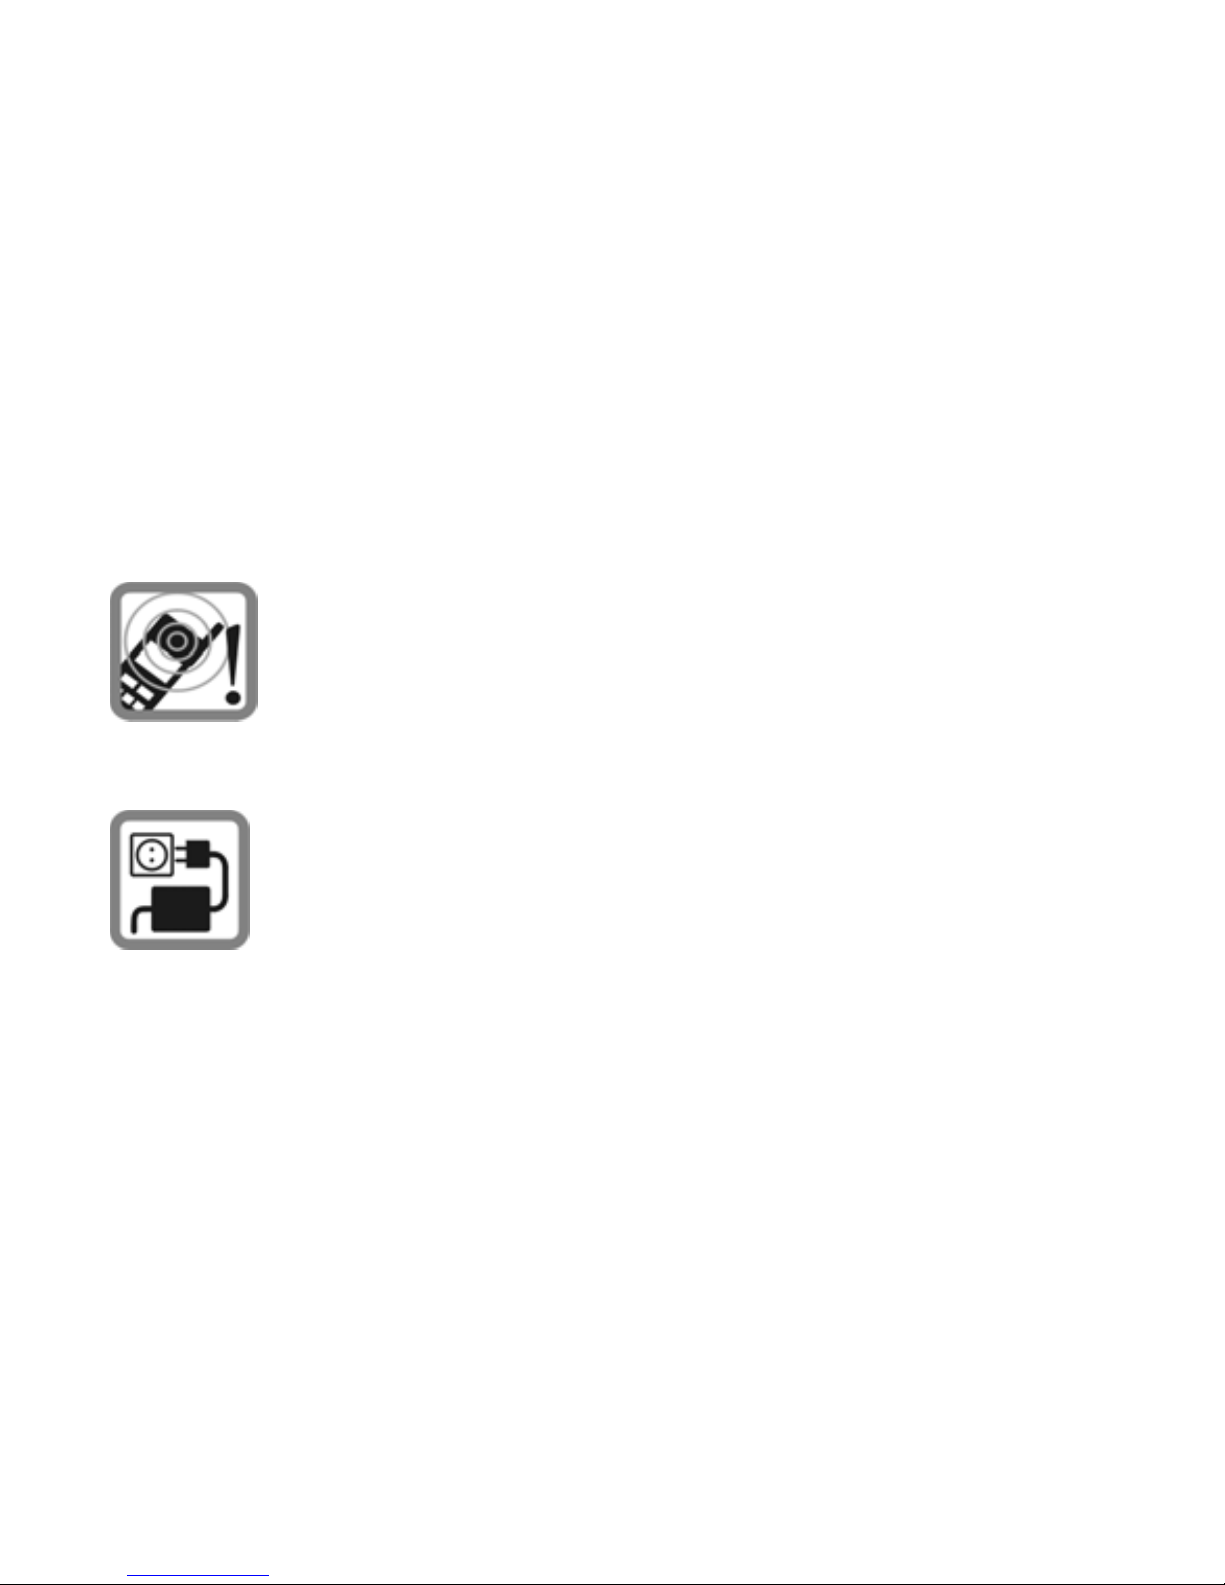
Ring tones, info tones and handsfree talking are
reproduced through the loudspeaker. Do not hold
the phone to the ear when it rings or when you have
switched on the handsfree function. Otherwise you
permanent damage to your hearing. risk serious
The main voltage (V) specified on the power supply
unit must not be exceeded. Otherwise the charging
device may damage.
The power supply must be plugged into an easily accessible AC
main power socket while charging the battery. The only way to
turn off the charging device after charging the battery is to
unplug it.
11
Page 12
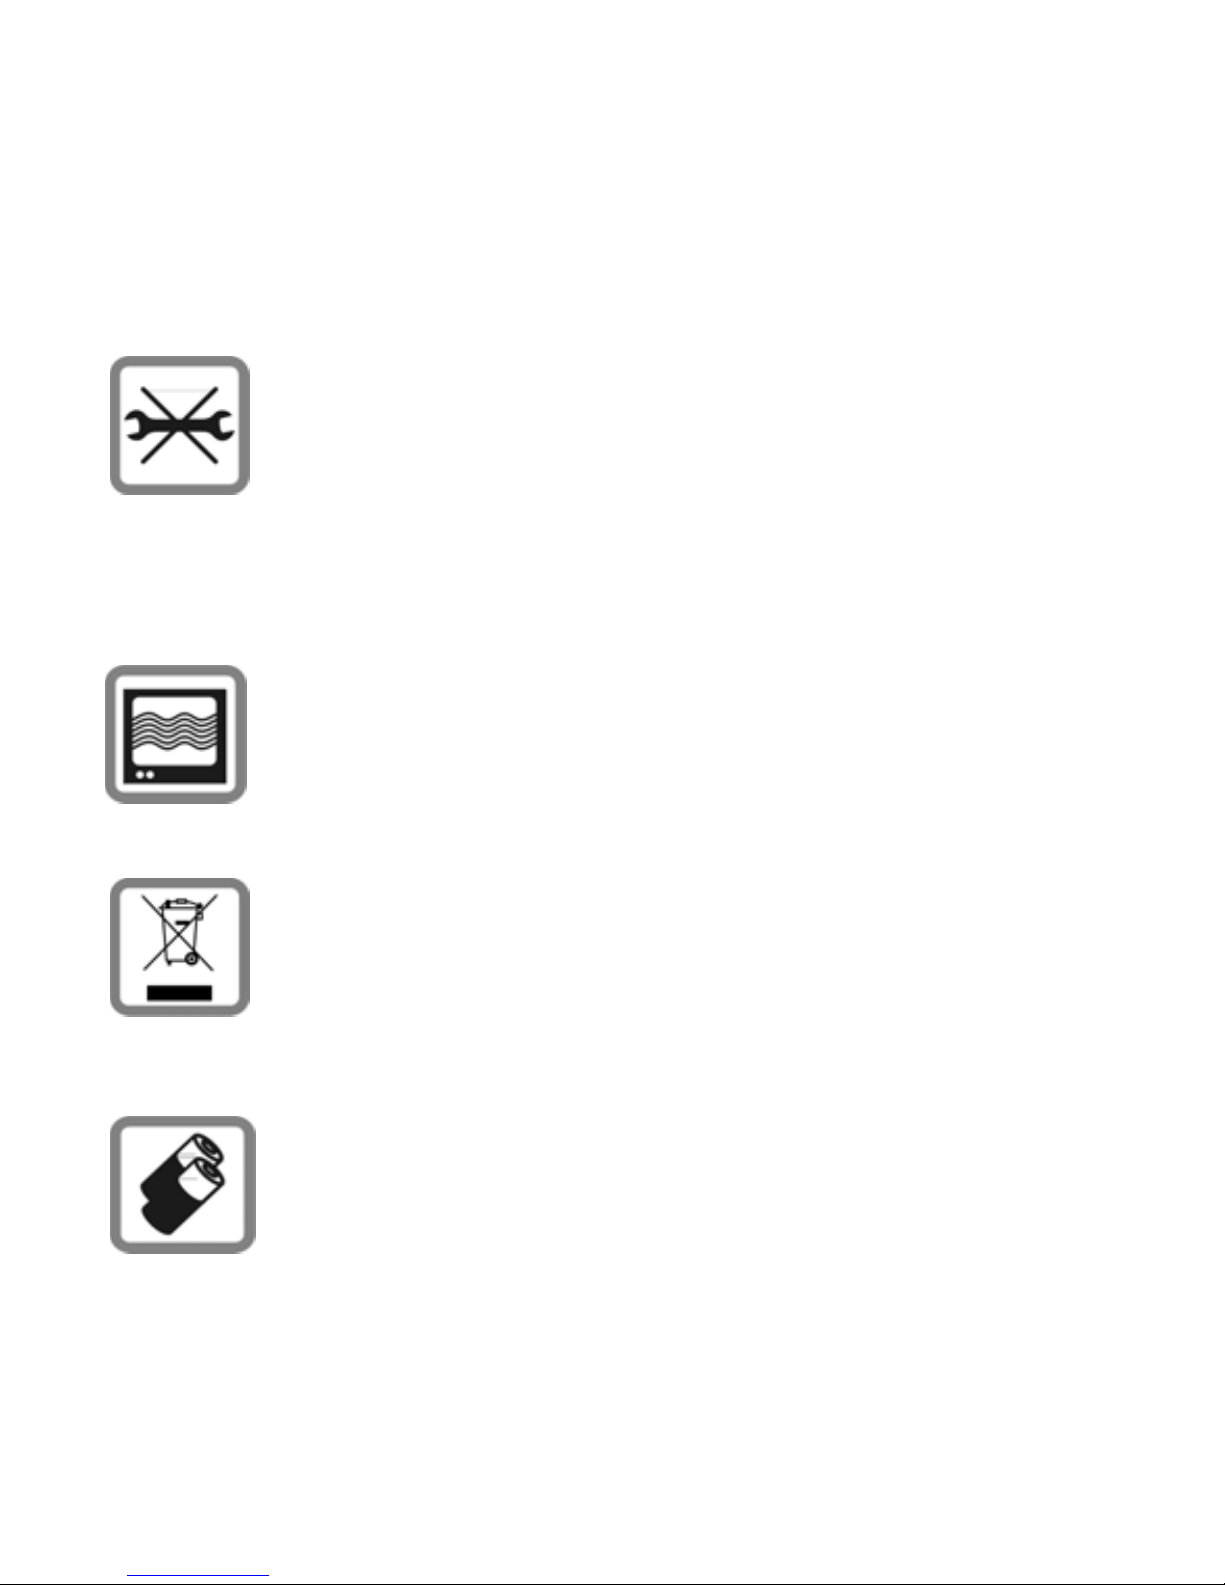
You should only open the phone to replace the
battery, SIM and microSD card. You must not open
the battery under any circumstances. All other
changes to this device are strictly prohibited and will
invalidate the guarantee.
The phone may cause interference in the vicinity of
TV sets, radios and PCs.
Dispose off the unwanted batteries and phones as per
the laws of your country.
Use only original batteries and charging devices.
Otherwise you risk serious damage to health and
property..
12
Page 13
A battery can cause property damage, injury or burns if a
conductive material such as jewelry, keys or beaded chains
touches its exposed terminals. The material may complete an
electrical circuit and become quite hot. Take extra care while
handling any charged battery, especially when you are carrying
it in your pocket, purse or other container with metal objects.
Do not dispose off the battery in fire as it may explode.
Improper use will nullify the guarantee! These safety
instructions also apply to original accessories.
13
Page 14
2. Phone Overview
14
Page 15

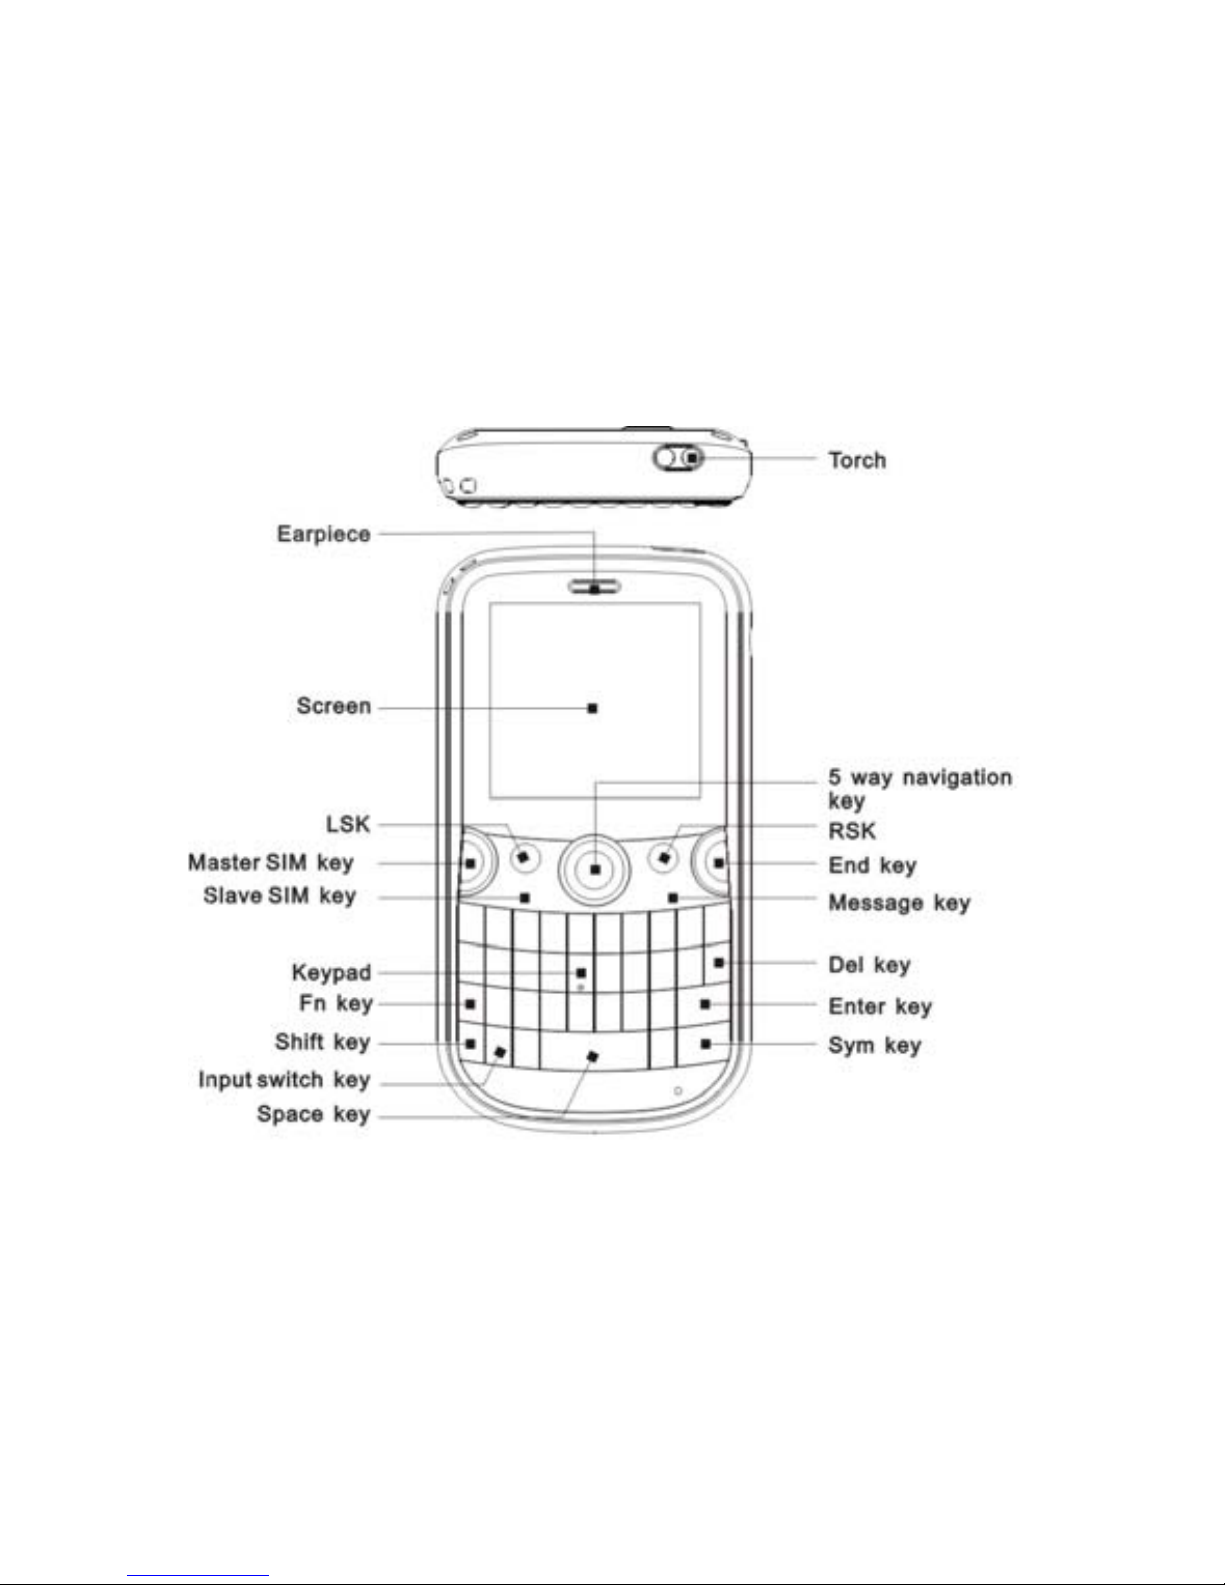
Communication Control Keys
Master SIM key is used to make a call after a number has been
entered in the idle screen, or to answer an incoming call. In idle
screen, press Master SIM key to show call logs of Master SIM
card.
End key is used to end a call during calling or conversation, or
to quit the menu and return to idle screen. Press and hold the
End key for about three seconds to turn on/off the phone.
5 Way Navigation Key
Scroll and select the desired function.
In idle screen, press this key to access the main menu.
Press the key to confirm a selection in menu option screen.
Left and Right Soft Keys
In idle screen, press the left soft key to directly access the main
menu.
In idle screen, press the right soft key to directly access the
15
Page 16

phone book list.
During menu operation, the current functions of the left and
right soft keys are shown in the bottom line of the screen, and
they are related to the current status of the phone.
Number Keys
In idle screen, press number keys (0-9) to enter numbers.
In idle screen, press and hold number keys (2-9) to start speed
dial.
You can also use number keys to select menus. If a number is
shown before an option in menu list, you can select the option
quickly by pressing the corresponding number key.
Asterisk Key
In idle screen, press the asterisk key to enter "*".
Hash Key
16
Page 17

In idle screen, press the hash key to enter "#".
Input switch key
Switch the input methods between Numeric, Normal, Smart
and Hindi in any text editor screen.
Shift key
In standby mode, press and hold the Shift Key for about 3 sec to
turn on/off the torch.
Input capital letters or small letters in any input mode.
Fn Key
Press the Fn Key once to input the digit or symbol labeled in the
keypad temporarily.
Press the key twice to input the digit or symbol labeled in the
keypad permanently.
SPACE Key
17
Page 18

In standby mode, press and hold the SPACE Key for about 3s to
directly access the FM radio module.
Insert a space character in any text editor screen.
Message Key
In standby mode, press the Message Key to access the write
message screen directly.
SYM Key
In standby mode, press and hold SYM Key in idle screen to
activate/deactivate the Silent mode.
In standby mode, press RSK and then the SYM key to lock the
keypad. To unlock the keypad press the RSK and then the SYM
key.
Show the symbol selected screen in any text editor screen.
Enter key
18
Page 19
Press the Enter Key to add a new paragraph in the text editor
screen.
Del Key
Press the Del key once to delete the last character in the display,
long press it to delete the characters consecutively.
Connection Jack
The connection jack is used to connect the charger and
headset with the phone.
Icons displayed on the main screen (Icons may be changed
without further notice)
The following icons may be displayed in the first line of the
screen.
Icon Indicates
Network Signal strength.
19
Page 20
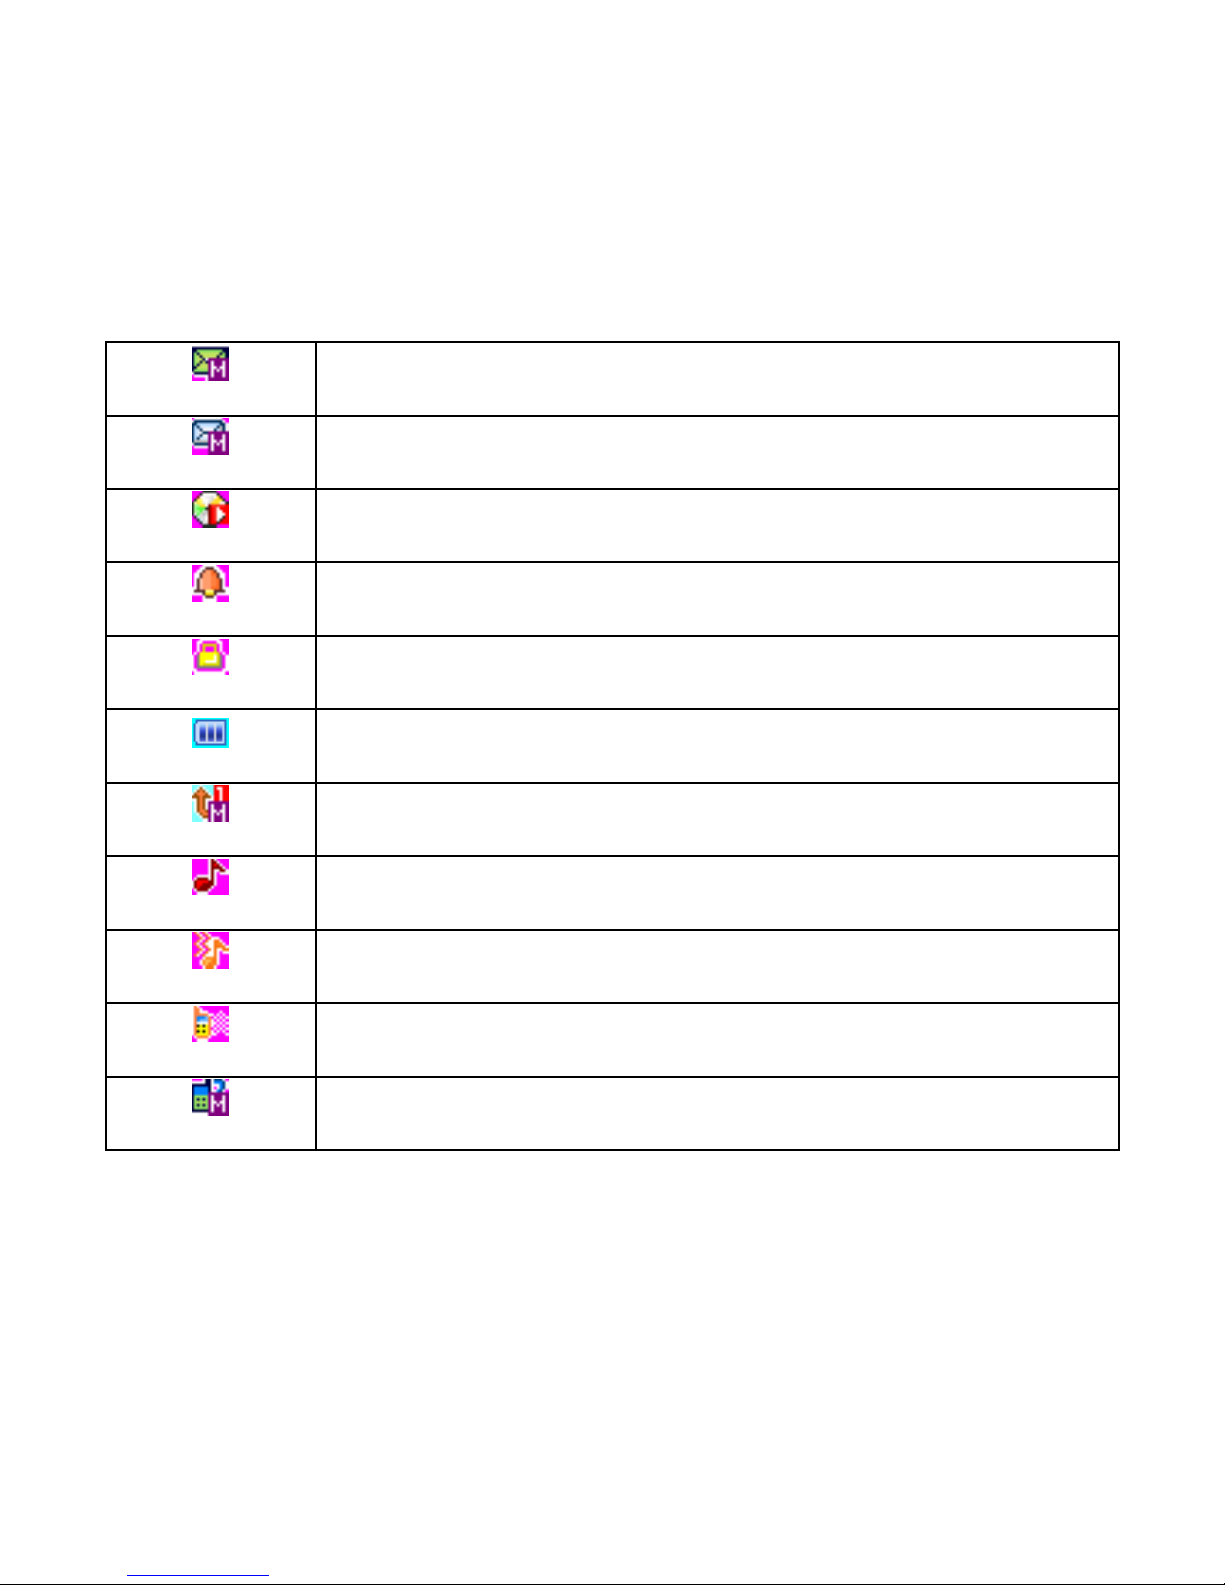
A new text message is received.
A new multimedia message is received.
MP3 player is running in the background.
Alarm activated.
Keypad locked.
Battery power level.
The call forward function is activated.
General profile activated.
Outdoor profile activated.
Silent profile activated.
Missed call(s).
20
Page 21

3. Getting Started
What is a SIM card ?
While registering your mobile phone number, you will be
provided with a SIM card (Subscriber Identity Module) by
network operator.
The SIM card has information, such as phone number, PIN
(Personal Identification Number), PIN2, PUK (PIN Unlocking
Key is the password to unlock PIN), PUK2 (password to unlock
PIN2), IMSI (International Mobile Subscriber Identity) number,
network information, phone book data, SMS data and so on
reserved for your use. . If it is lost, contact your network
operator immediately for help.
PIN Code
PIN is usually a 4 digit password provided by your network
operator. It is usually 4 digits. When you input the PIN code, the
screen displays “*” to replace the number entered.
21
Page 22

PIN is used to access the SIM card. If the PIN protection
function is enabled, the screen will display “Enter PIN” each
time the phone is switched on. You can deactivate this feature
but this may result in the unauthorized use of the phone. Some
network operators do not permit deactivating the control.
PIN2 Code
PIN2 is required for some specific functions provided by the
network, such as the charge information.
Note: If you enter the incorrect PIN three times in a row, the
SIM card will be locked. Please contact your network operator
immediately for decoding the PIN. Attempting to decode it
yourself may result in the permanent failure of the SIM card.
PUK Code
PUK (8-digit) unlocks a locked PIN. If you enter the PUK
incorrectly ten times in a row, the SIM card will become invalid.
Please contact your network operator for a new SIM card.
22
Page 23
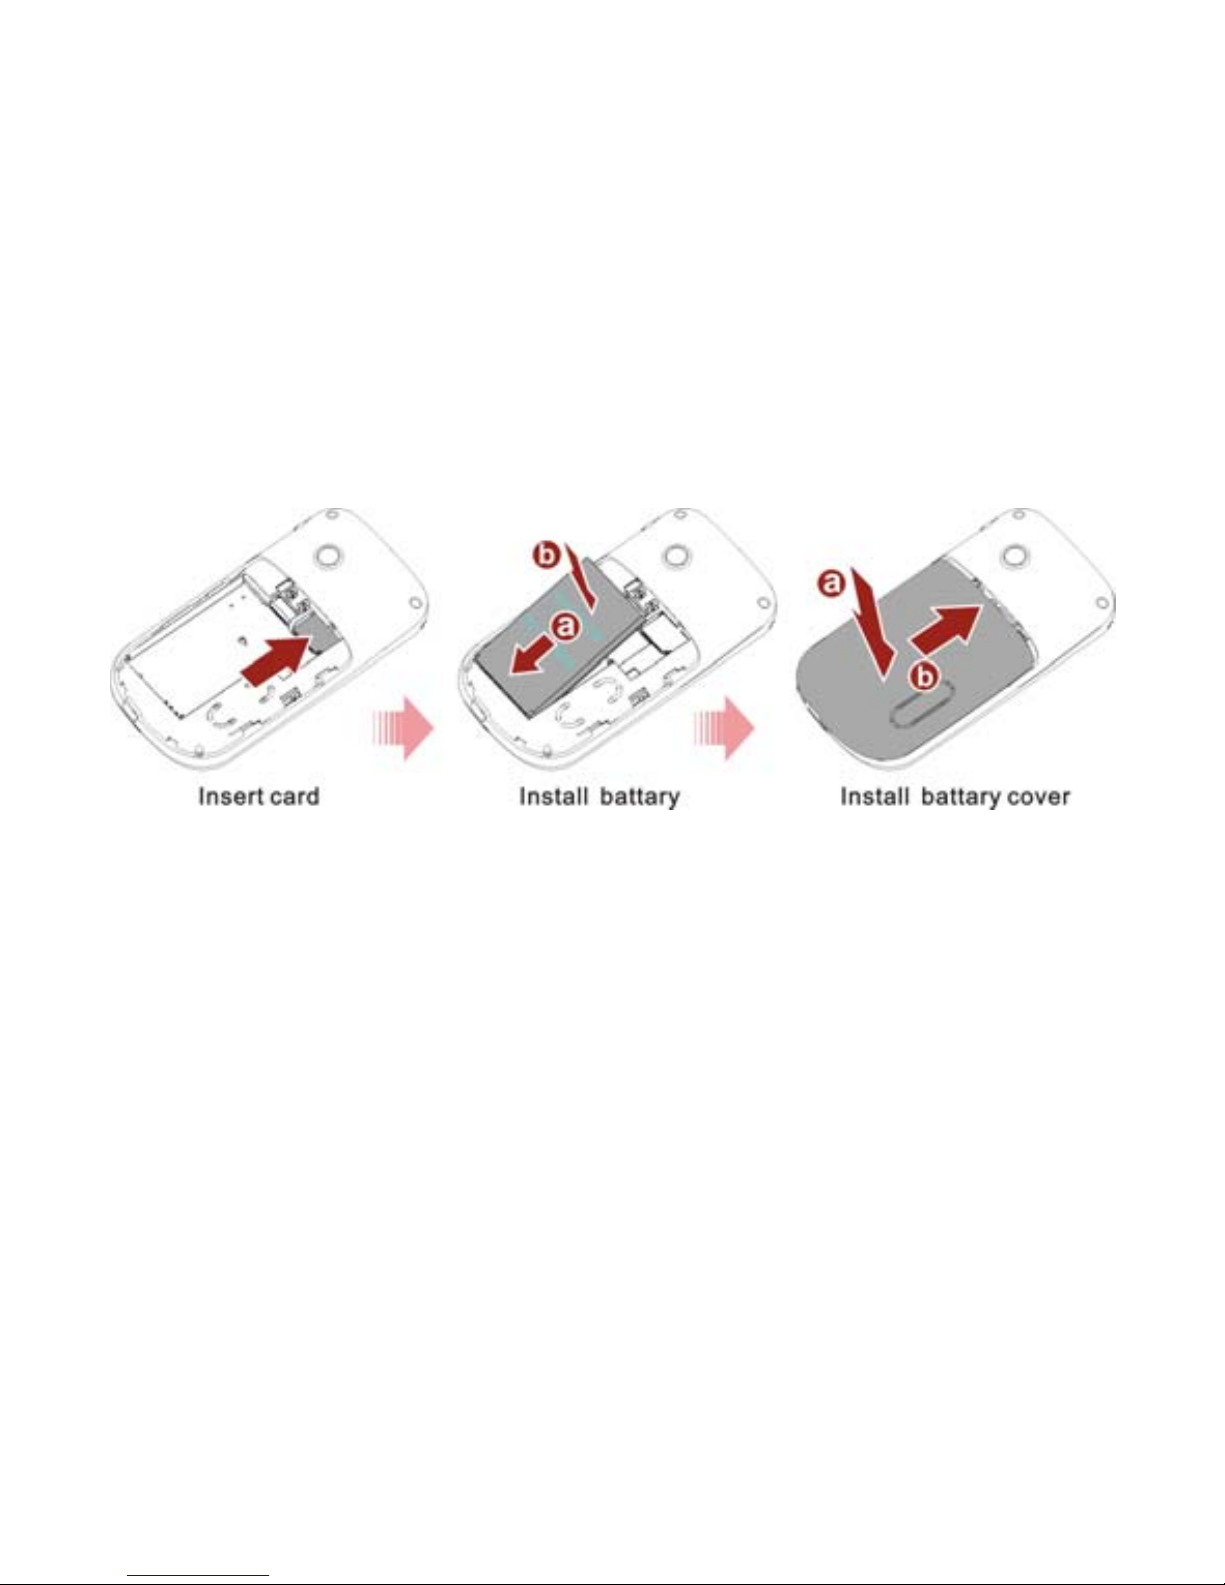
Inserting the SIM card
1. Press and hold the ending key to turn off the phone.
2. Remove the battery cover and then the battery.
3. Insert the SIM card into the card holder. Ensure that the cut
corner is at the top left and the metal contacts face the
phone.
4. Re-insert the battery. Place the battery cover onto the back
of your phone and slide it forward until the latch catches
the cover.
Note: A SIM card can be easily damaged if its metal contacts
23
Page 24

become scratched. Therefore, take special care while holding or
inserting it and keep it away from small children. Battery
Charging
The battery is not fully charged when first unpacked. It takes
three charging-discharging cycles for the battery to reach its
peak performance. The battery can be charged and discharged
hundreds of times. However, the capacity of the battery will be
reduced each time it is charged/emptied, and it will eventually
wear out. When the talk time and the standby time are
noticeably shorter than normal, replace the batte ry. Use original
batteries and charging devices only.
Unplug the charger from the outlet and the phone when not in
use. Do not leave a fully-charged battery connected to a charger
because overcharging may shorten the life of the battery.
If the battery is completely discharged, the charging may not
start immediately when you plug in the connector. Wait 10 to 15
minutes for the phone to begin charging.
24
Page 25

Use the battery only for its intended purpose. Never use any
charger or battery that is damaged.
Do not short-circuit the battery. An accidental short circuit may
occur when a metallic object such as a coin, clip or pen causes
the direct connection of the positive (+) and negative (-)
terminals of the battery, for example, when you carry a spare
battery in your pocket or purse. Short circuit may damage the
battery and the connecting object.
Storage at too high or low temperatures will result in a gradual
capacity loss. As a result the operating time of your mobile
phone may be considerably reduced, even after the battery is
fully charged.
Do not dispose off the battery in a fire as it may explode.
Batteries may also explode if damaged. Dispose off the
unwanted batteries and phones as permitted by the laws in your
countries.
Talk and standby time of the battery varies depending upon the
25
Page 26

signal strength of the network, parameters set by the network
operator and usage of the battery.
Battery
QT-60 comes with a 1000mAh battery, which gives about 15
days of standby time (under test conditions) so that you can
keep in touch with your loved ones for many days without
charging the battery.
Battery type Standby time Talk Time
Each Li-ion battery 15 days 240 minutes
* Note: The actual ope ration time of a battery varie s depending
upon the operation mode, network settings and call settings.
Follow the below mentioned steps to charge the battery:
1. Connect the charger to the connection jack of the phone in
proper direction, and connect it to the main socket.
2. The phone displays "Charger Connected!" and starts
26
Page 27

charging. The battery icon dynamically displays the
charging process. In switch-off state, the phone
dynamically displays the charging process.
3. When the battery is fully charged, the charging process
stops automatically, and the battery icon indicates full grid
on the screen. After the battery is fully charged, remove the
charger from the phone and socket as soon as possible.
Note:
z After the phone has run out of battery, we recommend that
you recharge the battery on time. If you do not recharge the
battery within two days, the phone may enter the slow
charging mode. When you recharge the battery, there may
be no display temporarily. After about 10 minutes, the
27
Page 28

charging indicator icon is displayed on the screen of the
phone. If you do not recharge the battery for more than two
days, the battery may enter the deep discharge protection
state. Thus, in order to get the battery into normal charging
mode quickly, we recommend that you charge the battery
on an adapter to activate the battery for charging, and then
charge the battery with the phone. Alternatively, you can
charge the battery with the adapter.
z Do not change the parts and accessories of the battery
yourself or take off the battery cover for safety.
z Use only original batteries and charging devices. Otherwise
you may risk serious damage to health and property.
z The temperature recommended for charging a battery is
10°C to 55°C. Do not charge battery in too high or too low
temperature.
z Do not use the phone while charging.
z It takes approximately four hours to fully charge a battery.
28
Page 29
Remove the charger quickly after the battery is fully
charged.
z After pulling out the battery system date and time will reset
to default values (factory settings).
Memory
QT-60 supports dual Memory cards of 8 GB each. Which allows
you to save any kind of data, such as music, videos etc. The
maximum memory space supported by the two SDcard is 16
GB.
29
Page 30

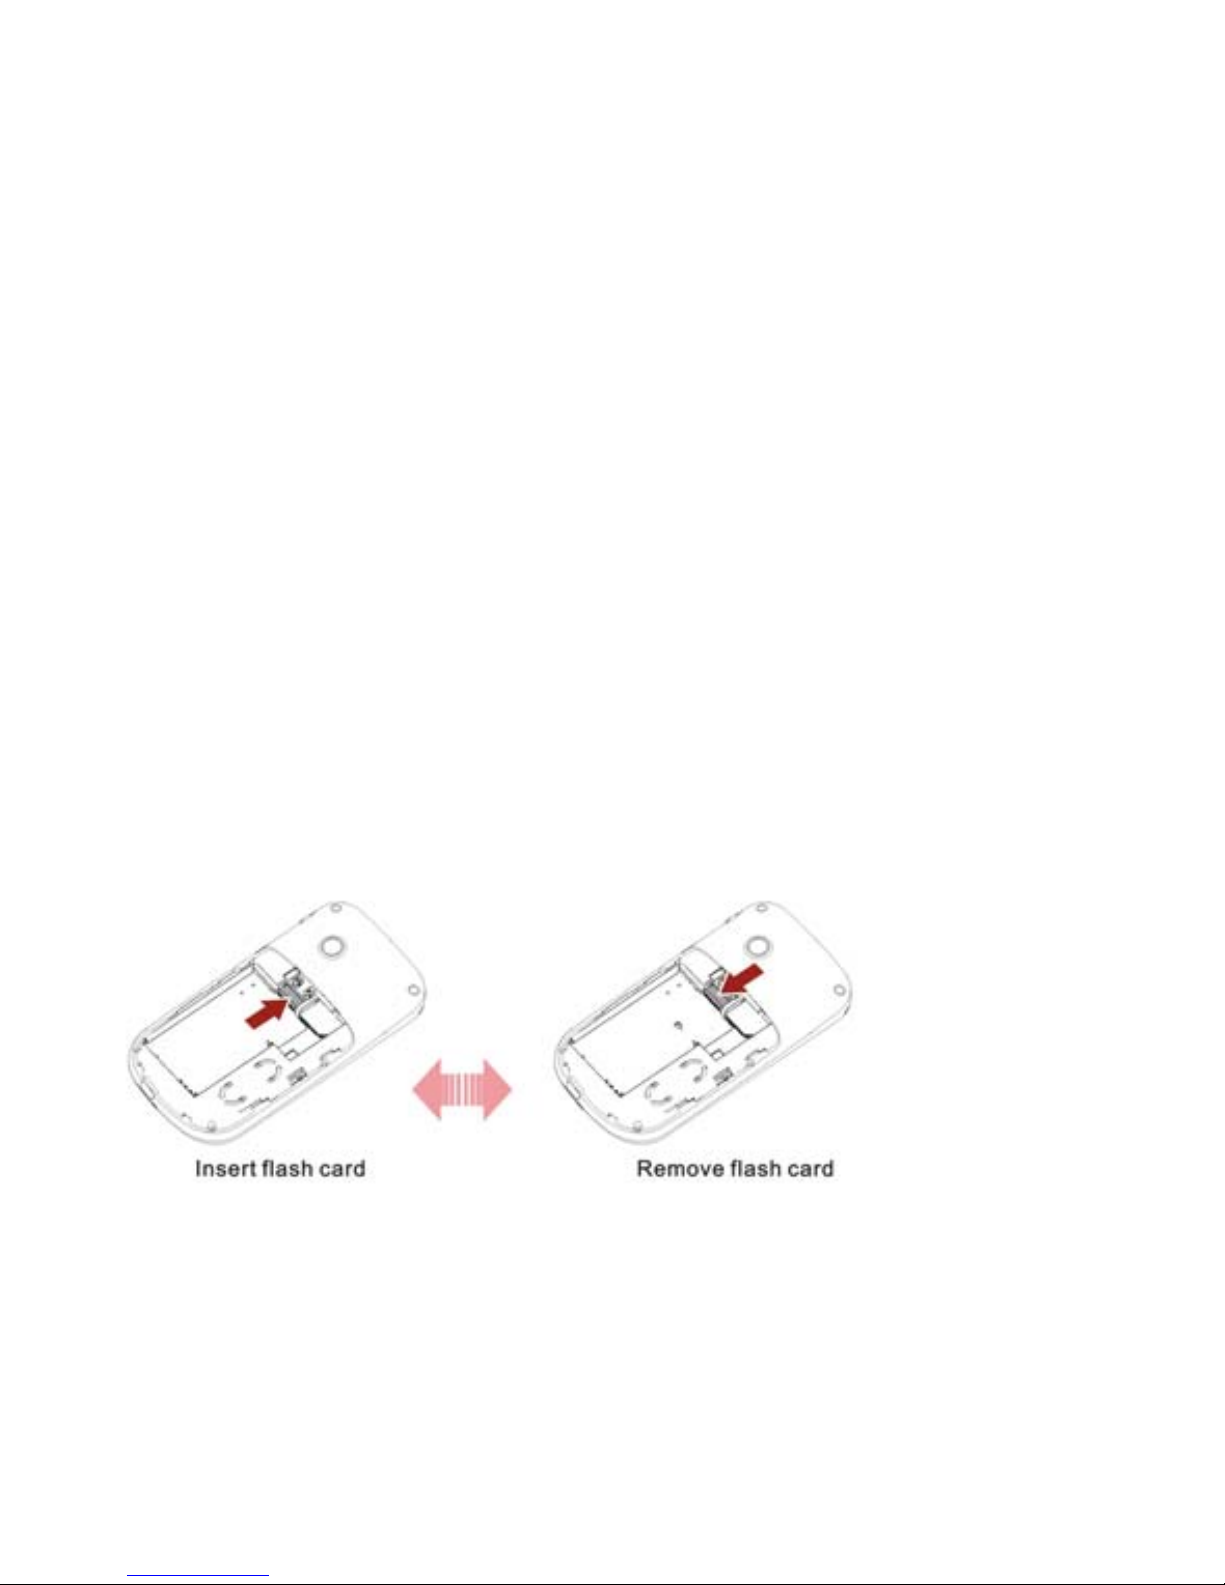
T-Flash/Micro SD card: It is a type of memory card.
Insert T-Flash card into mobile phone
Multi SIM:
This phone supports Multi-SIM (GSM+GSM) card with
dual-standby. When in Multi SIM Mode:
a) You can make or receive calls from/at master SIM card/slave
SIM card,
b) You can send or receive SMS/MMS from master SIM
card/slave SIM card,
c) You can reply/forward SMS of master SIM/slave SIM of the
phone from other SIM,
d) You can access Phone book / Call Logs of master SIM
card/Slave SIM card,
e) You can access WAP/GPRS (for internet access on phone) on
30
Page 31

master SIM card/slave SIM card.
Stand By Mode Settings:
Note: This phone supports Dual SIM, Dual standby but single
calling i.e if you make a call from master SIM card then you
cannot receive another call on your slave SIM card at the same
time or Vice-Versa. Hence incoming / outgoing / call conference
/ call swap on any other master SIM card/slave SIM card is not
possible.
Switching the phone on
Press and hold the ending key to turn on/off the phone . The
phone will automatically search for the network, if there is no
password protection for the SIM card and the phone. After the
phone has been registered on the network, the name of the
service provider will be displayed on the idle screen. Then you
can make or answer a call.
The phone remains in the searching state if it fails to find the
available network system.
31
Page 32

If your phone asks for a password when it is switched on, then
enter the correct PIN code and press the left soft key or the OK
key for confirmation. After being unlocked, the phone will
display the name of the registered network and the signal
strength. Contact your network operator if you do not know the
PIN code. The default password of the phone is “1122”.
When you switch on the and it displays “Insert SIM Card” on
the screen, press and hold the ending key to turn the phone off,
and check whether the SIM card is properly inserted.
Switching off the phone
Press and hold the ending key to turn off the phone. After the
switch-off animation is displayed on the screen, the phone will
be switched off.
Do not attempt to turn the phone off by directly taking out the
battery.
32
Page 33

4. Text Entry
This phone supports the QWERTY keypad, which is the most
useful function for editing text.
Traditional Entry Mode
Press the keys to enter the corresponding characters, which are
labeled on them.
Smart Entry Mode
Press each key associated with the letter you want to enter only
once. The words you have entered appear at the bottom of the
screen.
Set Default Input Method
Set the preferred input method by the route Settings > Phone
Settings > Pref. Input Methods. The preferred input method is
the default input method each time when you enter the text
editor screen.
33
Page 34

Changing the Input Method
In the editing screen, select Options > Input Method to
directly select the required input method. The current text input
method is indicated in the upper left corner of the display
screen.
Press Input switch key to switch the input method between
Normal, Smart, Hindi and Number entry mode.
Press Shift key to enter capital letters and small letters.
Insert Symbols
Press the SYM key and select the required symbols.
Press FN Key once to input the symbol labeled in the keypad
temporarily, press it twice to input the symbol labeled in the
keypad permanently.
Insert a Space
34
Page 35

In any text input method press SPACE key to insert a space
character.
Delete Character
Press RSK(
Clear) once to delete the last character on the
display, press and hold it to delete all entered text.
Press the Del key once to delete the last character in the display,
long press it to delete the characters one by one.
Add New Paragraph
Press Enter key to add a new paragraph.
35
Page 36

5. Calling
Making a Call
In idle screen, enter the phone number and press the Master
SIM key to make a call by the master SIM.
Making an International Call
1. Press the plus key “+” to enter “+”.
2. Enter the country code, area code and phone number.
3. Press the Master SIM key to make a call by master SIM.
Dialing an Extension Number
Enter the number, and press the P key to enter “P”, or press the
W key to enter "W".
Then enter the extension number.
Press the Master SIM key to make a call by master SIM.
Correcting a key-in Error
Press the right soft key to delete the last character on the display.
36
Page 37

Press and hold it to clear all entered text.
Making a call from Phone book
1. In idle screen, press the right soft key to enter Phonebook
list, or enter the menu and select Phonebook.
2. Enter the quick search screen, scroll and select a contact
name.
This quick search function is advanced option and is
hence known as Intelligent Quick Search. Just type the first
character of the name in the quick search and you will get
all the contacts matching your entry. It makes it simpler to
search any entry.
Press the “Master SIM key” to make a call by the master SIM.
Dialing
a previous number
1. In idle screen, press the Master SIM key to display Call
Logs of master SIM card, and press Slave SIM key to
display call logs of slave SIM card. Press the up and down
direction keys to select a number.
37
Page 38

2. Press the Master SIM key to make a call by the master
SIM.
Dialing a speed dial number
In idle screen, press and hold the corresponding number (2-9) in
the speed dial list to make a call. Note that number key 1 is
reserved for the voice mail number (to get Voice mail number,
please contact your Service provider).
To set spee d dia l,
1. Go to Phone book > Options > Phonebook Settings >
Speed dial > select On to enable this function.
2. Edit the speed dial numbers in Phone book > Options >
Phonebook Settings > Speed dial > Set number > OK >
Edit.
Listening to voice mail
Press and hold number key 1.
38
Page 39

You need to set the voice mail number and store it in your
phone. To set the number, go to Messaging> M essage settings
Text message > Master/Slave SIM Message settings >
Voicemail server, select Options and then Edit.
Answering a call
z Press the Master SIM key.
z Press the OK key or select Options and Answer to receive
the call.
Make call Silent
Press the RSK.
Rejecting a call
Press the end key.
Ending a call
Press the end key.
39
Page 40

Call Options
Press Options during a call for more options. Options vary
depending on the current situation.
Hold the current call.
Hold Single
Call
End the current call.
End Single
Call
End all the calls which are in progress.
End all calls
Add a new call and talk with more than one
person at a time.
New Call
Use Phone book to search for numbers.
Phone book
Read/write a message during a call.
Messaging
40
Page 41

Record the call.
Sound
Recorder
The phone adds an additional sound of your
choice in the conversation.
Background
sound
This function does not let the caller on the
other side hear your voice temporarily.
Mute
Enter tone sequences (number) for remote
inquiries to an answering machine.
DTMF
41
Page 42

6. Menus
6.1 Phone book
The phone provides two kinds of storage media: Master/Slave
SIM card and phone. The phone can store 1000 entries with
multiple fields. The capacity of the phone book on your master
SIM card/slave SIM card depends on the type of master SIM
card/slave SIM card provided by your network operator.
Enter a number in the idle screen and press OK key to save the
number. Select the storage location. Then the edit interface
appears. If you want to save the contact in the Master SIM then
select Master SIM card or Slave SIM. If you select SIM card
you need to edit the number only. If you select phone you need
to edit the items that you set in the settings of phone book,
including the name, number, email address, caller picture and
caller ringtone, and you can add more information using
Options > Add detail, including home number, office number,
fax number and company name.
42
Page 43

In idle screen, press the right soft key to directly access the
phonebook.
The small icon on the left of the phone book list indicates
whether the record is stored on the master SIM card, the slave
SIM card or the phone.
View the detailed information of the
record.
View
Send SMS/MMS after selecting a
designated number.
Send
message
Dial phone number by the master SIM card
Call or slave SIM card Call.
Call
Edit the options included in a phone book
record.
Edit
Delete the record.
Delete
43
Page 44

Copy the record from the current storage to
the other storage.
Copy
Move the record from the current storage
to the other storage.
Move
Send vCard by SMS/MMS or save it to
file.
Send VCard
Add to
Blacklist
Add the selected contact to the black
member.
Select multiple contacts for operating at a
time.
Mark
several
44
Page 45

A caller group is the combination of phone
settings that are used to identify a
particular group of records. The phone
provides five call groups: Friends, Family,
VIP, Business and Others. You can manage
and edit the details of caller groups.
Caller
groups
View the memory status. Set the default
storage of new numbers, Speed dial, My
number and other useful functions.
Phonebook
settings
You can also set caller ringtone or picture by setting the
parameters of caller groups.
6.2 Messaging
The phone supports Short Messaging Service (SMS) and
Multimedia Messaging Service(MMS). You can send
text/multimedia messages and manage the messages that you
send and receive.
45
Page 46

If the memory for short messages is not full, short messages will
be directly saved in the SIM card. A flashing icon
will
appear on the top of the main screen if the memory is full.
The phone also supports Multimedia Message Service (MMS),
which is a network service. It enables you to send messages
with images, sounds and text. Ask your service provider
whether this service is available. You may need to subscribe for
the service to your network operator before sending and
receiving multimedia message. All multimedia messages are
stored in the phone memory. The SIM card cannot store
multimedia messages. If the memory for MMS is full the phone
can not receive the new messages. Please delete the unnecessary
MMS and download them manually.
1. Write (Text/Multimedia) Message
Create and edit the Text/Multimedia message in the “Write
message” menu.
Create a new text message.
46
Page 47

1. Go to Main Menu > Messaging > Write Message
2. Write the message you want to send.
3. Press the left soft key (Options) and then select Advanced
to add the required items, including insert text template,
Insert contact number, Insert contact name, Insert
bookmark.
4. Press the LSK (Options) and select Send to or press OK
key to navigate to Send SMS screen.
5. Enter the recipient numbers in Enter recipient option or
attach the recipients from the phonebook list.
6. Press OK key and then select From Master SIM/Slave
SIM to send the SMS.
Create a new Multimedia message
1. Go to Main Menu > Messaging > Write Message to
navigate to message editor screen..
47
Page 48

2. Press LSK (Options) and then select Switch to MMS to
make this message to be MMS.
3. Press LSK (Options) and then select Add subject to edit
the subject of this MMS.
4. Press the LSK (Options) and select the items you want to
send, including images (Add picture), audios (Add audio),
video clips(Add videos) and files in other formats (Add
attachment), also organize slide(Add slide before/after)
and so on.
5. Press the LSK (Options) and select Send to or press OK
key to navigate to Send MMS screen.
6. Enter the recipient numbers in Enter recipient option or
attach the recipients from the phonebook list.
7. Press LSK (Options) and select Changes to Cc/Bcc, edit
the MMS to be carbon copied or blind carbon copied to.
8. Press OK key and then select From Master SIM/Slave
48
Page 49

SIM to send the MMS.
2. Inbox
Incoming short/multimedia messages are saved in inbox.
Read the message content.
View
Reply the short/multimedia message.
Reply
Make a call to the sender.
Call back
Forward this short/multimedia message to
others.
Forward
Delete the short message.
Delete
Delete all the messages stored in inbox.
Delete all
Save to
phonebook
Save the sender number as a contact in the
phonebook.
49
Page 50

Move to
Archive
Move the selected messages to Archive
folder.
Only show Master SIM or Slave SIM
message in inbox, show all the messages of
master and slave SIM if select All messages
option.
Filter by
You cannot receive new messages if the message memory is full.
Delete unnecessary messages.
3. Drafts
You can save a short/multimedia message as draft while
creating it. When you press End/Back key in editing screen, it
will save the message in Drafts automatically.
4. Outbox
Short/multimedia messages failed to be sent are saved here.
50
Page 51

5. Sent Message
Short/multimedia messages that have been send successfully are
saved here.
6. Archive
The short/multimedia messages can be copied from Inbox,
Sent message, Drafts and Outbox and saved here.
7. Delete Message
Delete the selected message folder or all the messages folders.
8. Broadcast Message
Broadcast messages are messages that your network operator
broadcasts to all users within a particular area, such as weather
forecast and transportation conditions.
Enable or disable the function.
Receive Mode
51
Page 52

Scroll to read broadcast messages.
Read Message
Set languages for cell broadcast
information. Only information in the
set language can be received.
Languages
Select the channel of cell broadcast.
Channel Settings
9. Templates
There are 10 common short phrases stored in the phone. You
can edit or delete the common phrases. After deleting, the
phrase will display empty.
There are five preset multimedia messages. You can view and
make new multimedia messages from the sample available in
your phone.
10. Schedule SMS
The phone will automatically send the SMS at the time
52
Page 53

predefined by you.
11. Message Settings
Set the following settings for short messages.
Set profile name, SC address, validity period
and message type.
Profile
Settings
Please see the explanation below this table.
Voicemail
server
Enable or disable the delivery report and
reply path of short messages.
Common
Settings
View the memory usage ratio of the SIM
card and phone for short messages.
Memory
Status
Set to save short messages to the SIM card
or to the phone. By default messages are
saved in the phone memory.
Preferred
Storage
53
Page 54

Voice Mail Server
Dial the voice mail number to access your voice mail. The
number is provided by your network operator.
Call Voice
Mail
Connect to the current voice mailbox
number.
Add or change the voice mailbox number.
Edit
Note: The voice mail function requires network support.
Set the settings of multimedia messages.
Set the network settings included by the service operator in
Profiles.
Set how a multimedia messa ge is composed,
including creation mode, picture resizing,
Best slide duration, auto signature and
Signature.
Compose
54
Page 55

Set the validity period, delivery report, read
report, priority, slide timing, delivery time
and whether to save the send MMS for
sending multimedia messages.
Sending
Set home network, roaming, read report and
delivery report for receiving multimedia
messages.
Retrieval
Select the storage location for saving the
MMS in the phone or on the memory card.
Preferred
storage
View the memory usage ratio, used space
and free space for multimedia messages.
Memory
Status
6.3 Call Center
6.3.1 Call His t ory
In idle screen, press the Master SIM key to directly access the
call history.
55
Page 56

1. Master card Call History
In idle screen, press the Master SIM key or go to Call center >
Call history > Master SIM call history > Master SIM missed
calls, Master SIM dialed calls and Master SIM received
calls.
Select a call from the list. When the call is displayed, press the
send key to make a call from the master SIM card or the slave
SIM card. You can press the OK key to view the details of the
call. Select Options for more options.
View the call log information.
View
Dial the selected number.
Call
Send text/multimedia message to the
record.
Send
message
Save to
phonebook
Save the selected number to the master
SIM card, the slave SIM card or the phone.
56
Page 57

Add to
Blacklist
Add the contact as a black list member.
View and edit the number information
before making a call to it.
Edit before
call
Delete the selected number from the list.
Delete
Delete Master SIM Call Logs: Delete missed calls, dialed calls
or received calls, or delete all call logs.
Master SIM call timers: View Last call time, Total dialed
calls and Total received calls, or Reset all time of the slave
SIM card.
Master SIM call cost: View Last call cost and Tota l cos t of
the master SIM card. You can also reset cost and set the
maximum cost and the price per unit of the master SIM card. It
requires network support.
57
Page 58

Master SIM text message counter: View and reset the
numbers of short messages sent and received on the master SIM
card.
Master SIM GPRS counter: View the volume of GPRS last
sent, last received, all sent and all received on the master SIM
card. You can also reset the contents of the counter on the
master SIM card. The unit is Byte.
2. Slave SIM Call History
For the detailed information of Slave SIM card call history,
please refer to the content in “Master SIM card call history”.
6.3.2 Call setti ngs
1. Master SIM call settings
Caller ID
When you make a call, your number can be displayed or hidden
on the screen of the called party. Select Set by network to use
58
Page 59

the default setting provided by the network operator.
You may not be able to make calls if you select Hide ID,
depending on the network settings.
Call Waiting
If activated, an incoming call is signaled
by a call waiting tone when you are on
another call. The number/name of the
incoming call is displayed.
Activate
Cancel the call waiting function.
Deactivates
Inquire about the current status from the
network.
Query Status
Call Divert
You can specify the conditions under which calls should be
59
Page 60

diverted to your voice mail box or another number.
Divert All
Voice calls
All calls are diverted.
Divert If
Unreachable
A call is diverted if the phone is switched
off or is out of range.
A call is diverted if not answered.
Divert If No
Answer
Divert If
Busy
A call is diverted if another call is in
progress.
Divert All
Data Calls
All data calls are diverted.
Cancel All
Divert
Cancel all call divert settings.
60
Page 61

Call Barring
Restrict the dialing or receiving of certain calls. To activate or
cancel call barring, you have to enter the network password
provided by your network operator.
If All calls are activated, no calls can be
made. If International calls are
activated, no international calls can be
made. If International calls except from
home PLMN is activated, only local calls
or calls to the home country (that is, the
country to which the network operator
belongs) can be made.
Outgoing
Calls
If All calls are activated, no calls can be
received. If When Roaming is activated,
you may not receive calls when you are
outside your home network.
Incoming
Calls
61
Page 62

Cancel all restrictions to calls. Password
from your network operator is required.
Cancel All
Change barring password. The original
barring password is required.
Change
Barring
Password
Line Switching
Switch the RF line connection of the phone.
Closed User Group
This function requires network support.
1. Select OK to display Group list.
2. Select Add to enter group name.
3. Select Done and enter the serial number.
4. Select OK to complete the addition of a new group.
2. Slave SIM Call Settings
For the detailed information of Slave SIM card call settings,
please refer to the contents in “Master SIM card call settings”.
62
Page 63

3. Advance Settings
Set the further settings relevant calling such as Blacklist,
Autoredial and so on.
6.4 User Profiles
The phone provides seven pre-defined user profiles that allow
the operations of the phone to best suit the environment you are
in. The profiles are General, Meeting, Outdoor, Indoor,
Bluetooth and Save power. The phone will automatically enter
the headset profile if you connect the headset to your phone.
Note: There is an extra silent mode which cannot be accessed
here. To activate that profile, go back to the idle screen, press
and hold the hash key until the phone gives you a prompt.
You can customize the following options for new profiles.
63
Page 64

Set master SIM card incoming call, Slave
SIM card incoming call, Power on, Power
off, Master SIM card message tone, Slave
SIM card message tone and Keypad tone.
Tone
Settings
Set volume for ring tone and key tone.
Volume
Four types of Ring only, Vibration only,
Vibration and ring and Vibration then ring
are available for your selection.
Alert Type
Three types of Single, Repeat and
Ascending are available for your selection.
Ring Type
You can select one or more extra tones. The
options are Warning, Error, Camp on and
Connect.
Extra
Tone
If Any key is selected, you can press any key
to answer a call.
Answer
Mode
64
Page 65

6.5 Media Center
6.5.1 Camera
The phone is provided with built-in 2.0 mega pixel CMOS
camera, which supports the photographing and video shooting
functions. Pictures are saved in the file system of the phone or
the memory card. The file is in the *.jpg format.
In standby mode, select Menu > Media Center > Camera to
launch the camera.
Photos To view the images that have been
captured recently.
Camera settings Set the settings, such as LED highlight,
shutter sound, EV and so on.
Image settings Set the image size and the image
quality.
65
Page 66
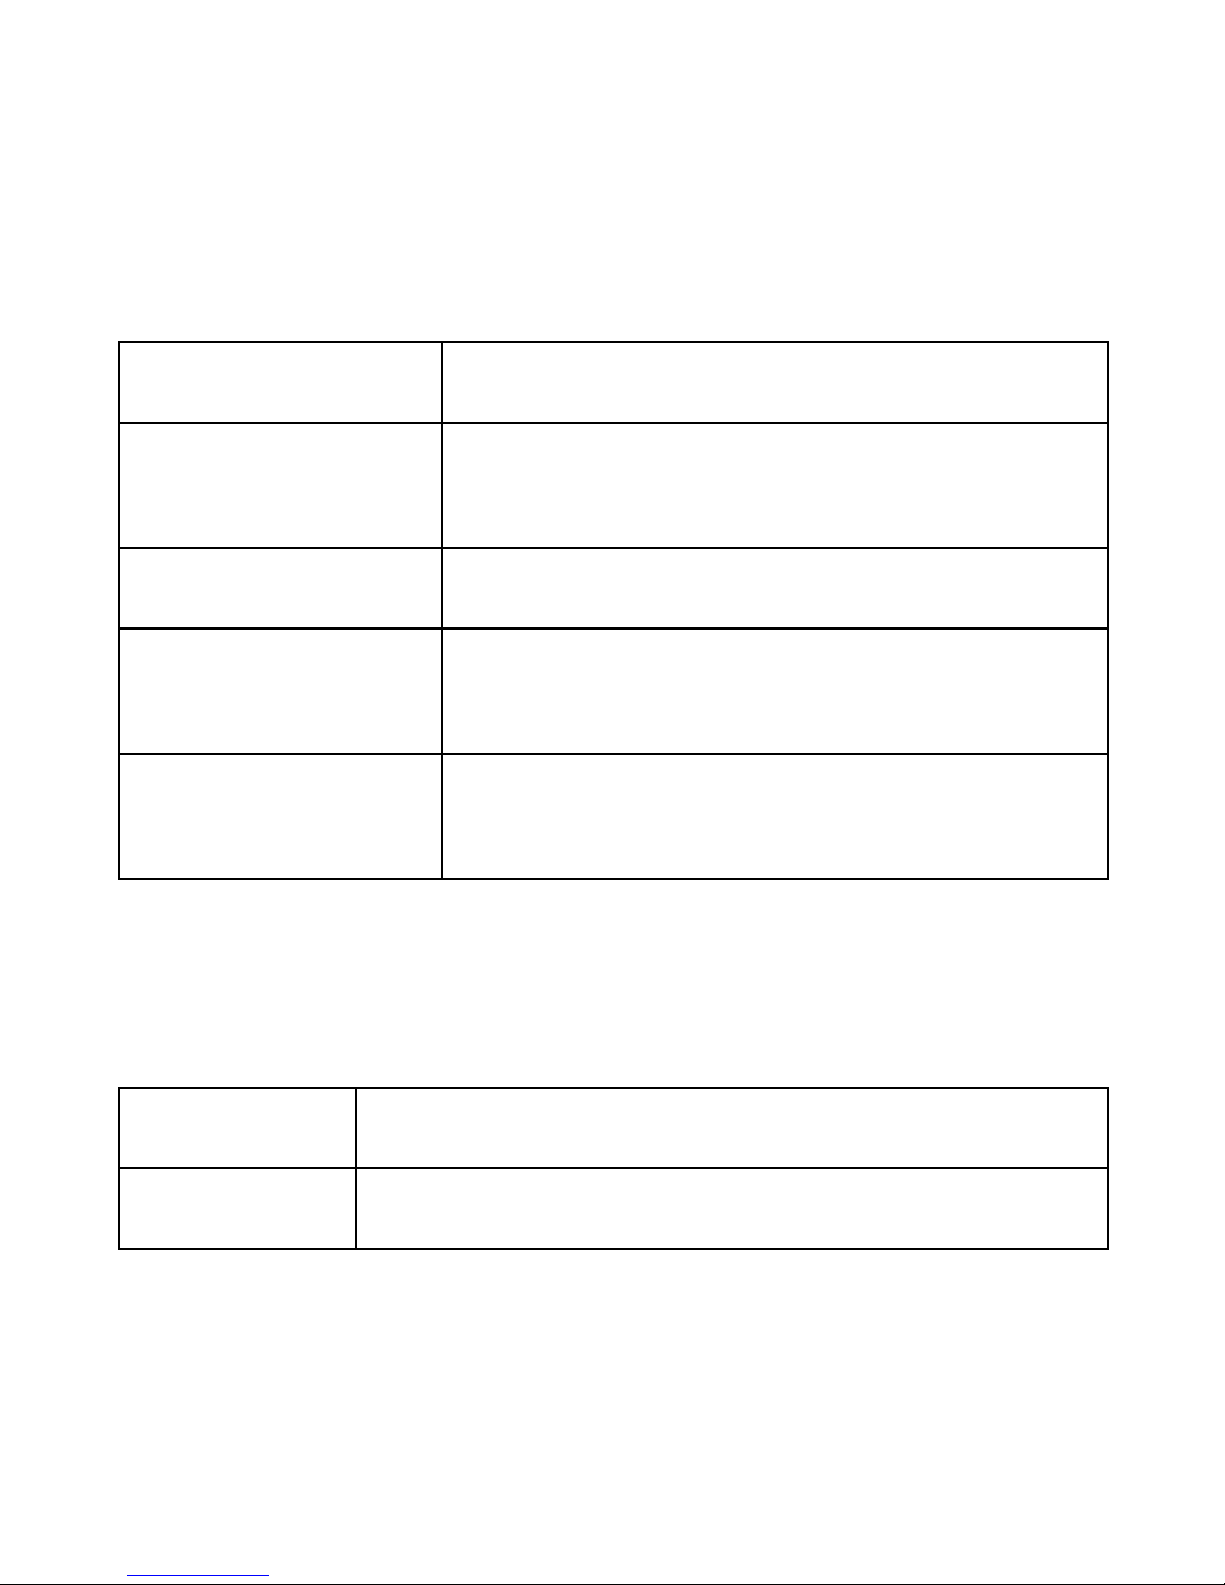
White balance Set light condition.
Scene mode Select pre-defined settings for the
current environment.
Effect settings Set the image effect style.
Storage Select the storage location to save the
captured pictures.
Restore default Restore the camera settings to the
default value.
6.5.2 Image Viewer
Picture s taken can be acc essed quickly in Image viewer. Select
Options for available options while viewing pictures.
Browse the pictures saved here.
View
Print the image via data cable.
Print
66
Page 67

Select List style or Matrix style.
Browse
Style
You can send it through MMS and
Bluetooth.
Send
You can use the selected picture as
wallpaper, screen saver and caller picture.
Use as
Rename the image.
Rename
Delete the picture.
Delete
Sort and view the pictures by the rules such
as type, time, size and name.
Sort by
Delete all t h e pict ures saved here.
Delete All
Files
Set the storage location of the picture.
Storage
67
Page 68

6.5.3 Video Recorder
In standby mode, select Menu > Media Center > Video
recorder to launch the video recorder.
Press LSK Options to do the relevant settings.
Camcorder
Settings
Set the settings, such as EV, night
mode and auto-flicker.
Video settings Set the video quality and so on.
White balance Set light condition.
Effect settings Select the effect of photo display.
Storage Select the storage location to save the
captured pictures.
68
Page 69

Restore default Restore the video settings to default
value.
6.5.4 Video Player
Select Menu > Media Center > Video player.
Select a video clip and press OK key to open it.
Press OK key to start playing the video clip.
While playing the video clip, you can
z Press Shift key to increase the volume. Press Sym key to
decrease the volume.
z Press Right Navigation key or Left Navigation key to fast
forward or rewind the video clip.
69
Page 70

z Press OK key to pause or resume.
Press RSK (Stop) to stop the video clip
6.5.5 Audio Player
Audio Player allows you to play audio files. The phone
supports T-Flash memory card. You need to save downloaded
music files to directory My Music, so that they can be played
normally.
Play the music files
Play
Check the details of music files
Details
Add to
Ringtones
Add the music to ringtones
Use the select audio as ringtones, SMS
ringtone, alarm ringtone and call ringtone.
Use as
70
Page 71

Update the play list.
Refresh List
Settings include Pre. Play list, List auto
gen., Repeat, Shuffle, Background play.
Settings
6.5.6 Sound Recorder
Your phone supports two kinds of recording formats: AMR and
WAV. Select a format from Settings in Options. A call may also
be recorded and saved to the phone or the memory card.
6.5.7 FM Radio
The headset cable works as FM antenna, so insert the
compatible headset before listening to the FM. To ensure
normal receiving of radio signal, do not remove the handset or
bend the cable while listening to the FM radio.
71
Page 72

In standby mode, Select Menu > Media Center > FM radio.
While playing a radio program, you can
z Press Shift/SYM key to adjust the volume.
z Press down Navigation key to start or pause the playing.
z Press right/left Navigation key to adjust the frequency with
a precision of 0.1 MHz.
z Switch to a channel by pressing the number key
corresponding to the channel.
Press LSK (Options) to view the channel list, manually enter a
frequency, automatically search for and perform relevant
settings.
6.5.8 Sound Effects
The phone provides 8 types of sound effect to suit your choice
while playing music.
6.6 Fun & Games
1. Java
72
Page 73

You can install and operate Java application here.
2. Java Settings
The settings related to Java application.
3. Java Default Security
Restore the Java settings to the default value.
4. Java Network
Set the GPRS connection for some Java applications, which
need to gain certain resource from network.
5. Games
The phone provides three games including Copter, Puzzle game
and Fruit.
You can set BGM, sound effect, games vibration and volume in
games settings.
73
Page 74

6.7 Settings
6.7.1 Dual SIM Switch
1. Select with SIM status
The phone will remind you to set the SIM standby status each
time you power it ON.
2. Use Default Mode
The traditional SIM card standby setting mode.
6.7.2 Multi SIM Settings
Go to Menu > Settings > Multi SIM settings to set SIM mode
as Multi SIM Open, Only Master SIM card Open, Only
slave SIM card and Flight mode.
When you are on a flight where the use of mobile phones is
prohibited, select flight mode so that the phone will not connect
to any network. However, alarm and calendar reminder will
remain on. You can still use the entertainment features, such as
audio player and camera in flight mode.
74
Page 75

6.7.3 Phone Settings
1. Time and Date
Set your time zone.
Set home city
Set the time and the date.
Set time/date
Set the format for the time and the data.
Set format
2. Schedule Power on/off
Set the time to power on/off the phone automatically.
Warning: In specific areas where the use of phone is prohibited
(such as in airplanes), please remember to disable the automatic
switch-on function before entering the areas to prevent
unexpected accidents.
3. Language
Set current display language.
4. Pref. Input Methods
Set input method for text entry.
75
Page 76

5. Display settings
Set the standby image of the phone.
Wallpaper
Set the waiting time and image for the
screen saver.
Screen Saver
Power on
display
Set the power on animation.
Power off
display
Set the power off animation.
If activated, date and time are
displayed on the idle screen.
Show Date and
Time
Screen switch
effect
Select the switch animation mode.
76
Page 77

Enable or disable the quick menu
displaying in idle screen, also you can
designate which menu to be displayed.
Smart Desk Top
6. Themes
Set the themes of the phone, the background color will be
changed mainly in the menu operation screen.
7. Auto update date and time
Automatically synchronize your phone’s date and time from
network.
Note: this service need to be supported by your server provider.
8. UART settings
Set the data output of your phone.
9. Misc. settings
77
Page 78

Set the LCD display duration, the time can be set from 5 to 60
seconds.
10. Jogball speed setting
Set the response speed of the 5 way navigation key.
Jogball working when Smart Desktop OFF:
Drag UP- Fun Spice, Drag Down-Shortcuts List, Drag
Right-Camera, Drag Left- Bluetooth
6.7.4 Network Setti ngs
It requires network support.
The network that your phone uses is configured automatically.
When turned on, the phone automatically connects to the
designated network, or automatically connects to a roaming
network when you are outside the coverage of your regular
network. When outside the coverage of your regular network,
you can manually select the local network system.
78
Page 79

1. Master SIM Network Settings
Network Selection
The phone will scan for the available
network when you are outside the home
network.
Automatic
The phone will list all networks for you to
choose from when you are outside the home
network.
Manual
Preferred Networks
Select the preferred network operator. The default is the
network of your SIM card.
2. Master SIM Network Settings
For the detailed information of slave SIM card network Settings,
please refer to the contents in “Master SIM Network
Settings”.
79
Page 80

6.7.5 Security Settings
The phone provides several codes to protect your phone against
misuse.
1. Master SIM Security Settings
The Master SIM is protected against misuse
by the PIN code. Master SIM lock may be
set after you enter the PIN code correctly.
Master
SIM Lock
Set new passwords, including Master SIM
PIN and Master SIM PIN2.
Change
Password
2. Slave SIM Security Se ttings
For the detailed information of slave SIM card security Settings,
please refer to the contents in “Master SIM security Settings”.
3. Phone Lock
If the phone lock is activated, the phone lock password is
80
Page 81

requested each time the phone is switched on. The default
password is "1122". If the phone is locked, only emergency
calls can be made.
4. Auto Keypad Lock
Keypad lock prevents the inadvertent phone usage. However,
you can still be called and you can make emergency calls.
5. Mobile Tracker
This feature allows you to track your phone if they are lost or
stolen. Switch on the application and whenever a new SIM is
inserted in your phone, you will receive a SMS on predefined
numbers.
6. Change Password
Set new phone password. Default Password is 1122.
81
Page 82

6.7.6 Connecti vi t y
Bluetooth
Power on will enable the Bluetooth.
Inquiry audio device will help you to search all Bluetooth
devices in the vicinity.
Remote Control will enable the Bluetooth to work as Remote
control of Laptop/PC, while giving presentations and listening
to Music or watching a movie
My device will show all the devices that are allowed to be
connected with your handset. One can add or delete the same
Active Devices are the one which are connected at the moment.
Thru Settings one can set his visibility to other devices, change
device name, authenticate new devices, Can forward your music
to Bluetooth headset, Block other Bluetooth devices, Can define
where you want to store data which you transfer thru Bluetooth,
82
Page 83

Also can define how much access to be given to connected
Bluetooth, and also which folder(s) can be allowed to be
accessed by connected Bluetooth devices.
6.7.7 Restore Factory Se tti n gs
Reset the phone to default values (factory settings).
The phone password is required, which is "1122" by default.
6.8 File Manager
You can use File manager to organize your files in folders.
If a memory card is inserted, the files stored on it are organized
separately.
Select Phone or Memory card and select Options to browse,
copy, delete, and move the files in folders.
83
Page 84

6.9 Organizer
6.9.1 Calen da r
You can enter events in the calendar.
In the calendar interface, press the up and down direction keys
to scroll to different weeks, and press the left and right direction
keys to scroll to different days.
View today’s task alarm.
View
View all the task information which
have been designated.
View all
Add event memos.
Add event
Delete the event in some case.
Delete event
Enter a specific date to be located and
the cursor will jump to the date quickly.
Jump to Date
84
Page 85

Return to the current date in calendar
screen.
Go to today
Go to
monthly/weekly
view
Display the date by month/week.
6.9.2 Alarm
You can set five types of alarm clock time if required. Once set
the alarm icon will be displayed on the idle screen.
Scroll to an alarm and select Edit for settings. You can set to
enable the alarm, the ring time, ring mode, audio options,
snooze minutes and alert type.
6.9.3 Tasks
If activated, the phone rings as a reminder when the set time
arrives. You can view, add, edit and delete task if required.
85
Page 86

6.9.4 World Clock
You can check the current local date and time of major cities in
the world.
6.10 Fun SPICE
Fun Spice menu is specifically for the entertainment
purpose and all the functions belonging to this menu are
chargeable. All the functions of Fun Spice will work
only if GPRS is activated on your SIM card.
6.10.1 Spice Gang
It is WAP portal from where user can download Ringtones,
Wallpapers, Animations, Videos, and other kind of content.
Step1. Check the GPRS settings for your operator.
Step2. Initiate Spice Gang wap portal to browse and download
the content.
Step3. Charges for download apply as per operator pricing.
86
Page 87

Explore the whole world of Entertainment with spice gang.
6.10.2 Opera Mini
Opera Mini is a fast and compact web browser that
allows you to access the Internet on your phone. With
Opera Mini, you can use your cell phone to access web
sites and content, including your mail, community sites,
news, blogs and more.
Please ensure that you have GPRS settings in your
phone to use Opera Mini. Contact your operator for
GPRS settings.
6.10.3 Reuters
Reuters India gives you the latest India, World and
Business news and more. Also, get the latest stock
market information along with tools like the currency
87
Page 88

converter and weather in your city on your mobile
phone.
Please ensure that you have GPRS settings in your
phone to open Reuters. Contact your operator for
GPRS settings.
6.10.4 ibibo
Now connect with the ibibo community on Spice Mobiles.
Go and create your profile, search for people based on
their age, sex & location, make new friends and send or
receive blurbs. Invite your existing friends to join your
new community.
Please check your GPRS settings before accessing Ibibo.
6.10.5 Email2SMS
Emergic Email2SMS is a product of Netcore Solutions
Pvt. Ltd. provided by Spice Mobiles. Email2SMS allows
88
Page 89

you to receive email on your phone via SMS without
GPRS. You can Read, Reply, Compose and Forward your
emails via SMS. This service is only available for Gmail,
Indiatimes and Corporate Account Holders. Spice
Mobiles offers FREE subscrip t i on fo r one month.
1. Just send SPICE START <Location> to 575758 to
register for Email2SMS service.
For composing new mail type NEW <Receiver's
Email-Id> S:<Subject> B:<Message> and send it to
575758
2. For replying to any mail type
REPLY <Message-Id> <Message> and send it to
575758
3. For replying to all in the mail type REPLY
<Message-Id> <Message> and send it to 575758
4. For forwarding the mail type
FWD <Message-Id> <Receiver's Email-Id>
<Message> and send it to 575758
89
Page 90

5. For reading the remaining part of mail type READ
<Message-Id> and send it to 575758
NOTE: Message-Id is the number which you get at the
end of SMS. i.e., 01,02,03,04
For more details contact Customer Support : Phone :
+91 22 6662 8130, Email :
6.10.6 Instant Messenger (Nimbuzz)
Nimbuzz, another path-breaking innovation is available
exclusively to the users of Spice Mobiles. Nimbuzz is a
common IM platform that allows one to chat, message
and send files on the move. This service is common for
most of the commonly used IM portals including skype,
MSN, yahoo, ICQ, AIM, Google talk – one log-in, one
90
Page 91

contact list for all accounts.
Please check your GPRS settings before accessing
Nimbuzz
6.10.7 Ngpay
What is ngpay?
ngpay is India’s first mobile marketplace.
You can use ngpay to buy air & rail tickets, pay your bills,
buy movie tickets, shop for books & gifts, do banking,
make payments and more from your mobile phone in a
fast, simple and secure fashion.
ngpay offers a range of services from it’s network of
partners view current list. In a simple, consolidated menu,
you can discover and choose merchants, banks, or service
providers with whom you want to transact
91
Page 92

6.10. 8 Free Videos
Vuclip is a Mobile Video search and Delivery service
which gives you a premium experience by providing real
time device optimization and delivery of Videos. Write
the search term for video in the search box and you get
options for both downloading and streaming. Videos can
be played in different resolutions and in parts. You can
also create your own playlist by adding your favorite
video to ‘Add to my Clip list’ tab.
Please ensure that you have GPRS settings in your phone
to open Vuclip. Con tact your operator for GPRS settings.
6.10.9 MGurujee
MGurujee is India's leading M-Learning portal delivering
92
Page 93

unique anytime anywhere mobile phone based learning
experience with access to a wide variety of quality
knowledge content from market leaders.
Please check your GPRS settings before accessing
MGurujee
6.10.10 Cricket Updates
Cricket Updates service is powered by ibibo. With this
service you can now check live cricket score and
schedule of matched. You require GPRS connection to
use this feature.
Please contact your operator for GPRS activation
6.10.11 Free SMS
Free SMS service is pow ered by ib ibo. You can now send
free sms to your friends using this feature. You require
GPRS connection to use this feature.
93
Page 94

Please contact your operator for GPRS activation
6.10.12 Mobile Tracker
Now be sure of your mobile phones with MTracker
offered by Spice Mobiles. This feature allows users to
track their phone if they are lost or stolen. Switch on
MTracker application and whenever a new SIM is
inserted in your phone you will receive a SMS on pre
defined numbers.
6.11 Extra
6.11.1 Calculator
1. Enter the amount to be calculated. Press the hash key to
enter decimal points.
2. Use navigation keys to operate and OK key to get the
result.
94
Page 95

6.11.2 Unit converter
The phone provides the unit conversion about weight and
length.
1. Enter the amount to be converted.
2. Press the OK key to obtain the converted result.
6.11.3 Currency converter
1. Set the exchange rate and confirm with the OK key.
2. Enter the amount to be converted in Local. Confirm with
the OK key. The amount in the other currency is displayed
in Foreign.
6.11.4 Stopwatch
You can measure times, for example, for a sports game. The
phone provides the following two types of stopwatches.
95
Page 96

The functions of Split timing, Lap timing
and View record are provided.
Typical
Stopwatch
Press direction keys to start stopwatch. The
total time is displayed on the top of the
screen. Press and hold the left soft key to
reset.
nWay
Stopwatch
6.11.5 Ebook Reader
The phone supports reading files in the *.txt format, which is
ideal for reading an e-Book.
Store the *.txt files in the Ebook folder, and then you can read
them in E-Book reader.
96
Page 97

6.12 Services
6.12.1 STK
STK is shown only if it is provided by your SIM card. For
further details, please contact your network operator.
6.12.2 WAP
With the WAP/GPRS function in this phone, you can surf
internet on your phone.
Connect browser to a homepage you set.
Homepage
The phone displays a list of stored
bookmarks. To add a page to bookmarks, go
to Bookmarks > Options > Add bookmark.
Bookmarks
The phone displays the recently-visited
pages.
Recent
Pages
97
Page 98

The phone displays the offline pages you
saved.
Offline
Pages
Enter the URL for direct connection to an
Internet address.
Input
Address
This function means the service provider
will send WAP content to your phone
without any operation from you. For
example, you can obtain the latest news or
new WAP settings from the service provider.
Service
Inbox
Set the browser settings, including Select
SIM, Edit account, Browser options,
Service message settings, Clear cache,
Clear cookies and Trusted certificates.
Settings
6.12.3 Data Account
The function is used to set account information.
98
Page 99

GSM data Press Edit to set Account name, Number,
User name, Password, Line type, Speed
and DNS.
GPRS Press Edit to set Account name, APN, User
name, Password and Auth. type.
99
Page 100

7. Appendix I Troubleshooting
Available accessories with phone are 1 Battery (1000mAH), 1
Dual Stereo Headset with call connect/disconnect button & 1
Travel Charger,
This device has been tested and found to comply with Part 15 of
the FCC rules. Performance is subject to the following
conditions:
• This device may not cause harmful interference.
• This device must accept any interference received,
including interference that may cause undesired
operation.
• Changes or modifications not expressly approved by
the manufacturer or authorized service center could
void the user’s authority to operate this equipment.
• If you encounter problems while using the phone, or if
it performs erratically, you can consult the
information in the following table. If a particular
100
 Loading...