

Page 1

Spice M-5252
User’s Manual
1
Page 2

Spice Mobiles Ltd. ©2009. All rights are reserved. No
part of this document may be reproduced without
permission. All trademarks and brand names mentioned
in this publication are property of their respective
owners.
While all efforts have been made to ensu re the accuracy
of all contents in this manual, we assume no liability for
errors or omissions or by statements of any kind in this
manual, whether such errors are omissions or statements
resulting from negligence, accidents, or any other cause.
The contents of this manual are subject to change
without notice.
Protect your environment! We strive to produce products
in compliance with glob al e nvironmental standards.
Please consult your local authorities for proper disposal.
Note: User’s Manu al is just to guide the user about
functionality of the phone. This should not be seen as
any certificate of technology. Some functions may vary
due to modifications and up gradations of softw are or
due to printing error.
2
Page 3

1. ......................................... 6 SAFETY PRÉCAUTIONS
2. ............................................... 10 PHONE OVERVIEW
3. .............................................. 14 GETTING STARTED
4. ........................................................... 24 TEXT ENTRY
5. .................................................................. 26 CALLING
6. ...................................................................... 30 MENUS
.............................................................. 30 6.1 PHONEBOOK
................................................................. 33 6.2 MESSAGES
.................................................................... 33 6.2.1 SMS
................................................................... 36 6.2.2 MMS
................................................................... 39 6.2.3 Chat
............................................... 39 6.2.4 Voice Mail Server
............................................ 40 6.2.5 Broadcast Message
........................................................... 40 6.3 CALL HISTORY
................................................................... 42 6.4 SETTINGS
.............................................. 42 6.4.1 Dual SIM Settings
....................................................... 43 6.4.2 Phone Setup
......................................... 45 6.4.3 General Call Settings
3
Page 4

.................................................... 50 6.4.4 Network Setup
.................................................... 51 6.4.5 Security Setup
.................................... 52 6.4.6 Restore Factory Settings
....................................................... 52 6.4.7 Sound Effect
.......................................................... 53 6.5 MEDIA CENTER
.............................................................. 53 6.5.1 Camera
..................................................... 54 6.5.2 Image Viewer
...................................................... 55 6.5.3 Audio Player
................................................... 56 6.5.4 Video Recorder
....................................................... 57 6.5.5 Video Player
........................................................... 57 6.5.6 FM Radio
6.5.7 Scheduled FM recording............................ 58
.................................................. 58 6.5.8 Sound Recorder
.......................................................... 58 6.6 FILE MANAGER
........................................................... 59 6.7 FUN & GAMES
.......................................................... 59 6.8 USER PROFILES
................................................................ 61 6.9 ORGANIZER
............................................................ 61 6.9.1 Calendar
.................................................................. 61 6.9.2 To Do
................................................................. 61 6.9.3 Alarm
4
Page 5

....................................................... 62 6.9.4 World Clock
................................................................. 62 6.10 SERVICES
6.10.1 Spice Gang.................................................. 62
................................................................. 62 6.10.2 WAP
................................................... 63 6.10.3 Data Account
.................................................................. 64 6.10.4 STK
.................................................................... 64 6.11 EXTRAS
........................................................ 64 6.11.1 Calculator
................................................. 64 6.11.2 Unit Converter
.......................................... 64 6.11.3 Currency Converter
......................................................... 65 6.11.4 Stopwatch
................................................... 65 6.11.5 Ebook Reader
............................................. 65 6.11.6 Bluetooth (Mono)
.............................................................. 66 6.12 SHORTCUTS
7. ................... 67 APPENDIX I TROUBLESHOOTING
8. APPENDIX II ABBREVIATIONS AN D
EXPLANATION
....................................................... 74
5
Page 6
1. Safety Précautions
Information for parents
Please read the operating instructions and safety precautions
carefully before use.
Explain the content to your children and the hazards associated
with using the phone.
Remember to comply with legal requirements and
local restrictions when using the phone, for example,
in aeroplanes, petrol stations, hospitals or while
driving.
Mobile phones can interfere with the functioning of
medical devices such as hearing aids or pacemakers.
Keep at least 20 cm (9 inches) between the phone and
pacemaker. When using the mobile phone hold it to the
ear which is furthest away from the pacemaker. For more
information, consult your doctor.
Always keep the phone and accessories out of reach of
small children.
Small parts such as the SIM card, dust cap, lens ring
6
Page 7
and lens cap as well as the microSD card can be dismantled and
swallowed by small children.
Do not place the phone near to electromagnetic data
carriers such as credit cards and floppy disks.
Information stored on them could be lost.
Do not look directly into the LED (such as flash LED)
with optical magnifiers because of radiation.
Permanent hearing loss may occur if you use
earphones or headphones at high volume. You can
adapt over time to a higher volume, which may sound
normal but can be damaging to your hearing. Set your
volume to a safe level. If you experience discomfort or buzzing in
your ears, reduce the volume or discontinue use of your earphones
or headphones.
Ring tones, info tones and handsfree talking are
reproduced through the loudspeaker. Do not hold the
phone to the ear when it rings or when you have
switched on the handsfree function. Otherwise you risk
serious permanent damage to your hearing.
The mains voltage (V) specified on the power supply
7
Page 8
unit must not be exceeded. Otherwise the charging device may be
damaged.
The power supply must be plugged into an easily accessible AC
mains power socket when charging the battery. The only way to
turn off the charging device after charging the ba ttery is to unplug
it.
You may only open the phone to replace the battery,
SIM and microSD card. You must not open the battery
under any circumstances. All other changes to this
device are strictly prohibited and will invalidate the
guarantee.
The phone may cause interference in the vicinity of TV
sets, radi o s and PCs.
Dispose of unwanted batteries and phones as permitted
by the laws in your countries.
Only use original batteries and charging devices.
Otherwise you risk serious damage to health and
property. The battery could explode, for instance.
All batteries can cause property damage, injury or burns if a
8
Page 9
conductive material such as jewelry, keys or beaded chains touch
exposed terminals. The material may complete an electrical circuit
and become quite hot. Exercise care in handling any charged
battery, particularly when placing it inside your pocket, purse or
other container with metal objects.
Do not dispose of batteries in fire as they may explode.
Improper use will invalidate the guarantee! These safety
instructions also apply to original accessories.
As mobile devices offer a range of functions, they can be used in
positions other than the head, such as directly on the body. In this
case, the limits are met too.
9
Page 10
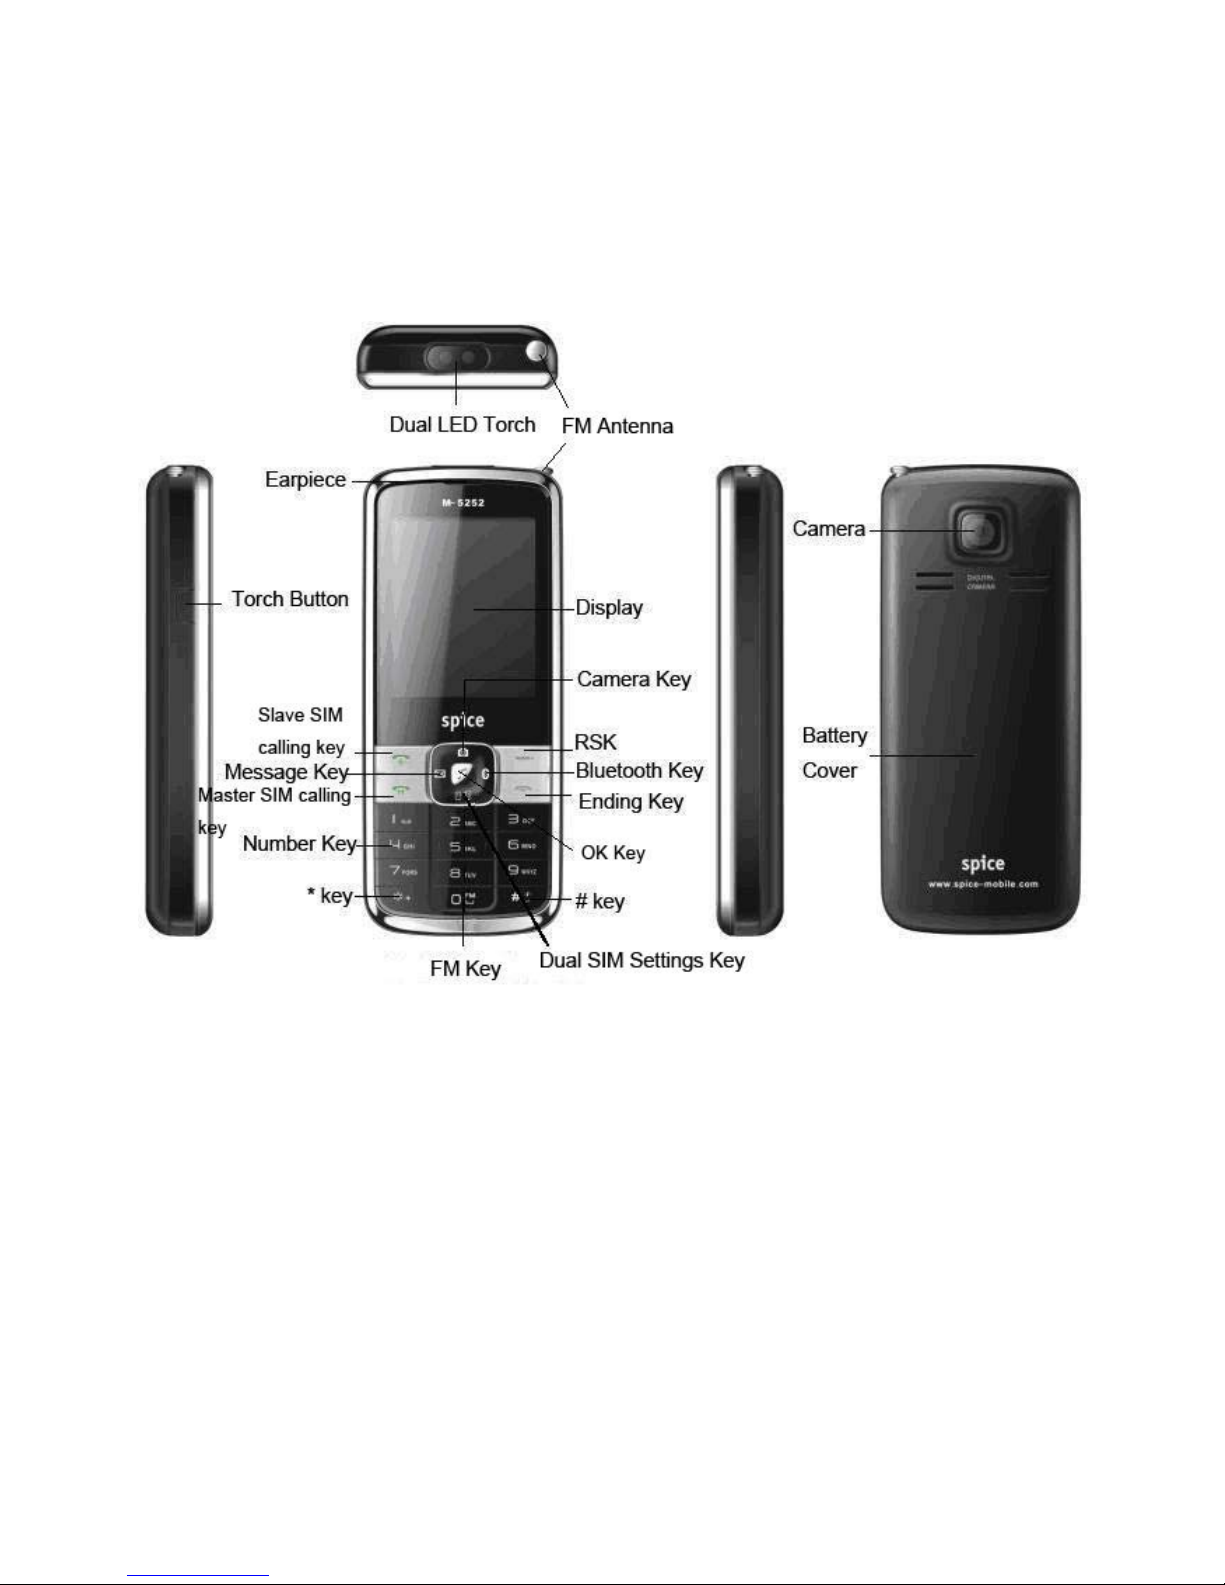
2. Phone Overview
Communication control keys
Calling key is used to make a ca ll after a number has been entered
or selected from the phone book, or to answer an incoming call. In
idle screen, press calling key to show call logs of Master SIM
card.
Ending key is used to end a call during calling or conversation, or
to quit the menu and return to idle screen. Press and hold the
ending key for about two seconds to turn on/off the phone.
10
Page 11

Direction keys
Go to Settings > Phone setup > Dedicated key to set direction
keys as per your choice.
OK key
In idle screen, press OK key to open the Audio player.
Left and right soft keys
In idle screen, press the left soft key to directly access the main
menu. In idle screen, press the right soft key to directly acce ss the
phone book list. During menu operation, the current functions of
the left and right soft keys are shown in the bottom line of the
screen, and they are closely related to the current status of the
phone.
In idle screen, press the right soft key and then the "#" key to lock
the keypad; to unlock, press the right soft key and then the "#" key.
Number keys
Press number keys (0-9) to enter numbers.
Press and hold number keys (2-9) to start speed dial.
You can also use number keys to select menus. If a number is
shown before an option in menu list, you can select the option
quickly by pressing the corresponding number key.
Asterisk key
11
Page 12
a. Press the asterisk key to enter "*".
b. Press the asterisk key twice in a row to enter "+", to
make an international call.
Hash Key
a. Press the hash key to enter "#".
b. Press and hold the hash key in idle screen to
activate/deactivate the Silent mode.
c. When in an text editing screen, press the hash key to
change the input method.
Connection jack
The connection jack is used to connect charger, headset.
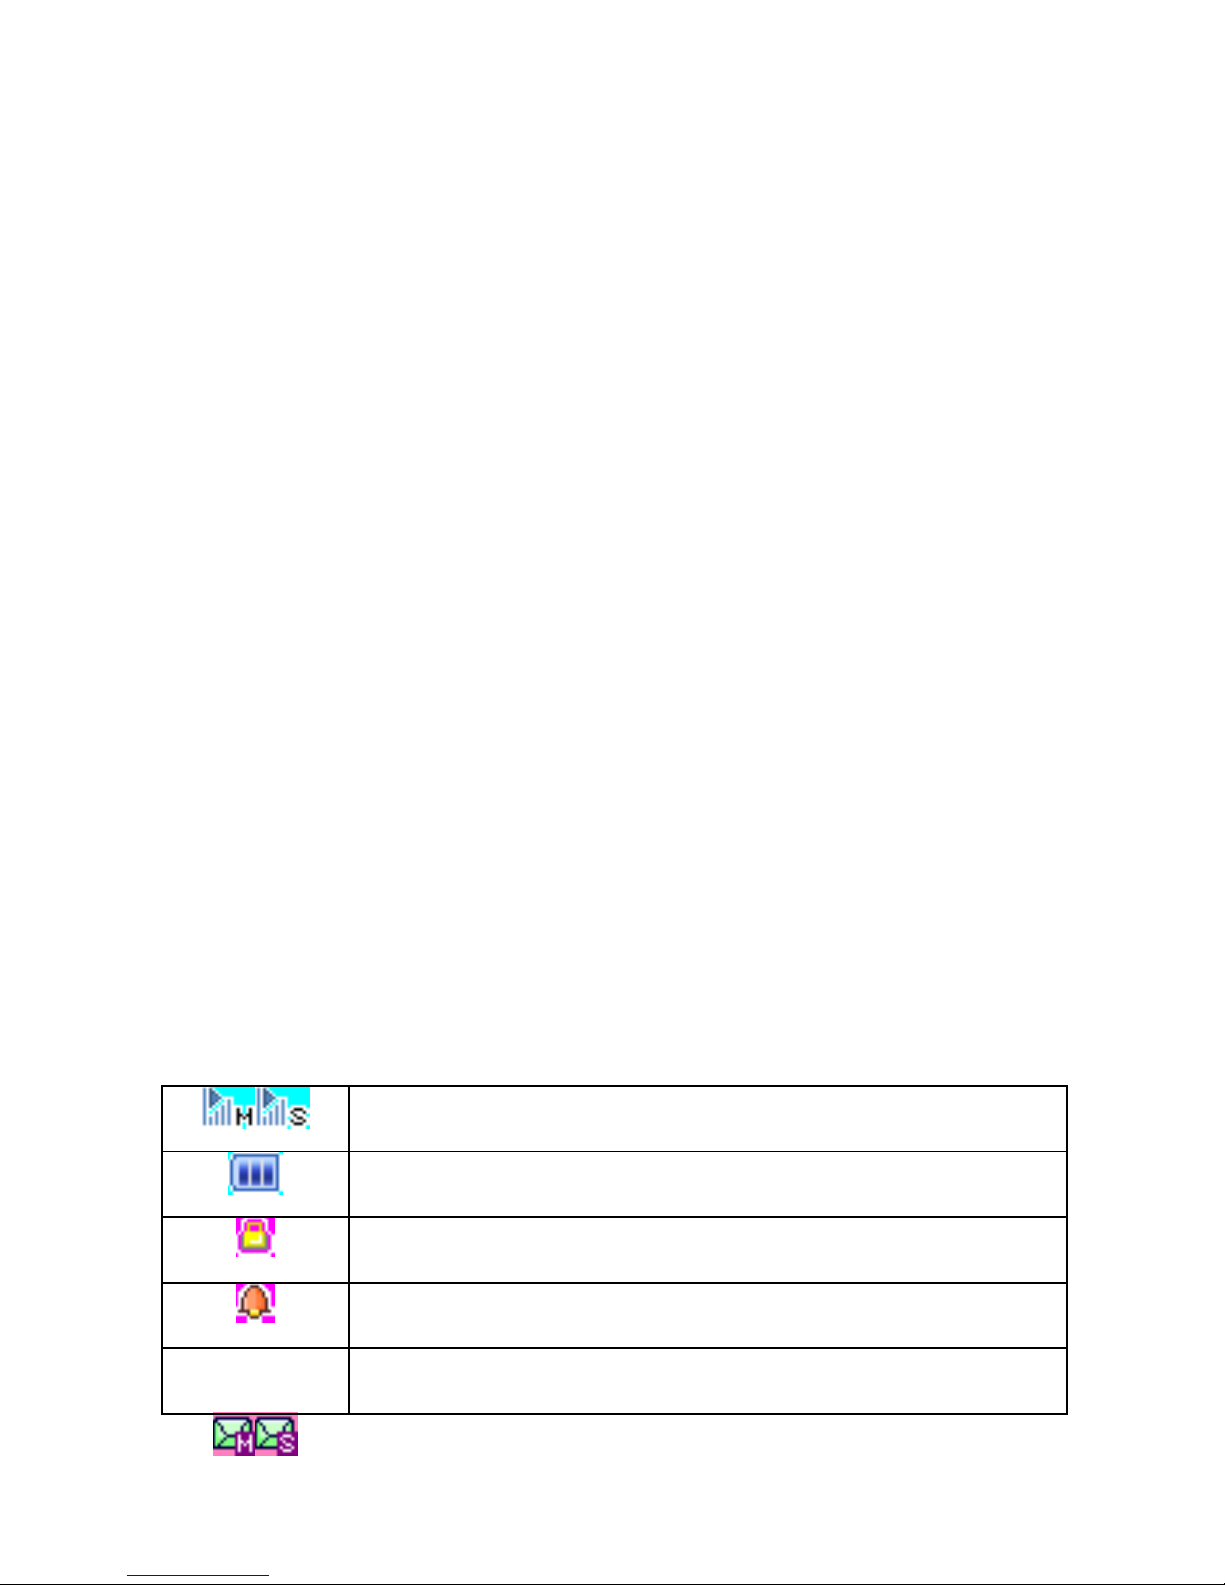
Icons displayed on the main screen (Icons may be changed
without further notice)
The following icons may be displayed in the first line of the
screen.
Signal strength
Battery status
Keypad locked
Alarm activated
New SMS received or SMS full
12
Page 13

New MMS received
Headset mode
Connected to the GPRS network
Ring
Vibration only
Vibration and ring
Vibration then ring
13
Page 14

3. Getting Started
What is a SIM card
When registering your mobile phone number, you will have a SIM
card (Subscriber Identity Module) provided by the network
operator.
The SIM card has information reserved for your use. It includes
your phone number, PIN (Personal Identification Number), PIN2,
PUK (PIN Unlocking Key is the password to unlock PIN), PUK2
(password to unlock PIN2), IMSI (International Mobile Subscriber
Identity) number, network information, phone book data, SMS
data and so on. If it is lost, contact your network operator
immediately for help.
PIN code
PIN is the password provided by your network operator. It is
usually 4 digits. When you input the PIN code, the screen displays
“*” to replace the number entered.
PIN is used to access the SIM card. If the PIN protection function
is enabled, the screen will display “Enter PIN” each time the
phone is switched on. You can deactivate this feature but you risk
unauthorized use of the phone. Some network operators do not
permit deactivating the control.
PIN2 code
PIN2 is required for some specific functions provided by the
14
Page 15

network, such as the charge information.
Note: If you enter the PIN incorrectly three times in a row, the
SIM card will be locked. Please contact your network operator
immediately for decoding. Attempting to decode by yourself may
result in the permanent failure of the SIM card.
PUK code
PUK (8-digit) unlocks a locked PIN. If you enter the PUK
incorrectly ten times in a row, the SIM card will become invalid.
Please contact your network operator for a new SIM card.
Installing the SIM card
1. Press and hold the ending key to turn off the phone.
2. Remove the battery cove r t
Insert the SIM card into the card holder. Ensure that the cut
and hen the battery.
3.
corner is at the top left and the metal contacts face the phone.
15
Page 16
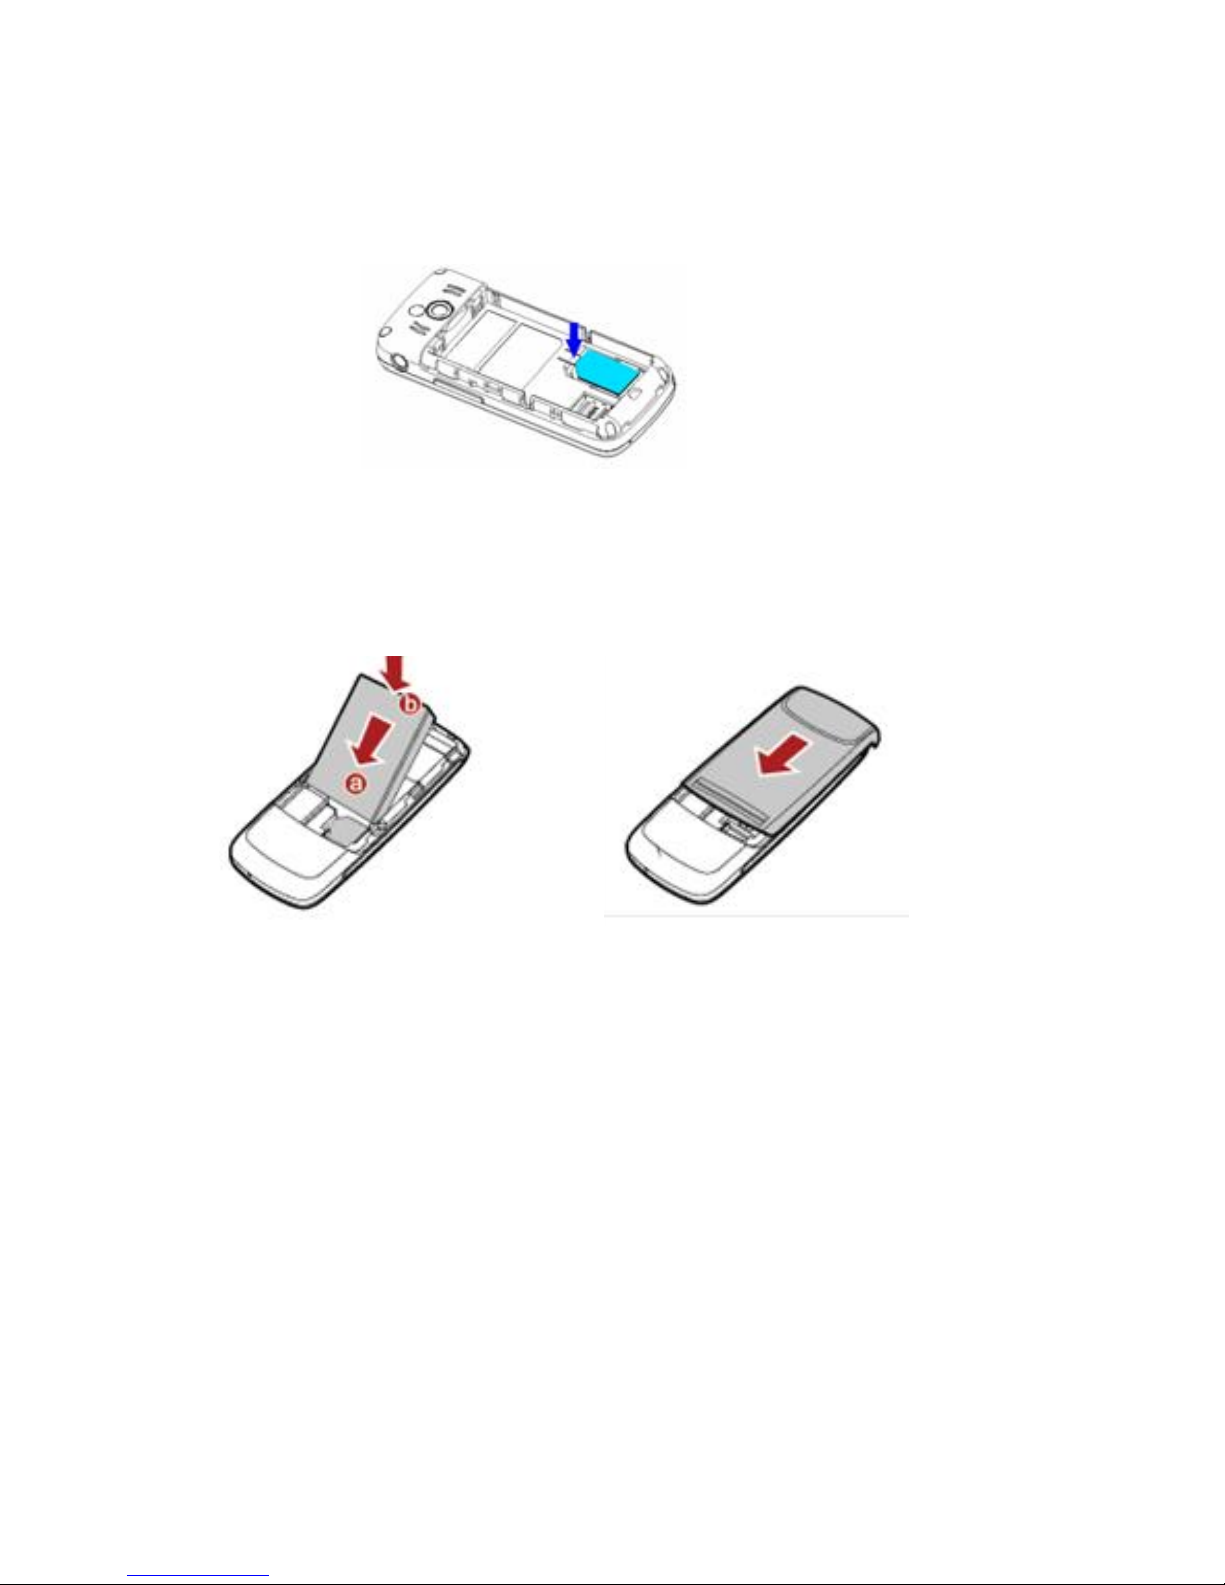
4. Re-install the battery. Place the ba ttery cover onto the back of
your phone and slide it forward until the latch catches the
cover.
Note: A SIM card can be easily damaged if its metal contacts
become scratched. Therefore, take special care when holding
or inserting it and keep it away from small children.
Charging the battery
The battery is not fully charged when first unpacked. It takes three
charging-discharging cycles for the battery to reach its peak
performance. The battery can be charged and discharged hundreds
of times. However, the capacity of the battery will be reduced each
time it is charged/emptied, and it will eventually wear out. When
16
Page 17

the talk time and the standby time are noticeably shorter than
normal, replace the battery. Use original batteries and charging
devices only.
Unplug the charger from the outlet and the phone when not in use.
Do not leave a fully-charged battery connected to a charger
because overcharging may shorten the lifetime of the battery. If
unused, a fully-charged battery will lose its charge over time.
If the battery is completely discharged, the charging may not start
immediately when you plug in the connector. Wait 10 to 15
minutes for the phone to begin charging.
Use the battery only for its intended purpose. Never use any
charger or battery that is damaged.
Do not short-circuit the battery. An accidental short circuit may
occur when a metallic object such as a coin, clip or pen causes the
direct connection of the positive (+) and negative (-) terminals of
the battery, for example, when you carry a spare battery in your
pocket or purse. Short circuit may damage the battery and the
connecting object.
Storage at too high or low temperatures will result in a gradual
capacity loss. As a result the operating time of your mobile phone
may be considerably reduced, even after the battery is fully
charged.
Do not dispose of batteries in a fire as they may explode. Batteries
may also explode if damaged. Dispose of unwanted batteries and
phones as permitted by the laws in your countries.
17
Page 18

Talk and Standby time of battery vary depending on signal
strength on the cellular network, the parameters set by the network
operator and usage of the battery.
Big Battery:
With its 1300mAh battery phone has *10 days stand by time
(under test conditions) so you can easily keep in touch with your
loved ones for many days without charging its BIG BATTERY.
Battery type Standby time Talk Time
Li-ion battery 10 days 240 minutes
* Note: The actual operation time of a battery varies based on
the operation mode, network settings and call settings.
Charge a battery according to the following steps:
1. Connect the charger to the connection jack of the phone in
proper direction, and connect the charger to a main socket.
2. The phone displays "Charger Connected!" and starts charging
after properly connected. The battery icon dynamically
displays the charging process. In switch-off state, the phone
dynamically displays the charging process.
3. When the battery is fully charged, the charging process stops
automatically, and the battery icon indicates full grid on the
screen. After the battery is fully charged, remove the charger
from the phone and socket as soon as possible.
18
Page 19

Note:
z After the phone has run out of battery, we recommend that
you recharge the battery in time. If you do not recharge the
battery in two days, the phone may enter the slow charging
mode. When you recharge the battery, there may be no
display temporarily. After about 10 minutes, the charging
indicator icon is displayed on the screen of the phone. If you
do not recharge the battery more than two days, the battery
may enter the deep discharge protection state. Thus, in order
to get the battery into normal charging mode quickly, we
recommend that you charge the battery on an adapter to
activate the battery for charging, and then charge the battery
with the phone. Alternatively, you can charge the battery with
the adapter.
z Do not change the parts and accessories of the battery by
yourself or take off the battery cover for safety.
z Use only original batteries and charging devices. Otherwise
you risk serious damage to health and property.
z The temperature range for charging a battery is -10°C -55°C.
Do not charge batteries in too high or too low temperature.
z Do not use the phone while charging.
z It takes approximately four hours to fully charge a battery.
Remove the charger quickly after the battery is fully charged.
z After pulling out the battery system date and time will be
reseted to default values (factory settings).
19
Page 20
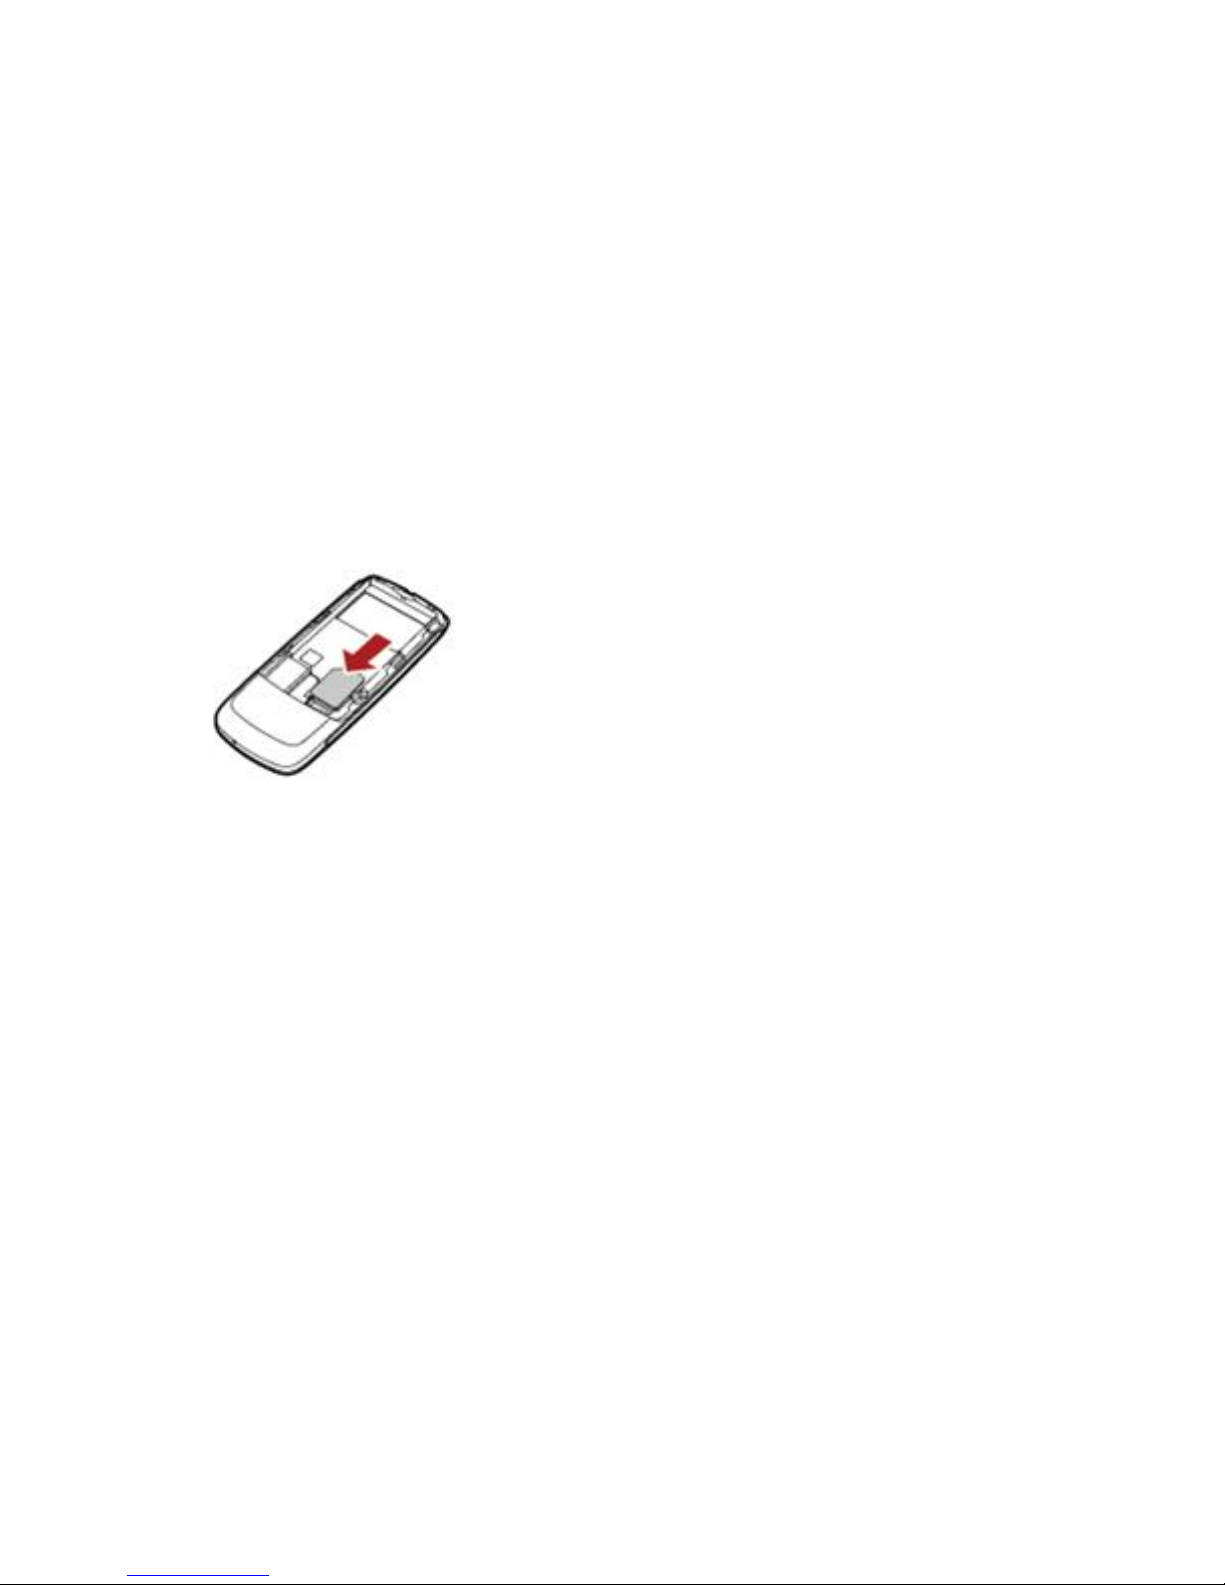
Big Memory:
This phone supports upto 8 GB mi cro sd card for you to
save any data, music, videos etc to carry along.
T-Flash/Micro SD card: It is a type of memory card.
Insert T-Flash card into mobile phone
Big Torch:
This phone has BIG BRIGHT Dual LED Torch with a dedicated
side key for all your emergency needs.
Big Sound:
This phone comes equipped with Dual Speakers so that you can
enjoy superior crystal clear sound quality. It is really very very
loud!!!
Big Screen:
This phone has 262K, TFT, 2.0” Screen. Its Big, TFT display lends
a pulsating effect to your screen and pictures.
20
Page 21

Multi SIM:
This phone supports Dual-SIM (GSM+GSM) card with
dual-standby. When in Dual Stand by mode:
a) You can make or receive calls from/at Master SIM/Slave SIM,
b) You can send or receive SMS/MMS from Master SIM/Slave
SIM,
c) You can reply/forward SMS of Master SIM/Slave SIM of the
phone from other SIM
d) You can access Phonebook / Call Logs of Master SIM/Slave
SIM,
e) You can access WAP/GPRS (for internet access on phone) on
Master SIM/Slave SIM.
Stand By Mode Setting:
21
Page 22
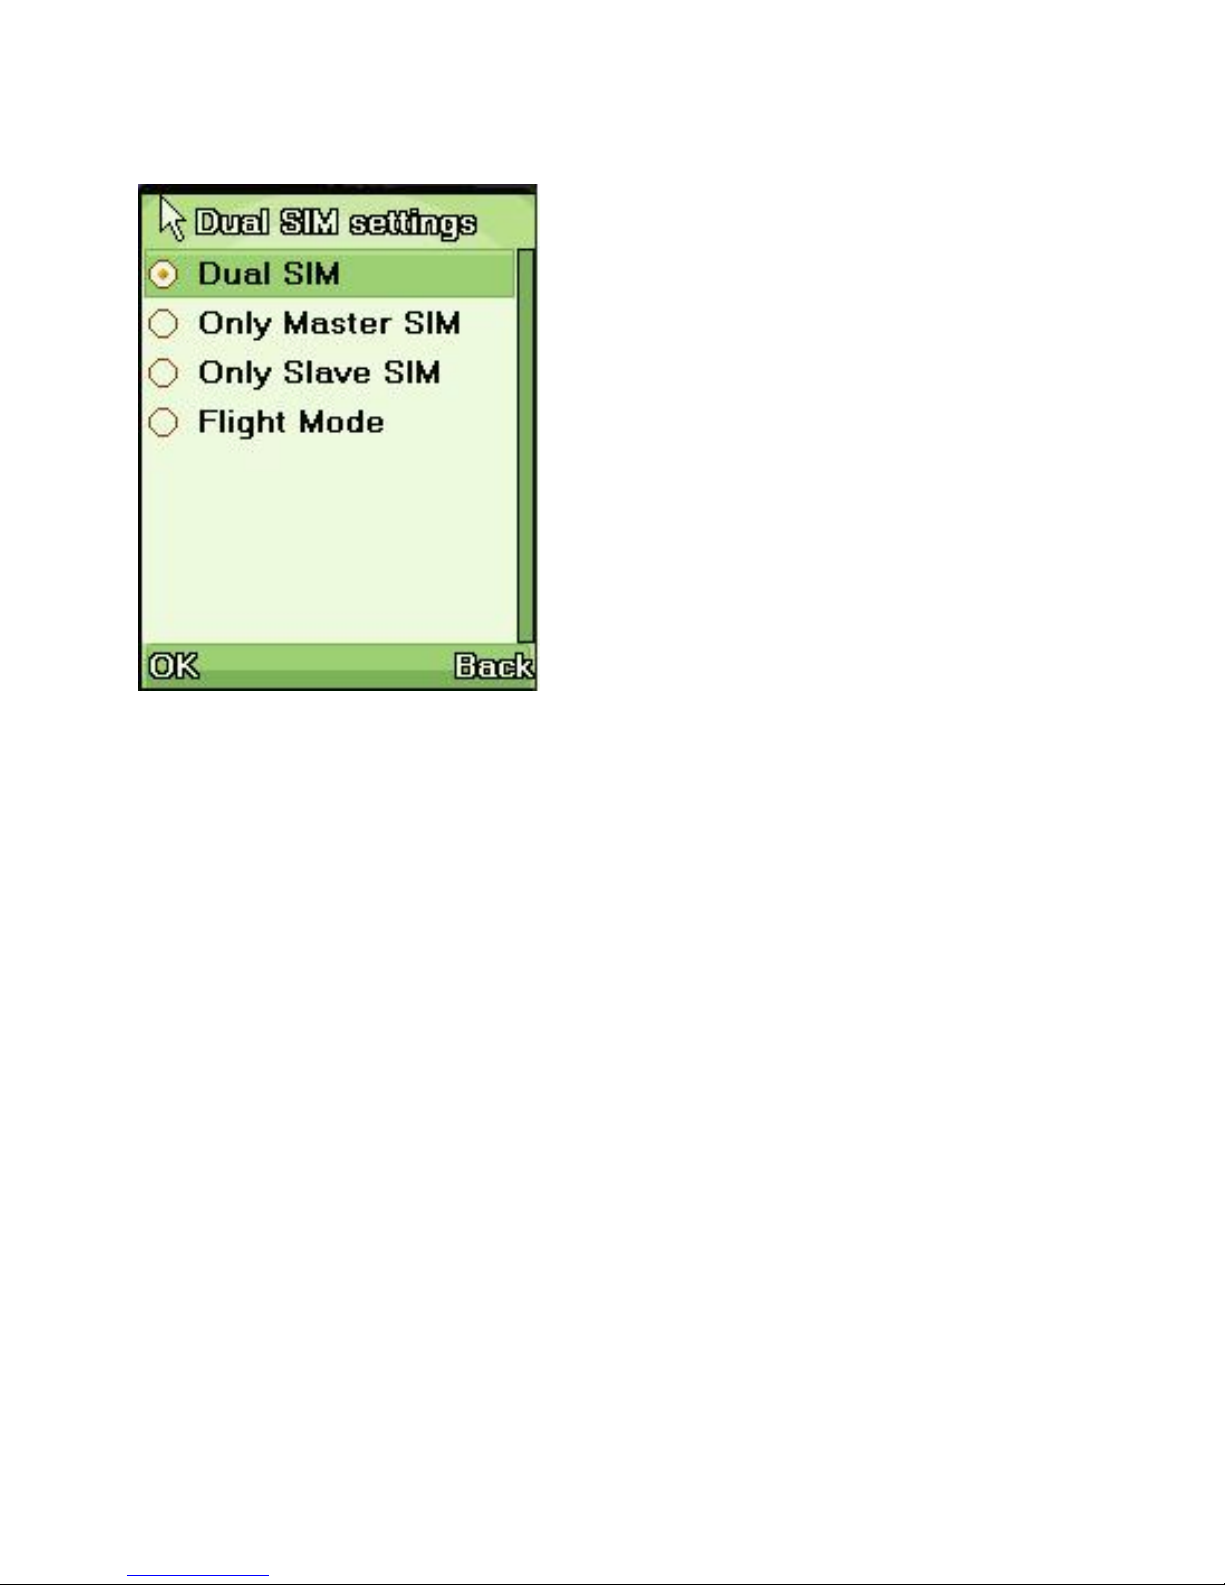
Note: M-5252 supports Dual SIM, Dual standby but single calling
i.e If you make a call from Master SIM then you cannot receive
another call on your Slave SIM at the same time or Vice-Versa.
Hence incoming / ougoing / call conference / call swap on any
other Master SIM/Slave SIM is not possible.
Switching the phone on
Press and hold the ending key to turn the phone on/off. The phone
will automatically search for the network, if there is no password
protection for the SIM card and the phone. After the phone is
registered on the network, the name of the service provider will be
displayed on the idle screen. Then you can make or answer a call.
The phone remains in searching state if it fails to find the available
network system temporarily.
After the phone is switched on, if a password is required, enter the
22
Page 23

correct PIN code and press the left soft key or the OK key for
confirmation. After unlocked, the phone will display the name of
the registered network and the signal strength. Contact your
network operator if you do not know the PIN code. The default
password of the phone is “1122”.
After the phone is switched on, if it displays “Insert SIM Card” on
the screen, press and hold the ending key to turn the phone off, and
check whether the SIM card is properly inse rted.
Switching the phone off
Press and hold the ending key to turn the phone off. After the
switch-off animation is displayed on the screen, the phone will be
switched off.
Do not attempt to turn the phone off by directly taking out the
battery.
23
Page 24

4. Text Entry
When an editing screen is displayed, the current text input method
is indicated in the upper left corner of the display. To have more
options to enter text, do one of the following ways to select the
desired input methods:
z Go to Settings > Phone Setup > Preferred Input Methods.
z In editing screen, select Options > Input Method.
Changing the input method
Press the hash key repeatedly to select an input method.
Inserting symbols
Press the asterisk key “*” and select the required symbols.
Numeric
When the input method icon is shown as "123", input numbers
directly with number keys.
Note: While using the numeric input method, you need to switch
to other text input methods to insert a space by pressing number
key 0.
Multitap ABC and abc
Press a number key (2-9) repeatedly until the required letter
appears in the text. Press a key once to input the first letter listed
on the key, press it twice quickly to input the second letter, and so
24
Page 25

on.
Press number key 0 to insert a space. Press numbe r key 0 twice to
enter 0.
While entering text, press the right soft key (
Clear) once to delete
the last character on the display; press and hold it to delete all
entered text.
Smart ABC and abc
After Smart ABC/ Smart abc is chosen, the screen shows
simulated keypad, you can input letters or words by clicking the
corresponding letters or words.
Press each key associated with the letter you want to enter only
once. The letters you have entered appear at the bottom of screen.
The candidate words change with each key you press. When the
candidate words are displayed, press the direction keys to choose
words.
While entering text, press the right soft key (
Clear) once to delete
the last character on the display; press and hold it to delete all
entered text.
25
Page 26

5. Calling
Making a call
In idle screen, enter a phone number and press the “M” key to
make a call by Master SIM, or press the “S” key to make a call by
the Slave SIM.
Press the ending key to end a call.
Making an international call
1. Press the asterisk key ”*” twice in a row to enter "+".
2. Enter the country code, area code and phone number.
3. Press the “M” key to make a call by the Master SIM, or press
the ”S” key to make a call by the Slave SI M .
Dialing an extension number
Enter the number, and then press the asterisk key three times in a
row to enter "P", or press the asterisk key four times in a row to
enter "W". Then enter the extension number.
Correcting a key-in error
Press the right soft key to delete the last character on the display.
Press and hold it to clear all entered text.
Making a call from phone book
1. In idle screen, press the right soft key to enter Phonebook list,
26
Page 27

or enter the menu and select Phonebook.
2. Select Quick search, scroll and select a contact person. This
Quick search option is advanced option and hence called as
Intelligent Quick Search. Just type any part of the name in the
quick search and you will get all the contacts matching your
entry. It makes it simpler to search any entry. e.g: You can
search word– “Arun Kr Goel” by giving word “Goel or Kr or
Arun” as clue to search in any order. It will show you all
options matching this word.
3. Press the “M” key to make a call by the Master SIM, or press
the “S” key to make a call by the Slave SIM.
Dialing a previous number
1. In idle screen, press the ”M” key to display Call Logs of
Master SIM/Slave SIM. Press the up and down direction keys
to select a number.
2. Press the “M” key to make a call by the Master SIM or “S”
for Slave SIM.
Dialing a speed dial number
In idle screen, press and hold the corresponding number (2-9) in
the speed dial list to make a call. Note that number key 1 is
reserved for the voice mail number (to get Voice mail
number,Please contact your Service provider).
To set speed dial,
1. Go to Settings > General call settings > Speed dial >
27
Page 28

Enable speed dial to enable the function.
2. Edit the speed dial numbers in Settings > General call
settings > Speed dial > Set number > Options > Edit.
Listening to voice mail
Press and hold number key 1.
You need to set the voice mail number and store it on your SIM
card. To set the number, go to Messages >SIM Master SIM/ Slave
SIM Voice mail server, select Options and then Edit.
Answering a call
z Press the calling key.
z Press the OK key, or select Options and Answer.
Make call Silent
z Press the RSK.
Rejecting a call
z Press the ending key.
z Press RSK twice to select Reject.
Ending a call
Press the ending key.
Call options
28
Page 29
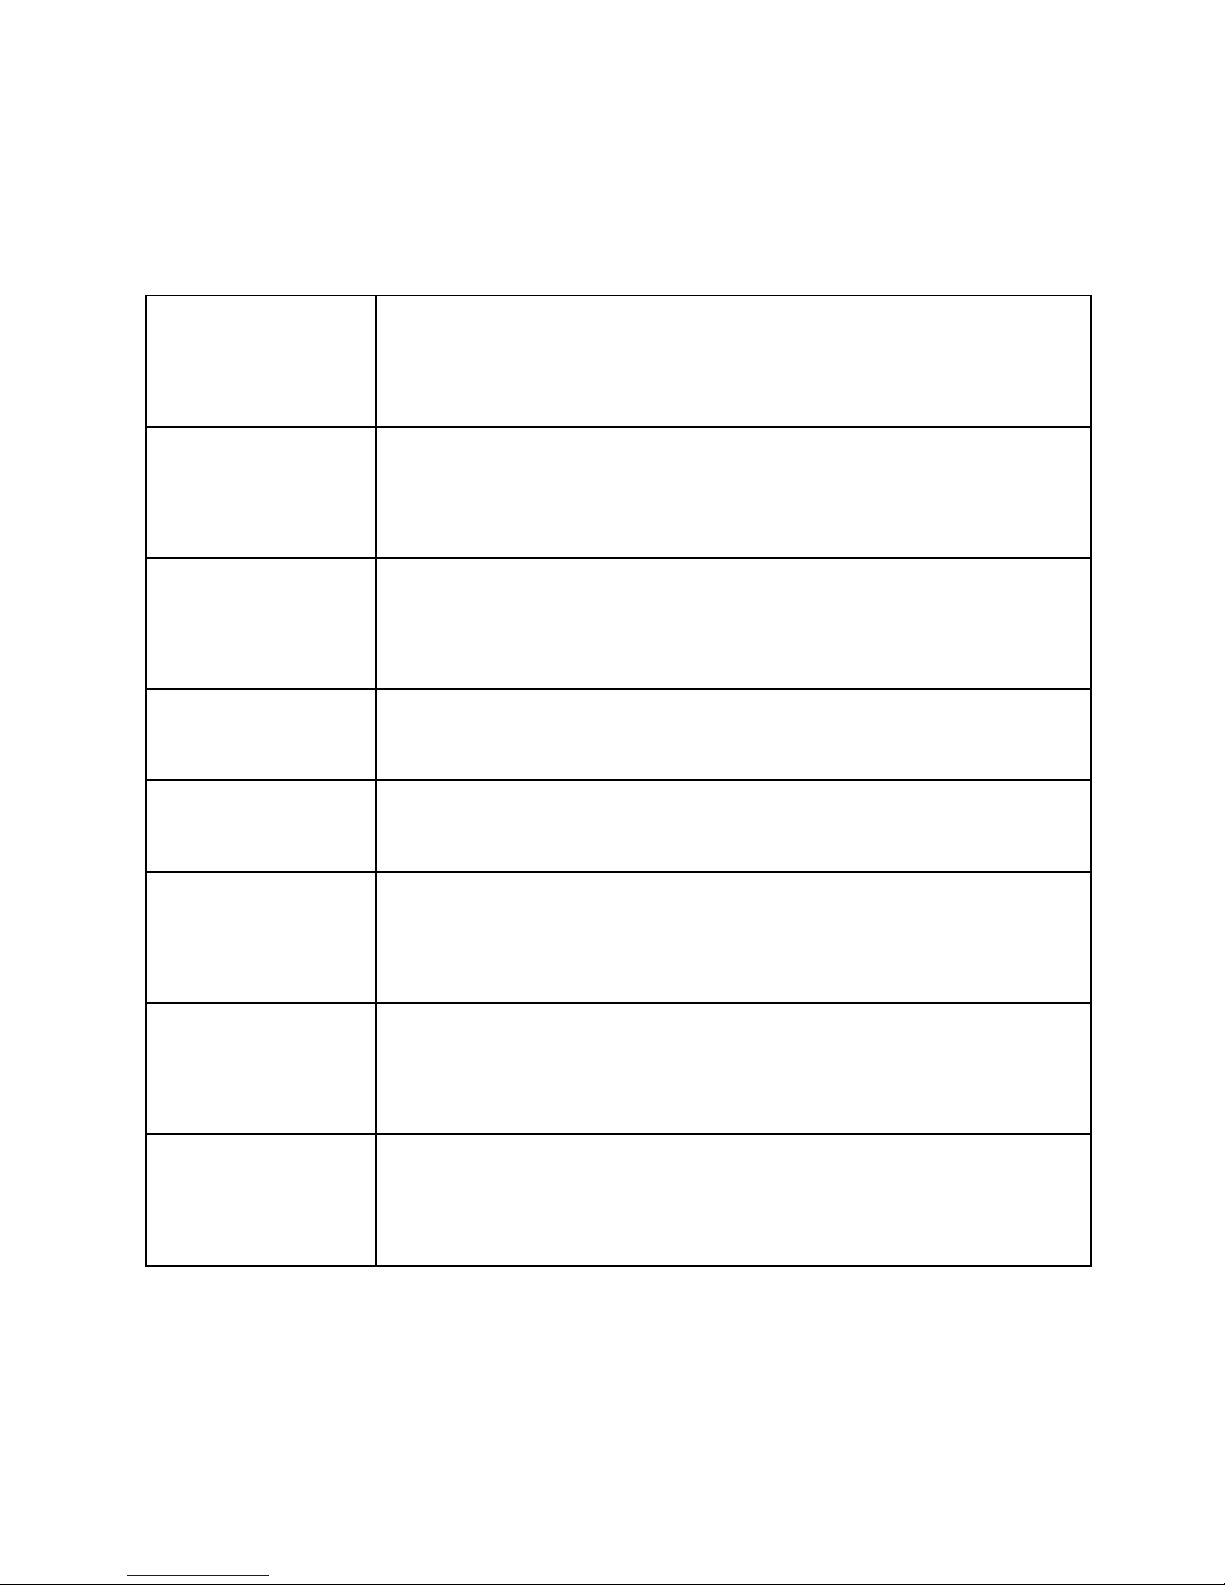
Press Options during a call for more options. Options vary
depending on the current situation.
Hold the current call.
Hold Single
Call
End the current call.
End Single
Call
Add a new call and talk with more than one
party at a time.
New Call
Use Phonebook to search for numbers.
Phonebook
Read/write a message during a call.
Messages
Record the call.
Sound
Recorder
The person on the other end of the line cannot
hear you (muting).
Mute
Enter tone sequences (number) for remote
inquiries to an answering machine.
DTMF
29
Page 30

6. Menus
6.1 Phonebook
The phone provides two kinds of storage media: Master
SIM/Slave SIM and phone. The phone can store 500 entries with
multiple fields. The capacity of the phone book on your Master
SIM/Slave SIM depends on the type of Master SIM/Slave SIM
provided by your network operator.
Enter a number in idle screen and press the OK key to save the
number. Select the storage location. Then the edit interface appears.
If To Master SIM or To Slave SIM is selected, you need to edit the
number only. If To phone is selected, you need to edit the items
that you set in the settings of phone book, including the name,
number, home number, company name, email address, office
number, fax number, birthday, associate picture, associate sound
and caller group.
In idle screen, press the right soft key to directly access the phone
book.
The small icon on the left of the phone book list indicates whether
the record is stored on the Master SIM, the Slave SIM or the
phone.
Dial phone number by the Master SIM Call
or Slave SIM Call
Call
30
Page 31
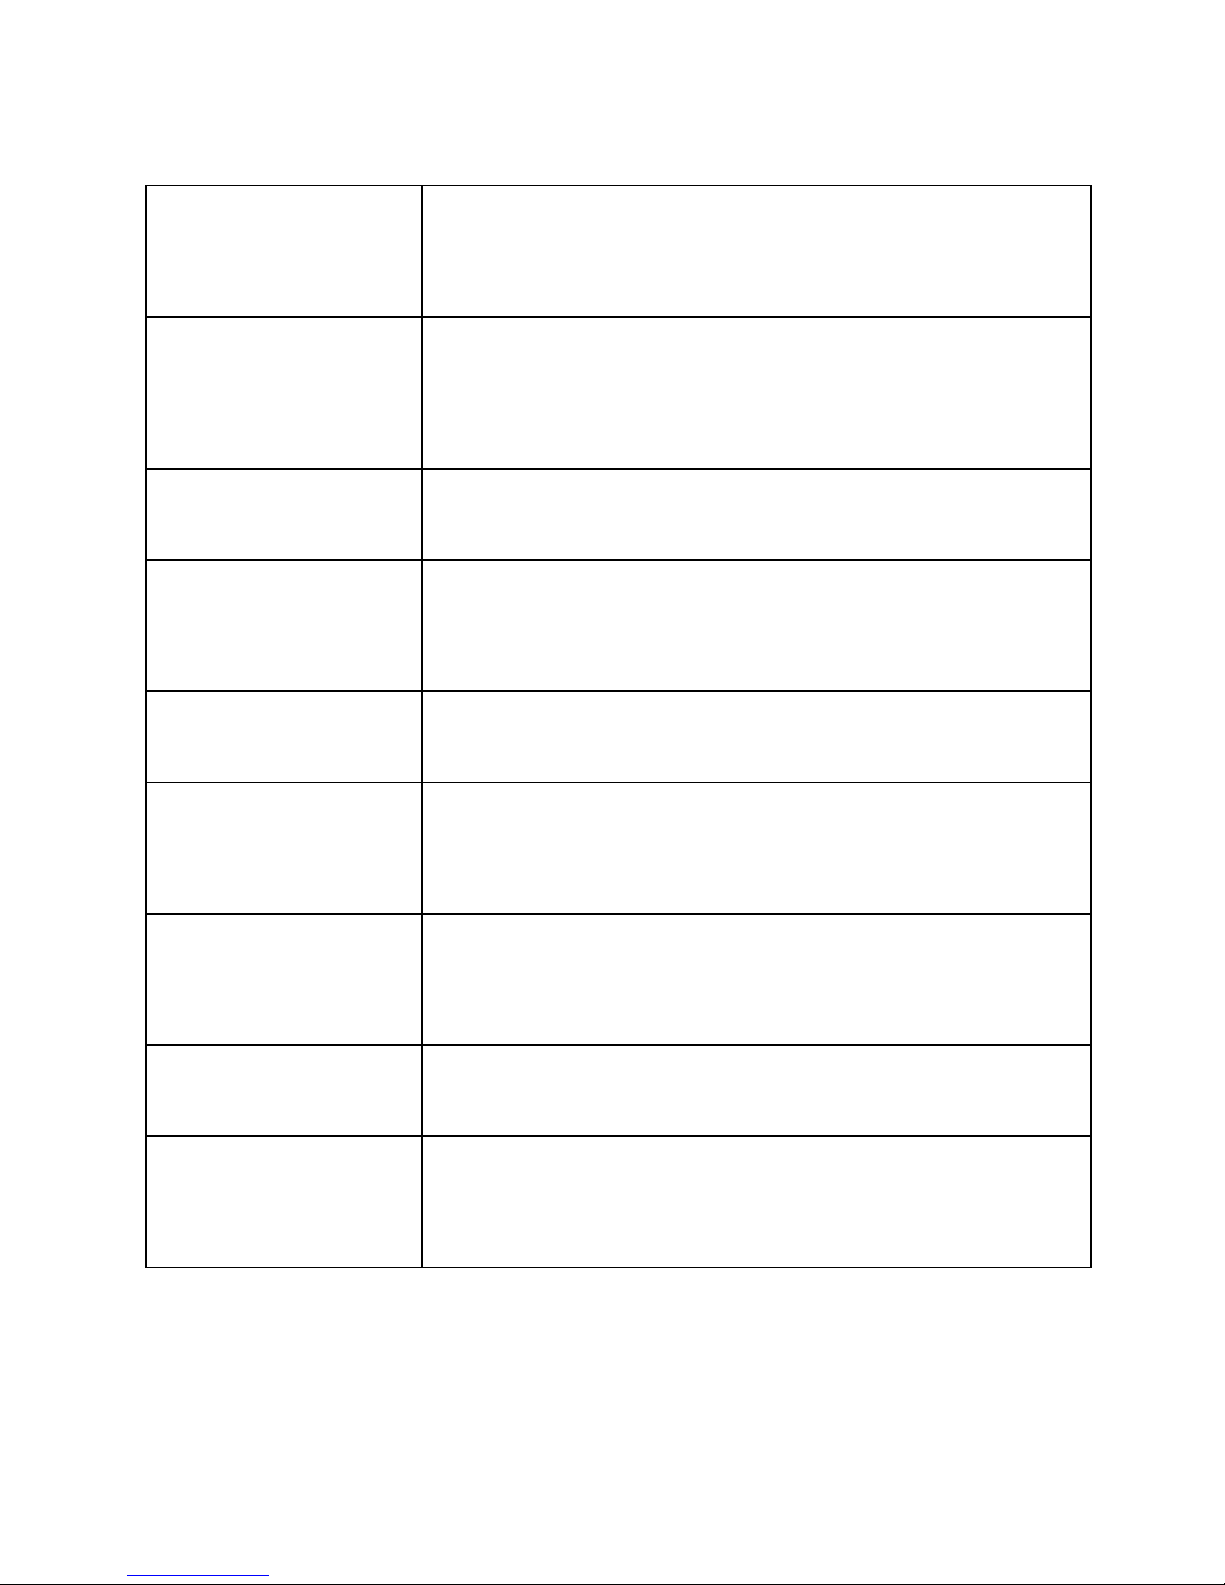
Send SMS after selecting a designated
number.
Send Text
Message
Send
Multimedia
Message
Send MMS after selecting a designated
number.
View the detailed information of the record.
View
Edit the options included in a phone book
record.
Edit
Delete the record.
Delete
Copy the record from the current storage to
the other storage.
Copy
Move the record from the current storage to
the other storage.
Move
Copy the record to the current storage.
Duplicate
Send vCard by SMS/MMS/Bluetooth or
save it to file.
Send VCard
There are the following options if you access the phone book from
menu.
31
Page 32

This option allows quick search through phone
book. Enter the first letter. Then all the records
starting with such letter are displayed.
Quick
Search
This option lets you search for a specific record.
Search
Contact
Add New
Contact
Add a new phone number to Master SIM,
Slave
SIM or phone.
Enable/Disable select Multi contact, then Copy
or Delete selected
Multi
Operation
A caller group is the combination of phone
settings used to identify a particular group of
records. The phone provides five call groups:
Friends, Family, VIP, Business and Others. You
can manage and edit the details of caller groups.
Caller
Groups
Set the Master SIM owner number and Slave
SIM owner number, Master SIM service dialing
number and Slave SIM service dialing number.
Extra
Numbers
32
Page 33

View the memory status. Set the default storage
of new numbers. Select the items required to be
added when adding new numbers to the phone.
Set name list filter. Edit and send your own
vCard. Select vCard version.
Settings
6.2 Messages
6.2.1 SMS
The phone supports Short Messaging Service (SMS) and
Enhanced Message Service (EMS). You can send text messages
and manage the messages that you sent and received.
If the memory for short messages is not full, short messages will
be directly saved in the SIM card. A flashing icon
will appear
on the top of the main screen if the memory is full.
1. Write Message
Create a new short messa ge.
1. Go to Main Menu > Messages > SMS > Write Message or
press Left dedication key to enter text.
2. Press the left soft key (Options) and select the required items,
including Use templates, Insert object, Format text, Insert
number, Insert name, Insert bookmark and Input method.
3. Press the left soft key (Options) and select Master SIM
done or Slave SIM done for send options.
33
Page 34
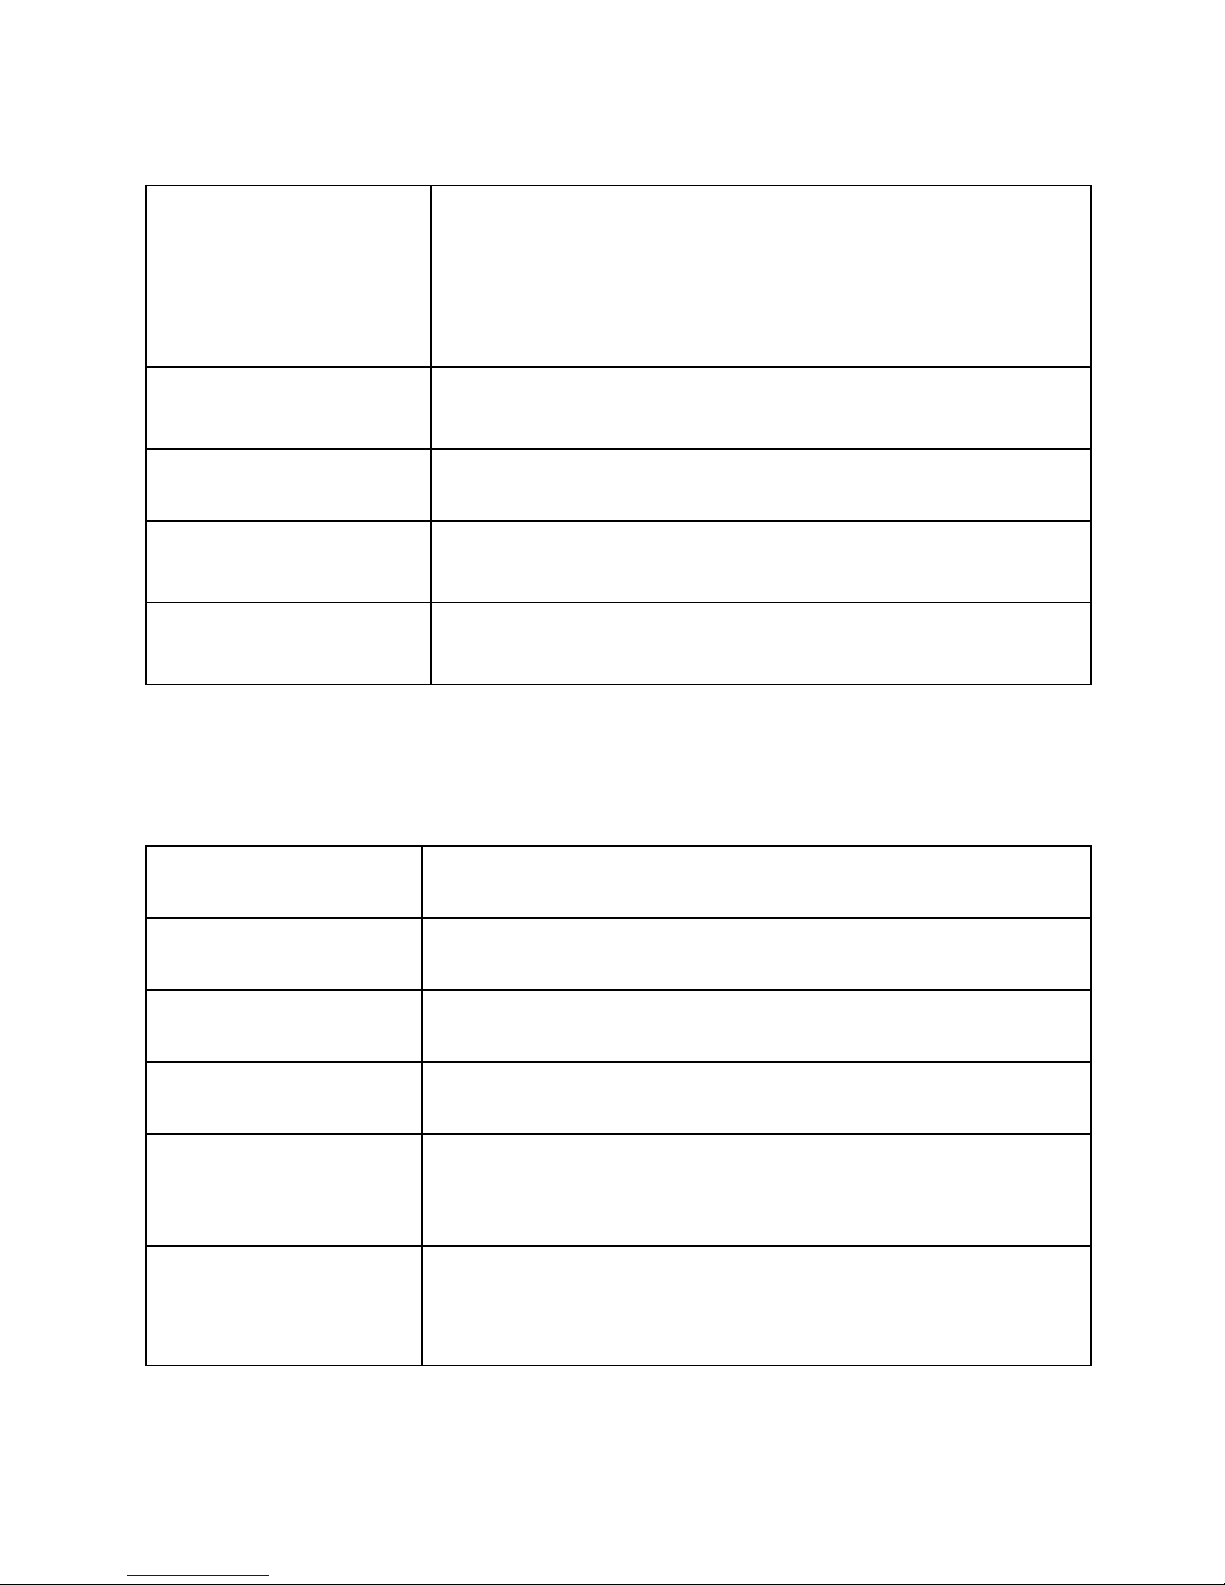
Save the short message in Outbox and send
it to the corresponding recipient at the sa me
time.
Save and Send
Send the short message to the
corresponding recipient.
Send Only
Save the short message in Outbox.
Save
Send the short message to several
recipients.
Send to Many
Send the short message to each member of
the corresponding caller group.
Send by Group
2. Inbox
Incoming short messages are saved in inbox.
Reply the short message.
Reply
Delete the short message.
Delete
Edit the short message.
Edit
Forward this short message to others.
Forward
Copy to
SIM/Phone
Copy this short message to SIM or phone.
Move to
SIM/Phone
Move this short message to SIM or phone.
34
Page 35

Start chat by sending short messages.
Chat
Delete all short messages in inbox.
Delete All
Copy all short messages from SIM or from
phone.
Copy All
Move all short messages from SIM or from
phone.
Move All
Extract the number in the short message.
Use Number
Extract the URL information in the short
message.
Use URL
Extract the USSD information in the short
message
Use USSD
You cannot receive new messages if the memory for messages is
full. Delete unnecessary messages.
3. Outbox
Short messages successfully sent, not sent and to be sent are saved
here.
4. Templates
The phone provides ten templates of text messages however these
templates are editable.
5. Text Message Settings
35
Page 36

Set the following settings of short messages.
Set profile name, SC address, validity
period and message type.
Profile Settings
Enable or disable the delivery report and
reply path of short messages.
Common
Settings
View the memory usage ratio of the SIM
card and phone for short messages.
Memory Status
Set to save short messages to the SIM card
or to the phone. By default messages get
saved to phone memory.
Preferred
Storage
6.2.2 MMS
The phone also supports Multimedia Message Service (MMS),
which is a network service. It enables you to send messages with
images, sounds and texts. Ask your service provider whether this
service is available. You may need to subscribe to the service from
your network operator before sending and receiving multimedia
message.
All multimedia messages are stored in the memory of the phone.
The SIM card cannot store multimedia messages.
1. Write Message
Create a new multimedia message.
1. Enter recipients in To by pressing the left soft key (Edit).
Confirm with Done.
36
Page 37

2. Enter a subject in Subject by selecting Edit. Press the left
soft key (Options) and select Done.
3. Enter text in Edit content by selecting Edit.
4. Press the left soft key (Options) and select the items you
want to send, including images (Add picture), audios (Add
audio), files in other formats (Add attachment) and slide
(Add slide before/after) and so on.
5. Confirm the contents by selecting Options and Done.
6. Press the right soft key (Done) for send options.
Send the multimedia message to the
corresponding recipient.
Send Only
Save the multimedia message in outbox and
send it to the corresponding recipient at the
same time.
Save and Send
Save the multimedia message in Draft.
Save to Drafts
Save As
Template
Save the multimedia me ssage as a template.
Set relevant options for sending multimedia
message.
Send Options
Exit the editing of MMS. A message will
appear to ask you whether to save the
MMS.
Exit
37
Page 38

2. Inbox
Incoming multimedia messages are saved in inbox.
3. Outbox
You can view or process the multimedia messages saved in
outbox.
4. Drafts
You can save a multimedia message as draft while creating it.
5. Templates
Besides user defined templates, the phone provides five templates
of multimedia message in Default.
6. MMS Settings
Set the following settings of multimedia messages.
Set how a multimedia message is composed,
including creation mode, picture resizing, Best
slide duration, auto signature and Signature.
Compose
Set validity period, delivery report, read report,
priority, slide timing and delivery time for
sending multimedia messages.
Send
38
Page 39
Set home network, roaming, read report and
delivery report for receiving multimedia
messages.
Retrieve
Your phone will reject multimedia messages that
meet the selected filter criteria here.
Filter
Activate and edit the server profile. Please
contact your service provider for settings.
Server
Profile
View the memory usage ratio, used space and
free space for multimedia messages.
Memory
Status
6.2.3 Chat
You can chat with one of your friends at a time in a chat room by
sending text messages to each other. You can set two chat rooms.
Note that phones from both sides must support the mobile chat
function.
6.2.4 Voice Mail Server
Dial the voice mail number to access your voice mail. The number
is provided by your network operator.
Connect to the current voice mailbox
number.
Call Voice Mail
Add or change the voice mailbox number.
Edit
39
Page 40

Note: The voice mail function requires network support.
6.2.5 Broadcast Message
Broadcast messages are messages that your network operator
broadcasts to all users within a particular area, such as weather
forecast and transportation conditions.
Enable or disable the function.
Receive
Mode
Scroll to read broadcast messages.
Read
Message
Set languages for cell broadcast information.
Only information in the set language can be
received.
Languages
Select the channel of cell broadcast.
Channel
Settings
For more information about available channels and the
information they provide, contact your network operator.
6.3 Call History
In idle screen, press the calling key to directly access the call
history.
1. Master SIM Call History
40
Page 41

In idle screen, press the “M” calling key or go to Call History >
Master SIM call history > Master SIM missed calls/ Master
SIM dialled calls/ Master SIM received calls, to view the call
logs.
Select a call from the list. When the call is displayed, press the
calling key to make a call from the Master SIM card, or press the
left soft key to make a call from the Slave SIM card. You can press
the OK key to view the details of the call. Select Options for more
options.
Delete the select number from the list.
Delete
Save To
Phonebook
Save the selected number to the Master SIM
card, the Slave SIM card or the phone.
Dial the selected number.
Call
Edit the selected number and save it.
Edit
Send Text
Message
Send a short message to the record.
Send a multimedia message to the record.
Send
Multimedia
Message
Delete Master SIM Call Logs: Delete missed calls, dialled calls
or received calls, or delete all on the Master SIM card.
41
Page 42

Master SIM Call Timers: View Last call time, Total dialled
calls and Total received calls, or Reset all time of the Master
SIM card.
Master SIM Call Cost: View Last call cost and Total cost of the
Master SIM card. You can also reset cost and set the maximum
cost and the price per unit of the Master SIM card. It requires
network support.
Master SIM text message counter: View and reset the numbers
of short messages sent and received on the Master SIM ca r d.
Master SIM GPRS Counter: View the volume of GPRS last sent,
last received, all sent and all received on the Master SIM card. You
can also reset the contents of the counter on the Master SIM card.
The unit is Byte.
2. Slave SIM Call History
For the detailed information of Slave SIM call history, please refer
to the content in “Master SIM call history”.
6.4 Settings
6.4.1 Dual SIM Settings
Go to Menu > Settings > Dual SIM settings or press down
dedication key to set SIM mode as Dual SIM/Only Master
SIM/Only Slave SIM/Flight mode.
When you are on a flight where the use of mobile phones is
prohibited, select flight mode so that the phone will not connect to
42
Page 43

any network. However, alarm and calendar reminder will remain
on. You can still use the entertainment features such as audio
player and camera in flight mode.
6.4.2 Phone Setup
1. Time and Date
Set your time zone.
Set home city
Set the time and the date.
Set time/date
Set the format for the time and the data.
Set format
2. Schedule Power on/off
Set the time to power on/off the phone automatically.
Warning: In specific areas where the use of phone is prohibited
(such as in aeroplanes), please remember to disable the automatic
switch-on function before entering the areas to prevent unexpected
accidents.
3. Language
Set current display language.
4. Pref. Input Methods
Set input method for text entry.
43
Page 44

5. Display Characteristics
Set the standby image of the phone.
Wallpaper
Set the waiting time and image for the
screen saver.
Screen Saver
Power On
Display
Set the animation displayed when the
phone is turned on.
Power Off
Display
Set the animation displayed when the
phone is turned off.
If activated, date and time are displayed
on the idle screen.
Show Date and
Time
Show Owner
Number
If activated, the phone number is
displayed on the idle screen.
Screen Switch
Effect
Switch on or off the screen switch effect.
Effect Switch
Choose
Set the effect switch choice.
44
Page 45

Auto Update Wallpaper: Go to Menu > Settings > Phone setup
> Display Characteristics > Wallpaper > Auto Update
Wallpaper to turn Motion Wallpaper feature On/Off. When
turned on, you can change Wallpapers with gentle flick of a
wrist.
6. Greeting Text
If activated, the greeting text appears when the phone is turned on.
You can edit the greeting text.
7. Dedicated Key
You can assign the navigation key as shortcuts to important
functions. Press the corresponding navigation key in idle screen to
start the function.
8. Auto update of date and time
This function requires network support.
If activated, the time zone is switched automatically to local time
by the network.
6.4.3 General Call Settings
Caller ID
When you make a call, your number can be shown or hidden on
the display of the called party. Select Set by network to use the
default setting provided by the network operator.
45
Page 46
You may not be able to make calls if you select Hide ID,
depending on the network setting.
Call W ait ing
If activated, an incoming call is signaled by a
call waiting tone when you are on another
call. The number/name of the incoming call
is displayed.
Activate
Cancel the call waiting function.
Deactivate
Inquire the current status from the network.
Query Status
Call Divert
You can specify the conditions under which calls should be
diverted to your voice mail box or another number.
Divert All
Voice calls
All calls are diverted.
Divert If
Unreachable
A call is diverted if the phone is switched off
or is out of range.
A call is diverted if not answered.
Divert If No
Answer
46
Page 47

Divert If
Busy
A call is diverted if another call is in progress.
Divert All
Data Calls
All data calls are diverted.
Cancel All
Divert
Cancel all call divert settings.
Call Barring
Restrict the dialing or receiving of certain calls. To activate or
cancel call barring, you have to enter the network password
provided by your network operator.
If Al l calls is activated, no calls can be made.
If International calls is activated, no
international calls can be made. If
International calls except to home PLMN
is activated, only local calls or calls to the
home country (that is, the country to which
the network operator belongs) can be made .
Outgoing
Calls
If All calls is activated, no calls can be
received. If When Roaming is activated, you
may not receive calls when you are outside
your home network.
Incoming
Calls
47
Page 48

Cancel all restrictions to calls. Password from
your network operator is required.
Cancel All
Change barring password. The original
barring password is required.
Change
Barring
Password
Line Switching
Switch to Line 1 or Line 2.
Note: If you select Line2, whether you can make calls is
dependent on the network operator.
Closed User Group
This function requires network support.
1. Select OK to display Group list.
2. Select Add to enter group name.
3. Select Done and enter the serial number.
4. Select OK to complete the addition of a new group.
2. Slave SIM Call Settings
For the detailed information of Slave SIM call settings, please
refer to the contents in “Master SIM call settings”.
3. Black List
48
Page 49

The phone cannot receive the call from black listed number (can
select upto 5 number) if number was added to the black list of the
phone.
4. Auto Redial
Once activated, the phone will automatically redial, if there is no
answer for a number you have dialled.
5. Speed Dial
You can assign number keys 2 to 9 as shortcuts to important phone
numbers. Press and hold a corresponding number key in idle
screen to dial the number.
Note: Number key 1 is predefined as the speed dial key for the
voice mail number. You cannot change this function.
6. More
Call Time
Display
Choose whether to display the current call
duration during a call.
Call Time
Reminder
If activated, the phone beeps at the interval
time you set during a call.
Choose whether to activate the auto quick end
function, and set the duration.
Auto Quick
End
49
Page 50

6.4.4 Network Setup
It requires network support.
The network that your phone uses is configured automatically.
When turned on, the phone automatically connects to the
designated network, or automatically connects to a roaming
network when you are outside the coverage of your regular
network. When outside the coverage of your regular network, you
can manually select the local network system.
1. Master SIM Network Setup
Network Selection
The phone will scan for the available network
when you are outside the home network.
Automatic
The phone will list all networks for you to choose
from when you are outside the home network.
Manual
Preferred Networks
Select the preferred network operator. The default is the network
of your SIM card.
2. Slave SIM Network Setup
For the detailed information of Slave SIM network setup, please
refer to the contents in “Master SIM Network Setup”.
50
Page 51

6.4.5 Security Setup
The phone provides several codes to protect your phone against
misuse.
1. Master SIM Security Setup
The Master SIM card is protected against misuse
by the PIN code. Master SIM card lock may be
set after you enter the PIN code correctly.
Master
Lock
You can define a list of numbers that can be
dialled by Master SIM card. Numbers not
included in this list cannot be dialled by Master
SIM card.
Fixed Dial
Note: The Master SIM PIN2 code is required.
Once the PIN2 code is entered when the phone is
turned on, it is no longer required until next time
the phone is turned on.
It requires network support. If the SIM card
supports this function, you may restrict the
numbers for outgoing calls. If activated, your
phone may not call the numbers in the Fixed dial
list. The PIN2 code is required for this setting.
Barred
Dial
Set new passwords, including Master SIM PIN
and Master SIM PIN2.
Change
Password
51
Page 52

2. Slave SIM Security Setup
For the detailed information of Slave SIM security setup, please
refer to the contents in “Master SIM security setup”.
3. Phone Lock
If the phone lock is activated, the phone lock password is
requested after the phone is switched on. The default password is
"1122". If the phone is locked, only emergency calls can be made.
4. Auto Keypad Lock
Keypad lock prevents the inadvertent phone usage. However, you
can still be called and you can make emergency calls.
5. Change Password
Set new phone password.
6.4.6 Restore Factory Setti n gs
Reset the phone to default values (factory settings).
The phone password is required, which is "1122" by default.
6.4.7 Sound Effect
Audio effect can be set in this item.
52
Page 53

6.5 Media Center
6.5.1 Camera
The phone is provided with a built-in 0.1 mega pixel CMOS
camera at the back, which supports the photographing and video
shooting functions. Pictures are saved in the file system of the
phone. The file is in the *.jpg format. You can send the pictures
taken by the MMS/Bluetooth function provided by the phone.
While in camera mode, press the left soft key or click Options to
set the camera. Then save the settings. Aim the camera lens at the
place/object, and then press the OK key to take a photo. Keep the
camera lens steady for a while for the image quality. After
photographing, the still scenery just taken is displayed on the
screen.
View the saved pictures.
Photos
Set EV, Banding, Delay timer of the
camera.
Camera Settings
Set image size and image qua lity.
Image Settings
Set light condition.
White Balance
Select pre-defined settings for the current
environment.
Scene Mode
53
Page 54
Select the effect of photo display.
Effect Settings
Set the storage location for photos.
Storage
Restore the default settings of camera.
Restore Default
6.5.2 Image Viewer
Pictures taken can be accessed quickly in Image viewer. Select
Options for available options while viewing pictures.
Browse the pictures saved here.
View
Select List style or Matrix style.
Browse
Style
You can used it as wallpaper, screen saver,
power on display, power off display, phonebook
Use
You can send it through MMS or Bluetooth
Send
Rename the picture.
Rename
Delete the picture.
Delete
54
Page 55

Delete all the pictures saved here.
Delete All
Files
Sort the pictures by name, type, time, size or
none.
Sort By
Set the storage location of the picture.
Storage
6.5.3 Audio Player
Audio Player allows you to play audio files. Audio player in this
phone comes with built-in Motion Music feature which allows you
to change music at the double shake of a wrist.
The phone supports T-Flash memory card. You need to save
downloaded music files to directory My Music, so that they can
be played normally.
Play the music files
Play
Check the details of music files
Details
Add to
Ringtones
Add the music to ringtones
Update the play list.
Refresh List
55
Page 56
Settings include Pre. Play list, List auto gen.,
Repeat, Shuffle, Background play.
Settings
Turn Change Music On/Off to allow Flip Flop
of songs at the double shake of a wrist
Change
Music
6.5.4 Video Recorder
Video Recorder is used for video shooting. Press the OK key to
start shooting, pause or resume. Stop shooting by pressing the
right soft key. The video clip is saved to the phone or T-Flash card.
Options for Video recorder are listed below.
Play the saved video file.
To Player
Set Night mode and Banding of the
Camcorder to obtain the best result of
video recording.
Camcorder
Settings
Select the storage location for video files.
Storage
Restore the default settings of video
recorder.
Restore Default
Note: The phone has limited video recording facility. This can
record video up to 1minute/300KB in AVI format. When the
document exceeds 300KB/1 minute length, you will get a message
56
Page 57

and be prompted to save the document
6.5.5 Video Player
Video player allows you to browse or process video recording
files,
Video player support the format of self created .avi and 3gp.
6.5.6 FM Radio
This option allows you to listen to FM radio wirelessly. With FM
antenna in this phone you can anytime anywhere swing to loud
FM music without attaching it to wired headset.
You can also listen to FM on headset.
Go to Menu > Media Center > FM Radio or Long Press “0” key to
turn on the FM.
Note: For good reception of the FM, please pull out the FM
antenna.
57
Page 58

Edit channel list.
Channel List
Input the channel manually.
Manual Input
Set automatic searching for channels.
Auto Tuning
Set background play and loud speaker .
Settings
6.5.7 Scheduled FM recording
Schedule to record one or more FM programs at the time you set.
You can set up to four sets of recordings. You can also set
recorded file as ringtone of your phone.
Note: Make sure you have enough free memory on your phone or
the memory card to store the recordings.
6.5.8 Sound Recorder
Your phone supports three kinds of recording formats: AMR and
WAV. Select a format from Settings in Options. A call may also be
recorded and saved to the phone or the memory card.
6.6 File Manager
You can use File manager to organize your files in folders.
58
Page 59

If a memory card is inserted, the files stored on it are organized
separately.
Select Phone or Memory card and select Options to browse,
copy, delete, and move the files in folders.
6.7 Fun & Games
The phone provides Copter, Puzzle, Robot and Fruit. This phone
also provides Motion game-Dice.
To play Motion game - Dice follow these instructions:
1. Shake the mobile phone to make the dices roll.
2. After rolling for a while, the dices will stop and display
their number.
3. Calculate the summary of al l the dic es, if the summa ry is
equal to the event setting item’s number, the
corresponding event will happen.
You can set BGM, sound effect, games vibration and volume by
Games settings.
6.8 User Profiles
The phone provide seven pre-defined user profiles that allow the
operations of the phone to best suit the environment you are in.
The profiles are General, Meeting, Outdoor, Indoor, Headset, Save
Power and Bluetooth. The phone will automatically enter the
headset profile if you connect the headset.
59
Page 60

Note: There is an extra silent mode which cannot be accessed here.
To activate that profile, go back to the idle screen, press and hold
the hash key until the phone gives you a prompt.
You can customize the following options for new profiles.
Set Master SIM incoming call, Slave SIM
incoming call, Power on, Power off, Master
SIM message tone, Slave SIM message tone
and Keypad tone.
Tone
Setup
Set volume for ring tone and key tone.
Volume
Four types of Ring only, Vibration only,
Vibration and ring and Vibration then ring
are available for your selection.
Alert Type
Three types of Single, Repeat and Ascending
are available for your selection.
Ring Type
You can select one or more extra tones. The
options are Warning, Error, Camp on and
Connect.
Extra
Tone
If Any key is selected, you can press any key to
answer a call.
Answer
Mode
60
Page 61

6.9 Organizer
6.9.1 Calendar
You can enter events in the calendar.
In the calendar interface, press the up and down direction keys to
scroll to different weeks, and press the left and right direction keys
to scroll to different days.
View or edit event memos for the day.
View T asks
Add event memos.
Add Task
Enter a specific date to be located and the
cursor will jump to the date quickly.
Jump to Date
6.9.2 To Do
If activated, the phone rings as a reminder when the set time
arrives. You can view, add, edit and delete task if required.
6.9.3 Alarm
You can set five types of alarm clock time if required. Then the
alarm icon will be displayed on the idle screen.
Scroll to an alarm and select Edit for settings. You can set whether
to enable the alarm, the ring time, ring mode, audio options,
snooze minutes and alert type.
61
Page 62

6.9.4 World Clock
You can check the current local date and time of major cities in the
world.
6.10 Services
6.10.1 Spice Gang
It is WAP portal from where user can download Ringtones,
Wallpapers, Animations, Videos, and other kind of content.
Step1. Check the GPRS settings for your operator.
Step2. Initiate Spice Gang wap portal to browse and download the
content.
Step3. Charges for download apply as per operator pricing.
Explore the whole world of Entertainment with Spice Gang.
6.10.2 WAP
With the WAP/GPRS function in this phone, you can surf internet
on your phone.
Connect browser to a homepage you set.
Homepage
The phone displays a list of stored bookmarks.
To add a page to bookmarks, go to Bookmarks
> Options > Add bookmark.
Bookmarks
62
Page 63
The phone displays the recently-visited pages.
Recent
Pages
The phone displays the offline pages you saved.
Offline
Pages
Enter the URL for direct connection to an
Internet address.
Input
Address
This function means the service provider will
send WAP content to your phone without any
operation from you. For example, you can
obtain the latest news or new WAP setting from
the service provider.
Service
Inbox
Set the browser settings, including Select SIM,
Edit account, Browser options, Service
message settings, Clear cache, Clear cookies
and Trusted certificates.
Settings
6.10.3 Data Account
The function is used to set account information.
Press Edit to set Account name, Number,
User name, Password, Line type, Speed and
DNS.
GSM Data
63
Page 64

Press Edit to set Account name, APN, User
name, Password and Auth. type.
GPRS
6.10.4 STK
STK is shown only if it is provided by y our SIM card. For further
details, please contact your network operator.
6.11 Extras
6.11.1 Calculator
1. Enter the amount to be calculated. Press the hash key to enter
decimal points.
2. Use navigation keys to operate and OK key to get the result.
6.11.2 Unit Converter
The phone provides the unit conversion about weight and length.
1. Enter the amount to be converted.
2. Press the OK key to obtain the converted result.
6.11.3 Currency Converter
1. Set the exchange rate and confirm with the OK key.
2. Enter the amount to be converted in Local. Confirm with the
OK key. The amount in the other currency is displayed in
64
Page 65

Foreign.
6.11.4 Stopwatch
You can measure times, for example, for a sports game. The phone
provides the following two types of stopwatches.
The functions of Split timing, Lap timing
and View record are provided.
Typical
Stopwatch
Press direction keys to start stopwatch. The
total time is displayed on the top of the
screen. Press and hold the left soft key to
reset.
nWay
Stopwatch
6.11.5 Ebook Reader
The phone supports reading files in the *.txt format, which is ideal
for reading an e-Book.
Store the *.txt files in the Ebook folder, and then you can read
them in E-Book reader.
6.11.6 Bluetooth (Mono)
You can connect wirelessly to other compatible devices with
wireless Bluetooth technology. Compatible devices may include
mobile phones, computers and enhancements such as headsets and
car kits. You can use Bluetooth connectivity to send images, video
clips, music, sound clips and notes. Since devices with Bluetooth
65
Page 66

wireless technology communicate by radio wave s, your device and
the other device do not need to be in direct line-of-sight. The two
devices only need to be within 10 meters (33 feet) of each other,
but the connection may be subject to the interference from
obstructions such as walls or other electronic devices.
6.12 Shortcuts
A list of shortcuts is displayed for you to access quickly.
In the shortcut list, press the up and down direction keys or the
number keys to access the designated function.
Select Options to edit the selected shortcut.
66
Page 67

7. Appendix I Troubleshooting
Available accessories with M-5252 are: 1 Battery (1300mAH), 1
Dual Stereo Headset with call connect/disconnect button, 1 Travel
Charger.
FCC Statement:
This device has been tested and found to comply with Part 15 of
the FCC rules. Performance is subject to the following conditions:
This device may not cause harmful interference.
This device must accept any interference received, including
interference that may cause undesired operation.
Changes or modifications not expressly approved by the
manufacturer or authorized service center could void the user’s
authority to operate this equipment.
If you encounter problems while using the phone, or if it performs
erratically, you can consult the information in the following table.
If a particular problem cannot be resolved by using the following
information, contact the dealer where y ou purchased the phone.
67
Page 68

Problem Possible causes Possible solution
The network signal is too
weak at your current
location, for example, in
a basement or near a tall
building, because
wireless transmissions
cannot effectively reach
it.
Move to a location
where the network
signal can be
properly received.
Poor
reception
The network is busy at
the current time, for
example, during peak
times, because there may
be too much network
traffic to handle
additional calls.
Avoid using the
phone at such time,
or try again after
waiting a short time.
You are too far away
from a base station for
your service provider.
You can request a
service area map
from your service
provider.
68
Page 69

Poor network trunk
quality on the part of
your service provider.
Press the ending key
and dial again. You
may be switched to a
better-quality
network trunk or
phone line.
Echo or
noise
Poor local telephone line
quality
Press the ending key
and dial again. You
may be switched to a
better-quality
network trunk or
phone line.
The battery or battery
arger is damaged.
ch
Contact the dealer.
The temperature of the
phone is below -10°C or
higher than 55°C.
Adjust the battery
charging
environment to avoid
extremes of
temperature.
Battery
will not
charge.
Poor contact between the
battery and charger.
Check all connectors
to make sure all
connections have
been properly made.
69
Page 70

The standby time is
related to your service
provider system
configuration. The same
phone used with different
service providers’
systems will not provide
exactly the same length
of standby time.
If you are located in
an area where
signaling is weak,
temporarily switch
off the phone.
Shortened
standby
time
The battery is depleted.
In high temperature
environments, battery life
will be shortened.
Use a new battery.
If you are not able to
connect to the network,
the phone will continue
to send out signals as it
attempts to locate a base
station. Doing so
consumes battery power
and will consequently
shorten standby time.
Change your location
to one where the
network is
accessible, or
temporarily turn off
your phone.
You cannot
switch your
phone on.
Battery power has been
depleted.
Recharge the battery.
70
Page 71

SIM card malfunction or
damage
Take the SIM card to
your service provider
for testing.
SIM card
error
SIM card is inserted
improperly.
Insert the SIM card
properly.
Debris on the SIM card
contacts
Use a soft and dry
cloth to clean the
SIM card contacts.
SIM card invalid. Contact your service
provider.
You are not within the
service area of the
network.
Check the service
area with your
service provider.
Unable to
connect to
the
network.
Poor signal. Move to an open
space, or if you are
inside a building,
move closer to a
window.
71
Page 72

Go to Settings >
General call settings
> Master SIM
/Slave SIM call
settings > Call
Barring/Line
Switching, and then
select Cancel
All/Line1.
You cannot
answer
incoming
calls.
You have activated the
call barring feature.
Go to Settings >
General call settings
> Master SIM/Slave
SIM call settings >
Call barring/Caller
ID, and then select
Cancel all/Set By
network.
You have activated the
call barring feature.
You cannot
make
outgoing
calls.
You have activated the
fixed dial number
feature.
Go to Settings >
Security setup >
Master SIM/Slave
SIM security setup
> Fixed dial, and
select Off to disable
this feature.
72
Page 73

Contact your service
provider. If the
service provider
provides the PUK
code of the SIM card,
use the PUK code to
unlock the SIM card.
PIN Code
is blocked.
You have entered an
incorrect PIN code three
consecutive times.
Delete unnecessary
data from the phone
book.
Unable to
enter
information
into the
phone
book.
The memory of the
phone book is already
full.
Unable to
select
certain
features.
Your service provider
does not support these
features, or you have not
applied for services that
provide these features.
Contact your service
provider.
73
Page 74
8. Appendix II Abbreviations and Explanation
GSM Global System of Mobile Communication
GPRS General Packet Radio Service
SMS Short Message Service
WAP Wireless Application Protocol
FDN Fixed Dialing Numbers
SIM Subscriber Identity Module
PIN Personal Identification Number
PUK Personal Unblocking Key
IMEI International Mobile Equipment Identity
MCC Mobile Country Code
MNC Mobile Network Code
74
Page 75

A service provided by the network, which allows
you to answer another incoming call without
interrupting the active call, but it is different from
conference call. You can only talk to one party
while another party is held at the same time.
Call
waiting
A service provided by the network, which allows
you to divert an incoming call to a specified
number according to different circumstances.
Call divert
The phone is not used in the area of its local
registered network. It includes international and
domestic roaming. In this manual it refers to
international roaming only.
Roaming
STK SIM Toolkit
75
 Loading...