

Page 1

Spice M-5170
User’s Manual
Page 2

Page 3

ALL RIGHTS RESERVED
Spice Mobiles Ltd. ©2010. All rights are reserved. No part of this
document can be reproduced without permission. All trademarks and
brand names mentioned in this publication are property of their
respective owners.
While all the efforts have been made to ensure the accuracy of contents
in this manual, we presume no responsibility for errors or omissions or
statements of any kind, whether such errors are omissions or
statements resulting from negligence, accidents, or any other cause. We
operate a policy of continuous development and reserve the right to
make changes, modifications and improvements to the phone, phone
features/specifications or any of its parts without prior notice.
Your device may have preinstalled bookmarks and links for third party
internet sites and may allow you to access third party sites. These are no
affiliated with Spice, and Spice does not endorse or assume liability for
them. If you access such sites, take precautions for security or content.
The limited warranty does not cover user manuals or any third party
software, settings, content, data or links, whether included/downloaded
in the product, whether included during installment, assembly, shipping
or any other time in the delivery chain or otherwise and in any way
acquired by you. To the extent permitted by applicable law(s), Spice does
not warrant that any Spice software will meet your requirements, will
work in combination with any hardware or software applications
provided by a third party, that the operations of the software will be
Page 4

uninterrupted or error free or that any defects in the software are
correctable or will be corrected.
Note: User’s Manual is provided just to guide the user about the
functionality of the phone. This does not seem to be any certificate of
technology. Some functions may vary due to modifications and upgradations of software or due to printing mistake.
Page 5

i
TABLE OF CONTENTS
SAFETY PRECAUTIONS......................................................1
UNDERSTANDING YOUR PHONE ........................................4
General Phone Information ..............................................................4
PHONE OVERVIEW.............................................................5
Position Of Keys................................................................................6
Function of Keys ...............................................................................7
Status Icons ......................................................................................8
GETTING STARTED ...........................................................9
Installing SIM Card and Battery ......................................................9
Installing Memory Card................................................................. 10
Charging the Battery ..................................................................... 10
Switch On/Off the Phone .............................................................. 11
Basic Operations ........................................................................... 11
MAIN MENU .....................................................................14
Phonebook...................................................................................... 14
Messages ........................................................................................ 15
Call History .................................................................................... 17
Page 6

ii
File Manager .................................................................................. 20
Media Center.................................................................................. 20
Settings .......................................................................................... 22
Services .......................................................................................... 27
Organizer........................................................................................ 29
Fun Spice ....................................................................................... 30
FREQUENTLY ASKED QUESTIONS AND TROUBLESHOOTING
....34
SUPPORT AND CONTACT .................................................38
Page 7
1
SAFETY PRECAUTIONS
Please read the following safety guidelines before using the phone.
Do not use the phone while you are driving. Pull over and
stop your automobile to dial or listen to a phone call.
Do not place magnetic storage media near your phone.
Radiation from the phone may erase the information
stored on them.
Keep your phone and its accessories away from children.
Do not allow children to use your phone without guidance.
Small parts such as the SIM card, dust cap, lens ring and
lens cap as well as the microSD card can be dismantled
and swallowed by small children.
Mobile phones can interfere with the functioning of
medical devices such as hearing aids or pacemakers. Keep
at least 20 cm (9 inches) between the phone and
pacemaker. When using the mobile phone hold it to the
ear which is furthest away from the pacemaker. For more
information, consult your doctor.
Permanent hearing loss may occur if you use earphones or
headphones at high volume. You can adapt over time to a
higher volume, which may sound normal but can be
damaging to your hearing. Set your volume to a safe level.
If you experience discomfort or buzzing in your ears,
reduce the volume or discontinue use of your headphones.
Page 8
2
Use only original batteries and charging devices, otherwise
you may risk serious damage to health and property.
Battery can cause property damage, injury or burns if a
conductive material, such as jewelry, keys or beaded
chains touch exposed terminals. The material may
complete an electrical circuit and become quite hot. Take
extra care while handling any charged battery, particularly
when placing it inside your pocket, purse or other
container with metal objects. Do not dispose of batteries in
fire as they may explode.
NOTICE:
• Do not dismantle the device or accessories otherwise,
manufacturer is not liable to pay for damages as the device
and accessories are not covered by warranty.
• Please back up your important data timely and keep them
properly. The company is not liable for any failure to call or
loss of data due to mis-operation, poor signal or power cut,
etc.
• All the screens in this manual are for reference only, and
some contents actually displayed may depend on the
presetting of the service provider or the network operator, or
the SIM card. If any functions referred to in this manual are
different from those of your phone, please follow your phone.
• Improper use will invalidate the guarantee! These safety
Page 9

3
instructions also apply to original accessories.
• Do not put your phone in a high-temperature place or use it
in a place with flammable gas such as a petrol pumps.
• Do not touch the charger, power cable or socket with wet
hands. This may cause an electric shock.
• Do not use the phone in an environment of extremely high or
low temperature, or an environment of high humidity. It may
cause malfunction of the phone, the charger and the battery.
The phone using environment recommendation: temp 5-35Ԩ,
humidity 35%-85%, charging temp: 0
o
C-45 oC.
• If you have difficulties installing the battery, do not force the
installation. This may cause battery leakage, overheating,
explosion or even fire.
• Note: If your phone or any of its accessories do not function
normally, please send them to the nearest authorized service
facility. The qualified personnel will assist you, and if
necessary, will arrange for service.
Page 10
4
UNDERSTANDING YOUR PHONE
General Phone Information
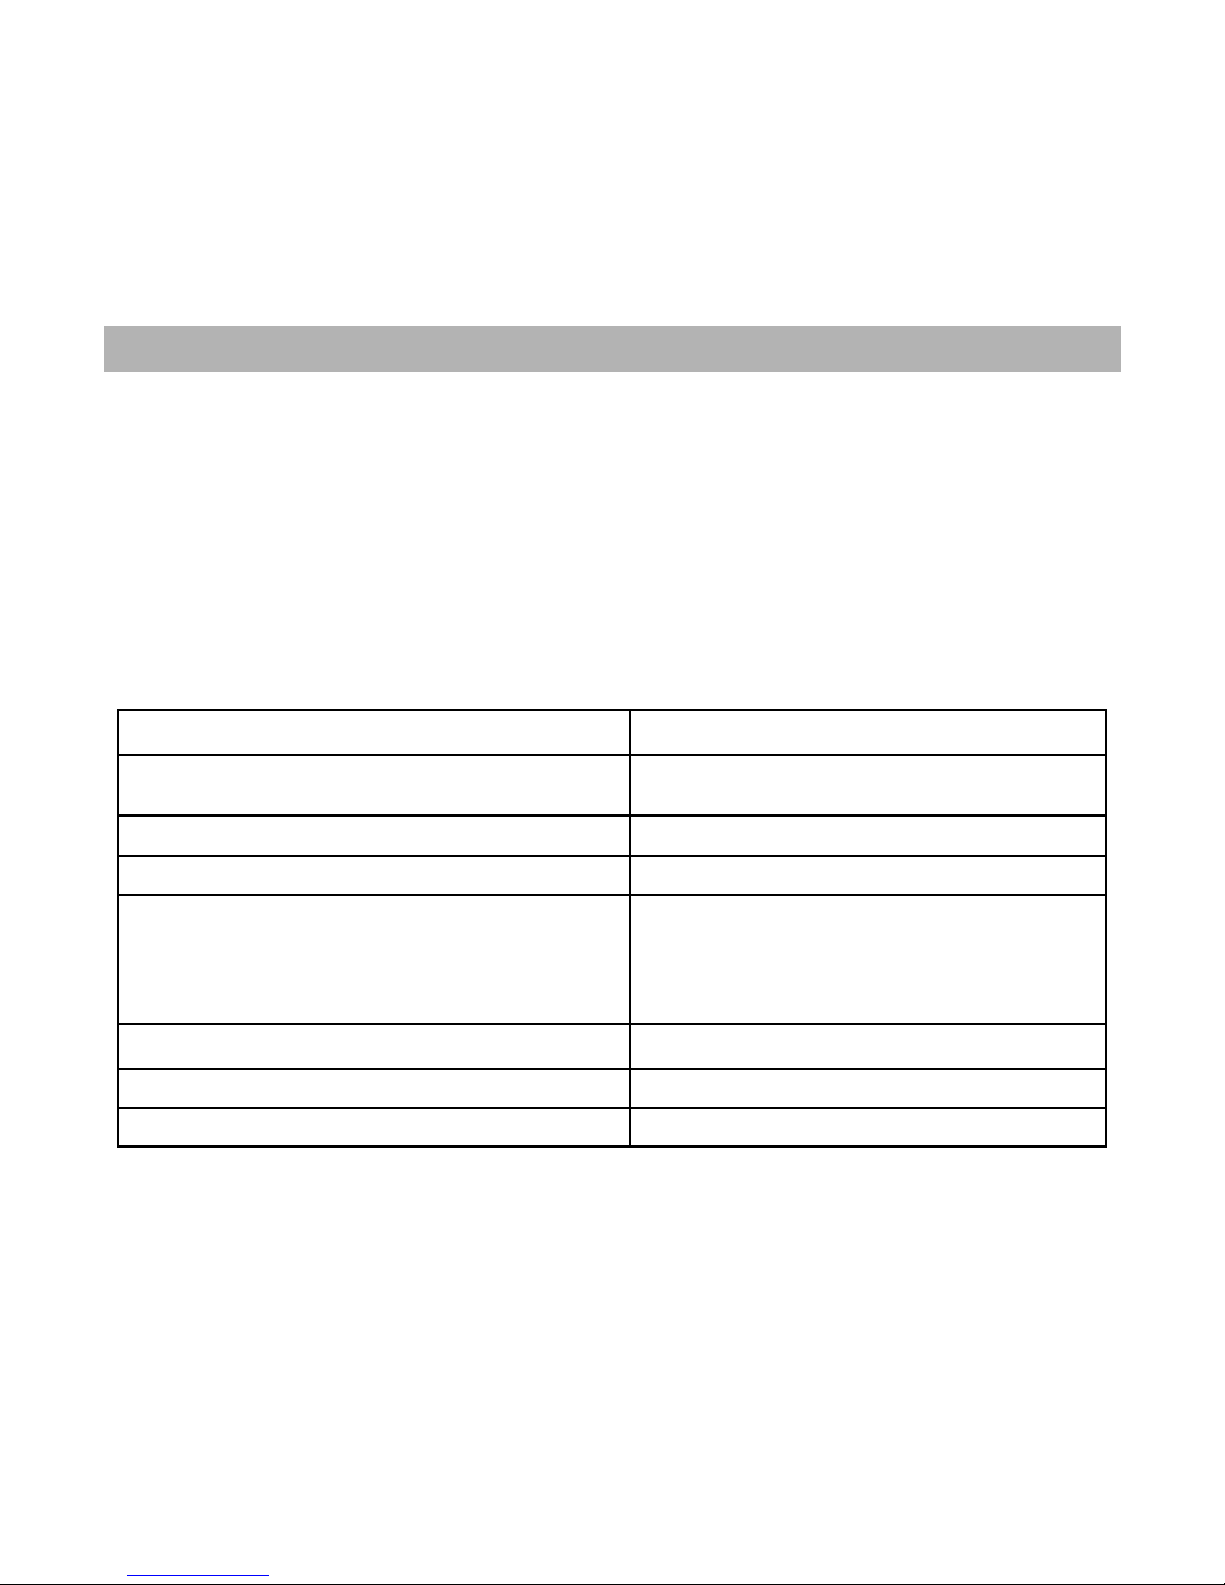
Spice M-5170 is a multi SIM phone that encloses features, such as
Bluetooth, Digital Camera, Video Player, Audio Player, FM radio etc. The
phone supports T-flash card of up to 4 GB. This phone is provided with
two SIM slots for two different SIM cards. The SIM card inserted in the
slot1 is called Master SIM, and the other one in the slot2 is known as
Slave SIM. You can select to operate SIMs as per your personal and
professional needs.
Technical Specifications
Battery 1200 mAh
Charger 5 V/500 mA
Dimensions 111mm*47.5mm*14.6mm
Weight 78g
Screen
Size: 5 cm
Resolution: 176*220
Screen: TFT
Standby Time* 350 hrs
Maximum Talk Time* 4 hrs
SAR Level [SAR
10g
(W/Kg)]
LB 0.861;HB 0.26
* The standby time and maximum talk time depend upon the
network signals and settings.
Page 11
5
PHONE OVERVIEW
Page 12
6
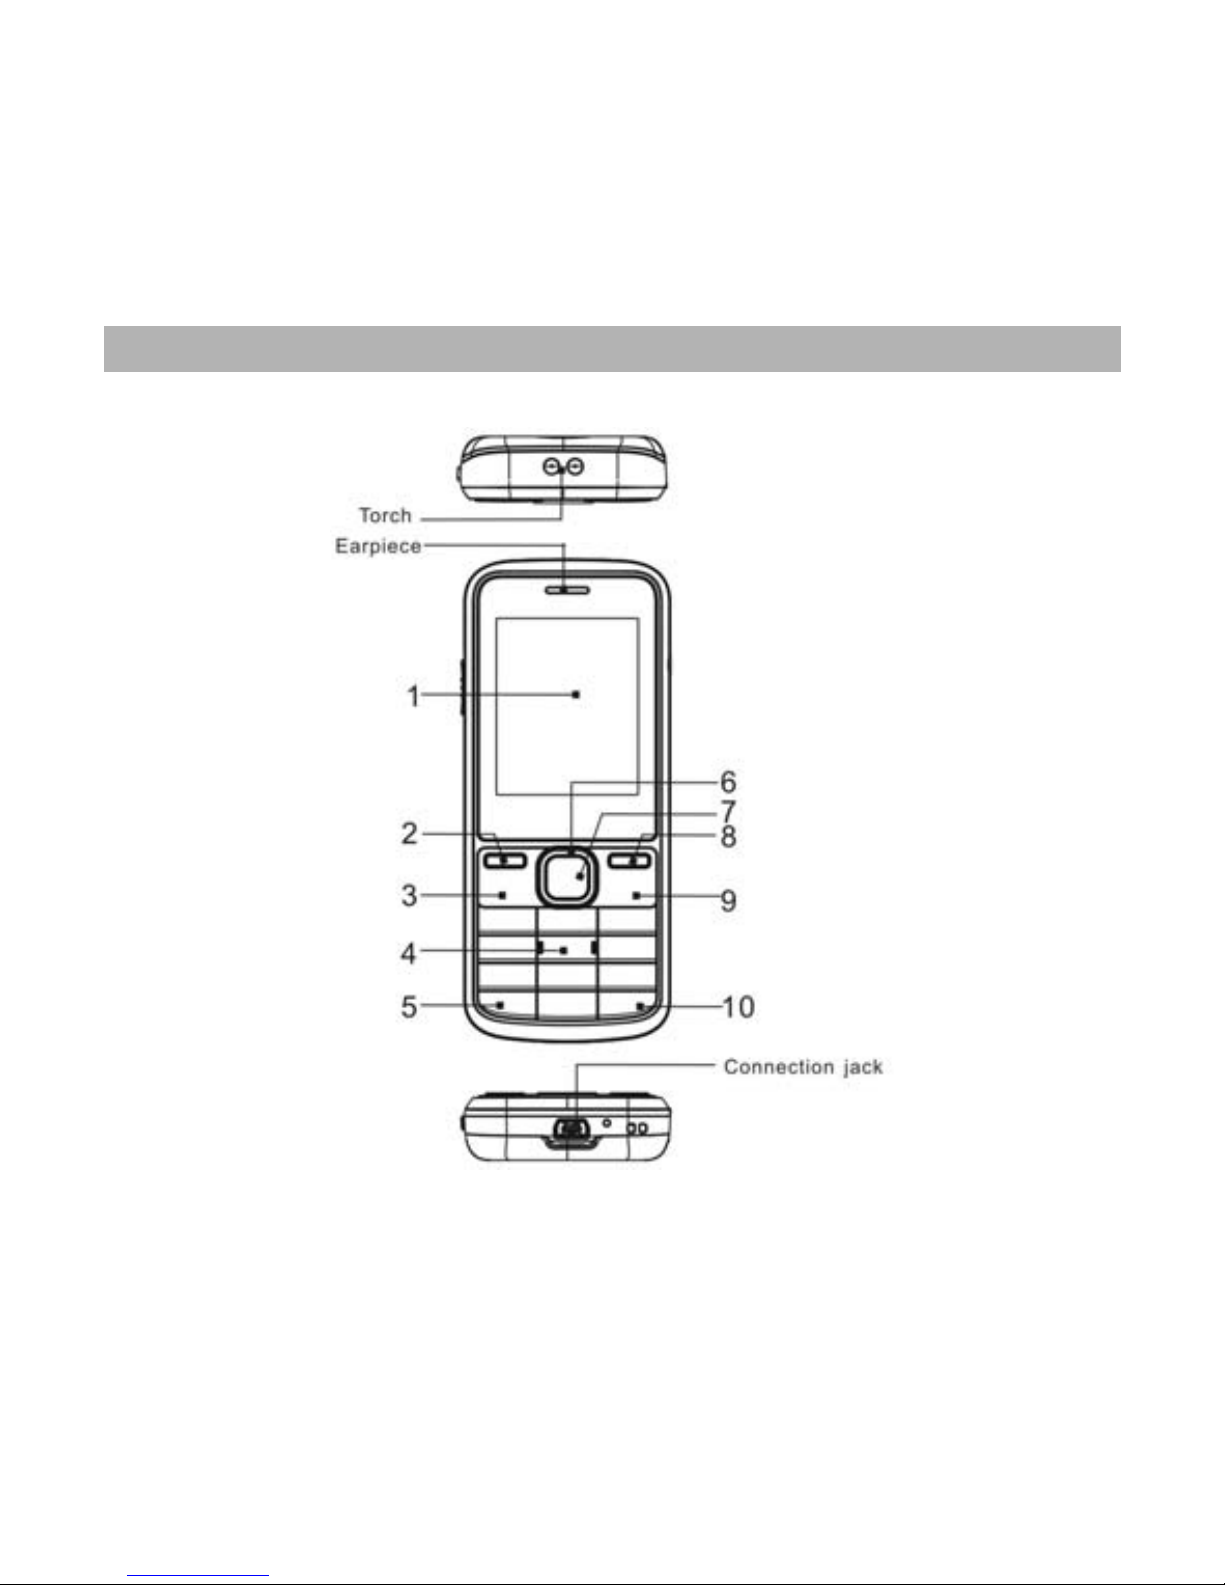
Position Of Keys
1. Display Screen 2. LSK/Slave SIM Key/Menu
3. Master SIM Key 4. Numeric Keypad
5. * Key 6. Navigation Keys
7. Ok Key/Audio Player Key 8. RSK (Right Soft Key)
9. End Key/Power On/Off 10. # Key/Silent Mode On/Off
Page 13

7
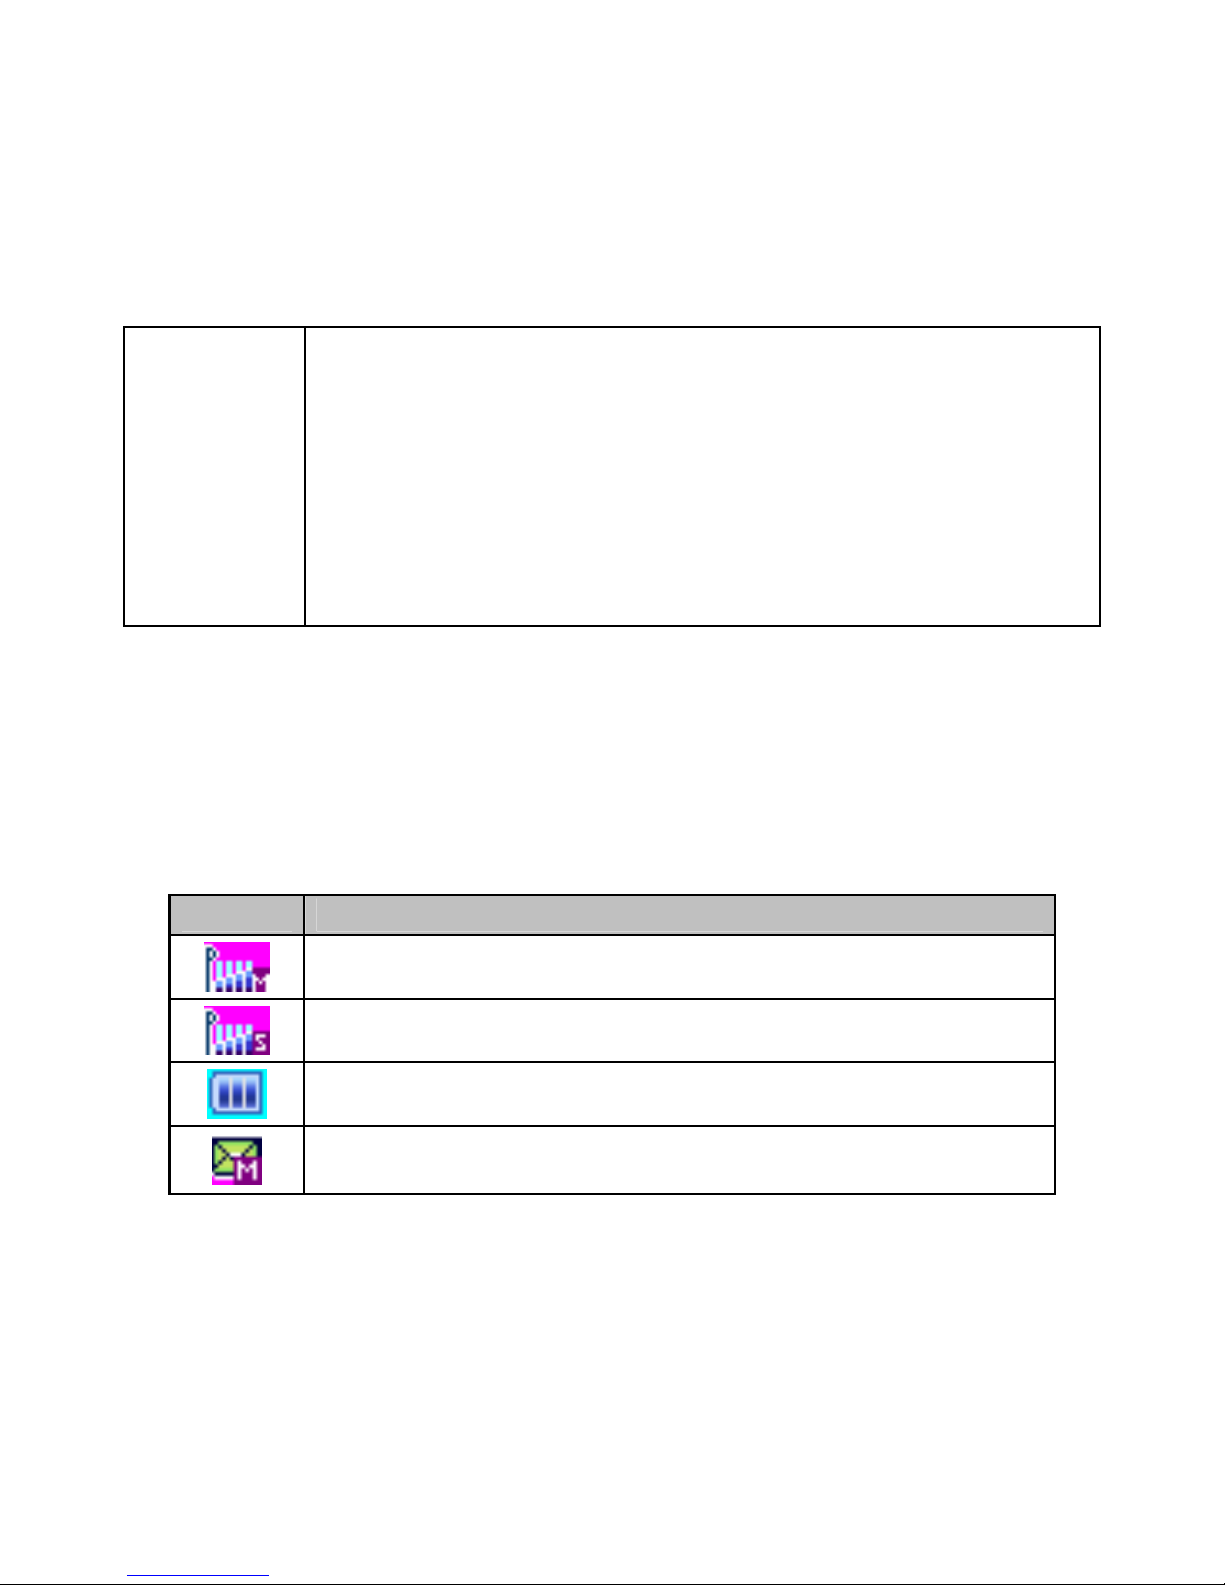
Function of Keys
Key Description
Master
SIM Call
Key
To make/answer a call from Master SIM.
In the standby mode, press this key to access the Call
Log.
End Key
End an ongoing call.
Press and hold this key to turn on or off the mobile
phone.
In the menu mode, press this key to quit the current
menu and return back to the standby mode.
Right Soft
Key (RSK)
Use the right soft key to execute the functions
indicated at the right of the prompt bar on the screen.
Slave SIM
Call Key /
Left Soft
Key (LSK)
Use the left soft key to execute the functions indicated
at the left of the prompt bar on the screen.
In the standby mode, press this key to access main
menu.
When the “Master SIM & Slave SIM open” has been
selected, press the left soft key to make a call from
Slave SIM after entering the phone number or selecting
a number from phonebook.
Navigation
Keys
In the editing mode, use the keys to move the cursor.
In the standby mode, press the keys to access the
function assigned to these keys.
Page 14
8
Numeric
Keys
Used to enter numbers, letters and some special
characters.
In the standby mode, press and hold the # key to
activate Silent mode, long press the 0 Key to activate
“FM Radio”, long press * key to access bluetooth
options.
In the edit mode, you can press the # key to switch
among the input methods, press the * key to enter
symbols.
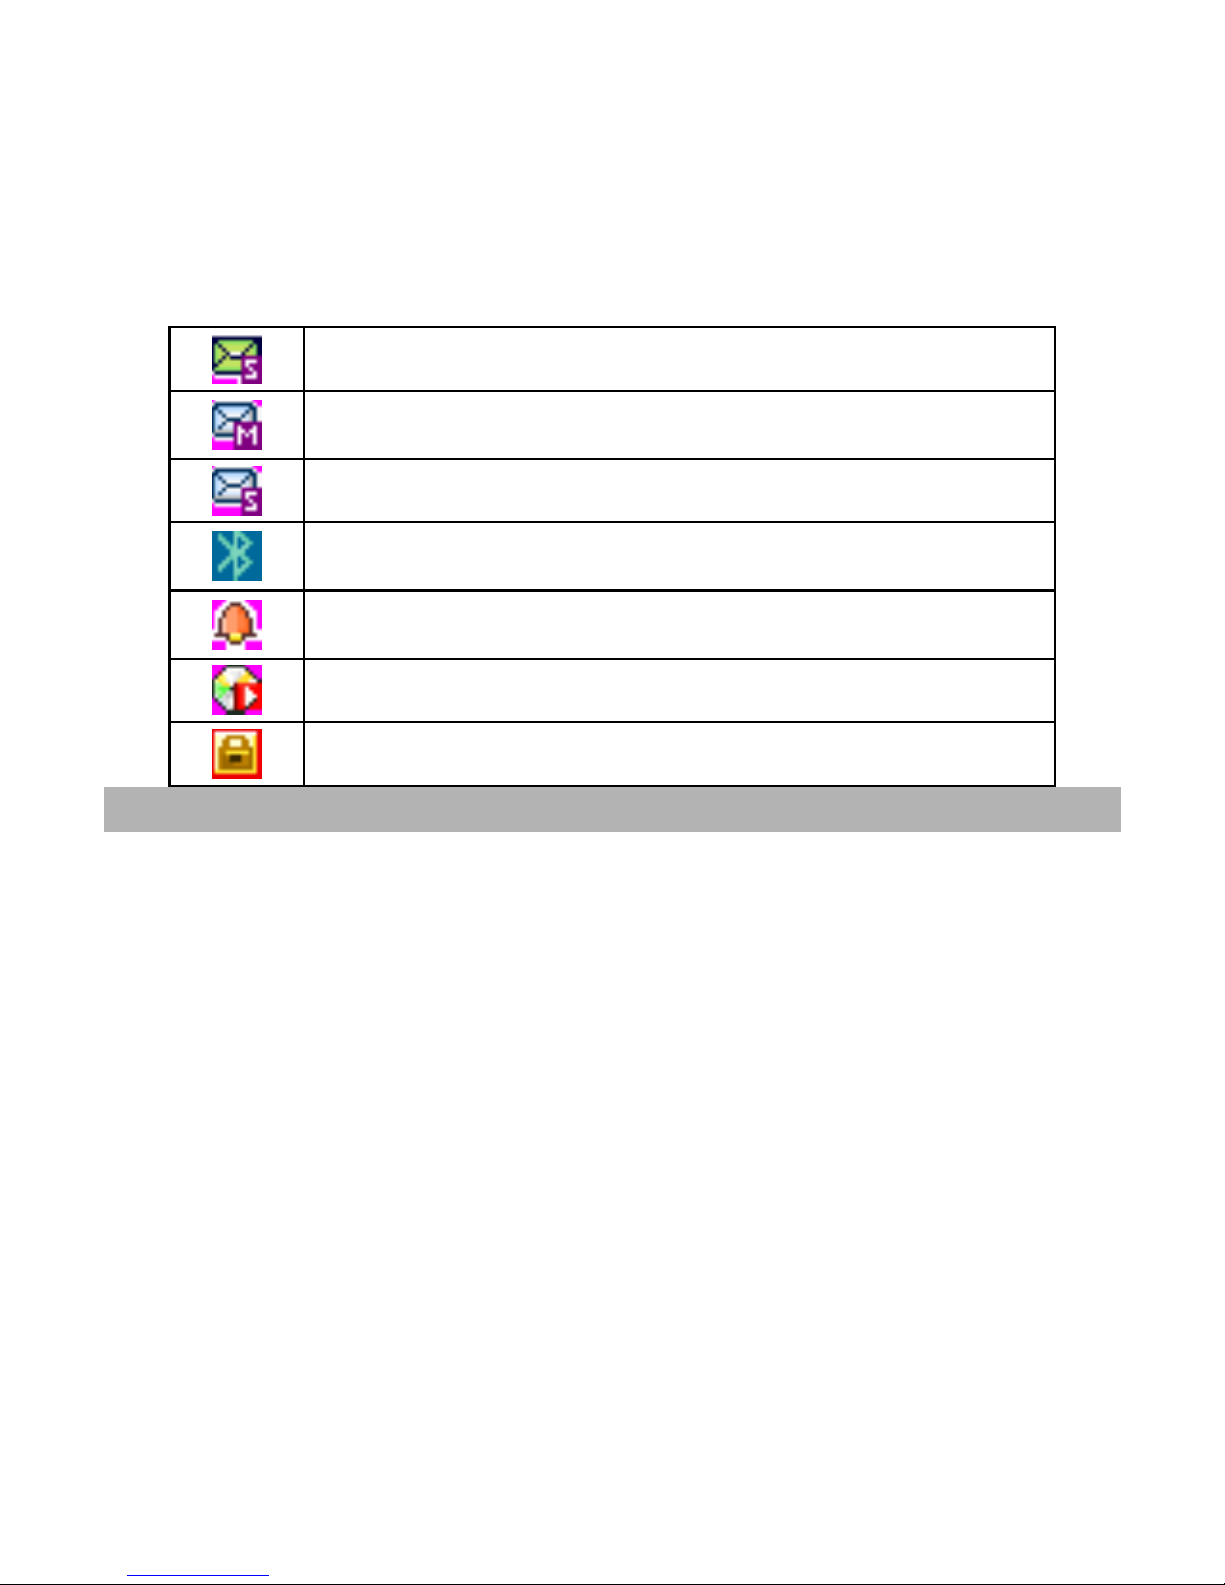
Status Icons
The table below lists various icons that might appear on the status bar
while using the phone. Apart from the icons for signal strength level and
the power, other icons are displayed as per the current mode and
priority of the phone.
Icon Description
Indicates the network signal strength of Master SIM.
Indicates the network signal strength of Slave SIM.
Indicates the current battery capacity.
Indicates that there is an unread SMS in Master
SIM.
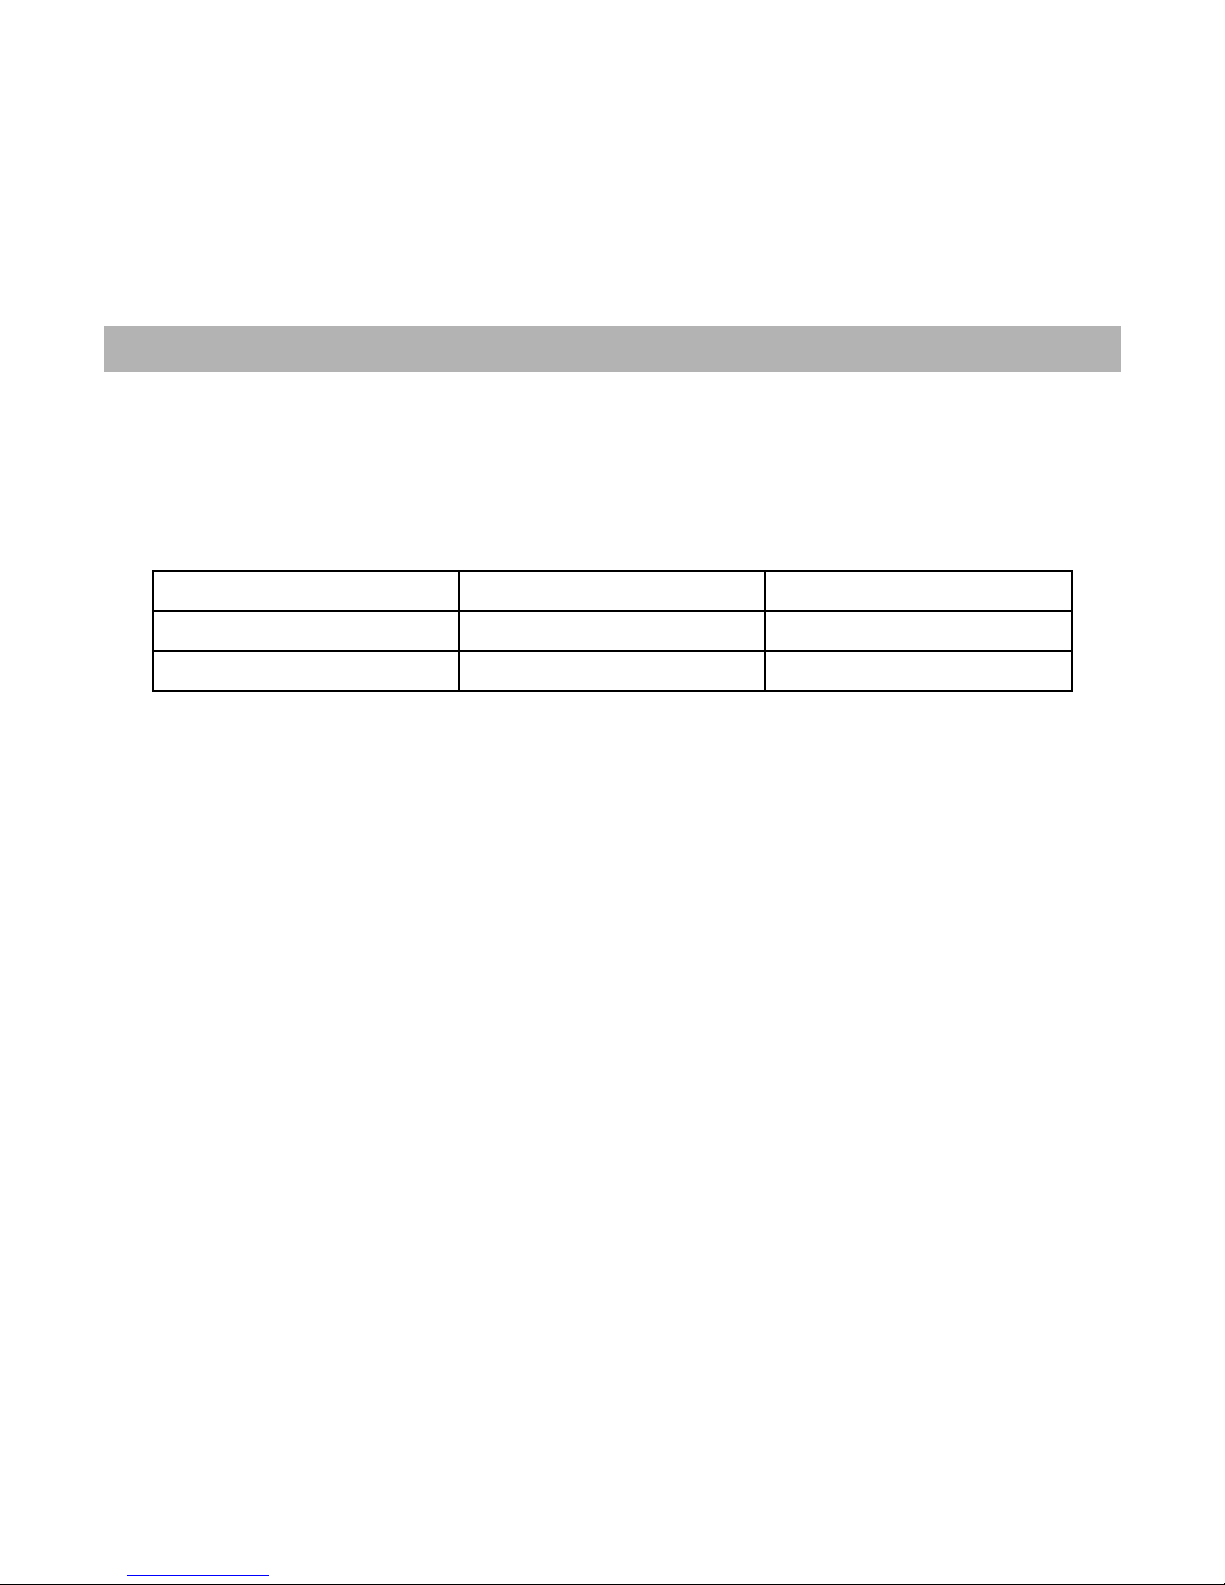
Page 15
9
Indicates that there is an unread SMS in Slave SIM.
Indicates that there is an unread MMS in Master
SIM.
Indicates that there is an unread MMS in Slave SIM.
Indicates that the current profile mode is the
Bluetooth mode
Indicates that the current alarm clock is set as
activated.
Indicates that the audio player is running.
Indicates the current keypad-locked state.
GETTING STARTED
Please switch off your phone before inserting or removing the
battery/SIM card or memory card.
Installing SIM Card and Battery
Your phone is provided with two SIM slots for two different SIM cards.
The SIM card inserted in the slot1 is called Master SIM, and the other
one in the slot2 is known as Slave SIM.
• Remove the back cover of the phone
• Hold the phone with the front facing downwards; pull the
battery cover
• Insert the SIM cards in the phone.
Page 16

10
• Attach the battery.
• Push the battery cover until it clicks into place.
Installing Memory Card
The phone supports T-Flash card, which is a multimedia memory card
used to multiply the memory of the phone. The T-flash card is small and
should be pulled out and installed carefully and prudently in order to
avoid any kind of damage.
• Switch off your phone.
• Remove the battery cover.
• Open the external cover of the T-Flash card slot.
• Slide the T-Flash card into the slot.
• Attach the battery.
• Push the battery cover until it clicks into place.
Charging the Battery
The phone prompts a warning tone and message stating insufficient
battery when the battery power of your phone is low.
Please follow the instructions mentioned below to charge your phone:
• Plug the connector of the charger into the jack of the phone.
• Plug the charger into a standard AC wall outlet.
Note:
When
is shown on the screen, it indicates that there is not enough
power and you should now charge your phone. When charging is
complete, the battery icon will stop flashing.
Charging……. Fully Charged…….
Page 17

11
You must fully charge the battery before using the phone for the first
time. It is recommended to charge the battery for four hours before
using the phone for the first time.
If the phone is turned on during charging, you can still make or answer
calls, but this will consume battery power, thus will extend the charging
time of the phone.
Switch On/Off the Phone
To turn on/off the phone, press and hold the End key.
If you have enabled the SIM Lock function then enter the PIN code (the 4
to 8 digits secret code of your SIM card). It is preconfigured and provided
to you by your network operator or retailer. If you enter an incorrect PIN
code 3 times in succession, your SIM card will be locked. To unlock it,
you must obtain a code from your network operator.
BASIC OPERATIONS
To Make Calls
If the icon / appears on the screen, then you can make or
receive calls.
• Input the phone number (should affix the
international/national/regional code or district code if necessary)
and then press [M/S] in the standby mode.
• Press [M/S] to dial a phone number listed in the recent call log in
the standby mode.
• Press and hold numeric keys [2]-[9] to dial the speed dial number
assigned to the numeric keys.
Page 18

12
• You can select a contact number from the phonebook and call the
contact person.
Tip: The signal strength may influence the quality of connection.
To Dial International Number
The phone supports dialing the international emergency phone number,
such as 112 and 911. With the phone, you can dial an emergency call in
any country or region under the normal situation regardless of SIM card
inserted when the phone is located within the coverage of the GSM
network. Input the emergency phone number and press [M/S] to dial.
In the idle mode, press * key twice to input “+”.
The phone will select the main network automatically after powered on if
it is located within the coverage of the main network. The phone can use
other network, called as roaming, if the phone is not located within the
coverage of the main network when the network operator protocol
permits.
You can dial or answer a call when the symbol of the network operator
appears on the screen.
Answer/Reject an Incoming Call
• Press [M/S] to receive the incoming call. You can use the earphone
to answer the call when the generic earphone or Bluetooth
earphone is inserted in the phone.
• Press [End] to reject an incoming call.
Options during a call
Press <Options> to use the following functions during the call:
Page 19

13
• Hold Single Call: temporarily hold the current call.
• End Single Call: end the current call.
• End All Calls: end all the calls.
• New Call: call the opposite party to build a Call to Many.
• Phonebook: enter in the phonebook menu.
• Message: enter in the SMS menu.
• Call History: view call logs.
• Sound Recorder: record the current call.
• Mute: open or close the mute mode.
• DTMF: open or close the DTMF function during the call.
Page 20
14
MAIN MENU
Menu guides you to the various features, applications and services
available in your phone. Press the Menu [LEFT SOFT Key] in the idle
mode to access the main menu. Press the Navigation Keys
Up/Down/Left/Right to choose the desired operation and press Ok to
enter the selected operation.
Phonebook Message Call History
File Manager Media Center Settings
Services Organizer Fun Spice
Phonebook
Phonebook refers to the directory wherein all the contacts are stored in
an alphabetical order. You can view, edit, delete, send message and
perform various other functions on each contact of your phonebook.
Press <Menu> in the standby mode and then select Phonebook. OR
Press Names (RIGHT SOFT KEY) to directly access the phonebook.
Search Contact
• Input the first characters of a name to be searched.
• Select a desired entry from the list.
Select a contact from the phonebook and press<Option> to perform the
following functions:
• View: view the detailed info of a selected contact.
• Send Message: send a message to the current contact.
• Edit: edit the current contact.
Page 21

15
• Delete: delete the current contact.
• Copy: Copy the entry to phone memory, SIM memory or to a
file.
• Move: Move the entry from phone to SIM or vice-versa.
• Send VCard: Send contact as text message, as MMS, via
Bluetooth.
• Add To Blacklist: add the contact to the blacklist list.
• Mark Several:
• Caller Groups: you can group the contacts with this function.
• Phonebook Settings: manage the phonebook with this
function.
• Dialer Search: if you on this option, you can enter the first
digits of a contact’s phone number and search the contact no
by using the number digits.
Messages
Press <Menu> in the standby mode and then select Messages to
create/send/read/ delete SMS/MMS.
Write Message
You can create a SMS.
Inbox
The phone will prompt you when you receive a new message.
Page 22

16
Drafts
While creating a message, you can save it into Draft folder and can
perform operations, such as send from SIM1/SIM2, edit and delete etc
on the saved SMS.
Outbox
The messages that have not been sent successfully get stored in the
Outbox folder.
Sent Messages
The messages that have been sent successfully get stored in the Sent
messages folder.
Archive
You can save your messages in the Archive folder.
Delete Messages
You can select to delete inbox, sent messages, outbox, drafts or all
messages using Delete Message option.
Broadcast Message
This network service enables you to receive all kind of text messages,
such as weather reports or transportation information. There are
several networks who afford this service in this world. Please consult
your network operator for more reference.
• Receive Mode: Turn on or off the Cell Broadcast.
• Read Message: Scroll the Up/Down Key to select the message.
• Languages: Select the desired language to display the broadcast
message.
Note: Your network operator decides whether the language is
supported or not.
Page 23

17
• Channel Settings: You can choose Select, Add, Edit or Delete to
receive the Broadcast information.
Templates
There are 10 pre-defined messages in your phone that can be sent,
edited or removed.
Message Settings
You can change the SMS settings, such as profile, voicemail server,
delivery report etc.
Schedule SMS
In the schedule SMS menu, press Add or Options > Add, and then you
can set SIM, the date, time, message and phone number. Press Done
and Save the message. The message will be sent automatically at the
time predefined by you.
Call History
In the standby mode, press left soft key to access Menu > Call History.
Call History
Master /Slave SIM Call history
Missed Calls
With this function, you can check recent missed calls.
Scroll the Up/Down keys to select a missed call.
Press OK key to access Missed Call Information, and you can Delete,
Save to Phone book, call, Edit and so on.
Dialed Calls
Page 24

18
With this function, you can check recent dialed calls. In this function,
you can Delete, Save to Phone Book, Call, Edit and so on.
Received Calls
With this function, you can check recent received calls. In this function,
you can Delete, Save to Phone Book, Call, Edit and so on.
Delete Call Logs
You can delete all records of missed calls, dialed calls or received calls
with this function or Delete all folders drastically.
Call Timers
• Last Call: The last call time can be checked.
• Dialed Calls: The total time for all dialed calls can be checked.
• Received Calls: The total time for all received calls can be checked.
• Reset All: Reset the counters.
Call Cost
• Last Call Cost: You can check the cost of last call.
• Total Cost: You can check the total cost of all calls.
• Reset Cost: You can modify the cost of call, and reset the cost to 0.
PIN2 code is required while modifying.
• Max Cost: You can check and modify the upper limit. PIN2 code is
required while modifying.
• Price Per Unit: You can check and modify the call rate. PIN2 code is
required while modifying.
Note: This function is related to the SIM card. Some SIM cards don't
support the function. PIN2 is provided from the network operator. Please
consult your network operator to obtain the number.
Text Msg. Counter
• Sent: You can check and clear the number of sent messages.
Page 25

19
• Received: You can check and clear the number of received messages.
Note: This function has nothing to do with the SIM card. The amount of
sent or received messages will not change even if you change the SIM
card.
GPRS Counter
You can check or reset the Last Sent, Last Received, All Sent, All
Received and Reset Counter.
Call Settings
Master/Slave Call Settings
• Caller ID (Net work Service): You can select Set By Network, Hide ID
or Send ID. The default state is the Set By Network.
• Call Waiting: Activate, the network will notify you of a new incoming
call while you have a call in progress (Net work Service).
• Call Divert: This network service allows you to divert your incoming
calls to anther number. For details, contact your service provider.
• Call Barring: Activate, this network service allows you to restrict
incoming calls from your phone. For details, contact your service
provider.
• Close User Group (only for Master SIM): if On, this network service
specifies the group of people whom you can call and who can call you.
For further information, contact your network operator or service
provider.
Advance Settings
Blacklist: you can set 20 numbers. When this Black list is enabled, you
won’t receive the calls from the numbers entered in the Blacklist.
Page 26

20
Auto Redial: On, the phone will automatically redial the last called
number after a while if you fail to connect to the number. The times for
auto redial are up to 10 times. Press Abort to end Auto Redial.
Call Time Display: On, the call time will display.
Call Time Reminder: This function prompts you to end the call in time
to save the call cost. You can select Off, Single, or Periodic.
Auto Call Disconnect: You can set ON/ OFF, and set a time (1~9999s)
as your desire.
File Manager
In "File manager", you can browse, open and manage the data saved in
the Phone and Memory card.
Media Center
This menu is specifically designed for the entertainment purpose of the
user. To enter this menu, go to the main menu and select Media Center.
Camera
The phone is provided with a digital camera, which supports the
photographing and video shooting functions. Pictures are saved in the
file system of the phone or the memory card. In order to directly access
the camera, press the one touch camera key on the keypad.
Image Viewer
Pictures taken can be accessed quickly in Image viewer. Select Options
for available options while viewing pictures.
Page 27

21
Video Recorder
In standby mode, select Menu > Media Center > Video Recorder to
launch the video recorder and shoot your videos.
Video Player
Select a video clip and press OK key to open it. Press OK key to start
playing the video clip.
Audio Player
Audio Player allows you to play audio files. The phone supports T-Flash
memory card.
Sound Recorder
The mobile phone supports WAV, AMR recording formats. You can
record conversations, which may be saved to the Audio folder under File
Manager. If there is a record, press left soft key you can do: Play, Append
(only for AMR), Rename, Delete, Delete All files, Use As and Send.
Note: If a call is coming while recording, the record will abort and the
data will be paused. AMR adopts dynamic compression and provides a
longer recording time than WAV‘s while utilizing the same storage space.
FM Radio
You can use your phone to listen to FM radio stations once the original
Headset is plugged into the accessories connector. Select FM Radio in
the Menu to access the radio controls.
Schedule FM Record
You can set 4 schedule to record FM radio.
Games
For your entertainment purpose, your phone is provided with several
interesting games, such as UFO and Fruit.
Page 28

22
You can set the BGM, sound effect, vibration and volume of the game as
per your choice by selecting the Game Settings sub-menu.
Settings
In the standby mode, press left soft key to access Menu > Settings.
User Profiles
The phone provides nine pre-defined user profiles that allow the
operations of the phone to best suit the environment you are in. The
profiles are General, Meeting, Outdoor, Indoor, Silent, Headset,
Bluetooth, Saver Power and Flight mode. The phone will automatically
enter the headset profile if you connect the headset to your phone.
General
Activate
Customize
• Tone Settings: Includes Master/Slave SIM Incoming Call, Power on,
Power off, Master/Slave SIM Message, Keypad. You can select builtin ring tunes, or the tunes composed by yourself.
• Volume: Includes the volume setting of Ring Tone and Key Tone. The
volume degree is from 1 to 7.
• Alert Type:
• Ring Only: Just ringing, no vibration.
• Vib. Only: Just Vibrating, no ringing.
• Vib. and Ring: Ringing and vibration.
• Vib. then Ring: Ringing after vibration.
• Ring Type:
Page 29

23
• Single: Rings once when a call is coming.
• Repeat: Rings continuously when a call is coming.
• Ascending: Rings continuously and the volume increases
gradually.
• Extra Tone:
• Warning: If necessary, you will be warned by the prompt tone.
• Error: You will be warned by a tone if you make a mistake.
• Camp On: A prompt tone will be heard after searching the
network successfully.
• Connect: A prompt tone will be heard after the call gets
connected.
• Answer Mode:
• Any Key: Press any key to answer a call (Except of Hang Up Key
and Right Soft Key).
Meeting
Please refer to “General” for more details.
Outdoor
Please refer to “General” for more details.
Indoor
Please refer to “General” for more details.
Silent
Please refer to “General” for more details.
Note: Press and hold the # key to enable or cancel the silent mode.
Headset
Insert the earphone and access the Headset mode automatically. This
mode has no Activate option. Please refer to “General” for more details.
Page 30

24
Bluetooth
You will enter into Bluetooth mode after you activate the Bluetooth
function. This mode has no Activate option; the detailed operation has
been shown in the “General”.
Power Saver
This is a special profile which increases the usage time of the phone. In
this profile only important functions of the phone will work so the power
consumption of the phone will minimize.
Flight mode
If you activate this profile, there will no network signal; however, you can
use other functions, such as camera & audio player.
Multi SIM settings
You can choose one mode as per your desire.
Phone Settings
Time and Date
Set Time Zone: Select the desired time zone.
Set Time / Date: Enter the current time and date.
Set Format: Select a time and a date format.
Update with Time Zone: It can be set to On or Off.
Schedule Power On / Off
You can set the time for auto power on /off. Do turn the status on before
using that function, and then the time.
Note: Please disable the Schedule Power On function before you board
an airplane.
Page 31

25
Language
Select the desired language for the display text. M-5170 supports
English and Hindi language.
Pref. Input Methods
Select the desired input method for the default input method.
Display Settings
With this function you can configure the basic status of display
characteristics including Wallpaper, Screen Saver, Power On Display,
Power Off Display, Main menu style, Show date and time, Show owner
number, Can auto open keypad light.
Themes
Set the themes of the phone, the background color will be changed
mainly in the menu operation screen.
Dedicated Key
You can configure short cut functions for the Up, Down, Left and Right
key respectively. In the standby mode, press any one of them to access
the appointed function.
Auto Update of Date and Time
It can be set to On or Off.
UART Settings
When using this phone for GPRS, select different UART port to decide
whether Master /Slave SIM to be used.
Misc. Settings
LCD backlight: You can set the LCD backlight.
Network Settings
Please contact the network operator for the following network service.
Page 32

26
Master/Slave SIM Network setup
Network Selection
You can choose Automatic or Manual to select the network (Auto is
recommended). When you select Automatic, the phone will make the
preferential selection according to the network where the SIM card
belongs. When you select Manual, you are required to select the same
network as the registered network with the network operator by SIM
card for your use.
Preferences
Select the Preferred Networks. The default network is the network where
the SIM card belongs. Select Options to perform the following operations:
• Add From List: Display all PLMN list.
• New: Create a new network and set the network priority.
• Change Priority: Reset the selected Network Priority.
• Delete: Delete the current preferred network.
Security Settings
Master/Slave SIM Security Settings
• Master/Slave SIM Lock:
You will be asked to input the PIN. It can be configured if the PIN is
correct. If SIM card is set on, you will need to input the PIN every time
you switch on the power. If you enter incorrect PIN three times, you will
be asked to enter PUK. PUK is used to release and modify the locked PIN.
If PUK is not provided or missed, please consult your network operator.
• Change Password:
You can change Master SIM/Slave SIM PIN, Master SIM/Slave SIM PIN2.
Page 33

27
Phone Lock
You can lock or unlock the phone. Enter the password to activate or
deactivate the phone lock. When the phone is locked, you will be asked
to enter the phone password. 4-8 numbers can be used for the phone
password. The default phone password is 1122.
Auto Keypad Lock
You can lock/unlock the phone keyboard and set the Key Lock Time to
None, 5 sec, 30 sec, 1 min, and 5 min.
Change Password
You can change phone password and Tracker Password.
Connectivity
Bluetooth
You can transfer data, such as music to other device using Bluetooth.
Search the device and accept/transfer data. The received data is
automatically stored in the directory.
Restore Factory Settings
Access Settings to select Restore Factory Settings, and press OK. All
settings can be restored to factory settings with this function. The
default password is 1122.
Services
To access the Services menu, enter the Main Menu in the standby mode
and then select Services. You can use the network-related services with
this function.
Page 34

28
STK Service
This service is offered as the SIM card service provided by the network
operator.
WAP
You can surf on the network with this function. After entering in the function,
you can perform:
• Homepage: indicates the default website of the internet
• Bookmarks: used to save most commonly-used websites
• Recent Pages: browse the record of the recently browsed web pages
• Input Address: input the website to be searched and press finish
button to access to the network directly
• Service Inbox: save the short messages sent from the website
• Settings: set up WAP-related service
• Select SIM: select a SIM card to access to WAP
• Profiles: the GPRS is set up for the phone by default
• Browser Options: set up the waiting time and display
image
• Service Message Settings: set up to open/close the
service, prohibit/always use the white list setting, never
confirm/confirm/ not confirm SL setting and add the
white list
• Clear cache: clear the cache
• Clear cookies: clear the data
• Trust certificates: select a trust certificate.
Data Account:
You can use this function to edit the account related settings.
Page 35

29
Organizer
The organizer menu gives you access to a number of features including
calendar, tasks, alarm, and world clock.
Calendar
You can view and edit the memo of a specified date with this function.
• View: You can view or edit the daily arrangement of the day.
• View All: You can view or edit all the daily arrangement of
the day.
• Add Event: You can select task types: Reminder, Meeting,
and Course.
• Delete Event: You can select delete entries form All, Overdue,
Spec Period.
• Jump to Date: Skip to the specified date to view or edit the
daily arrangements of the day.
• Go to today: Return to today’s view.
• Go To Weekly View: Go to the specified date to check which
week/Month it is.
Alarm
The mobile phone provides 5 alarms and you can set them as your need.
If you have configured an alarm, an icon indicated that you have
configured the alarm will appear.
Tasks
You can View, Add, Edit, Delete, Delete Overdue, Delete All, Send
Vcalendar and Save As File as desired. Start up the Tasks and press OK.
Press Add to access to add a new memo.
Page 36

30
World Clock
Scroll to browse every city’s time zone in the world map. The related date
and time will display at the bottom of the screen.
Stopwatch
Stopwatch is used for measuring time with possibility to register several
results and suspend/resume measurement.
Fun Spice
Fun Spice menu is specifically for the entertainment purpose and all the
functions belonging to this menu are chargeable. All the functions of
Fun Spice will work only if GPRS is activated on your SIM card.
Facebook
Facebook is a very popular social networking site around the world
giving people the power to share and make the world more open and
connected. Millions of people use Facebook everyday to keep up with
friends, uploads an unlimited number of photos, share links and videos,
and learn more about the people they meet.
Please ensure that you have GPRS settings in your phone to open
Facebook. Contact your operator for GPRS settings.
Free SMS
Free SMS service is powered by Ibibo. You can now send free SMS to
your friends using this feature. You require GPRS connection to use this
feature. Please contact your operator for GPRS activation.
Page 37

31
Ibibo
Now connect with the ibibo community on Spice Mobiles. Go and create
your profile, search for people based on their age, sex & location, make
new friends and send or receive blurbs. Invite your existing friends to
join your new community. Please check your GPRS settings before
accessing Ibibo.
Mobile Tracker
Now be sure of your mobile phones with Mobile Tracker offered by Spice
Mobiles. This feature allows users to track their phone if they are lost or
stolen. Switch on Mobile Tracker application and whenever a new SIM is
inserted in your phone you will receive a SMS on pre defined numbers.
1) Tracker Mode
This function requires your network support. You can set ON or OFF.
When the function ON and the phone change a SIM card, the phone will
sent a message to the number which you set in Fun Spice > Others >
Mobile Tracker > Number. The message will tell you that which number
is using your phone now. The default password is 1122.
2) Number
You can set Tracker number.
TIP: This function requires your network support. When you set Tracker
Mode OFF, and then you can set the tracker number you want.
SpiceGang
Spice Gang is a WAP portal from where user can download ringtones,
wallpapers, animations, video and other kind of content.
Step1: Check the GPRS settings for your operator.
Step2: Initiate Spice Gang WAP portal to browse and download the
content.
Page 38

32
Step3: Charges for download apply as per operator pricing.
Explore the whole world of Entertainment with Spice Gang.
Email2SMS
Emergic Email2SMS is a product of Netcore Solutions Pvt. Ltd. provided
by Spice Mobiles. Email2SMS allows you to receive email on your phone
via SMS without GPRS. You can Read, Reply, Compose and Forward
your emails via SMS. This service is only available for Gmail, Indiatimes
and Corporate Account Holders. Spice Mobiles offers FREE subscription
for one month.
1. Just send SPICE START <Location> to 575758 to register for
Email2SMS service.
For composing new mail type NEW <Receiver's Email-Id> S:<Subject>
B:<Message> and send it to 575758
2. For replying to any mail type REPLY <Message-Id> <Message> and
send it to 575758
3. For replying to all in the mail type REPLY <Message-Id> <Message>
and send it to 575758
4. For forwarding the mail type FWD <Message-Id> <Receiver's EmailId> <Message> and send it to 575758
5. For reading the remaining part of mail type READ <Message-Id> and
send it to 575758
NOTE: Message-Id is the number which you get at the end of SMS. i.e.,
01,02,03,04
For more details contact Customer Support : Phone : +91 22 6662
8130, Email : [email protected]
, Chat ID : [email protected],
Page 39

33
Nimbuzz
Nimbuzz, another path-breaking innovation is available exclusively to
the users of Spice Mobiles. Nimbuzz is a common IM platform that
allows one to chat, message and send files on the move. This service is
common for most of the commonly used IM portals including Skype,
MSN, yahoo, ICQ, AIM, Google talk – one log-in, one contact list for all
accounts.
Please check your GPRS settings before accessing Nimbuzz.
Wapedia
Welcome to Wapedia, the encyclopedia for mobile devices.
Wapedia brings the contents of Wikipedia to mobile devices offering the
most high speed and up-to-date articles. Standard Wikipedia pages are
typically too long for display on these devices, so long pages are divided
into smaller chunks to fit into the small displays. Wapedia can be
accessed through Fun Spice section in your spice mobile phone. Please
ensure that you have GPRS settings in your phone to open Wapedia.
Contact your operator for GPRS settings.
Yahoo!
Yahoo zone allows you to access Yahoo Mail, Flickr, Finance, News
Updates and Astrology.
Page 40

34
Frequently Asked Questions And Troubleshooting
If you encounter problems while using the phone, or if it performs
erratically, you can refer to the information given in the following table.
Problem Causes Solution
The phone
cannot be
switched
on
• Check if the battery power
has been used up
completely.
• Did you press the End Key
for adequate time?
• Have you inserted the
battery properly?
• Charge the battery
• Press the power on key
for about 1 second.
• Please remove and re-
install the battery and
turn on the phone.
SIM card
error
• SIM card malfunction or
damage.
• SIM card is not inserted
properly.
• Take the SIM card to
your service provider for
testing.
• Insert the SIM card
properly.
Unable to
make calls
• Has the signal bar
disappeared?
• Is the phone number
entered by you is correct?
• Move to a place with
strong signal.
• Please re-check whether
the number entered by
you is correct or not.
Page 41

35
You cannot
answer
incoming
calls.
• You have activated the call
barring feature.
• Go to Call History > Call
Settings > MASTER SIM
card /SLAVE SIM card
call settings > Call
Barring/Line Switching,
and then select Cancel
All/Line1.
Fail to
connect to
the
network.
• Weak signals.
• Invalid UIM card.
• Please try and move to a
location with strong
signal and try connecting
to the network again
• Please ensure that you
have a valid UIM card.
Please contact your
network provider for
further information.
Poor
reception.
• The network signal is too
weak at your current
location, for example, in a
basement or near a tall
building, because wireless
transmissions cannot
effectively reach it.
• The network is busy.
• You are too far away from
a base station of your
service provider.
• Move to a location where
the network signal can
be properly received.
• Avoid using the phone at
such time, and try again
after waiting for a while.
• You can request for a
service area map from
your service provider.
Page 42

36
Echo or
noise
during the
calls
• Poor network trunk quality
on the part of your service
provider.
• Press the ending key and
dial again. You may be
switched to a betterquality network trunk or
phone line.
Unable to
enter
information
in the
phone
book.
• The memory of the phone
book is already full.
• Delete unnecessary data
from the phone book.
Unable to
charge
battery
• The battery or battery
charger is damaged.
• The temperature of the
phone is below 10°C or
higher than 55°C.
• Poor contact between the
battery and charger.
• Contact the dealer.
• Adjust the battery
charging environment to
avoid extremes of
temperature.
• Check all connectors to
make sure all
connections have been
properly made.
PIN Code is
blocked
• You have entered an
incorrect PIN code three
times in a row.
• Contact your service
provider. If the service
provider provides the
PUK code of the SIM
card, use the PUK code
to unlock the SIM card.
Fail to set
• Wrong operation • Please refer to the user
Page 43

37
certain
functions
• The network provider does
not support the function,
or you have not applied for
it.
manual
• Please contact your
service operator.
Short
stand by
time
• The standby time is related
to your service provider
system configuration. The
same phone used with
different service providers’
system will not provide
exactly the same length of
standby time.
• The battery is depleted.
• If you are located in an
area where signals are
weak, temporarily switch
off your phone.
• Use a new battery.
Page 44

38
SUPPORT AND CONTACT
You can visit www.spice-mobile.com for additional information,
downloads and services related to your Spice handset.
To check for your nearest SPICE service center, you can visit www.spicemobiles.com/support-services .
For further assistance or queries, you can call on SPICE customer care
number 1800-300-77423 (toll free) or mail at
[email protected]
To know the address of your nearest Spice service station please SMSSPICE SERVICE to 56300.
Note: For issues related to network or UIM card, please contact your
network operator.
 Loading...