

Page 1
THREE POINT INTERNAL MICROMETER
swissprec.com
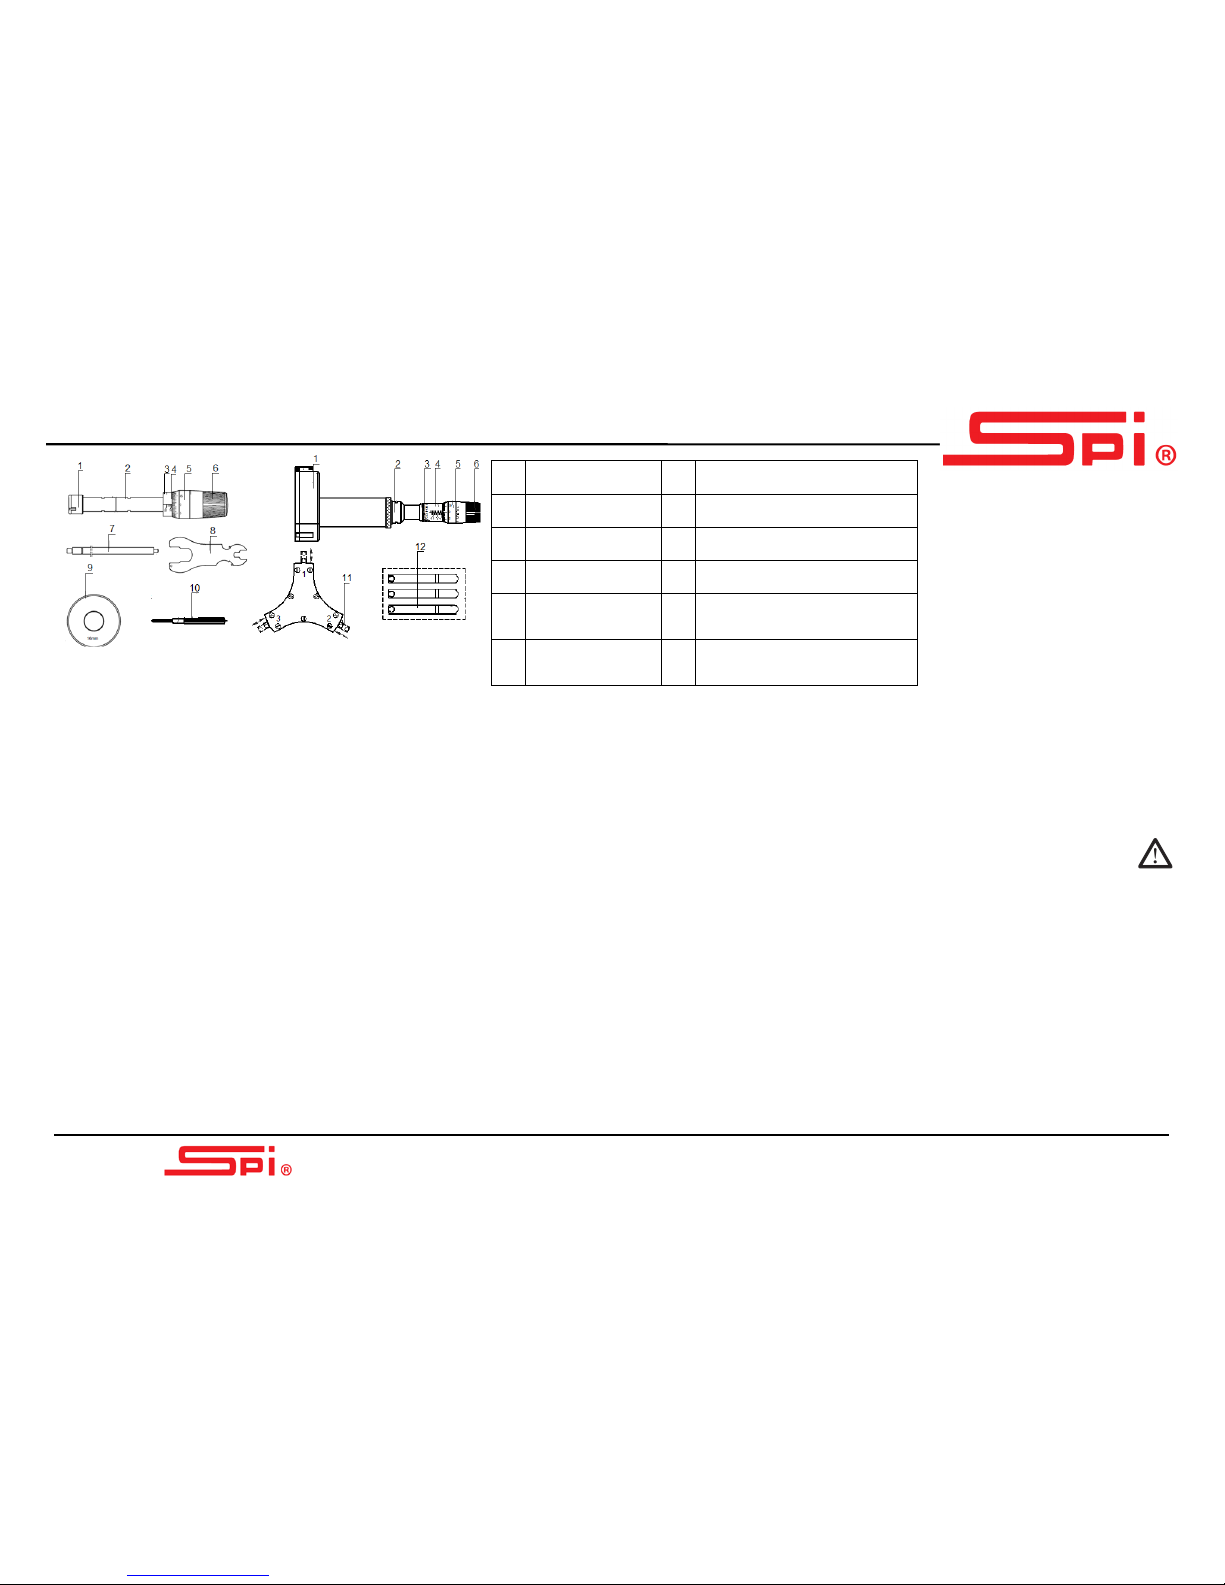
1
Measuring head
7
Extension Rod
2
Inside sleeve
8
Spanner
3
Adjusting Screw
9
Setting Ring
4
Fastness Sleeve
10
Screwdriver
5 Thimble
11
The first set Interchangeable
anvil
6
Ratchet
12
The second set Interchangeable
anvil
THREE POINT INTERNAL
MICROMETER
OPERATION MANUAL
SPI20G02
IMPORTANT NOTICE
• Clean all spindle and body prior to use.
• Clean the battery before installation.
• Zero set the indicators after installing
the battery.
Specifications
• Graduation:Inch: .0001"
Metric: 0.001mm
• Carbide tipped measuring faces
• Ratchet Stop.
• Models Up to and including 6mm or .24 inch have two
measuring points and models 7mm or .275 inch and above
are with three measuring points.
Zero setting
Clean the measuring jaws and the hole of the setting ring
with soft cloth. Rotate ratchet stop until the measuring jaws
Repeat the above process until indicator value is identical with
the setting ring.
Remark: Need to zero setting again after install or remove
extension rod.
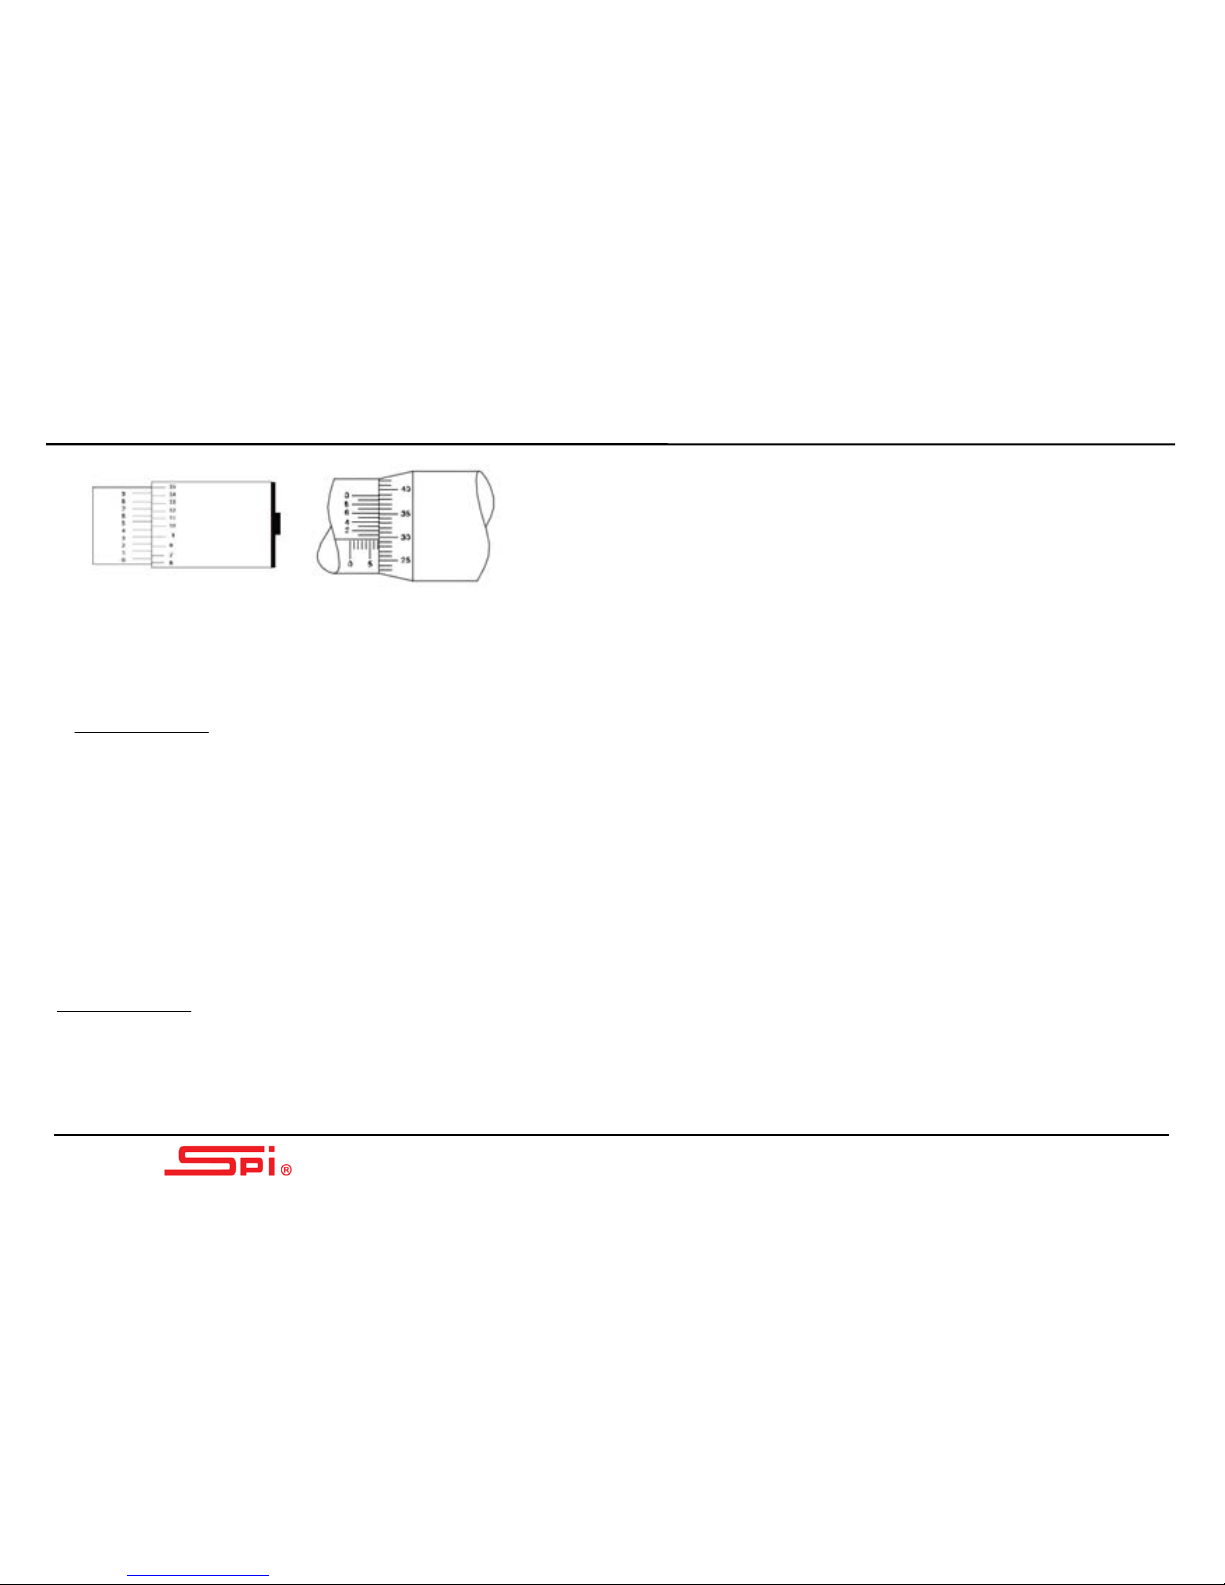
Method of Reading
• Metric
The standard micrometer with the vernier scale on the sleeve
can be read to 0.001mm. In reading of vernier scale, find which
graduation of the vernier scale coincides with that of the
thimble and multiply it by 0.001mm.
Page 2
THREE POINT INTERNAL MICROMETER
swissprec.com
Sleeve: 7.00 mm
Thimble: 0.29 mm
Vernier: 0.008 mm
Reading: 7.298 mm
• Inch
In this scenario the numbers on the left repress sent the readings from the
vernier scale. Each division counts as .0001 inch based on the division that
lines up with the line on the thimble.
Sleeve: 0.175ʺ
Thimble: 0.004ʺ
Vernier: 0.0003ʺ
Reading: 0.1793ʺ
Interchangeable anvil replacement instructions
• Product measuring ranges over 4 "(100 mm) is with Interchangeable anvil.
•
Rotate the thimble until the line marked “0” comes exactly in line with the
reference line on the sleeve. Pull out the measuring jaws; insert another set of
measuring jaws into the grooves in the measuring head in turn. Inspect the
measuring jaws by smaller pull.
• When changing the measuring jaws, number of the measuring jaws must fit the
relevant that of the three grooves in the measuring head.
• Prevent dust from getting inside the three grooves in the measuring head.
• Place tool into packaging box after apply antirust oil on the measuring jaws if the
micrometer not used for a long of time.
Precaution
• Clean all measuring surfaces and body prior to use.
• Zero set the tool using the following steps before use, and after installing the
extension rod.
• Check the zero point by measuring setting ring. If the reading doesn’t match the
setting ring:
• Unlock the adjusting screw; rotate the fastness sleeve till getting correct reading.
• Lock the adjusting screw.
 Loading...