

SPEX SamplePrep 6875D QUICK START GUIDE
1300-87052QSG-1A, REV 0
How To Operate 6875D Freezer/Mill
Set up the 6875D FM in a well ventilated, unconfined
space. The Freezer/Mill should be run on an open
countertop, in ambient air, with recommended
maximum relative humidity 70% from 5°C – 31°C
(40°F – 88°F).
When working with liquid nitrogen directly or
indirectly, the LN Tank valve or hose, or chilled
Freezer/Mill components, cryogenic gloves must be
worn to protect hands. A face shield is recommended
to protect eyes from possible splashing. Wear the
proper protection equipment (PPE).
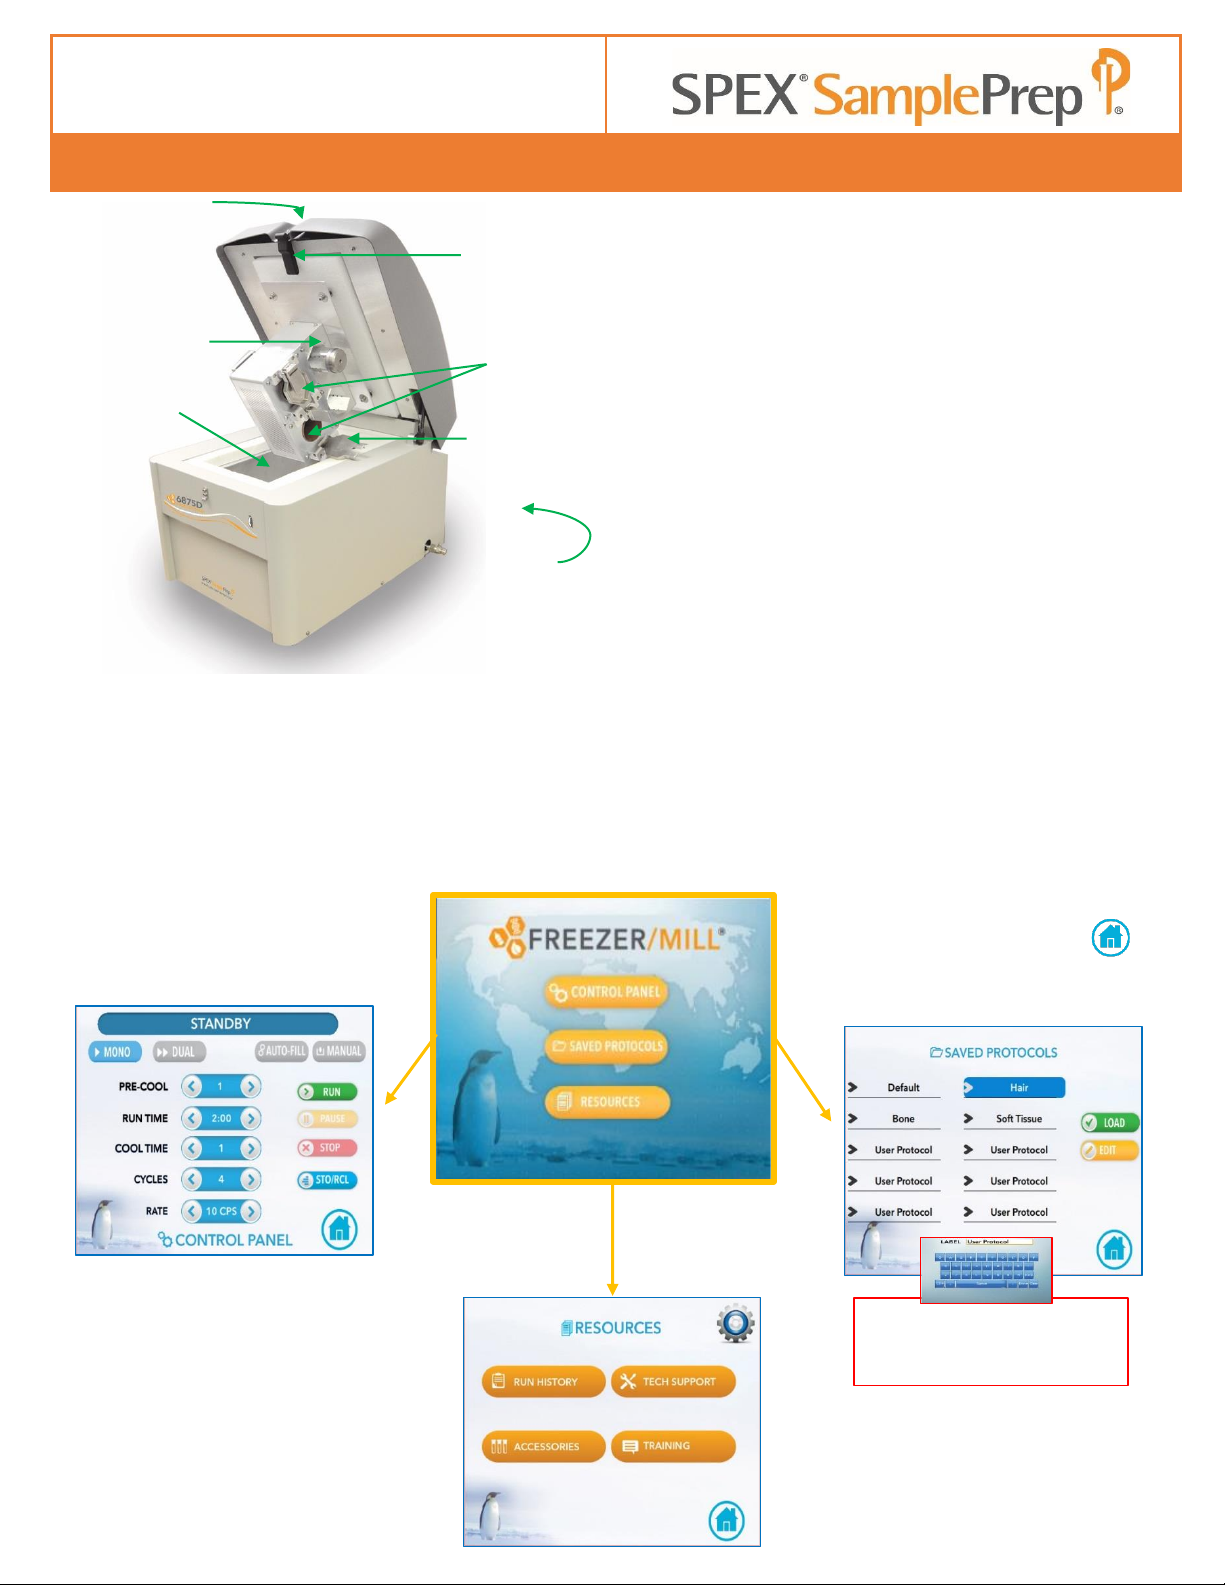
6875D FREEZER/MILL®
Touchscreen
(USB Port back
of Controller)
Dual
Grinding
Chambers
LN Tub
Latch
AC Inlet and
ON/OFF Switch
(back of unit)
Gate (locks
in sample)
Dual Pre-cooling
Chambers
Touching Edit will activate
a pop-up keyboard to edit
or save a protocol.
From the Home Screen the
Control Panel, Saved Protocols,
and Resources can be accessed
by the user.
On the Control Panel, select Mono
or Dual sample mode and Auto-Fill
or Manual to fill the mill with liquid
nitrogen. In auto-fill mode make
sure the unit is connected to a LN
Tank with the LN hose and the LN
valve is open. In manual mode fill
the tub with LN until the unit
sounds with a series “Beeps”
indicating the proper liquid nitrogen
level has been reached (approx. 2
inches below the rim of the tub).
From the Resources screen the run
history, technical support, accessories,
and training information (manual, etc.)
are accessed.
Touching the Home Icon returns
the user to the Home screen.
Step 1. Connect the powercord to the AC Inlet located at the back of unit. Power On the 6875D FM. “Please
Wait” appears on the screen during start-up as the software loads. After a brief animation, the screen
will switch to the Home Screen.
Step 2. Fill the tub with auto-fill connection or manually with liquid nitrogen to approximately 2 inches below
lip of the tub). Always close the lid slowly to avoid splashing of LN and latch down. It is normal
to see a visible vapor stream exiting the vent at the back of the unit. Do not block the vent.
QUICK START GUIDE
1300-87052QSG-1A, REV 0
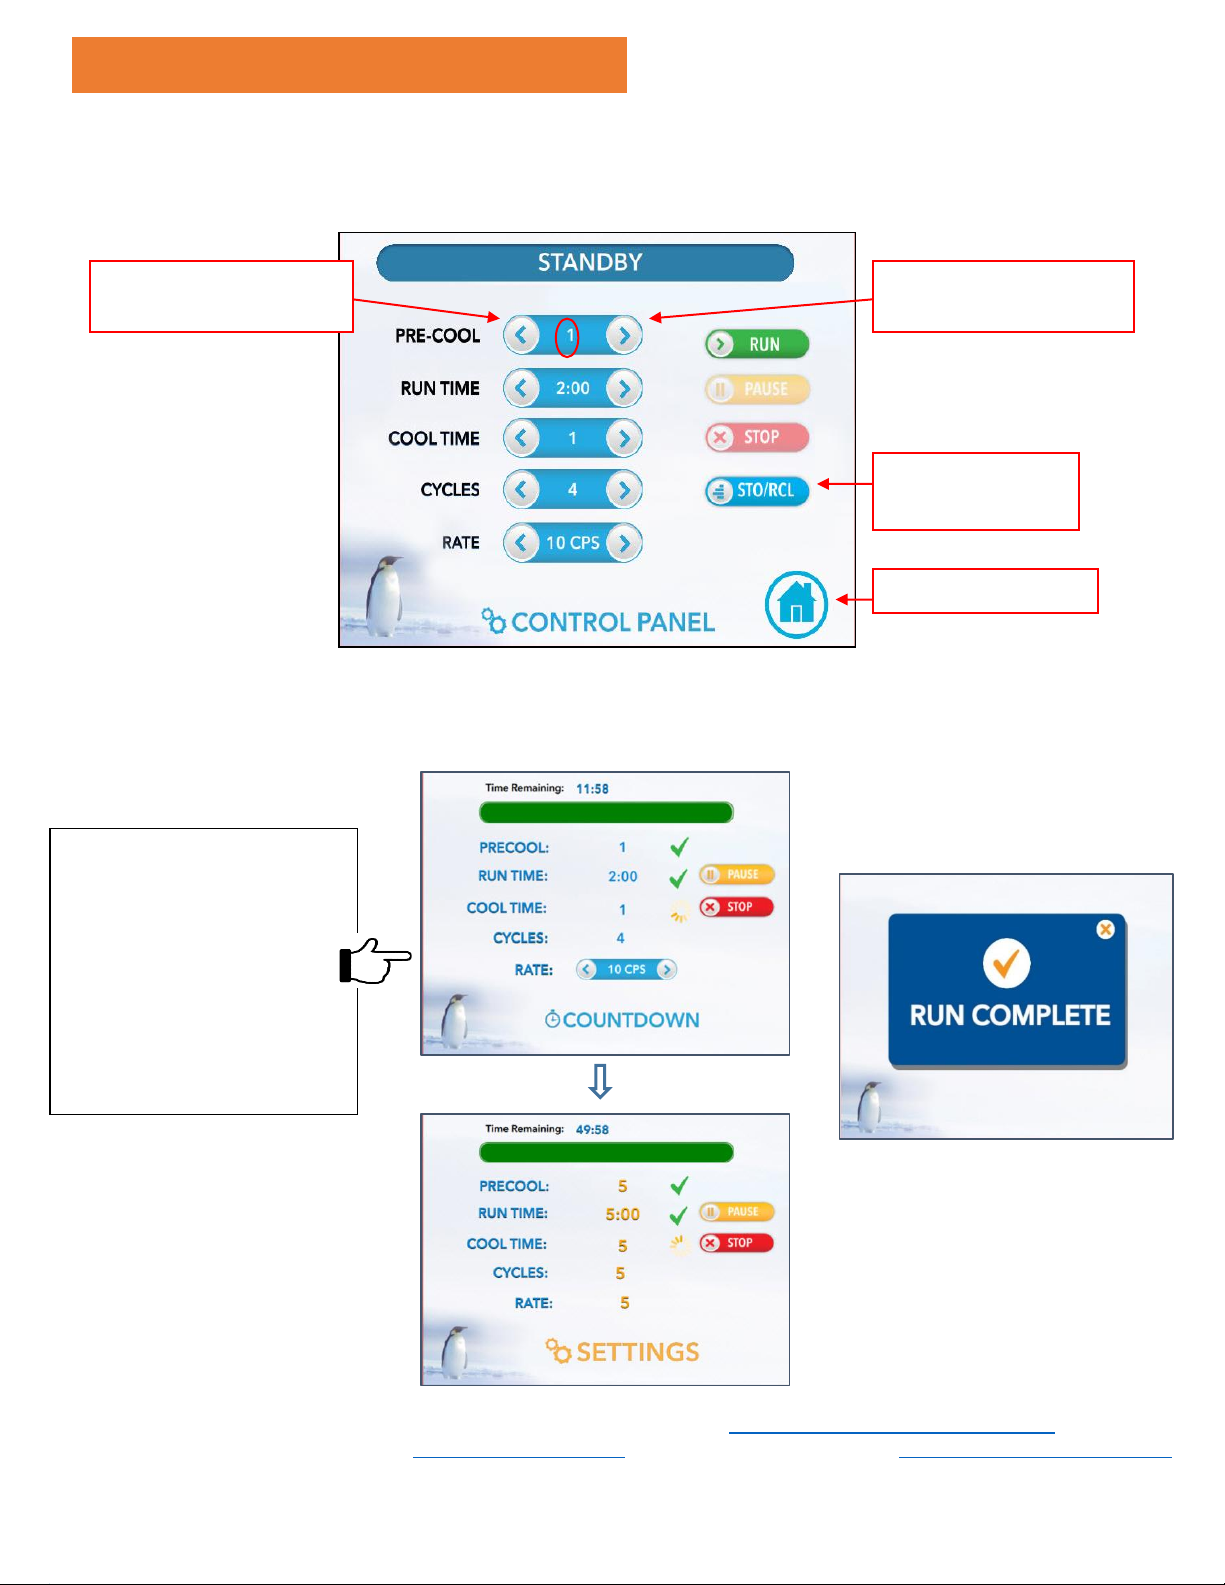
Right Arrow Increases
the Parameter
Store and Recall
Protocols
Left Arrow Decreases
the Parameter
Home Screen Icon
Changing the Run Parameters
To change parameters (pre-cool time, run time, cool time, cycles and rate), touch the arrow buttons on the
CONTROL PANEL screen. (10 minute pre-cool time is recommended.) To pause the program, touch the PAUSE
button. To continue the program, touch the RESUME button. To abort the program, touch the STOP button.
During a run a green check mark is placed next to a field when complete. The Status Bar (top of screen) counts
down the time remaining in a run.
To access our full library and download application notes visit www.spexsampleprep.com/appnotes
Videos of our products can be found on www.spexsamprep.com and on our YouTube Channel www.youtube.com/sampleprep.
Our Application Specialists at SPEX Headquarters in USA and Europe Sales Office are here to help with advice on
accessories and grinding protocols. Access contact information by touching the Resources button (on the Home Screen).
When the grinding program has ended,
the screen will display Run Complete.
NOTE: Touching and holding
the Run screen, during a
programmed run displays the
current run settings in an
orange color font.
The protocol description
located bottom of screen will
change to SETTINGS.
 Loading...