

Instruction
Guide
for the
Speedy Stitcher
Sewing Awl
AN INDISPENSABLE TOOL FOR SEWING
•
AWNINGS
•
SAILS
•
TENTS
•
AUTO TOPS
•
UPHOLSTERY
•
SADDLES
•
SHOES
•
HANDBAGS
•
ALL TYPES OF SPORTING EQUIPMENT
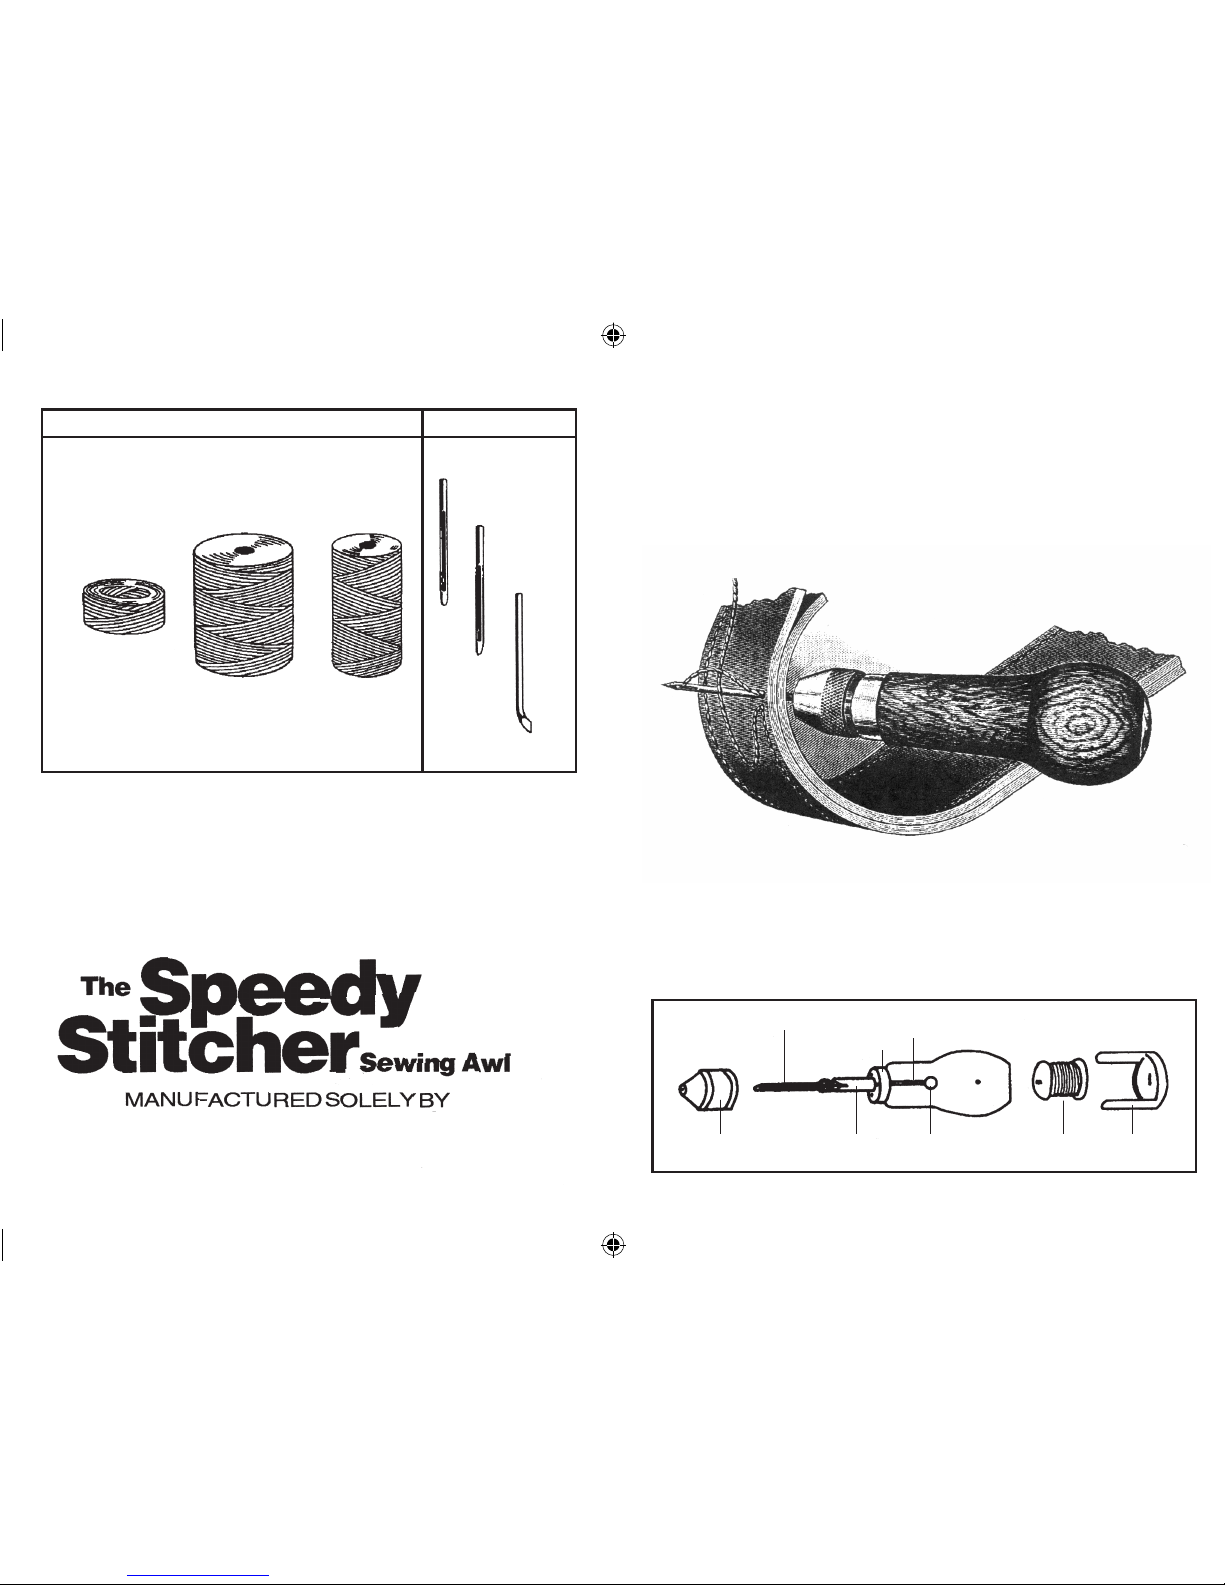
CHUCK
LOCK
NEEDLE
THREADED
POST
TENSION
POST
END
CAP
BOBBIN
FERRULE
THREADED
GROOVE
Supplies for the Speedy Stitcher Needles
Waxed Polyester Thread (Tan)
IMPORTANT – Fine sewing requires FINE THREAD and the 130-#4
NEEDLE. Both are pictured above. If these supplies are not available from
your dealer, we will be pleased to help you locate a supplier.
Visit: www.speedystitcher.com or send postcard to:
Dept. S
STEWART MFG. INC.
70A Overocker Road
Poughkeepsie, N.Y. 12603
No. 140 Coarse
No. 160 Fine
No. 150 Coarse No. 170 Fine
30 Yd. Skein
180 Yd. Tube180 Yd. Tube
No. 130A
-#8S
No. 130B - #8C
No.130 - #4
Stewart Manufacturing, Inc.
70A Overocker Road • Poughkeepsie, N.Y. 12603-2035
Speedy Stitcher.indd 1 12/12/11 2:15 PM
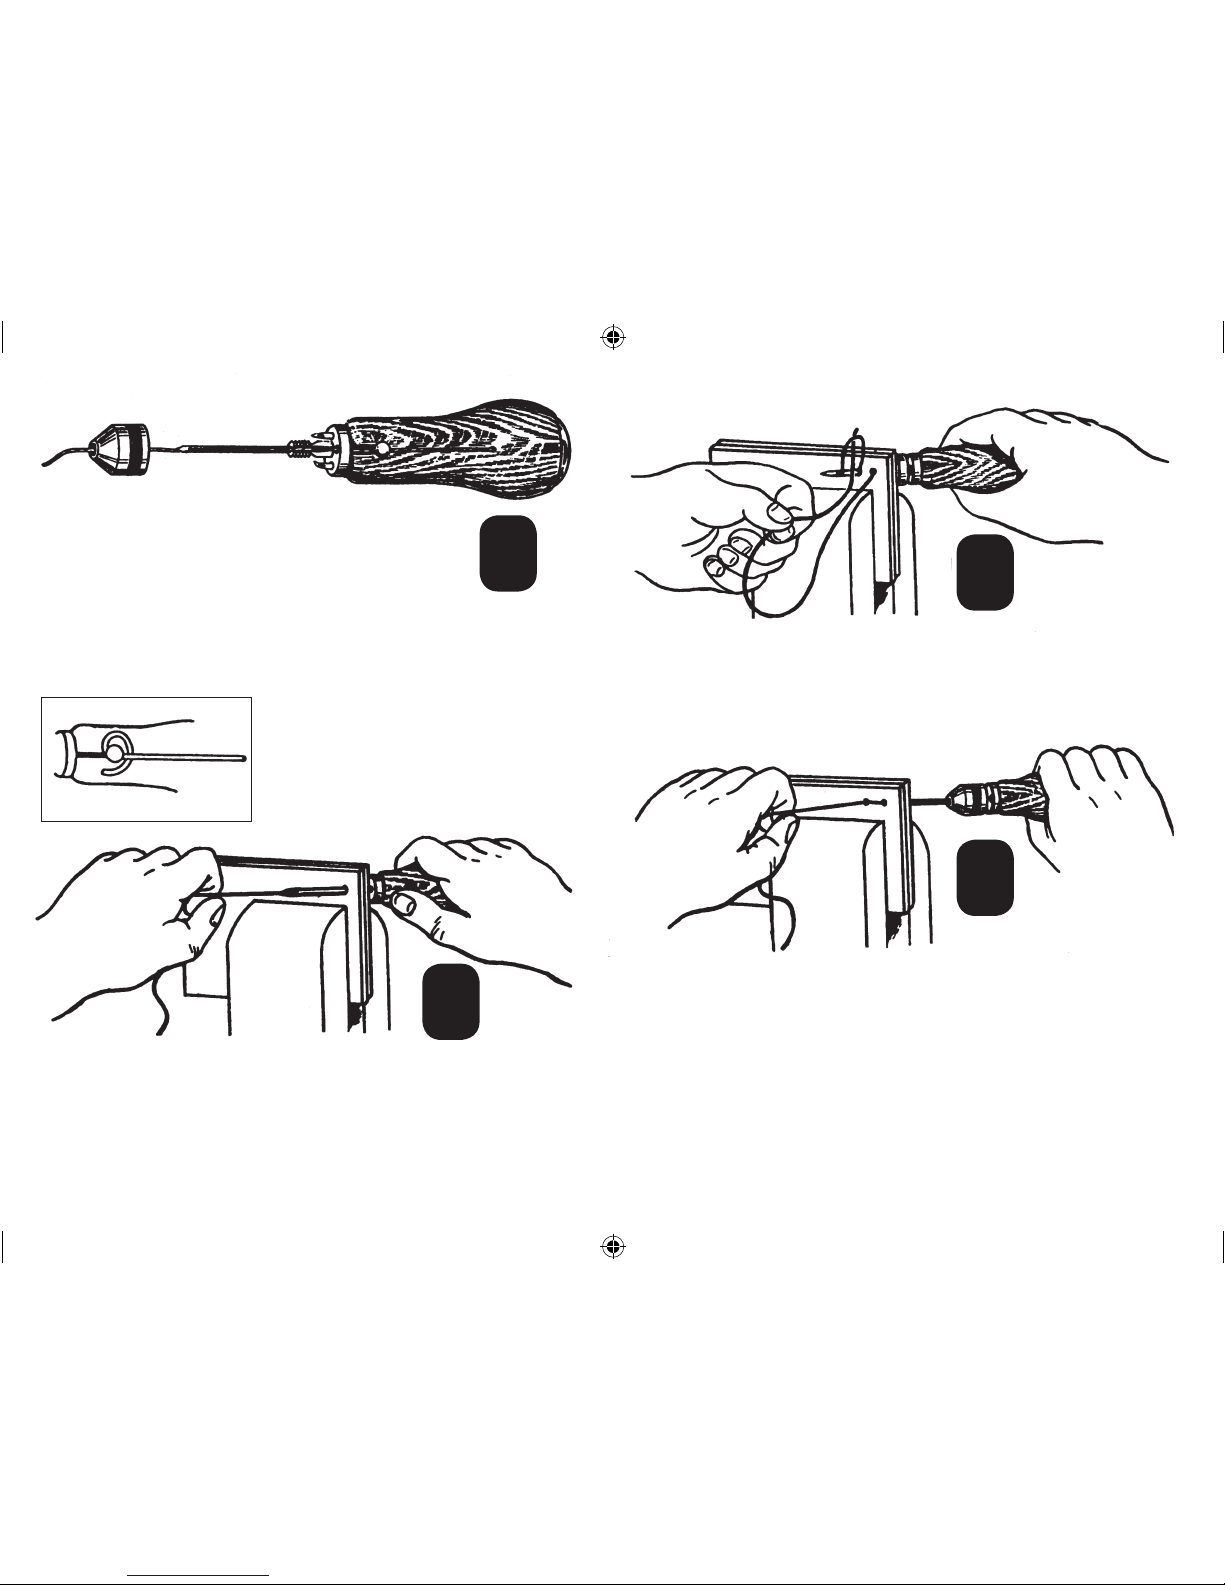
TO SET UP
•
Unscrew chuck lock to nd needles
•
Pull end of thread from bobbin through hole in handle
•
Loop thread around tension post as shown in Detail ‘A’.
•
Continue thread along handle groove and through ferrule
hole as illustrated.
•
Place needle in threaded post making sure that grooves in needle and
threaded post are in alignment with each other.
•
Pass thread through eye of needle, then through chuck lock as shown.
•
Screw chuck lock onto threaded post and tighten securely by hand only.
DETAIL ‘A’
•
When looping thread around tension
post, be sure to pass it under the thread
coming from hole in handle as shown
above, otherwise it will not feed freely.
TO STITCH
•
Push needle through material and draw out enough thread to do the
length of work involved, plus about 3” more.
•
Draw thread through material so that the full length of thread is pulled
through the hole in which the needle rests.
•
Hold thread in position and pull needle back through the material and
start it through a second hole.
•
Push needle as far as it will go, then draw back enough so that the thread
forms a loop as shown.
•
Pass all of the thread through this loop.
•
While holding thread taut in one hand, draw needle out with other hand.
This forms a lock-stitch in the material.
•
Draw equally hard on the Awl and the loose end of the thread.
•
Before taking another stitch, release more thread between the needle and
the material to allow you to move the awl back and start the next hole.
•
Continue same procedure until nished.
After you have nished your stitching, use the following procedure to tie off
the thread. On your last stitch, instead of passing thread through the loop,
grasp loop and pull out about 3 inches of thread. Cut thread. Then pull Awl
and needle out of material. Now you have both ends of thread on same
side of material for tying off. Use square knot.
1
2
3
4
Speedy Stitcher.indd 2 12/12/11 2:15 PM
 Loading...