

Page 1
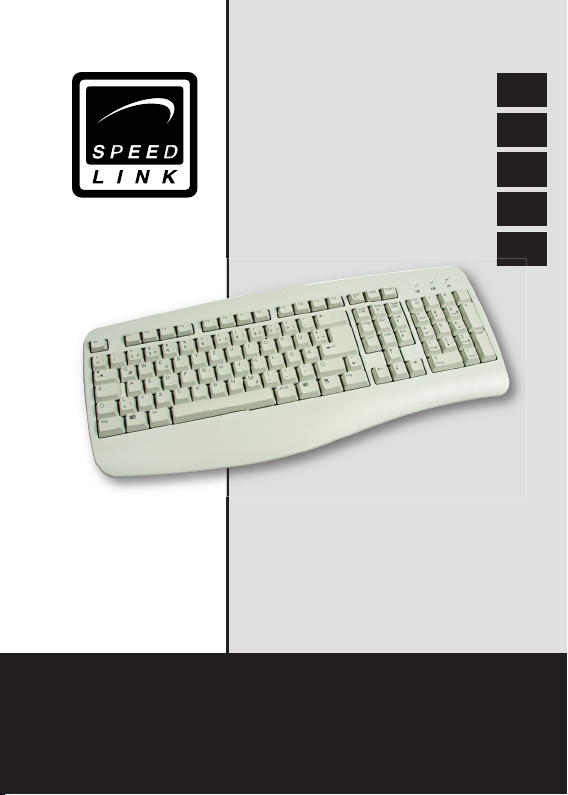
USB Keyboard Comfort
Bedienungsanleitung
User‘s guide
Mode d‘emploi
Manual del usuario
Manuale dell‘utente
SL-6420
D
GB
F
E
I
Page 2

Einleitung
D
Vielen Dank für den Kauf dieser USB-Tastatur.
In ansprechendem Design bietet diese Tastatur
GB
solide Qualität und eine einfache Installation über
USB-Anschluss.
F
Systemvoraussetzungen
E
• Windows 98/Me/2000/XP
I
• USB-Port
Installation
1. Schließen Sie den USB-Anschluss der
Tastatur einfach an einen freien USB-Port
Ihres PCs an.
2. Die Tastatur ist betriebsbereit. Gegebenen falls werden Sie aufgefordert die Windows
Installations-CD einzulegen.
Eine Treiber-Installation ist nicht notwendig.
Problembehebung
Die Tastatur funktioniert nicht.
1. Vergewissern Sie sich, dass Sie den
USB-Stecker richtig am USB-Port Ihres PCs
angeschlossen haben.
2. Überprüfen Sie, ob USB-Eingabegeräte von
Ihrem Betriebssystem erkannt werden.
Gehen Sie dazu wie folgt vor:
2
Page 3

a) unter Windows Me/98/98SE:
1. Klicken Sie mit der rechten Maustaste auf
“Arbeitsplatz” und wählen Sie
“Eigenschaften”.
2. Klicken Sie auf die Registerkarte
„Hardware“ und wählen Sie „Geräte manager“.
3. Machen Sie einen Doppelklick auf
„Eingabegeräte (Human Interface Device)“.
4. Vergewissern Sie sich, dass USB Eingabegeräte aufgeführt sind und davor
kein gelbes Ausrufezeichen erscheint.
Wenn die USB-Eingabegeräte nicht angezeigt
werden oder gelbe Ausrufezeichen zu sehen sind,
funktionieren die USB-Eingabegeräte nicht richtig.
Setzen Sie sich in diesem Fall mit Ihrem Computerhersteller in Verbindung.
b) unter Windows 2000/XP:
1. Klicken Sie mit der rechten Maustaste
auf das Symbol „Arbeitsplatz“.
HINWEIS: Unter Windows XP muss das
Symbol „Arbeitsplatz“ möglicherweise über
„Start“ aufgerufen werden.
2. Klicken Sie auf „Geräte-Manager“
3. Machen Sie einen Doppelklick auf
„Eingabegeräte (Human Interface Device)“.
D
GB
F
E
I
3
Page 4

4. Vergewissern Sie sich, dass USB-
D
Eingabegeräte aufgeführt sind und davor
kein gelbes Ausrufezeichen erscheint.
GB
Wenn die USB-Eingabegeräte nicht angezeigt
F
werden oder gelbe Ausrufezeichen zu sehen sind,
funktionieren die USB-Eingabegeräte nicht richtig.
E
Setzen Sie sich dann mit Ihrem Computerhersteller in Verbindung.
I
Sicherheitshinweise
• Versuchen Sie nicht, das Gerät selbst zu
warten oder zu reparieren. Überlassen
Sie jegliche Wartungsarbeiten dem
zuständigen Fachpersonal.
• Nehmen Sie keine Veränderungen am
Gerät vor. Dadurch verlieren Sie jegliche
Garantieansprüche.
• Verwenden Sie das Gerät nicht in der
Nähe von Wasser (z.B. Waschbecken,
Badewannen oder Schwimmbecken), und
halten sie es von Feuchtigkeit, tropfenden
oder spritzenden Flüssigkeiten sowie
Regen fern.
4
Page 5

Garantie
Für dieses Produkt gewähren wir Ihnen eine Garantie von zwei Jahren ab Kaufdatum auf Verarbeitung und alle eingebauten Teile.
Falls Sie Hilfe benötigen..
Bei technischen Problemen wenden Sie sich bitte
an unseren technischen Support. Die HotlineNummer nden Sie auf der Rückseite dieser
Bedienungsanleitung.
D
GB
F
E
I
5
Page 6

Introduction
D
Thank you for purchasing this USB keyboard.
With its attractive design, this keyboard offers
GB
sound quality and simple installation via a USB
port.
F
System requirements
E
• Windows 98/ME/2000/XP
I
• USB port
Installation
1. Simply connect the USB socket of the
keyboard to a free USB port of your PC.
2. The keyboard is ready to use. You may be
requested to insert the Windows installation
CD.
It is not necessary to install a driver.
Troubleshooting
The keyboard doesn’t work.
1. Make sure you have correctly connected the
USB plug to the USB port pf your PC.
2. Check that USB input devices are detected
by your operating system. To do this, proceed
as follows:
6
Page 7

a) Under Windows ME/98/98SE:
1. Click with the right mouse
button on “My Computer” and select
“Properties”.
2. In the System Properties dialogue, click on
the “Device manager” tab.
3. Double click on “Human Interface Devices”
or “Keyboard”.
4. Make sure the USB input devices are
listed and there is no yellow exclamation
mark in front.
If the USB input devices are not displayed or you
can see a yellow exclamation mark, the devices
are not working correctly. If that is the case,
contact your computer manufacturer.
b) Under Windows 2000/XP:
1. Click with the right mouse button on the
“My Computer“ icon.
NOTE: In Windows XP, you may have to
call the “System Properties” dialogue via
the Start menu.
2. Click on the Device Manager button.
3. Double click on “Human Interface
Devices”.
D
GB
F
E
I
7
Page 8

4. Make sure USB input devices are listed
D
and no yellow exclamation marks appear
before them.
GB
If the USB input devices are not displayed or you
can see yellow exclamation marks, the USB input
F
devices are not working correctly. If that is the
case, contact your computer manufacturer.
E
I
Safety advice
• Do not attempt to maintain or repair the
device yourself. Get a qualied specialist to
carry out any maintenance.
• Do not make any modications to the device.
Doing so will render the guarantee void.
• Do not use the device in the vicinity of water
(e.g. wash basins, baths or swimming pools)
and keep it away from moisture, dripping or
splashing liquids and rain.
Guarantee
We guarantee this product for two years from
the date of purchase in respect of workmanship
and all built-in components.
8
Page 9

If you need help..
In the event of technical problems, please contact our technical support. The hotline number
can be found on the back of this manual.
D
GB
F
E
I
9
Page 10

Introduction
D
Merci d’avoir acheté ce clavier USB. Ce clavier
avec son design agréable vous offre une qualité
GB
solide et une installation facile par USB.
F
Exigences du système
• Windows 98/ME/2000/XP
E
• Port USB
I
Installation
1. Branchez simplement la connexion USB du
clavier sur un port USB libre de votre
ordinateur.
2. Le clavier est prêt à l’usage. Le cas échéant
on vous demande d’introduire le CD
d’installation Windows.
L’installation d’un logiciel pilote n’est pas nécessaire.
Résolution des problèmes
Le clavier ne fonctionne pas.
1. Assurez-vous que la che USB soit connectée
correctement au port USB de votre
ordinateur.
10
Page 11

2. Contrôlez si les unités d’entrée USB sont
reconnues par votre système d’exploitation.
Procédez pour ceci de la manière suivante :
a) sous Windows Me/98/98SE:
1. Cliquez avec la touche droite de votre
souris sur « poste de travail » et
sélectionnez « Propriétés ».
2. Cliquez sur l’onglet « Matériel » et
sélectionnez « gestionnaire de
périphérique ».
3. Double-cliquez sur « Unités d’entrée
(Human Interface Device) ».
4. Assurez-vous que les unités d’entrée USB
soient énumérées et que n’apparaisse
pas un point d’exclamation jaune devant
elles.
Si les unités d’entrée USB ne sont pas énumérées ou si vous voyez des points d’exclamation
jaunes, cela signie que les unités d’entrée USB
ne fonctionnent pas correctement.
D
GB
F
E
I
11
Page 12

Contactez dans ce cas le fabricant de votre
D
ordinateur.
b) sous Windows 2000/XP:
GB
1. Cliquez avec la touche droite de la souris
sur le symbole « Poste de travail ».
F
REMARQUE : Sous Windows XP le
symbole « Poste de travail » doit
E
probablement être ouvert en passant par
« Démarrage ».
I
2. Cliquez sur « gestionnaire de
périphérique »
3. Double-cliquez sur « Unités d’entrée
(Human Interface Device) ».
4. Assurez-vous que les unités d’entrée USB
soient énumérées et que n’apparaisse
pas un point d’exclamation jaune devant
elles.
Si les unités d’entrée USB ne sont pas énumérées ou si vous voyez des points d’exclamation
jaunes, cela signie que les unités d’entrée USB
ne fonctionnent pas correctement. Contactez
dans ce cas le fabricant de votre ordinateur.
12
Page 13

Informations de sécurité
• Ne pas entretenir et réparer soi-même le
dispositif. L’entretien et les réparations doivent
être effectués par un spécialiste.
• Ne pas effectuer de changements sur le
dispositif. Dans un tel cas vous perdriez vos
droits à une garantie.
• Ne pas utiliser le dispositif près de sources
d’eaux (p. ex. lavabos, baignoires ou piscines)
et ne pas le mettre dans un lieu humide ou
en contact avec des liquides que ce soit sous
forme de gouttes ou de jets comme la pluie
par exemple.
Garantie
Pour ce produit nous vous accordons un droit
à une garantie de deux ans à partir de la date
d’achat. Cette garantie comprend la fabrication
et toutes les parties intégrées.
Si vous avez besoin d’aide...
Si vous avez des problèmes d’ordre technique,
contactez notre assistance technique. Le numéro de téléphone se trouve sur le dos du mode
d’emploi.
D
GB
F
E
I
13
Page 14

Introducción
D
Muchas gracias por la compra de este teclado
con conexión USB. Su atractivo diseño y una
GB
excelente calidad hacen de este sólido teclado un
dispositivo ideal que se instala con sencillez en el
F
puerto USB.
E
Requerimientos del sistema
I
• Windows 98/ME/2000/XP
• Puerto USB
Instalación
1. Conecte el cable del teclado a un puerto USB
de su ordenador que esté libre.
2. El teclado ya está listo para funcionar. Puede
que el sistema operativo emita un aviso para
que vuelva colocar el CD del Windows con el
que opera.
No precisa la instalación de un controlador.
Resolución de problemas
El teclado no funciona.
1. Cerciórese de que ha enchufado bien el
conector al puerto USB de su ordenador.
14
Page 15

2. Compruebe también si su sistema operativo
reconoce y admite dispositivos USB. Para
ello proceda de la siguiente manera:
a) en Windows Me/98/98SE:
1. Haga clic con el botón derecho del ratón
en „Escritorio, mi PC“ y seleccione
„Propiedades“.
2. Haga clic en la lengüeta „Hardware“ y
seleccione „Administrador de dispositivos“.
3. Haga doble clic en „dispositivos de
introducción (Human Interface Device)“
4. Verique que los dispositivos de
introducción USB estén listados y no haya
delante de ellos un signo de admiración
amarillo.
Si los dispositivos de introducción USB no se
muestran, o aparecen signos de admiración
amarillo, los dispositivos USB no están funcionando correctamente. En tales casos póngase en
contacto con el fabricante de su ordenador.
b) en Windows 2000/XP:
1. Haga clic con el botón derecho del ratón
en el icono „Escritorio, Mi PC“.
ADVERTENCIA: In Windows XP el icono
„Mi PC“ se muestra posiblemente a través
del botón de „Inicio“.
D
GB
F
E
I
15
Page 16

2. Haga clic en „Administrador de
D
dispositivos“.
3. Haga doble clic en „Dispositivos de
GB
introducción (Human Interface Device)“
4. Verique que los dispositivos de
F
introducción USB estén listados y no haya
delante de ellos un signo de admiración
E
amarillo.
Si los dispositivos de introducción USB no se
I
muestran o aparecen signos de admiración
amarillos, los USB no están funcionando correctamente. En este caso, póngase en contacto con
el fabricante de su ordenador.
Medidas de seguridad
• No intentes en ningún caso reparar o
mantener este sistema. Deja cualquier
trabajo de mantenimiento en manos de
personal especializado.
• No hagas cambios en el aparato. De lo
contrario perderás la garantía que te ampara.
• No utilices el aparato cerca del agua (p. ej.
lavabos, bañeras o piscinas) y mantenlo
alejado de la humedad, líquidos que salpiquen,
goteen o de la lluvia.
16
Page 17

Garantía
Este producto tiene una garantía de dos años a
partir de la fecha de compra tanto para defectos
de fabricación como de sus componentes.
Si precisas ayuda...
En caso de surgir cualquier problema técnico,
acude a los especialistas que te proporcionarán
todo tipo de soporte técnico. El número de nuestra línea Hotline, se encuentra al dorso de estas
instrucciones de manejo.
D
GB
F
E
I
17
Page 18

Introduzione
D
Congratulazioni per aver acquistato la nostra tastiera con interfaccia USB. Dal facile collegamento
GB
grazie all’interfaccia USB e dal design elegante,
questa tastiera si caratterizza per la sua elevatis-
F
sima qualità.
E
Requisiti di sistema
I
• Windows 98/ME/2000/XP
• una porta USB
Installazione
1. Collegate il cavo USB ad una porta USB
ancora libera del Vostro PC.
2. La tastiera è quindi pronta per l’uso. Il
sistema operativo Vi inviterà eventualmente
ad inserire il CD d’installazione Windows.
Quindi non è richiesta alcuna installazione software.
Ricerca guasti
La tastiera non funziona.
1. AccertateVi che il connettore USB sia stato
collegato correttamente all’interfaccia USB
del Vostro computer.
2. Controllate che il Vostro sistema operativo
supporti le periferiche con interfaccia
18
Page 19

USB. Al ne di poter accertarvene,
procedete nel seguente modo:
a) per i sistemi operativi Windows 98 /
98 SE / ME:
1. Cliccate con il pulsante destro del
mouse su “Risorse del computer” e
selezionate nel menù a ventaglio che
comparirà la voce “Proprietà”.
2. Cliccate su “Hardware” e selezionate in
seguito “Gestione periferiche”.
3. Ciccate due volte su “Gestione
periferiche di input” (Human Interface
Device, sistemi per l’interfaccia con
l’uomo).
4. AccertateVi che le periferiche di input
con interfaccia USB vi siano elencate
e davanti ad esse non vi si trovi un
punto esclamativo di colore giallo.
Se le periferiche con interfaccia USB non vi
dovessero essere elencate o davanti ad esse vi si
trovasse un punto esclamativo di colore giallo, ciò
è segno di un loro cattivo funzionamento. In tal
caso, siete pregati di contattare la casa produttrice del Vostro computer.
D
GB
F
E
I
19
Page 20

b) per i sistemi operativi Windows 2000
D
/ XP:
1. Cliccate con il pulsante destro del
GB
mouse sull’icona “Risorse del
computer”.
F
NOTA BENE: In ambiente Windows
XP, l’icona “Risorse del computer” deve
E
essere eventualmente attivata
cliccando su “Start”.
I
2. Cliccate su “Gestione periferiche”.
3. Fate doppio click su “Periferiche di input
(Human Interface Device)”.
4. AccertateVi che le periferiche di input
con interfaccia USB vi siano elencate
e davanti ad esse non vi si trovi un
punto esclamativo di colore giallo.
Se le periferiche con interfaccia USB non vi
dovessero essere elencate o davanti ad esse vi
si trovasse un punto esclamativo di colore giallo,
ciò è segno di un loro cattivo funzionamento.
In tal caso siete pregati di contattare la casa
produttrice del Vostro computer.
Precauzioni per la sicurezza
• Non riparate l’apparecchio e non effettuate la
manutenzione da soli. Per lavori di riparazione
o manutenzione rivolgeteVi a personale
20
Page 21

competente specializzato.
• Non apportate al dispositivo alcuna modica.
Facendo ciò, perderete ogni diritto ad una
garanzia sul prodotto.
• Non utilizzate l’apparecchio in prossimità
d’acqua (p. es. in prossimità di lavandini,
vasche da bagno o piscine) e tenetelo lontano
da luoghi umidi, da spruzzi o gocce d’acqua,
nonché dalla pioggia.
Garanzia
Per questo prodotto concediamo una garanzia
della durata di due anni a partire dalla data
di acquisto. La garanzia copre i difetti di
fabbricazione, nonché quelli delle componenti
integrate.
Nel caso in cui abbiate bisogno di un
ulteriore aiuto …
Nel caso in cui dovessero vericarsi ulteriori problemi tecnici, Vi preghiamo di contattare i nostri
tecnici. A tale proposito, troverete sul retro di
questo manuale di istruzioni il numero del servizio
di assistenza tecnica.
D
GB
F
E
I
21
Page 22
SL-6420
 Loading...